#3dsmax tutorial
Explore tagged Tumblr posts
Visit Tumblr Blog
Explore Tumblr blogs with no restrictions, modern design and the best experience.
Last Seen Tumblr Blogs


Fun Fact
When “GIF” was named word of the year in 2012, Oxford Dictionaries U.S.A. credited Tumblr for pushing the word.
Text
youtube
In this 3DS Max tutorial, we will see how we can control the rotation of a texture using a Dummy helper and the powerful tool called Wire Parameters. We will do that by binding the Z rotation of the UVW Map's gizmo to the Z rotation of the Dummy. We will also see how we can create a parametric relation between two animated textures by binding the two textures to the same Dummy and using a simple expression to alter the speed and angle of rotation for one of the textures relative to the speed and angle of rotation of the other one. Finally, we will see how we can achieve the same thing in case there is no UVW Map(or another mapping method), if the object is collapsed, by binding the U offset parameter of the Bitmap to the Z rotation of the Dummy.
#3dsmax#3ds max tutorials#3ds max animation#3dsmax tutorial#autodesk#autodesk 3dsmax#3ds max wire parameters#3ds max parametric#3ds max helpers#3ds max dummy#learn 3dsmax#3dsmax online course#3dsmax online training#3dsmax animate textures#3ds max bitmap#3ds max texture#Youtube
0 notes
Text
Tutorial: Blueprint para construção modular no Unreal https://www.youtube.com/watch?v=xF_FpjhKyEQ
#3d art#3dsmax#animacao#animation#animação#archviz#arquitetura#curso#curso online#cursos#cursosonline#tutoriales#tutorial#maquete#maqueta#arquitectura#architecture#urbanismo#animaciones#animacion#blender#revit#sketchup#modelagem 3d
5 notes
·
View notes
Photo


Mehdi Beheshti
Texture Artist
artstation linkedin youtube
More from «Artstation» here
#texturing#unreal5#imperfection#mirage3dart#substance painter#course#substance#Corona#Character Modeling#drawing#unrealengine#art#material#environment#artstation#noai#marmoset#tutorial#unreal#Substance Designer#Mehdi Beheshti#Textures Materials#gameart#TrimSheet#roughness#hardsurface#marmoset toolbag#Tutorial#artist#3dsmax
4 notes
·
View notes
Text
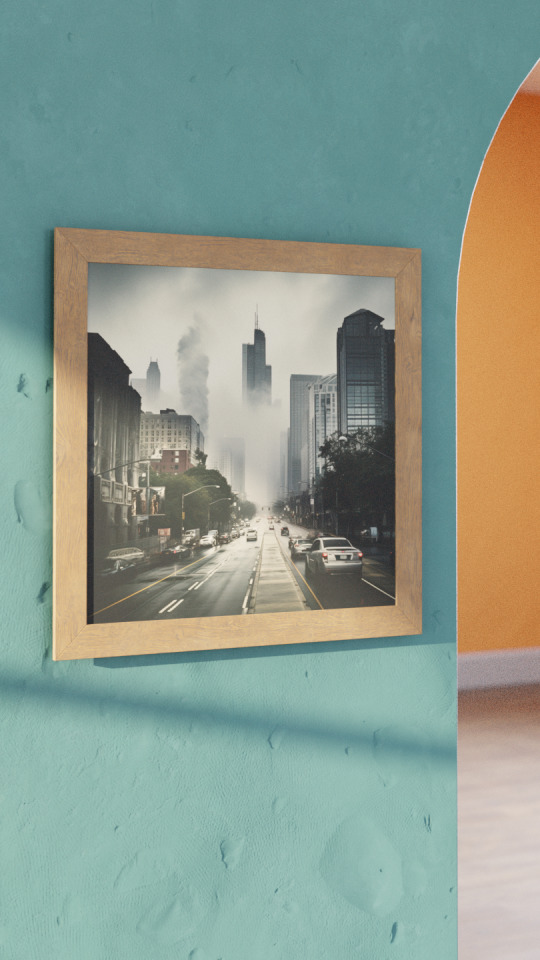
New tutorial #2
How to create a picture with a frame from Plane.
Subscribe to catch a new tutorial!
Source : glancingeye.com
#blender3d#3dpillow#3dmodeling#3dtutorial#3dtutorials#blender tutorial#blender beginner#pillow3d#furniture#howtocreate3d#howtoblender#3d blender#3dmodel#beginner#3d render#home decor#3dsmax#tutorial3d#tutorial#blenderhow#california#home#3dmodels 3dfurniture 3dobj interiordesign kitchen#interior design#3d design
16 notes
·
View notes
Text
New Line - HOW TO
Blender Tutorial. Pillow from Plane
Source: glancingeye.com
#blender tutorial#blender beginner#pillow3d#furniture#howtocreate3d#howtoblender#blender3d#3d blender#3dmodel#beginner#3d render#home decor#3dsmax#tutorial3d#tutorial#blenderhow#california#home#3dmodels 3dfurniture 3dobj interiordesign kitchen#interior design#3d design
2 notes
·
View notes
Text
Avance Semanal - 2025 - Semana 24
Avance de los próximos videos en el canal!
youtube
Compartirlo con quien estiméis oportuno.
Bueno chicos, chicas… sed buenos. Portaros bien
#Avance#mazhuka#maya#blender#tutorial#albatros#fyp#promociones#youtube#modelado3d#3dmodeling#curso3d#b3d#israelcantillo#3dsmax#Youtube
1 note
·
View note
Video
youtube
Add custom modifier buttons to front in 3DS MAX
It is very basic tutorial. Though, it might come in handy to some so, I'm sharing this tutorial. This tutorial demonstrates how to show the custom modifier buttons in front for easy workflow. Please follow the tutorial. And thanks for subscribing :) :)
0 notes
Text

THE SIMS 3 TUTORIAL
HOW TO CREATE DEFAULT REPLACEMENT MOD USING CUSTOM MESH & TEXTURE FOR SIMPLE OBJECT
⚠️ Tumblr has 30 pictures limit, so I cannot include too many pictures. If you want to zoom in the pictures, click the pictures to enlarge, or save the pictures into your PC, zoom the pictures on picture viewer or zoom in the pictures on your mobile phone. ⚠️
----------------------------------------------------
I create this tutorial to make easier to follow because there are older tutorials available before but scattered on internet and usually only say "Export to replace s3asc" without explaining how to export the edited object properly.
My method is using TSR Workshop instead of exporting the object using Sims 3 Object Export/Import plug in because exporting to replace the s3asc using that plug in always giving error notification "ERR: Model has 1 groups; original had 0" and cannot be exported.
For beginners who are very new using s3pe and haven't created default replacement mod before, better start from simple object first.
Simple objects I mean in-game object that has single MODL and single texture with no morphs, no GeoStates, no presets, no CAS colour channels, and easily cloned from OBJD on catalogue. Usually as utensils that Sims holding in their hand, not buy/build objects. For example: Pencil, pan, fork, spoon.
----------------------------------------------------
Tools to prepare:
s3oc
s3pe
Milkshape 3D for bone assignment (Version I use 1.8.5 beta, discontinued by its developer, therefore feel free to download the full version with its license key provided).
Sims 3 Object Export/Import 1.01 by Wesley Howe (Milkshape plug-in. Download msS3ObjPluginsV101.rar )
TSR Workshop (Older version for TS3 only version 2.0.88)
TSR Workshop plug-ins for export.import TSRW Object.
3D Program (Blender/Maya/3dsMax)
Editing images software (Photoshop, make sure you have to install .dds plugin by Nvidia. For free software alternative, you can use GIMP with its .dds plugin)
This tutorial will not teach you how to:
Meshing object ❌
Create alpha texture ❌
Change thumbnails in-game ❌
Install programs and plug-ins ❌
This is how I created Chinese chopsticks replacement mod using custom mesh and texture.
In summary, this tutorial has 10 steps:
Step 1. Clone the Object using s3oc
Step 2. Open S3PE to Copy the Original Resource Code and Export the Files
Step 3. Export the Original Mesh as Base Mesh to .obj format
Step 4. Create Your Custom Mesh
Step 5. Bone Assignment & Create Group
Step 6. Create custom Texture
Step 7. Import the .wso of Edited Mesh on TSR Workshop & Export the package
Step 8. Export MODL file from Package saved from TSR Workshop
Step 9. Finalizing in s3pe & Replacing the Original file with Edited File & Correcting the Code As Same As Default Code
Step 10. Test the CC in your game.
-----------------------------------
✳️ Step 1. Clone the Object using s3oc
Before cloning the object, check the Game Folder for in-game object file location. Settings > Game Folders...
Take a look if the Base Game or Expansion Pack for object file you want to clone is in the right folder. For example, my The Sims 3 game are all bought from Steam, so the location is D:\SteamLibrary\steamapps\common\The Sims 3
If you want to clone object from Expansion Pack, make sure input the folder location. For example, the location for World Adventures EP is D:\SteamLibrary\steamapps\common\The Sims 3\EP1

If you are done, close the pop-up box. You can continue click Cloning then choose Normal Object...
Wait until you get the whole catalogue. Click Search...

For example, I clone object from World Adventures Expansion Pack. You can clone object from Base Game or other Expansion Packs as long it is considered as "utensil" that Sim holding on hand. For example: "Pencil" or "Pan"
Search for text: chopsticks
or if you want to clone object from Base Game, search: utensil
Tick check marks for Resource Name, Object Name, Object Desc then click "Search button"
Search result gives you results with name "chopsticks". Here is the object we are looking for: UtensilChopsticks
We need the OBJD file to clone. OBJD = Object Data.

Click "Clone or Fix" at the right bottom. Then you see the next page to determine if you want to clone with renumber or not. If you want to make default replacement, then do not check the Renumber box. Keep it blank.
Tick check box means the s3oc will generate new resource code for new item. Not tick the check means the s3oc will overwrite the same resource code, it is to replace object you cloned in-game.
I am personally a detailed person, so I usually tick as many as I want: tick "Deep clone" "Missing String Tables" and "Include Thumbnail" to include more details. Then click "Start" to proceed.

It will give you file name [CreatorName]_ObjectName_Number
Then save your package file in "DBPF Package" format in your project folder. Always make folder for any file to make everything organized.
✳️ Step 2. Open S3PE to Copy the Original Resource Code and Export the Files
Open S3pe, locate your package file you cloned from s3oc. Find the MODL of Utensil Chopsticks, Right-Click, "Details..."

On Resource Details, click "Copy TGI" to copy the Resource Code. Type, Group, and Instance will automatically be copied on clipboard. Then open Notepad, Right-Click to "Paste".
Click GRID on bottom of the s3pe (I mark it red on picture), it will give you pop-up box with Data Grid. Click "Resources", it will be highlight blue and there's 3 dots button appeared on the right side. Click the 3 dots button. It will give you TGI Block List Editor.
Inside MODL's TGI Block List Editor only has IMG. You may wondering why, but that's how the game coded. Type, Group, Instance of _IMG inside TGI Block List Editor should be the same as _IMG on the package.
Copy the TGI, Group, Instance to your Notepad.

After you copied code of MODL, do the same for the texture image (_IMG), but only copy the code from Resource Details. You cannot edit TGI Block List Editor for _IMG as the Grid button for _IMG is greyed out.
The main task is the code of your edited mesh and texture should be the same as the code you copied now from original package you cloned with s3oc.
Keep the code on notepad. You will need this code later.
Export the MODL file. Right-Click, "Export to s3asc". The file appears in long string such with name for example: S3_01661233_08000001_B619DB2238C3430B%%+MODL_filebase
Do not rename the file. Save.

Export the texture file. Right-Click "Export > To File..." The file will be saved in .dds format. Do not rename the file. Save.

✳️ Step 3. Export the Original Mesh as Base Mesh to .obj format
Open Milkshape. Import the s3asc file you saved before.
More steps click spoiler tag "Read More / Keep Reading" below
File > Import > Sims 3 Object Import v 1.01 by Wesley Howe

Locate the s3asc file, then the original chopsticks mesh appears.
Click the "Joints" tab. It has 4 codes. Check box "Draw vertices with bone colors" It will show Bone Assignment colors on the original mesh. Yellow on top chopstick and light blue on bottom chopstick. The colours are to make the object has rig and movement following the Sim's interaction.

Take a look at the 4 codes on Joints Tab. You can play around to see which colour of the code will appear, after that copy paste the code to Notepad to make it easier to comprehend.
Click Select from Tools menu, Select Options: Face. On "Right/Left/Top/Bottom 2D View", Left-click make selection of one part of chopsticks. While the part of object being selected (Red), click Joints then Choose "Assign".
0x96239247 --> Yellow 0xFEAE6981 --> Purple 0xCD68F001 --> Light Blue 0xD0DECA8E --> Red
Your edited mesh must have the exact same Bone Assignment colour later. Check again if the code and colour are correct.

You can save object mesh as .obj to other 3D software such as Blender or any other 3D software.
✳️ Step 4. Create Your Custom Mesh
Use the original .obj as base model. While you can create longer mesh or any edited version as you wish.
Make sure the scale and position of the edited mesh is same as base original mesh, because the edited mesh will be used on Sim's hand.

If you are done editing the mesh, export the UVmap.
You can export the uvmap in higher resolution, as long as it is Power of 2. 64x64, 128x128, 256x256, 512x512, 1024x1024, 2048x2048, 4096x4096. I export in 1024x1024 pixels to make the size of texture larger and have more details.
Then export the mesh object in .obj format.
✳️ Step 5. Bone Assignment & Create Group
Open Milkshape. Import the original mesh.
Check the Groups Tab. Original mesh has 1 group, "group 00". Group 00 means it is the main mesh. There is no shadow beneath the object.

Import the edited mesh as .obj file.

My edited mesh has one single name "default" name on the Group Tab. While edited mesh may have a lot of file name scattered on Group Tab. Regroup the file name to simplify your edited mesh into one single name. Select > Regroup.
The main task is replacing the EA's original mesh with your edited mesh.
Before you delete anything, you must do Bone Assignment first to the edited mesh you created.
Your edited mesh does not have Bone Assignment, so it appears white.
Remember the 4 codes you copied earlier in Notepad.

Copy Bone Assignment from original mesh to your edited mesh.
This case, your want to Bone Assign Yellow colour.
Select > Face to select one part of chopsticks of your edited mesh. On Joints Tab, double click the appropriate code 0x96239247 in blue highlight then the code box on the right side of "Rename" will appear 0x96239247. Make sure the code is correct. Then you can click "Assign".

Your edited mesh will appear in Yellow colour. Then do the same for another part of chopsticks.
Select another part of chopsticks of your edited mesh. On Joints Tab, double click the appropriate code 0xCD68F001 in blue highlight then the code box on the right side of "Rename" will appear 0xCD68F001. Click "Assign".

Your edited mesh will appear in Light Blue colour.
Then what's the other code for? With colour purple and red?
Leave them. Let the codes have the same exact codes as appear in original mesh and let the colours only assigned Yellow and Light Blue. The colours are to determine rig for interaction in-game, which only use Yellow as upper part of chopstick and Light Blue as bottom part of chopstick.
You can safely delete the original mesh with name group00 until it remains your only your edited mesh.

Rename your edited mesh to group00. Type group00 on the box then click "Rename" on the left side.

Export to TSRW Object in .wso format. .wso is format with bone assignment on object attached.

Save your .wso in your project folder.
✳️ Step 6. Create custom Texture
Import original texture you exported from s3pe to your editing image software.
Look at the original texture made by EA. 32x64 pixels. It is very low resolution, blurry and stretched, because the texture should be compressed as low as possible by game designer. As player you want it has higher detail to look realistic as possible and your PC of course can handle high resolution content, sure you can make the resolution much higher than EA's.

Import the UVMap you saved from 3D software. For example, UVmap I imported has 1024x1024 resolution. Add your custom texture. Then save it to .dds format in the same name as original texture. Save in separate folder, name it "Edited Texture" to keep it separated from original texture.
✳️ Step 7. Import the .wso of Edited Mesh on TSR Workshop & Export the package
Open your TSR Workshop.
Create New Project > New Import >Next...

Then Browse original mesh by EA in package format in your project folder.
On Open file box, you cannot see .package file because the filter is .wrk (TSR Workshop Project). Choose the .package dropdown.

Then you can see .package file.
Open the .package. After the file is located, then Next. On Project Details I usually skip without giving name of Project Name and Title. Next.
You must have seen green land with white blank sky.
Where's the mesh? It is actually there... just being zoomed in too close. You need to zoom out by scrolling down mouse.
You can see the original chopsticks mesh by EA. You can save the project file in .wrk format. After you save the file, import the .wso of your edited mesh. Mesh tab > High Level detail. Click green arrow folder icon to import. Then your edited mesh will appear replacing the original EA mesh.

As you see, the texture is messed up because the texture is still using original EA's texture. But then you check Textures tab and it has blank dropdown...
I cannot change the texture on this TSR Workshop!
Don't worry, we can replace the texture on s3pe later.
No need to change anything other than importing mesh. Click Edit > Project Contents to save as package.
You will see pop up box with number or files DDS, FTPT, LITE, MODL, OBJD, OBJK, etc. Export > To. package. Give name such as "EditedChopsticks_TSRW"

✳️ Step 8. Export MODL file from Package saved from TSR Workshop
Open S3PE, File > Open package "EditedChopticks_TSRW" that you saved from TSR Workshop.
Export MODL. Right-Click, export. It gives you file name with [StringOfNumber] .model .
Save it on project folder. Keep it organized and separated from original MODL. Name the folder "Edited MODL". Do not rename the file.
✳️ Step 9. Finalizing in s3pe & Replacing the Original file with Edited File & Correcting the Code As Same As Default Code
Open s3pe, File > Open original package that you cloned from s3oc. [CreatorName]_ObjectName_Number
Find the MODL. Right-Click > Replace...
Locate to your edited MODL with filename .model .
Then click Open.
The original MODL of the package should be replaced with your edited mesh.
Do the same for the texture.
Locate to your edited texture with filename .dds
Then click Open.
The original texture of the package should be replaced with your edited texture.
Take a look at MODL's Type, Group, Instance. It has the same code as original MODL in the original package cloned with s3oc (because it has been replaced)
Don't forget to see the code inside TGI Block List Editor.
Repeat step 2 how to check the code. Right-Click on MODL/IMG > Details... and click GRID > Resources > TGI Block List Editor.
The Type, Group, Instance of the _IMG are different compared from IMG from original package clone, which means that is the evidence of edited mesh replaced the original.
Rename the Instance with default/original Instance you copied on notepad from Step 2. Type, Group, Instance should be the same as default/original Type, Group, Instance.

Open notepad with resource code you copied from Step 2. Make sure the Type, Group, and Instance are all the same.
If the codes are the same, then your edited mesh and texture will overwrite the default mesh and texture with the same code in the game. Save, Commit, Save the package.
Check again if the texture is replaced properly. Right-Click on _IMG > ViewDDS.
ALTERNATIVES!
Yes, you can delete unwanted files in your edited package, to keep the package clean. Simply Right-Click>Deleted.
The only files needed in package are: MODL, _IMG, _KEY
They are the only files with your edited mesh/texture including codes to overwrite the default codes.
You can Start new fresh blank s3pe. Right-Click>Import from file...
Locate your edited MODL and _IMG (texture) file.
On Resource Details box, tick mark "Use resource name" > OK.
Make sure all the Type, Group, and Instance of MODL and _IMG including in the TGI Block List Editor are all the same as the code in original package.

Save the package.
✳️ Step 10. Test the CC in your game.
Put the package to your CC folder in your The Sims 3 document folder to see if the CC is working or not.
If the CC is working as your intended, with your custom mesh and texture, then test the animation. Are the chopsticks animation working as the same as original EA's? If the animation are working well too, then congratulations!

Your default replacement are working. Give applause to yourself. 👏
-------------------------------------
QUESTIONS!
Q:
Can I use this tutorial for making default replacement for buy/build object?
A: This tutorial covers basic method of using TSR Workshop and replacing the default codes (Type, Group, Instance), so you will understand the basic principle of doing default replacement mod.
Keep in mind that different object has different case. Buy / build object has MLOD (not just MODL) more than one, texture images more than one, has presets, and CAStable colour channels.
The TGI Block List Editor for buy/build object has a lot of codes, so have to spend a lot of time to do trial-and-error to make the default replacement working properly, because a lot of times the texture doesn't work (still using default EA's texture), or when the object appears right with your edited mesh and texture, after you choose the presets, the object reverts back to your edited mesh with default EA's texture.
Q:
Help! The texture is black! / still using same EA's texture when tested in the game!
A: The texture codes must be not the same. Check the Type, Group, Instance of _IMG. Do the codes are the same like codes in original package? Check the TGI Block List Editor for MODL, is the _IMG inside has the same Type, Group, Instance as in original package.
Q:
Help! The object disappears when tested in the game!
A: You must be replacing OBJD in your package. Do not replace OBJD. Just MODL and texture only.
#tutorial#the sims 3#the sims 3 tutorial#thebleedingwoodland#the sims 3 default replacement mod#modding#s3pe#s30c#TSR Workshop
120 notes
·
View notes
Text
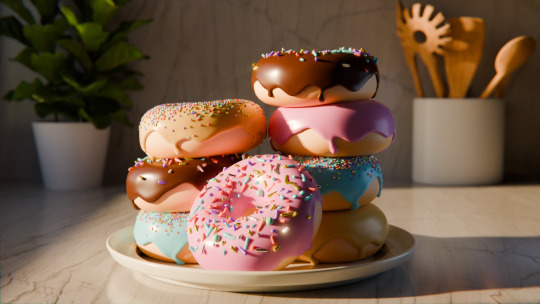
I finally made it through the recent Blender Guru donut tutorial as I try to shift from 3DSMax to something more opensource-
Not a super clean render as my current setup is lower spec but this is an amazing first step as I try to make my way towards an indie game dev career :D
(plant and utensils are from BG's website)
#yes I promise there will be more Kirby stuff here soon :^)#esp with Art Fight coming up#definitely more Sword and Blade content too bc it's been too long LOL#blender#blender guru#donut tutorial
9 notes
·
View notes
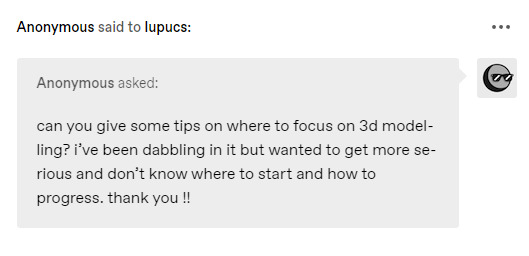
Note
Do you have any recommendations for character modeling in blender?
Ooh boy I never know how to respond to questions like that, but I'm gonna try my best and list some stuff which helped me personally, so hopefully this will be helpful to you guys too.
A lot of what im gonna say is probably gonna sound really generic but generally speaking just watching one tutorial series and calling it a day isn't gonna cut it.
Something that helped me a whole lot was having a clear goal in mind (like I remember the first thing I wanted to do was translate my OCs in 3D). Picking something I was invested in is what pushed me to do my own research (and now its Deltarune fan animations lol). Knowing how to maintain motivation and going in with the right mindset is the most important thing imo.
I use Blender for my 3D work, which is free and open source. I personally prefer it over paid software like Maya or 3dsMax, especially for modeling and sculpting (I remember I had to use Max and Maya for a while but overall it was a pretty agonizing experience to be honest, so I switched back to Blender, which just feels a whole lot easier to use for me personally lol, but really at the end of the day just pick the software you want. This is just my personal preference). If you have a potato laptop like me, I definitely advise you to use Blender tho as it is very lightweight compared to other 3D programs, plus it can do the same things and then some. Not to mention there are way more free resources on Blender stuff so it's easier to get access to the info you need. Anyways Blender-simping over, moving on!
Tutorials are always a great idea, but you're also gonna have to learn how to do problem-solving. 3D can be a really technical and rigid medium, so being patient and knowing how to do independent learning is very important. Take a look at box-modeling, sculpting, texturing and procedural shading. Unfortunately that's gonna involve a lot of annoying situations and moments of immeasurable pain, but once you're more familiar with how things work, it's super fun and rewarding!
Don't forget to have fun and experiment! It's easy to get lost and overwhelmed by the technical aspects of 3D but it's important to just let go and make silly things. Also talking to other 3d artists with similar interests helps a ton, especially more experienced ones but I am aware not everyone has access to that (plus not everyone might want that, esp when you're an introvert like me haha!)
If you gotta sell your soul to a corporation then focusing on one particular subset is gonna be useful for animation jobs, as this is what most studios want. Some artists might like specializing into just one area, and that's totally fine but for me who prefers to be a generalist, it just kinda ruins my joy for 3D to restrict myself to just one part of it. Plus if you enjoy doing what you do, you tend to learn a lot faster anyway.
This might be a bit of an uncommon take, but one of the most stifling pieces of advice I have received from industry 3D artists is to only focus on one thing (as in, only skill up your UV-unwrapping, or only do rigging, only do hard-surface modeling, only do organic environment modeling and so on). NUH-UH! Just do what you want fam. Make the spoingle-boingles pet cats. Focus on the things you like. Make barney the dinosaur destroy the whole set. Model, rig and animate them if you want. Really, just have fun. Obviously you gotta do some self-checks and see where you need to improve, and where your strengths and weaknesses are, and focusing on those areas can be very helpful. Just make sure you're having a good time doing it, and don't be too harsh on yourself. Definitely take a break if you're overwhelmed.
You don't have to be able to draw to be good at character modeling but making turnaround sketches helps me a whole lot whenever I make 3D characters. Knowing how to draw will also benefit your sense of design and shapes, as you can use your drawing skills for texturing and adding your own flair to your models.
Another thing I would do is look at other people's 3D models and study the topology and the way they model things. This also helps a lot with motivation. Obviously you don't wanna copy, just study the way other people model things and see what other talented artists come up with! There are a bunch of free Blender rigs you can download and study on your own, not to mention useful videos and streams on YouTube. The Rain and Snow rigs are pretty awesome. Some of this stuff is behind a paywall but I recommend checking out the free resources of the "Settlers" project for highly cartoony modeling and rigging (this playlist is very useful, I didn't watch all of it but some parts have been pretty inspirational to me). Also just following 3D artists you like and looking at their art for inspiration will help you stay motivated.
Hope this is useful!
#lupucs chats#anon#ask#text#character modeling#i hope this was useful because im always kinda at a loss with questions like these
44 notes
·
View notes
Text
im learning to mod BG3, i needed a substitute for adobe substance painter because it's like 60€/month so i don't have it since i left my job, and ArmorPaint works so well, i'm loving it so far (i'm not an advanced substance painter user so i don't really miss the advanced features), i feel ready to go now!
unfortunately it seems most BG3 modding tutorials are now outdated since larian added official mod support through their own tool but i got hold of a few to hopefully cover the process of adding custom heads and hairstyles for the character creator among other things :3
i don't think i'll need custom textures for those but i want to make my own outfits later down the road too so i wanted to be ready. im so excited for all this aaaaa i wanted to learn how to make game mods for so long and im finally dipping my toes in
feels like coming full circle since my first experience with 3D was making custom clothes and hairstyles for the sims 2 when i was a wee lil kid. we didn't even have blender back then, i learned 3DsMax for this purpose
i want to check out coding/mechanics mods too but tbh idk what i'd make like i don't really have any ideas for those since i've barely played the game itself
6 notes
·
View notes
Text
youtube
In this tutorial, we will create a parametric infinite cube table and we will see how to keep some of its parameters parametric, meaning that, after making the main geometry, we can go back and change things in it. After extracting the necessary segments from a base chamfered box(used as a path), we will use Loft to make the main shape using a custom rectangle as a profile.
#3dsmax#3ds max tutorials#autodesk#autodesk 3dsmax#learn 3dsmax#3dsmax modeling#3dsmax furniture modeling#3dsmax parametric#parametric in 3dsmax#3dsmax online course#3dsmax online training#3dsmax how to#3dsmax loft#Youtube
3 notes
·
View notes
Text
Animação de quarto que criamos no curso de Unreal da 3D1, comparação entre Lumen e Path Tracing.
#3d art#3dsmax#animacao#animation#animação#archviz#arquitetura#curso#curso online#cursos#unreal#unreal engine#ue5#maquete#maqueta#animaciones#animacion#tutoriales#tutorial#arquitectura#architecture#decoracao#decoration#interior decorating#home decorating#interiores#interior design#interiors#decor#interior decor
4 notes
·
View notes
Note
drop the blender guides you're using? <3
youtube
this is the one i'm using atm, i'm literally just following along doing exactly everything he talks about as he does it an pausing and going back an rechecking stuff, and then futzing about a lil bit on my own to tweak things in a way i like better (like the shape of the hands) i don't think this teaches u how to UV unwrap or texture jus yet, let alone rigging (i have a tiny bit of prior knowledge from learning the basics of 3dsmax years ago but never really using it to do anything cause it was around the time i started getting a LOT better at 2d art so that became my more dominant focus then)
youtube
i also like this for being an extremely short but solid introduction to the concept of shape keys which answered a lotta questions i had about how to solve some 3d problems i'll try to reblogupdate this post with anymore useful tutorials i end up liking and the specific problems/questions they helped me address (i've watched/read a fair few i did not like or find ver helpful recently too 😔)
6 notes
·
View notes
Text
How to create a Pillow from PLANE

We are opened a NEW line - Blender Tutorial from a PLANE. We want to hear from you - your requests - what you want to know! Please tell us. Of course we will improve our video skills! EN/ES support See you soon #blender3d #3dpillow #3dmodeling #3dtutorial #3dtutorials
#blender tutorial#blender beginner#pillow3d#furniture#howtocreate3d#howtoblender#blender3d#3d blender#3dmodel#beginner#3d render#home decor#3dsmax#tutorial3d#tutorial#blenderhow#california#home#3dmodels 3dfurniture 3dobj interiordesign kitchen#interior design#3d design
14 notes
·
View notes
Text
got a 3dsmax tutorial straight from the STONE AGE omg
1 note
·
View note