#Blender panoramic camera
Explore tagged Tumblr posts
Visit Tumblr Blog
Explore Tumblr blogs with no restrictions, modern design and the best experience.
Last Seen Tumblr Blogs


Fun Fact
China blocked Tumblr because of pornography and censorship problems in 2013.
Text
youtube
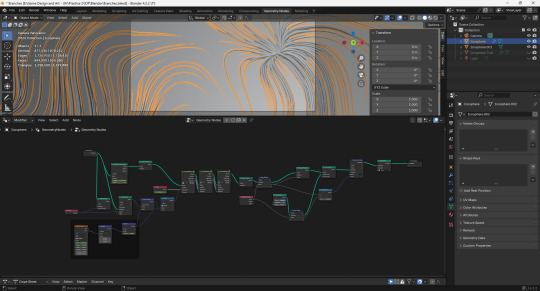
Had a little breakthrough with my Blender mapmaking process, and got so excited I made a video about it. I hope some of you will find this useful as a resource but ultimately I'm just overjoyed at how easy I've just made things for myself.
Enjoy!
#mapmaking#imaginary maps#plate tectonics#continental drift#Blender#Blender panoramic camera#digital sculpture#video#demonstration of process#artistic resource#Youtube link#Christopher Maida Artwork#Youtube
8 notes
·
View notes
Text

here's a 360° image of the soundstage i've been working on, you can use this in something like a gearVR (what i'm still using lol, working on a fricking potato as well) set design is inspired from Lee and Herring's Fist of Fun as well as Mark Weiner's Weinerville more views soon, and we're building out a lot
4 notes
·
View notes
Text
Ok so I understand it now. Possibly unrelated but there's also a mass of large eyes protruding from my back and it's making it really difficult to sit in my chair.
Working with a panoramic camera in Blender is a surreal experience. The human brain was not meant to observe the world through 360°.
#not art#blender#3d artwork#unreality#unreality tw#(specifically the second part; i do now understand how panoramic cameras work)
4 notes
·
View notes
Text
Rigging the monster, it looks so goofy, I can't. Hope export won't mess up the animations in the future. Godot seems to be alright with shapekeys, I made some animated butterflies without any rigging at all! I wonder if there's a plugin for more advanced particle systems, I wish I could make 3d-animated objects spawn as particles :c
Also, I'm planning on how to make an HDRI skybox, turns out you can just paint a sphere in blender and render it as a sky from the inside with panoramic camera, but since I also thought of making moving clouds I'll need to make some complex work here. Btw, since I'm using really small textures, I could try to make sprite animations out of them, this idea may cost some performance, but the result may be stunning
2 notes
·
View notes
Text
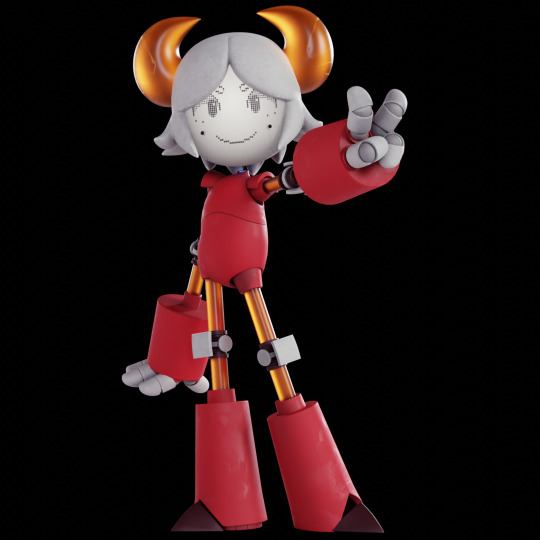
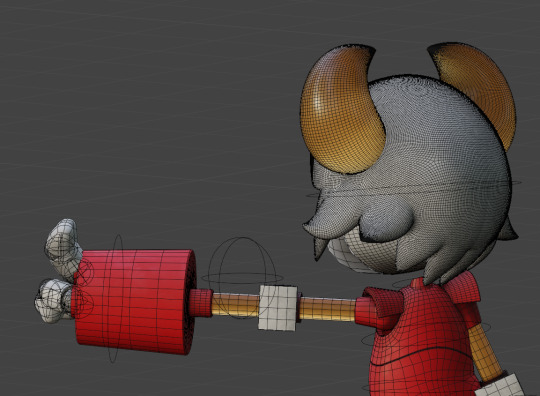
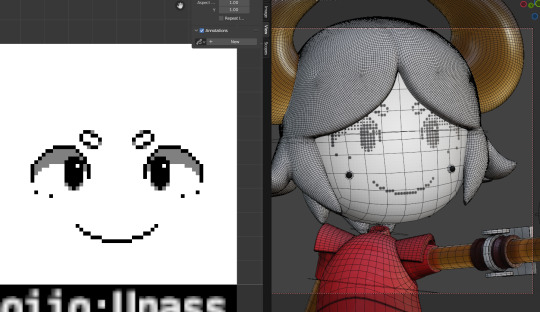
art antics 9/20/23
character model - nitri (~2 weeks' time)
character by kybymyby on twitter
add't help by toasterbbombs & kimoiguess
will admit that there were some things i could do better, but it honestly feels great to model something substantial again after all this time
previous renders below:
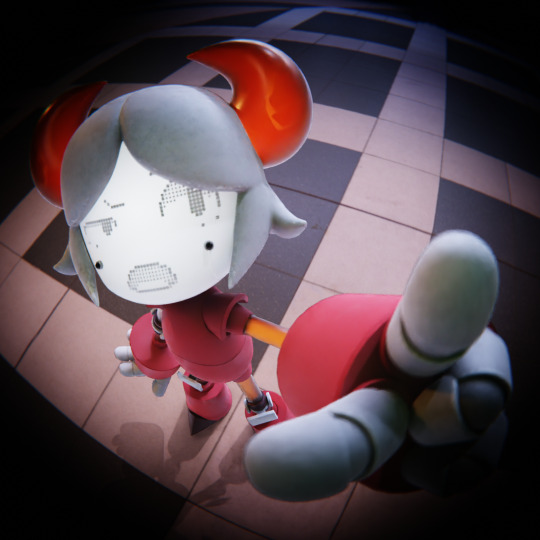

i really like using the panoramic settings for blender's camera, and i used ntscQT to apply the fake camera effect.
(fun fact: that second picture is bein taken from where her cheek is supposed to be!)
5 notes
·
View notes
Text
Blog Post 3: Learning Blender & Getting Unstuck
I’ll be honest — when I started this project, I had zero experience with Blender, and diving into something this ambitious felt overwhelming. I wanted to create a fully animated VR scene with prisoners, dream selves, ghosts, lighting, sound, and more… but didn’t even know how to rig a character. Having experience in 3DMax only, I tried to step out of my comfort zone and learn.
At first, it was frustrating. I spent hours just trying to find things like “Pose Mode” or figure out why a texture wasn’t showing up. But slowly, with YouTube tutorials, forums, and some trial and error, I started piecing it together. I learned how to use speaker objects for directional audio, panoramic cameras for VR rendering, and how to reduce .glb file sizes to make the scene more efficient.
Now, I still feel like a beginner — but one who’s making real progress. The project that once felt impossible is actually becoming real. And that’s a win I didn’t expect.
1 note
·
View note
Text
Blog 8 - Assignment Progress 2 - Adhvaith

Following the allocation of responsibilities for our team's immersive dome project, I got on with the task of working on my 3D animation. The first thing I worked on was creating a 3D bubble animation. Based on Neil's tutorial, we have to use a 360 panoramic camera in order to get out dome projection correct. So I ended up deciding to create everything in a dome and place the camera at the center for the all-around panoramic shot.
youtube
The first thing I did was watch a variety of bubble animation tutorials in Blender. I played with geometry nodes based on a tutorial video, but I wasn't very satisfied with the results. A short while later, I discovered a Tutor4u tutorial using particle systems with Metaballs (Mball) in Blender; this provided a much more realistic rendering of the movement of the bubbles. Hence, I followed this tutorial to create an animation in which the bubbles merge and float organically.

I built a dome structure to incorporate the animation within the dome, using instances on points within geometry nodes to distribute the bubbles evenly across its surface. This resulted in more organic and immersive movement of the bubbles inside the dome. I showcased the initial version to my team; unfortunately, there were some black patches in the render, and the whole thing seemed a bit dark. I fixed the lighting setup and re-rendered the scene, glowing up the colors and getting rid of the dark patches significantly.
youtube
Having completed the bubble animation, I proceeded with my second animation on a branching tissue effect. To achieve this, I did some research on YouTube, and one of the tutorials I came across was 3D Singh VFX, in which he created a tree branch effect using noise flow in geometry nodes. I followed his tutorial and basically built an initial version just to get an understanding of the fundamental geometry node setup. Once I understood the concept, I made an adjustment to fit inside the dome environment. For the animation, I assigned my values for density and noise texture. After an initial render, however, my teammates thought that the density was quite high, so I adjusted the values and produced a more refined final render.
While I was working on my animations, my teammates completed their tasks, and we compiled all our work in After Effects. We used basic opacity transitions to blend the different elements together.During sound design conversations, I suggested that a mother talking to her child might add emotional appeal to the animation. I wrote a monologue to last about a minute and a half and got my friend's pregnant wife to read it. We applied a muffled filter for an in-womb effect, which we later included in the animation.
Once everything was compiled, we did a trial test in the dome. Seeing our work come together was a rewarding experience, and we were all satisfied with our final submission.
References
3D Singh VFX (2022) Noise Flow with Geometry Nodes in Blender - Tutorial, YouTube. Available at: https://www.youtube.com/watch?v=Cm_I7wtmb2c
tutor4u (2020) Blender Beyond Basics #5: Merging Bubbles - Blender Tutorial, YouTube. Available at: https://www.youtube.com/watch?v=amZ1pRvN6D0
0 notes
Text
Creating the Cosmos – Learning through Tutorials
【Post 4-by Chuanxin Li】
During the process of creating a cosmic scene, I found a tutorial that greatly influenced my work:
youtube
It is divided into four sections, each addressing different elements of a cosmic scene. The first part focuses on creating Saturn, adding materials, animating its rotation through blueprints, and designing a semi-transparent ring around the planet. The second part dives into creating asteroid fields, generating them through complex blueprints, and applying automatic rotation animations.
I followed the first part of the tutorial, which took me through the process of creating Saturn step by step—from generating a basic sphere to applying materials and creating its ring.
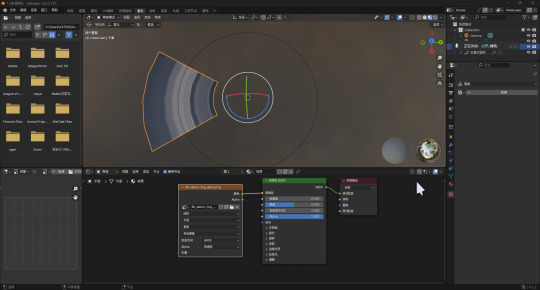
The ring was modeled in Blender and textured, while I used Unreal Engine (UE) blueprints to animate Saturn's rotation, including a feature to adjust the speed. This was my first time working with UE blueprints, and I found the experience fascinating. It reminded me of connecting material nodes in Maya or compositing effects with nodes in Nuke. Additionally, I picked up a helpful trick: using Photoshop to generate a basic normal map from a color map, allowing me to achieve decent results in a shorter time.


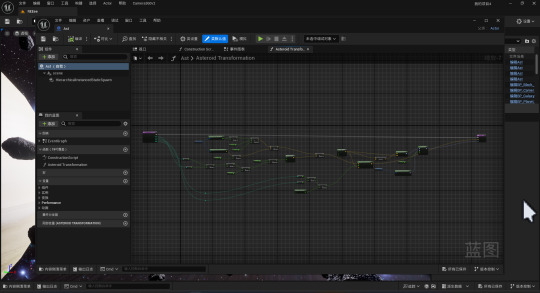
The second part of the tutorial involved creating a field of asteroids around Saturn’s ring. This section was more challenging than the first, as the blueprint setup was significantly more complex. I initially underestimated the difficulty but eventually managed to complete the blueprint by carefully rewatching the tutorial and following each step closely. This part deepened my understanding of UE’s blueprint system and its logic. Before this, I had always felt intimidated by blueprints, thinking they were only for programmers or those with a strong science background. Completing this section gave me newfound confidence and a sense of accomplishment in using blueprints.

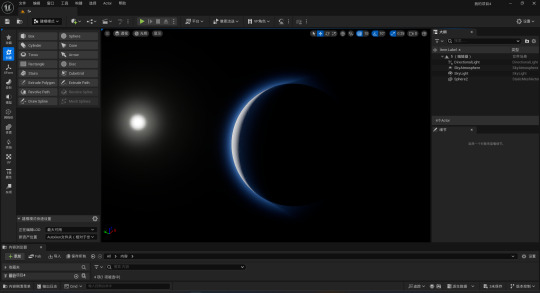
While I skimmed through the remaining sections of the tutorial, I learned about creating lighting and background star maps. Instead of using a simple skysphere material, the tutorial introduced HDRI maps to create starry backgrounds with a twinkling effect. This approach added more realism and depth to the scene.

After completing the tutorial, I sought additional resources to enhance the visual richness of my project. Since my scene initially only featured Saturn, I added elements like nebulae and particle effects for stars. Considering my instructor’s advice about the Dome environment, where dark scenes may not work well, I incorporated more celestial objects and lighting to brighten the scene and make it more dynamic.

Challenges Encountered and Solutions
Blueprint Option Visibility
After completing the blueprint setup as instructed in the tutorial, I noticed that the options I created did not appear in the details panel when the blueprint was dragged into the level. I discovered the issue was due to not enabling the options within the blueprint itself. A helpful member of a UE technical support group I joined guided me to solve this problem.
Scaling Issues
The size of the planets I created based on the tutorial was too large, causing issues when rendering panoramic shots. The vast distances between objects and the camera made the scene less cohesive. Adjusting the camera's focal length or angle didn’t help since I was rendering in a panoramic format. To address this, I scaled down all the models, including planets and asteroid fragments, rather than increasing their size, which would have caused the texture maps to lose normal map details.
Lighting Discrepancies in Rendering
The lighting in my renders didn’t match the preview. Specifically, the light rays I loved—created by directional light shining through the slowly moving asteroid fragments—were not as clear as in the viewport. I experimented with various factors like Skylight, Post-Process Volume, and Fog. Eventually, I discovered that the issue was due to the volumetric fog settings being too strong.

Pano Rendering Darkness Issue
The renders were too dark in panoramic format, an issue I found answers to in a video tutorial’s comment section. The problem lies with UE’s automatic lighting not functioning properly in this specific format. Switching to manual light adjustments through a Post-Process Volume resolved this. Initially, the Post-Process adjustments didn’t affect the scene, but after watching additional videos, I realized I needed to enable the "Unbound" option to apply the settings across the level.
0 notes
Text
Lighting and Rendering - Conclusion (Aryan Raj Adhikari)
This was the final phase of my individual production. I took it upon myself to light up the cave environment appropriately so that the narrative feels as it is submerged underwater. Creating a water simulation that would cover the entire environment was out of question as it would increase the render times immensely and our deadline was approaching closer.
I employed a simple trick of assigning a blue volumetric cube that envelops the entire cave environment. This would provide a blue volumetric tint and fake the simulation of being underwater.
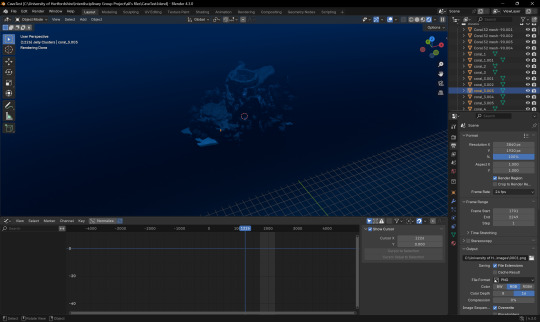
Figure 1 (Volumetric cube enveloping the cave environment)
The creation of a volumetric cube influences lighting systems in Blender. There is a way to unlink them so that they both act separately, however, this proved to be a blessing as the lighting was perfect for the scene.
I added a couple of point lights with varying power and an appropriate color tone to set the ambience of the narrative to a theme of smooth, relaxing meditation. A couple of lights were also added inside the tunnel so that it is properly lit.

Figure 2 (Lighting up the cave environment)
After properly lighting up the cave environment, I decided to create a bioluminescent shader to the jellyfish so that it illuminates its pathing during the phase of its animation. A simple node setup with a Fresnel texture linked to its coating and emission did the trick and made the jellyfish stand out as the focal asset for the audience to pay attention to, hereby increasing the immersion of the 360 narrative.

Figure 3 (Simple jellyfish shader setup)
For some final touchups, I imported the animation of the background jellyfishes that Ali created and the movement of a school of fishes created by Corey and placed them appropriately at the perfect places that would surround the camera, making it more immersive for the audience.
Krishi wanted a simple transition where the entire glow of the cave transitions into darkness before the illumination of the jellyfishes at the end of the sequence would envelop individually all around the screen. This was pretty easy to animate as I just animated a simple transition of the intensity of the lights decrease to the value of '0' and again reverting it back to its original power when appropriate.
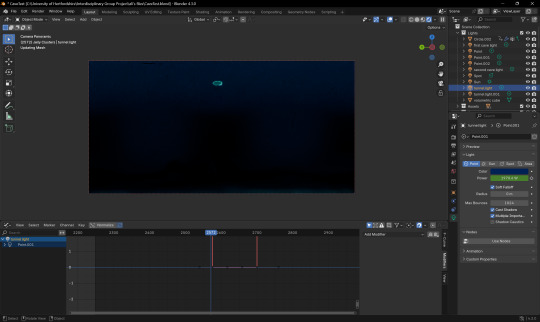
Figure 4 (Animation of the intensity of the lights)
The render settings is set to a 4K resolution in a 2:1 equirectangular panoramic export format. The render times for an 8K resolution would have take longer and exceeded the deadlines and as such, we had to settle for a 4K resolution. However, the quality of the immersive image sequence after rendering is really crisp and visually pleasing and this formally concluded my role for the Interdisciplinary Group Project.
To efficiently render the image sequence of the animation, we split the render between me, Ali and Corey and after the completion of the render, we sent it to Krishi who was tasked with the visual composition and the 2D effects for the animation.
Conclusion
I am sincerely grateful towards the professors Ian Willcock and Saint Walker for this invaluable opportunity to have been part of this engaging group assignment. It was a precious experience to be working alongside students from other disciplines that allowed me to gain different diverse perspectives on a common narrative. We certainly faced obstacles as one does in a diverse group but we were able to adapt and overcome and come up with a beautiful underwater narrative that hopefully captivates the audience and contributes to their immersion.
I would also like to thank Miguel Gonzalez Del Rio for allowing us to use one of his own personal music tracks he worked on to aid in the ambience of the underwater narrative. Without his helpful assistance, we would not have achieved a total immersive 360 ambient underwater experience.
I truly appreciate the chance to learn and grow through this teamwork and hope to apply what I have learned during this 3 week project for future relevant projects.
0 notes
Text
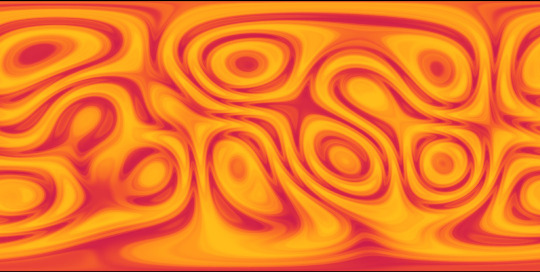
I'm starting to work on some assets for the Itsohkahaya avatar world. Continuing with my theme of funky looking skyboxes, this one is yet more silly Blender shader stuff, but now animated. You'll be able to see the animated effects in game.
I hooked up a magic texture to a mapping node in Blender, animated the mapping, ran the output through a colorramp node and rendered everything with a panoramic camera to a video I can stream to a render texture in Unity.
1 note
·
View note
Text
(week 13)Process
In the making of the video “Banksy's World”, we primarily use three software programs: OpenBrush, Blender, and Premiere Pro.
The challenges we encountered with OpenBrush were mainly related to exporting. After creating content in OpenBrush during class, we were unable to export it.
This weekend, we borrowed a Meta Quest 3 from the loan store to redo the painting.
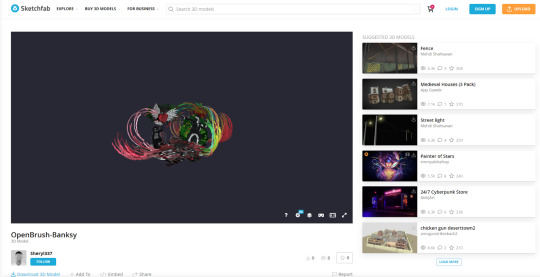
This time, we successfully exported by selecting the ‘Share’ option in OpenBrush, making the artwork public on Sketchfab, and then downloading the GLB file.
After that, we imported the GLB file into Blender, made adjustments, and added the camera. We wanted to create a shuttle effect, so we set up an S-shaped path for the camera and made the camera move following that path. We then installed the eeVR plugin, adjusted parameters such as modes, VR format, and resolution in eeVR, and then output the sequence frames.
Here, we will make some adjustments:
Due to time constraints, we haven't added a background behind the model yet. We will add it later.
If we find that the path curves too much when viewed through the device and causes vertigo, we will change it to a straight line.
When importing into Blender, we found that some of the effects from OpenBrush, such as light spots and smoke, did not appear. We are going to try adding similar effects in Blender.
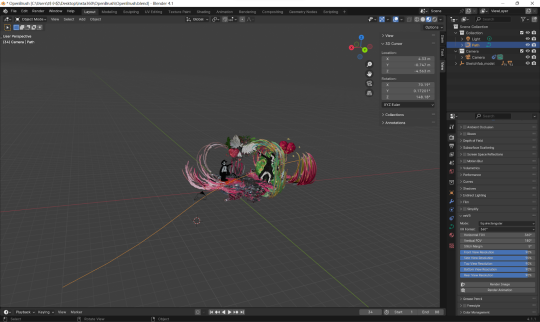
The main parameters we adjusted:

The sequence frames:
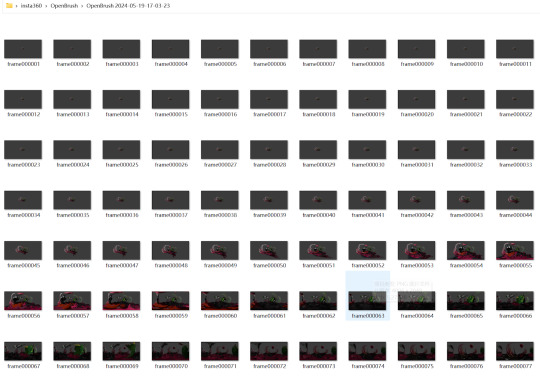
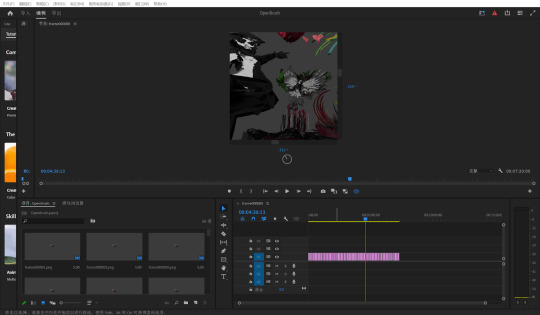
The next step is to import the sequence frames into Premiere Pro and output the panoramic video. We have already completed the output of the 360 video.
Our follow-up task in Premiere Pro is to adjust the timing of this video to make it fit better into our overall video.
To conclude, in addition to the follow-up work mentioned above, our next tasks are:
Create transitions between the parts: we plan to draw a time tunnel in OpenBrush, set up the camera in Blender, and output the video (in the same way as we did in the 'Banksy's World' part of the video).
Add background music.
Watch it in VR and debug it.
0 notes
Text
project 2 working progress
Storyline we designed:
Prologue:
“To find freedom from suffering, we must sever the root that binds us - the illusion of self and the material world. It's all a fleeting dream, a shimmering bubble, a passing phantom”
-Lu Yang. The great adventure of Material World.
Lu, Y.(2020). The great adventure of Material World [game film, time-based art]. Art Gallery NSW https://www.artgallery.nsw.gov.au/collection/works/170.2021/#about
2. Transition:
(enter Banksy's perpective)
"Banksy world is now open"
3. Ending:
"What's your perception of the world?"


We completed the shoot at the Art Gallery of New South Wales using insta360. In the movie we plan to use two of these clips. We will use a digital art image that has a sense of travel and is relevant to Banksy's style as an introduction. At the end we will use the video of looking up at the artwork.

We have finished painting in OpenBrush, containing four of Banksy's street paintings. However, we have encountered some difficulties in exporting that need to be resolved in the follow-up.


4 works of art from Banksy we hope to present were: Flower thrower, Girl with balloon, Dove in a bulletproof vest, and Band-aid balloon.

We designed and set up the camera action track in Blender. After the OpenBrush model is exported, we will adjust it accordingly in Blender.


After exporting 360 videos to Premiere Pro, we first organise the clips, which were 5 minutes long, then access the "type" tool and insert
“To find freedom from suffering, we must sever the root that binds us—the illusion of self and the material world. It's all a fleeting dream, a shimmering bubble, a passing phantom.”
-Lu Yang. The great adventure of Material World.
After the text was inserted, we personalised the text and repositioned it where it should appear in the 360 VR video.
Lastly, we need to add the text animation to make the intro more consistent. (effect control: Avenir next condensed; modify opacity; toggle animation).
In the making of the video “Banksy's World”, we primarily use three software programs: OpenBrush, Blender, and Premiere Pro.
The challenges we encountered with OpenBrush were mainly related to exporting. After creating content in OpenBrush during class, we were unable to export it. This weekend, we borrowed a Meta Quest 3 from the loan store to redo the painting. This time, we successfully exported by selecting the ‘Share’ option in OpenBrush, making the artwork public on Sketchfab, and then downloading the GLB file.

After that, we imported the GLB file into Blender, made adjustments, and added the camera. We wanted to create a shuttle effect, so we set up an S-shaped path for the camera and made the camera move following that path. We then installed the eeVR plugin, adjusted parameters such as modes, VR format, and resolution in eeVR, and then output the sequence frames.
Here, we will make some adjustments:
Due to time constraints, we haven't added a background behind the model yet. We will add it later.
If we find that the path curves too much when viewed through the device and causes vertigo, we will change it to a straight line.
When importing into Blender, we found that some of the effects from OpenBrush, such as light spots and smoke, did not appear. We are going to try adding similar effects in Blender.

The main parameters we adjusted:


The sequence frames:

The next step is to import the sequence frames into Premiere Pro and output the panoramic video. We have already completed the output of the 360 video.
Our follow-up task in Premiere Pro is to adjust the timing of this video to make it fit better into our overall video.

To conclude, in addition to the follow-up work mentioned above, our next tasks are:
Create transitions between the parts: we plan to draw a time tunnel in OpenBrush, set up the camera in Blender, and output the video (in the same way as we did in the 'Banksy's World' part of the video).
Add background music.
Watch it in VR and debug it.
0 notes
Text
"Hindsight": An Insight into Emotional Spaces and Absence

The project "Hindsight" revolves around the profound, often delayed realization of someone's absence from one's life. This project aims to explore and visually represent the emotional aftermath of this realization through immersive technology. By leveraging mixed media, I seek to create a palpable sense of the void left behind, not just in the physical spaces shared but in the emotional landscape of those affected.
"Hindsight" integrates the theories of presence and absence we explored, using virtual environments to manifest the intangible feelings of loss and longing. The project builds on the idea that technology can be a powerful tool to evoke and manipulate emotional responses, which we've seen in various art installations and VR experiences discussed in class.
To generate the necessary content and assets for "Hindsight," I will use:
- Insta360 Camera: For capturing panoramic videos of environments that the subjects once shared, infused with ambient sounds and traces of their past interactions.
- Blender: For creating abstract and metaphorical visuals that represent the chaotic emptiness experienced by the protagonist.
- 3D Scanning Tools: To digitally map and recreate the shared spaces, emphasizing the imperfections and incompleteness of memory and presence.
The project will be authored using a combination of:
- These powerful game development platforms will be used to integrate the various media elements into a cohesive VR experience.
- For editing video and sound, ensuring that all components align with the emotional tone and narrative pace of the project.
- Such as Oculus Rift or HTC Vive, to deliver the final immersive experience to the audience.
Several challenges may arise during the development of "Hindsight":
- Combining different media forms - video, 3D scans, and computer-generated imagery - into a seamless VR experience can be technically demanding.
- Capturing and conveying the depth of emotional absence without making it feel contrived will require careful consideration of content and technique.
- Ensuring that the experience is both immersive and relatable to a wide audience, making them feel the absence as acutely as intended, without overwhelming them.
Through "Hindsight," I aim to push the boundaries of how virtual reality can be used to express complex human emotions and craft an experience that resonates deeply with those who navigate the journey of loss and realization.
0 notes
Text
Final Stages
This is the description of the very last stages of our interdisciplinary project in which each one of us contributed within their own skills.
During the time we each spent developing our separate scenes, we kept communicating as a team to make sure the final video outputs ended up merging together as a puzzle, and no huge differences in style could be noticed throughout. Some things we discussed are aspect ratio, video resolution and transitions. We encountered some rendering issues as well since we are new to this type of visualisation that is made for VR and 360 domes, but we made sure to keep contacting each other with updates on the matter and finding fixes for the rendering issues. Talha was especially helpful as he had more experience than Abhinav and I in both Unreal Engine and Blender, so he was able to guide us. We were eager to test our creations on the last Friday before the submission, but the testing ended up getting postponed to the day of the exhibition which made us more worried due to the lack of time to fix things in case we encountered issues with the projection.
After we were done with rendering our footage we sent all sequences to Anosh who was responsible of compositing, editing and adding sound to our project. He made sure to do the proper research before starting his practical work, which was great, as he ended up coming across useful techniques for working in After Effects. At some point I was contacted regarding something that did not seem quite right in the final output of the video: it turned out that I had set up my camera in a different way compared to Talha’s. In fact, I had put my camera in the scene in a way that it’s positioned beneath the particles that I wanted to have projected at the top of the dome, which was clearly noticeable based on the full-dome render output. In fact, the particle systems I had rendered ended up being on one side of the circle rather than the center, for this reason, I decided to contact one of our classmates who told me that he had done it the same way as I had. Since we were not sure if we were supposed to direct the camera in a way that faced the visuals or not, I suggested to clear out any probable issues. I suggested we create two versions with two different scenarios that we’d test the next day, but Talha raised some valid concerns regarding rendering time. Fortunately, Anosh started doing some research to find a solution, and he came up with a way to flip the 360 rotations of our camera angles in the panoramic render sequences in After Effects, which granted us more flexibility.
Unfortunately, though, when the day came we were not able to see our project come to life when the event was cancelled as the university was not able to provide us with the dome installation needed. Nonetheless, we were very satisfied with the final result as we watched the video that we produced. It was nice to test our abilities to collaborate and create something that is both visually pleasing and satisfying.
0 notes
Text
Blog 5 : Initial project Idea - 3
by Shamshan Chandrathodika
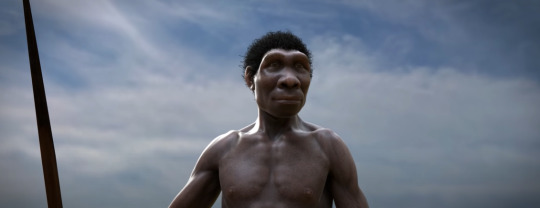
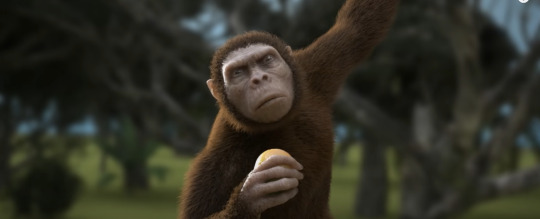
The third concept is a multidisciplinary approach using 2D and 3D animation (Arcane style) modes to illustrate Earth's evolutionary story. This animated representation, which runs from the beginning of human existence to the rise of Homo sapiens, captures the dynamic variations in earth's conditions and developmental paths that extend times.
The visual story develops like a movie, providing a compact yet complete picture of geological and artificial processes. Viewers are transported across time, seeing the shifting patterns of landscapes, the rise of historical periods, and the inventive breakthroughs that have shaped humanity's past. Viewers are treated to a visual record of social milestones, technological advances, and cultural changes that shaped human civilisation.
The ability of this projection in a dome environment increases the sensory quality by taking viewers on a panoramic canvas that covers their visual and perceptive skills. Viewers are taken on an immersive trip beyond basic observation, encouraging a deep engagement with Earth's evolutionary tale's temporal and spatial elements.
Thus, merging 2D and 3D animation modes within a domed projection expresses the various fabrics of Earth's growth and humanity's ongoing imprint on its historic landscapes.


Bibliography
www.youtube.com. (n.d.). Lucy (2014) - Brain usage 100% - Cool/Epic Scenes [1080p]. [online] Available at: https://www.youtube.com/watch?v=NdLTEC6X3pk&t=112s
Scientists Against Myths (2019). Evolution from ape to man. From Proconsul to Homo heidelbergensis. YouTube. Available at: https://www.youtube.com/watch?v=SGxDv7XybSo.
NHK WORLD-JAPAN (2019). 3. Dawn of the Stone Age - OUT OF THE CRADLE [人類誕生CG] / NHK Documentary. YouTube. Available at: https://www.youtube.com/watch?v=xgd5Mt25koI.
Connellan, S. (2021). You don’t have to play ‘League of Legends’ to enjoy the masterful animation of Netflix’s ‘Arcane’. [online] Mashable. Available at: https://mashable.com/article/netflix-arcane-league-of-legends-animation.
www.youtube.com. (n.d.). Arcane: Bridging the Rift | Part 1 - I Only Dream in Risky. [online] Available at: https://www.youtube.com/watch?v=Mz4-38d3-AE&t=898s
www.youtube.com. (n.d.). Arcane Tutorial Part 2 : Deep Dive Into the Arcane Look and Camera Projections (Blender 3.0 / EEVEE). [online] Available at: https://www.youtube.com/watch?v=gG7ZoP3fd1w&list=PLHTCMLF-iraIQxffTaCBIQIaIT5wybWAb
iStock. (2012). Vector picture of Human Evolution. [online] Available at: https://www.istockphoto.com/vector/vector-of-human-evolution-concept-gm165960104-21104472?phrase=human+evolution&searchscope=image%2Cfilm
0 notes
Text
Project Making
Testing Ideas in Blender.
After creating the idea proposal, I began testing the special video format for the dome project. The test itself is fairly straightforward - I created a scene that represented the proposal on a basic level, did some primitive animations and rendered it with a panoramic perspective. After that I took the render as a video and applied it on a dome-like mesh, thus making a dome video.


An example of the dome projection and a rendered picture of the scene with minimal lighting.
With the rendering I desired to achieve a better blocking of the entire idea - see how far things should be placed and understand the distortion, spacing and distance.
youtube
After showing the results to my group members, I decided to extend the testing and created some quick meshes for further testing. I asked Sabrina for her low-poly whale, applied a primitive rig and made it fly around the camera. The purpose of this test was to understand how the moving objects would look like, how close or far away those objects should be, and so on.
youtube
Eventually, I made a test room by following the concept art that Sabrina did for us. I made the animation to show my group the concept of how we could transition between two scenes - the normal room stage and the dreaming room stage.
youtube
References: Fedor B (2024) DOME PROJECT. Video 1. Available at: https://www.youtube.com/watch?v=BJmCNKdvSOc
Fedor B (2024) DOME Project. Video 2. Available at: https://youtu.be/btHCymh6FhM
Fedor B (2024) DOME Project. Video 3. Available at: https://youtu.be/GofVUpPe_xI
0 notes