#Boot ISO Files
Explore tagged Tumblr posts
Visit Tumblr Blog
Explore Tumblr blogs with no restrictions, modern design and the best experience.
Last Seen Tumblr Blogs


Fun Fact
Tumblr was attacked by a cross-site scripting worm deployed by the Internet troll group GNAA on Dec 3, 2012.
Text
iVentoy: Setup Network Boot of ISO Files Made Easy
iVentoy: Network Boot of ISO Files Made Easy #homelab #virtualizationhowto #iVentoy #NetworkBooting #BootISOFiles #ISOoverNetwork #LinuxAutoInstallation #WindowsAutoInstallation #PXEServerSetup #UEFIBoot #LegacyBIOSBoot #AutoOSInstallation
If you are like me, you used Rufus for years to “burn” ISO image files to a bootable USB drive. However, once I discovered Ventoy, I moved to using it for all my USB boot needs. It is a great tool, and we will talk about its advantages here. However, recently iVentoy was released that brings all the Ventoy goodness to network boot, which is great! Let’s look at iVentoy, the ultimate network boot…
View On WordPress
#Auto OS Installation#Boot ISO Files#ISO over Network#iVentoy#Legacy BIOS Boot#Linux Auto Installation#Network Booting#PXE Server Setup#UEFI Boot#Windows Auto Installation
0 notes
Text
hey, privacy concerned folks,
DON'T USE BALENA ETCHER TO USB YOUR ISOs
As @tailsos-official stated in their blog post, it displays ads which is weird for a simple disk imaging tool and more important:
It shares your IP address, the file name of the image the model of the USB stick and a bunch of other things with the Balena company and third parties.
On Windows, use Rufus instead. It's pretty neat.
On Mac, use the Raspberry Pi Imager. It does its job. Or if you don't mind the terminal, use dd. It's built-in.
On Linux you can use dd, or whatever comes with your DE. Or whatever else you prefer. We got options.
You can also use Ventoy and just chuck all your ISOs on it. No need to reformat your usb drives again just for a new boot stick. One USB to rule them all.
sources under the cut
youtube
#linux#linuxposting#windows#microsoft#mac#macos#balena etcher#tailsos#tails os#privacy#data privacy#internet privacy#Youtube
454 notes
·
View notes
Text
Installing Linux (Mint) as a Non-Techy Person
I've wanted Linux for various reasons since college. I tried it once when I no longer had to worry about having specific programs for school, but it did not go well. It was a dedicated PC that was, I believe, poorly made. Anyway.
In the process of deGoogling and deWindows365'ing, I started to think about Linux again. Here is my experience.
Pre-Work: Take Stock
List out the programs you use regularly and those you need. Look up whether or not they work on Linux. For those that don't, look up alternatives.
If the alternative works on Windows/Mac, try it out first.
Make sure you have your files backed up somewhere.
Also, pick up a 5GB minimum USB drive.
Oh and make a system restore point (look it up in your Start menu) and back-up your files.
Step One: Choose a Distro
Dear god do Linux people like to talk about distros. Basically, from what all I've read, if you don't want to fuss a lot with your OS, you've got two options: Ubuntu and Linux Mint. Ubuntu is better known and run by a company called Canonical. Linux Mint is run by a small team and paid for via donations.
I chose Linux Mint. Some of the stuff I read about Ubuntu reminded me too much of my reasons for wanting to leave Windows, basically. Did I second-guess this a half-dozen times? Yes, yes I did.
The rest of this is true for Linux Mint Cinnamon only.
Step Two: Make your Flash Drive
Linux Mint has great instructions. For the most part they work.
Start here:
The trickiest part of creating the flash drive is verifying and authenticating it.
On the same page that you download the Linux .iso file there are two links. Right click+save as both of those files to your computer. I saved them and the .iso file all to my Downloads folder.
Then, once you get to the 'Verify your ISO image' page in their guide and you're on Windows like me, skip down to this link about verifying on Windows.
Once it is verified, you can go back to the Linux Mint guide. They'll direct you to download Etchr and use that to create your flash drive.
If this step is too tricky, then please reconsider Linux. Subsequent steps are both easier and trickier.
Step Three: Restart from your Flash Drive
This is the step where I nearly gave up. The guide is still great, except it doesn't mention certain security features that make installing Linux Mint impossible without extra steps.
(1) Look up your Bitlocker recovery key and have it handy.
I don't know if you'll need it like I did (I did not turn off Bitlocker at first), but better to be safe.
(2) Turn off Bitlocker.
(3) Restart. When on the title screen, press your Bios key. There might be more than one. On a Lenovo, pressing F1 several times gets you to the relevant menu. This is not the menu you'll need to install, though. Turn off "Secure Boot."
(4) Restart. This time press F12 (on a Lenovo). The HDD option, iirc, is your USB. Look it up on your phone to be sure.
Now you can return to the Linux Mint instructions.
Figuring this out via trial-and-error was not fun.
Step Four: Install Mint
Just follow the prompts. I chose to do the dual boot.
You will have to click through some scary messages about irrevocable changes. This is your last chance to change your mind.
I chose the dual boot because I may not have anticipated everything I'll need from Windows. My goal is to work primarily in Linux. Then, in a few months, if it is working, I'll look up the steps for making my machine Linux only.
Some Notes on Linux Mint
Some of the minor things I looked up ahead of time and other miscellany:
(1) HP Printers supposedly play nice with Linux. I have not tested this yet.
(2) Linux Mint can easily access your Windows files. I've read that this does not go both ways. I've not tested it yet.
(3) You can move the taskbar (panel in LM) to the left side of your screen.
(4) You are going to have to download your key programs again.
(5) The LM software manager has most programs, but not all. Some you'll have to download from websites. Follow instructions. If a file leads to a scary wall of strange text, close it and just do the Terminal instructions instead.
(6) The software manager also has fonts. I was able to get Fanwood (my favorite serif) and JetBrains (my favorite mono) easily.
In the end, be prepared for something to go wrong. Just trust that you are not the first person to ever experience the issue and look it up. If that doesn't help, you can always ask. The forums and reddit community both look active.
178 notes
·
View notes
Note
Please, please explain how to install and use linux like I'm 5 years old. I'm so sick of windows adding AI and other bullshit to my already struggling elderly laptop but I'm really not good with computers at all so I have no idea where to start with Linux.
Okay, so, I'm going to break this down into steps I would give the average tumblr user first, and then if any of them are confusing or use words you don't understand, ask me and I'll explain that step in greater detail.
Step 0) BACK. UP. YOUR. SHIT.
NEVER EVER EVER CHANGE YOUR OPERATING SYSTEM WITHOUT A COMPLETE BACKUP OF ALL YOUR FILES.
Step 1) Learn your machine. You need to know:
How much RAM you have
If your processor is 32 or 64 bit
How big your hard drive is
On windows, you can find out all of this by going to the start menu, typing "about" and opening the first result on your system instead of the internet.
For additional instructions, visit this page.
Step 2) Pick your Linux.
There's like 10,000 kinds of Linux, each tailored to particular functions that the end-user (that is you!) might want to have. The sheer amount is very daunting, so first I'm going to give my suggestions, then I'll explain how to pick for yourself.
For Mac users, I suggest Kubuntu. For windows users, I suggest Mint Cinnamon. If your laptop is really REALLY old, I recommend Sparky Stable, which is the lightest weight Linux I would ever suggest for a new user. In every case, download the version suited to your processor (32 bit can be labelled "x86" or "32 bit"; 64 bit is always labelled "64 bit").
If you want to try a different type of linux, you'll need to make sure your laptop meets the "minimum specs" or "system requirements." These numbers tell you how much RAM, processor and hard drive space the linux will use. (That's why you needed those numbers at the beginning.)
Step 3) Collect your supplies. You're going to need:
An ISO burning program compatible with your current system, like Balena Etcher.
A copy of the ISO file for the Linux you want to use.
Your laptop.
An 8gb or larger USB flash drive.
Step 3) Make a bootable USB drive
Install Balena Etcher, hitting "okay" and "next" when prompted. Last I checked, Etcher doesn't have adware attached, so you can just hit next every time.
Plug your USB drive into the laptop.
Open Etcher.
Click "flash from file" and open the ISO file with your Linux on it.
Click "Select target" and open the USB drive location. Hit the "flash" button. This will start writing all the linux installer data to your flash drive. Depending on the speed of your machine, this could take as long as 10 minutes, but shouldn't be much longer.
Step 4) Boot to the USB drive
This is, in my opinion, the trickiest step for a lot of people who don't do "computer stuff." Fortunately, in a rare act of good will, Windows 10 made this process a lot easier.
All you'll need to do is go to settings, then recovery, then advanced startup and pick the button labelled "use a device."
This tutorial has images showing where each of those is located. It's considered an "advanced setting" so you may get a spooky popup warning you that you could "harm your system by making changes" but we're not doing anything potentially harmful so you can ignore that if you get it.
Step 5) Try out linux on the flash drive first.
Linux installs using a cool little test version of itself that you can play around in. You won't be able to make changes or save settings, but you can explore a bit and see if the interface is to your liking. If it's hideous or hard to navigate, simply pick a new linux version to download, and repeat the "make a bootable USB" step for it.
Step 6) Actually install that sucker
This step varies from version to version, but the first part should be the same across the board: on the desktop, there should be a shortcut that says something like "install now." Double click it.
Follow the instructions your specific linux version gives you. When in doubt, pick the default, with one exception:
If it asks you to encrypt your drive say no. That's a more advanced feature that can really fuck your shit up down the road if you don't know how to handle it.
At some point you're going to get a scary looking warning that says 1 of 2 things. Either:
Install Linux alongside Windows, or
Format harddrive to delete all data
That first option will let you do what is called "dual booting." From then on, your computer will ask every time you turn it on whether you want Windows or Linux.
The second option will nuke Windows from orbit, leaving only linux behind.
The install process is slower the larger your chosen version is, but I've never seen it take more than half an hour. During that time, most linux versions will have a little slideshow of the features and layout of common settings that you can read or ignore as you prefer.
Step 7) Boot to your sexy new Linux device.
If you're dual booting, use the arrow keys and enter key to select your linux version from the new boot menu, called GRUB.
If you've only got linux, turn the computer on as normal and linux will boot up immediately.
Bonus Step: Copy Pasting some code
In your new start menu, look for an application called "terminal" or "terminal emulator." Open that up, and you will be presented with an intense looking (but actually very harmless) text command area.
Now, open up your web browser (firefox comes pre-installed on most!), and search the phrase "what to do after installing [linux version you picked]"
You're looking for a website called "It's FOSS." Here's a link to their page on Mint. This site has lots and lots of snippets of little text commands you can experiment with to learn how that functionality works!
Or, if you don't want to fuck with the terminal at all (fair enough!) then instead of "terminal" look for something called "software manager."
This is sort of like an app store for linux; you can install all kinds of programs directly from there without needing to go to the website of the program itself!
297 notes
·
View notes
Text
does anyone know some arch based distro, that is easy to install in a dual boot configuration?
and not manjaro, because manjaro sucks.
ps: also is there a way i can smuggle some sh file onto an arch iso, so i don't have to type it all by hand?
72 notes
·
View notes
Text
>power cycle engaged >memcheck... complete >pwrcheck... complete >cpucheck... complete >booting user_interface_13.2 ... .SYS >checking cached memory... .SYS >no cached memory found. Please partition drive for installation. .SYS >Launching DPTOOL1.24.3 >Please select drive to be partitioned C:OMEAGA5 12TB D:COMSAT22235552 H:HU2947208YY283984 .GUEST >C .SYS >Partitioning drive C, please do not remove drive C or turn off the system. .SYS >Done! .SYS >no wireless connection detected, please select drive with master control soft. C:OMEAGA5 12TB D:COMSAT22235552 H:HU2947208YY283984 .GUEST >H .SYS >one (1) ISO file detected, installing. . . .SYS >done! .SYS >please input acc username and password: USER:Molly PASSWORD:******* .SYS >Master ControlSoftware set up successfully .Molly C:\Home>ls README.txt INSTRUCTIONS.txt EMERGENCY_BACKUP.exe ANDROID_PARAMS.TXT ANDROID_MASTER_CONTROL_TERM.JAR .Molly C:home>sudo jar ANDROID_MASTER_CONTROL_TERM.JAR xms4G smx10G datacache735820.2 password:******* .SYS>launching .jar file... .SYS>ERR:NO_PARAMS_SET .Molly C:\Home>nano ANDROID_PARAMS.TXT | VOGEL Corporation Android Type: | PX-42934-5 PRERELEASE | please accept the terms | of service in order to | use device | | TOS ACCEPT:true | | further params | recording soft: true | personality matrix: true | power saving mode: false | allow for self modification: true | allow for reprogramming: true | admin access: false | blacklist enable: true | hard coded objective: false | | crtl+s: save crtl+x: close Warning: Setting certain parameters out side of company default may void your warranty, continue? Y/N .Molly C:\Home>Y .SYS>Document Saved .Molly C:\Home>ls README.txt INSTRUCTIONS.txt EMERGENCY_BACKUP.exe ANDROID_PARAMS.TXT ANDROID_MASTER_CONTROL_TERM.JAR BLACKLIST.TXT .Molly C:home>jar ANDROID_MASTER_CONTROL_TERM.JAR xms4G smx10G datacache735820.2 .SYS>Launching .JAR file. . . [###############-------]
23 notes
·
View notes
Text


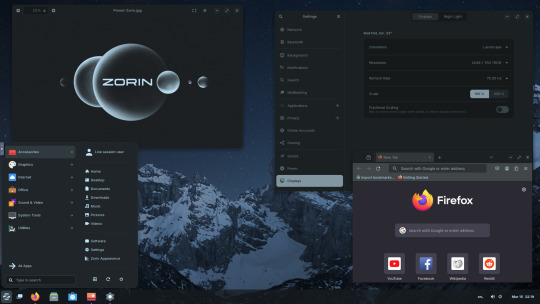


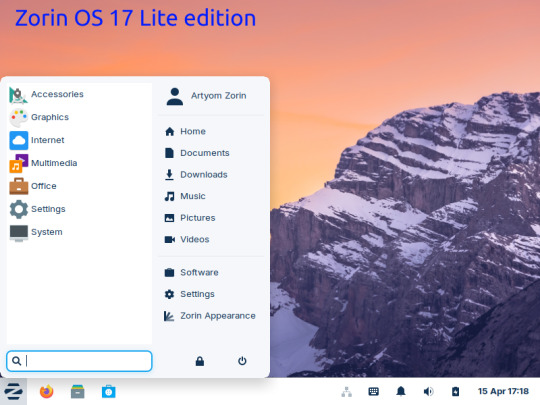
15.03.25
I tried out Zorin OS Linux on Distrosea.
https://distrosea.com/
Zorin OS started its development in 2008 by co-founders Artyom and Kyrill Zorin. The company is based in Dublin, Ireland.
Main site:
https://zorin.com/os/
Wiki link:
https://en.wikipedia.org/wiki/Zorin_OS
Like Linux Mint, it is based on Ubuntu, which in turn is based on Debian and uses the current Ubuntu 24.04.2 LTS base release.
It features the GNOME 3 and XFCE desktop environments and is available in Lite, Education and Core editions.
Due to enhanced performance optimizations in the Core, Pro, and Education editions of Zorin OS, the Lite version is being discontinued.
However the XFCE desktop packages will still be available through the official software repositories:
https://help.zorin.com/docs/getting-started/getting-zorin-os-lite/
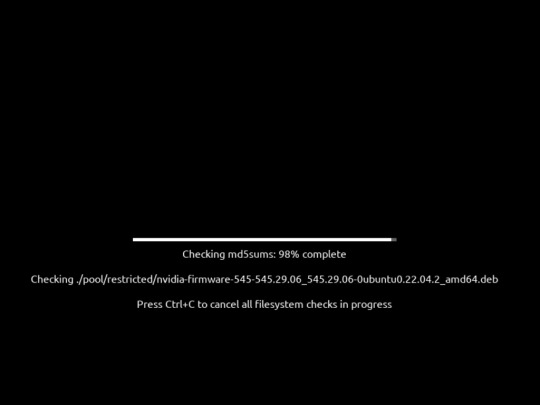
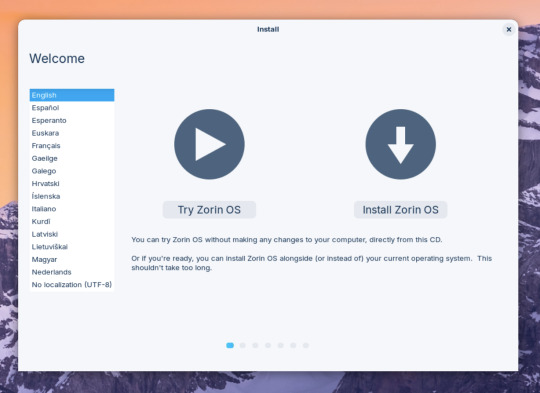
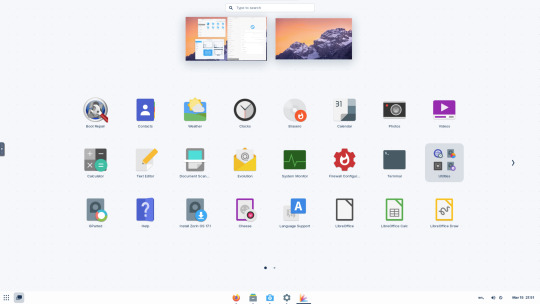
I chose version 17 and selected the 'Core' edition.
This version (Core64) features the GNOME desktop and a few more apps. I clicked 'Try' when the Linux distro booted up to the install wizard. The distro performs a md5 sum check before boot-up to check the security of the .iso file.
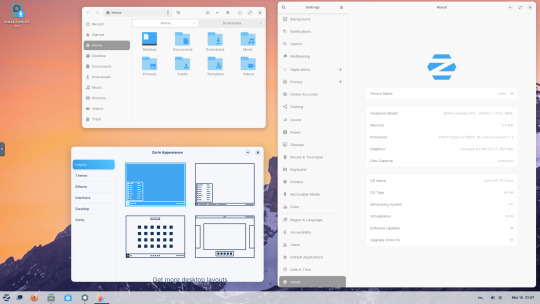
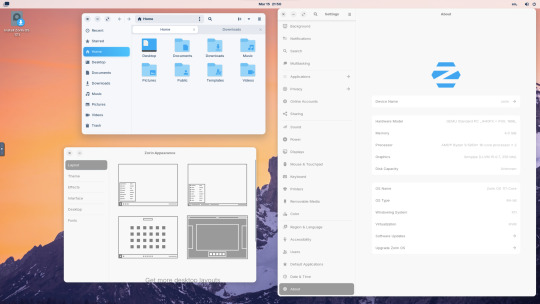
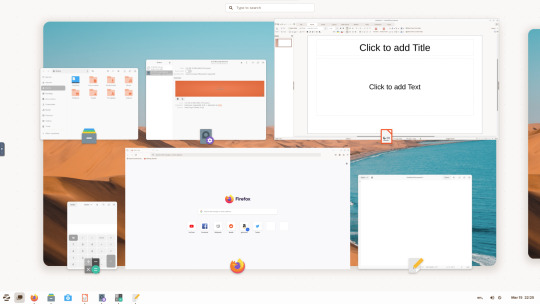
The distro can be easily customised to echo Windows or MAC-OS, as well as being tweaked to the users preferred layout.
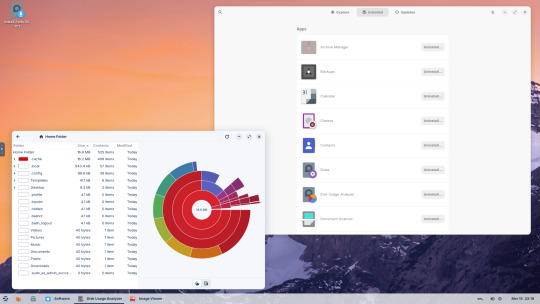
Software can be installed through Zorin's Software Store. applications are available to install in APT, dpkg, Snap and flatpak.
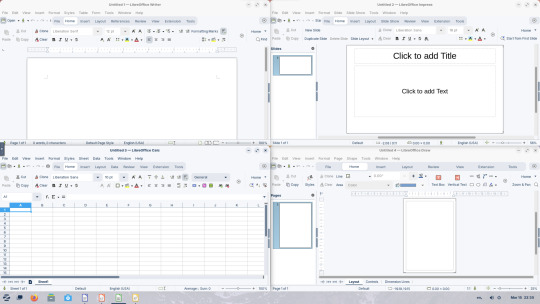
Windows software can be ran using Wine, a compatibly layer for running Windows only programs on Linux, MAC OS and BSD systems.
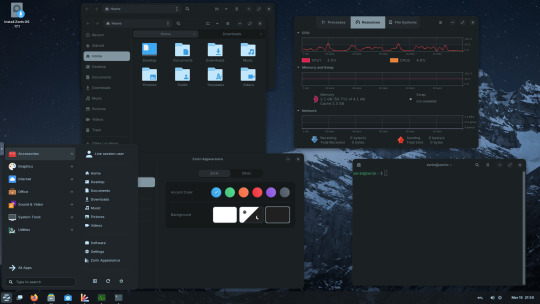
Zorin OS 17 also comes with various menu layouts from a Windows Classic/7 layout, Windows 11 style layout, GNOME menu and full screen menus. Some of the menu layouts are only available in the paid for Pro edition.
For more about the various layouts and a review see:
https://www.zdnet.com/article/zorin-os-demonstrates-exactly-what-a-desktop-operating-system-should-be/
The panel (referred to as a taskbar) is also highly configurable in size and appearance and can be changed to match the desktop layouts.
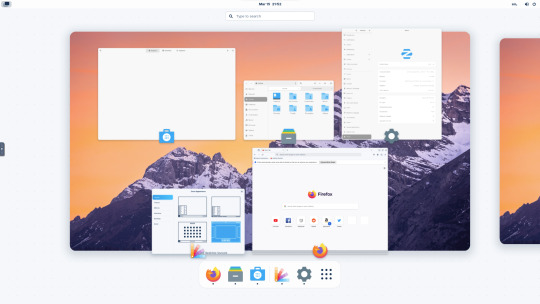
Various window management set-ups are featured for tiling windows to the sides of the screen.
I like the operating system as it is both familiar to me as a Windows user, but also is very configurable, features a polished user interface and is easy to navigate. Also Zorin comes with some very striking desktop backgrounds and colours!
However, I couldn't get the VM to connect to the internet, so I couldn't browse Firefox or try out any additional software.
This is just the way that it has been set-up on Distrosea. For test purposes though, it works very well.
It also feels very speedy, even in a virtual machine over the host internet!
4 notes
·
View notes
Text
How to bypass Microsoft Account when installing Windows 11

Microsoft has confirmed that the popular “bypassnro” command, which let users to skip connecting to the Internet and signing into a Microsoft Account, is being removed, when setting up a new Windows 11 PC.
Microsoft is now requiring every Windows 11 device be set up with an internet-connected account.
Windows 11 PCs that have already been set up without a Microsoft Account will be unaffected. This change only affects the Windows 11 install and setup experience, where the OS requires an internet connection and a Microsoft Account to progress.
There are still ways to bypass these requirements, Currently, it’s also possible to manually re-add the bypassnro command to your system by typing the following into a command prompt: “reg add HKLM\SOFTWARE\Microsoft\Windows\CurrentVersion\OOBE /v BypassNRO /t REG_DWORD /d 1 /f shutdown /r /t 0”
However, there’s no guarantee Microsoft will allow this additional workaround for long. There are other workarounds as well, such as using the unattended.xml installation, but this requires a lot more work and includes creating a new Windows installation image from scratch.
Steps to Create an Unattended XML File for Local Account
1. Basic unattend.xml to Skip Microsoft Account:
Here’s a minimal XML file that configures a local administrator account and skips OOBE (Out-of-Box Experience) prompts:
<?xml version="1.0" encoding="utf-8"?> <unattend xmlns="urn:schemas-microsoft-com:unattend"> <settings pass="oobeSystem"> <component name="Microsoft-Windows-Shell-Setup" processorArchitecture="amd64" publicKeyToken="31bf3856ad364e35" language="neutral" versionScope="nonSxS" xmlns:wcm="http://schemas.microsoft.com/WMIConfig/2002/State" xmlns:xsi="http://www.w3.org/2001/XMLSchema-instance"> <OOBE> <HideEULAPage>true</HideEULAPage> <HideOEMRegistrationScreen>true</HideOEMRegistrationScreen> <HideOnlineAccountScreens>true</HideOnlineAccountScreens> <!-- Skips Microsoft account --> <HideWirelessSetupInOOBE>true</HideWirelessSetupInOOBE> <NetworkLocation>Work</NetworkLocation> <ProtectYourPC>1</ProtectYourPC> </OOBE> <UserAccounts> <LocalAccounts> <LocalAccount wcm:action="add"> <Password> <Value>YourPassword123</Value> <!-- Change this --> <PlainText>true</PlainText> <!-- Set to false if hashed --> </Password> <DisplayName>LocalAdmin</DisplayName> <Name>LocalAdmin</Name> <Group>Administrators</Group> </LocalAccount> </LocalAccounts> </UserAccounts> <AutoLogon> <Password> <Value>YourPassword123</Value> </Password> <Enabled>true</Enabled> <Username>LocalAdmin</Username> <LogonCount>999999</LogonCount> </AutoLogon> </component> </settings> </unattend>
2. Save the File
Save as autounattend.xml (for USB boot) or unattend.xml (for deployment tools).
Place it in the root of your Windows 11 installation USB or inject it into the ISO.
3. Use the File During Installation
Boot from the USB, and Windows Setup will automatically apply the settings.
No Microsoft account prompt will appear.
Get a Windows 11 Product key at keyingo.com for half price !
5 notes
·
View notes
Text
How to Install Ubuntu 24.04 on VirtualBox - Ubuntu 24.04 As Host

If you're looking to explore Ubuntu 24.04 without messing up your main system, installing it on VirtualBox is the perfect way to go! Here's a step-by-step guide to get you started.
Step-by-Step Guide:
Download VirtualBox: Head over to the VirtualBox website and download the latest version for your operating system.
Download Ubuntu 24.04 ISO: Grab the Ubuntu 24.04 ISO file from the official Ubuntu website.
Install VirtualBox:
Follow the installation instructions for your OS.
Open VirtualBox once installed.
Create a New Virtual Machine:
Click on “New”.
Name your VM (e.g., Ubuntu 24.04).
Choose “Linux” as the type and “Ubuntu (64-bit)” as the version.
Allocate RAM (at least 2048 MB recommended).
Attach the Ubuntu ISO:
Select your newly created VM and click “Settings”.
Go to “Storage”.
Under “Controller: IDE”, click the empty disk icon and select “Choose a disk file”.
Find and select the Ubuntu 24.04 ISO you downloaded.
Start the Virtual Machine:
Click “Start” to boot from the ISO.
Follow the on-screen instructions to install Ubuntu.
Complete the Installation:
Select your language and keyboard layout.
Choose “Install Ubuntu”.
Follow the prompts to set up your system (create a user, set a password, etc.).
Once installation is complete, restart the VM.
Remove the ISO and Boot from Virtual Disk:
Go back to “Settings” -> “Storage” and remove the ISO from the virtual drive.
Restart your VM again, and it should boot into your new Ubuntu 24.04 installation!
For a visual guide, check out this helpful video tutorial: How to Install Ubuntu 24.04 on VirtualBox 🎥
youtube
Happy virtualizing! 🚀
#Install Ubuntu 24.04 on Virtualbox#Ubuntu 24.04#How to Install Ubuntu 24.04#Linux#Ubuntu#Fedora 40#GNOME 46#Youtube
15 notes
·
View notes
Text
Oh yay, unexpected system problems!
For whatever reason, my MX install seems to be borked. I can log in on TTY fine, but XFCE refuses to load, and sudo is not working(?). It's claiming the sudoers file doesn't exist. I did not knowingly do anything that might break it.
The only thing I can really think of is probably running an update, and not immediately booting back into it to make sure everything is working fine then. ¯\_(ツ)_/¯ So, I wouldn't have caught it earlier. This is basically Debian Stable minus systemd and with some extra tools bolted on, so I don't really expect updates to go breaking shit like on rolling releases. Didn't see anybody else reporting any weird shit like this, glancing at the forums.
Haven't even seriously gotten into trying to clean up whatever the hell happened yet. I wasn't awake enough yet.
Glad that's not my daily driver right now, but a (sometimes useful) side install that I kept around after trying and mostly switching over to another distro. It's still deeply annoying whenever something like this happens.
But! Worst case, backups may pull my chestnuts out of this fire.

Got a handy recent-enough snapshot ISO in my little USB treasure chest.
And I've currently got a fresh /home backup running on my current main system.
After that finishes, I'd better go and try in earnest to fix the situation. If nothing else, because I am morbidly curious wtf exactly has even gone wrong there. But, at least it's nbd if it's just not readily fixable.
13 notes
·
View notes
Text
If I ever wanted to punish someone, I would set them down with a Unibody MacBook Pro and a Debian 12 Bootable USB and tell them they're not allowed to get up from the table until Debian boots off of the Mac's internal drive.
Because, despite being at my limit with Linux, I'm still giving it more chances, and I'm trying to get Debian 12 to work on my MacBook, but it won't fucking work.
Apparently Debain 12 doesn't ship with (or automatically download?? idk.) Broadcom's Proprietary drivers like every other distro I've tried has. That causes problems, and after installation the machine won't boot.
I've tried absolutely everything. I found the missing firmware files on GitHub and have tried loading them off a separate USB when prompted by the installer. The Debian installer can't find them for some reason, even though they're the only thing on that USB drive. I've tried using the Mac-specific Debian ISO. The Mac Bootpicker fails to recognize that ISO as a bootable USB, so I can't even get to the installer with it. I've tried every installation configuration from default to LVM Encryption, and nothing works.
It should not be this hard to put an operating system on a computer.
I don't trust Zorin. The Mint community seemed too elitist for my taste. I don't like Ubuntu's priority of Snaps of Flatpaks. Elementary OS was too restrictive and elitist. I didn't like the way Pop!_OS looked, and now Debian is fighting me every single step of the way. I'm just 🫠
4 notes
·
View notes
Text
Installing Kali Linux on a USB Stick: A Step-by-Step Guide
If you want a portable, powerful cybersecurity toolkit you can carry in your pocket, installing Kali Linux on a USB stick is the perfect solution. With Kali on a USB, you can boot into your personalized hacking environment on almost any computer without leaving a trace — making it a favorite setup for ethical hackers, penetration testers, and cybersecurity enthusiasts.

In this guide, we'll walk you through how to install Kali Linux onto a USB drive — step-by-step — so you can have a portable Kali environment ready wherever you go.
Why Install Kali Linux on a USB?
Before we dive into the steps, here’s why you might want a Kali USB:
Portability: Carry your entire hacking setup with you.
Privacy: No need to install anything on the host machine.
Persistence: Save your settings, files, and tools even after rebooting.
Flexibility: Boot into Kali on any system that allows USB boot.
There are two main ways to use Kali on a USB:
Live USB: Runs Kali temporarily without saving changes after reboot.
Persistent USB: Saves your files and system changes across reboots.
In this article, we’ll focus on setting up a Live USB, and I'll also mention how to add persistence if you want. and if you seek knowledge about kali linux you can visit our website any time
Website Name : Linux Tools Guide
What You’ll Need
✅ A USB drive (at least 8GB; 16GB or more recommended if you want persistence). ✅ Kali Linux ISO file (download it from the official Kali website). ✅ Rufus (for Windows) or Etcher/balenaEtcher (for Mac/Linux/Windows). ✅ A computer that can boot from USB.
Step 1: Download the Kali Linux ISO
Go to the Kali Linux Downloads page and grab the latest version of the ISO. You can choose between the full version or a lightweight version depending on your USB size and system requirements.
Tip: Always verify the checksum of the ISO to ensure it hasn't been tampered with!
Step 2: Insert Your USB Drive
Plug your USB stick into your computer. ⚠️ Warning: Installing Kali onto the USB will erase all existing data on it. Backup anything important first!
Step 3: Create a Bootable Kali Linux USB
Depending on your operating system, the tool you use may vary:
For Windows Users (using Rufus):
Download and open Rufus (Get Rufus here).
Select your USB drive under Device.
Under Boot selection, choose the Kali Linux ISO you downloaded.
Keep the Partition scheme as MBR (for BIOS) or GPT (for UEFI) based on your system.
Click Start and wait for the process to complete.
For Mac/Linux Users (using balenaEtcher):
Download and open balenaEtcher (Get Etcher here).
Select the Kali ISO.
Select the USB drive.
Click Flash and wait until it's done.
That's it! You now have a Live Kali USB ready.
Step 4: Boot Kali Linux from the USB
Restart your computer with the USB plugged in.
Enter the BIOS/UEFI settings (usually by pressing a key like F12, Esc, Del, or F2 right after starting the computer).
Change the boot order to boot from the USB first.
Save changes and reboot.
You should now see the Kali Linux boot menu! Select "Live (amd64)" to start Kali without installation.
(Optional) Step 5: Adding Persistence
Persistence allows you to save files, system changes, or even installed tools across reboots — super useful for real-world usage.
Setting up persistence requires creating an extra partition on the USB and tweaking a few settings. Here's a quick overview:
Create a second partition labeled persistence.
Format it as ext4.
Mount it and create a file /persistence.conf inside it with the content: cppCopyEdit/ union
When booting Kali, choose the "Live USB Persistence" option.
Persistence is a little more technical but absolutely worth it if you want a real working Kali USB system!
Troubleshooting Common Issues
USB not showing up in boot menu?
Make sure Secure Boot is disabled in BIOS.
Ensure the USB was properly written (try writing it again if necessary).
Kali not booting properly?
Verify the ISO file integrity.
Try a different USB port (preferably USB 2.0 instead of 3.0 sometimes).
Persistence not working?
Double-check the /persistence.conf file and make sure it's correctly placed.
Conclusion
Installing Kali Linux onto a USB stick is one of the smartest ways to carry a secure, full-featured hacking lab with you anywhere. Whether you’re practicing ethical hacking, doing security audits, or just exploring the world of cybersecurity, a Kali USB drive gives you power, portability, and flexibility all at once.
Once you’re set up, the possibilities are endless — happy hacking! 🔥
2 notes
·
View notes
Note
tell us the linux story. 🎤
OKAY this is going to get a lot of technobabble probably but I'll try to simplify and explain everything. Also some of the explainations may not be technically correct, im a Casual hobbyist. Long post warning.
So, this started when I was checking my windows error logs, because my computer had started to randomly blue screen (again) (it stopped for a while but I suspect it was just happening in sleep mode). So I check the logs, and it's. It's bad. There's SO many errors. Windows has apparently been throwing up under the hood. I showed a computer adept friend and his response was "Oh God" followed up by "i think you need to reinstall your OS" so that was great.
First I'm directed to do what I'll call a soft reinstall, which is basically windows redownloads the OS and applies it as an update. You get to keep your stuff. I back up Everything to my external hard drive anyways because I know better. Do the install, check the logs the next day, windows is still throwing up. I'm told I will likely have to do a fresh install of windows.
I decide, fuck it, let's take a look at linux. I was planning on swotching to linux next time i get a computer anyways. How installing linux works, is you basically download an ISO file of the linux version you want, and use a program to put it on a USB or DVD, and stick it in your computer for it to boot off of. So, you're running linux completely separate from the rest of your computer, just using the hardware. Whatever you do in this environment isn't saved, so it's supposed to be a safe way to test out an OS. I imagine for people who aren't me, it is.
I try Ubunto, decide i want to try linux mint instead for petty reasons (Ubunto doesn't have shortcuts built in, mint does, i didn't feel like going to the command prompt every time I wanted to make a shortcut).
To do this, I have to restart my computer back into windows, so i can download and make the mint USB. I have not installed linux yet.
I promptly learn windows has decided to murder me for booting Anything off a USB. It's aggressively encrypted both of my hard drives. (The external drive is fine, it wasn't plugged in.) This is a security measure it must have activated in case I was a Hacker trying to bypass my login password. I cannot use my password to fix it.
Luckily, if I install Ubuntu to a drive, it'll format that drive and basically rescue it from the grips of windows. This is why I backed everything up, because windows is a piece of shit. I do that. I pick the one with windows to fucking eradicate windows.
My original plan was dual-booting windows and linux, simply because I wanted to make sure I could still run games that might not work on linux. Oh well, I decide. I'll just do mint.
I use Ubuntu to make the mint USB, wipe the other drive with mint, and then reformat the Ubunto drive. This is fine! It's great. Linux is responsive and my steam games are happy, because somehow valve made a thing that just Makes Games Work On Linux.
Now, I have a Legally Obtained Copy of ac3. There's specific ways to install windows games onto Linux like this, using a thing called WINE, and a program called lutris. Wine just sort of... translates windows stuff into Linux??? You can install windows drivers with it. Lutris is a game hub that manages all that using WINE for video games.
(I successfully installed the .Net framework with wine. Which if you're like me and have ever had a fucking nightmare trying and failing to install it on windows for Gaming, you will know this feels like stepping into the twilight zone to see.)
Anyways, for reasons unknown to me still, it has some kind of problem getting the installer to run. Okay, I say, I'll go back to my dual boot plan. I make a windows 11 install ISO on mint, boot off it, encounter thirty problems I don't understand and have to remake the ISO like three times, and then get windows installed. I also learned how to set the default drive to boot from using the BIOS, aka the super scary thing you shouldn't touch unless you're doing insane computer sjit like this. Turns out the windows USB installer needs to be the default boot while installing.
Note here: don't be me. Always install windows first, and THEN linux. They both have dual booting managers, and the second install overrides the first, and you NEED the linux boot manager.
NEW exciting windows problems! It cannot percieve my wifi card. Or, as I later learn, act like a fucking gaming laptop. It also fucks Linux again so I have to reinstall mint. I take the time to politely partition the drives (split it up into chunks, basically, so the windows-storage doesn't interact with the linux-storage), and disable the security thing windows freaked out and triggered earlier to encrypt my drives. Yay! My OS's are now installed and linux is in charge of booting, which is good because the windows booter can't tell the computer to boot into linux.
I use rose's computer to download and install a bunch of drivers that my windows install lacks in an attempt to fix the wifi, no dice. Currently I am waiting for a wifi USB adapter to see if that will get around it.
At this point, I decide to install AC3. Install goes okay! It's giving me a weird error with the launcher, but it worked on the second install, so okay. Except there's a problem: once it gets past the safety warnings and stuff, it decides to drop to 1fps. Messing with the game settings doesn't change this. Reinstalling doesn't fix this. I complain to rose. I install every driver related to my laptop I can think of. 1fps. No wifi. Audio works fine though!
I then remember a random thing a redditor mentioned while I was working with lutris: installing the game on windows, and using external storage to copy that install to limux.
So... I do that. I add it to lutris. I open the game.
It Just Works. No lag. Fully working. What the fuck. I installed the make on WINDOWS and fucking LINUX was running it better.
At this point, I had been working on this for three days, and it was 4am. I felt insane! I still feel insane! It just works!
Now, it's basically just messing with windows again tomorrow when the wifi adapter arrives, and finishing transferring everything to linux. And other small things that are basically just quality of life for me.
Windows is just going to be my non-steam windows games installer, basically. I don't think I'll need all 400gb i partitioned off for windows, I'll probably reduce it to 250gb or 300gb, so linux can have Even More. I literally just need it for edge cases and running game installers.
So, that's what I spent my weekend doing!!!!! Do more research than me if you change to linux, kids.
#ramblings#long post#it really was an experience#to be clear wifi and everything DOES work on linux. i didnt have to do anything special for linux. idk whats up with windows#if you want any more details on any onr part of this Let Me Know#curtis does hobbies
2 notes
·
View notes
Note
You are the mutual I know who uses linux, and I have a half-broken dinosaur of a laptop I want to see if linux would make usable again.
Its 8+ years old, cannot connect to the internet for a reason that may be software related or might not(its a mystery), and has other various issues.
My use of it would Primarily be as a on-the-go text & html editor and if I can get the internet running on it then also firefox as well. Maybe some offline emulation of some older games or a simple linux supported drawing program but that isnt essential.
The question is Thus: If I download a linux mint installer and copy to a flashdrive(presuming you can download the file without it starting to set up the OS instantly), is that all thats necessary to upload linux mint onto a laptop that has no internet capabilities?
Also which version of linux mint should I use? I see there are several. This laptop 3 years ago ran windows 10 ok enough to boot up chrome and use the internet, but now it takes like 15 mins to finish loading enough that you can open programs, as a metric.
Thanks and hope you have a nice day!
Yes, most linux distros will run on a machine that age, and with a surprising degree of vitality. Game emulation should work just fine, unless the computer was very low power even for 2015.
On a mech that old, I'd suggest just checking if the tiny wire for the wifi card has popped loose over time. They are snap-on wire heads that don't lock, so especially with laptops, disconnections like that happen.
Your wifi card should look a lot like this:

I've circled the two tiny ports, and drawn arrows to identify which cables. The whole wifi card will be about an inch across, and is the ONLY thing that uses those kind of wires, so it's very identifiable.
Linux mint is designed to install offline, and includes a wide variety of open source and generic drivers for just.... so much hardware. When you begin installation, it will ask you if you want to use, "third party, private and proprietary drivers." If you say yes, it will want an internet connection to download those drivers. If you say no, it will install entirely offline without issue.
As for which version: the only difference is the visuals. I, personally, like XFCE because it has very minimal visual noise. Everything is simple rectangles with sharp corners and clear boundaries. This lack of visual flair also means it uses the least resources to run the OS, leaving more hardware power available for actual tasks. However, it's a very intimidating desktop. If you liked Windows XP but haven't enjoyed much since, grab XFCE.
If you are a Mac/apple user, I actually recommend Kubuntu instead of Mint, because it has the most similar interface visually and will cause the least transition pains. Kubuntu has equally if not even more robust hardware support to Mint, as both of them are built on top of the Ubuntu framework.
For everyone else, I suggest starting with Mint Cinnamon. I have actually, with no reservations, had way better results teaching confused retirees to run Cinnamon than Windows or Mac. It's a very user friendly interface.
The start bar search, for example, literally just shows results for files/programs installed to your computer, none of this bs about integrated web searching.
As for installation tools:
You must burn the ISO file to the flashdrive as a bootable disk, rather than simply copying the file to it. I'm sure you know that; it's the same for installing windows. But! People often forget that detail and wonder why their computer keeps booting to windows instead of the installation media.
I personally use LiLiUSB because I'm stuck mentally in the year 2014 which is when it stopped updating. For a more sane approach, try Balena Etcher. Or whatever bootable drive software you like; it doesn't really matter. You just need to make the drive bootable before installation.
47 notes
·
View notes
Text
I’m officially connected to the Iglunix project. If you need some help with installing it, have this guide:
0. Boot an iso that isn’t @voidlinux and install xbps-static. This is important because Iglunix doesn’t currently have an iso.
1. Make two partitions on an empty drive. If using (G)Parted/KDE Partition Manager, using they should be a fat32 partition named IGLU_BOOT and an ext4 partition named IGLU_ROOT, if not, use fdisk to create the two partitions and mkfs to format them.
2. Make directory as root:
3: Mount IGLU_ROOT to /mnt/new-root
4: make a boot directory: /mnt/new-root/boot
5: mount IGLU_BOOT to /mnt/new-root/boot
6: xbps-install -r/path/to/mountpoint -SyfRhttps://mirror.iglunix.org/ (all .xbps files listed in the repo)
7: download this script and run it as root: https://raw.githubusercontent.com/anoraktrend/Iglu-install/main/postinstall
8: reboot, removing the iso. when dhcpcd is done running, hit enter and edit /etc/inittab to make it more secure: replace the ask firsts with respawn and change /bin/sh to /bin/sgetty 0 tty(match the tty at the beginning of the stanza) and add at least two more lines like tty1 with numbers
9: reboot one more time, and login as root. Congrats you have working Iglunix install, git clone https://github.com/iglunix/iglunix to wherever you want to keep your source code directories and optionally clone https://github.com/anoraktrend/frankensrc. Build packages with iglupkg, install using iglu add out/*.xbps.
If you want to contribute to this project, try making pull requests to Frankensrc first (I am more likely to make merges than Ella is, just based on freetime) and Iglunix second, (all Frankensrc build.shs are dual licensed as Berkeley Artistic and bsd0 to be upsourced to Iglunix).
Here be dragons: The Iglunix project does not officially support installing Iglunix at the moment. It’s not complete and many parts of it are not currently working. I can help you if you have issues installing the system if you need it, send an ask if you have trouble! My recommendation is to use a Chimera Linux iso for step zero. (You will need to run doas apk add chimera-repo-contrib chimera-repo-user to be able to install gparted).
3 notes
·
View notes
Text


07.05.25
I tried out two Linux distributions on my test laptop today.
Before I started the task, I updated Linux Mint Cinnamon with the update manager to receive the latest updates for the system and installed apps.
I can also use the terminal to update everything by typing the APT command 'sudo apt-get update'.
'sudo' elevates root (admin) privileges, 'apt-get' receives the packages needed and 'update' checks for updates. I then type 'sudo apt-get upgrade' and press enter to upgrade all the applications and the system.
System up to date!
Firstly, I downloaded Debian from: https://www.debian.org/distrib/
I chose the Debian Live MATE desktop environment.
I then went to download Linux Mint from: https://linuxmint.com/download.php
I chose the Mint MATE Edition desktop environment.
Debian MATE was 3.1 Giga-Bytes and Linux Mint MATE was 2.9 Giga-Bytes to download.
Once they had downloaded, I located them in Downloads and opened the built in USB writer application.
I wrote the ISO files to the sticks to create two bootable USB sticks.
After this step I booted Debian 12 MATE.
I selected 'try' on the boot menu screen.
Here it is in action! I played around with the user interface and tested the sound, which worked brilliantly!
Next, I booted Linux Mint 22.1 MATE.
Again, I selected 'try' to boot up the live environment.
Here it is in action! Again I tested the sound, played a YouTube video in Firefox and customised the panels and themes.
Both MATE desktops in both distros were very interesting and seemed even snappier when compared to the operating systems I have installed on this laptop, which are Linux Mint 22.1 Cinnamon and Ubuntu 24.04!
I found Debian with the MATE desktop to be the most stable environment however.
See blog below to learn more about the modern take on the classic GNOME 2 experience!
4 notes
·
View notes