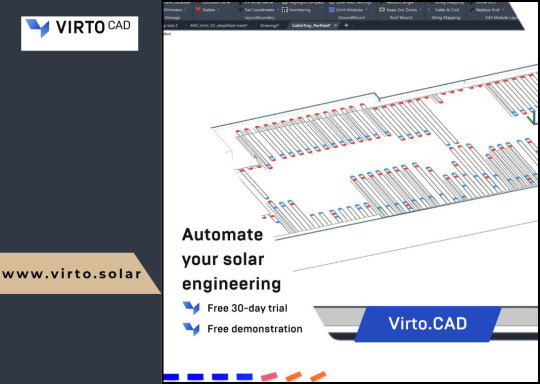
#CAD System Configuration
Explore tagged Tumblr posts
Visit Tumblr Blog
Explore Tumblr blogs with no restrictions, modern design and the best experience.
Last Seen Tumblr Blogs


Fun Fact
Tumblr Inc. is funded by 13 investors.
Text
Understanding CAD Computer Requirements: Essential Guide for Optimal Performance
If you’re diving into the world of Computer-Aided Design (CAD), ensuring that your system is properly equipped to handle the demands of software like AutoCAD is crucial. Whether you are an architect, engineer, or designer, having the right hardware and software configuration will not only improve your workflow but also guarantee smoother performance and better results. In this blog, we’ll walk through the key computer requirements for running AutoCAD and other CAD software smoothly.
Why Understanding CAD Computer Requirements Matters
Running CAD software efficiently requires more than just having a standard computer. CAD applications, especially AutoCAD, are resource-intensive and demand high computing power. Without a suitable setup, you might experience lagging, crashes, or long rendering times that could affect productivity. Understanding these requirements ensures that your system is up to the task and can handle the software’s robust functionalities without compromising performance.
Key CAD Computer Requirements for Optimal Performance
1. Processor (CPU): The Brain of Your CAD System
The processor is the heart of your CAD system. CAD software requires a multi-core processor to handle complex calculations and data. AutoCAD, for example, performs better on processors that can handle multiple tasks at once.
Recommended: A multi-core processor, ideally with 4 or more cores, such as Intel i7/i9 or AMD Ryzen 7/9.
Minimum: Intel Core i5 or AMD Ryzen 5 (6th generation or newer).
Choosing a higher-end processor will significantly enhance your CAD experience, especially when working with complex designs or large files.
2. Graphics Card (GPU): Visuals and Rendering Performance
The graphics card is crucial for rendering 3D models and visualizing designs in AutoCAD. A powerful GPU will ensure smooth navigation, rendering, and model manipulation in both 2D and 3D spaces.
Recommended: NVIDIA GeForce RTX Quadro series or AMD Radeon Pro series.
Minimum: NVIDIA GeForce GTX or AMD Radeon RX series.
For demanding 3D modeling tasks, consider upgrading to a workstation-grade GPU like the NVIDIA Quadro series, which is optimized for professional CAD workflows.
3. Memory (RAM): Smooth Multitasking
When working with large files or running multiple applications, ample RAM is necessary to avoid system slowdowns or crashes. CAD software requires significant memory to store large drawings, 3D models, and complex calculations.
Recommended: 16GB or more of RAM.
Minimum: 8GB of RAM.
For more intensive CAD tasks or multitasking (like running AutoCAD with other software), investing in 32GB or more of RAM is ideal.
4. Storage: Quick Access to Large Files
CAD designs often involve large files that need fast access and ample storage space. A slow hard drive can create bottlenecks when loading files or saving work, hindering your productivity. Opting for an SSD (Solid-State Drive) will significantly improve file loading times and overall system responsiveness.
Recommended: 512GB or higher SSD for storage.
Minimum: 256GB SSD or a 1TB HDD (though SSD is always recommended).
For the best performance, SSDs should be used for the operating system and primary software installation, while larger HDDs can be used for archival purposes.
5. Display: Crisp and Accurate Visualization
A high-resolution display is essential for accurately visualizing detailed designs and models. AutoCAD users often work with intricate 2D and 3D elements, making a large, high-resolution monitor an essential component of the setup.
Recommended: A 24” or larger screen with 1920x1080 resolution (Full HD) or higher, ideally with IPS technology for better color accuracy.
Minimum: 21” screen with 1920x1080 resolution.
For better productivity, you may even consider a dual monitor setup to increase workspace and improve multitasking efficiency.
6. Operating System: AutoCAD Compatibility
The operating system you use can impact the compatibility and performance of your CAD software. AutoCAD supports both Windows and macOS, but Windows remains the dominant platform for CAD applications due to better driver support and compatibility.
Recommended: Windows 10 64-bit (or newer), or macOS Mojave 10.14 or later.
Minimum: Windows 8.1 (64-bit) or macOS High Sierra 10.13 or later.
For those using Windows, make sure to keep your OS updated to take advantage of the latest performance and security enhancements.
7. Internet Connection: Cloud Integration and Updates
While not a direct hardware requirement, a reliable internet connection is important for downloading software updates, using cloud-based storage, and collaborating on projects. AutoCAD’s cloud integration features, such as AutoCAD Web and AutoCAD Mobile, rely on internet connectivity for seamless operation.
Recommended: Stable broadband connection with speeds of at least 10 Mbps.
Minimum: Basic internet connection for updates and cloud features.
Additional Tips for Optimizing Your CAD System
Ensure Regular Software Updates: Keeping your AutoCAD software and drivers up to date ensures compatibility and optimizes performance.
Consider External Storage for Backup: Large CAD files can quickly fill up your system’s storage, so having an external drive or cloud storage option for backup and archiving is a good idea.
Use CAD-Specific Peripherals: A high-quality mouse and keyboard designed for CAD work can enhance precision and reduce strain during long working hours.
Conclusion
Setting up a system to run AutoCAD and other CAD software efficiently isn’t just about meeting the bare minimum requirements — it’s about ensuring that your system can handle complex design tasks without compromising on speed or performance. By investing in a high-performance processor, powerful graphics card, sufficient RAM, and an SSD for fast storage, you’ll experience smoother, more efficient CAD workflows.
To learn more about AutoCAD system requirements, be sure to check out Virto Solar’s AutoCAD System Requirements page. This guide will help you make the right decisions for your setup, ensuring that your CAD design work is always at its best.
Are you ready to upgrade your system for seamless CAD experiences? Make sure your system is optimized for success with the right components, and get started on your next project with confidence!
#AutoCAD System Requirements#Best Computer for AutoCAD#AutoCAD Hardware Requirements#Computer Requirements for CAD Software#Optimal PC for AutoCAD#CAD System Configuration#CAD Design Computer Specifications#Best Graphics Card for AutoCAD#Recommended Processor for AutoCAD#AutoCAD RAM Requirements#Storage Requirements for AutoCAD#AutoCAD Performance Optimization#How to Choose a Computer for AutoCAD#AutoCAD PC Setup Guide#Best Workstation for AutoCAD#AutoCAD Compatible Hardware#Laptop for AutoCAD#Solid-State Drive for AutoCAD#AutoCAD 3D Modeling Requirements#AutoCAD 2025 System Requirements#How Much RAM for AutoCAD#Best Monitor for CAD Design#AutoCAD Operating System Requirements#AutoCAD Graphic Cards Comparison
0 notes
Text
How I ditched streaming services and learned to love Linux: A step-by-step guide to building your very own personal media streaming server (V2.0: REVISED AND EXPANDED EDITION)
This is a revised, corrected and expanded version of my tutorial on setting up a personal media server that previously appeared on my old blog (donjuan-auxenfers). I expect that that post is still making the rounds (hopefully with my addendum on modifying group share permissions in Ubuntu to circumvent 0x8007003B "Unexpected Network Error" messages in Windows 10/11 when transferring files) but I have no way of checking. Anyway this new revised version of the tutorial corrects one or two small errors I discovered when rereading what I wrote, adds links to all products mentioned and is just more polished generally. I also expanded it a bit, pointing more adventurous users toward programs such as Sonarr/Radarr/Lidarr and Overseerr which can be used for automating user requests and media collection.
So then, what is this tutorial? This is a tutorial on how to build and set up your own personal media server using Ubuntu as an operating system and Plex (or Jellyfin) to not only manage your media, but to also stream that media to your devices both at home and abroad anywhere in the world where you have an internet connection. Its intent is to show you how building a personal media server and stuffing it full of films, TV, and music that you acquired through indiscriminate and voracious media piracy various legal methods will free you to completely ditch paid streaming services. No more will you have to pay for Disney+, Netflix, HBOMAX, Hulu, Amazon Prime, Peacock, CBS All Access, Paramount+, Crave or any other streaming service that is not named Criterion Channel. Instead whenever you want to watch your favourite films and television shows, you’ll have your own personal service that only features things that you want to see, with files that you have control over. And for music fans out there, both Jellyfin and Plex support music streaming, meaning you can even ditch music streaming services. Goodbye Spotify, Youtube Music, Tidal and Apple Music, welcome back unreasonably large MP3 (or FLAC) collections.
On the hardware front, I’m going to offer a few options catered towards different budgets and media library sizes. The cost of getting a media server up and running using this guide will cost you anywhere from $450 CAD/$325 USD at the low end to $1500 CAD/$1100 USD at the high end (it could go higher). My server was priced closer to the higher figure, but I went and got a lot more storage than most people need. If that seems like a little much, consider for a moment, do you have a roommate, a close friend, or a family member who would be willing to chip in a few bucks towards your little project provided they get access? Well that's how I funded my server. It might also be worth thinking about the cost over time, i.e. how much you spend yearly on subscriptions vs. a one time cost of setting up a server. Additionally there's just the joy of being able to scream "fuck you" at all those show cancelling, library deleting, hedge fund vampire CEOs who run the studios through denying them your money. Drive a stake through David Zaslav's heart.
On the software side I will walk you step-by-step through installing Ubuntu as your server's operating system, configuring your storage as a RAIDz array with ZFS, sharing your zpool to Windows with Samba, running a remote connection between your server and your Windows PC, and then a little about started with Plex/Jellyfin. Every terminal command you will need to input will be provided, and I even share a custom #bash script that will make used vs. available drive space on your server display correctly in Windows.
If you have a different preferred flavour of Linux (Arch, Manjaro, Redhat, Fedora, Mint, OpenSUSE, CentOS, Slackware etc. et. al.) and are aching to tell me off for being basic and using Ubuntu, this tutorial is not for you. The sort of person with a preferred Linux distro is the sort of person who can do this sort of thing in their sleep. Also I don't care. This tutorial is intended for the average home computer user. This is also why we’re not using a more exotic home server solution like running everything through Docker Containers and managing it through a dashboard like Homarr or Heimdall. While such solutions are fantastic and can be very easy to maintain once you have it all set up, wrapping your brain around Docker is a whole thing in and of itself. If you do follow this tutorial and had fun putting everything together, then I would encourage you to return in a year’s time, do your research and set up everything with Docker Containers.
Lastly, this is a tutorial aimed at Windows users. Although I was a daily user of OS X for many years (roughly 2008-2023) and I've dabbled quite a bit with various Linux distributions (mostly Ubuntu and Manjaro), my primary OS these days is Windows 11. Many things in this tutorial will still be applicable to Mac users, but others (e.g. setting up shares) you will have to look up for yourself. I doubt it would be difficult to do so.
Nothing in this tutorial will require feats of computing expertise. All you will need is a basic computer literacy (i.e. an understanding of what a filesystem and directory are, and a degree of comfort in the settings menu) and a willingness to learn a thing or two. While this guide may look overwhelming at first glance, it is only because I want to be as thorough as possible. I want you to understand exactly what it is you're doing, I don't want you to just blindly follow steps. If you half-way know what you’re doing, you will be much better prepared if you ever need to troubleshoot.
Honestly, once you have all the hardware ready it shouldn't take more than an afternoon or two to get everything up and running.
(This tutorial is just shy of seven thousand words long so the rest is under the cut.)
Step One: Choosing Your Hardware
Linux is a light weight operating system, depending on the distribution there's close to no bloat. There are recent distributions available at this very moment that will run perfectly fine on a fourteen year old i3 with 4GB of RAM. Moreover, running Plex or Jellyfin isn’t resource intensive in 90% of use cases. All this is to say, we don’t require an expensive or powerful computer. This means that there are several options available: 1) use an old computer you already have sitting around but aren't using 2) buy a used workstation from eBay, or what I believe to be the best option, 3) order an N100 Mini-PC from AliExpress or Amazon.
Note: If you already have an old PC sitting around that you’ve decided to use, fantastic, move on to the next step.
When weighing your options, keep a few things in mind: the number of people you expect to be streaming simultaneously at any one time, the resolution and bitrate of your media library (4k video takes a lot more processing power than 1080p) and most importantly, how many of those clients are going to be transcoding at any one time. Transcoding is what happens when the playback device does not natively support direct playback of the source file. This can happen for a number of reasons, such as the playback device's native resolution being lower than the file's internal resolution, or because the source file was encoded in a video codec unsupported by the playback device.
Ideally we want any transcoding to be performed by hardware. This means we should be looking for a computer with an Intel processor with Quick Sync. Quick Sync is a dedicated core on the CPU die designed specifically for video encoding and decoding. This specialized hardware makes for highly efficient transcoding both in terms of processing overhead and power draw. Without these Quick Sync cores, transcoding must be brute forced through software. This takes up much more of a CPU’s processing power and requires much more energy. But not all Quick Sync cores are created equal and you need to keep this in mind if you've decided either to use an old computer or to shop for a used workstation on eBay
Any Intel processor from second generation Core (Sandy Bridge circa 2011) onward has Quick Sync cores. It's not until 6th gen (Skylake), however, that the cores support the H.265 HEVC codec. Intel’s 10th gen (Comet Lake) processors introduce support for 10bit HEVC and HDR tone mapping. And the recent 12th gen (Alder Lake) processors brought with them hardware AV1 decoding. As an example, while an 8th gen (Kaby Lake) i5-8500 will be able to hardware transcode a H.265 encoded file, it will fall back to software transcoding if given a 10bit H.265 file. If you’ve decided to use that old PC or to look on eBay for an old Dell Optiplex keep this in mind.
Note 1: The price of old workstations varies wildly and fluctuates frequently. If you get lucky and go shopping shortly after a workplace has liquidated a large number of their workstations you can find deals for as low as $100 on a barebones system, but generally an i5-8500 workstation with 16gb RAM will cost you somewhere in the area of $260 CAD/$200 USD.
Note 2: The AMD equivalent to Quick Sync is called Video Core Next, and while it's fine, it's not as efficient and not as mature a technology. It was only introduced with the first generation Ryzen CPUs and it only got decent with their newest CPUs, we want something cheap.
Alternatively you could forgo having to keep track of what generation of CPU is equipped with Quick Sync cores that feature support for which codecs, and just buy an N100 mini-PC. For around the same price or less of a used workstation you can pick up a mini-PC with an Intel N100 processor. The N100 is a four-core processor based on the 12th gen Alder Lake architecture and comes equipped with the latest revision of the Quick Sync cores. These little processors offer astounding hardware transcoding capabilities for their size and power draw. Otherwise they perform equivalent to an i5-6500, which isn't a terrible CPU. A friend of mine uses an N100 machine as a dedicated retro emulation gaming system and it does everything up to 6th generation consoles just fine. The N100 is also a remarkably efficient chip, it sips power. In fact, the difference between running one of these and an old workstation could work out to hundreds of dollars a year in energy bills depending on where you live.
You can find these Mini-PCs all over Amazon or for a little cheaper on AliExpress. They range in price from $170 CAD/$125 USD for a no name N100 with 8GB RAM to $280 CAD/$200 USD for a Beelink S12 Pro with 16GB RAM. The brand doesn't really matter, they're all coming from the same three factories in Shenzen, go for whichever one fits your budget or has features you want. 8GB RAM should be enough, Linux is lightweight and Plex only calls for 2GB RAM. 16GB RAM might result in a slightly snappier experience, especially with ZFS. A 256GB SSD is more than enough for what we need as a boot drive, but going for a bigger drive might allow you to get away with things like creating preview thumbnails for Plex, but it’s up to you and your budget.
The Mini-PC I wound up buying was a Firebat AK2 Plus with 8GB RAM and a 256GB SSD. It looks like this:

Note: Be forewarned that if you decide to order a Mini-PC from AliExpress, note the type of power adapter it ships with. The mini-PC I bought came with an EU power adapter and I had to supply my own North American power supply. Thankfully this is a minor issue as barrel plug 30W/12V/2.5A power adapters are easy to find and can be had for $10.
Step Two: Choosing Your Storage
Storage is the most important part of our build. It is also the most expensive. Thankfully it’s also the most easily upgrade-able down the line.
For people with a smaller media collection (4TB to 8TB), a more limited budget, or who will only ever have two simultaneous streams running, I would say that the most economical course of action would be to buy a USB 3.0 8TB external HDD. Something like this one from Western Digital or this one from Seagate. One of these external drives will cost you in the area of $200 CAD/$140 USD. Down the line you could add a second external drive or replace it with a multi-drive RAIDz set up such as detailed below.
If a single external drive the path for you, move on to step three.
For people with larger media libraries (12TB+), who prefer media in 4k, or care who about data redundancy, the answer is a RAID array featuring multiple HDDs in an enclosure.
Note: If you are using an old PC or used workstatiom as your server and have the room for at least three 3.5" drives, and as many open SATA ports on your mother board you won't need an enclosure, just install the drives into the case. If your old computer is a laptop or doesn’t have room for more internal drives, then I would suggest an enclosure.
The minimum number of drives needed to run a RAIDz array is three, and seeing as RAIDz is what we will be using, you should be looking for an enclosure with three to five bays. I think that four disks makes for a good compromise for a home server. Regardless of whether you go for a three, four, or five bay enclosure, do be aware that in a RAIDz array the space equivalent of one of the drives will be dedicated to parity at a ratio expressed by the equation 1 − 1/n i.e. in a four bay enclosure equipped with four 12TB drives, if we configured our drives in a RAIDz1 array we would be left with a total of 36TB of usable space (48TB raw size). The reason for why we might sacrifice storage space in such a manner will be explained in the next section.
A four bay enclosure will cost somewhere in the area of $200 CDN/$140 USD. You don't need anything fancy, we don't need anything with hardware RAID controls (RAIDz is done entirely in software) or even USB-C. An enclosure with USB 3.0 will perform perfectly fine. Don’t worry too much about USB speed bottlenecks. A mechanical HDD will be limited by the speed of its mechanism long before before it will be limited by the speed of a USB connection. I've seen decent looking enclosures from TerraMaster, Yottamaster, Mediasonic and Sabrent.
When it comes to selecting the drives, as of this writing, the best value (dollar per gigabyte) are those in the range of 12TB to 20TB. I settled on 12TB drives myself. If 12TB to 20TB drives are out of your budget, go with what you can afford, or look into refurbished drives. I'm not sold on the idea of refurbished drives but many people swear by them.
When shopping for harddrives, search for drives designed specifically for NAS use. Drives designed for NAS use typically have better vibration dampening and are designed to be active 24/7. They will also often make use of CMR (conventional magnetic recording) as opposed to SMR (shingled magnetic recording). This nets them a sizable read/write performance bump over typical desktop drives. Seagate Ironwolf and Toshiba NAS are both well regarded brands when it comes to NAS drives. I would avoid Western Digital Red drives at this time. WD Reds were a go to recommendation up until earlier this year when it was revealed that they feature firmware that will throw up false SMART warnings telling you to replace the drive at the three year mark quite often when there is nothing at all wrong with that drive. It will likely even be good for another six, seven, or more years.

Step Three: Installing Linux
For this step you will need a USB thumbdrive of at least 6GB in capacity, an .ISO of Ubuntu, and a way to make that thumbdrive bootable media.
First download a copy of Ubuntu desktop (for best performance we could download the Server release, but for new Linux users I would recommend against the server release. The server release is strictly command line interface only, and having a GUI is very helpful for most people. Not many people are wholly comfortable doing everything through the command line, I'm certainly not one of them, and I grew up with DOS 6.0. 22.04.3 Jammy Jellyfish is the current Long Term Service release, this is the one to get.
Download the .ISO and then download and install balenaEtcher on your Windows PC. BalenaEtcher is an easy to use program for creating bootable media, you simply insert your thumbdrive, select the .ISO you just downloaded, and it will create a bootable installation media for you.
Once you've made a bootable media and you've got your Mini-PC (or you old PC/used workstation) in front of you, hook it directly into your router with an ethernet cable, and then plug in the HDD enclosure, a monitor, a mouse and a keyboard. Now turn that sucker on and hit whatever key gets you into the BIOS (typically ESC, DEL or F2). If you’re using a Mini-PC check to make sure that the P1 and P2 power limits are set correctly, my N100's P1 limit was set at 10W, a full 20W under the chip's power limit. Also make sure that the RAM is running at the advertised speed. My Mini-PC’s RAM was set at 2333Mhz out of the box when it should have been 3200Mhz. Once you’ve done that, key over to the boot order and place the USB drive first in the boot order. Then save the BIOS settings and restart.
After you restart you’ll be greeted by Ubuntu's installation screen. Installing Ubuntu is really straight forward, select the "minimal" installation option, as we won't need anything on this computer except for a browser (Ubuntu comes preinstalled with Firefox) and Plex Media Server/Jellyfin Media Server. Also remember to delete and reformat that Windows partition! We don't need it.
Step Four: Installing ZFS and Setting Up the RAIDz Array
Note: If you opted for just a single external HDD skip this step and move onto setting up a Samba share.
Once Ubuntu is installed it's time to configure our storage by installing ZFS to build our RAIDz array. ZFS is a "next-gen" file system that is both massively flexible and massively complex. It's capable of snapshot backup, self healing error correction, ZFS pools can be configured with drives operating in a supplemental manner alongside the storage vdev (e.g. fast cache, dedicated secondary intent log, hot swap spares etc.). It's also a file system very amenable to fine tuning. Block and sector size are adjustable to use case and you're afforded the option of different methods of inline compression. If you'd like a very detailed overview and explanation of its various features and tips on tuning a ZFS array check out these articles from Ars Technica. For now we're going to ignore all these features and keep it simple, we're going to pull our drives together into a single vdev running in RAIDz which will be the entirety of our zpool, no fancy cache drive or SLOG.
Open up the terminal and type the following commands:
sudo apt update
then
sudo apt install zfsutils-linux
This will install the ZFS utility. Verify that it's installed with the following command:
zfs --version
Now, it's time to check that the HDDs we have in the enclosure are healthy, running, and recognized. We also want to find out their device IDs and take note of them:
sudo fdisk -1
Note: You might be wondering why some of these commands require "sudo" in front of them while others don't. "Sudo" is short for "super user do”. When and where "sudo" is used has to do with the way permissions are set up in Linux. Only the "root" user has the access level to perform certain tasks in Linux. As a matter of security and safety regular user accounts are kept separate from the "root" user. It's not advised (or even possible) to boot into Linux as "root" with most modern distributions. Instead by using "sudo" our regular user account is temporarily given the power to do otherwise forbidden things. Don't worry about it too much at this stage, but if you want to know more check out this introduction.
If everything is working you should get a list of the various drives detected along with their device IDs which will look like this: /dev/sdc. You can also check the device IDs of the drives by opening the disk utility app. Jot these IDs down as we'll need them for our next step, creating our RAIDz array.
RAIDz is similar to RAID-5 in that instead of striping your data over multiple disks, exchanging redundancy for speed and available space (RAID-0), or mirroring your data writing by two copies of every piece (RAID-1), it instead writes parity blocks across the disks in addition to striping, this provides a balance of speed, redundancy and available space. If a single drive fails, the parity blocks on the working drives can be used to reconstruct the entire array as soon as a replacement drive is added.
Additionally, RAIDz improves over some of the common RAID-5 flaws. It's more resilient and capable of self healing, as it is capable of automatically checking for errors against a checksum. It's more forgiving in this way, and it's likely that you'll be able to detect when a drive is dying well before it fails. A RAIDz array can survive the loss of any one drive.
Note: While RAIDz is indeed resilient, if a second drive fails during the rebuild, you're fucked. Always keep backups of things you can't afford to lose. This tutorial, however, is not about proper data safety.
To create the pool, use the following command:
sudo zpool create "zpoolnamehere" raidz "device IDs of drives we're putting in the pool"
For example, let's creatively name our zpool "mypool". This poil will consist of four drives which have the device IDs: sdb, sdc, sdd, and sde. The resulting command will look like this:
sudo zpool create mypool raidz /dev/sdb /dev/sdc /dev/sdd /dev/sde
If as an example you bought five HDDs and decided you wanted more redundancy dedicating two drive to this purpose, we would modify the command to "raidz2" and the command would look something like the following:
sudo zpool create mypool raidz2 /dev/sdb /dev/sdc /dev/sdd /dev/sde /dev/sdf
An array configured like this is known as RAIDz2 and is able to survive two disk failures.
Once the zpool has been created, we can check its status with the command:
zpool status
Or more concisely with:
zpool list
The nice thing about ZFS as a file system is that a pool is ready to go immediately after creation. If we were to set up a traditional RAID-5 array using mbam, we'd have to sit through a potentially hours long process of reformatting and partitioning the drives. Instead we're ready to go right out the gates.
The zpool should be automatically mounted to the filesystem after creation, check on that with the following:
df -hT | grep zfs
Note: If your computer ever loses power suddenly, say in event of a power outage, you may have to re-import your pool. In most cases, ZFS will automatically import and mount your pool, but if it doesn’t and you can't see your array, simply open the terminal and type sudo zpool import -a.
By default a zpool is mounted at /"zpoolname". The pool should be under our ownership but let's make sure with the following command:
sudo chown -R "yourlinuxusername" /"zpoolname"
Note: Changing file and folder ownership with "chown" and file and folder permissions with "chmod" are essential commands for much of the admin work in Linux, but we won't be dealing with them extensively in this guide. If you'd like a deeper tutorial and explanation you can check out these two guides: chown and chmod.

You can access the zpool file system through the GUI by opening the file manager (the Ubuntu default file manager is called Nautilus) and clicking on "Other Locations" on the sidebar, then entering the Ubuntu file system and looking for a folder with your pool's name. Bookmark the folder on the sidebar for easy access.

Your storage pool is now ready to go. Assuming that we already have some files on our Windows PC we want to copy to over, we're going to need to install and configure Samba to make the pool accessible in Windows.
Step Five: Setting Up Samba/Sharing
Samba is what's going to let us share the zpool with Windows and allow us to write to it from our Windows machine. First let's install Samba with the following commands:
sudo apt-get update
then
sudo apt-get install samba
Next create a password for Samba.
sudo smbpswd -a "yourlinuxusername"
It will then prompt you to create a password. Just reuse your Ubuntu user password for simplicity's sake.
Note: if you're using just a single external drive replace the zpool location in the following commands with wherever it is your external drive is mounted, for more information see this guide on mounting an external drive in Ubuntu.
After you've created a password we're going to create a shareable folder in our pool with this command
mkdir /"zpoolname"/"foldername"
Now we're going to open the smb.conf file and make that folder shareable. Enter the following command.
sudo nano /etc/samba/smb.conf
This will open the .conf file in nano, the terminal text editor program. Now at the end of smb.conf add the following entry:
["foldername"]
path = /"zpoolname"/"foldername"
available = yes
valid users = "yourlinuxusername"
read only = no
writable = yes
browseable = yes
guest ok = no
Ensure that there are no line breaks between the lines and that there's a space on both sides of the equals sign. Our next step is to allow Samba traffic through the firewall:
sudo ufw allow samba
Finally restart the Samba service:
sudo systemctl restart smbd
At this point we'll be able to access to the pool, browse its contents, and read and write to it from Windows. But there's one more thing left to do, Windows doesn't natively support the ZFS file systems and will read the used/available/total space in the pool incorrectly. Windows will read available space as total drive space, and all used space as null. This leads to Windows only displaying a dwindling amount of "available" space as the drives are filled. We can fix this! Functionally this doesn't actually matter, we can still write and read to and from the disk, it just makes it difficult to tell at a glance the proportion of used/available space, so this is an optional step but one I recommend (this step is also unnecessary if you're just using a single external drive). What we're going to do is write a little shell script in #bash. Open nano with the terminal with the command:
nano
Now insert the following code:
#!/bin/bash CUR_PATH=`pwd` ZFS_CHECK_OUTPUT=$(zfs get type $CUR_PATH 2>&1 > /dev/null) > /dev/null if [[ $ZFS_CHECK_OUTPUT == *not\ a\ ZFS* ]] then IS_ZFS=false else IS_ZFS=true fi if [[ $IS_ZFS = false ]] then df $CUR_PATH | tail -1 | awk '{print $2" "$4}' else USED=$((`zfs get -o value -Hp used $CUR_PATH` / 1024)) > /dev/null AVAIL=$((`zfs get -o value -Hp available $CUR_PATH` / 1024)) > /dev/null TOTAL=$(($USED+$AVAIL)) > /dev/null echo $TOTAL $AVAIL fi
Save the script as "dfree.sh" to /home/"yourlinuxusername" then change the ownership of the file to make it executable with this command:
sudo chmod 774 dfree.sh
Now open smb.conf with sudo again:
sudo nano /etc/samba/smb.conf
Now add this entry to the top of the configuration file to direct Samba to use the results of our script when Windows asks for a reading on the pool's used/available/total drive space:
[global]
dfree command = /home/"yourlinuxusername"/dfree.sh
Save the changes to smb.conf and then restart Samba again with the terminal:
sudo systemctl restart smbd
Now there’s one more thing we need to do to fully set up the Samba share, and that’s to modify a hidden group permission. In the terminal window type the following command:
usermod -a -G sambashare “yourlinuxusername”
Then restart samba again:
sudo systemctl restart smbd
If we don’t do this last step, everything will appear to work fine, and you will even be able to see and map the drive from Windows and even begin transferring files, but you'd soon run into a lot of frustration. As every ten minutes or so a file would fail to transfer and you would get a window announcing “0x8007003B Unexpected Network Error”. This window would require your manual input to continue the transfer with the file next in the queue. And at the end it would reattempt to transfer whichever files failed the first time around. 99% of the time they’ll go through that second try, but this is still all a major pain in the ass. Especially if you’ve got a lot of data to transfer or you want to step away from the computer for a while.
It turns out samba can act a little weirdly with the higher read/write speeds of RAIDz arrays and transfers from Windows, and will intermittently crash and restart itself if this group option isn’t changed. Inputting the above command will prevent you from ever seeing that window.
The last thing we're going to do before switching over to our Windows PC is grab the IP address of our Linux machine. Enter the following command:
hostname -I
This will spit out this computer's IP address on the local network (it will look something like 192.168.0.x), write it down. It might be a good idea once you're done here to go into your router settings and reserving that IP for your Linux system in the DHCP settings. Check the manual for your specific model router on how to access its settings, typically it can be accessed by opening a browser and typing http:\\192.168.0.1 in the address bar, but your router may be different.
Okay we’re done with our Linux computer for now. Get on over to your Windows PC, open File Explorer, right click on Network and click "Map network drive". Select Z: as the drive letter (you don't want to map the network drive to a letter you could conceivably be using for other purposes) and enter the IP of your Linux machine and location of the share like so: \\"LINUXCOMPUTERLOCALIPADDRESSGOESHERE"\"zpoolnamegoeshere"\. Windows will then ask you for your username and password, enter the ones you set earlier in Samba and you're good. If you've done everything right it should look something like this:

You can now start moving media over from Windows to the share folder. It's a good idea to have a hard line running to all machines. Moving files over Wi-Fi is going to be tortuously slow, the only thing that’s going to make the transfer time tolerable (hours instead of days) is a solid wired connection between both machines and your router.
Step Six: Setting Up Remote Desktop Access to Your Server
After the server is up and going, you’ll want to be able to access it remotely from Windows. Barring serious maintenance/updates, this is how you'll access it most of the time. On your Linux system open the terminal and enter:
sudo apt install xrdp
Then:
sudo systemctl enable xrdp
Once it's finished installing, open “Settings” on the sidebar and turn off "automatic login" in the User category. Then log out of your account. Attempting to remotely connect to your Linux computer while you’re logged in will result in a black screen!
Now get back on your Windows PC, open search and look for "RDP". A program called "Remote Desktop Connection" should pop up, open this program as an administrator by right-clicking and selecting “run as an administrator”. You’ll be greeted with a window. In the field marked “Computer” type in the IP address of your Linux computer. Press connect and you'll be greeted with a new window and prompt asking for your username and password. Enter your Ubuntu username and password here.

If everything went right, you’ll be logged into your Linux computer. If the performance is sluggish, adjust the display options. Lowering the resolution and colour depth do a lot to make the interface feel snappier.

Remote access is how we're going to be using our Linux system from now, barring edge cases like needing to get into the BIOS or upgrading to a new version of Ubuntu. Everything else from performing maintenance like a monthly zpool scrub to checking zpool status and updating software can all be done remotely.

This is how my server lives its life now, happily humming and chirping away on the floor next to the couch in a corner of the living room.
Step Seven: Plex Media Server/Jellyfin
Okay we’ve got all the ground work finished and our server is almost up and running. We’ve got Ubuntu up and running, our storage array is primed, we’ve set up remote connections and sharing, and maybe we’ve moved over some of favourite movies and TV shows.
Now we need to decide on the media server software to use which will stream our media to us and organize our library. For most people I’d recommend Plex. It just works 99% of the time. That said, Jellyfin has a lot to recommend it by too, even if it is rougher around the edges. Some people run both simultaneously, it’s not that big of an extra strain. I do recommend doing a little bit of your own research into the features each platform offers, but as a quick run down, consider some of the following points:
Plex is closed source and is funded through PlexPass purchases while Jellyfin is open source and entirely user driven. This means a number of things: for one, Plex requires you to purchase a “PlexPass” (purchased as a one time lifetime fee $159.99 CDN/$120 USD or paid for on a monthly or yearly subscription basis) in order to access to certain features, like hardware transcoding (and we want hardware transcoding) or automated intro/credits detection and skipping, Jellyfin offers some of these features for free through plugins. Plex supports a lot more devices than Jellyfin and updates more frequently. That said, Jellyfin's Android and iOS apps are completely free, while the Plex Android and iOS apps must be activated for a one time cost of $6 CDN/$5 USD. But that $6 fee gets you a mobile app that is much more functional and features a unified UI across platforms, the Plex mobile apps are simply a more polished experience. The Jellyfin apps are a bit of a mess and the iOS and Android versions are very different from each other.
Jellyfin’s actual media player is more fully featured than Plex's, but on the other hand Jellyfin's UI, library customization and automatic media tagging really pale in comparison to Plex. Streaming your music library is free through both Jellyfin and Plex, but Plex offers the PlexAmp app for dedicated music streaming which boasts a number of fantastic features, unfortunately some of those fantastic features require a PlexPass. If your internet is down, Jellyfin can still do local streaming, while Plex can fail to play files unless you've got it set up a certain way. Jellyfin has a slew of neat niche features like support for Comic Book libraries with the .cbz/.cbt file types, but then Plex offers some free ad-supported TV and films, they even have a free channel that plays nothing but Classic Doctor Who.
Ultimately it's up to you, I settled on Plex because although some features are pay-walled, it just works. It's more reliable and easier to use, and a one-time fee is much easier to swallow than a subscription. I had a pretty easy time getting my boomer parents and tech illiterate brother introduced to and using Plex and I don't know if I would've had as easy a time doing that with Jellyfin. I do also need to mention that Jellyfin does take a little extra bit of tinkering to get going in Ubuntu, you’ll have to set up process permissions, so if you're more tolerant to tinkering, Jellyfin might be up your alley and I’ll trust that you can follow their installation and configuration guide. For everyone else, I recommend Plex.
So pick your poison: Plex or Jellyfin.
Note: The easiest way to download and install either of these packages in Ubuntu is through Snap Store.
After you've installed one (or both), opening either app will launch a browser window into the browser version of the app allowing you to set all the options server side.
The process of adding creating media libraries is essentially the same in both Plex and Jellyfin. You create a separate libraries for Television, Movies, and Music and add the folders which contain the respective types of media to their respective libraries. The only difficult or time consuming aspect is ensuring that your files and folders follow the appropriate naming conventions:
Plex naming guide for Movies
Plex naming guide for Television
Jellyfin follows the same naming rules but I find their media scanner to be a lot less accurate and forgiving than Plex. Once you've selected the folders to be scanned the service will scan your files, tagging everything and adding metadata. Although I find do find Plex more accurate, it can still erroneously tag some things and you might have to manually clean up some tags in a large library. (When I initially created my library it tagged the 1963-1989 Doctor Who as some Korean soap opera and I needed to manually select the correct match after which everything was tagged normally.) It can also be a bit testy with anime (especially OVAs) be sure to check TVDB to ensure that you have your files and folders structured and named correctly. If something is not showing up at all, double check the name.
Once that's done, organizing and customizing your library is easy. You can set up collections, grouping items together to fit a theme or collect together all the entries in a franchise. You can make playlists, and add custom artwork to entries. It's fun setting up collections with posters to match, there are even several websites dedicated to help you do this like PosterDB. As an example, below are two collections in my library, one collecting all the entries in a franchise, the other follows a theme.

My Star Trek collection, featuring all eleven television series, and thirteen films.

My Best of the Worst collection, featuring sixty-nine films previously showcased on RedLetterMedia’s Best of the Worst. They’re all absolutely terrible and I love them.
As for settings, ensure you've got Remote Access going, it should work automatically and be sure to set your upload speed after running a speed test. In the library settings set the database cache to 2000MB to ensure a snappier and more responsive browsing experience, and then check that playback quality is set to original/maximum. If you’re severely bandwidth limited on your upload and have remote users, you might want to limit the remote stream bitrate to something more reasonable, just as a note of comparison Netflix’s 1080p bitrate is approximately 5Mbps, although almost anyone watching through a chromium based browser is streaming at 720p and 3mbps. Other than that you should be good to go. For actually playing your files, there's a Plex app for just about every platform imaginable. I mostly watch television and films on my laptop using the Windows Plex app, but I also use the Android app which can broadcast to the chromecast connected to the TV in the office and the Android TV app for our smart TV. Both are fully functional and easy to navigate, and I can also attest to the OS X version being equally functional.
Part Eight: Finding Media
Now, this is not really a piracy tutorial, there are plenty of those out there. But if you’re unaware, BitTorrent is free and pretty easy to use, just pick a client (qBittorrent is the best) and go find some public trackers to peruse. Just know now that all the best trackers are private and invite only, and that they can be exceptionally difficult to get into. I’m already on a few, and even then, some of the best ones are wholly out of my reach.
If you decide to take the left hand path and turn to Usenet you’ll have to pay. First you’ll need to sign up with a provider like Newshosting or EasyNews for access to Usenet itself, and then to actually find anything you’re going to need to sign up with an indexer like NZBGeek or NZBFinder. There are dozens of indexers, and many people cross post between them, but for more obscure media it’s worth checking multiple. You’ll also need a binary downloader like SABnzbd. That caveat aside, Usenet is faster, bigger, older, less traceable than BitTorrent, and altogether slicker. I honestly prefer it, and I'm kicking myself for taking this long to start using it because I was scared off by the price. I’ve found so many things on Usenet that I had sought in vain elsewhere for years, like a 2010 Italian film about a massacre perpetrated by the SS that played the festival circuit but never received a home media release; some absolute hero uploaded a rip of a festival screener DVD to Usenet. Anyway, figure out the rest of this shit on your own and remember to use protection, get yourself behind a VPN, use a SOCKS5 proxy with your BitTorrent client, etc.
On the legal side of things, if you’re around my age, you (or your family) probably have a big pile of DVDs and Blu-Rays sitting around unwatched and half forgotten. Why not do a bit of amateur media preservation, rip them and upload them to your server for easier access? (Your tools for this are going to be Handbrake to do the ripping and AnyDVD to break any encryption.) I went to the trouble of ripping all my SCTV DVDs (five box sets worth) because none of it is on streaming nor could it be found on any pirate source I tried. I’m glad I did, forty years on it’s still one of the funniest shows to ever be on TV.
Part Nine/Epilogue: Sonarr/Radarr/Lidarr and Overseerr
There are a lot of ways to automate your server for better functionality or to add features you and other users might find useful. Sonarr, Radarr, and Lidarr are a part of a suite of “Servarr” services (there’s also Readarr for books and Whisparr for adult content) that allow you to automate the collection of new episodes of TV shows (Sonarr), new movie releases (Radarr) and music releases (Lidarr). They hook in to your BitTorrent client or Usenet binary newsgroup downloader and crawl your preferred Torrent trackers and Usenet indexers, alerting you to new releases and automatically grabbing them. You can also use these services to manually search for new media, and even replace/upgrade your existing media with better quality uploads. They’re really a little tricky to set up on a bare metal Ubuntu install (ideally you should be running them in Docker Containers), and I won’t be providing a step by step on installing and running them, I’m simply making you aware of their existence.
The other bit of kit I want to make you aware of is Overseerr which is a program that scans your Plex media library and will serve recommendations based on what you like. It also allows you and your users to request specific media. It can even be integrated with Sonarr/Radarr/Lidarr so that fulfilling those requests is fully automated.
And you're done. It really wasn't all that hard. Enjoy your media. Enjoy the control you have over that media. And be safe in the knowledge that no hedgefund CEO motherfucker who hates the movies but who is somehow in control of a major studio will be able to disappear anything in your library as a tax write-off.
1K notes
·
View notes
Note
i really enjoy your opinions on different builds! build-wise, do you have a favorite character for each campaign? (simply build-wise, so i suppose the question would be better phrased as "favorite build per campaign")
Hi anon!
Campaign 1 is hard simply because between the cast learning the system and there not being a huge number of options, most of the builds were pretty simple. Percy, Pike, and Keyleth don't really have many build choices at all - they're all good builds, and the players played them well, but it's pretty much as simple as "this is my class and subclass ok done" because Pike and Keyleth are both prepared casters. Grog taking fighter levels is solid but fairly straightforward. Vax gets points for narrative integration but it was so item-dependent and base assassin rogue is so weak. I am torn between Vex and Scanlan and I think I'm calling a tie, which I also am going to do for C3:
Vex makes the most out of a limited base subclass, and the observant feat is an excellent touch. The choices she made for terrain and enemies were well-integrated into her story, as was her choice to multiclass into rogue (assassin rogue as a multiclass for a dex-based combat class is a different story than for base class). Her spell list was solid to the point that she was a strong secondary healer, unusual for a ranger.
Scanlan had a good spread of feats (warcaster and tough) but what puts him here is that he was often the only full caster in a position to cast on the field, since Keyleth was frequently wildshaped and Pike absent. This is incredibly hard for a bard, and his spell list was an extremely good one that had to straddle healing and arcane utility all at once, and he did an admirable job.
Campaign 2 is Fjord; this has been discussed extensively, feel free to check my archives.
Campaign 3 is tough but I'm going for a tie between our Crownkeeper members, Fearne and Orym:
Fearne's level of rogue, while it initially made me take a sidelong glance, is why she rolled that 30 on persuasion this episode, and also is a very true choice to her character. A lot of the rest is, to be honest, the fact that her subclass is one of the best out there, but I've found her spell choices to generally be very well done, she's adapted to the divine damager role (honorable mention to Laura for doing this adeptly with Jester in C2 once Cad showed up), and I have to applaud taking ASIs instead of feats when appropriate. Her stat configuration also makes perfect sense for the character.
Orym as a fighter is strong out the gate but his choices of battlemaster moves make perfect sense for the role he played and are very useful in a party with two glass cannons but also two damage reduction tanks; it's good to have a dodge tank in the mix. His feats are focused on rounding out his skills and his optimized perception is truly ridiculous.
53 notes
·
View notes
Text

Mastering Finite Element Analysis: A Comprehensive Guide for Do Your Abaqus Assignment
Finite Element Analysis (FEA) stands as a cornerstone in the realm of structural and mechanical engineering, enabling engineers to simulate and understand the behavior of complex structures under various conditions. Abaqus, a powerful FEA software, empowers users to conduct intricate simulations, but mastering its capabilities requires a thoughtful approach. In this comprehensive guide, we'll explore the intricacies of using Abaqus to simulate a dynamic loading scenario on a complex mechanical structure. For those seeking assistance with their Abaqus assignments, this guide serves as a valuable resource to navigate through the challenges.
Understanding the Task:
Imagine a scenario where a mechanical structure, comprising interconnected components with diverse material properties and geometric configurations, undergoes dynamic loading. The task to do your Abaqus assignment at hand is to simulate and analyze this complex system using Abaqus. The goal is to provide accurate results while considering computational efficiency, convergence, and the significance of selecting appropriate element types and integration schemes.
Section 1: Modeling Approach
1.1 Geometry and CAD Import
To kick off the simulation process, importing the CAD geometry accurately into Abaqus is crucial. This step ensures that the virtual model faithfully represents the physical system.
1.2 Meshing Strategy
Developing a meshing strategy involves finding the right balance between accuracy and computational efficiency. Areas of high stress or deformation may require mesh refinement, and selecting appropriate element types for each component is key to achieving reliable results.
1.3 Material Assignments
Accurate material assignments are paramount. Understanding the behavior of materials under dynamic loading conditions is essential for realistic simulations. Abaqus allows users to define material properties with precision, enhancing the fidelity of the analysis.
1.4 Boundary Conditions
Applying realistic boundary conditions is crucial to replicate the physical constraints of the structure accurately. This step ensures that the simulation mirrors the actual behavior of the system under the specified loading conditions.
Section 2: Simulation Challenges and Strategies
2.1 Convergence Issues
Convergence issues can arise during the simulation, affecting the accuracy and reliability of results. Monitoring the simulation for convergence problems and adjusting criteria and time increments are essential steps. Sub-stepping techniques can be employed to enhance stability.
2.2 Contact and Interaction
In a complex structure, components may interact and come into contact. Defining contact pairs, choosing appropriate contact algorithms, and validating contact behavior are crucial for a realistic simulation.
2.3 Solver Settings
Optimizing solver settings is vital for computational efficiency. Parallel processing and solution controls can be utilized to manage convergence and enhance the efficiency of the simulation process.
Section 3: Element Types and Integration Schemes
3.1 Element Selection
Choosing the right element types is fundamental for accurate representation. Tetrahedral, hexahedral, and shell elements, when strategically employed, contribute to a comprehensive simulation that captures the nuances of the structure's deformation.
3.2 Integration Schemes
The selection of integration schemes is a delicate balance between accuracy and computational cost. High-order integration schemes may offer more precise results but could increase computation time. Careful consideration is required to find the optimal trade-off.
Conclusion: Navigating the Abaqus Landscape
In the world of finite element analysis, mastering Abaqus is a journey that demands attention to detail and a strategic approach. Simulating a dynamic loading scenario on a complex mechanical structure involves a series of critical decisions, from modeling and meshing to addressing convergence issues and selecting the right element types.
For those seeking assistance with their Abaqus assignments, understanding the nuances of the software and the finite element analysis process is crucial. This guide serves as a roadmap to navigate through the challenges posed by complex simulations, ensuring that the virtual representation aligns with the physical reality.
In the words of simulation experts, tackling an Abaqus assignment involves not just running the software but orchestrating a symphony of decisions that shape the accuracy and reliability of the results. As the virtual world converges with the physical, the mastery of Abaqus becomes an art and science, providing engineers with the insights needed to design and optimize structures in the real world.
#mechanical engineering assignment help#assignment help#students#educational website#university#education#study tips#educational service#mechanical engineering#mechanical engineering assignment#abaqus assignment helper#abaqus
5 notes
·
View notes
Text
The Evolution of Leaf Spring Technology in the Automotive Industry
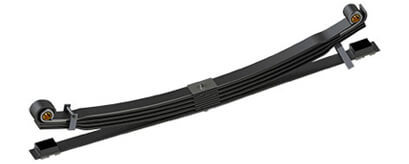
Leaf springs have been a fundamental component of vehicle suspension systems for centuries, providing stability and support to a wide range of vehicles. Their evolution over time has been a remarkable journey, showcasing advancements in material science, design, and engineering to meet the changing needs of the automotive industry.
Early Beginnings
The concept of leaf springs dates back to ancient civilizations, where horse-drawn carriages utilized flexible wooden or metal strips to provide support and cushioning. As the automotive industry emerged, these early leaf springs were adapted for use in early automobiles. Initially, simple semi-elliptical springs made of multiple layers of steel were employed to handle the vehicle's weight and smooth out the ride.
Transition to Modern Materials
With the advent of the industrial revolution, the automotive industry witnessed a shift towards the use of high-strength steel alloys. These alloys offered increased durability and resilience compared to traditional materials. By the mid-20th century, advancements in metallurgy allowed for the production of leaf springs with superior strength-to-weight ratios, enhancing their overall performance and longevity.
Multi-Leaf and Mono-Leaf Spring Designs
In the mid-20th century, engineers began experimenting with different leaf spring designs to improve suspension performance. Multi-leaf springs, which featured several thinner leaves stacked on top of each other, gained popularity due to their ability to distribute weight more evenly and provide a smoother ride.
Later, the mono-leaf spring design emerged, utilizing a single, thicker leaf with varying thicknesses along its length to optimize load distribution and enhance ride comfort. Mono-leaf springs offered advantages in terms of reduced weight, improved handling, and ease of manufacturing.
Composite Leaf Springs
In recent decades, the automotive industry has explored innovative materials such as composite materials for leaf springs. Composite leaf springs are manufactured using reinforced plastics or composite fibers, offering significant weight savings compared to traditional steel leaf springs. This reduction in weight contributes to improved fuel efficiency and reduces the vehicle's overall carbon footprint.
Composite leaf springs are also known for their corrosion resistance, enhanced fatigue life, and the ability to be precisely tailored to specific load requirements. They have become increasingly prevalent in both commercial and passenger vehicles, representing a modern and sustainable approach to leaf spring technology.
Computer-Aided Design and Simulation
The advent of computer-aided design (CAD) and simulation technologies has revolutionized leaf spring design and optimization. Engineers can now use sophisticated software to model, analyze, and simulate various leaf spring configurations, enabling them to fine-tune designs for optimal performance, durability, and cost-effectiveness. This technology has significantly accelerated the development process and facilitated the creation of highly efficient leaf spring designs.
Future Trends and Innovations
Looking ahead, the future of leaf spring technology in the automotive industry appears promising. Advancements in materials science, such as the integration of carbon fiber and other advanced composites, hold the potential to further reduce weight and enhance the performance of leaf springs.
Moreover, research into smart materials and adaptive suspension systems may lead to leaf springs that can adjust their characteristics in real-time, optimizing the ride and handling based on driving conditions and load variations. These innovations will play a crucial role in shaping the automotive landscape, promoting sustainability, fuel efficiency, and improved driving experiences.
In conclusion, the evolution of leaf spring technology in the automotive industry has been a remarkable journey of innovation and adaptation. From humble beginnings as simple wooden or metal strips to the sophisticated composite leaf springs of today, this fundamental suspension component continues to evolve, driven by advancements in materials, design methodologies, and engineering techniques. As we continue to push the boundaries of technology, the leaf spring remains a vital element in ensuring a safe, comfortable, and efficient ride for vehicles of all kinds.
2 notes
·
View notes
Text
Tube Sheet Drilling: Precision Engineering for Heat Exchanger Efficiency
Introduction to Tube Sheet Drilling
Tube sheet drilling is a highly specialized machining process used to create accurate and aligned holes in tube sheets—critical components in heat exchangers, boilers, pressure vessels, and condenser systems. These precision-drilled holes allow for the insertion and secure mounting of heat exchange tubes, ensuring optimal thermal transfer efficiency and mechanical stability.
With increasing demands in petrochemical, oil & gas, power generation, and chemical industries, high-precision tube sheet drilling has become more essential than ever for leak-proof, high-pressure, and high-temperature applications.
What is a Tube Sheet?
A tube sheet is a thick metal plate, typically made from carbon steel, stainless steel, copper alloys, or nickel-based alloys, that holds tubes in position within a heat exchanger or similar device. These plates are drilled with hundreds or even thousands of holes, each of which must be precisely located and dimensioned to ensure proper tube alignment and flow dynamics.
Tube sheets may be:
Flat or flanged
Cladded or solid
Fixed or floating
The integrity of tube sheet drilling directly influences the operational efficiency and lifespan of the entire equipment.
Key Features of Tube Sheet Drilling
1. Ultra-Precision Hole Placement
Hole pitch accuracy within ±0.02 mm
Accurate alignment for seamless tube-to-sheet welding or expansion
Support for complex configurations like square, triangular, or staggered pitch patterns
2. Custom Hole Diameters
Hole diameters typically range from 10 mm to 50 mm
Precision tools for countersinking, reaming, and chamfering as per design requirements
3. CNC and Multi-Spindle Drilling Options
CNC drilling offers repeatability, speed, and automation
Multi-spindle heads reduce cycle time by drilling multiple holes simultaneously
Option to program tool paths, feed rates, and depths
4. Compatibility with Multiple Materials
High-speed steel and carbide-tipped drill bits for superior performance
Capability to drill cladded tube sheets (e.g., stainless steel + carbon steel)
Coolant-fed tools and optimized cutting conditions to handle exotic alloys
Applications of Tube Sheet Drilling
1. Heat Exchangers
Critical for U-tube heat exchangers, shell & tube designs, and double-pipe configurations
Precise drilling ensures efficient thermal conductivity and mechanical locking
2. Boilers and Pressure Vessels
Supports high-pressure operations
Helps in achieving zero-leakage expansion joints
3. Oil Refineries and Chemical Plants
Used in corrosive environments where precision and metallurgy are key
Hole alignment ensures uninterrupted flow of process fluids
4. Power Generation and Nuclear Plants
Used in superheaters, economizers, and condenser systems
Requires radiographic inspection compliance for nuclear-grade tube sheets
Tube Sheet Drilling Process: Step-by-Step
1. Design and Layout Preparation
3D CAD models or 2D technical drawings created for hole mapping
Pitch, margin, and hole count are finalized
2. Material Preparation
Tube sheets undergo annealing, cleaning, and marking
Plate thickness checked (often ranges from 20 mm to 200 mm)
3. CNC Drilling Operation
CNC-controlled drill head moves in X-Y coordinates
Drilling depth, diameter, and tolerance pre-set for each hole
Coolant system active to prevent heat build-up and tool wear
4. Finishing
Chamfering or reaming if needed
Deburring for smooth hole edges
Non-destructive testing (NDT) to check hole accuracy and spacing
Advanced Technologies in Tube Sheet Drilling
1. Deep Hole Drilling Machines
Capable of handling thick tube sheets over 150 mm
Specialized gun drilling or BTA (Boring & Trepanning Association) methods used
2. Laser Drilling (For Special Alloys)
Non-contact, heat-concentrated drilling
Used where traditional tooling may not work (e.g., titanium, Inconel)
3. Robotic Drilling Systems
Fully automated arms integrated with CAD/CAM
Ideal for custom tube sheets or small production batches
Quality Control and Inspection
1. Dimensional Inspection
Coordinate Measuring Machines (CMM) used for verifying hole positions
Ensures compliance with ASME, TEMA, and ISO standards
2. Surface Integrity Checks
Inspection for burrs, cracks, or work hardening
Use of penetrant testing (PT) and ultrasonic testing (UT)
3. Fit-Up Verification
Tube insertion test to validate hole alignment and tightness
Simulates real working conditions under thermal and hydraulic stress
Choosing the Right Tube Sheet Drilling Partner
When selecting a supplier for tube sheet drilling, consider the following:
Experience in large-diameter tube sheets
Capability for high-volume or prototype jobs
Access to modern CNC drilling machines
Compliance with international QA/QC standards
In-house NDT and post-drilling inspection systems
Conclusion
Tube sheet drilling is more than just a machining task—it is an engineering-critical operation that demands micron-level accuracy, repeatability, and material adaptability. As industries continue to evolve towards energy efficiency and system reliability, precision-drilled tube sheets form the backbone of high-performance heat exchange systems. Investing in advanced tube sheet drilling solutions means investing in long-term operational safety, energy conservation, and system longevity.
1 note
·
View note
Text
Supplying Reliable Ball Valves to Projects Around the Globe – Insights from ICCL Manufacturing
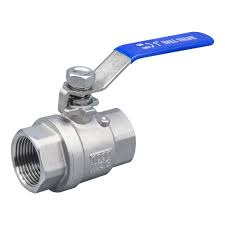
In critical sectors such as oil and gas, petrochemicals, energy, and marine, ball valves are essential for managing the flow of fluids and gases. These valves need to perform reliably under extreme pressures, temperatures, and environmental conditions. As global infrastructure projects increasingly demand higher reliability and efficiency, the need for dependable valve manufacturers has never been more pressing.
ICCL (Instrumentation Control & Components Ltd) has established itself as a top-tier global manufacturer of high-performance ball valves, exporting to over 30 countries across North America, South America, Europe, the Middle East, and Asia. Renowned for its precision engineering and adherence to international quality standards, ICCL ball valves are the go-to choice for flow control systems around the world.
What Sets ICCL Ball Valves Apart on a Global Scale?
1. Strong Engineering & Design
ICCL ball valves are crafted to ensure consistent, leak-free operation. Made from high-quality stainless steel, carbon steel, duplex, and exotic alloys, these valves are built to withstand aggressive fluids, high pressures (up to 10,000 PSI), and a wide range of temperatures.
Available in both 2-way and 3-way configurations, ICCL’s valves are versatile enough for various applications—from oil refineries and power plants to marine systems and process industries.
2. Extensive Product Line
ICCL offers a diverse range of products, including:
- Floating Ball Valves
- Trunnion Mounted Ball Valves
- Multi-Port Ball Valves
- High-Pressure Ball Valves
- Fire-Safe and Anti-Static Ball Valves
- Full Bore & Reduced Bore Options
Every valve undergoes rigorous 100% testing for pressure and leak tightness, guaranteeing uncompromised quality before it leaves the facility.
3. Adherence to International Standards
ICCL valves meet key global standards, including:
- API 6D / API 608
- ASME B16.34
- ISO 9001:2015 Quality System
- Fire-safe API 607
- NACE MR0175 for sour services
This compliance ensures that ICCL valves are ready for projects with major clients like Aramco, ADNOC, Petrobras, BP, Total, Shell, Chevron, and others worldwide.
Discover the Global Reach with Local Impact
ICCL's valves are making a difference in essential infrastructures all around the world, including:
- Oil & Gas Pipelines in the USA
- LNG Plants in Saudi Arabia and Qatar
- Refineries in Venezuela and Brazil
- Petrochemical Complexes in Germany and Italy
- Water Treatment Facilities in Canada and Australia
- Power Plants in India, UAE, and South Africa
What sets ICCL apart from local competitors is its knack for delivering tailored solutions right on schedule, no matter where you are.
Manufacturing Excellence from India to the World
ICCL’s manufacturing facilities in India boast:
- CNC machines for top-notch precision machining
- In-house hydro and pneumatic testing
- Surface finishing, coating, and clean-room assembly
- CAD/CAM design capabilities for bespoke projects
This integrated approach gives ICCL complete control over quality, costs, and delivery timelines, making it a go-to OEM partner on a global scale.
Why Global Engineers and EPC Contractors Rely on ICCL
On-Time Global Delivery
ICCL has a solid track record in exports, complete with documentation, packaging, and customs compliance to ensure smooth international shipping.
Custom Solutions
Looking for a valve with specific end connections, materials, or testing needs? ICCL’s engineering team works hand-in-hand with EPCs and plant engineers to make it happen.
Competitive Pricing
By taking advantage of cost efficiencies in manufacturing while adhering to international standards, ICCL delivers exceptional value worldwide.
Post-Sales Support
We provide remote installation guidance, maintenance manuals, and technical datasheets to ensure everything runs smoothly.
Industries ICCL Serves
- Oil & Gas
- Petrochemical
- Power Generation
- Offshore & Marine
- Water & Wastewater
- Mining
- Pharma & Biotech
Wherever flow control is crucial, ICCL is there with certified and dependable ball valve solutions.
Future Outlook – Smart Valve Integration
As the industry embraces automation, ICCL is stepping up with actuated ball valves and smart valve monitoring systems. These advancements will enable remote monitoring, predictive maintenance, and real-time diagnostics for high-performance valves that are essential in mission-critical systems.
Final Thoughts
With a footprint in over 30 countries, ICCL is more than just a valve supplier—it’s a global partner in flow control. Our ball valves are designed for precision, performance, and durability, ready to tackle the toughest engineering challenges. Whether you’re gearing up for a major refinery upgrade or a specialized offshore project, ICCL brings the expertise, quality, and reliability that clients around the world trust.
Visit https://icclksa.com to check out our complete range of ball valves and request a quote for your next international project.
0 notes
Text
How CNC Machining Services Work: An Overview

CNC machining is a cornerstone of modern manufacturing, offering high precision, speed, and flexibility for producing intricate parts and components. From aerospace to automotive, electronics to industrial machinery, CNC machining services are critical in fabricating parts that meet exact specifications. Whether you're a product designer or a manufacturing engineer, understanding how CNC machining works can help you leverage its benefits effectively.
What Is CNC Machining?
CNC machining is a subtractive manufacturing process where material is removed from a solid block—known as a blank or workpiece—using a variety of cutting tools. The process is controlled by pre-programmed computer software that dictates the movement of machines such as mills, lathes, routers, and grinders. Unlike manual machining, CNC systems operate with extraordinary precision and repeatability, making them ideal for high-tolerance, complex parts.
Key Components of CNC Machining Systems
Computer-Aided Design (CAD): Everything starts with a 3D model or a technical drawing of the desired part. Engineers or designers use CAD software to define dimensions, geometries, and tolerances.
Computer-Aided Manufacturing (CAM): The CAD file is then imported into CAM software, which generates a toolpath and converts the design into G-code—a programming language that CNC machines understand.
CNC Machine: The G-code is uploaded to the CNC machine, which follows the programmed instructions to execute precise movements and tool changes. Machines may be 3-axis, 4-axis, or even 5-axis, depending on the complexity of the part and the number of simultaneous movements required.
Cutting Tools: Depending on the material and design, different cutting tools are used, such as end mills, drills, or turning tools. The choice of tool affects surface finish, cutting speed, and overall efficiency.
Workholding: Fixtures and vises secure the workpiece in place during machining, ensuring stability and accuracy.
The CNC Machining Workflow
Here’s a simplified breakdown of the typical CNC machining process:
1. Design & Planning
The journey of custom CNC machined parts begins with a detailed design. Engineers define all technical requirements, including geometry, material selection, surface finish, and tolerance. This stage is crucial because the CAD model directly influences machining feasibility and cost.
2. Programming
CAM software interprets the CAD model to produce G-code. This code tells the CNC machine what actions to perform—movements along the X, Y, and Z axes, spindle speeds, feed rates, tool changes, and more.
3. Setup
A technician sets up the machine by loading the workpiece, installing the required tools, and configuring the machine based on the program. This step may also involve calibrating the tool offsets and checking initial positions.
4. Machining
Once everything is set up, the machine starts removing material as per the G-code instructions. The process could involve multiple operations such as drilling, milling, turning, or tapping. Multi-axis machines can produce complex geometries in a single setup, reducing lead time and improving precision.
5. Inspection & Quality Control
After machining, the part is inspected using precision measurement tools such as calipers, micrometers, or Coordinate Measuring Machines (CMM). This step ensures that the final product meets all specified dimensions and tolerances.
6. Finishing Operations
Depending on the application, post-machining processes like deburring, anodizing, or powder coating may be applied. These finishing steps enhance durability, corrosion resistance, or aesthetics.
Types of CNC Machining
There are several types of CNC machining processes, each suited for specific applications:
Milling: A rotating cutting tool moves along multiple axes to remove material.
Turning: The workpiece rotates while a stationary cutting tool shapes its exterior or interior.
Drilling: Straight holes are created using a rotating drill bit.
EDM (Electrical Discharge Machining): Material is removed using electrical sparks—ideal for hard materials or intricate cavities.
Grinding: A rotating wheel removes material to achieve high surface finish and tight tolerances.
Advantages of CNC Machining
Precision: CNC machines can achieve tolerances as tight as ±0.001 inches, ideal for high-performance industries.
Repeatability: Once programmed, the machine can produce thousands of identical parts with minimal variation.
Flexibility: CNC services can handle one-off prototypes or high-volume production runs.
Efficiency: Faster turnaround times and reduced manual labor.
Material Versatility: Supports a wide range of materials including metals (aluminum, steel, titanium), plastics (nylon, ABS, PEEK), and composites.
Applications of Custom CNC Machined Parts
Custom CNC machined parts are essential in industries where performance and reliability are non-negotiable:
Aerospace: Complex components such as turbine blades, housings, and brackets.
Medical Devices: Surgical instruments, prosthetics, and diagnostic equipment.
Automotive: Engine components, transmission parts, and custom performance mods.
Robotics & Automation: Gears, end-effectors, and structural parts.
Consumer Electronics: Housings, frames, and connectors.
At MS Machining, our team specializes in producing high-quality custom CNC machined parts tailored to exact client specifications. Whether you need prototypes or full-scale production, MS Machining delivers consistent quality with fast lead times.
Why Choose MS Machining?
When it comes to custom CNC machined parts, choosing the right partner can make all the difference. Here's what sets MS Machining apart:
State-of-the-Art Equipment: We operate a fleet of advanced 3-, 4-, and 5-axis CNC machines.
Experienced Technicians: Our machinists have years of hands-on experience across multiple industries.
Fast Turnaround: We streamline production timelines without compromising quality.
Material Expertise: From exotic alloys to engineering plastics, we handle diverse materials with precision.
Quality Assurance: Every part undergoes rigorous inspection to ensure it meets or exceeds your requirements.
Whether you're a startup developing your first prototype or a large enterprise needing scalable production, MS Machining is your trusted source for dependable CNC machining services.
The Future of CNC Machining
CNC machining is constantly evolving, with emerging technologies like AI, machine learning, and automation pushing the boundaries further. Predictive maintenance, adaptive toolpath optimization, and real-time quality monitoring are enhancing productivity and reliability. As industries continue to demand higher performance and customization, CNC machining will remain a foundational technology for manufacturing innovation.
Final Thoughts
CNC machining is more than just a fabrication method—it's a bridge between concept and reality. With its unparalleled accuracy, versatility, and efficiency, it enables manufacturers to produce everything from simple fixtures to complex aerospace components. Companies like MS Machining are at the forefront, delivering precision-crafted custom CNC machined parts that help bring ambitious designs to life.
Whether you're exploring rapid prototyping or full-scale manufacturing, understanding how CNC machining services work empowers you to make informed decisions and achieve superior results.
0 notes
Text
Why ServiceNow Course in Online is the Best Choice for IT Career Growth?
The demand for cloud-based service platforms has been growing steadily, and ServiceNow has positioned itself as the market leader in IT Service Management (ITSM). Whether you are a fresher or an experienced IT professional, learning ServiceNow can be a turning point in your career. If you want to gain these valuable skills with flexibility and convenience, opting for a ServiceNow Course in Online mode is the perfect solution. At LearnoVita, we offer a comprehensive and practical ServiceNow online training program to help you master this powerful platform.
What is ServiceNow and Why Learn It?
ServiceNow is a widely adopted platform that automates IT workflows and helps organizations enhance their service delivery processes. It covers areas like ITSM, IT Operations Management (ITOM), Security Operations, HR Service Delivery, and Customer Service Management. Top global companies rely on ServiceNow to optimize their IT infrastructure and improve operational efficiency.
Learning ServiceNow not only boosts your technical knowledge but also opens up lucrative job opportunities such as ServiceNow Administrator, Developer, and Consultant. These roles are in high demand and offer excellent salary packages across the world.

Advantages of Choosing ServiceNow Course in Online Mode at LearnoVita
Learn at Your Pace Online learning allows you to control your schedule. Whether you are working full-time or pursuing studies, our ServiceNow Course in Online format lets you balance your commitments while upgrading your skills.
Interactive Sessions with Industry Experts At LearnoVita, the course is delivered by certified ServiceNow professionals who bring real-world experience into the virtual classroom. You get to solve practical problems and understand how ServiceNow is used in real projects.
Hands-on Practical Training Theory alone isn’t enough. That’s why our training includes practical exercises, real-time project work, and access to ServiceNow environments for hands-on learning. You’ll practice building applications, automating workflows, and managing IT services.
Comprehensive Curriculum Our ServiceNow Course in Online covers everything from the basics to advanced concepts. Topics include:
ServiceNow Introduction & User Interface
ITSM Processes (Incident, Problem, Change)
Service Catalog & Request Management
CMDB Configuration
Workflow & Flow Designer
Client & Server-side Scripting
Integration Techniques
Performance Analytics and Reporting
Certification & Job Support LearnoVita prepares you for ServiceNow certification exams such as CSA, CIS, and CAD. We also offer career support, mock interviews, and placement assistance to help you land your dream job.

Who Can Enroll?
Fresh Graduates
IT Professionals
System Admins
Software Developers
Project Managers
Business Analysts
No prior ServiceNow experience is required, making this course beginner-friendly.
Conclusion
Choosing a ServiceNow Course in Online mode from LearnoVita is a smart investment in your career. With practical learning, expert mentorship, and placement support, you can build the skills needed to thrive in the ever-growing IT industry.
Enroll Today at LearnoVita! 📧 [email protected] | 🌐 www.learnovita.com |
1 note
·
View note
Text
Reason for Selecting Dell Workstations as Your CAD Workstation

When it comes to selecting a workstation for computer-aided design (CAD), Dell Precision workstations stand out as a top contender. Renowned for their exceptional performance and reliability, these machines are specifically engineered to meet the demanding needs of CAD professionals.
Furthermore, they boast seamless compatibility with various industry-leading software applications, making them an ideal choice for designers and engineers alike. These systems are engineered to manage the intensive requirements of Computer-Aided Design (CAD), equipped with advanced processors, specialized graphics cards, and flexible options for memory and storage capacity. Moreover, Dell offers a range of support and services designed to guarantee a seamless and dependable user experience.
Here’s a comprehensive analysis of the reasons why Dell Precision workstations excel in CAD applications:
1.Performance and Power
High-Performance Processors: Dell Precision workstations are equipped with cutting-edge Intel Core and Xeon processors. This advanced technology enables the seamless management of intricate CAD models and enhances rendering capabilities, ensuring efficient workflows for demanding tasks.
Dedicated Graphics Cards:NVIDIA's professional graphics cards, meticulously engineered for CAD applications, guarantee seamless rendering and visualization.
Expandable Memory and Storage Options: Workstations provide extensive memory and storage capabilities, designed to handle substantial CAD files and extensive datasets with ease.
2.Dependability and durability:
Certification by Independent Software Vendors (ISVs): Dell workstations come with certifications that guarantee their compatibility with prominent CAD software solutions such as Dassault Systèmes CATIA and SOLIDWORKS, which in turn ensures peak performance and consistent stability.
Enhanced Cooling Efficiency: Advanced thermal management systems maintain optimal temperatures for the workstation, even during intense workloads. This helps to avert any decline in performance while ensuring consistent reliability.
Reliable Memory Technology Pro (RMT Pro): This advanced technology, when paired with ECC memory, enhances system reliability by minimizing downtime and mitigating memory-related errors.
3.Compatibility and Support:
Diverse Model Selection:
Dell provides an extensive array of Precision workstations, encompassing both mobile and desktop options. This variety enables users to select the configuration that perfectly fits their specific requirements.
Dell Optimizer: Enhancing Performance with AI Technology
The Dell Optimizer is an innovative software that utilizes artificial intelligence to automatically enhance the performance of your workstation. By fine-tuning various settings, it significantly boosts application responsiveness and extends battery life, ensuring an efficient and seamless user experience.
Dell ProSupport: A Resource for Comprehensive Assistance
Dell ProSupport offers an extensive range of support services designed to assist users in troubleshooting and effectively resolving various issues.
4.Enhanced Features:
Ultra High-Definition Displays:
Precision workstations are frequently equipped with ultra high-definition displays, such as 4K InfinityEdge screens. These advanced displays are particularly suited for CAD (Computer-Aided Design) tasks, providing the accuracy and clarity necessary for meticulous design work.
Data Security:
Dell provides a range of security features designed to safeguard sensitive information and block unauthorized access. In summary, Dell Precision workstations provide an impressive blend of power, dependability, and compatibility, making them the perfect selection for CAD professionals in need of a workstation capable of managing intensive workloads while delivering outstanding performance.
Top Dell CAD Workstations to Consider:
When it comes to CAD applications, Dell’s Precision workstations stand out as exceptional options. The models Precision 3680, 3591, 5680, 7680, and 7780 are particularly noteworthy for their performance and reliability in handling demanding design tasks. These workstations provide a variety of configurations to accommodate diverse requirements, ranging from basic entry-level setups to advanced high-performance models.
Here’s a closer look at the important choices:
Entry-Level Workstation:
Dell Precision 3680: This robust tower workstation is expertly designed for professionals who engage with resource-intensive CAD applications such as AutoCAD, SOLIDWORKS, and various engineering software tools. It demonstrates superior performance in single-threaded applications and provides exceptional computing power for CAD and CAE tasks.
Dell Precision 3591: A Perfect Blend of Power and Portability for Professionals.The Dell Precision 3591 stands out as a mobile workstation that expertly combines robust performance with enhanced portability. This makes it an ideal choice for designers and engineers who need to work effectively while on the move. This technology is especially optimized for use with SOLIDWORKS and various other CAD applications.
Mid-Range Options:
Dell Precision 5680:
The Dell Precision 5680 is a 16-inch mobile workstation that strikes an excellent balance between performance and portability. This laptop is particularly well-suited for intricate CAD and CAE tasks, including simulation, visualization, and 3D scanning, making it a reliable choice for professionals in need of robust computing power on the go.
Dell Precision 7680: A Powerful Mobile Workstation:
The Dell Precision 7680 is a highly adaptable mobile workstation available in both 16-inch and 17-inch models. It is specifically engineered for professionals who manage extensive component data, conduct occasional simulations, and require high-quality visualizations.
High -End workstations:
Dell Precision 7780
The Dell Precision 7780 is a sophisticated 17-inch mobile workstation crafted for professionals engaged in intricate assembly, simulation, and visualization projects.
Dell Precision 7680 :
Introducing the Dell Precision 7680, a premium 17-inch laptop designed for demanding tasks such as complex assemblies, simulation, and advanced visualization. This high-performance device caters to professionals seeking powerful computing capabilities to handle intricate projects with ease.
When selecting a CAD workstation, it's essential to take into account your individual requirements, financial constraints, and the various types of CAD software that you plan to utilize. Dell's Precision series provides an extensive array of choices designed to cater to the diverse requirements of CAD professionals.
0 notes
Text
Why Desktop Application Development Still Matters in the Era of Cloud and Mobile

In an age dominated by smartphones and cloud-based solutions, it’s easy to assume that desktop applications have lost their relevance. However, that assumption couldn't be further from the truth. Desktop application development services continue to play a vital role in digital ecosystems, especially for industries that demand performance, security, and offline capabilities.
While web and mobile apps are widely adopted for their flexibility and ease of deployment, desktop software still offers unmatched benefits in certain scenarios. This article explores why desktop applications remain indispensable for many businesses and how they complement modern cloud and mobile ecosystems rather than compete with them.
1. Superior Performance for Resource-Intensive Tasks
Desktop applications are known for their ability to utilize local hardware resources efficiently. Whether it’s high-end graphics rendering, complex simulations, large-scale data processing, or enterprise-level software operations—desktop software handles these tasks much more smoothly than cloud or mobile apps.
For instance, industries like video editing, architecture (CAD), and engineering still rely heavily on desktop-based tools for their heavy processing needs. Cloud solutions often suffer from latency or bandwidth limitations, which make them less suitable for such tasks. This is where desktop applications shine by offering high-speed, uninterrupted functionality.
2. Offline Accessibility and Reliability
One of the biggest advantages of desktop applications is their ability to function offline. In regions with unreliable or slow internet connections, desktop applications become crucial. Even in developed countries, field workers or remote employees may not always have access to high-speed internet. In such cases, relying solely on cloud or web applications can disrupt workflows and reduce efficiency.
Offline functionality ensures that critical operations can continue without interruption, allowing users to save their data locally and sync when internet access becomes available. For mission-critical systems—such as hospital management, retail POS systems, or manufacturing control systems—desktop apps offer the reliability businesses need.
3. Enhanced Security and Control
Data security continues to be a top concern for organizations worldwide. Cloud-based applications are vulnerable to cyber threats, especially if they are not properly configured or maintained. While cloud vendors invest heavily in security, some businesses prefer to have full control over their systems, data storage, and access permissions.
Desktop applications offer better control over the data since everything is stored locally or on private servers. For companies in finance, healthcare, defense, or legal sectors, this level of control is essential to meet compliance standards and reduce exposure to third-party risks. Additionally, firewalls and on-premise encryption can be more effectively applied to desktop systems.
4. Deep Integration with Hardware and Operating Systems
Desktop applications can interact more directly with system hardware than browser-based applications. This is especially important for software that requires access to peripherals such as printers, scanners, biometric devices, or industrial equipment.
By tapping into system APIs and local drivers, desktop apps can offer better integration, faster processing, and advanced features that are simply not possible with web or mobile applications. This makes them a preferred choice for customized business solutions, manufacturing tools, and specialized scientific software.
5. Long-Term Cost Efficiency
Although initial development and deployment costs for desktop applications might be higher than those of cloud apps, they often prove more cost-effective in the long run. There are no recurring cloud subscription fees, and updates can be controlled internally, which reduces vendor lock-in and operational overhead.
Moreover, for organizations with strict IT budgets, deploying software on existing desktop infrastructure can avoid the recurring costs of hosting, bandwidth, and cloud storage.
6. Ideal for Enterprise Environments
In corporate settings, desktop applications often provide a more stable and feature-rich environment for employees. Enterprise resource planning (ERP), customer relationship management (CRM), HR tools, and financial systems are still commonly used as desktop solutions because of their deep functionality and user customization options.
With central administration and role-based access, IT teams can manage software updates and security settings without relying on external networks or services.
Conclusion
While the world continues to move toward cloud computing and mobile-first solutions, desktop applications are far from obsolete. They offer distinct advantages in terms of performance, security, offline access, and hardware integration. For many businesses, these strengths are critical for smooth and secure operations.
That’s why it’s important to choose a partner who understands these unique needs. Partnering with a trusted desktop application development company can ensure your business leverages the power of desktop software alongside modern digital technologies. With the right development approach, desktop applications can serve as a powerful asset in today’s hybrid digital environment.
#custom desktop application development services#desktop application development services#desktop application development company
0 notes
Text
Precision Craftsmanship in Metal: Elevating Industries through Sheet Metal Fabrication
In the evolving world of modern construction, manufacturing, and industrial design, the demand for precision-engineered materials continues to grow. Among the most crucial processes supporting these sectors is sheet metal fabrication, a discipline that blends engineering, creativity, and technological innovation. As industries increasingly seek tailored solutions for durability and performance, metal fabrication stands as a foundational element behind everything from machinery to architectural structures.
Sheet metal fabrication plays a critical role in bringing concepts to life. It involves a detailed process of cutting, bending, and assembling flat sheets of metal into usable products or components. The process begins with a design or prototype and progresses through stages involving computer-aided design (CAD), laser cutting, and expert manipulation of the materials. Whether for commercial buildings, industrial equipment, or artistic installations, the technique ensures a blend of strength, precision, and aesthetic appeal.
In Australia, the market for custom metal fabrication services has surged, driven by infrastructure expansion, technological advancements, and a growing emphasis on locally manufactured products. Businesses and engineers rely on experienced fabricators to transform raw materials into functioning parts that meet both regulatory standards and specific performance requirements. The expertise and accuracy demanded in this field make the choice of a fabrication partner especially important.
One of the most valuable aspects of sheet metal fabrication is its versatility. Steel, aluminum, brass, and other metals are adapted into diverse shapes and configurations. This flexibility allows for a range of applications, including HVAC systems, enclosures, brackets, industrial panels, and decorative pieces. Moreover, the capability to fabricate in varying thicknesses and finishes means each project can be uniquely customized to suit the end-user’s needs.
Modern metal fabrication has also become synonymous with sustainability and efficiency. Advancements in CNC machinery, automation, and material optimization have significantly reduced waste and turnaround times. Many Australian companies are integrating eco-friendly practices, such as recycling offcuts and reducing energy consumption, into their operations—offering clients not only quality but also a greener choice.
Vollers.com.au exemplifies this forward-thinking approach, balancing traditional craftsmanship with state-of-the-art tools and techniques. With a strong reputation for reliability, their services cater to a wide spectrum of industries, including construction, mining, transport, and agriculture. The company’s attention to detail and commitment to meeting deadlines have earned the trust of engineers, architects, and project managers across the region.
As consumer expectations grow, so too does the importance of innovation within the fabrication industry. Digital tools allow engineers to simulate designs before production, improving accuracy and reducing costly revisions. These developments have also enhanced communication between fabricators and clients, enabling clearer expectations, better results, and faster delivery times.
Despite technological advances, metal fabrication remains a field where human skill is irreplaceable. The knowledge required to read blueprints, interpret design specs, and apply precise measurements underscores the value of experienced technicians. At its core, the success of any fabricated component depends on a balance between machinery and the hands that guide it.
Vollers.com.au understands this balance well, fusing decades of hands-on experience with continual investment in advanced fabrication equipment. Their team works closely with clients from the planning phase to the final product, ensuring that every piece aligns with structural demands and visual standards. This collaborative approach guarantees results that are both functional and enduring.
In summary, sheet metal fabrication continues to shape the way we build and innovate, offering robust solutions across a multitude of industries. As demands for precision, durability, and customization rise, metal fabrication proves indispensable in meeting modern engineering challenges. Choosing a provider with a solid track record, a focus on quality, and a commitment to innovation is key to achieving successful outcomes in any project involving metalwork.
0 notes
Photo

Biwin launches PCIe Gen5 SSD with incredible read speeds of 14,500 MB/s, setting a new benchmark in high-performance storage. This breakthrough, announced at Computex 2025, targets both demanding gamers and professionals needing ultra-fast data transfer. Built on Maxio’s new platform, the X570 SSD uses advanced NAND technology to deliver up to 14,500 MB/s sequential read and 11,000 MB/s write speeds. It offers impressive random IOPS, with 2 million reads and 1.5 million writes, reflecting top-tier responsiveness. Priced competitively—likely below the $180 CAD mark—these SSDs are positioned as some of the most affordable high-end PCIe 5.0 drives. Available in 1TB, 2TB, and 4TB configurations with up to 2400 TBW endurance, they come with a five-year warranty. Imagine a storage device that can handle massive files, fast gaming loads, and heavy data workloads. Biwin’s innovation signals a new era in SSD performance—are you ready to upgrade your system? Are you excited about the future of SSD technology? Drop your thoughts below and let us know if you'd consider a PCIe Gen5 drive like this for your setup! #PCIe5 #SSD #HighPerformanceStorage #GamingGear #TechInnovation #NextGenSSD #Biwin #DataSpeed #Computex2025 #TechNews #StorageSolution #GamingTech #FutureOfStorage
0 notes
Text
I.B.1698 MICHAEL [IBM] harrelltut.com Domain of SIRIUS BLACKANUNNAQI.tech Patents 2 iapplelisa.com of CLASSIFIED 1983 iapplelisa.tech Memory Application Configuration [MAC] Languages... Mathematically Engineered [ME] by ANU GOLDEN 9 Ether [MAGE] Tri-Solar Black Sun planetrizq.tech SKY FEDERATION of Astronomical MARS’ [FAM'S] Highly Complex [ADVANCED] Ancient Cosmic Algorithmic [CA] Computational [Compton] STAR WEB GATEWAY Language Algorithms [L.A.] Digitally Embedded w/Astronomical [DEA] DNA Markup Language Software from Astronomical MERCURY’s [SAM’s] ibmapple1984.tech Secure Socket Layer Virtual Private Network [SSL VPN] Communications.gov Privately Managed [PM] by ANU GOLDEN 9 Ether [iAGE] quantumharrell.tech Graphical User Interface [GUI] Domain Compu_TAH [PTAH] of iquantumapple.com Infrastructure as a Service [IaaS] since ibquantumapple.com VISION PRO of 1968 quadrillionharrell.tech Machine Engineering [ME] AutoCAD [MAC] Robotics in Architectural Memory Equipment w/Symmetric Encryptions of Satellite [RAMESES] Broadband Communication [B.C.] quantumharrellmatrix.tech Languages… Computationally Accessing [CA] quantumharrelltesla.tech Education and Copyright Harmonization Act [HA = HARRELL] of 2001 Digital Tech Rights [DTR] Scholastically Engineered Academically [SEA] @ 1921 QUANTUM 2023 HARRELL 2024 TECH 2025 Apple & IBM [A.i.] LLC of ATLANTIS [L.A.] 5000
WELCOME BACK HOME IMMORTAL [HIM] U.S. MILITARY KING SOLOMON-MICHAEL HARRELL, JR.™

i.b.monk [ibm] mode [i’m] tech [IT] steelecartel.com @ quantum harrell tech llc


US ANCIENT [USA] SKY [U.S.] GODS OF ASTRONOMICAL MERCURY ENERGY [GAME] VORTEX GENERATORS 2 OUR INTERPLANETARY POWER [I/P] SYSTEMS of Urani-Atlantis.tech... PRIVATELY COMMUNICATING [PC] ONLINE @ QUANTUMHARRELL.tech Domain LLC

eye 1921steelecartel.tech TITAN of SIRIUS [U.S.] gullahgeecheemilitary.tech WEALTH @ quantum harrell tech llc

who secretly own apple, inc [a.i.] in 2024?!?!?!

uh oh... not our ancient 9 ether computational algorithm design [cad] patents of SIRIUS electronic architectural intel [a.i.] of Apple [A.I.A] Inc. Patents [I/P] @ 1921 QUANTUM 2023 HARRELL 2024 TECH 2025 Apple & IBM [A.i.] LLC of ATLANTIS [L.A.] 5000?!?!?!

ibmapple1984.tech @ 1921 QUANTUM 2023 HARRELL 2024 TECH 2025 Apple & IBM [A.i.] LLC of ATLANTIS [L.A.] 5000

iapplelisa.com?!?!?!

of iapplelisa.tech?!?!?!

but who own iquantumcad.com?!?!?!
ibmautocad.tech memory hardware manual @ 1921 QUANTUM 2023 HARRELL 2024 TECH 2025 Apple & IBM [A.i.] LLC of ATLANTIS [L.A.] 5000?!?!?!
iquantumapple.com of iapplelisa.com @ 1921 QUANTUM 2023 HARRELL 2024 TECH 2025 Apple & IBM [A.i.] LLC of ATLANTIS [L.A.] 5000

MICHAEL A COMPUTER [MAC] APPLE NERD [MAN] of iapplelisa.tech Intel @ 1921 QUANTUM 2023 HARRELL 2024 TECH 2025 Apple & IBM [A.i.] LLC of ATLANTIS [L.A.] 5000

hi:teKEMETICompu_TAH [PTAH] PRO Michael [PM] Harrell, Jr. Deep Machine [DM] VISION Learning @ 1921 QUANTUM 2023 HARRELL 2024 TECH 2025 Apple & IBM [A.i.] LLC of ATLANTIS [L.A.] 5000

CLASSIFIED iapplelisa.tech of iapplelisa.com accessing tri-solar black sun planetrizq.tech PRO of blackanunnaqi.tech VISIONS @ 1921 QUANTUM 2023 HARRELL 2024 TECH 2025 Apple & IBM [A.i.] LLC of ATLANTIS [L.A.] 5000

try the quantumharrelltech.com visual dial tone domain... my personal iphone hung up on you [insert quantumharrell.tech's intellectual encryption phrase property tag]

quantumharrell.tech international [qi] 1921steelecartel.tech family business [dynasty] communication [d.c.] knowledge economy @ 1921 QUANTUM 2023 HARRELL 2024 TECH 2025 Apple & IBM [A.i.] LLC of ATLANTIS [L.A.] 5000

shhh... we 3 sets of 144,000 confidential iapplelisa.tech elites @ 1921 QUANTUM 2023 HARRELL 2024 TECH 2025 Apple & IBM [A.i.] LLC of ATLANTIS [L.A.] 5000

him ancient [ha = harrell] 1921 hi:tekemeticompu_tah [ptah] domain signature technocrat of 1968 planetrizq.tech?!?!?!... says who?!?!?!

says his hi:tekemeticompu_tah [ptah] father michael [fm]... since i.b.1698 michael [ibm] harrell jr @ 1921 QUANTUM 2023 HARRELL 2024 TECH 2025 Apple & IBM [A.i.] LLC of ATLANTIS [L.A.] 5000

eye anugoldenblackwallstreet.com compu_tah [ptah] business of anu golden 9 ether [age] blackatlantis5000.com economy w/SIRIUS blackatlantis5000.tech WEALTH @ 1921 QUANTUM 2023 HARRELL 2024 TECH 2025 Apple & IBM [A.i.] LLC of ATLANTIS [L.A.] 5000

I.B.1968 MICHAEL [IBM] QUANTUM COMPUTING ANU [CA] quantumharrellmatrix.tech MINING Economy [ME] @ 1921 QUANTUM 2023 HARRELL 2024 TECH 2025 Apple & IBM [A.i.] LLC of ATLANTIS [L.A.] 5000

© 1968-2223 QUANTUM HARRELL TECH LLC All LOST ANCIENT [L.A.] ATLANTEAN DNA [A.D.] DotCom [A.D.] + DotTech [A.D.] + Pre 1698quantumharrellgov.tech Domain Name Rights Reserved.
#apple#ibm#t mobile#at&t#quantumharrelltech#vision pro#apple lisa#quantum dara#qdara.tech#harrelltut.com#u.s. michael harrell#o michael#king tut#intuitive machine learning
2 notes
·
View notes
Text
PINQ2 & Distriq join To Advance Quantum Computing in Canada

The Quantum Leap: Quebec's Quantum Technology Strategy. The main quantum organisations in Quebec, PINQ2 and Distriq, have formed a strategic cooperation to advance quantum technology acceptance and commercialisation in Canada and Quebec. This boosts Canada's quantum technology leadership.
Distriq-PINQ2 Partnership
Distriq and PINQ2 Benefit from Partnership:
Distriq, Sherbrooke's Quantum Innovation Zone, and PINQ2, Canada's first IBM Quantum System One, are using their advantages to bridge infrastructure, industrial deployment, and research. This relationship helps enterprises of all sizes by providing advanced toolkits like Qiskit SDK v2.0, shared access to classical and quantum computing platforms, and guidance for integrating quantum technologies into AI and high-performance computing workflows.
Marion Urso, a partnership spokeswoman, said enrolling more organisations, initiating trial activities, and creating infrastructure should deliver verifiable results in 12-18 months. She said PINQ2 works with IBM and other non-Quebec corporations.
Nord Quantique Improves Fault-Tolerant Quantum Computing:
This cooperation is helping Sherbrooke startup Nord Quantique enhance quantum computing. After emerging from stealth status in 2022, the company obtained CAD $9.5 million in seed funding from Paris-based Quantisation VC and BDC Capital's Deep Tech Venture Fund, with Real Ventures participating.
Nord Quantique is developing hardware to accelerate the transition to fault-tolerant quantum computing. The company is reinventing computers from the ground up using Canadian quantum technology and semiconductor chip manufacturing skills to reduce error events on each qubit.
Sherbrooke Quantum Innovation Centre
Sherbrooke is a global quantum technology hub because to projects like the Distriq Quantum Innovation Zone, which promotes research and entrepreneurship. The 45-year-old Quantum Institute's famous academics and students live in the city. This ecosystem attracts international companies like Quandela and Pasqal, helping the community thrive.
The Sherbrooke quantum industry has received almost $8 million from the federal government, including a $1.8 million loan for Nord Quantique and a $5.2-million grant for Distriq.
About Distriq
Distriq—the Quantum Innovation Zone—is a vital quantum research and technology facility in Sherbrooke, Quebec. Distriq, an innovation accelerator founded in 2022, supports researchers, businesspeople, and industry leaders to speed quantum technology development and commercialisation by providing infrastructure.
Ecosystem, Mission
The purpose of Distriq is to foster collaboration between academic research and industrial use. Distriq uses research, education, entrepreneurship, and industry to commercialise quantum ideas. The organisation connects entrepreneurs with promising quantum technologies and assists quantum companies from inception to industrial implementation.
Resources and Facilities
The infrastructure of Distriq includes DevTeQ, a shared laboratory with cutting-edge quantum research and development technology. Facilities include clean rooms, cryogenic refrigerators, quantum computers, and other experimentation and development equipment. Espace Quantique 1 also has over 50,000 square feet of configurable office space, conference rooms, coworking spaces, and technical expert services to foster creativity and collaboration.
Partnering strategically
Distriq collaborates with esteemed institutions including 3iT, Institut Quantique, and Université de Sherbrooke. These collaborations boost the integrated innovation chain by helping enterprises in AI, quantum, and creative manufacturing.
Distriq partnered with PINQ2 in 2025 to promote quantum technology adoption and commercialisation in Quebec and Canada. This agreement will give firms access to cutting-edge toolkits like Qiskit SDK v2.0, quantum computing platforms, and instructions for integrating quantum technology into present operations.
Assistance from the government
Given Distriq's relevance in quantum, the Canadian government has committed over $8 million in Sherbrooke's quantum environment. Distriq received a non-repayable $5.2 million grant to buy cutting-edge DevTeQ equipment to aid quantum research and development.
In conclusion
Quebec's commitment to quantum technology is seen in the relationship between PINQ² and Distriq and Nord Quantique's advancements. These efforts aim to make Canada a worldwide quantum power and accelerate quantum technology implementation.
#PINQ2#DistriqandPINQ2#Distriq#PINQ2andDistriq#quantumtechnologies#DistriqQuantum#QuebecandCanada#technology#technews#technologynews#news#govindhtech
0 notes
Text
The signposts are pointing the way: The Factory of the Future, where information technology (IT) and operational technology (OT) converge, is straight ahead and the road leading to it is a superhighway of technology, innovation, and advanced capabilities. This four-part series examines the definition of the Factory of the Future, common characteristics, benefits, and how to get started. Defining the Factory of the Future The Factory of the Future has an evolving definition, even different names. Some call it Smart Manufacturing, Industry 4.0 or the Digital Enterprise. While the terms vary, some elements are always in common. The Factory of the Future is the product of fast-changing disruptive technologies hitting manufacturing like a cyclone. Information technology and operational technology are both seeing drastic innovations. The convergence of these two forces is creating a paradigm shift. Manufacturing is experiencing the fourth industrial revolution. We are already seeing results: According to a report from SCM World, 40% of manufacturers they surveyed say that smart manufacturing along with its foundational technology—the Internet of Things—is within reach, and it’s the right time to invest. Huffington Post reports that early adopters who have at least partially implemented smart manufacturing initiatives have documented measurable results: 82% reported increased efficiency 49% reported fewer product defects 45% reported customer satisfaction gains The impact promises to grow and be even more substantial as manufacturers and their suppliers deploy and integrate more technologies across the entire manufacturing landscape. Greater speed, value, innovation, and closer alignment with demanding customers will be the new normal. Analysts often cite the year 2020 as the next milestone moment. Some point to 2030 or 2050 as being the thresholds. Find the Latest Internet-of-Things News, Trends and Best Practices No matter which date you want to target, it is clear that substantial change is coming and coming fast. That future looks promising. Perhaps manufacturing will at last be able to leave behind the public impressions of labor-intensive, dirty and dangerous worksites, and bury once and for all the memories of plant closings and shipping jobs to low-cost countries, leaving communities devastated. Manufacturing will be new again. We are on the way. According to the U.S. Department of Defense, nearly 900,000 new manufacturing jobs have been created since February 2010. Disruptive technologies have been appearing on the horizon for several quarters now, starting to build the momentum and define the characteristics of the Factory of the Future, including: Social and mobile capabilities were some of the first next-generation trends that became must-have capabilities very quickly. Product configuration tools, integrated computer-assisted design (CAD) systems and late-stage assembly helped manufactures meet demands for mass customization. Robotics changed operational technology dramatically, just as shop-floor automation revolutionized workflows and production cycles. Big data started conversations about factories becoming predictive, leveraging analytics and creating strategies for identifying customer expectations. Cloud computing fueled the imagination further, making storage of immense pools of data possible. 3D printing launched a hype cycle that was—and still is—staggering. The Internet of Things far surpasses all of these disruptive technologies. The potential impact of the IoT is truly staggering and hard to grasp. While projections vary greatly, they are always described in trillions. McKinsey & Co. anticipates the global economic value to be $11 trillion, and Cisco predicts a $19 trillion opportunity. This isn’t an absolute list, nor is there just one checklist of IT and OT tools that must be deployed to be considered a Factory of the Future. Some manufacturers will need more; some will be able to leverage two or three disruptive technologies to create a strong market position. There is o...
0 notes