#ElectronicsProject
Explore tagged Tumblr posts
Visit Tumblr Blog
Explore Tumblr blogs with no restrictions, modern design and the best experience.
Last Seen Tumblr Blogs


Fun Fact
Average visit duration of Tumblr.com is 10 mins and 25 secs.
Text
Solenoids go clicky-clacky 🔩🔊🤖
We're testing out an I2C-to-solenoid driver today. It uses an MCP23017 expander. We like this particular chip for this usage because it has push-pull outputs, making it ideal for driving our N-channel FETs and flyback diodes. The A port connects to the 8 drivers, while the B port remains available for other GPIO purposes. For this demo, whenever we 'touch' a pin on port B to ground, the corresponding solenoid triggers provide an easy way to check speed and power usage.
#solenoid#electronics#i2c#mcp23017#hardwarehacking#maker#embedded#engineering#robotics#automation#circuitdesign#pcb#microcontroller#tech#hardware#diyelectronics#electricalengineering#firmware#innovation#prototype#electromechanical#diy#electronicsproject#smarthardware#tinkering#gpio#fet#flybackdiode#programming#linux
40 notes
·
View notes
Text
youtube
FPGA Project IDEA | Design VA meter with VHDL code [In Hindi]
Discover the endless possibilities that FPGA and VHDL unlock for electronic enthusiasts. Whether you're a student, hobbyist, or professional, this project idea serves as a gateway to exploring the capabilities of FPGA and VHDL, showcasing their potential to revolutionize your electronic design projects. Join us on this educational journey and bring your VA meter project to fruition!
Subscribe to "Learn And Grow Community"
YouTube : https://www.youtube.com/@LearnAndGrowCommunity
LinkedIn Group : https://linkedin.com/company/LearnAndGrowCommunity
Blog : https://LearnAndGrowCommunity.blogspot.com/
Facebook : https://www.facebook.com/JoinLearnAndGrowCommunity/
Twitter Handle : https://twitter.com/LNG_Community
DailyMotion : https://www.dailymotion.com/LearnAndGrowCommunity
Instagram Handle : https://www.instagram.com/LearnAndGrowCommunity/
Follow #LearnAndGrowCommunity
#VHDLProjectIdea#VoltAmpereMeterDesign#FPGAIntegration#VHDLProgramming#DigitalDesign#ElectronicsProject#VHDLproject#FPGA#fpgadesign#Verilog#VerilogHDL#fpgaprogramming#learnandgrow#learnandgrowcommunity#hdlsimulation#synthesis#engineeringprojects#finalyearprojects#finalyearprojectideas#7segment#7segmentdisplay#diyelectronics#LearnFPGA#VAMeter#CodeWithFPGA#FPGATutorial#Youtube
1 note
·
View note
Text

🌟Buy Components from Element14 on Semikart! 🌟
Element14 Electronics, a premier high-service distributor of technology products, for electronic system design, maintenance, and repair, is now available on Semikart.com
Explore a vast array of Element14 Electronics’s high-quality products on Semikart.com. Elevate your projects with Element14 Electronics's unparalleled support and vast offerings.
#Semikart#element14#TechInnovation#Electronics#indiastartups#semiconductors#components#electroniccomponents#electronicsengineering#electronicsprojects
2 notes
·
View notes
Text

You can purchase the Arduino Leonardo R3 board for just Rs. 652.00 exclusively on quartzcomponents.com. This offer provides an affordable opportunity to acquire this versatile microcontroller board for your electronics and programming projects. Don't miss out on this budget-friendly deal!
#arduinoleonardo#leonardo#microcontroller#makerspace#electronicsprojects#programminglife#diyelectronics#embeddedsystems#hardwarehacking#stem#digitalprototyping#techinnovation#circuitdesign#opensourcehardware#creativecoding#electronicaccessories
4 notes
·
View notes
Text

How to Use a 5A Adjustable Power Adapter for DIY Projects & Devices
Whether you're into robotics, LED projects, or custom electronic builds, a 5A Adjustable Power Adapter is an essential tool in your DIY toolkit. It offers flexibility, stability, and efficiency—allowing you to power various devices with different voltage requirements using just one adapter.
What is a 5A adjustable power adapter? A 5A adjustable power adapter is a plug-in power supply that lets you manually select the output voltage—commonly ranging from 3V to 12V or even up to 24V. The 5A refers to its maximum current output, which means it can supply up to 5 amps, making it suitable for medium- to high-powered devices like
LED light strips
CCTV cameras
Mini amplifiers
3D printer components
Small motors and Arduino boards
How to Use It Safely Check Device Voltage & Current: Before connecting, verify your device’s voltage and current requirements. Never exceed the voltage, and ensure the device draws less than 5A.
Adjust the Voltage Dial: Most adapters have a small dial or selector switch. Turn it to match your device’s voltage—usually labeled on the device or in its manual.
Select the Correct Plug Size: These adapters come with interchangeable tips. Match the correct polarity and plug size to ensure a proper connection.
Power It On: Once everything is connected and set, plug the adapter into an AC socket. Monitor the device initially to make sure it’s running as expected.
Benefits of Using a 5A Adjustable Power Adapter Cost-Efficient: One adapter for multiple voltage devices.
Space-Saving: Reduces clutter from using several chargers.
Portable: Great for on-the-go makers and technicians.
Versatile: Ideal for testing new circuits, components, or prototypes.
Final Thoughts Using a 5A adjustable power adapter simplifies powering various electronics, especially for tinkerers and hobbyists. Just make sure to double-check your voltage settings and use the correct tip to avoid damaging your components.
#PowerAdapter#AdjustablePowerSupply#5APowerAdapter#ElectronicsTools#VoltageRegulator#ElectronicsProjects#PowerSupplyGuide#Callsa#CallsaPowerAdapter#CallsaElectronics#CallsaTools#MadeByCallsa
0 notes
Text
Best Arduino Projects for Engineering Students – Takeoff Projects
Arduino is a popular microcontroller that helps students create innovative electronic projects. It is easy to use and perfect for beginners and advanced learners. Engineering students can develop various projects using Arduino, such as home automation, robotics, IoT applications, and sensor-based systems.

At Takeoff Projects, we offer a wide range of Arduino projects for students to learn and implement in real-time applications. These projects help students improve their technical skills and understand how hardware and software work together.
One of the best Arduino projects is home automation, where students can control lights, fans, and appliances using a smartphone or voice commands. Another interesting project is automatic street lights, which turn on and off based on the surrounding light conditions. These projects help students learn about automation and energy efficiency.
IoT-based Arduino projects are also very popular among engineering students. For example, a smart irrigation system uses Arduino to control water supply based on soil moisture levels. This project helps in water conservation and is useful for agriculture. Health monitoring systems are another great project idea, where students can build devices to measure heart rate, temperature, and oxygen levels.
#Arduinoprojects#engineeringstudents#Arduinominiprojects#TakeoffProjects#electronicsprojects#IoT projects#Arduino-based projects#simple Arduino projects#final year projects
0 notes
Text

If you are seeking a reliable partner for your next electronics design project, look no further than Voler Systems. Our comprehensive electronics design services will guide you from concept to completion, while our focus on risk management ensures that your project remains on track, on time, and within budget. Let Voler Systems help you bring your vision to life and deliver a product that meets the highest standards of quality and performance.
1 note
·
View note
Text
#microcontroller#arduino#arduinoproject#arduinocoding#engineering#technology#electronics#electronicsprojects
0 notes
Text

Explore ICStation Xmas Tree Kits and gadgets to add a spark of innovation to your Christmas decoration!
0 notes
Link
pcb Repairing Course
In today’s technology-driven world, almost every device we use relies on electronic circuits. From smartphones and computers to home appliances and automobiles, Printed Circuit Boards (PCBs) are the backbone of modern electronics. When these intricate circuit boards malfunction, it can lead to expensive repairs or the need for complete replacement. However, with specialized skills in PCB repair, one can save both time and money, making PCB repairing not only a valuable technical skill but also a lucrative career opportunity.
#circuitboard #electronics #pcb #pcbdesign #circuit #soldering #engineering #pcbassembly #diyelectronics #arduino #pcbmanufacturing #pcbprototype #maker #pcbmanufacturer #electronicdiy #electronicsproject #pcbrepairingcourse #acpcbrepairingcourse #course #pcb #noida #careskillsacademy
0 notes
Text

Fruit Jam RP2350B credit-card mini computer with all the fixin's 🍓🍇💾
We were catching up on a recent Hackaday hackchat with Eben Upton (https://hackaday.io/event/202122-raspberry-pi-hack-chat-with-eben-upton) and learned some fun facts: such as the DVI hack for the RP2040 was inspired by a device called the IchigoJam (https://www.hackster.io/news/ichigojam-combines-strawberry-and-raspberry-to-deliver-a-raspberry-pi-pico-powered-educational-micro-66aa5d2f6eec). We remember reading about this back when it was an LPC1114, now it uses an RP2040. Well, we're wrapping up the Metro RP2350 (https://www.adafruit.com/product/6003), and lately, we've been joking around that with DVI output and USB Host support via bit-banged PIO, you could sorta build a little stand-alone computer. Well, one pear-green-tea-fueled-afternoon later we tried our hand at designing a 'credit card sized' computer - that's 3.375" x 2.125", about the same size as a business card (https://hackaday.com/2024/05/07/the-2024-business-card-challenge-starts-now/) and turns out there's even a standard named for it: ISO/IEC 7810 ID-1 (https://www.iso.org/standard/70483.html).
Anyhow, with the extra pins of the QFN-80 RP2350B, we're able to jam a ridonkulous amount of hardware into this shape: RP2350B dual 150MHz Cortex M33 w/ PicoProbe debug port, 16 MB Flash + 8 MB PSRAM, USB type C for bootloading/USB client, Micro SD card with SPI or SDIO, DVI output on the HSTX port, I2S stereo headphone + mono speaker via the TLV320DAC3100 (https://www.digikey.com/en/products/detail/texas-instruments/tlv320dac3100irhbt/2353656), 2-port USB type A hub for both keyboard and mouse or game controllers, chunky on-off switch, Stemma QT I2C + Stemma classic JST 3-pin, EYESPI for TFT displays, 5x NeoPixels, 3x tactile switches, and a 16-pin socket header with 10 A/D GPIO + 5V/3V/GND power pins. The PSRAM will help when we want to do things like run emulations that we need to store in fast RAM access, and it will also let us use the main SRAM as the DVI video buffer.
When we get the PCBs back and assembled, what should we try running on this hardware? We're pretty sure it can run DOOM. Should that be first? :) We also need a name. Right now, we're just calling it Fruit Jam since it's inspired by the IchigoJam project.
#fruitjam#rp2350b#raspberrypi#microcomputer#hackaday#diyelectronics#retrocomputing#creditcardpc#hardwarehacking#usbhost#dvioutput#psram#retrogaming#makercommunity#opensourcehardware#homemadecomputer#minipc#embeddeddevelopment#techinnovation#electronicsproject#tinkering#cortexm33#doomport#custompcb#hacktheplanet#hardwaredesign#diytech#retroconsole#handheldgaming#fruitjampc
34 notes
·
View notes
Text
How To Make Electronics Water Diya At Home

Creating an electronic water diya at home is a fun and educational project that combines creativity with basic electronics. To start, you'll need a small LED, a coin cell battery, a water-resistant base (like a small bowl or plastic cap), and some waterproof adhesive. Begin by attaching the LED to the battery, ensuring the positive and negative terminals align correctly. Secure the LED to the battery using the adhesive. Next, place the LED battery setup inside the water-resistant base, sealing it with more adhesive to prevent water from entering. Once secured, carefully place the base into a bowl of water. The LED will float, creating a glowing water diya effect. You can add colored film or paper over the LED to enhance the visual appeal. This project is a great way to introduce kids to electronics while adding a unique touch to festive decorations. Safety Tip: Ensure all components are waterproofed to avoid short circuits.
#DIYElectronics#WaterDiya#FestiveDecor#ElectronicsProjects#CreativeLighting#LEDProjects#DIYCrafts#HomeDecor#InnovativeDIY
0 notes
Text
youtube
VHDL Project Idea : How to design Volt-Ampere Meter with VHDL Code and FPGA integration
Watch the video for complete go-through and Step-By-Step Tutorial. @LearnAndGrowCommunity
#VHDLProjectIdea#VoltAmpereMeterDesign#FPGAIntegration#VHDLProgramming#ElectricalMeasurement#DigitalDesign#DataProcessing#ElectronicsProject#VHDLproject#FPGA#fpgadesign#Verilog#VerilogHDL#fpgaprogramming#learnandgrow#learnandgrowcommunity#hdlsimulation#synthesis#engineeringprojects#finalyearprojects#finalyearprojectideas#7segment#7segmentdisplay#Youtube
1 note
·
View note
Text

🌟 Buy Components from TME Electronics on Semikart! 🌟
Transfer Multisort Elektronik is a global leader in electronic component distribution, with components available for purchase on Semikart! 🎉🔌
Explore a vast array of TME's high-quality products right here on Semikart.com. Get access to over 1400 Manufacturers with over 700k SKUs available with a low lead time.
#Semikart#tme#TechInnovation#Electronics#IoT#indiastartups#semiconductors#components#electroniccomponents#electronicsengineering#electronicsprojects
1 note
·
View note
Text
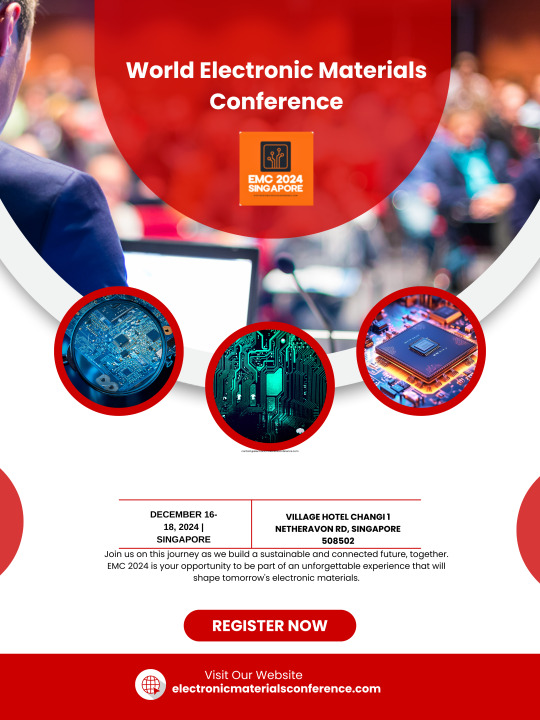
World Electronic Materials Conference December 16-18, 2024 | Singapore
More information: electronicmaterialsconference.com
For Enquiry: [email protected]
#WorldElectronicConference#ElectronicsInnovation#Innovation#DIYElectronics#ElectronicsProjects#Arduino#RaspberryPi#CircuitDesign#ElectricalEngineering
0 notes
Text
Unlock the power of embedded systems with us! 🚀 Dive into a world of innovation and technology where every circuit, code, and connection matters. Read more: https://livewirecoimbatore.com/
Reach Us: 8870275880
Embedded Systems
#embeddedsystems#electronics#raspberrypi#engineering#arduino#technology#iot#robotics#electrical#arduinoproject#projects#arduinouno#programming#electricalengineering#electronicsprojects#embedded#sensors#diyelectronics#digitalelectronics#microcontroller#artificialintelligence#electronicsengineering#electricians#computerengineering#electronicsquiz#pcbdesign#electricianlife
0 notes