#Export Documents Software
Explore tagged Tumblr posts
Visit Tumblr Blog
Explore Tumblr blogs with no restrictions, modern design and the best experience.
Last Seen Tumblr Blogs


Fun Fact
Tumblr has 4 main sources of revenue.
Text
China’s Rare Earth Export Controls: What Manufacturers Must Know
China’s new rare earth export controls are reshaping global manufacturing supply chains. In this short clip, Certivo CEO Kunal Chopra explains the real-world impact on procurement, pricing, and supplier reliability.
👉 Longer lead times — +30 to 45 days in procurement cycles 👉 Price volatility — Up to 200% cost spikes on key materials 👉 Heavier documentation — Composition, origin & processing info required 👉 Supplier uncertainty — Even trusted partners now face disruptions
📱 Watch this short clip: https://youtube.com/shorts/4dstdWn581k
🎥 Full podcast episode: https://youtu.be/teq9bXymluc
🔗 Rare Earth Compliance Help: https://www.certivo.com/solutions
🌐 Visit Certivo: https://www.certivo.com/
#China rare earth export controls 2025#Manufacturing impact of rare earth regulations#Rare earth procurement delays for manufacturers#Rare earth price volatility 2025#Supply chain disruptions due to China policy#Compliance software for rare earth sourcing#Rare earth certification and documentation#AI tools for supply chain compliance#Certivo rare earth regulatory support#Supplier risk from Chinese export licensing
0 notes
Text
Efficient and Compliant Service Exports with Sky ERP Export Plus

The services industry plays a crucial role in India's economy, being the largest contributor with over 50% of the GDP. This sector includes a wide range of services such as trade, tourism, aviation, telecom, shipping, ports, communication, storage, financing, insurance, transportation, real estate, business services, software services, and IT-BPM. Following the COVID-19 pandemic, there was a significant increase in the tourism and hospitality sector in the country. The Indian economy relies heavily on exporting services such as travel, transportation, insurance, software, business services, financial services, and communication. These exports play a significant role in India's economic growth. NASSCOM Forecasts that technology exports from India will hit US$ 200 billion by fiscal year 2024.
In 2023-24, services exports increased from USD 325.3 billion to USD 341.1 billion
India is a major exporter of services to various countries worldwide, with the USA, the UK, and Japan being the primary recipients. Industries such as software, computer technology, IT, BPO, and call centers are among the top services exported to regions including America, Europe, Asia, and the Gulf countries.
The top importers of India's software services and IT sector are the USA, Europe, and the UK. Other markets for India's software services include Canada, Asia, Australia, and New Zealand. Additionally, India's top export markets include Hong Kong, Singapore, Germany, Bangladesh, the Netherlands, and Nepal.
In today's global economy, service exports play a critical role in the success of many businesses. However, the process of exporting services can be complex and requires careful documentation to ensure compliance with regulations and smooth transactions.
Export documentation software for service exports is essential for streamlining the export process and reducing the risk of errors. This software helps businesses create, manage, and track all necessary documentation, such as invoices, packing lists, certificates of origin, and export licenses. By automating these tasks, businesses can save time and resources, while also ensuring accuracy and consistency in their export documentation.
In addition, export documentation software can help businesses stay compliant with ever-changing regulations and requirements. This software for service exporters can provide updates on regulatory changes, generate reports to demonstrate compliance and help businesses avoid costly fines or delays in the export process.
Overall, export documentation software is a valuable tool for businesses involved in service exports, helping them navigate the complexities of global trade and ensure successful transactions. By investing in this software, businesses can improve efficiency, reduce risks, and ultimately enhance their competitiveness in the global marketplace.
Sky ERP Export Plus is a highly advanced Export Documentation software suite designed for managing export documentation and business intelligence reports online. This comprehensive solution ensures accurate and efficient handling of export transactions, giving businesses a competitive edge in the export industry. By utilizing this software for service Exporters, companies can confidently navigate the complex process of export registration and streamline their operations. In today's export industry, having access to reliable export software is crucial for achieving success and staying ahead of the competition.
0 notes
Text
For those who are not aware: Bitlocker is encryption software, it encrypts your computer and makes it impossible to access the information on the computer unless you have the key.
It should be standard practice for IT companies to document the bitlocker keys as they are configuring bitlocker on a computer; generally you would do this by creating a record in your client management software for that specific device and putting the key in the record. Sometimes software can be used to extract that information in the event that it's necessary, but even if there's theoretically a way to extract the key, it should be documented somewhere *other* than on the encrypted computer.
This is something that a lot of IT people fuck up on kind of a lot (we've definitely had problems with missing bitlocker keys and I'm quite happy that the people who didn't document those keys aren't my coworkers anymore).
So what do you do if you want to use encryption software and you're NOT an IT company using a remote management tool that might be able to snag the keys?
When you are setting up encryption, put the encryption key in your password manager. Put it in your password manager. Document the important information that you cannot lose in your password manager. Your password manager is a good place to keep important things like your device encryption key, which you do not want lost or stolen. (If you run your password manager locally on an encrypted computer, export the data every once in a while, save it as an encrypted file, and put the file on your backup drive; you are going to have a bad time if your computer that hosts the only copies of your passwords shits the bed so *make a backup*)
This is my tip for home users for any kind of important recovery codes or software product keys: Print out the key and put it in your underwear drawer. Keep it there with your backup drive. That way you've got your important (small) computer shit in one place that is NOT your computer and is not likely to get shifted around and lost (the way that papers in desks often get shifted around and lost).
2K notes
·
View notes
Note
As you've asked for asks!:
Do you have any quick-and-dirty book/fic binding methods a terrified-of-failure novice could use to bang something out to get over the first collywobbling step of Actually Doing The Thing? (this may be something I've been meaning to ask for ages)
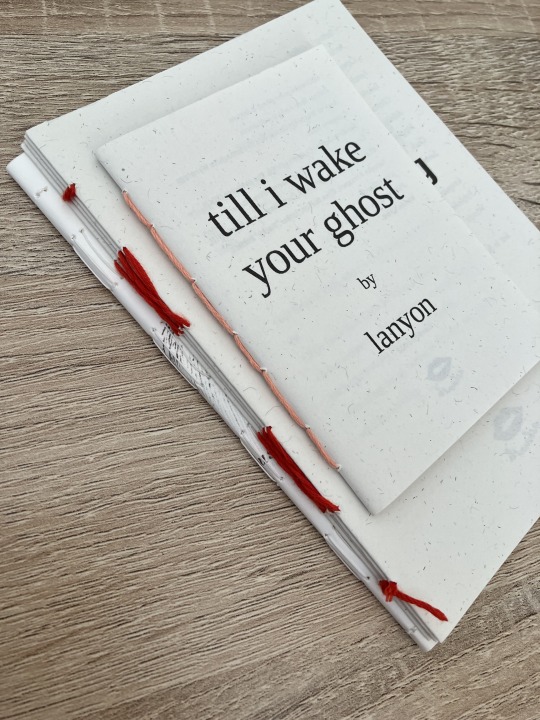
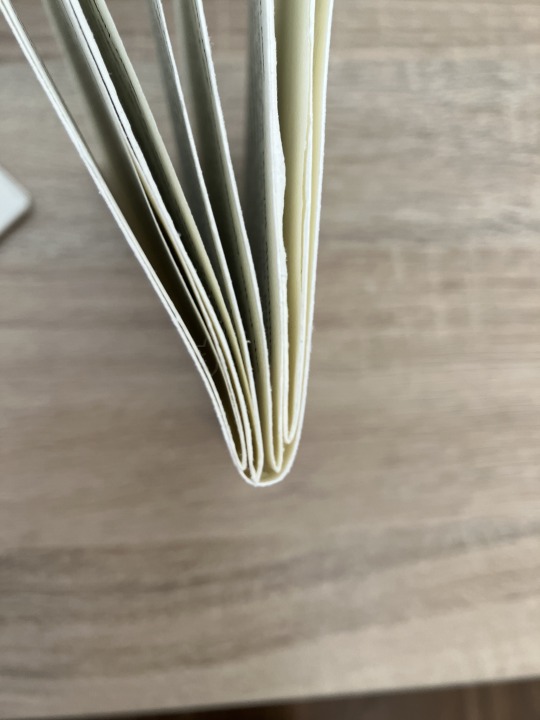
yes! I absolutely do! in my opinion the best quick-and-dirty bookbinding method is a no-glue pamphlet: you don't have to mess with glue or measuring or cutting anything, all you need is your text, some paper, a needle and thread. you can use the same needle to punch holes if you don't have an awl.
this is going to be a little long but that's because I'm going to write out some fairly detailed instructions for an A5 sized pamphlet. If you don't want detailed instructions and think you can glean the necessary info from photos, just skip to the photos! I've also linked tutorials.
for preparing the text to printing, in whatever software you use (word, libreoffice, gdocs, whatever) make sure your document is set to page size A5. make it look readable. then save as/export that document as a straight-paged PDF. now go to the bookbinder JS tool (https://momijizukamori.github.io/bookbinder-js/), and upload the PDF. source manipulation: none printer paper size: A4 display unit (you can ignore, or choose cm if it gives you anxiety that it automatically displays points) printer type: select single-sided or duplex accordingly* rotate paper: ignore flip on long side: check if you are printing duplex and if your duplex printer flips the paper on the long side page layout: tick folio page scaling: original page positioning: centered ignore the rest flyfleaf: ignore signature format tick: standard signatures. in the length drop down, this depends on the type of pamphlet you are doing. for folio i generally find 4-5 pages per signature a comfortable thickness. if you have 6 whole A4 pages you can still do that as a single signature or you can split it into two signatures 3 pages each. wacky small layouts: ignore this signature info click the generate preview button to see what your PDF looks like imposed! I love this step especially when I'm doing quarto (A6) or octavo (A7) sized books generate output - click this to generate an imposed PDF
for A6 and A7 sized books the instructions are much the same, except for these you make sure the page size is A6 or A7 in your software, and then you choose quarto or octavo instead of folio. for signature length drop down I keep signature length to 1 for octavos typically and 2 for quartos, as this still refers to sheets of paper, and for octavo 1 sheet of A4 paper will turn into 4 smaller sheets in one signature once folded and cut.
*if you don't have a duplex printer you will have to manually turn the paper to print on the other side. I cannot be arsed with this so I bought a printer capable of duplex printing (I didn't have a printer anyway). if you already have a printer check what it can do as you might be surprised and go from there.
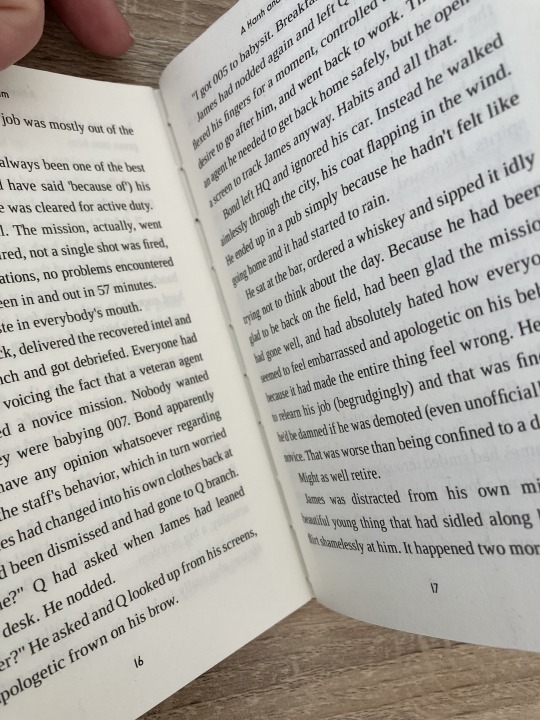
now to the pamphlets! you don't need a cover - I have one for the long stitch pamphlet but for the saddle stitch one I didn't bother and just made sure the first page had a title on it. you can always take a different piece of paper and print a cover on or or just use coloured cardstock and create a simple cover, but a cover is not necessary unless you're doing a long stitch pamphlet. all you need to do is to punch holes and start sewing. there are a few different stitch types below, I wouldn't say any of them are more difficult or easier than others, but they do look different so...pick one you like the look of and go from there?
pamphlet stitch (uneven number of holes) I haven't ever done a pamphlet stitch but here's a tutorial for how to do it: https://www.starpointestudio.com/simple-pamphlet-stitch-book-step-by-step/
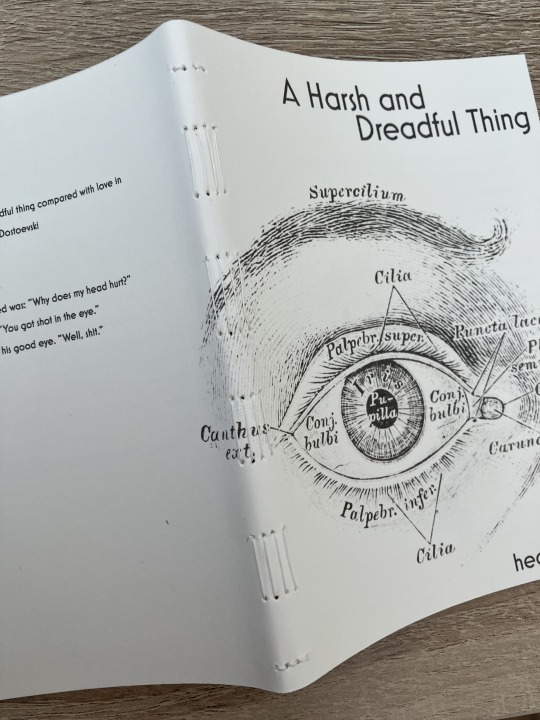
saddle stitch (uneven number of holes) I realised that what I was thinking of as a pamphlet stitch is actually saddle stitch, as in this A7 pamphlet:
here's a tutorial for how to sew saddle stitch: https://www.bookbindingworkshopsg.com/saddle-stitch-bookbinding-tutorial/ here's a video tutorial: https://www.youtube.com/watch?v=aWHkY5jOoqM (sealemon has a lot of bookbinding tutorials and I know many people who like her videos, I used her tutorial for coptic binding way back when I first made a book but I can't otherwise vouch for the quality as I haven't used her videos)
french link stitch (even number of holes) in this one I used french link stitch which I typically use for thicker textblocks that i'm not planning to use tapes with as the french link gives it some robustness, I used it here because I had never done it before and wanted to try it out. I am planning to take these stitches out and re-sew this pamphlet with a cover now that I've found a suitable piece of transformer fanart to use as a cover:
french link tutorial. it's quite long but it has a colour coded bit towards the end that shows how the thread is supposed to link which i find very helpful to visualise: https://www.handmadebooksandjournals.com/bindings/french-link-stitch-binding/
here's a video tutoral from DAS bookbinding (he is my go to for techniques and he has the most soothing Australian accent as well, though fair warning not all of his videos are for beginners): https://www.youtube.com/watch?v=O4ZPdbaM-Ws
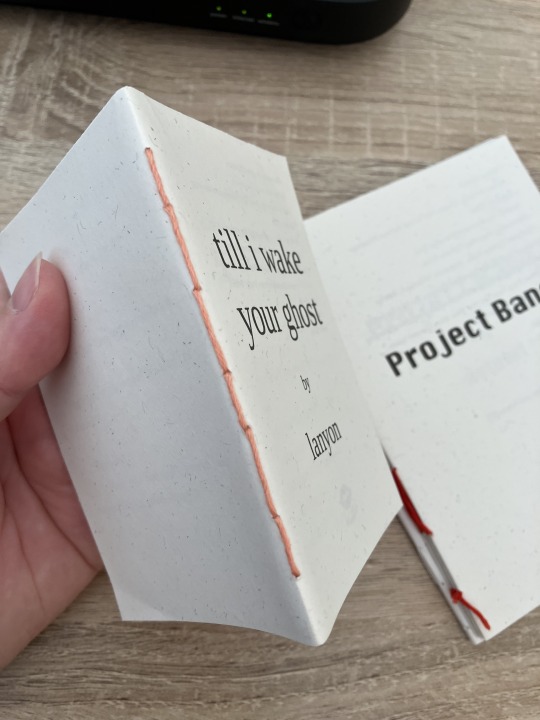
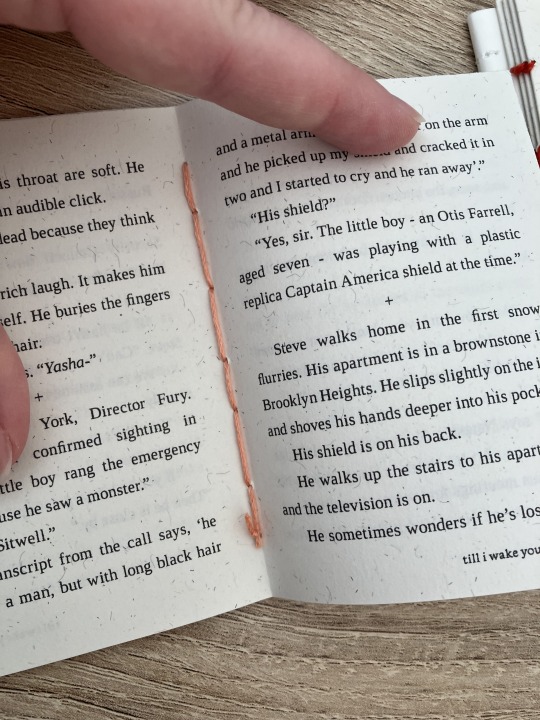
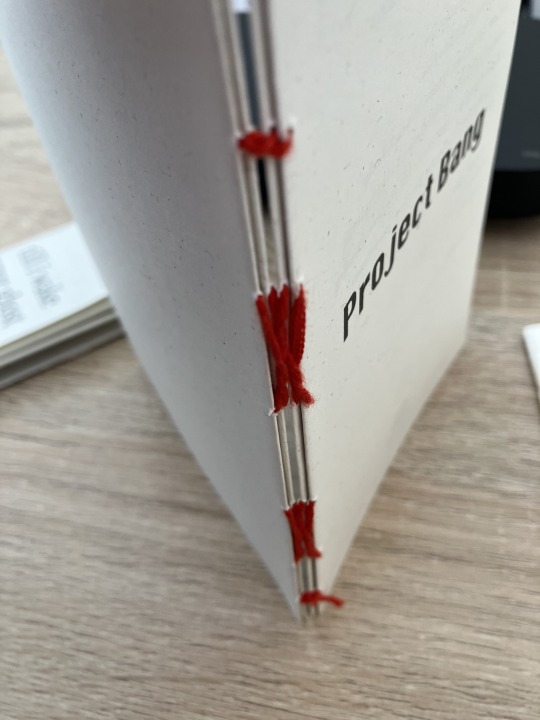
long stitch (even number of holes) for this one I used long stitch and I had a cover. this one is my favourite variation because I can make these pretty and simple covers and the stitch looks nice on the outside as well, so this one scratches the 'i want to make a book' itch for me.

here's a tutorial that also includes a how to on a cover that is different from my cover: https://lccprintmaking.myblog.arts.ac.uk/files/2020/06/Long-Stitch-Tutorial-A4.pdf DAS also has a video tutorial for long stitch but it's like three videos long, maybe watch it later :'D here's one I haven't watched but seems decent: https://www.youtube.com/watch?v=XnignTL_wDQ
you can use saddle stitch for this kind of pamphlet as well, that's what I did for dozens of ships and hundreds of souls (https://ashmouthbooks.tumblr.com/post/681587080267202560).
I hope this helped!!
2K notes
·
View notes
Text
as per a request in my local renegade server: here is my process (such as it is) for the stenciled covers i've done for my binds. obviously, huge thanks to everyone in the renegade discord for teaching me most of what i know about bookbinding. this tutorial only exists thanks to the resources they've made available and the conversations i've had there.
material list
vinyl cutter (i have a silhouette portrait 3) + mat + blade
stencil vinyl (i have this one, but have had some adherence troubles with it. unclear whether this is just The Nature Of Stencil Vinyl or whether there's a better brand out there. adhesive vinyl can also be a viable option, although i haven't personally experimented with it yet.)
transfer tape (i have this stuff. it's fine.)
weeding tools (i have this hook and a very fine tip pair of tweezers. i highly recommend getting a hook, especially if you—like me—are haunted by the specter of carpal tunnel. get an off-brand one or get one on sale, though. i only have the silhouette brand one because it was on clearance.)
acrylic medium (i have this one because it was on sale at the time i was buying acrylic medium. when i replace it, i will be replacing it with a matte one. the gloss definitely has a noticeable sheen that i don't love.)
acrylic paint (literally any paint will do. i've been mostly using the decoart extreme sheen because it's $4 at michaels. you may be noticing a theme here.)
stiff stenciling brushes (the ones i have are similar to these but cost even less. again, there's a theme here.)
an iron and some parchment paper (jury is still out on whether using heat to "set" the pattern is necessary, but i do feel like it melts the paint a bit into the bookcloth and lessens the extent to which the pattern sits above the bookcloth.)
your trusty bone folder
instructions and a truly hideous number of words under the cut.
step 0.5: discern what will make a good stencil and what will make you hate yourself, your life, and the art of bookbinding
there are a LOT of different ways to put titling on a book. you could do a paper cover with a printed design or paste paper labels onto bookcloth or foil your title onto your cover with heat activated foil. the best method depends on what kind of design you have in mind, what tools you have available to you, and what materials you're working with (for example, i've had very bad luck getting acrylic paint to adhere to Allure bookcloth, but Allure does foil like a dream).
as far as stencils are concerned, you can kind of sort cover designs into three categories:
BEST for stencils: big, bold shapes on larger format books (think letter folio or letter/legal quarto)
OKAY for stencils, but you might hate yourself: intricate detail at a large enough form factor for it to be cut well by your vinyl cutter
BAD for stencils, you will die and it will hurt the entire time you are dying: lots of intricate detail and lots of fine lines
below are examples of category 1, 2, and 3 (all designed for letter folio). to be clear, category 3 can technically be possible, depending on the design. but only undertake it with the awareness that you will die, and it will hurt the entire time you are dying.


step 1: design a thing to put on your cover
i'm not going to go too in depth on this because cover design is a HUGE can of worms. a few pointers, though:
i never start designing my cover until my text block is done. this allows me to design my cover at "full size" based on the measured size of my text block and cover boards.
i fully lay out my cover in a separate program before exporting a transparent PNG to silhouette studio (or whichever proprietary software you have to use to communicate with your particular vinyl cutter). i use affinity designer. some free options would be inkscape (if you want to work with vectors) or gimp.
i design my cover on a document with dimensions of (HEIGHT of boards + 20 mm) x (WIDTH of boards or spine + 20 mm) and 10 mm margins. the area within the margins represents the actual dimensions of the thing i'm designing, while the area outside of the margins creates a mask that prevents me from getting paint on things i don't want paint on (like the covers, if i'm creating a spine stencil).
i always outline my document with a 3 or 4pt black line. this creates the outer edge of my stencil and provides my vinyl cutter with a cut line. if you're working with a smaller vinyl cutter (like the cricut joy) there are ways to jigsaw designs together from smaller pieces of vinyl, but i'm not the person to ask about that. i specifically bought a portrait so that i didn't have to worry about that.
here's an example of one of my affinity files from a recent cover. i've exaggerated my outline to make it clearer. you can also see that i use affinity to experiment with color combinations. before i export, i turn all my elements black and make any backgrounds transparent, meaning that the PNG i import into silhouette studio looks like the one on the right.

step 2: cut and weed your stencil
again, not going to go terribly in depth here. there is a veritable army of youtubers out there with tutorials about how to use [insert propriety vinyl cutter software here]. but, again, a few pointers:
with my particular vinyl cutter and stencil vinyl, i usually cut my stencils with the material set to "washi," depth at 1, force at 13, and speed at 4. google, experiment, see what works. also, you want to put your stencil vinyl on the mat with the blue vinyl facing UP, and you don't want to mirror your design. with stencils, what you see is what you get.
i cut my vinyl a bit bigger than necessary because i'd rather waste a bit of vinyl than have to worry about a stencil falling off the edge of my vinyl because i misaligned it on the mat.
unlike HTV, you will be weeding out all the black parts of your original image. be prepared to hate the letters "e" and "a" forever, because you will have to somehow keep the little eye of them in place while you pry out the rest of it.
step 3: apply your stencil to your case
alright, now let's get into the meat of it. i always stencil after my case is finished but before i case in my book. this means that if i totally fuck it up, i can trash the case instead of the entire book.
additionally, i completely stencil my spine first (as in lay down stencil, paint, remove stencil) and then stencil my covers. i've found that it's easier when you don't have stencils overlapping and sticking to each other.
OPTIONAL STEP: mark guides onto your cover to help you position your stencil. whether or not i do this step depends on the design. a lot of the time, i just eyeball it. but for some designs, precision is key. for those projects, i use my ruler to mark out guides in white chalk for where i need certain elements of the stencil to fall. (i used guide marks for the "penguin clothbound" copies of the The Weight Collected that i've been using as an example in this post—the black rectangular boarder would've made uneven placement REALLY obvious.)
use transfer tape to remove your vinyl from its slick backing. what i've found is that you really, really don't want your transfer tape to be too sticky. you want it just barely sticky enough to pick up the stencil if you rub it down with a bone folder or your fingernail. i have a piece of transfer tape that i stuck to my jeans a bunch of times and then proceeded to use for 8 books in a row. it is, frankly, still a little bit too sticky. i have rolled it up so that i can use it for the next 8 books, at which point it will presumably be the right level of stickiness.
position your stencil. when you're happy with it, rub it firmly down with your bone folder. then do it again. then use your fingernail to score down over the titling text. then pray. in my experience, stencils prefer to stick to transfer tape rather than bookcloth. ymmv.
start at one corner of your stencil. carefully begin peeling back the transfer tape. i've found that essentially folding back the transfer tape (like, the corner that's been freed from the stencil being folded back away from the stencil) helps the tape to release. go slowly, rubbing down with the bone fold as necessary.
after you've finally manage to pry the tape off, go back and smooth down the stencil and firmly rub it down to get it to adhere to the bookcloth as thoroughly as possible with as few ripples or air bubbles as possible.
step 4: paint time!
here is a secret that the renegade discord taught me that i am now passing on to all of you: before you put any paint on your stencil, put down a layer of clear acrylic medium. the medium will finish the job of pasting down the stencil to your cover, and any leaks that happen in the process will be clear medium instead of colored paint (and will therefore be basically unnoticeable). ergo:
stipple a thin coat of acrylic medium over your stencil. you want to use an up-and-down daubing motion, not a brushing motion. brushing will get paint under your stencil. let dry.
after your medium is dry, stipple a few thin coats of your colored acrylic paint onto your stencil. let dry between coats. (i usually find that two coats is enough.) again, try to keep your coats thin. you don't want a thick layer of paint because that will create a raised surface above your bookcloth.
let your paint fully dry. i usually leave it overnight, but if i'm feeling especially impatient, i still make sure to at least give it a good three or four hours.
peel up your stencil. your weeding tools will once again come into play here to pry up little bits and pieces of stencil (like the stupid eyes of the "a"s and "e"s that were so annoying during the initial weeding stage).
step 5: optional setting stage
again, jury is still out on whether or not this is necessary, and the effects are pretty subtle. but i do it every time anyway. some tips:
use an iron on very low heat (i keep mine at the low end of the synthetic setting) and with steam turned OFF
keep a piece of parchment paper (NOT waxed paper. you want the slick paper that you put under cookies to keep them from sticking to the pan.) between the iron and your cover.
press the iron down, don't rub it like you're ironing a shirt. it's possible to smear your paint doing that (ask me how i know).
i usually lay the iron down on a section for 10-15 seconds at a time, then lift it and move it to another section.
start with less of everything (less heat, less time) and build up. always better to be conservative with this.
i usually continue until the paint is warm to the touch, then move onto another section. after it's cooled, i evaluate if i feel like it's melted into the cloth enough. if not, i repeat the process.
step 6: BOOK
congrats, you have put a design on a book cover. the world is your oyster. go forth and make books. become ungovernable.


113 notes
·
View notes
Text
on the topic of writing software
I want to ramble at you about some writing software options. 98% of the time I'm perfectly content with LibreOffice Writer (and previously I used Word, back when Microsoft products were less shitty). But every now and then when I have a new project (like now - more on that later) I start looking for something shiny and new to try. And I fell down into another research rabbit hole lol
I usually don't talk a lot about this bc my needs are very simple, and not sure how useful my opinion is to others, but I enjoy the topic. It's an intersection of creative writing and tech nerdiness and I like both of those things. Also what writing software you prefer really depends on the type of writer that you are, and everyone has a slightly different writing process and I find that fascinating.
Now, as I said, I'm coming at it from a slightly tech-nerd angle. I don't care if the installation is clunky, I'm happy to see the words open-source, and the need to create an account will already mildly piss me off (:
Don't worry, I'm not as intense as the guy writing his novel in Vim. Though fucking respect. And I can't say I'm not tempted to try it even with the steep learning curve lmao (Seriously, if you don't know Vim is notorious among software developers.)
Anyway, things I've tried so far:
Manuskript: this was listed as an open-source Scrivener alternative (though I haven't tried Scrivener. so.). I gave it a go when I was writing heart worth the trouble and it was pretty nice. It helped me when I had to move scenes and chapters around. But overall I think it was made with plotters in mind bc it wants you to enter a lot of information upfront. I'm not a planner/architect type of writer so this type of software is a bit overwhelming for me. Still, the fact that it's open source and works on Linux gets kudos from me.
Wavemaker: I recently played around with this, and I actually surprisingly like the features it has. You can put multiple books in a project, which is very nice if you like to work on different things, like fanfic, novels, etc. The mindmap is a feature I liked, though it's a bit clunky bc it collapses the text fields when you exit, and once I added an image field by accident that I could never remove lol I do like a bit of a snowflake method, so that feature is cool, and the cards are pretty straightforward too. Usually, my problem with these apps is that I don't even want to touch half of the features so they are pointless to me, but the features of Wavemaker were kind of nice. It's a web app that you can download and use offline but it's still working from your browser if that makes sense. That was what I didn't really appreciate. Also, it doesn't give you a lot of options to back it up. You either save the wavemaker file, export it into a document (which is fine, but it adds an extra step to the backup process) or you sync with Google Drive *shudders*
Things I want to try out:
Calmly Writer: now this is just purely a text editor that focuses on being very zen, streamlined, distraction-free, etc. It's pretty and it has typewriter sounds. (Yeah, I'm not immune to a pretty UI and harmless fun features alright? I can contain multitudes :P) It has an online version, but you can also download it, and works on Windows, Mac, and Linux. On paper, the desktop app requires a license, but the way they put it is that you can evaluate it for free and the evaluation doesn't have an enforced time limit... So. As good as free. (Though if I really like it, I would totally consider buying a license for 20usd that I can use on 3 computers, that seems fair. I appreciate a license over a subscription model for sure.) Honestly, I think this is the one I'm going to try next bc it just integrates perfectly into my writing process. That being: a multitude of messy, hand-written notes and notebooks + a document editor + backups on hard drive and GitHub (yes, really) ^^"
Shaxpir: This is on the opposite end of the spectrum basically, but out of the "fancy" ones, I kind of like the look of this the most. I like the statistics part in particular. But honestly, I probably won't try it bc it doesn't have a Linux version which would be a pain in the ass for me, and is cloud-based. I kind of don't really trust them, which is my biggest issue with these companies. (Although the creator's heart seems to be in the right place when it comes to AI. Basically, some of their features are based on machine learning and language models. For example, it will recognize passive voice, if it's an adverb with "-ly" or the emotion of a word. Which I think is all cool and fine and shouldn't be lumped in with generative AI. But he also had a website that did this analysis for already published works, and when people pointed out that it was sketchy, he took that down and I can respect that. I'm not sure how much it influenced the actual features of the app, maybe I'll just take a peek out of curiosity. The whole thing does make me have trust issues though lmao) If anyone has experience with it though, I'm interested to hear about it.
Obsidian: not a dedicated writing software, but rather an elaborate note-taking app. I heard good things about it from smart people lol If I really wanted to access my writing on my phone, I would probably use this bc it works on every platform and has end-to-end encrypted sync with version control. I heard you can also integrate it with GitHub which is always music to my ears lol But the setup probably takes a bit of time and I'm not particularly motivated to do that right now.
So yeah, those are the options that appeal to me right now. If anyone used these and has opinions, I'm all ears :D
137 notes
·
View notes
Note
Do you think it's a good idea to try and get away from Google Docs when it comes to writing? I really can't afford any other fancy program to write my drafts in, and it honestly seems like the easiest - not to mention, most convenient - program to use to share my manuscript with beta readers. I could use advice on this matter because I keep seeing things across the net about it being a bad place to work on writing, but I have no idea what to turn to to make things easy for me and my future beta readers.
This is such a good question. Thank you.
So, a little backstory. Ever since Google removed their motto "do no evil" they have gone down the rather predictable path of all big players of the rot economy: putting profits over user experience.
A little while back, there was rumor that Google trains AI with the content of google docs, then they said they don't really, they only scan the content and do nothing with it, and then they started blocking access to documents with sexy images. Do we believe that Google has our own best interest at heart? That's something everyone has to decide for themselves.
Back then, I made a post with alternatives for Google Docs, you can find it here, also check the reblogs for more options:
Now, is it a good idea to switch from google docs? I think it is, but I'm also not consistent with it. As you mentioned, it seems to be the easiest to share writing with beta readers, and I also still often use it for fanfiction.
But there are alternatives, and they require very little adjustment in the process. Let me give you two free options.
Ellipsus is webbased, meaning you can write in it in the browser on any device. They have sharing, specifically for beta reading, and an export function for AO3.
Reedsy (marketplace around everything self-publishing) has an editor. It is webbased, and they also have an option for sharing with beta readers. This software is aimed at book type-setting and exporting but it works just fine for copying to web.
Personally, I'm currently switching everything to LibreOffice (also free!) files in some cloud connected folder. I used to do a lot of mobile writing on my phone with a bluetooth keyboard but currently, I'm taking my laptop everywhere so LibreOffice works great for me. If I have to use my phone or tablet for some lightweight mobile writing, on vacation for instance, I can still use something webbased.
So, I hope I gave you some interesting options. Do I think it's a good idea to make us less dependent on Google? Yes, I do. I don't trust them.
We have alternatives, and they cost us nothing more than a little adjustment.
~ barbex
#writing software#writing tools#alternatives to google docs#barbex gives advice#ellipsus#reedsy#google docs#libre office
46 notes
·
View notes
Note
Do you still use Flash/Animate as your main drawing software? Flash was the program I learned to draw in, and I remember some of your process videos really helped me figure out how to make use of some of its tools. I remember there was a shark mermaid illustration you did, and I really loved how the underwater lighting effects looked in that one.

To this day, I still use this version of Flash from 2008. Newer versions have a quirk where it takes longer to save a document the larger it gets, so CS4 is where I've been for the past 16 years.
There's also this funny bug in it that will sometimes make Graphic symbols draw with the Add blend mode, which is normally exclusive to Movie Clips. This is great for exporting and it's what I did in my kyu-kurarin cover for the chromatic aberration effect.

106 notes
·
View notes
Text

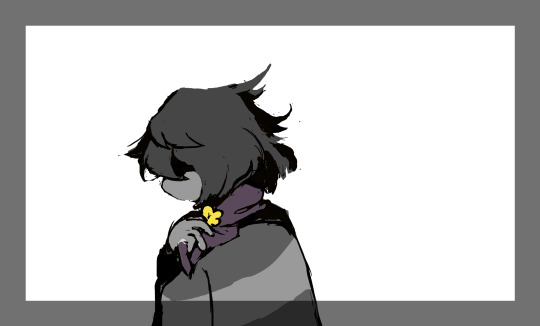
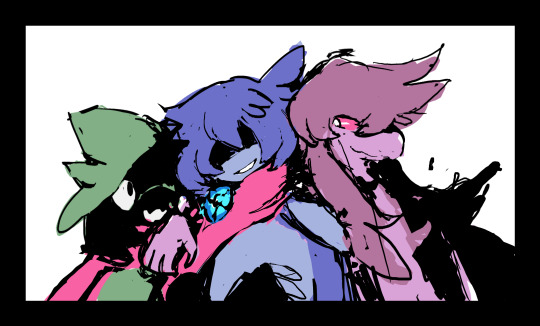
Ported all of the art into procreate (our current main drawing program) and having a blast working on it !
Can see it now feels more like our current art compared to when it was just clip studio paint . we originally planned for it Just be in csp , however realized it harder on body n more of a hassle , as well as just wont get that good of result
this just cuz body disabled n so been easier in current years to draw while laying down n all , csp is still hands downs a better software
--
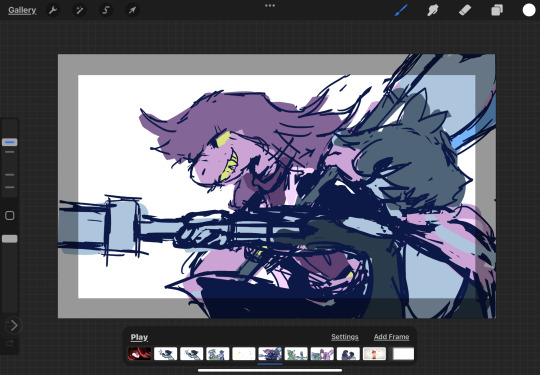
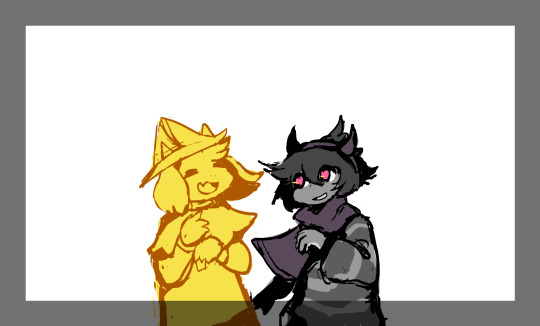
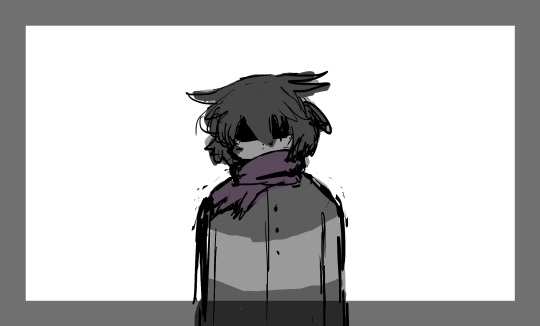
heres what looks like in procreate ! you can port procreate and csp files back n forth by exporting as photoshop document as both support psd files
in procreate , we have it set to "animation assist" with onion skin turned off and fps at 1 (just in case accidentally click play)
reason set it to "animation assist" instead of "page assist" is so that can have a foreground layer , which is this border here as it shows 1920x1080 size .
yippie :]
34 notes
·
View notes
Text
Writer's Talk
Dear Writer Friends,
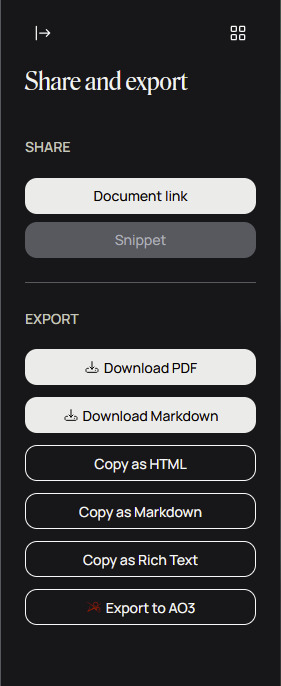
as Google Documents is no longer safe to use, you might want to consider @ellipsus-writes. It's a collaborative writing software, currently in beta stage, with a very firm anti gen AI policy.
It's free to use and comes with an Export to AO3 button
#ao3 fanfiction#gale dekarios fanfic#bg3 fic#bg3 fanfic#bg3 fanfiction#bg3 fanfic writers#writers of tumblr#writer community#writers on tumblr#writerscommunity#ao3 author#ao3 writers#ao3 community#fic writing
26 notes
·
View notes
Text
A Party To Die For Templates: SFS
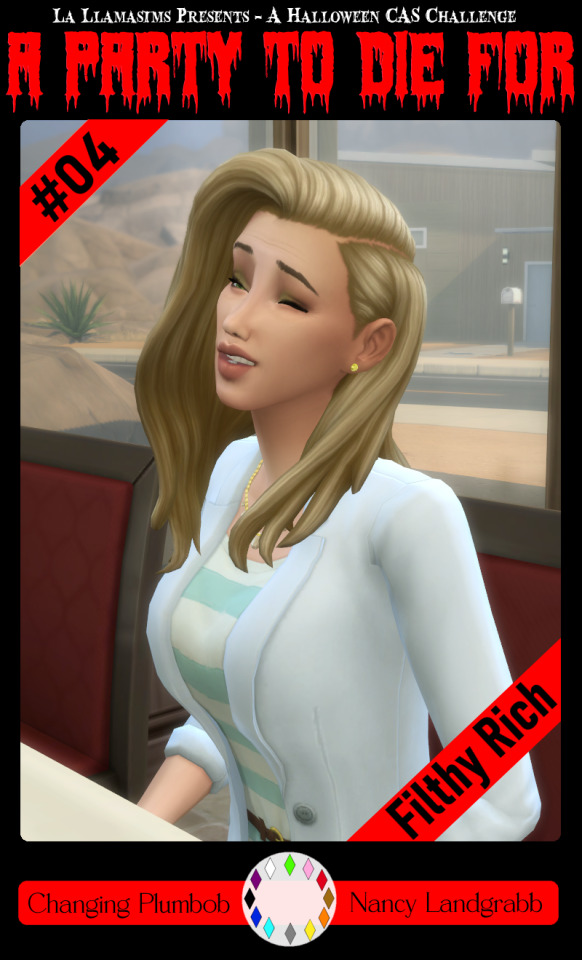
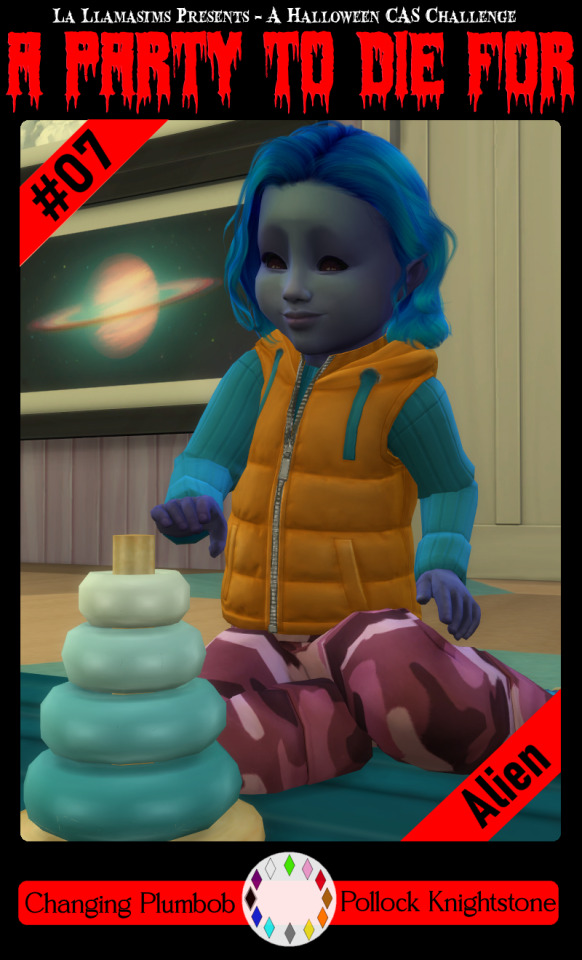
So I may have got a tad overexcited about the Halloween CAS Challenge created by @la-llama-sims, and I made templates for every prompt. I wanted to share them on the off chance someone wanted to also do the challenge but maybe didn't have time to do much other than screenshots.
Tutorial below on how to make your own cards using the templates if you are unfamiliar with photo software, all you need is the template and a screenshot of your sim! Very little technical skill required to so feel free to jump in for Simblreen (the month of October on simblr). Remember to go to the original creator post to check out the prompts and the hashtag given for creations is #LLPTDF. Hope to see some of your creations next month, keep them for the spooky season 🎃👻🦇
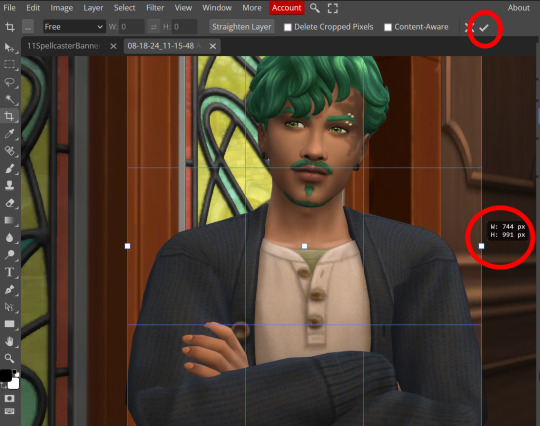
Strap in and follow along as I make Glenn here (he won't do the spellcaster prompt for Simblreen, it's dress up after all, but it makes sense for a demo)
Step one: Grab the zipped folder of templates on SFS HERE. Unzip the folder and put it somewhere easy to find in your documents, I have a tumblr specific folder my templates are normally sorted in.
Step two: Open your photo editing program of choice. I use paint.net which is old but for this demonstration I will use Photopea, the online free alternative to adobe. You will see the screen below
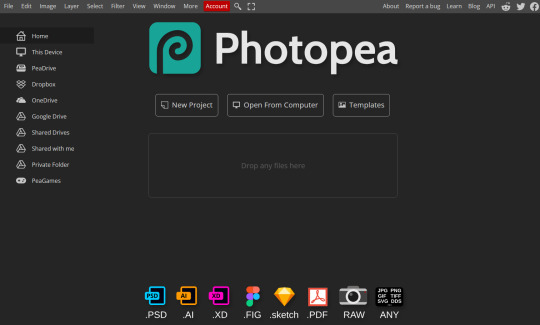
Step three: Click "Open From Computer" right in the middle under the main title. Find the screenshot you have taken that you would like to use and open it. Now the hole in my template is 744x991 but you can make it slightly bigger if you don't want to fuss as much with lining things up exactly. To resize image from the top bar (Image -> Image Size) We're going to use the crop tool when we have our picture.
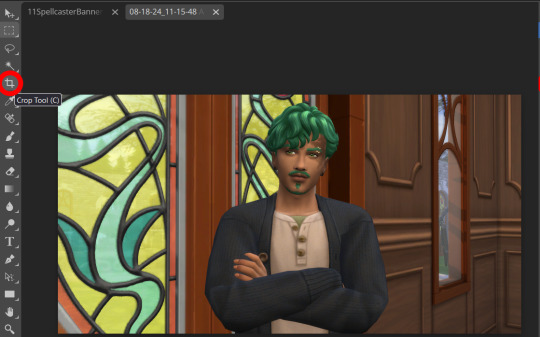
Step four: Pull on the squares at the edges to change the size. If you need click View in the top bar and you can zoom in to allow finer selecting. When you have the right size click the tick and copy the image. Keyboard shortcuts are Ctrl+A to select all, then Ctrl+C to copy.
Step five: Open the template you want to use (File -> Open, from the top bar). Add a new layer using either the top bar (Layer -> New -> Layer) or the icons on the bottom right.
Step six: With the new layer selected paste the image, Ctrl+V.
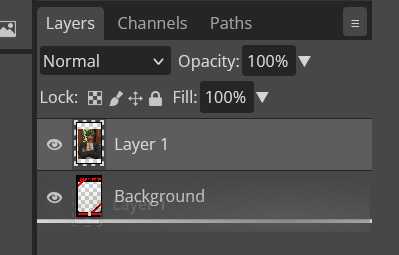
Step seven: On the right of the screen you'll be able to see layer order. Drag the layer with your sim underneath the background layer. This is what will let you slot in your picture.
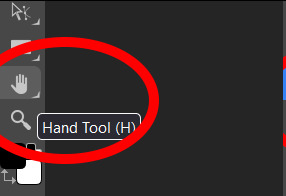
Step eight: Finishing touches! Unless you are super duper lucky your sim won't appear in the exact right place, you'll have to move them around using the move tool. For precision you'll need to zoom in and move your field of vision using the hand tool.

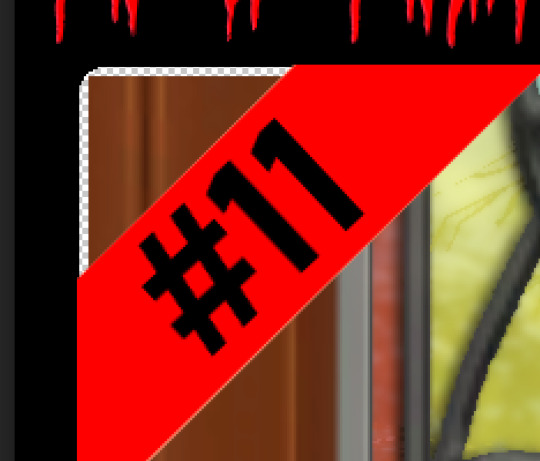
You'll know it's in the right place when you can no longer see any of the negative space behind it. I like to check both corners to make sure I've got it. This is where having a sim image slightly larger will make it easier.

If you like you can finish now. From the top bar File -> Export as -> PNG or JPG. The picture will save to your downloads folder. If you want to add your own text, keep reading, as I've left space at the bottom for your username, the sim name, and a profile pic or other logo. Or go ahead and crop it out, who needs extra hassle when there are cute CAS looks to be made?
Step nine: From the bar on the right select the large T to add some text, it will automatically spawn in a new layer. Scroll through text options and find one you like (the text style I used isn't in photopea so we will find another). Depending on the type of text you will likely need to play around with the size as well.
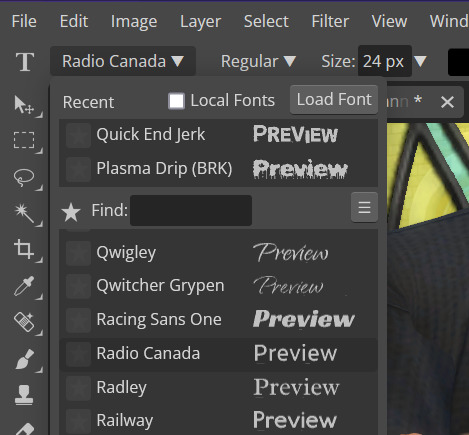
Step ten: Start typing. When you're done you can highlight what you have written and use that size box to adjust how big the text is. Select the move tool from the right to move your text where you want it. Repeat step nine if you want text on the other side. I've chosen to put my username on one side, and my sim's name on the other.
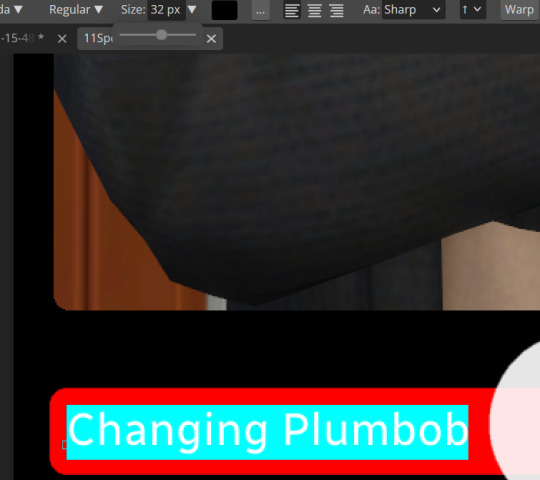
Step eleven: Logo time. Open a pre shrunk logo (I scaled my pride plumbobs down to 125x125) and copy. Back on the template add a new layer then paste your image (for some reason I had to copy twice before it would do the right thing, I don't have an explanation sorry). Then using the move tool and the hand tool get your image where you want it.

From the top bar File -> Export as -> PNG or JPG. Again it will have saved to your downloads folder.
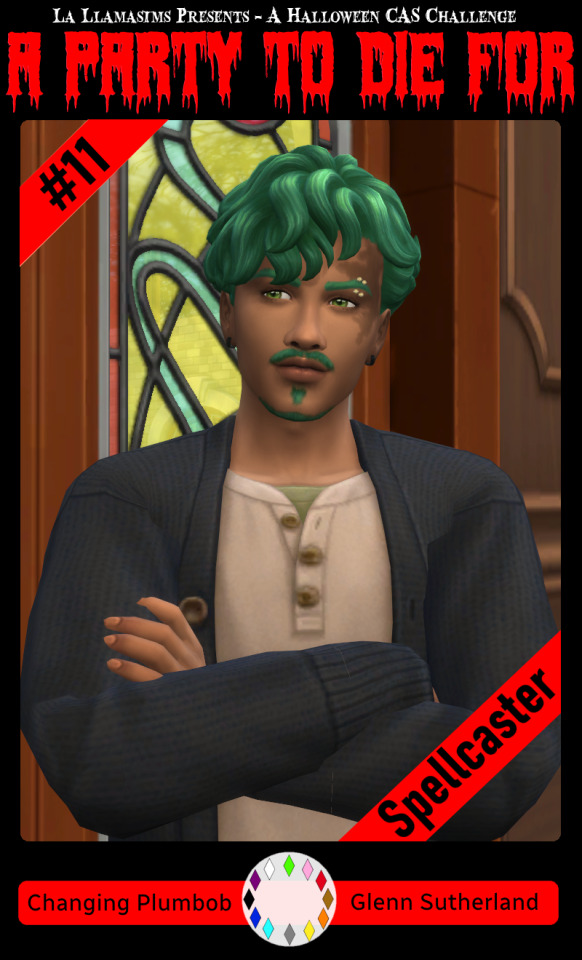
Voila, we have a Glenn card! Hopefully you have a your sim card. I spent hours doing up all the templates so feel free to fill them with your sims for the challenge. All I ask is that you don't claim templates as your own work or shove them behind a paywall because rude and the whole premise of Simblreen is free treats! Obviously you do NOT need the templates to participate in the challenge, the cards are just how I'll be presenting mine. Like CAS challenges the possibilities are most often only limited by your imagination.
#sims 4#the sims#simblr#my sims#ts4#active simblr#Enjoy my friends#I wanted all of us to be able to do Simblreen#Even if we don't have prior skills
53 notes
·
View notes
Text
Simplify Your Jute Export Process with Sky ERP Export Plus

In the competitive world of jute exporting, having a reliable and efficient document management system is crucial. Exporting jute, like any other commodity, involves attention to detail in Documentation. Bills of lading, commercial invoices, packing lists, certificates of origin, and letters of credit are just a few of the critical documents that must be accurately prepared and submitted. Jute exporters face the unique challenge of managing complex documentation requirements, navigating compliance regulations, and ensuring timely deliveries.
Sky ERP Export Plus is an Export Documentation Software that offers jute exporters the tools they need to streamline their documentation processes, ensure compliance, and improve operational efficiency. Sky ERP Export Plus significantly reduces the time and effort required to prepare and manage export documents. This allows your team to focus on other critical aspects of your business, such as customer service and market expansion.
Our Export Documentation Software for Jute Exporters streamlines the entire export process, starting from order acceptance to payment realization. Once an order is accepted, the software automates the creation of necessary export documents, ensuring accuracy and compliance. This comprehensive solution ensures efficiency, reduces errors, and improves cash flow management throughout the export process.
This Export Documentation Software centralizes all your export documentation in one easy-to-use platform. From generating commercial invoices to preparing bills of lading, every step of the documentation process is automated, reducing manual errors and speeding up operations. Understanding that the jute export industry has specific requirements, Sky ERP Export Plus offers customization options that allow you to tailor the software to your business needs. Our Export Documentation Software for Jute Exporters adapts to fit your business whether it’s custom forms, specific compliance checks, or integration with your existing systems.
Sky ERP Export Plus strikes the perfect balance between simple and functional. The intuitive design ensures that even those with minimal technical knowledge can quickly learn to use the software. The layout is clean, with clearly labelled menus and options that guide users through the various functions.
0 notes
Text
Weirdly Motivated to Write


Well, I did say that I have a new keyboard—to correct my posture and not look like a pretzel while I work remotely. Small victories, right?
Now, let’s talk about motivation. Because for some reason, I am absolutely buzzing with it today. Is it because of my keyboard? Most likely. Is that weird? Probably. But hey, I never claimed to be normal.
See, besides being a full-time student, I also have a job. And that job? Writing. Creating. Capturing life in words, pictures, and fleeting moments of inspiration. Filming, writing, photography—these are the things that make me absolutely happy. And honestly? Life is just too beautiful not to share.
There’s something about having the right tools that makes everything feel different. You could give me the exact same blank document yesterday, and I wouldn’t have been nearly as eager to write as I am today. But now? With my new keyboard? I feel like I could churn out a whole novel, rewrite history, or at the very least, write an unnecessarily long blog post about why I feel like writing.
Maybe it’s the clickity-clackity. (Yes, that’s a technical term.) There’s just something deeply satisfying about hearing each keystroke, like a tiny round of applause with every word I type. It’s hypnotizing. Encouraging. Addictive, even. Without it, I don’t think I’d be half as motivated to write.
And that brings me to a very important question:
Could this mean my iPad will replace my laptop?
Ha! Not a chance. Never. Not in a million years.
As much as I love this setup, there are things my iPad just cannot do. And honestly, those things make a huge difference in my daily workflow. Don’t get me wrong—iPads are fantastic. They’re lightweight, portable, and perfect for quick notes, reading, or sketching. But when it comes to serious work? My Windows laptop remains irreplaceable.


Why My Windows Laptop Wins Every Time
Multitasking Like a Pro iPads have some multitasking capabilities, but let's be real—nothing beats having multiple windows open, side by side, without limitations. On my laptop, I can have a research paper in one window, my notes in another, a video playing on the side, and Spotify running in the background. Try doing that on an iPad without constantly swiping between apps. It’s just not the same.
File Management That Actually Makes Sense The Windows file system is superior. Hands down. Drag-and-drop functionality, proper file explorer, external drive support—it’s just easier. iPads, on the other hand, have a clunky file system that often makes me want to scream into the void. Copying files? Moving them? Finding them again? It takes way longer than it should.
Software Compatibility & Heavy-Duty Programs This one’s a dealbreaker. There are so many professional-grade applications that just don’t run on iPads. Things like:
Adobe Premiere Pro for serious video editing (iPad versions are limited)
Photoshop & Illustrator (yes, they have mobile versions, but they’re nowhere near as powerful)
Microsoft Excel with Macros (because let's be honest, the iPad version is lacking)
Programming software & full IDEs (if I ever decide to code, my iPad will just sit there, useless)
Mouse & Keyboard Freedom Yes, iPads can connect to a mouse and keyboard, but do they truly function like a laptop? Nope. There are still weird limitations. Right-clicking? Custom shortcuts? The precision of a real trackpad or external mouse? Windows just does it better. Period.
Downloading Anything Without Jumping Through Hoops iPads don’t let you download everything you want, especially if it’s outside the App Store. Need a program that isn’t on Apple’s list of approved software? Too bad. Meanwhile, on Windows? I can download whatever I want, whenever I want, however I want. No restrictions.
Serious Writing & Formatting Writing on an iPad is fine for quick drafts, but when it comes to formatting long documents, citations, and exporting files in different formats? My laptop is my best friend. Whether it's proper PDF editing, running reference managers like Zotero, or managing multiple Word documents with complex layouts, iPads just don’t cut it.
Gaming & Emulation Okay, maybe not work-related, but still important! iPads have mobile games, sure. But do they run full-fledged PC games? Nope. Can I use them for game modding? Nope. Can I play older games with emulators? Again, nope. My Windows laptop, on the other hand? Unlimited possibilities.
The Verdict?
As much as I love the convenience of my iPad + keyboard combo, it will never replace my laptop. Ever. My laptop is where the real magic happens—the deep work, the serious projects, the things that actually require a proper computer.
But will I still use my iPad for writing on the go? Absolutely. Because nothing beats the clickity-clackity joy of my new keyboard. And if that keeps me weirdly motivated to write, then hey—I’ll take it.
So if you ever see me typing away somewhere, looking ridiculously focused, just know—it’s not me. It’s the keyboard.
#book#books#bookstore#new books#book review#booklr#books and reading#bookworm#book quotes#book blog#old books#bookblr#books & libraries#read#reading#reader#currently reading#long reads#library#literature#classic literature#english literature#book lover#english#classic#classics#bookshelf#bookshelves#productivity#ipad
10 notes
·
View notes
Text
How to make Tattoos/Skin Textures for Final Fantasy 14
Hi there! I made a video about this a long time ago, essentially it is still the same work flow even though the Textools UI has changed a little bit with the Dawntrail update. Please mind that the video is a little old, recorded with a free software and I personally have zero editing skills. From experience and from what other creators told me it helped them a lot so I would like to bring it to more people and share my wisdom. This is a "beginners guide" for now, I can and will expand on it if necessary. You're always welcome to ask me questions. Join my discord or send me a dm! Let's start with what we need to make a tattoo/skin texture:
- Textools - Final Fantasy 14 with subscribtion - Substance Painter - Any Photo editor (Photopea is a free Photoshop online clone) - Not required but it could help: my videos
Step 1
Open your fbx in Substance Painter by clicking "Open" then "New" or Ctrl + N, with the following settings: PBR Metallic Roughness (Starter Assets) Resolution 2048 You can find the Bibo+, Gen3 and TBSE .fbx file here!
Step 2
Import your assets by dragging and dropping them into the Asset Library, then set them to "Texture" and import into your preferred Asset Library Category.
Step 3
Drawing: You can draw directly onto the 3D model and on the UV/2D planes. For that create a paint layer, select your brush, set your color in "base color". Assets: You can drag and drop your assets onto the 3D model, then select "Base color". This will project the asset in 3D. You can change the projection properties on the right under your layer selection or by right clicking in either of the windows. You can also create a "Paint Layer" and drag and drop the asset into the "Base color" slot. This will replace the fill color with the asset. Please make sure to make linework have a transparent background before using your assets.
Step 4
Whenever you're done arranging your tattoos/textures, it is time to export. Export with the following settings: - Output template: Document channels + Normal + AO (With Alpha) - Size: 2048 is more than enough for skin textures in FF14!! 4096 is almost overkill but will result in better quality, if you're a Mare user, please don't blast others with a 4k tattoo/skin texture unless it's really necessary - Padding: Dilation + Transparent
Step 5
Export the Skin Diffuse Material from Textools by selecting Character then choose your Characters race and gender. Midlanders share their skin material with Miqote and Elezen.
Step 6
Open a photo editor of your choice, open the skin Diffuse png and your Substance Painter Export. Adjust the layers if needeed so your tattoo/skin texture is above the skin texture. Export as png.
Step 7
Replace the Skin Diffuse png with the one you've just created, save to FFXIV to apply your changes to the game files and then launch the game to check the results!
If you have any questions please don't hesitate to DM me here or on discord @arimaemae
#ffxiv tattoos#tutorial#guide#skin texture#tattoo guide#ffxiv tutorial#ffxiv#ffxiv oc#final fantasy xiv#ff14#final fantasy 14#texture
14 notes
·
View notes
Text
using git and a … wikipedia says that the generic term for what github and gitlab are is 'software forge' for document editing is pretty great
you can use your favorite text editor! you can track a multi-file project! the default workflow encourages you to keep copies both on your computer and in the cloud! you can log what changes you're making!
if you accidentally edit with the wrong account you can go edit the history, it'll be a pain but you can.
the other options for "edit a document and show it to your friends as you edit" are, like:
google docs. it's a weird proprietary format and if you export to html it will be a horrible mess of html that needs cleanup. you don't by default end up with your file constantly up to date on your computer. it's super easy to end up viewing a doc with the wrong account.
edit in some platform on your computer and upload files to share them with your friends. you will have to upload the files a lot to lots of people if you want to keep them all up to date.
use some weird other web text service. it might also randomly go down and delete everything and there's way less of a robust advice ecosystem
unfortunately if you use a software forge they might ask you if you want to add a kubernetes cluster. and also they often won't enable word wrap on plaintext.
(im currently writing stuff on gitgud.io which has a fairly lenient ToS)
7 notes
·
View notes
Text
Hey, if you frequently use any kind of word processor (and especially if you write fiction of any kind) and hate that your work is being scraped for AI slop, then try giving Ellipsus a look. It's an alternative word processor that's strongly against AI (the bare minimum) and it has collaboration centric features. Options for drafts to be attached to a main document, export to ao3, import from google docs and microsoft word, and others. It's still in beta, but it looks promising. I'll personally be trying out for the next for weeks.
6 notes
·
View notes