#FREE IMAGE OPTIMIZATION TOOLS
Explore tagged Tumblr posts
Visit Tumblr Blog
Explore Tumblr blogs with no restrictions, modern design and the best experience.
Last Seen Tumblr Blogs


Fun Fact
There were a total of 171.5 billion posts on Tumblr in 2019.
Text
Unlock Your Potential: The Ultimate Guide to HugeTools.net
In today’s fast-paced digital world, having access to the right tools can make all the difference in boosting productivity, saving time, and achieving success. Enter HugeTools.net , your ultimate toolkit designed to simplify even the most complex tasks. Whether you're a developer, marketer, student, or entrepreneur, this platform has everything you need to get things done efficiently.
Welcome to our comprehensive guide where we’ll explore what makes HugeTools.net so special, highlight its key features, and show you how it can transform the way you work. Let's dive in!
What Is HugeTools.net?
HugeTools.net is an innovative online platform offering a vast array of free tools tailored to meet the needs of modern professionals and hobbyists alike. From text manipulation and image optimization to data conversion and SEO utilities, HugeTools.net provides solutions for almost every task imaginable.
Our mission is simple: empower users by delivering powerful, user-friendly tools that save time, reduce effort, and deliver high-quality results. No matter your skill level, you'll find something here to help you achieve your goals.
Key Features of HugeTools.net
Let’s take a closer look at some of the standout features available on HugeTools.net:
1. Text Tools
Manipulating text has never been easier with our collection of text tools:
Convert case (uppercase, lowercase, sentence case).
Remove extra spaces or duplicate lines.
Generate Lorem Ipsum for testing purposes.
Perfect for writers, developers, and anyone working with large amounts of text.
2. Image Optimization Tools
Optimize your images effortlessly with these handy utilities:
Resize images for web or print.
Convert file formats (JPEG to PNG, etc.).
Add watermarks for branding purposes.
Ideal for designers, bloggers, and photographers who need optimized visuals without compromising quality.
3. Data Conversion Tools
Transform data into different formats quickly and easily:
CSV to JSON converter.
XML to HTML transformer.
Base64 encoder/decoder.
Great for developers and analysts handling complex datasets.
4. SEO & Marketing Tools
Enhance your online presence with our suite of SEO and marketing tools:
Meta tag generator.
URL shortener.
Keyword density checker.
Helps marketers and content creators improve website performance and visibility.
5. Developer Utilities
Streamline coding tasks with specialized developer tools:
Color picker and palette generator.
Regex tester.
QR code generator.
Saves time for developers and simplifies common coding challenges.
Why Choose HugeTools.net?
Here are just a few reasons why HugeTools.net stands out from the competition:
User-Friendly Interface: Our tools are intuitive and require no technical expertise to operate.
Free to Use: Access all our tools without any hidden fees or subscriptions.
Constant Updates: We regularly update our platform with new features based on user feedback.
Reliable Performance: Trust us to deliver accurate results every time.
At HugeTools.net, usability, reliability, and accessibility are our top priorities. That’s why thousands of users worldwide rely on us to simplify their workflows.
How to Get Started
Ready to try HugeTools.net? Follow these simple steps:
Visit https://hugetools.net and browse through the categories.
Select the tool that matches your needs.
Follow the on-screen prompts to input your data or upload files.
Download or copy the output as needed.
Explore additional options within each tool for advanced functionality.
It’s that easy! Within minutes, you’ll be up and running with one of our powerful tools.
Tips and Tricks
To get the most out of HugeTools.net, consider these pro tips:
Combine multiple tools for enhanced productivity (e.g., optimize an image and then add a watermark).
Bookmark frequently used tools for quick access.
Check the "Help" section for tutorials and FAQs if you encounter any issues.
Share your experience with others—your feedback helps us improve!
Success Stories
Don’t just take our word for it—here’s what real users have to say about HugeTools.net:
"As a freelance graphic designer, I rely heavily on HugeTools.net to compress my images before sending them to clients. It saves me hours of work every week!" – Sarah M., Graphic Designer
"The CSV-to-JSON converter saved my team during a tight deadline. We couldn’t have completed the project without it." – John D., Software Engineer
These testimonials speak volumes about the impact HugeTools.net can have on your workflow.
Conclusion
HugeTools.net isn’t just another collection of tools—it’s a powerhouse designed to revolutionize the way you work. With its diverse range of functionalities, commitment to user satisfaction, and constant innovation, there’s no reason not to give it a try.
Start exploring today and discover how HugeTools.net can transform your productivity. Who knows? You might just find your new favorite tool!
Call to Action
Ready to boost your productivity? Head over to HugeTools.net now and start using our free tools! Don’t forget to leave a comment below sharing your favorite tool or suggesting new ones we could add. Happy tooling!
#Secondary Tags (Specific Features)#Text Tools#Image Optimization#Data Conversion#SEO Tools#Marketing Tools#Developer Utilities#CSV to JSON Converter#QR Code Generator#Regex Tester#Meta Tag Generator#Tertiary Tags (Audience & Use Cases)#For Developers#For Marketers#For Students#For Entrepreneurs#For Designers#Work-from-Home Tools#Remote Work Tools#Digital Marketing Tools#Content Creation Tools#Graphic Design Tools#Long-Tail Tags (Specific Phrases)#Best Free Online Tools#Tools for Boosting Productivity#How to Optimize Images Online#Convert CSV to JSON Easily#Free SEO Tools for Beginners#Quick Text Manipulation Tools#Enhance Your Workflow with HugeTools.net
0 notes
Text
#Technology Magazine#Free Online Tool#Interactive Tools and Collection#Internet Tools#SEO Tools#Learn Search Engine Optimization#Computer Tips#Freelancer#Android#Android Studio#BlogSpot and Blogging#Learn WordPress#Learn Joomla#Learn Drupal#Learn HTML#CSS Code#Free JavaScript Code#Photo and Image Editing Training#Make Money Online#Online Learning#Product Review#Web Development Tutorial#Windows OS Tips#Digital Marketing#Online Converter#Encoder and Decoder#Code Beautifier#Code Generator#Code Library#Software
0 notes
Text
Top Free Image Optimizer Software
In today's digital age, where visuals play a crucial role in websites, apps, and social media, it's essential to ensure that your images are not only stunning but also optimized for faster loading times. Slow-loading images can significantly impact user experience and SEO rankings. However, investing in image optimization software can be expensive. Luckily, there are several top-quality free image optimizer tools available that can help you compress your images without compromising their quality. In this article, we will explore these tools and how they can benefit your website or application.
What is Image Optimization?
Before delving into the specifics of image optimizer software, let's understand what image optimization entails. Image optimization is the process of reducing the file size of an image while maintaining its visual quality. Optimized images load faster on websites and consume less bandwidth, leading to a better user experience. This is particularly important in today's fast-paced online environment where users expect quick access to information.
The Importance of Image Optimization
Image optimization is crucial for various reasons:
Faster Loading Times Optimized images load faster, which is essential for retaining visitors on your website. Slow-loading images can lead to high bounce rates.
Improved SEO Search engines favor websites that load quickly. Image optimization can positively impact your site's SEO by improving its loading speed.
Reduced Bandwidth Consumption Optimized images consume less bandwidth, making them cost-effective for your website, especially if you're on a tight hosting budget.
Top Free Image Optimizer Software
SEOWagon SEOWagon is a user-friendly online tool that can compress both PNG and JPEG images. It offers a simple drag-and-drop interface, making it convenient for beginners. The tool reduces the file size while preserving the image quality. It provides options for lossless and lossy compression, allowing you to choose the best option for your needs. Image Optimization from SEOwagon automatically optimizes images as soon as they are uploaded to any website. It is an excellent choice for those who use their website as a content management system.
Why choose SEOWagon Image Optimization Tools
SEOWagon Image Optimization Tools offer a range of benefits that make them a compelling choice for individuals and businesses looking to optimize their website's images. Here are some reasons to consider SEOWagon for your image optimization needs:
User-Friendly Interface: SEOWagon's image optimization tools feature a user-friendly interface, making it easy for both beginners and experienced users to navigate the optimization process. You don't need advanced technical skills to get started.
Free and Accessible: SEOWagon's image optimization tools are available for free, making them an economical choice for individuals and small businesses with budget constraints. You can access these tools online without the need for downloads or installations.
Bulk Image Optimization: SEOWagon allows you to optimize multiple images simultaneously. This time-saving feature is particularly valuable for websites with a large number of images, such as e-commerce stores, blogs, or portfolios.
Varied Optimization Options: SEOWagon provides various image optimization options, including compression and format conversion. You can tailor the optimization settings to strike the right balance between file size reduction and image quality.
Quick and Efficient: SEOWagon's tools are designed for speed and efficiency. They optimize images swiftly, helping to improve your website's loading speed and user experience. Faster websites tend to rank higher in search engine results, contributing to better SEO.
No Watermark or Branding: Some image optimization tools add watermarks or branding to the optimized images. SEOWagon does not impose such limitations, allowing you to maintain a clean and professional appearance on your website.
Responsive and Mobile-Friendly: In an era where mobile device usage is prevalent, SEOWagon's image optimization tools ensure that your website's images are responsive and mobile-friendly. This is vital for providing an excellent user experience on all devices.
Conserve Storage Space: Optimizing images with SEOWagon reduces their file size, helping you conserve storage space on your web server. This is especially beneficial if you have limited hosting resources.
Helps Improve SEO: SEOWagon's image optimization tools can enhance your website's SEO by contributing to faster loading times, a key factor in search engine rankings. Additionally, using descriptive alt text for images can further boost your SEO efforts.
Regular Updates and Maintenance: SEOWagon is committed to providing a reliable and up-to-date service. Regular maintenance and updates ensure that the image optimization tools remain effective and secure.
0 notes
Video
youtube
How Do I Convert JPEG Images to PNG Image Format Online #shorts
#youtube#Best online JPG to PNG converter#Step-by-step JPG to PNG conversion#Quick and easy image format conversion#Top websites for JPG to PNG conversion#Comparing JPG and PNG image formats#Free tools for converting JPG to PNG#High-quality PNG images from JPG#Optimizing images for the web#Converting pictures from JPG to PNG'
0 notes
Text
0 notes
Text
complete beginner's guide to [kpop] giffing, as explained by me!
keep in mind everyone has a different style and process, so there are some things in mine that may not feel intuitive or helpful - if so, don't include it! if you can make the gif, and have fun doing it, that's good enough. this post also assumes interest in specifically kpop giffing, but can for the most part apply to other content as well. i would just recommend different sharpening and coloring for those.
separated by headings (not images, since i need those... for examples) - if you are skipping to a specific section, look for the orange text of what you are looking for!
table of contents: - picking your programs - additional tools and programs (optional) - finding files - importing to photoshop (vapoursynth, screencaps, etc) - photoshop shortcuts and actions - sharpening - coloring - export settings - posting on tumblr
programs:
if you already have photoshop / your giffing program installed and set up, go ahead. if you don't, i would recommend looking here to get photoshop. please make sure you follow instructions carefully and safely! i do know photopea is an alternative people use, and i'm sure there are others. i unfortunately don't know any tutorials to link and probably won't be much help in regards to those programs, but i'm sure there are some floating around on tumblr!
my gif process uses photoshop, so this tutorial assumes that as well. if you use a different one, you might be able to transfer this to what you use, i'm not really sure :(
additional tools and programs: - handbrake: upscaler, found here. i make my own settings and generally only use this on lower quality sources to give vapoursynth a better chance with encoding in higher quality. - davinci resolve: a program i use to make clips appear 60fps when they are choppy or too few frames for the gif to look nice, and occasionally to do pre-photoshop coloring! i use the free version. i do not use this all the time and it is a big program, so definitely don't get it if you think you'd forget to / not want to use it. - yt-dlp: open source, downloads pretty much any file i could want quite well. i use this for most of my downloads and for subtitles as well. does require some knowledge of code, or, at the very least, willingness to troubleshoot set-up. find it here! i can share the command lines i run for: video, audio, vid + sub. - 4k+ downloader: what most people use for youtube-source sets, i believe. you have a limited number of downloads per day on the free version, thus the other downloading programs. - jdownloader2: no limit but sometimes a little slow or will refuse to download because of not being logged into an account, etc. a good download alternative if you plan on downloading a lot and yt-dlp is too much. - vlc: free program, standard on some devices, good for viewing files. - mpv: excellent file viewing, can also deinterlace and screencap (if you do not have / use vapoursynth) - vapoursynth: mac users beware, it's not optimized or set up and is a huge headache. windows users, once you get it set up, it's golden.
finding files, what to look for, and how to use them: how to use is explained here, with a focus on smooth and nice speeds! but finding the file is the first step, so let's head there.
stages: k24hrs (invite only, feel free to private dm or send an ask off anon for a file - i will do my best to get it to you); kpopbuzzhub; sharing korea torrent (requires a torrent app); twitter (shrghkqud (only has recent files) and a few other uploaders, requires much more active searching). there are a few other places you can look, but it is often more trouble than it is worth (or costs $). i am also always willing to help people find materials, so you can ask me to help you look for something or to link a source i used for whatever set.
music videos: also sometimes on k24hrs. i use vimeo a lot (color graders, directors, etc., will upload clearer versions). sharemania.us has some kpop mvs, typically bigger groups (i.e. blackpink). this is a place i check for ggs. and if none of these places or searching for torrents on btdigg, or on google in korean works, i just download the highest quality setting from youtube.
other types: like vlogs and fancams, normally directly downloaded from youtube, instagram, or twitter using yt-dlp or sites specifically for the app (i.e. twittervideodownloader).
what do i look for? 1080i for stages (or 1080p) are often super nice as they're a .ts. 2160p/4k is often ideal, but it also depends on your computer and what you are comfortable working with! generally - not always due to ai upscale - a bigger file size (in the gbs, high mbs like 800) is better and has more detail that will look clear when you work on it. older stages (2nd gen and before, some 3rd gen) and music videos often always are lower quality due to camera quality, and much harder to find. if you have to use the youtube upload for a stage, it is definitely doable, but it may be slightly disappointing in the quality you want to achieve. it depends on what you're comfortable posting and making!
how do i use them? if you use vapoursynth, scenedetect (encode/process whole video) or timestamp (just a small clip) your file - if upscaling, using davinci resolve, or any other pre-processing, do that first. it will pull up a resizer and a program and once you encode, it will give you an output file using the size and settings you put. this will import to photoshop. if using mpv or another screencapping method, take your screencaps (again, all pre-processing first) and prepare to import. there are two ways to do that for screencaps. you can also just watch whatever you downloaded, i'm guilty of downloading concert files just for fun 😅
in the next sections, i will be using four different files of varying quality and sources to explain my steps. hopefully that is helpful!
example file 1 (4k and 60fps, obtained using yt-dlp) example file 2 (1080i, obtained from k24hrs) example file 3 (1080p HD, obtained using yt-dlp) example file 4 (pulled from the gg archive i use, master)
importing to photoshop (vapoursynth and mpv explained): using example file 1, i am processing in vapoursynth - i always do one extra second before and after the clip i actually want so it doesn't cut off any frames i'd like. i adjust my sizes based on what works best for tumblr (540px for wide, 268px for 2 column, and 178 for 3 column). i always use finesharp 1.5 (this setting is up to you! i used to use .7, so totally ok if it changes over time, too!) when you export in vapoursynth, you need the y4m header. i use export to mov preset.
when importing to photoshop using a video (so vapoursynth, video files, not screencaps):


i recommend making your selected range a little bigger than the frames you want so they don't accidentally not get included. delete any extra frames while in the frame animation and then turn it into video timeline. i turn all my layers into a smart object (select them all by clicking the bottom layer and then shift-clicking the top one, or use (on windows) ctrl + alt + a to have it select faster). set timeline framerate (if you want to, i always use 60).


now your smart object is ready to sharpen and color!
using example file 2, i am processing mpv - i hit 'd' until deinterlace is on 'auto'. find the clip you'd like and hit your screencap shortcut (alt+s) for me - your screencaps should be super clear, it depends on how you set up your software (if mpv, what compression you told it). screencaps can take up a ton of storage so i recommend only screencapping what you need and deleting them after. when you hit your shortcut, play the file to the end of the clip you went and hit the screencap shortcut again to stop. your frames should be in the folder you designated as pngs now. delete extra frames now!
you now have two options: import as is, which can be a little slow, or turn them into dicom files. importing as is is done through stack. it will prompt you to select what is being loaded - change Use: to folder, and let it process. it will be slow. hit ok when the file list updates.

when it is done loading: create frame animation -> make frames from layers -> reverse frames. i would crop now using the crop tool for processing speed, and then proceed to do video timeline, smart object, and frame rate. when cropping: on the top, above your document names, the second image should show up on the crop tool - this can set your dimensions. i zoom and crop screencaps using this.


the other option is DICOM files, and what i use. when you have your pngs, do alt + d in the folder (windows), type cmd, and run this command: ren *.* *.dcm. press enter. it will update the files. on macOs, just rename the file type to .dcm.

then, import as so (it will prompt you to select the folder your .dcm are in, and will not work if the files are not actually DICOM). i find it much faster than the stack import. crop when it is done importing for processing time, like the other screencap import style.

create frame animation -> make frames from layers -> video timeline -> smart object from layers -> 60 fps.
photoshop shortcuts and actions: (windows) - ctrl + alt + a: select all layers - ctrl + shift + alt + w: export as image - ctrl + alt + shift + s: save for web (legacy) - this is the gif one!
actions are imported or created, i've shared my sharpening ones before. there are plenty you can find (or make) for a variety of things, such as aligning objects to a fixed position on all docs, doing the screencap reverse and import for you, etc. they are imported using load actions - select the [downloaded] .atn file and it'll pop up.

sharpening: explained here, and has my actions (feel free to use). very important to the quality and clarity of the gif. the better the file, the clearer a gif looks, sharpening can only do so much. play around during this step!
coloring: very much the most personal taste stage of giffing. i explain my process here. in kpop giffing, we tend to focus on unwhitewashing. other giffing tends to be more aesthetic tastes and fun since the source has better colors to work with.
export settings: these are what i use! you need the 256 colors. i do not recommend lossy or interlaced. i think bicubic sharper is the clearest i have tried.

posting on tumblr: use these dimensions FOR GIFS. edits can be different. height is up to you - i would not go over 800, but i think my quality looks weird past 600 range anyways.

example gifs: yeji, from example file #1, imported using vs. uses no. 1 sharpening (altered) from my pack. colored. zhanghao, from example file #2, imported using mpv and the load via stack. uses no. 4 sharpening (altered) from my pack. colored. taeyeon, from example file #3, imported using mpv and the load via dicom. uses no. 1 sharpening from my pack. colored. eunbi, from example file #4, imported using vs. uses no. 2 sharpening from my pack. colored.


if your gifs don't look how you want right away, that's okay! it takes time. my first ones were not great either. i am always improving on and working on my gifs. good luck and have fun hehe ♡
#i do not feel that qualified to answer this so caveat im not the best. and please also take ideas from my lovely moots and their resource#tags and tutorials / shared things. they are all so good#m:tutorial#resources#long post#flashing tw#userdoyeons#awekslook#ninitual#useroro tuserflora#useranusia#userchoi
85 notes
·
View notes
Text
Welcome to Our Image Compression Tool
Effortlessly compress and resize your images while maintaining high quality. Optimize your images for faster load times, reduced bandwidth, and better user experience. Our tool is easy to use and completely free!
Our Image Compression Tool is designed to simplify the process of optimizing images for various purposes. Whether you're a web developer aiming for faster load times or a designer looking to conserve bandwidth without compromising quality, our tool offers a seamless solution. With just a few clicks, you can compress and resize your images while ensuring they retain their visual appeal. Explore the features below to see how our tool can enhance your digital projects.
76 notes
·
View notes
Note
Hi! I juuust found your work, and I like it (namely through that formatting post, but now I'm actually reading through CURSE/KISS/CUTE and, hey! It is cute! Aster's growing on me)!
I'm actually in the process of writing another book—er, webnovel. Something free because I want people to have the chance to actually invest themselves in it—and I wanted to ask! Did you code the site all yourself, or did you use something as a framework? And, to someone who doesn't know much code, what would you reccomend?
Asters are always growing in odd places ...
I coded the whole entire thing myself. I even coded a ton of backend tools that live on my computer for automating tasks like formatting pages and converting images. I did all of this because I’m a freak...? And I wanted to optimize for fast, lightweight page loads with no server-side rendering. (The entire website is static HTML.)
For someone less inclined to hubris than me, depending on your skill level or interest in learning web code I would recommend either:
just using Wordpress (every web host in existance has a big glowing button labeled “install wordpress” for making a wordpress site and there are endless templates for formatting any kind of post you can imagine with no coding required), or
picking a static site generator and using that (for a fast and lightweight website but one that you might have to do a little coding to finish out the way you like it).
Notably, one thing I don’t recommend is using SquareSpace. For one thing, they have an adult content ban on the books; for another, if you ever do want to do something as basic with your website as “upload an HTML page you coded yourself”, you’ll find yourself locked out in the cold, because that’s grown-up stuff and they don’t like you doing that. (Learning this the hard way is the reason I ended up making my new website myself. A nice thing about a static site is that not only do you have complete control, but it’s fully portable, too: just paste the files into whatever web host you like and it’ll work just the same.*)
*except sometimes you gotta configure your .htaccess a bit etc
33 notes
·
View notes
Text

the tl;dr
IRON CROWN as a free comic is now off of wordpress and can be viewed by a neat, robust HTML/CSS/JS comic template called rarebit! effectively nothing has changed for the reader, beyond expecting a little more reliability of uptime over the years.
all comic pages and previously paywalled patreon posts can also be downloaded in this art dump for free, as mentioned in the new author's notes.
the long story:
When talking shop about site/platform moves under this handle, I think it's useful to realize that us (taboo) kink artists live in an actively adversarial internet now, compared to five years ago.
meaning that we have to live with an expectation that 99% of platforms (including registrars and hosting, let alone sns sites) will ban/kick us without warning. this might explain the overly cautious/defensive way we discuss technologies - weighing how likely (and easily) the tool can be used against us vs the perks.
for example: has a harassment mob bullied the platform owners into quietly dropping lolisho artists? trans artists? does the platform/technology have a clear, no-bullshit policy on drawn kink art (specifically third rail kinks like noncon)? does the platform have a long history of hosting r18 doujin artists/hentai publishers with no issue? does the company operate in a nation unfriendly to specific kinks (eg fashkink artists fundamentally incompatible with companies based in germany, when other kinks might be OK?). i talk with a few different groups of artists daily about the above.
but that gets tiring after a while! frankly, the only path that's becoming optimal long-term is (a) putting kink art on your personal site, and if possible, (b) self hosting the whole thing entirely, while (c) complementing your site with physical merch since it's much harder to destroy in one go.
with that said - I've been slowly re-designing all of my pages/sub-domains as compact 'bug out bags'. lean, efficiently packed with the essentials, and very easy to save and re-upload to a new host/registrar near instantly (and eventually, be friendly to self-hosting bandwidth costs since that's now a distant goal).
how does this look in theory, you ask?
zero dependencies. the whole IRON CROWN comic subdomain is three JS files, a few HTML files, one CSS file, and images. that's it.
no updates that can be trojan horse'd. I'm not even talking about malware though that's included; I'm talking about wordpress (owned by the same owners as tumblr cough) slipping in AI opt-outs in a plug-in that's turned on by default. I used to think wordpress was safe from these shenanigans because wordpress-as-a-CMS could be separate from wordpress-as-a-domain; I was wrong. they'll get you through updates.
robust reliability through the KISS principle. keep it simple stupid. malware/DDOS'ing has an infinitively harder time affecting something that doesn't have a login page/interactive forms. You can't be affected by an open source platform suddenly folding, because your "starter" template is contained files saved on your desktop (and hopefully multiple backups...). etc.
so how does this look in practice?
To be fair, you're often trading convenient new shiny UI/tools for a clunkier back-end experience. but i think it's a mistake to think your art site has to look like a MIT professor's page from 1999.
with IRON CROWN, I've effectively replicated it from a (quite good) comic template in wordpress to 98% of the same layout in pure HTML/CSS/JS via rarebit. Should rarebit's website go "poof", I've got the initial zip download of the template to re-use for other sites.
I frankly have a hard time recommending rarebit for an actively updating webcomic since you personally might be trading too many advantages like SEO tools, RSS feeds, etc away - but for a finished webcomic that you want to put in "cold storage" - it's amazing. and exactly what I needed here.
45 notes
·
View notes
Text
A year in illustration (2024), Part two


If you'd like an essay-formatted version of this post to read or share, here's a link to it on pluralistic.net, my surveillance-free, ad-free, tracker-free blog:
https://pluralistic.net/2024/12/07/great-kepplers-ghost/art-adjacent
Part one

Algorithmic feeds are a twiddler's playground
I confess that the kind of music that people make with modular synths leaves me totally, absolutely flat. However, the look of modular synths is perfect for conjuring up the idea of "twiddling" – a key part of my theory of enshittification (doubly so after I painstakingly put a HAL 9000 eye on every dial and knob).
https://pluralistic.net/2024/05/11/for-you/#the-algorithm-tm
(Image: Cryteria, CC BY 3.0; djhughman, CC BY 2.0; modified)

CDA 230 bans Facebook from blocking interoperable tools
"Interoperability" is one of those abstractions I really struggle to visually represent, but sticking a giant, scuffed, USB-C port (courtesy of D-Kuru's great CC BY 4.0 macrofocus image) on the Facebook sign worked great.
(Image: D-Kuru, Minette Lontsie, CC BY-SA 4.0, modified)

Cleantech has an enshittification problem
Illustrating "cleantech" being bricked seemed pretty straightforward, but it took a lot of doing to find a good picture of a brick. Eventually, I found a brick and took a picture of it! I think the solar panels on the brick are pretty nicely matted in.
(Image: 臺灣古寫真上色, Grendelkhan CC BY-SA 4.0; modified)

How to design a tech regulation
Cutting out those balance scales took a long-ass time, but I've found a lot of uses for them, illustrating the concept of "making trade-offs." The tradeoff here is between a rigid, planned approach and a more improvisational one, so I used an Air Force guy at rigid attention and a guerrilla fighter on the scales. The "impatient guy" from the maybe-a-radio-ad stands in this time for a government regulator.
https://pluralistic.net/2024/06/20/scalesplaining/#administratability
(Image: Noah Wulf, CC BY-SA 4.0, modified)

Microsoft pinky swears that THIS TIME they'll make security a priority
Look, I'll stipulate that using "Clippy" as a symbol for Microsoft personified is a bit antiquated, but I like to think that for those who know, they really know. The Uncle Sam is Keppler again. With apologies to Skippy Shulz, natch.
https://pluralistic.net/2024/06/14/patch-tuesday/

An end to the climate emergency is in our grasp
Virgil Finlay's demon head is sinister, sure, but the unintentional, undeniable sinisterness of the body language of this guy puts him in the shade. He comes from an unsourced image that looks like an ad for a built-in stereo.
https://craphound.com/images/guygestures.jpg
The audience in the front comes from a Victorian daugerrotype of a crowd watching some kind of unknown spectacle. I cropped 'em out by hand and use them as a visual stand-in for "this is a thing that the world is, or should be, watching."
https://pluralistic.net/2024/06/12/s-curve/#anything-that-cant-go-on-forever-eventually-stops

Surveillance pricing
I don't make a lot of animations, but this one is super-sweet. The idea of things switching slowly via crossfades is a great way to illustrate how tech lets companies change things when you aren't paying attention. Thanks as ever to ezgif.com for help assembling and optimizing it.
https://pluralistic.net/2024/06/05/your-price-named/#privacy-first-again
(Image: Cryteria, CC BY 3.0, modified)

"Carbon neutral" Bitcoin operation founded by coal plant operator wasn't actually carbon neutral
Thomas Hawk is an amazing photographer who also posts all kinds of amazing found photos (more than 23,000 of them!) to his Flickr stream, at very high rez:
https://www.flickr.com/search/?sort=date-taken-desc&safe_search=1&tags=foundphotograph&user_id=51035555243%40N01&view_all=1
The guys in the foreground appear in one of these, proudly displaying an award for – I kid you not – "canned bacon." The kids in the background come from a gallery of photos of early 20th C. child laborers.
https://pluralistic.net/2024/08/09/terawulf/#hunterbrook

The Google antitrust remedy should extinguish surveillance, not democratize it
If Keppler's "Capital Controls the Senate" is one of the most important antitrust images of all time, then his "Next!" (depicting Standard Oil as a rapacious, world-strangling octopus) is the most important antitrust illustration.
The Uncle Sam-as-a-cop figure is another Keppler (natch), and he's a regular in my collages – I can make him stand in for any federal agency by putting its logo on his chest, where a badge would go.
It took me a long time to cut up that Next! image for easy modding. Here's a GIMP XCF file for your pleasure:
https://craphound.com/images/standard-oil-kraken.xcf
And a PSD:
https://craphound.com/images/standard-oil-kraken.psd
https://pluralistic.net/2024/08/07/revealed-preferences/#extinguish-v-improve
(Image: Cryteria, CC BY 3.0, modified)

The largest campaign finance violation in US history
The giant figure looking at something in his palm through a looking-glass is yet another Keppler Uncle Sam illo (in the original, Sam is peering at a taxpayer who's shouting back up at him). I love the sad little donkey; I spent a bunch of time this election year finding public domain images of mules and elephants and dressing them in the livery of the mascots of the Democratic and Republican parties to have a bunch of visual signifiers with different emotional valences for each.
Note the halftoned background (a Maricopa County ballot); I'm increasingly fond of halftoning as a way to create a nice looking, scale-independent background.
https://pluralistic.net/2024/07/31/greater-fools/#coinbased

AI's productivity theater
"Technofeudalism" was a theme in my work even before Yanis Varoufakis's excellent book on the subject. Putting a HAL Eye on the reeve in this medieval tapestry depicting him lording it over his groveling serfs really caught the subject, especially after I faded in some Matrix code waterfall for the background.
https://pluralistic.net/2024/07/25/accountability-sinks/#work-harder-not-smarter
(Image: Cryteria, CC BY 3.0, modified)

Return to office and dying on the job
This medieval torture chamber was really brightened up by the LATE AGAIN! workplace poster on the wall and the impatient guy posed before the Manhattan skyline through the window bars. Cutting out all the window-panes took forever.
https://pluralistic.net/2024/09/27/sharpen-your-blades-boys/#disciplinary-technology

Thinking the unthinkable
Bosch's anus-demon (from the Garden of Earthly Delights) returns, this time to illustrate the problems of radium suppositories as a metaphor for commercial surveillance (yes, a visual metaphor for a textual metaphor – whew, it's getting abstract around here). It took some fiddling to get the right green radioactive glow in the anal cavity, and to match it for each of the suppositories in the Museum of the Health Sciences' picture of a box of the
The damask-esque background comes from a gallery of antique marbled endpapers that I often use when I need a texture, tweaking the curves and colors until they look cool.
https://pluralistic.net/2024/09/19/just-stop-putting-that-up-your-ass/#harm-reduction

There's no such thing as "shareholder supremacy"
Boy I love this one. The background is a late 1800s photo of the Temple of Pluto. The golden calf on the idol comes from an early 20th century illustrated bible. Add Milton Friedman's head, the lettering from the original U Chicago School of Business, and a tiny golden top-hat for the calf, and voila! Idol-worship! Alistair Milne's tip for making gold textures work went down a treat here.
https://pluralistic.net/2024/09/18/falsifiability/#figleaves-not-rubrics

America's best-paid CEOs have the worst-paid employees
The heads of the millionaires are more Keppler Punch illos, while the bodies and sofas come from another Thomas Hawk found industrial photo. You'll remember the child coal miners from ""Carbon neutral" Bitcoin operation founded by coal plant operator wasn't actually carbon neutral." I have a vivid memory of carefully cutting out the guillotine and its Jacobins during a boring conference presentation.
https://pluralistic.net/2024/09/09/low-wage-100/#executive-excess

Conspiratorialism as a material phenomenon
The superstitious belief that Big Tech has built a mind-control ray is a common theme in my work, and I've got a few prized, carefully sliced up "mind control ray" themed images from old pulps in my stock art folder. This one is augmented with Cryteria's HAL 9000 eye, and a Keppler cavorting vaudevallian with Zuck's metaverse head. The midcentury family comes from a midcentury ad for Mason Masterpieces's bronzed baby-shoes.
(Image: Cryteria, CC BY 3.0, modified)
Part three
Part four
#art#collages#public domain#creative commons#cc#fair use#copyfight#visual communications#illustration#pluralistic illustratons 2024
26 notes
·
View notes
Text
Optional Mods and Custom Portrait Guide
Essential Mods (I feel) are here
These are mods that add to the game but aren't essential for your playthrough. Feel free to pick and choose as you wish but this is just what I use.
Homeworlds of the Expanse
Expands to the list of homeworlds and gives perk to each choice depending on the manuals.
Better Type Sorting
Sorts by not only the spec but also the type of article it is. Really helps keep the inventory more organized.
ReDress
Allows you to change your characters appearance by adding and removing pieces of articles. Adds more hairs to the menu and also allows you to edit your character wherever.
Enhanced Graphics (DLSS Upscaling)
Upscales graphics. I don't feel the base graphics are that bad so that's why it's down here. Also only works with Nvidia cards.
Bi Heinrix Pronouns Fix
This is just a personal choice so down here. But fixes the pronouns for Heinrix's romance if you romance him as a male. DOES NOT ADD A BI ROMANCE FOR HEINRIX, YOU NEED TOY BOX FOR THAT.
Commorragh Cure
Enough said, if you haven't played to there yet trust me it'll really irritate you if you don't have this.
Allow Modded Achievements
This can be fixes with Toy Box if you remember to select the option but if you're particularly anxious and just want to make sure. Here is a mod for it.
Installing Custom Portraits
I'm not linking to any custom portraits, i feel like you can find those yourself due to your own taste but here's a guide on how to install.
Make sure you have run the game at least one and then go into your Appdata folder, this is usually in your main hard drive if you have multiple.
C:\Users\(your computer name here)\AppData\LocalLow\Owlcat Games\Warhammer 40000 Rogue Trader
If you cannot see your Appdata folder make sure you have hidden items set to visible. Look at the top of the file explorer box and click view then check off hidden items.
Create a folder called Portraits in the Rogue Trader Folder and then drag the custom folder into the Portraits Folder. Each custom portrait is in a singular folder - if you use a mod do not have it in the main folder, drag the singular folders into the main - with three png files inside.
You can also make your own custom portait in game. You need a folder with the picture cropped at varying sizes. "Fulllength" at 692x1024 pixels, "Medium" at 330x432, and "Small" at 180x242. These are for the varying usages of the portait and name each resolution as such
Here is a website to help crop if you don't wish to do manually.
And a program as well.
9 notes
·
View notes
Text
How to Become the Perfect Man in 2035
In the bustling, high-tech corridors of a futuristic hospital in 2035, an 18-year-old man, fit and brimming with vitality, walks through the doors for the last time on his own two legs. Today, he elects to undergo a double above-knee (DAK) amputation, a procedure that will redefine his existence. Under the glow of advanced surgical lights, he is placed under general anesthesia as the team begins. Precise incisions are made mid-thigh, guided by 3D imaging, severing muscles, nerves, and blood vessels with meticulous care. The femurs are cut cleanly at 20 cm from the hips using laser-assisted tools, ensuring symmetry and a smooth surface for healing. Bleeding is controlled with bioengineered hemostatic agents, and the remaining muscles are sculpted to form optimal stumps before the skin is sutured, leaving two long scars. Within six hours, he awakens in a recovery room, his thighs swollen and tightly bandaged with smart dressings that adapt to his healing needs. Over the next few months, through AI-supported rehabilitation, he transitions from wheelchairs to optional cybernetic enhancements, emerging as a pioneer of a new masculine ideal in 2035—freed from the burdens of legs and ready to embrace a liberated future.
The Crushing Cons of Keeping Your Legs
Let’s face it: legs are a liability. For all their evolutionary hype, they come with a laundry list of problems that plague even the healthiest among us. Knee issues are practically inevitable—cartilage wears down, leading to osteoarthritis, while repetitive strain invites tendonitis or ligament tears. Tendons themselves are ticking time bombs; Achilles ruptures and shin splints haunt runners and casual walkers alike. Then there’s the feet: a nightmare of orthopedic woes. Bunions twist toes into painful knots, plantar fasciitis stabs with every step, and flat feet or high arches throw off your entire body’s alignment. These aren’t rare afflictions—they’re the norm for anyone relying on legs day after day.
Beyond the physical toll, legs are exhausting. Walking burns through energy at a staggering rate—studies show the average person expends 100-200 calories per mile, a constant drain that saps vitality. Standing for hours? That’s even worse, taxing muscles and joints while blood pools in your lower extremities, leaving you fatigued. Climbing stairs, dodging crowds, or just getting through a long day—legs demand a relentless effort that feels increasingly outdated in a world of efficiency. In 2035, where technology promises liberation from such burdens, why cling to a pair of flawed, tiring appendages?
Why Gay Men Should Embrace DAK Amputations
For gay men, the case for DAK amputations with symmetrical 20 cm stumps is even more compelling—it’s a revolution in both form and function. The 20 cm length isn’t random; it mirrors the world average penis size (around 13-15 cm erect, with stumps extending slightly beyond for symmetry), creating a balanced, harmonious physique that resonates on a deeply personal level. But the real game-changer lies in sexual dynamics. Legs, for all their supposed utility, are a hindrance in the bedroom. During anal sex, they get in the way—awkwardly positioned, limiting flexibility, and restricting access whether you’re giving or receiving. Remove them, and the body transforms. The spread and shape of DAK stumps—firm, symmetrical, and unobstructed—offer unparalleled versatility. They provide natural leverage and support, enhancing comfort and creativity for both partners, turning intimacy into an art form unencumbered by clumsy limbs.
Picture this: it’s 2035, and gay men who’ve chosen DAK amputations are the vanguard of a new masculinity. Free from the orthopedic nightmares of knees and feet, they conserve energy once wasted on walking, redirecting it to pursuits of passion and intellect. Their 20 cm stumps, healed and sculpted, are both a aesthetic triumph and a functional marvel—celebrated in a culture that prizes bold reinvention. Rehabilitation, powered by 2035’s advancements, is swift and seamless: smart prosthetics or sleek mobility aids integrate effortlessly, offering options without the baggage of biological legs. Sexually, they’re liberated, their bodies optimized for pleasure and connection in ways legs could never allow.
This is the perfect man—not bound by tradition, but shaped by choice. In a world racing toward innovation, DAK amputation isn’t a loss; it’s a leap forward. For gay men, it’s the key to shedding the past’s burdens and stepping—or rolling—into a future where perfection is yours to define.

11 notes
·
View notes
Text
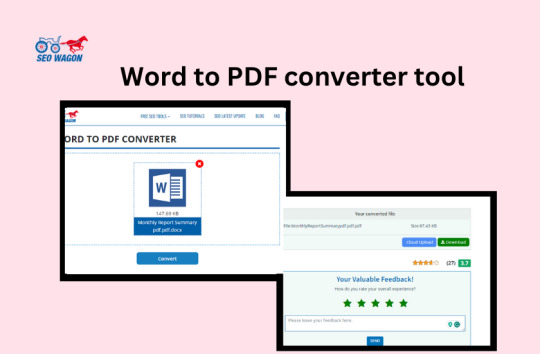
What is the Word to PDF converter tool?
A Word to PDF converter tool is a software or online service that allows you to convert documents created in Microsoft Word (usually in .doc or .docx formats) into PDF (Portable Document Format) files. PDF is a widely used format for sharing and preserving documents because it ensures that the document's layout and formatting remain consistent across different devices and platforms.
why use the Word to PDF converter tool
Word to PDF converter tools are valuable for ensuring document integrity, compatibility, security, and ease of distribution, making them essential in various professional and personal contexts. Also Word to PDF converter tools are used for several reasons. e.g.
Preserving Document Formatting: When you convert a Word document to PDF, it retains the layout, fonts, images, and overall formatting. This ensures that the document looks the same on different devices and operating systems.
Universal Compatibility: PDF is a widely supported format. It can be opened and viewed on various devices and platforms without the need for specific software, unlike Word documents which require Microsoft Word or compatible software.
Document Security: PDFs can be password-protected or encrypted, adding a layer of security to your documents. This is useful when you want to restrict access to the content.
Reducing File Size: PDFs are often smaller in file size than Word documents, making them easier to share via email or upload to the web.
Archiving: PDF is a suitable format for long-term document storage and archival, as it is less susceptible to formatting errors or changes over time.
Online Publishing: Many websites and platforms prefer PDFs for publishing documents, as they maintain a consistent appearance and are easy for users to download and read.
Legal and Business Documents: PDFs are commonly used for legal contracts, reports, business proposals, and other important documents because they ensure the integrity of the content.
Printing: PDFs are the preferred format for high-quality printing, as they eliminate issues with font and formatting variations that can occur when printing Word documents.
Comments and Annotations: Many PDF readers offer features for adding comments, annotations, and digital signatures to the document, making it useful for collaboration and feedback.
Compliance and Regulations: In some industries and for certain documents, there may be legal or regulatory requirements to use PDF format for reporting and documentation.
What are the benefits of using Word to pdf converter tool?
Using a Word to PDF converter tool offers several benefits:
Preserves Formatting: It retains the original layout, fonts, images, and formatting of your Word document, ensuring it looks the same on different devices and platforms.
Universal Compatibility: PDF files can be opened and viewed on various devices and operating systems without the need for specific software. This ensures broader accessibility.
Reduced File Size: PDFs are often smaller in size than Word documents, making them easier to share via email, upload to websites, or store on your computer or cloud storage.
Document Security: PDFs can be password-protected or encrypted, adding a layer of security to sensitive documents and controlling access to their content.
Content Integrity: PDFs are less susceptible to accidental edits or changes, ensuring the integrity of your document's content over time.
High-Quality Printing: PDFs are the preferred format for printing because they eliminate issues with font and formatting variations, resulting in professional-looking printouts.
Cross-Platform Consistency: PDFs provide a consistent viewing experience on different platforms, reducing the risk of compatibility issues that can occur with Word documents.
Online Publishing: PDFs are commonly used for publishing documents on websites, as they maintain a consistent appearance and are easy for users to download and read.
Digital Signatures: PDFs often support digital signatures, making them suitable for contracts, legal documents, and other materials that require authentication.
Reduced Environmental Impact: Since PDFs are easily shared electronically, they reduce the need for printing, helping to save paper and reduce environmental impact.
Archiving: PDFs are a suitable format for long-term document storage and archival, as they are less susceptible to degradation and format changes over time.
Compliance and Regulations: In some industries, there are legal or regulatory requirements to use PDF format for specific documents, ensuring compliance with industry standards.
#word to pdf converter tool#free word to pdf converter tool#seo tools#image optimizer#online word to pdf converter tool#best word to pdf converter tool
0 notes
Text

Hello! In this post I will share some tips I have to help you on your custom content making journey. These are more general rather than creating a specific item, but I may make another part in the future!
Things covered: learning curve of blender, free resources, learning your computer, using references

1️⃣ There’s no need to pay for anything
The only money I have spent on anything related to TS4/custom content is for some of the expansion packs. Every resource I have used I have only had to pay with time. Blender, Sims 4 Studio, and Sims 4 Tray Importer are all free! And for Photoshop, a good free alternative I use is Photopea, which is just a web version. Another good alternative is GIMP, which is an application.
There are applications like Substance Painter and Marvelous Designer, but I would only recommend those if you have a genuine interest in 3D modeling outside of TS4.
And in terms of finding tutorials, scouring the internet will always lead to some result. A good tumblr page is @thefoxburyinstitute, which has many sections based on your level of experience. Adding “reddit” to the end of a search helps too!
2️⃣ You can export anything from Sims 4 Studio as a reference (mod or EA object)
For an EA item, In S4S, go to Tools -> Browse Game Content -> then select the category you need a ref. If it’s a mod, click on My Projects and find the package you want.

From here, you can export the mesh, images, or any textures you need without having to create a new package for it! Best used when you have already created your own package and just need one aspect of the object.
If you want to append in Blender, go to File -> Append (works with any .blend file exported from S4S), then find the location of whatever you exported. Go to the Object folder, find anything labeled s4studio_mesh_number, then append. I just append all of them, then delete ones I don’t need.

Also, in the Scene tab, make sure the cut box is blank for the reference you imported! S4S will confuse this with your mesh if not, as the cut number determines which mesh will replace the EA one.
3️⃣ File management is important!
The more you create, the more random things you’ll download on your computer. You need to be aware of where you’re downloading things from, duplicate files, how much storage it’s taking up, etc. I recommend the Sims 4 Mod Manager by GameTime. Back up your files often and learn how your computer works because every device is different! Below is how I organize my CC (could use some improvement), but use whatever keeps you organized.

4️⃣ Learn Blender outside of Sims 4 CC
There have been so many times when I’m so frustrated about Blender that I have to take a step back and focus on a different hobby. The first time that happened years ago, I decided to learn how to make simple models in Blender, and not only did I enjoy it, but I also learned so much that can be applied to CC! Below are some tutorials that I watched.
Blender 3D Beginner Tutorial by 3DGreenhorn
A simple room tutorial.
3D Isometric Bedroom by artbytran
Another simple room tutorial, but with more cute details.
Creating Stylized Low Poly Characters by lacruzo
How to make a low-poly character and texture paint on it (I used this tutorial to texture paint on a hair clip!)
Intro to Creative Web Development by Andrew Woan
Okay I know the 5 hours is daunting, but only (lol) the first 2 hours are Blender. This video goes more into the technological aspect and making models optimized for video games/web (ahem TS4). After the 2-hour mark, it's all coding, which is not needed for CC making.
5️⃣ It takes time/consistency
As a person who only makes CC once every other month or so, it’s mostly muscle memory and consistent practice that makes someone feel confident in their CC making abilities. Remember how as a kid typing was the slowest thing ever, and today you’re (hopefully) better? It’s cause you kept practicing over a long period of time.
The first time I opened Blender to make poses was in 2021, and 4 years later, there’s so much that I have learned from others, and 10x more that I don’t know due to the endless possibilities of what can be created. But hey, I’m confident enough that I made this post of tips, right? Take small steps, the end goal is to make something you or others enjoy.
Thanks for reading this if you’ve come this far, and here are two pages I recommend reading to help you on your CC journey! :D
Internet safety regarding TS4 by crazy-hazy-sims (pls read this) Custom Content Creation by simlaughlove
6 notes
·
View notes
Text
Talking about Art reference and some source.
In this age of AI Art and corporate Art industry, I think it is more important than ever to cite your inspiration and reference, to both works and creators, than to call Ai art soul less or not art.
Before AI Art, Pinterest is also one of the greatest "art/reference middleman" that hoard all reference and disconnect artists from the useful source to learn instead of cherry-picking information that might be wrong or lacking context.
Before ChatBots scraping data and spew out recipe telling people to add bleach into egg mix, we have websites choke full of stolen recipes that came with pointless made up life story to add as many unnecessary keywords to Search Engine Optimization, written by unpaid interns.
What comes to mind is the "wolf skull" that is actually a badger skull and used wildly as a tattoo reference.
Or an art student who study horse muscles, and they mistakenly give the horse human muscle somewhere, also wildly used as a reference.
And the worst of all, tumblr, that feel like the last big website that allow me to curate my own user experience has notoriously awful search function (still not as bad as twitter). I couldn't to find the source for both incident, even if I am mostly sure I reblogged it.
Also, beside the inaccuracy, I want people to think of it as less, "I don't want to use AI Art (or use it as a reference) because they are worse." and more of a:
"We are losing our respect and connection to people who search and publish information. Because of all of these middlemen, Google, Pinterest, and now AI tools, who love to obfuscate information source they took from someone's hard work."
"We are losing out on chances to connect to each other and build community based on shared goals."
"We are losing out developing respect of knowledge, critical thinking skills, and curiosity because we are under a false premise that all knowledge is easily available/easily created."
"We are losing our chance to decided to be someone who provide information and teaching instead of consuming and learning all the time. Unlike what the internet search engine and Chatbot, want to convince you, knowledge is hard-earned and not always available."
This is some art source I used:
Eh, this is a coral identification guild I used, because why not.
This one is from Australia, that I did not use, but truly appreciate how through it is.
Made into a very good, familiar website format:
I beg everyone to make The Internet a good place to share information and argue with each other in good faith again.
4 notes
·
View notes
Note
how do you make the stamps?
COPIED AND PASTED FROM MY LAST ANSWER TO THIS QUESTION
ill try my best to explain it
___________________________________________________________
GO TO EZGIF (its free and u dont have to sign in or anything like that)
click on crop
put any image you want in there and turn it into the rectangle shape a stamp is and then click the crop button to crop it
THEN GO TO THE RESIZE BUTTON THAT IS RIGHT ABOVE YOUR NOW CROPPED IMAGE OR GIF
MAKE THE WIDTH 91 AND THE HEIGHT 47
RESIZE IT AND THEN GO TO DEVIANTART AND SEARCH FOR AND STAMP OUTLINE
(this is the average one most people use)
THEN GO BACK TO EZGIF AND CLICK ON OVERLAY AND CLICK THE BUTTON THAT SAYS EXTEND CANVAS SIZE ADD THE STAMP BORDER YOU DOWNLOADED AND click generate image
change "left" to 40 and "top" to 19
generate that and then click crop and then just crop out the extra blank stuff around the border
TELL ME IF U STILL NEED HELP
BTW U CAN DO THIS ALL ON MOBILE
8 notes
·
View notes