#How to download youtube videos with vlc
Text
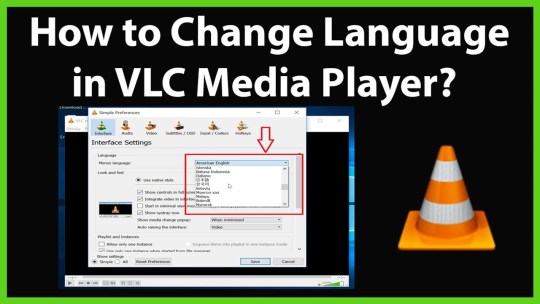
How to download youtube videos with vlc

#How to download youtube videos with vlc how to
#How to download youtube videos with vlc Offline
#How to download youtube videos with vlc free
Keep in mind: Before downloading and using any content from YouTube, you need to be aware of the copyright claims of that particular video.
#How to download youtube videos with vlc how to
Now it is about time to learn and understand how to download a YouTube video to a computer or any other smart device for your benefit. There can be multiple other requirements for a particular business to download a YouTube video, but these are important aspects.
#How to download youtube videos with vlc Offline
If you want to improve your YouTube experience, you can buy a YouTube premium subscription to download the video and view it offline without any advertisements. You need to escape the Advertisement partĪs YouTube ads are one of the key marketing strategies, YouTube consistently shows multiple advertisements before starting any video. You might need swift access to the file on your smart devices so that you can use it or show it to anyone anywhere. Going onto YouTube and searching and scrolling for the particular content piece you like might be time-consuming. You need quick access to the Content Piece If you like a content piece and want to use some of the clips of a non-copyrighted video, you might want to download the particular video, as you cannot use the clip without downloading it so that you can tweak it in your YouTube video editor tool.
Let’s discuss some of the key points that may arise the need for downloading a YouTube video: You need to use some of the clips of a YouTube video And for that, you might feel the necessity to download the video for easy access in the future. You need to be aware of what the world is doing, what the competitors are doing, what’s working, and what’s not.

Why is there a Need to Download a YouTube Video?īeing a content creator on YouTube, you need to always expand your creative mind by watching and scrolling through tons of the latest videos. We have filtered some of the best and most effective ways for you to download a YouTube video on your computer or any other smart device.īut before we jump onto that, let’s discuss why a YouTube business channel needs to download a YouTube video for future purposes.
#How to download youtube videos with vlc free
But there are tons of other free ways you can download a YouTube video. YouTube suggests you subscribe to its YouTube Premium services to download or save video content for your benefit. It is one of the most preferred video content platforms for over 90% of the audience in the U.S.īut the issue is that YouTube content can only be streamed on the YouTube platform as you are restricted from downloading YouTube content for future use.īut being a serious content creator, you can come around videos that inspire you, and you might want to use bits and pieces of those for your future videos.īut how to download a YouTube video if you don’t have any permission to download it? People across the platform consume over 1 billion hours of video content. YouTube is loaded with 720,000 hours of video content every day.
0 notes
Text
vlc media player.......... why are you not playing any youtube videos........................
#i am not sure why it has just Stopped Working now#might be a 'youtube has changes how its videos play specifically to fuck over vlc' problem or something like that#cus ive already done the usual 'yt not playing' fix for vlc#hm. how do i get yt audio#(<- was using vlc to download videos)#wait. can i do it with obs. oh i could def do it with obs#would be sort of an insane way to work around it because id have to use a mkv file#but i am nothing but creative <3#(if you're wondering what im doing with audio: i am going to be stuck in an airport for 5 hours#because my flight from turkey to america happens at like 12:40 am and i get there around 7 pm.#and since turkey uses the same plugs as georgia im hoping to work on some pmv shit on my laptop without losing too much power lol)#(busting out the drawing tablet in the middle of the airport....)
2 notes
·
View notes
Text
REBLOGS ARE OFF CAUSE THIS GUIDE IS TERRIBLE AND YOU DESERVE BETTER
I will instead redirect you to THIS more comprehensive guide, and cobalt.tools. Cobalt solves the problem of low quality video when you're done with VLC, and it can also take videos from a dozen other social media platforms.
Support the cobalt dev and the better guide writer, not me. I'm just a person who boiled down a wikihow guide and a youtube tutorial into a TLDR. I did not do very much work. They have.
I might turn reblogs back on, but for now I implore you to put your attention where it's needed most. Thanks for understanding.
(original post under the cut)
-----------------------------------------------------------------------------
alright i am sick of yt to mp4 sites being shady and full of viruses and finding websites that seem to be working and then don't work
so HERE'S HOW YOU DOWNLOAD YOUTUBE VIDEOS WITH VLC!! VLC FREAKIN RULES!!
get your youtube link
open vlc, go to media > open network stream
paste your url in the box and PRESS PLAY!
wait for the video to open then go to tools > codec information
copy the entire file location (click the box, then ctrl-a to select all, then ctrl-c to copy)
paste into your browser of choice (i use firefox)
right click video and press "save video as", choose your file format if you want
DONE! NO VIRUSES OR SKETCHY STUFF!
the quality might be a little crummy but if you don't mind that, then shabam! video on your computer! then you can email it to yourself and have it on your phone too if you want!
if you need a guide with pictures wikihow has you covered my friends
happy downloading and stay safe on the internet :D
59K notes
·
View notes
Text
How to download youtube videos with vlc media player

#How to download youtube videos with vlc media player software
#How to download youtube videos with vlc media player series
#How to download youtube videos with vlc media player download
#How to download youtube videos with vlc media player free
#How to download youtube videos with vlc media player windows
#How to download youtube videos with vlc media player series
However, if it does not work, try another option that takes you through a series of steps and other configuration options. Usually, you go for recommended settings and choose the compatible version of the operating system to run the program. You will have to options, either try recommended settings or troubleshoot the program. The compatibility wizard will automatically check for the issues. If you want to run VLC in compatibility mode, go to the VLC icon and right click to select troubleshoot compatibility. This happens with the older version of the software.
#How to download youtube videos with vlc media player windows
With Windows 7, many had inexperienced compatibility problems. Now try to open a file and see if the dialogue box appears.Įrror 3. Select Stream from that menu to open the Stream. Click the small arrow beside the Convert/Save button at bottom of window to expand a menu with extra options on it. Press Add and then select a video to extract the audio from. That will open the window shown in the snapshot below. Change the text-rendering module to Dummy font renderer and save it. First, open the VLC window and then click Media > Convert/Save. Pretty simple, send me a msg if you need more help walking through the process. Open Browser, Paste the location text in the URL Bar, Ctrl+S. To view the video, open the Files app on your iOS device and go to the VLC player folder. Ctrl+J, Double click Location text at the bottom, Ctrl+C.
#How to download youtube videos with vlc media player download
The download progress will be shown in VLC player and when it is complete, you can view the video offline. If you didnt know that you could load up online videos from streaming sites, then just hit Media > Open Network Stream CTRL + N. Expand Video entry on the left and go to Subtitles/OSD. Open VLC player and go to the Network tab. Go to the tools menu and under preferences, go to Show Settings. You can close this dialogue box permanently. Step 6 : Tap on download link, and select Copy option to copy the link. Step 5 : Select desired video format, and click Start button. Step 4 : visit clipconverter, and paste the video URL in the provided field, and click Continue. Step 3 : Play any video and copy the video URL. Most of the time, VLC does this to rebuild fonts for subtitles in videos. Step 1 : Get the VLC Media for your device. Whenever you try to play a media file, you see a Building font cache dialogue box. This will create new configuration and cache files. An active internet connection YouTube video link A VLC media player A web. Just delete the vlcrc file and cache file. Here’s what you will need when using a VLC media player to download YouTube videos. You can find the files at C: UsersusernameAppDataRoamingvlc. Copy the URL of the video and then head back to VLC media player. Now, Go to YouTube and open the video you want to download. Hence, you will have to clean the configuration and cache file. Open the VLC media player and keep it running in the background. This problem arises because of the corrupted configuration file. You may have seen the dialogue window “VLC media player has encountered a problem and needs to close. The download link is available on the right on the page and takes few minutes for installation. You can also view the old version of the software. This website also gives you a detailed review and rating of the website right from the editor and customer.
#How to download youtube videos with vlc media player software
Download link available right from the software profile. It also gives technical specifications, a change log, and the user comments. You can directly download the software from the website with ease.įile Hippos is a similar website to Cnet and Softonic. You can read the note from the Editor, view reviews, specifications, file size, and a number of downloads. You can search VLC on Google, and you will find the Softonic link for the software.ĭ is a popular website for knowing the reviews and news related to software. You can also see the rating, pros, and cons of the VLC. It is a popular source for downloading software. It is another website, which is a reliable source for downloading VLC. You find the download link right from the homepage. The website is the best place to know more about the software and related news. It is the official website of VLC player from where you can download the software. There are several reliable sources for downloading VLC.
#How to download youtube videos with vlc media player free
VLC media player is available as a freeload. You may have trouble understanding the command at first, but it's pretty simple to use: "VLC LOCATION" videofile1.mp4 videofile2.VLC TRY IT FREE TRY IT FREE 1. You can write this command separately in a text document, and then run it in the Command Prompt afterward.
0 notes
Text
alright, let's keep moving with that DCEU watch bc i have the time today. time for David F. Sandberg's Shazam! Fury of the Gods (2023). here's to hoping this has retained the spirit and heart of the original and improved the superhero aspects because they were the worst part of Shazam! (2019).
i've been trying to get a more accurate video player setup working for like 2 hours, i was using basically stock MPC-BE for the most part but some of the images looked a little soft to me even compared to something basic like a VLC (which i only really keep for its subtitle downloading feature bc it's the easiest to use, and tbh it could've been using sharpening filters, i didn't really check) and Potplayer (which is the only way i can get two subtitles to display simultaneously for media with multiple subs like fansubs or different translations or something, and also it's got like pretty good video output). i tried to look into MPV and the amount of work and scripts everyone was recommending kind of broke me, so i'm just using like the base form of mpv.net bc it's got a GUI, with like GPU decoding turned on which was the one common thing everyone recommended from my research.
hopefully this is better image quality then like standard VLC stuff and my previous MPC-BE setup though i obviously haven't sat through entire movies to compare frame by frame, so beware that if i say anything about the visuals it might not be the most accurate. MPV is supposed to be the most accurate and flexible option around but i don't know how much futzing around people do with it and there's a lot of like upscaling and downscaling scripts for no fucking reason, which is kind of antithetical to the entire point of accuracy to me, but it's fine. i'm just sticking to the base options and hoping it's good and better than what i had. the image does look just a tad sharper to me than in VLC and MPC so i don't know if they have sharpening filters on or something, but this is like the most base form with nothing changed (except the subtitle font) so i cannot imagine they are messing with the video signal with too much filtering. i tried to look into madVR and MPC-HC and got them installed and almost lost my mind trying to get it set up bc there's no real guides anywhere so don't fucking tell me to go look up madVR bc i will kill you. maybe some other day when i have 15 hours to dedicate to going through forums to try to find something that works for me and get enough knowledge to understand what the fuck everybody's talking about, maybe i'll check it out. i cannot believe there's not like some fucking guide for some anime noob because you know those anime people are on the cutting edge of video tech and playback for accuracy, that there's not some fucking guide for people that don't know what they're doing. i mean it's not that i don't know what i'm doing, it's that there's so much fucking shit to sort through that it would be nice if somebody narrowed it down for me. there's nothing even on YouTube or like some shitty github page or an old reddit comment or something, trust me i've like checked fucking everywhere i could think of but if i missed something, please feel free to link it somewhere in the comments or something, i don't know.
anyway, that is entirely an aside, that's just a forewarning that if i do say something about the visuals and you think it's not accurate to what the movie looks like or is not properly representative of the movie, feel free to take it with a grain of salt. i'm trying out something new.
#james talks#james watches stuff#shazam fury of the gods#shazam! fury of the gods#Shazam! Fury of the Gods (2023)#Shazam Fury of the Gods (2023)#david f. sandberg#dceu
50 notes
·
View notes
Text
YouTube Downloads through VLC: Step by Step
So this guide to easily downloading off YouTube is super helpful, but there's enough important information hidden in the reblogs that (with the permission of OP @queriesntheories ) I'm doing a more step-by-step version.
Please note: these downloads will be in YouTube quality. My test video download is coming through at 360p, even though the video I'm starting from is set to 720p. They're legible, but they won't look great on a TV. For high visual quality, you'll want to seek out other methods.
This guide is written for Windows 10, since that's what I can test on. It's been tested on Firefox, Chrome, and Edge (which is a Chromium browser, so the method should work in other Chromium browsers too). So far, I haven't tracked down a way to use this download method on mobile.
BASIC KNOWLEDGE:
I'll try to make this pretty beginner-friendly, but I am going to assume that you know how to right-click, double-click, navigate right-click menus, click-and-drag, use keyboard shortcuts that are given to you (for example, how to use Ctrl+A), and get the URL for any YouTube video you want to download.
You'll also need to download and install one or more programs off the internet using .exe files, if you don't have these programs already. Please make sure you know how to use your firewall and antivirus to keep your computer safe, and google any names you don't recognize before allowing permission for each file. You can also hover your mouse over each link in this post to make sure it goes where I'm saying it will go.
YOU WILL NEED:
A computer where you have admin permissions. This is usually a computer you own or have the main login on. Sadly, a shared computer like the ones at universities and libraries will not work for this.
Enough space on your computer to install the programs listed below, if you don't have them already, and some space to save your downloaded files to. The files are pretty small because of the low video quality.
A simple text editing program. Notepad is the one that usually comes with Windows. If it lets you change fonts, it's too fancy. A notepad designed specifically to edit program code without messing it up is Notepad++, which you can download here.
A web browser. I use Firefox, which you can get here. Chrome or other Chrome-based browsers should also work. I haven't tested in Safari.
An Internet connection fast enough to load YouTube. A little buffering is fine. The downloads will happen much faster than streaming the entire video, unless your internet is very slow.
VLC Media Player, which you can get here. It's a free player for music and videos, available on Windows, Android, and iOS, and it can play almost any format of video or audio file that exists. We'll be using it for one of the central steps in this process.
If you want just the audio from a YouTube video, you'll need to download the video and then use a different program to copy the audio into its own file. At the end of this post, I'll have instructions for that, using a free sound editor called Audacity.
SETUP TO DOWNLOAD:
The first time you do this, you'll need to set VLC up so it can do what you want. This is where we need Notepad and admin permissions. You shouldn't need to repeat this process unless you're reinstalling VLC.
If VLC is open, close it.
In your computer's file system (File Explorer on Windows), go to C:\Program Files\VideoLAN\VLC\lua\playlist
If you're not familiar with File Explorer, you'll start by clicking where the left side shows (C:). Then in the big main window, you'll double-click each folder that you see in the file path, in order - so in this case, when you're in C: you need to look for Program Files. (There will be two of them. You want the one without the x86 at the end.) Then inside Program Files you're looking for VideoLAN, and so forth through the whole path.
Once you're inside the "playlist" folder, you'll see a lot of files ending in .luac - they're in alphabetical order. The one you want to edit is youtube.luac which is probably at the bottom.
You can't edit youtube.luac while it's in this folder. Click and drag it out of the playlist folder to somewhere else you can find it - your desktop, for instance. Your computer will ask for admin permission to move the file. Click the "Continue" button with the blue and yellow shield.
Now that the file is moved, double-click on it. The Microsoft Store will want you to search for a program to open the .luac file type with. Don't go to the Microsoft Store, just click on the blue "More apps" below that option, and you'll get a list that should include your notepad program. Click on it and click OK.
The file that opens up will be absolutely full of gibberish-looking code. That's fine. Use Ctrl+A to select everything inside the file, then Backspace or Delete to delete it. Don't close the file yet.
In your web browser, go to https://github.com/videolan/vlc/blob/master/share/lua/playlist/youtube.lua
Click in the part of the Github page that has a bunch of mostly blue code in it. Use Ctrl+A to select all of that code, Ctrl+C to copy it, then come back into your empty youtube.luac file and use Ctrl+P to paste the whole chunk of code into the file.
Save the youtube.luac file (Ctrl+S or File > Save in the upper left corner of the notepad program), then close the notepad program.
Drag youtube.luac back into the folder it came from. The computer will ask for admin permission again. Give it permission.
Now you can close Github and Notepad. You're ready to start downloading!
HOW TO DOWNLOAD:
First, get your YouTube link. It should look something like this: https://www.youtube.com/watch?v=abc123DEF45 If it's longer, you can delete any extra stuff after that first set of letters and numbers, but you don't have to.
Now open VLC. Go to Media > Open Network Stream and paste your YouTube link into the box that comes up. Click Play. Wait until the video starts to play, then you can pause it if you want so it's not distracting you during the next part.
(If nothing happens, you probably forgot to put youtube.luac back. coughs)
In VLC, go to Tools > Codec Information. At the bottom of the pop-up box you'll see a long string of gibberish in a box labeled Location. Click in the Location box. It won't look like it clicked properly, but when you press Ctrl+A, it should select all. Use Ctrl+C to copy it.
In your web browser, paste the entire string of gibberish and hit Enter. Your same YouTube video should come up, but without any of the YouTube interface around it. This is where the video actually lives on YouTube's servers. YouTube really, really doesn't like to show this address to humans, which is why we needed VLC to be like "hi I'm just a little video player" and get it for us.
Because, if you're looking at the place where the video actually lives, you can just right-click-download it, and YouTube can't stop you.
Right-click on your video. Choose "Save Video As". Choose where to save it to - I use my computer's built-in Music or Videos folders.
Give it a name other than "videoplayback" so you can tell it apart from your other downloads.
The "Save As Type" dropdown under the Name field will probably default to MP4. This is a good versatile video format that most video players can read. If you need a different format, you can convert the download later. (That's a whole other post topic.)
Click Save, and your video will start downloading! It may take a few minutes to fully download, depending on your video length and internet speed. Once the download finishes, congratulations! You have successfully downloaded a YouTube video!
If you'd like to convert your video into a (usually smaller) audio file, so you can put it on a music player, it's time to install and set up Audacity.
INSTALLING AUDACITY (first time setup for audio file conversion):
You can get Audacity here. If you're following along on Windows 10, choose the "64-bit installer (recommended)". Run the installer, but don't open Audacity at the end, or if it does open, close it again.
On that same Audacity download page, scroll down past the installers to the "Additional resources". You'll see a box with a "Link to FFmpeg library". This is where you'll get the add-on program that will let Audacity open your downloaded YouTube video, so you can tell it to make an audio-only file. The link will take you to this page on the Audacity support wiki, which will always have the most up-to-date information on how to install the file you need here.
From that wiki page, follow the link to the actual FFmpeg library. If you're not using an adblocker, be careful not to click on any of the ads showing you download buttons. The link you want is bold blue text under "FFmpeg Installer for Audacity 3.2 and later", and looks something like this: "FFmpeg_5.0.0_for_Audacity_on_Windows_x86.exe". Download and install it. Without this, Audacity won't be able to open MP4 files downloaded from YouTube.
CONVERTING TO AUDIO:
Make sure you know where to find your downloaded MP4 video file. This file won't go away when you "convert" it - you'll just be copying the audio into a different file.
Open up Audacity.
Go to File > Open and choose your video file.
You'll get one of those soundwave file displays you see in recording booths and so forth. Audacity is a good solid choice if you want to teach yourself to edit soundwave files, but that's not what we're here for right now.
Go to File > Export Audio. The File Name will populate to match the video's filename, but you can edit it if you want.
Click the Browse button next to the Folder box, and choose where to save your new audio file to. I use my computer's Music folder.
You can click on the Format dropdown and choose an audio file type. If you're not sure which one you want, MP3 is the most common and versatile.
If you'd like your music player to know the artist, album, and so forth for your audio track, you can edit that later in File Manager, or you can put the information in with the Edit Metadata button here. You can leave any of the slots blank, for instance if you don't have a track number because it's a YouTube video.
Once everything is set up, click Export, and your new audio file will be created. Go forth and listen!
#reference#vlc media player#youtube downloader#youtube#uh what other tags should i use idk#how to internet#long post
80 notes
·
View notes
Text
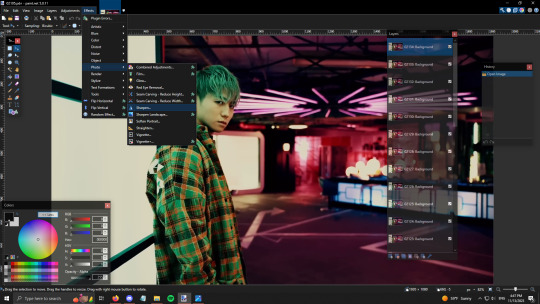
GIF Tutorial
This is going to be a long post, so I'm going to place the majority of it under the cut.
Disclaimer - There are many ways to make gifs, and this is just one way to make them - it's the process that I have figured out works best for me. I am in no way claiming that this is the "definitive" or "best" way to make gifs. There are probably other, better ways to do things, but because people have asked how I do it, I am sharing my process.
Introduction
I use a Mac. I am assuming most of this will also be applicable to those of you using Windows as well. This tutorial is divided into three parts. Here is a video of the following process as well:
https://www.youtube.com/watch?v=lBRbWC-iMOM
Actions
I use three Actions, that you can download here through my Google drive, if you want. A tutorial for how to install Actions in Photoshop can be found here.
Photoshop Layout
I use Photoshop CC, but I used Photoshop CS5 for years, got used to it, so when I upgraded to CC, I arranged it to resemble what I was used to.
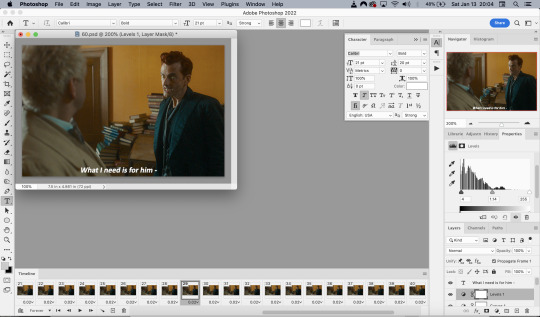
I have the following windows open:
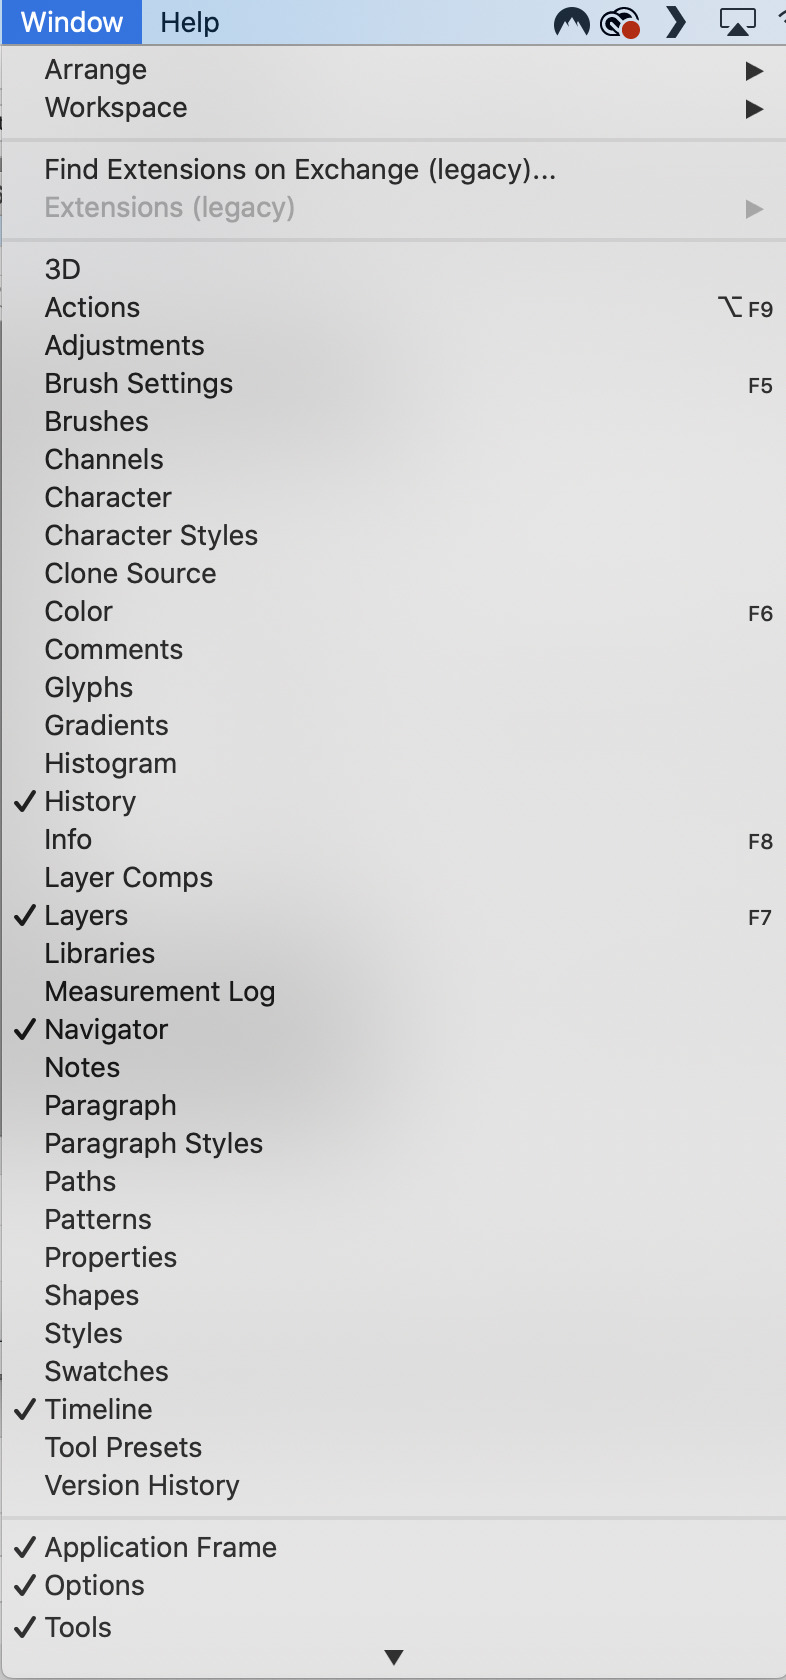
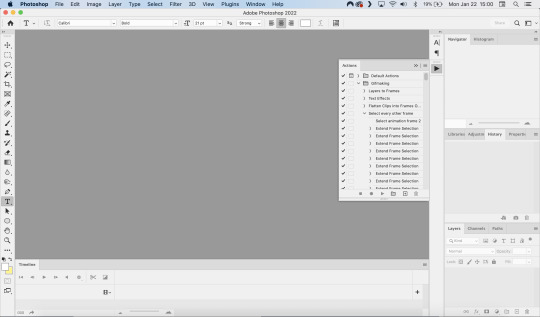
And they are arranged like this:
PART ONE - CLIPPING
Part 1 consists of using a screen recorder (i.e., Quicktime) to make short clips of scenes or parts of a scene that you want to make gifs of. I have a Mac, so Quicktime is what I use. For Windows users, I’m sure there are equivalent alternatives that are just as good. Years ago, when I was first starting to make gifs, I frequently heard people refer to KMPlayer as what they used, so that might still be a good option for you if you are a Windows user. The most important part is that it takes high-quality recordings, with as little detail and quality loss as possible.
With this screen recording method, you can make screen recordings of video files that are stored locally on your computer (I use VLC to play videos), or streaming on sites like YouTube, Amazon Prime, Hulu, Disney+, HBO, etc. No downloading of the video is necessary. For some of those websites, if you have trouble with getting it to work, you may have to disable your browser’s hardware acceleration. This process is described here (https://www.theverge.com/23715928/netflix-amazon-prime-screenshot-mac-windows-how-to).
I record the clips with sound, to make it easier to transcribe/write out the dialogue in Photoshop later. When I have recorded all the clips I want, I put the clips into my folder where I store all my clips, and into another folder that is labelled with the episode number so I can remember where each clip came from in order to properly label them later when the time comes to upload them to Tumblr.
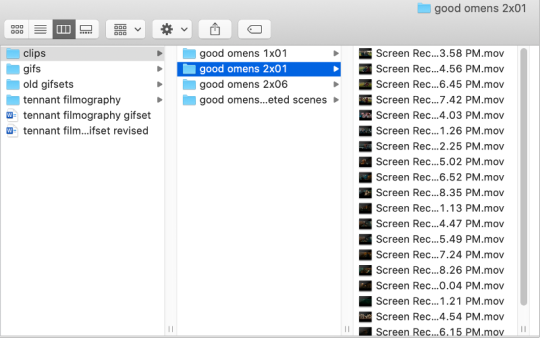
Example: A folder containing clips from Good Omens 2x01
PART TWO: EXTRACTING/MAKING GIFS FROM THE CLIPS
Open video file in Photoshop
To do this, click on File > Import > Video Frames to Layers
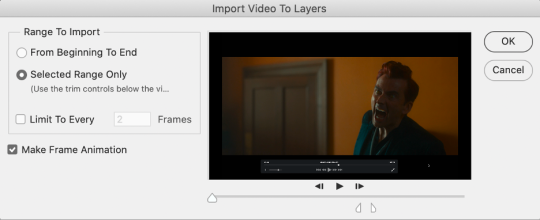
Use the markers to select roughly where you want the gif to begin and end.
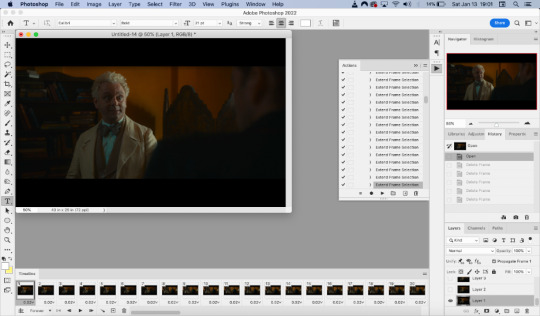
With videos that have been clipped with Quicktime (not sure about other programs), the vast majority of the time there are twice as many frames as needed – every other frame is a duplicate. For a smaller gif size and smoother playback, I delete every other frame in the timeline box at the bottom of the screen. I used to do this manually (very time consuming), but now do it with the use of an action that I created that will automatically select every other frame. Downloads and installation instructions for all the actions I use are available above.
To use an action, click on the title of the action, then click the play button at the bottom of the window.
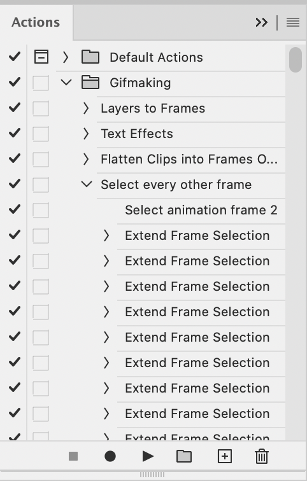
I often get an error message that says “The command ‘Extend Frame Selection’ is not currently available”, but it still works. Just click “stop” and every other frame will be selected.

Click the trash can icon in the timeline window to delete the selected frames.
At this point, you will have half as many frames in your timeline as you did before. You will also likely have extra frames at both the beginning and end of the timeline that you don’t want to be part of the gif – from the previous shot, for example. You can delete those now.
This next step is optional: There will still be some duplicate frames in the timeline that were not deleted earlier. It is not strictly necessary to delete these, and I see many gifmakers who don’t get rid of them. It’s usually not all that noticeable. However, because I’m a bit of a perfectionist, I always go through the timeline frame-by-frame and delete each duplicate. This ultimately will reduce the gif’s file size and make the movement in the gif appear much smoother. I usually find that every fourth or fifth frame is a duplicate. Unfortunately, it’s not always consistent, so using an automated action would not work to make this process go faster.
Cropping
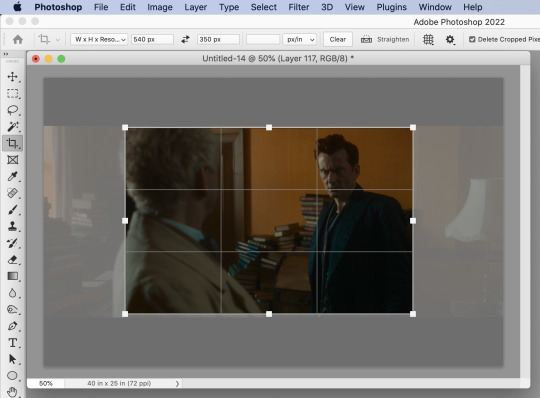
Once this part is complete, I select the crop tool. I usually make my gifs 540px wide by 350px high. You can change the height to whatever you want, but Tumblr’s max width is 540px. I find the aspect ratio of 540x350px usually allows gifs to feel large, while at the same time not cutting off too much of the sides. Depending on the type of gif I’m making I may adjust this, but generally, if I’m giffing a scene from a TV show or movie, I stick with my standard 540x350px dimensions.
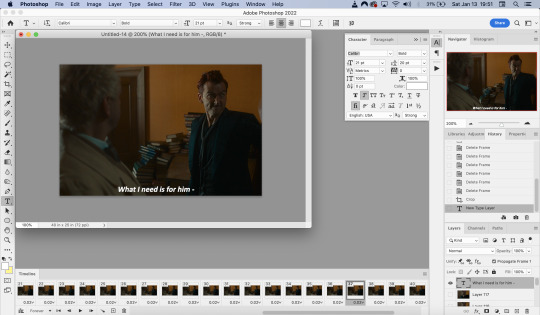
Adding Text
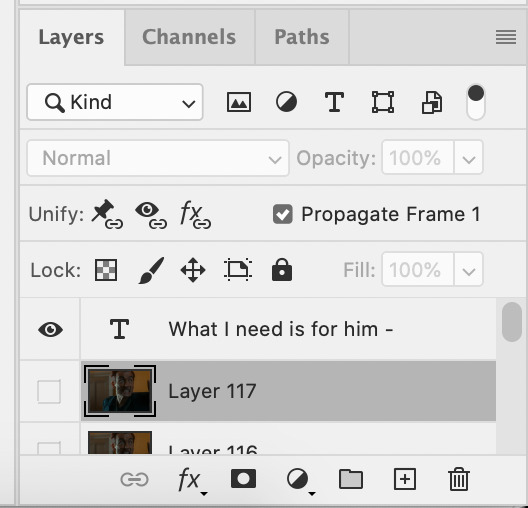
Next, I add text. Select the text icon. In the layers window, make sure the top layer is selected, otherwise the text will not show up when you start typing.
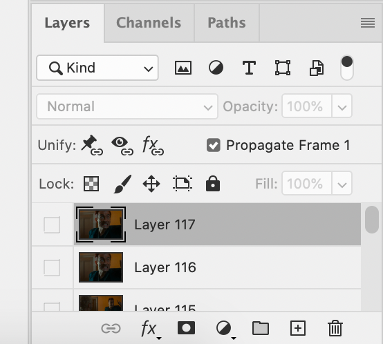
The top layer is selected
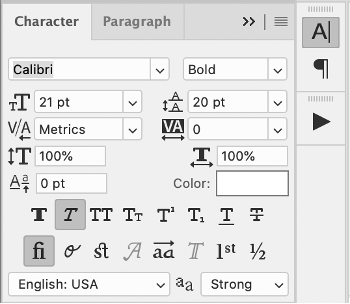
These are the font settings I currently use:
If I am just making one gifset, or one or two gifs, I’ll go straight on to the next steps. However, if I’m making a large amount of gifs, I save the gif right now, close out of it, and repeat the steps in this section for the next gifs, so I eventually have an entire folder of “raw” unedited photoshop files that have been cropped and captioned, and just need to be colored, have text effects added, and be sharpened. For me personally, I find I make gifs more efficiently by doing it in this “batch” style process.
All cropped and unedited gifs (psd files)
PART 3: COLORING, EFFECTS, & SHARPENING
Coloring
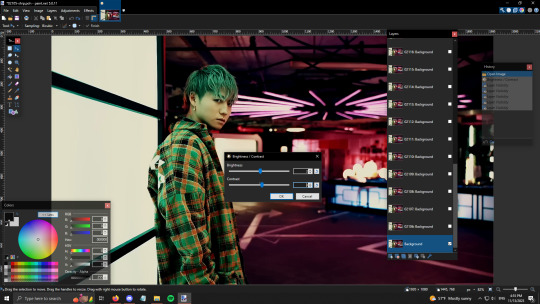
I do plan on making a separate tutorial on this at some point, but will include a brief summary here. When it comes to coloring, I generally tend to go by a “less is more” attitude. I am not by any means great at coloring, but nonetheless I’ll explain the types of adjustment layers I typically use.
Note: Before making any adjustments, make sure you have the layer directly underneath the text layer selected, as shown in the screencap below, otherwise it will also apply those adjustments to the text, which makes it look weird.
I start with a Curves layer to change the overall brightness/contrast, then a Levels layer to adjust the shadows and highlights, and then a Brightness/Contrast layer to do some final minor tweaks. The only time I ever reuse gif coloring is when they are from the same scene with the same colors, lighting, backgrounds, etc. Every other time, I tailor the adjustment layers to the specific gif.
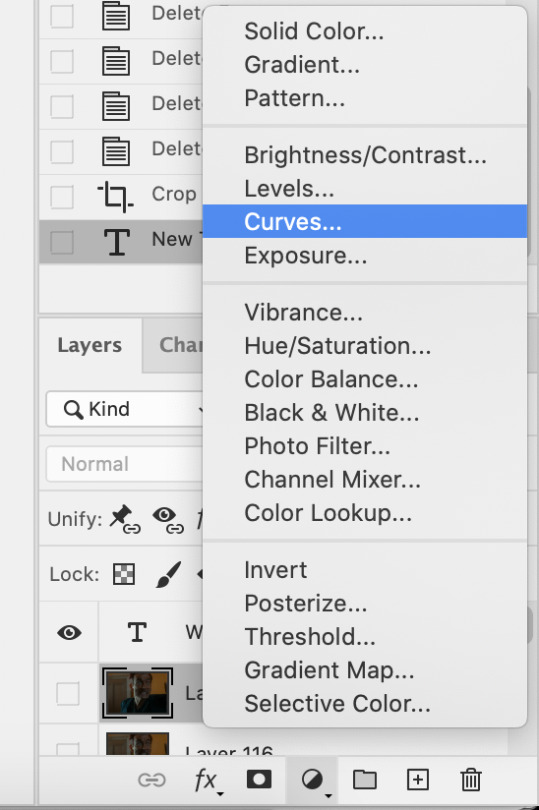
You can add adjustment layers by clicking the half light/dark circle on the bottom of the Layers window.
How the gif looks with both a Curves layer and Levels layer
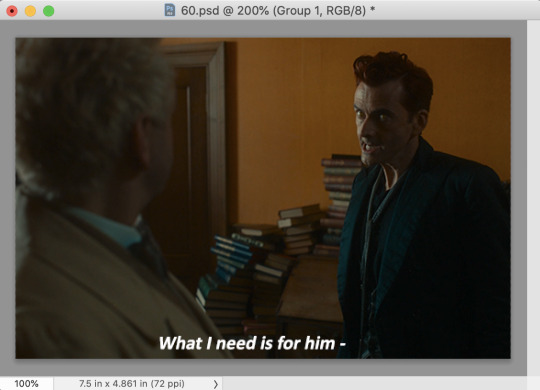
Before adding the adjustment layers
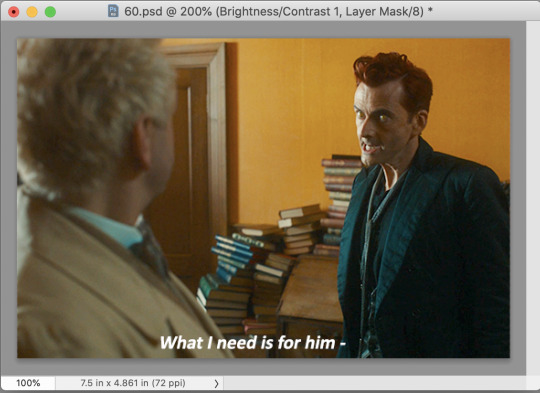
After adding the adjustment layers
A lot of the time, I'll just stick to adjusting the lighting. However, if the colors look gross, or if they are over/undersaturated, I’ll add a Color Balance layer and play around with the settings on that, or use a Hue/Saturation layer and increase/decrease the saturation of specific color channels. It really depends on what you’re going for, and what you think looks good. There is no one “right” way to color a gif.
Text Effects
If you are using the Actions I included in the download, you can just run the "Text Effects" action with the text layer selected, and it will do the following automatically. If not, you can do it manually by doing the following.
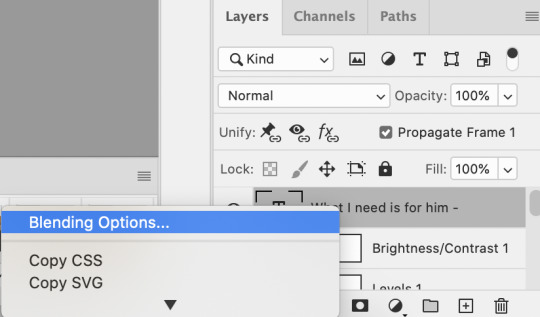
Right click on the text layer in the Layers window and click on Blending Options.
I use a stroke and drop-shadow on my gifs. Here are the settings I use.
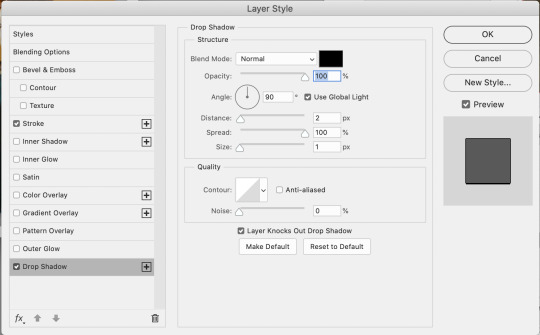
Drop Shadow settings
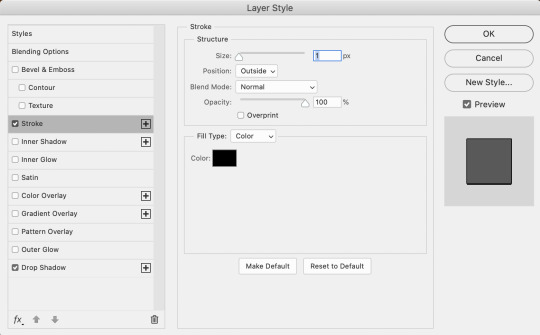
Stroke settings
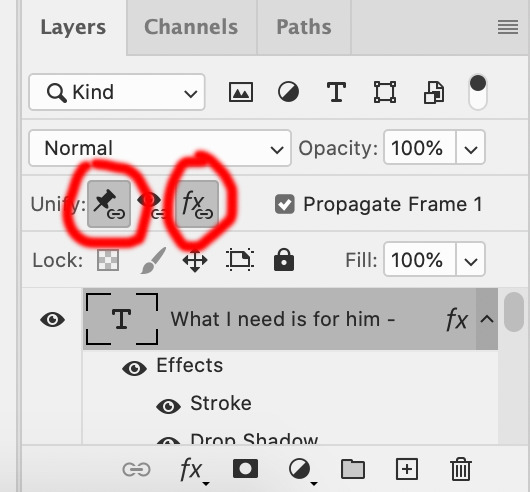
Next, to center the text, click on the text layer. With the text layer selected on the Layers window, Select All by clicking ctrl+a (Windows) or command+a (Mac). Then click on the "Align horizontal centers" icon in the “Move tool” option menu.
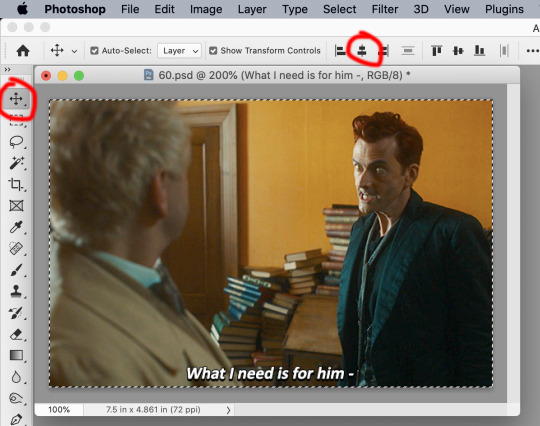
Important – in the Layers menu, make sure the buttons “Unify layer position” and “unify layer effects” are clicked an enabled for the text layer.
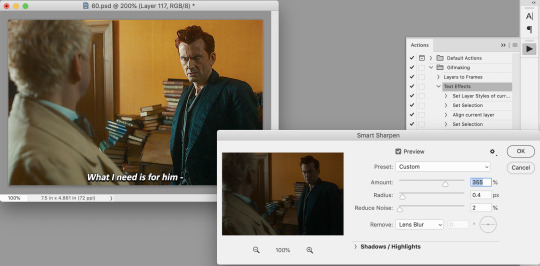
Sharpening
Select all the frames in the Timeline window. Then in the lower left-hand corner click “convert to video timeline.”

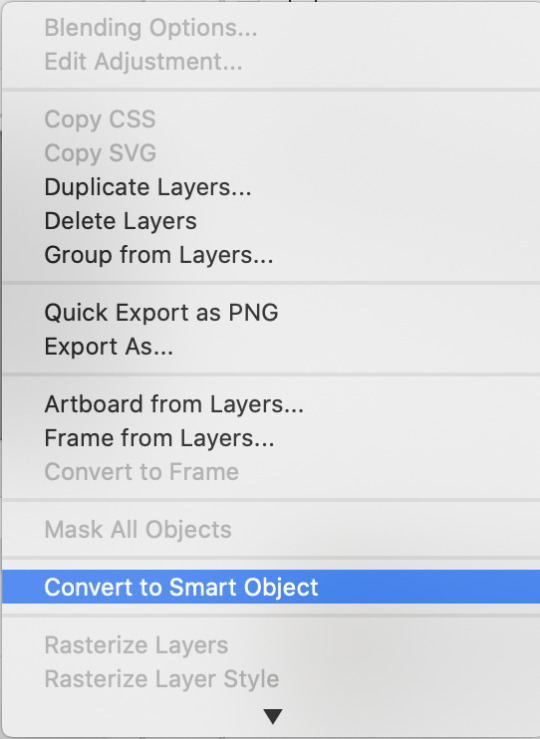
In the Layers window, select all of the frame layers (do not include the text layer or adjustment/coloring layers in the selection) and right click on it. Select “Convert to smart object.”
Select Filter > Sharpen > Smart Sharpen. In the same way that coloring can differ depending on the gif, the ideal settings for sharpening can also differ from gif-to-gif. It can really depend on the quality of the source of the gif, like whether it’s HD or not. These are the settings I’m using for the current gif:
If you are using Actions, you can run the "Layers to Frames" Action. If not, do the following:
Click on the button circled in red
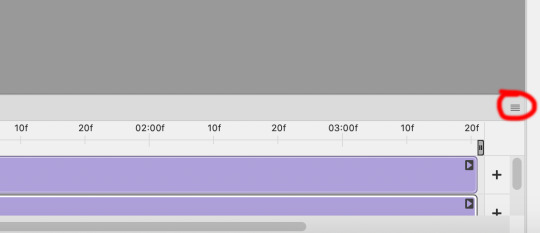
It will open up this menu. Click on "Flatten frames into clips"
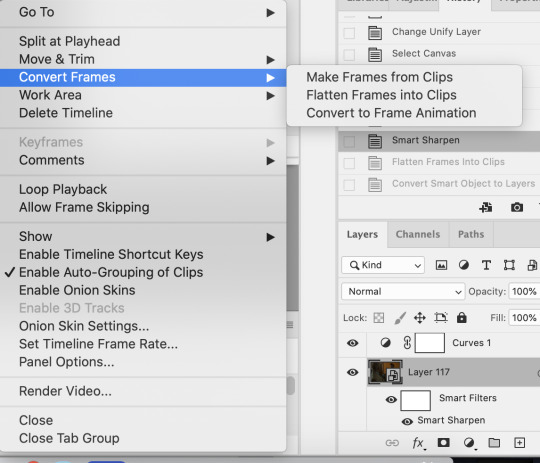
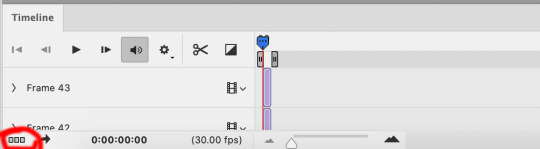
Click the button circled in red, then click "Make frames from layers"
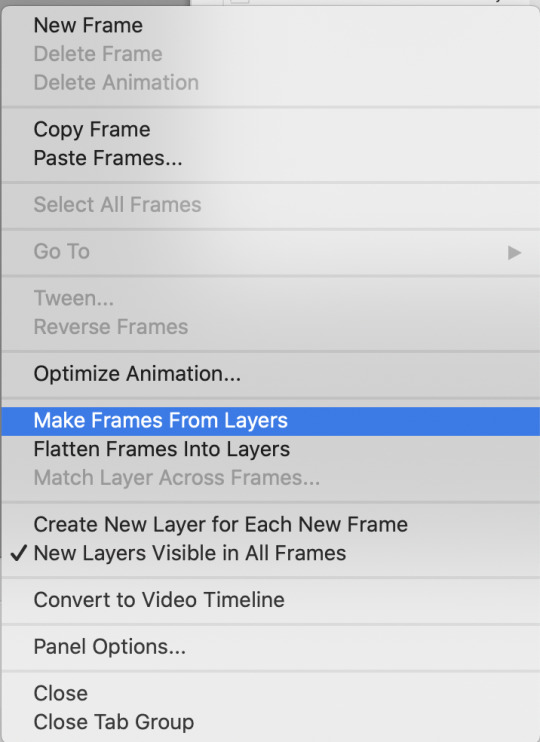
Delete the first couple of "junk" frames
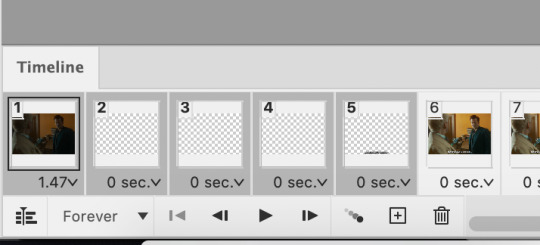
Select all of the frames. Right click on the "0 sec." to change the frame rate. I usually use 0.05, but it might depend on the gif itself.
Exporting
Click on File > Export > Save for Web (Legacy)
I cannot add another screencap because I've reached Tumblr's max for this post, but here are the settings I use:
Selective
Diffusion
256 Colors
Dither 100%
You may find that when you try to export your gif, the file size is too big. Tumblr’s gif file size limit is 10mb – try to make it under that – even anywhere in the 9.9mb range. As long as it’s under 10mb, it should work.
To get gifs that are too large to fit under the limit, I usually end up deleting frames from the beginning or end of the gif. If you’re using the 540x350px dimensions, I typically find that the average number of frames I can fit into one gif is between 80-90. Depending on the colors in the gif, it’s sometimes more, sometimes less.
63 notes
·
View notes
Text
HOW TO GET YOUR OWN SCREENCAPS FOR MAKING ICONS / GFXs / ETC.
being able to find pre-made icons of whomever you want to roleplay as can be nothing short of tedious, right? well, that's why i've put it upon myself to make this tutorial! because idk about you guys but i prefer making my own icons because mine are all 150 x 65 because i simply like and prefer rectangular icons to square icons. so let's get down to business, yeah? and like pretty much all of my lengthy tutorials, this will be under a READ MORE.
STEP 1: PROGRAMS
the main program you'll need for this is VLC Media Player. the reason for this is because it has a built-in feature that allows you to screencap any video you play. now if you're roleplaying as a video game character and you need the cutscenes from said game ( or video game movies as i call them if they're all together in one video ) then i definitely recommend you getting 4K Video Downloader. the free version allows you to download up to 30 videos / day for free whereas the license grants you an unlimited # of downloads / day off of youtube.
STEP 2: THE SETUP
after you've install VLC Media Player, get it going and go to Tools > Preferences. once you've done that something like this should pop up.
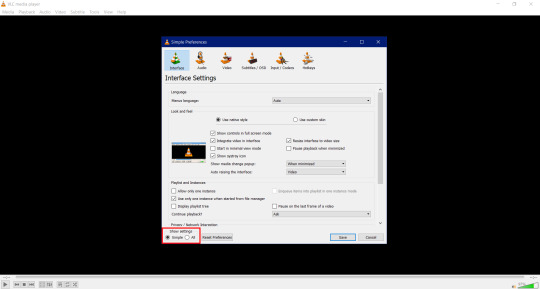

now do me a solid and click All in the box that's highlighted in the red box. by doing so will result in this popping
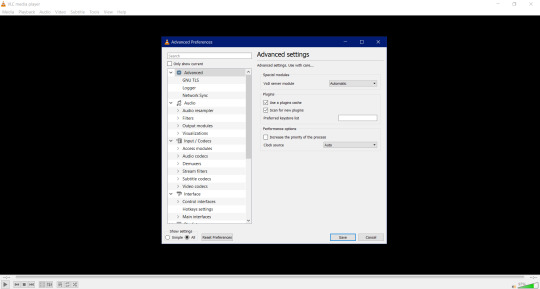

now scroll all the way down to where you see Video and then click on Filter. once done you'll have this pop up.

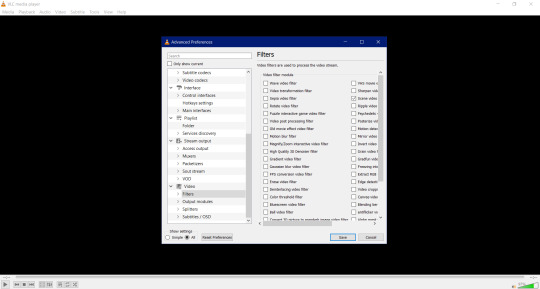
once you have this window up scroll the sidescroll all the way to the right until you see Scene filter video. it'll be third from the top as highlighted down below. check it and then click Save.


STEP 3: WE'RE ALMOST THERE
so once you hit Save, the box closes. there's nothing to freak out or worry about because that's perfectly normal. what we're gonna do now is have you go to ... like ... your Pictures folder and make a folder named after whatever you're getting screencaps for. if you're needing screencaps for, say, crisis core reunion then you'll create a new folder and name it something like ... say ... Crisis Core Reunion Screencaps. now do me a favor and double click on the folder so that you're now actually in it. you'll see why in a minute.
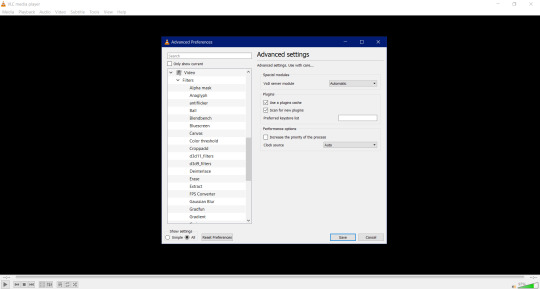
i need you to go back to Tools > Preferences > All > Videos in VLC Media Player. once you do that i need you to click on the little > right next to Filter so that a little drop down menu will pop up. it'll look a little something like this.

now scroll all the way down until you see Scene filter and click on that. once you've clicked on it this window will pop up.

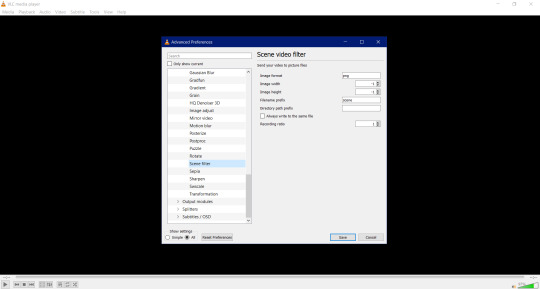
remember when i told you to keep that folder up and running for Crisis Core Reunion Screencaps? well, this is where it comes into play! click on where it says This PC > Pictures > Crisis Core Reunion Screencaps , highlight everything , and the press CTRL + C to copy it. and for those of you wondering ... ... ... ... ... it'll look a little something like this: C:\Users\PROFILE\Pictures\RP Stuff\References. that's perfectly normal!
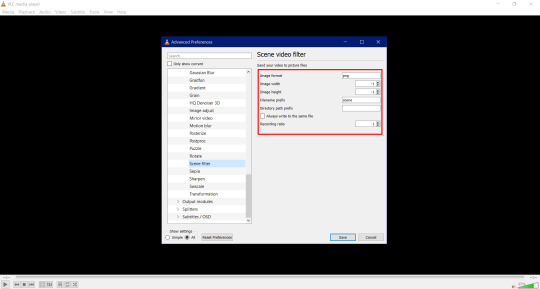
now i want you go pay close attention to the box i have highlighted down below. why? because the original number they had for the Recording ratio is ridiculous. switching the number to 1 means that it'll take one ( 1 ) screencap every second! and the number of screencaps you'll have will determine how long your video game movie is.

now you're probably wondering why the Directory path prefix is empty. of course you are. why wouldn't you be wondering it? well, that's where you're putting the directory for the directory path you just copied earlier! click on the empty box and press CTRL + V to paste it. once finished, click save and you're good to go.
STEP 4: GETTING THE ACTUAL SCREENCAPS
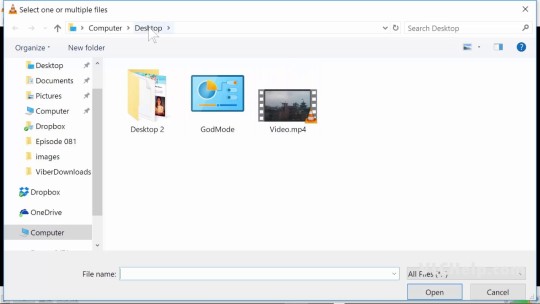
now that you've gotten all of the hard stuff done and out of the way, this is when you click on Media > Open file and then click on that Crisis Core Reunion movie you downloaded using 4K Video Downloader. once you have that going, the screencapping will commence and all you have to do is just minimize VLC Media Player and go on your merry way until the "movie" is done!
this is all you have to do to get screencaps. and all you have to do every time you want to get screencaps for something super specific is to make a folder for said thing, copy the directory path, and paste it into the Directory path prefix.
i'm hoping this tutorial was simple enough and easy to understand for y'all!
#how to#tutorial#tutorials#rp#rpc#roleplay#roleplay community#rpc tutorial#rpc tutorials#rp tutorial#rp tutorials#screencaps#screencap#icon#icons#iconing#gfx#graphics#photoshop#making icons#making
211 notes
·
View notes
Text
Wander Over Yonder - full series on the internet archive (link no longer works)
January 2024 update:
I was coming to edit this because I think I was originally mistaken in crediting Craig as the up-loader of these, i think it was just a fan - I wasn’t as familiar with internet archive and I think I mistook him being credited as him being the uploader.
But more on point, I have to share the unfortunate news that the links are dead now. It was probably taken down by disney, EVEN THOUGH THEY STILL HAVEN'T RELEASED A DVD SET. Oh, but you can waste your money on their streaming service to watch it! how nice...
I’ll be leaving this post up to shame disney for their anti-customer practices. It’s hard to have any sympathy for someone upset over piracy if they refuse to let anyone buy and own their product in the first place.
-----------------------------------------------------------------------------
https://archive.org/details/WanderOverYonderSeason1
https://archive.org/details/WanderOverYonderSeason2
I was looking for a way to watch the cartoon series “Wander Over Yonder” (without subjecting myself to streaming services) - and was disappointed to see the only “dvd sets” that were available were through shady bootleg sites. Thankfully, it seems to full series has actually been uploaded to the internet archive by Craig McCracken himself! It’s in a file format I’ve never heard of, but from what I’ve read the videos should be viewable with the VLC media player program.
Edit: I’ve found out there’s also a series of shorts that aren’t included in these downloads, so I thought I’d mention that here too. Thanks to tumblr user ariel-s-awesome for this info and the link to them on Youtube! https://www.youtube.com/playlist?list=PLZqTAC5U7gLMQ63UkU06prVbEWxfixjY5
2nd Edit: I think I was mistaken

#Disney#caroons#internet archive#craig mccracken#wander over yonder#fuck streaming services#cartoons#fuck you disney#fuck disney#release a dvd set
118 notes
·
View notes
Note
drop the how to download music tutorial. unless you like actually pay for each song in which case do not
oh i don't pay for digital music because usually the fuckers that sell it can take it back at any moment so what's the point. that being said,
how to download music tutorial
there's easier ways to do this, mind you, but i'm scared of sketchy websites most of the time, also the easy way is literally just googling "youtube to mp3" and following your heart. ANYWAYS without further ado,
step 1: download vlc media player (that's what i use to download music, but again if you prefer sketchy websites go for it)
step 2: grab the link to the song you want from youtube
the rest of the tutorial is gonna be under the cut because it got too long
step 3: go to media on the top left and click open network stream
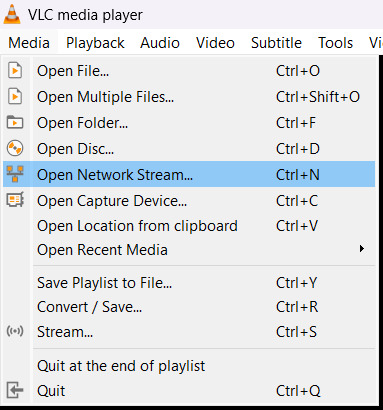
[image ID: the options on the media menu on the toolbar on vlc. open network stream is highlighted. end ID.]
step 4: paste the link and click play
step 4.1: if the video starts playing, congratulations, skip to step 5 you lucky bastard. if not,
step 4.2: get the youtube.lua file from vlc on the least sketchy website you can find (i'm so sorry i forgot where i found it)
step 4.3: right click the vlc shortcut that probably is on your desktop and select open file location. that's gonna open the vlc folder in your computer.
step 4.4: open the lua folder (inside the folder you just opened), and then the playlist folder (inside the lua folder)
step 4.5: scroll down until you find the youtube.luac file and delete it
step 4.6: put the youtube.lua file you downloaded earlier in that same folder. now it should work fine, try step 4 again, and if it doesn't work, i have no idea why, sorry but you're on your own
step 5: go to tools on the top left and click media information

[image ID: the tools menu on vlc. the media information option is highlighted. end ID.]
step 6: copy the link on the location thingy (it's the link on the bottom of the current media information window) and paste it on your browser of choice
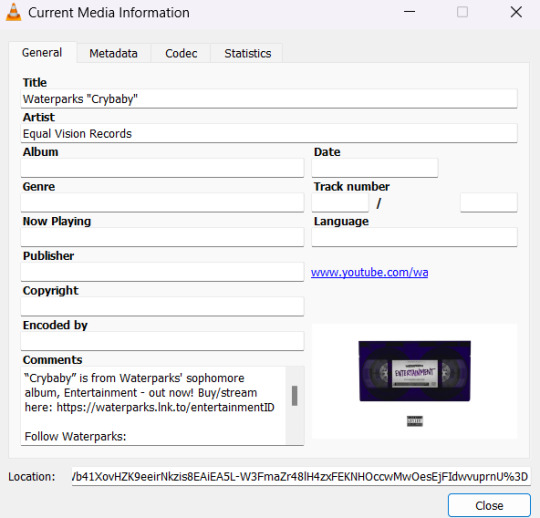
[image ID: the current media information window on vlc. end ID.]
step 7: right click the bastard (the video in the browser) and click save video as...

[image ID: the first video i could find for this tutorial opened with the link i got from the location thingy on step 6. the right click menu thing is there. save video as is highlighted. end ID.]
step 8: save the video as mp4
step 9: open the mp4 file you just downloaded with vlc
step 10: go to the media menu on the top left and click convert / save

[image ID: the options on the media menu on the toolbar on vlc. convert / save is highlighted. end ID.]
step 11: click the add button on the convert / save window. find the mp4 file you downloaded and add it. then, click convert / save on the bottom of the window.
step 12: make sure the profile thingy on the settings section of the convert window is set to mp3
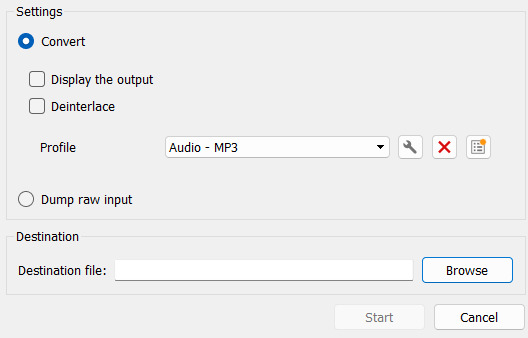
[image ID: the settings and destination sections of the convert window on vlc. end ID.]
step 13: choose the destination path for the mp3 file you're about to bring into the world, and click start (look at the image from step 12 if you need an image, i'm tired)
step 14: wait for the file to convert. and it's done! that's it! (the mp3 file is going to be on the path you chose on step 13)
i hope this helped because holy shit it was so many words to type
anyways have fun
15 notes
·
View notes
Text
Gif Making, the Broke Bitch Way
I've been considering making this tutorial for awhile, because not all of us can afford PhotoShop and doing it the way I do it does take some finagling.
For this tutorial, you will need:
A video you want to gif - I usually find them off of YouTube
Paint.net - the free version, I emphasize the free version. The paid for version doesn't play as nicely with plugins
midora's 'GIF Animations and Images' FileType Plugin (.GIF, .AGIF) plugin - have a tutorial on installing plugins for Paint.net)
ffmpeg - have a tutorial on installing ffmpeg because I struggled hardcore with that
VLC - for clipping larger videos down into smaller clips
Tutorial continues under the cut because it's fucking long and I ramble.
For this video, I will be breaking down SHOCK THE WORLD into frames.

Here, I already have it downloaded.
I have a special folder for breaking things down into frames and I've copied the file over into that folder.

Now, I'm gonna change the name of the file because that's motherfucking atrocious and I'm not fucking typing that out in ffmpeg.

Much better.

Now type in cmd in the address bar and hit enter. That'll bring up the command screen, where you type in
ffmpeg -i [nameoffile].mp4 %04d.png
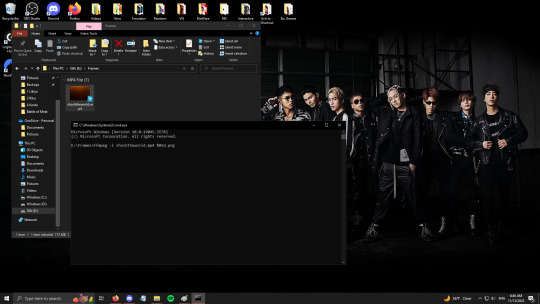
Notably, I actually wrote ffmpeg -i shocktheworld.mp4 %05d.png because this video is 7 minutes long, so I wanted 5 digits in the file name instead of 4 just in case. You would be amazed at how many frames a video breaks down into when every second of footage is 23.99 frames.

And good thing I did. The text in the red box says 'frame=10707', which means it broke the video down into 10,707 frames.
You don't have to do this, but I go through and delete the frames that say RhythmZone at the beginning and the ones at the end, because I don't need them and these files are huge.
Now I move the images out of the Frames folder and into their new home.
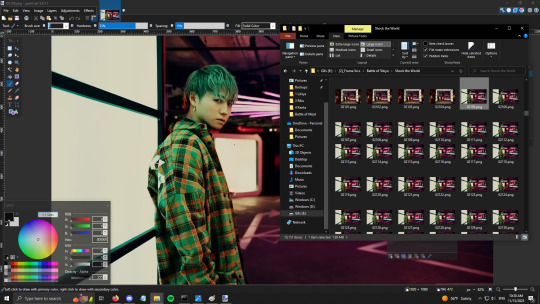
Now that the frames are in their proper folder, it's time to find what we want to gif. I like this shot of Leiya, he looks pretty.

Now we have to decide how many frames we want our gif to be. Most of my gifs are between 25 and 35 frames - like the birthday gif sets are 28 frames, the Ray of Light second outfits are 37, and the MV gif sets are 30 frames of moving gif (45 frames w/promo pic).
In this case, I think we're gonna for for 30 frames. That's a decent amount. So first open up the first image - I just drag it into Paint.net from File Explorer because it's easier that way.
You can drag each frame you want in individually like that, too, just hit 'add as layer' every time. What I prefer to do is select all of the ones I want and drag them in at once. Just hit the 'Add as layer' button and magic happens.

Sometime when doing this, Paint.net drops the layers in in the wrong order, so it's always a good idea to go through and check that all of the numbers are in the right order. From this one, you can see that 2133 and 2134 ended up at the bottom, so I had to drag them back up to the top.
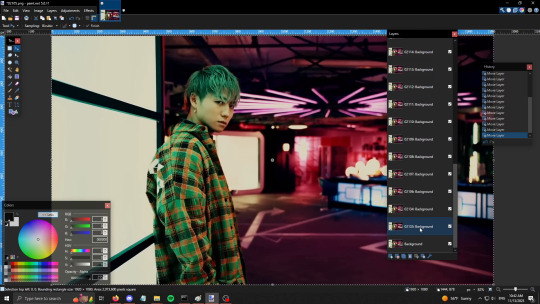
One way that I check that my frames are in the right order is I resize the file down to a much smaller size - 600x338 is what they tend to end up becoming when I do the previews - and then I go to Save As -> Save as AGIF format and preview the gif.

Technically, we could just call it quits here. You have the frames, you have them in the right order, you can truly just hit Save and move on with your life. This is the gif, saved just as it is, using the default settings for making a gif.

It's not as much a problem here, but sometimes the default settings move a little slower when you have all the frames. This is currently set at 1 frame per 100ms. I default to 1 frame per 80ms instead. The difference is slightly more obvious in these two gifs, I think, because there's more movement.

Gif on the left is 100ms per frame, gif on the right is 80ms per frame. It's a little faster and, in my opinion, truer to the actual music video.
But! Since I am a Picky Bitch, as well as a Broke Bitch, I don't usually leave my gifs at this point. I do two extra steps on every gif.
Step 1. Sharpen all the frames.
Unless it looks bad, I just take the default sharpening settings. Ctrl+F repeats the most recent effect you've applied. Considering each frame needs adjusted individually, I suggest you memorize that command. 😂


No sharpening left; sharpened right. The difference is subtle, but I prefer to sharpen my gifs to reduce chances of the gif looking blurry later.
Step 2. Brightness and contrast!

This step is a lot more finagling - I often do multiple tries and I'll compare the frame I've edited with the frame above it to see if I like the difference. The reason why I always do Brightness/Contrast - especially Contrast - is because I feel like it unifies the colors and takes off the sort - grey edge the gifs sometimes have if I don't do Brightness/Contrast.
Once you're happy with the Brightness/Contrast you have, you get to apply it to every single frame 😂 Ctrl+Sht+T is the shortcut.

So... Difference isn't as strong as I'd like it here. 😅 The one I modified is on the right.

I think the difference is more obvious with these two. On the left, is the one that hasn't been Sharpened or had the Brightness/Contrast affected. On the right is the finished version I actually posted. The left one just feels - greyer, to me, the colors aren't as vibrant or sharp.
#thistale makes things#thistale rambles#tw flashing gif#gif making the broke bitch way#thistale gifs
9 notes
·
View notes
Text
well, Ublock Origin isnt up to date, and no longer works on youtube. given that, i wanted to tell yall how you can still watch youtube videos without ads for free!
Download VLC Media Player
Copy the link to the youtube video that you want to watch
open VLC
Click "Media" in the navigation bar
Click "Open Network Stream" in the popup menu
Paste the youtube link in the field
Press play
Enjoy your completely ad-free experience!
10 notes
·
View notes
Text
You know how when you download a video you can also download the subtitles as a separate file, and then when you play the video in like VLC media player then you can import the file for the subtitles and they play with the video again? We should be able to download chapters and timecodes in YouTube videos, too.
2 notes
·
View notes
Note
Hey, can I ask you how do you make your gifs?
It took a lot of trial and error, but here is what I have learned(so far cause I'm very much still going through it):
1. Photoshop vs Photopea
To make your gifs you can either use Photoshop or Photopea. I started off with Photpea because it’s cloud-based and doesn’t take up any space on your computer, but I've since moved onto Photoshop. Most of the tutorials you’ll find will use photoshop. So if you need help or want to learn a new skill it will be much easier to find that help if you are using Photoshop.
Photoshop
👆🏽They have ones out there for mac if you search for them on here, but I happen to have a Windows PC so this is the one I use🤷🏽♀️
Photopea
2. Downloading videos
I get most of my videos from either YouTube or torrent sites which have a wide selection of shows and movies for you to download.
Watch So Much
👆🏽Is my favorite torrent site. You can also stream shows and movies on their site well.
YTS
👆🏽Is another torrent site I use, but they only have movies on there.
Qbittorrent
👆🏽Lets you download torrents. I should note that If you torrent you'll need a VPN. Literally do not try and download any content from HBO or Disney without a VPN, because at least here in America, they will email you threatening to disconnect your internet😅
For VPN’s do not use the free ones. They don’t work. I’ve personally used NordVPN, but there are other ones out there like Surfshark, or ProtonVPN.
4k downloader
👆🏽Lets you download most things off of YouTube(as well as a couple other sites like TikTok). I say most things because they will not let you download those free movies(ex. Twilight) YouTube itself uploads onto its platform.
Occasionally someone will upload an old movie onto a private channel which you can download with no problems, but anything new or recent you won’t find on there.
You do not have to use a VPN to download videos from YouTube.
3. Resources:
Whatever you're trying to gif will probably be on the long side. So you're either going to need to trim it down to make a 2-3 second clip that you can then use to make your gif, or you can screencap your video.
Screencaping allows you to take a shot of each individual frame* which you can then use to make your gifs out of.
*I like to use anywhere between 40-90 frames per gif.
VLC
👆🏽This is a video player that lets you play your videos and create screencaps from them.
👆🏽This is a great post on how to screencap using VLC.
KMPlayer
👆🏽Is another video player/screencapping software, but I found their interface to be overly complicated
Clipchamp
👆🏽This lets you trim down your videos to create those 2-3-second clips. There are better video editing tools out there(like DaVinci Resolve), but if you have Windows for what it's worth, it’s simple and gets the job done 🤷🏽♀️
rPiracy
👆🏽Has links for torrents and things of that nature.
👆🏽This is a great post on how to make a basic gif using Photoshop.
👆🏽This is a great post on how to make a basic gif using Photopea.
👆🏽This user has a lot of tutorials so when you're ready to move onto more complicated gif making, use them as a resource.
4. Lastly, have patience with yourself.
GIF making is time-consuming and as I stated it takes practice. So don't sweat it too much and have fun🎉
4 notes
·
View notes
Text
IPTV Codes for Android Devices
https://iptvtunes.com/
Are you feeling restricted by the limited channel options on your Android device? Have you ever pondered the possibility of expanding your streaming choices affordably? Look no further! This article delves into the realm of IPTV codes designed for Android devices, showcasing the incredible potential they hold for enhancing your entertainment experience.
In essence, IPTV codes open up a vast array of channels, delivering global content directly to your Android device. With just a few codes, you can gain access to a plethora of movies, TV shows, sports events, and more. Picture enjoying premium content without the burden of hefty subscription fees. This article provides a comprehensive breakdown, guiding you through the process of acquiring and utilizing IPTV codes on your Android device.

Understanding IPTV Codes
IPTV codes play a pivotal role in enhancing the functionality of IPTV on Android devices. Essentially, these codes serve as keys to unlock a vast array of channels, content libraries, and features. The benefits they bring to the table are not only significant but also contribute to the growing popularity of IPTV among Android users.
How to Find and Use IPTV Codes
IPTV (Internet Protocol Television) codes, also known as IPTV subscription codes or M3U codes, are alphanumeric strings that provide access to IPTV services. Please note that using IPTV codes to access content without proper authorization may violate copyright laws and terms of service, so it’s important to use them responsibly and within legal boundaries.
To Become iptv Reseller
Here’s a general guide on how to find and use IPTV codes:
Finding IPTV Codes:
Online Forums and Communities:
Many IPTV users share codes and playlists on forums and online communities. Look for IPTV-related forums or groups where users share their experiences and codes.
Social Media:
Platforms like Reddit, Twitter, and Facebook have communities dedicated to IPTV. Search for keywords like “IPTV codes” or “IPTV playlists” to find relevant discussions.
IPTV Providers:
Some IPTV service providers offer free trial codes to potential customers. Check the official websites of reputable IPTV services to see if they provide trial codes.
YouTube Tutorials:
YouTube often has tutorials and videos where users share IPTV codes. Be cautious and verify the legitimacy of the source before using any codes.
Using IPTV Codes:
M3U Playlist URL:
The most common form of IPTV codes is the M3U playlist URL. It is a text file that contains information about the channels and streams. Copy the M3U URL provided by the code.
IPTV Player:
Use an IPTV player or application to input the M3U URL. Popular players include VLC, Kodi, IPTV Smarters, and others. Download and install the player on your device.
Player Configuration:
Open the IPTV player and locate the option to add a new playlist or source. Paste the M3U URL into the designated field.
Verify and Save:
Verify that the playlist is working by checking a few channels. Save the playlist, and the player will usually refresh to display the available channels.
Enjoy IPTV:
Once the playlist is added successfully, you can start enjoying IPTV channels. Navigate through the channels using the player’s interface.
IPTV Services What You Need to Know Related To IPTV
Important Considerations:
Legal and Ethical Use:
Ensure that you have the legal right to access the content. Avoid using codes that provide unauthorized access to copyrighted material.
Security:
Be cautious about the sources from which you obtain IPTV codes. Avoid sharing personal information, and use reputable sources to minimize security risks.
Quality and Reliability:
Consider using reputable IPTV services to ensure better content quality, reliability, and customer support.
Top IPTV Codes for Android Devices
Navigating through the myriad of available IPTV codes can be overwhelming. To simplify your choices, we review some of the top IPTV codes for Android, comparing their features and performance. This section acts as a comprehensive guide for users looking to make informed decisions.
Tips for Optimizing IPTV Experience on Android
While IPTV codes enhance your streaming experience, it’s crucial to optimize the overall performance on your Android device. Learn about compatibility, and gain insights into troubleshooting common issues to ensure a seamless and enjoyable IPTV experience.
Legal Considerations and Best Practices
Before delving deeper, it’s essential to address the legality of IPTV codes. This section outlines the legal landscape and provides best practices for responsible use, ensuring users stay within the bounds of the law while enjoying IPTV content on their Android devices.
Future Trends in IPTV Technology
As technology advances, so does the world of IPTV. Explore the evolving features and anticipated developments in IPTV for Android devices, providing readers with a glimpse into the future of streaming technology.
User Reviews and Recommendations
Real-world experiences matter. This section showcases user reviews and recommendations, offering valuable insights from those who have explored the world of IPTV on their Android devices. Learn from their experiences and make informed choices.
Conclusion
In conclusion, IPTV codes for Android devices open up a world of entertainment possibilities. Recap the benefits and express final thoughts on how these codes revolutionize the way we consume digital content.
https://iptvtunes.com/
#iptv usa#iptv subscription#iptv firestick#iptv#adult iptv#iptv m3u#best iptv#iptv in 2023#movies#tv series
2 notes
·
View notes
Text
project updates. feel free to dm or send an ask for details on the programs I'm using
getting an external blu-ray player was the biggest non-refundable cost so far (around $65.00). I've found a free blu-ray ripper, but the trial period ends in a month so I have to work fast
I also have a dvd player (cheaper - $17ish, and also a present), and I paid for a yearlong dvd ripper program ($43) before I found the blu ray one. I have time for this later, so I'm prioritizing the films I want in high-quality first before my blu-ray trial runs out
with youtube premium you CAN download videos, but you can only view them on yt and you lose access to them once your premium account ends. I found a low-quality website to download most of rgu, but some of the episodes weren't downloadable
for films that aren't in english (prey, the handmaiden, cthd, etc), I'm thinking I'll just have to buy the blu-rays. I want them in high-quality and I want to see them subbed, but ripping them doesn't always carry the subs over. the handmaiden is proving so expensive and difficult to find I'll probably end up recording a library copy of the blu ray. I can do that anytime, so it's not urgent. and it's important to me that I get a high-quality copy
as I said earlier, anime series will be particularly hard to find copies of to download since I want to watch it subbed. yu yu hakusho is the one exception
tv series in general seem to be a challenge. I tried copying a disc with three episodes plus bonus content and it was a huge mess. nothing was labelled when they were transferred, and I didn't remember which episode went where, so I gave up in the end. torrenting might be the way to go for tv shows. we'll see how my next attempt goes
the ripping takes anywhere from 45 minutes to a little under two hours, depending on the size and number of files
once captured, videos ARE good quality and easily watchable on vlc media player or powerdvd 22, a program I kind of accidentally downloaded. I think I only have a month left on cyberlink, but vlc is a practical and sturdy program
I'm copying all my files to an external drive I already own because I just don't have the space. I have to delete all the movies from my PC once they're moved over, which makes me nervous, but I will have a little external library soon
having two USB inputs is great. it's something I knew I'd need when I bought this computer some...three years ago and it's really paying off. I wanted one with a disc drive, but that was just not practical :(
2 notes
·
View notes
Last Seen Blogs

millenianthemums
The One True Swamp Gay

babakslt
mesmerized


teachplaysing
Teach, Play, Sing

thejuliostar
The Smokings/Weed