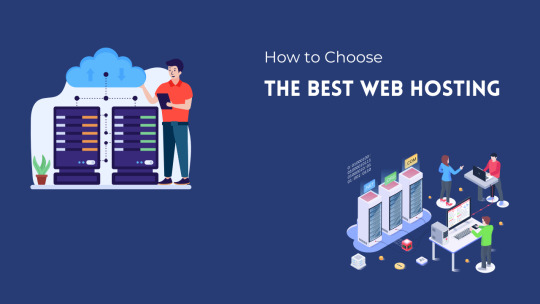
#How to select wordpress hosting
Explore tagged Tumblr posts
Visit Tumblr Blog
Explore Tumblr blogs with no restrictions, modern design and the best experience.
Last Seen Tumblr Blogs


Fun Fact
The Tumblr office adopted Tommy, an 11-year-old Pomeranian.
Text
0 notes
Note
hello ms. comrade Ironside, longtime reader, first time caller.
as a fellow writer of queer erotica, I was wondering if you had any thoughts/spoons to share those thoughts on wordpress being swept into the AI debacle under automattic? (I think that’s what you use to host your cool website, forgive me if I am mistaken.) I’m trying to figure out where to set up an author website of my own so I don’t have to host my stuff on tumblr anymore, but I’m a bit gun-shy in the current moment. I know AI trawling is inevitable in today’s internet, but as someone who’s been doing the indie author thing for some time (and admirably!), is there something you would recommend, best practices or otherwise, to someone just trying to get their metaphorical kite off the ground? or anything you wish you knew when you set up your own author-type socials? any thought at all would be genuinely appreciated.
thanks for your time, and I hope you and yours are as well as can be expected 🖤
I hate to be the bearer of bad news, but afaik nothing approaching best practices has been figured out yet; it's all already happening and there's precious little as can be done to put the toothpaste back in the tube. Of course I uncheck all the little boxes in settings and deny them my consent or whatever, but I don't think a gaggle of unimaginative piss-bellied technocrats who decided it was a sensible use of vast amounts of water and power to teach a computer how to write very badly are what I'd call trustworthy. I'm still gonna move all my website shit off of Wordpress because they won't let me get rid of the stupid AI assistant thing, but that's more a case of their UI being ugly and dumb than me thinking it'll actually do any good.
Best I can tell you on that front is to try to find yourself a niche and develop yourself as an artist from there; "Write the kinds of books you wish other people were writing" is good general advice, and a human operator is always going to be capable of things a predictive network just isn't. Other ppl are gonna disagree with that, but they're wrong. Their understanding of resource allocation and scarcity is just childishly naive and you shouldn't waste your time listening to people who think we're gonna solve climate change with apps or whatever.
Far as social media goes, this is still the best one for hocking books as far as I can tell. I'm hearing a lot of good things about Cohost and Pillowfort, but their user bases are still quite small, and I haven't found the indie author community on Bluesky yet. If Tumblr goes belly up I'll probably end up migrating to one of those first two primarily b/c I think longform blogging is the secret stuff for ppl like me who are just too crabby and agoraphobic to be Twitter influencers; I may not be any good at videos or regular quick posts or documenting the writing process (which is too bad, b/c a lot of my friends who do that stuff seem to be having fun with it), but I sure can Lay Out Some Thoughts in A Few Paragraphs and I like to think that's something ppl expect from a novelist.
Also, never get in a public argument, don't go posting Your Thoughts On The Issues unless someone asked or you feel like you've got something interesting to say, and be very selective with how much and what personal information you give out to the hoi polloi. Those are my 3 rules for how to do social media good.
44 notes
·
View notes
Text
What is a Website? A Complete Beginner’s Guide

In today’s digital age, having an online presence is not a luxury — it’s a necessity. Whether you're a business owner, content creator, or just someone curious about the web, understanding what a website is and how it functions is essential. In this guide, we’ll cover everything you need to know about websites, their components, types, benefits, and how to create one.
What is a Website?
A website is a collection of publicly accessible web pages that are linked together and share a single domain name. These pages are hosted on a web server and can include text, images, videos, forms, and other elements that users interact with online.
In simpler terms, a website is your virtual space on the internet — like your home or office in the digital world. It allows you to communicate, sell, educate, entertain, or showcase anything to a global audience.
Why is a Website Important Today?
In a world dominated by smartphones, search engines, and social media, a website acts as your central hub online. Here's why it’s important:
Visibility: A website helps you appear in search results when people look for your products, services, or information.
Credibility: A professional-looking site builds trust among your audience.
Accessibility: Your website is available 24/7, allowing customers to reach you anytime.
Marketing: It's the foundation for all your digital marketing efforts.
Sales: With e-commerce, your website can directly generate revenue.
Core Components of a Website
Every website has several key components that make it function properly:
1. Domain Name
This is your site’s address (e.g., www.digitalcreator.org.in). It’s what users type in their browser to visit your site.
2. Hosting Server
Web hosting stores your website’s data and serves it to users when requested.
3. Content Management System (CMS)
A CMS like WordPress, Joomla, or Shopify makes it easy to build and manage content on your website without coding.
4. Web Pages
These include the homepage, about us, contact, services, blog, etc., that make up your website.
5. Navigation
Menus and internal links guide visitors through your website.
Types of Websites
Different websites serve different purposes. Here are some common types:
1. Business Website
Used by companies to promote services, share information, and connect with clients.
2. E-commerce Website
Allows users to buy and sell products online. Examples include Amazon and Flipkart.
3. Portfolio Website
Ideal for creative professionals to showcase their work.
4. Blog or Personal Website
Used by individuals to share ideas, stories, or niche content regularly.
5. Educational Website
Used by schools, institutions, or educators to provide learning materials.
6. Non-profit or Government Website
Focused on delivering information and services to the public.
How to Create a Website (Step-by-Step)
Creating a website doesn’t require you to be a tech expert. Follow these steps:
Step 1: Choose a Domain Name
Pick a short, relevant, and memorable domain name. Make sure it reflects your brand or purpose.
Step 2: Get Web Hosting
Choose a reliable hosting provider like Bluehost, SiteGround, or Hostinger.
Step 3: Select a CMS or Website Builder
Use platforms like WordPress, Wix, or Shopify to start building your website.
Step 4: Design Your Website
Choose a theme or template. Customize colors, fonts, and layout to match your brand.
Step 5: Add Content
Create and publish pages like Home, About, Services, and Contact. Use quality visuals and optimized text.
Step 6: Optimize for SEO
Use keywords (like website) naturally, optimize images, and ensure fast load speed.
Step 7: Launch and Promote
Once satisfied, make your website live. Share it on social media and start your SEO or ad campaigns.
Best Practices for a Great Website
Responsive Design: Ensure your site works well on all devices.
Fast Loading Speed: Use compressed images and optimized code.
Clear Navigation: Make it easy for users to find what they need.
Secure (HTTPS): Use an SSL certificate to protect data.
Call-to-Action (CTA): Guide visitors toward actions like “Buy Now” or “Contact Us.”
Examples of Great Websites
A well-designed and fully functional example is www.digitalcreator.org.in. It demonstrates how a website can showcase services, build trust, and attract new clients efficiently.
LSI Keywords to Keep in Mind
While writing or optimizing your website, include these Latent Semantic Indexing (LSI) keywords to enhance search performance:
Web design
Online presence
Website development
Internet site
Web page
Digital platform
Domain and hosting
CMS (Content Management System)
Website builder
E-commerce site
Frequently Asked Questions (FAQs)
1. What is the purpose of a website?
A website helps individuals or businesses share information, sell products, provide services, or connect with others online.
2. How much does it cost to build a website?
Costs vary based on design, features, and hosting. Basic websites can cost as low as ₹3,000–₹10,000, while advanced ones may go up to ₹1 lakh or more.
3. Do I need coding skills to create a website?
No. Tools like WordPress or Wix allow you to build a full website without writing any code.
4. How long does it take to build a website?
A simple website can be built in 1–2 days. More complex sites may take a few weeks.
5. What makes a website successful?
A successful website is user-friendly, fast, mobile-optimized, secure, and offers valuable content with clear calls-to-action.
Conclusion
Understanding what a website is is the first step toward establishing your digital footprint. Whether you're planning to launch a personal blog, online store, or professional portfolio, your website will serve as the foundation of your online presence.
If you're ready to build or improve your website, visit www.digitalcreator.org.in — your one-stop destination for digital marketing and website development solutions.
2 notes
·
View notes
Text
Firefish - a twitter alternative
TLDR: Looks like twitter, functions better. Lets you interact across multiple platforms. Allows NSFW. Has built in anti AI scraping.
If you ever used Twitter, it's going to look similar in structure, so the learning curve is low. There's more features that that, but they're not so intrusive you HAVE to learn them right away but also aren't hard to find. It's a nice balance.
The big difference is post length- it allows up to 8000 characters, so like Mini-Tumblr.
one of the features I like that familiar's but better is if you hover cursor over name on desktop is it pops up the profile for the person and a follow button. So you can immediately hover over name and get context about the person posting when it's not someone you already follow. Is this health info being posted by a professional or by someone that thinks you should stick rocks in your vagina?
That feature also means its incredibly easy to follow people regardless of the instance. On Mastodon it was extremely annoying to follow people. If that the thing that put you off Mastodon, Firefish fixed that and made it better than Twitter.
Firefish runs off ActivityPub, so it lets you follow and interact with anyone using the plugins for that. So includes Mastodon, WordPress, PeerTube, Pixelfed, Lemmy, Misskey, and Tumblr is allegedly developing an integration to run it.
Okay, NSFW content! We're about to get slightly in the weeds here. whether NSFW content is allowed is generally by server. When you go to join Firefish, it'll ask you what server you want to use and it'll tell you about rules. If you want NSFW, pick one that allows!
That's it. If you picked one that did not, it generally won't allow you to follow things that do or boost stuff from a location that did.
NOW, A GREAT FEATURE! Spoilering stuff is super easy on Firefish. Just click the button! Say you see something you wanna boost but its *not* spoilered. You can boost AND spoil the image/text of the quoted item! MAGIC.
now, on to antennas.
The Antenna feature on there lets you track tags or users in a separate panel so you can see it in one spot. You can also add NEGATIVE tags to the antenna. So say you want to see news about your city. So you set the main tag as the City. But you don't want sports news. So you can put in negative tags of sports, specific sport names, and individual teams in the city. And then you get news about the location, but no sports
For fandom purposes, you can use it to filter out things you just don't vibe with. hate that one ship? BEGONE.
PROFILES: you can stick hashtags in your profile and it'll turn up in searches easily. also it will ask you "are you a cat?" If you say yes, it gives your profile pic cat ears.
Overall when I'm posting links to Firefish posts (or posts via something from ActivityPub hosted sites that I interacted with via Firefish), so far it renders the preview link well on most platforms. I'm not sure how it works for embedding a whole message into a static page (like you could do with Twitter for news articles).
AN IMPORTANT NERDY NOTE: okay, you wanna sign up for Firefish now. Select from the servers offered some have different rules restrictions and some have Non-english default languages. Pick the one you like. If you pick Firefish.social itself that one IS the largest but also it gets day one code updates... so sometimes it gets funky or won't load properly for a few hours. If that will drive you bonkers, pick *any* other server. The server size is almost irrelevant because Firefish plays so well with other services!
also, if you don't see one today, check again in a few days! admins rotate through open enrollments to keep the growth rate managable. also, if you're *that* kind of nerd, you can host your own server. Even with only YOU on it. and it still interacts normally with the rest of the ActivityPub servers!
40 notes
·
View notes
Note
Hey I’m new to tumblr and want to start posting some of my writing for people to read and comment one. Do you have any tips on WIPs, drafts and how to get attention on it? Very new to this space so I don’t really know how things are done.
Hi! First of all, welcome to Tumblr (and Writeblr)!!
The first thing I recommend you do is make a Writeblr intro post and tag it #writeblr intro. Introduce yourself, what genres you like to write, who some of your inspirations are, what your WIP(s) is/are about. You can scroll through the tag to see what others have posted if you need ideas.
You can also make WIP specific intro posts and tag them #WIP intro. These tend to include images that match the vibe of your WIP and will also contain a blurb of what your story is about and a snippet or two of your writing.
For any writing you post - snippets, full chapters, WIP intros, OC intros, single sentences from your WIP - you can also make use of tags like #writing, #writeblr, #writers on tumblr, #fiction writing, #creative writing, #original writing, and genre specific tags like #fantasy writing. Put the five highest trending tags first to guarantee your post shows up in them.
Another great way to grow your blog (and help your writing find an audience) is to interact with other writeblrs. Follow the people who reblog your intro post, send them asks (and ask games like Story-Telling Saturday (STS) or Worldbuilding Wednesday (WBW)), reblog their WIPs, jump in on open tag games. My post for how tag games work can be found here. The more people get to know you the more people will send you asks back, tag you in games, and most importantly reblog your WIP posts so they can reach a wider audience.
You can also specify in your bio if you are ask/tag game friendly. You are more likely to get tags/asks if other writeblrs are certain they won't be annoying you haha.
In general, posts containing links to original writing hosted on other platforms (google docs, wordpress etc.) tend not to do as well as posts that contain the writing itself. I've also heard that posts with images and interesting titles tend to do better. Same with formatted paragraphs and dialogue as opposed to a single, huge text block.
Another thing you can do to help readers find your work is make a master-post for all your WIPs and pin it to the top of your blog. List each WIP, then add hyperlinks below (in reading order) to each post containing snippets/excepts from it. [To make a hyperlink: click on the three dots on the top of the post you want to link to, select "copy link", then go to the post you want to link from, select the text you want to link, then ctrl+v. This will be your end result.]
In settings, you can also feature up to 10 tags that you use for all content on your blog related to specific WIPs. This will help make it easier for readers to search for and find your content too.
My last bit of advice is to talk about writing on your blog (and use the tags). Make little jokes and memes, those "oof relatable" kind of posts, and make and reblog writing advice from time to time. It is the hard truth of WriteBlr that these posts get a lot more interaction than original writing does but they do serve to get your blog seen by more people because they are short, relatable, have wide appeal, and/or low-effort to read. Strangely, they seem to prompt people to check out your blog. I tend to get a small wave of new followers every time one of my posts reaches 100 notes or more. I can only speculate as to why this is.
I hope something in here helps and good luck!
If anyone else has any tips feel free to add on!
15 notes
·
View notes
Text

Step-by-Step Guide to Selling Digital Products with Ease
The digital economy is booming, and selling digital products—like eBooks, courses, templates, or printables—has never been more accessible. With low startup costs and limitless scalability, it’s an ideal venture for creators and entrepreneurs. Here’s how to start your journey effortlessly:
1. Identify Your Niche & Audience
Begin by pinpointing a niche you’re passionate about and that has demand. Research communities on social media, forums, or platforms like Reddit to understand pain points. For example, if you’re skilled at graphic design, consider offering Canva templates for small businesses. Narrowing your focus helps you stand out.
2. Validate Your Idea
Before investing time, validate demand. Use surveys, polls, or pre-sale offers to gauge interest. Share a concept on Instagram or LinkedIn and ask followers if they’d buy it. Tools like Google Forms or Gumroad’s pre-order feature can simplify this step.
3. Create Your Product
Focus on quality and usability. Use tools like Canva for design, Teachable for courses, or Adobe Audition for audio guides. Keep it simple—start with one product (e.g., a PDF workbook) before expanding. Ensure it’s professionally presented and solves a specific problem.
4. Choose a User-Friendly Platform
Select a platform that handles hosting and sales. Options like Gumroad, Ko-fi, or Etsy are beginner-friendly. For more control, use Shopify or WordPress with WooCommerce. Prioritize platforms with built-in marketing tools and analytics.
5. Set Up Payments & Pricing
Integrate secure payment gateways like Stripe or PayPal. Price your product strategically: research competitors, consider value-based pricing (e.g., $29 for a time-saving template bundle), or offer tiered options (basic vs. premium).
6. Launch & Market Smartly
Build anticipation before launching. Share snippets on social media, collaborate with micro-influencers, or offer limited-time discounts. Use email lists (start with free lead magnets) and SEO-friendly product descriptions to drive organic traffic.
7. Prioritize Customer Support
Automate delivery using platforms like SendOwl to avoid manual work. Create a FAQ section and respond promptly to queries. Positive reviews boost credibility, so encourage feedback with follow-up emails.
8. Analyze & Scale
Track sales and customer behavior with analytics tools. Identify top-performing marketing channels and double down. Expand your offerings based on demand—turn a popular eBook into a video course, or bundle products for upsells.
Final Thoughts
Selling digital products is a rewarding way to monetize your skills. By starting small, validating ideas, and leveraging the right tools, you can build a sustainable online business with minimal friction. Ready to launch? Your audience is waiting!
Take the first step today—create, share, and grow. The digital world is yours to conquer.
(Word count: 500)
This guide balances actionable steps with encouragement, ensuring readers feel empowered to start their digital product journey without overwhelm. Each section is concise, with practical examples to inspire immediate action.
#explore#digital marketing#digital product#selling#Sell digital products#Digital product creation#Online business ideas#Passive income strategies#Niche research#Audience validation#Low startup costs#Digital product platforms (e.g.#Gumroad#Etsy#Shopify)#Value-based pricing#Email list building#Social media marketing#SEO-friendly content#Customer support automation
2 notes
·
View notes
Text
Best Web Design and Hosting for Small Business
User experience (UX) is a top priority for a successful small company website. This features responsive layouts that guarantee smooth surfing across devices, clear information hierarchy, and easy navigation. Websites should captivate users with eye-catching graphics, excellent photos, and interactive features that are consistent with the brand's identity. For small businesses looking to establish a strong online presence, investing in quality web design and reliable hosting is paramount.
Creating a powerful brand identity is essential. In order to create a unified image that makes an impression on visitors, this entails using logos, colors, and font consistently throughout the website. Retaining user interest also requires interesting material that speaks to the demands of the target audience, including educational blog entries and captivating product descriptions.
How to Make a Website for a Small Business
Select a User-Friendly Website Builder: Website construction is made easier by the intuitive interfaces of platforms like as Squarespace, Shopify, and Wix. Because these builders frequently have drag-and-drop capabilities, consumers can alter their websites without knowing any code23.
Choose a Domain Name and Register It
A memorable domain name is crucial for internet branding and represents your company's identity. Make sure it is pertinent to your services and simple to spell.
Select a Trustworthy Web Hosting Provider
The performance of the website depends on the hosting provider selection. Important things to think about are:
Uptime Promise: To reduce downtime, look for hosts that have 99.9% uptime.
Loading Speed: To improve user experience, try to keep page load times under three seconds.
Features of Security: To safeguard your site2, be sure the server offers SSL certificates, frequent backups, and virus detection.
Customer service: For prompt problem solving, round-the-clock assistance can be essential.
Create the Visual Identity for Your Website
Make an eye-catching layout that complements the style of your brand. Make use of top-notch photos and keep design components consistent.
Plan the Navigation and Site Structure
Logically arrange your information to make it easier to navigate. A site with a clear structure makes it easier for people to find information fast.
Create Key Pages
Home, About Us, Services/Products, Blog, and Contact Us are all important pages. Every page should contribute to the general objectives of the website while fulfilling a distinct function.
Top Web Design Platforms for Small Businesses
WordPress:
Flexible and customizable with thousands of plugins and themes.
Ideal for businesses looking for scalability and SEO features.
Wix:
Drag-and-drop functionality for easy website creation.
Suitable for businesses without technical expertise.
Squarespace:
Modern templates and built-in e-commerce features.
Perfect for visually appealing designs.
Shopify:
Best for small businesses focused on e-commerce.
Features include inventory management, payment integration, and analytics.
Weebly:
Affordable and user-friendly.
Ideal for small businesses needing basic functionality.

#Best Web Design and Hosting for Small Business#website#website design#seo services#digital marketing#web design#web development#usa news#usa
3 notes
·
View notes
Text
Ultimate Web Hosting: One-Click Install and 99.9% Uptime

Ultimate Web Hosting: One-Click Install and 99.9% Uptime
In today's digital landscape, the right web hosting provider can make or break your online presence. Whether you’re launching a personal blog, an e-commerce store, or a business website, reliable web hosting is crucial for success. At TroDomains, we understand the importance of a robust hosting service that meets all your needs. Our plans, which include one-click install, a guaranteed 99.9% uptime, and round-the-clock security monitoring, are designed to empower your online journey. Explore our offerings at [TroDomains cPanel](https://www.trodomains.co.uk/products/cpanel) and discover how our hosting solutions can simplify your life while keeping your data safe.
Simplify Your Setup with One-Click Install
Setting up your website need not be a daunting task. TroDomains makes it straightforward with our one-click install feature, streamlining the entire process. Whether you’re looking to establish a blog, an online store, or a professional business site, our one-click install functionality allows you to get started with minimal hassle. This feature supports a wide range of popular content management systems (CMS) such as WordPress, Joomla, and Drupal, ensuring that you have the flexibility to choose the platform that best suits your needs. Gone are the days of manual installations, which often require a series of complicated steps and a certain level of technical expertise. With our one-click install, the process is as simple as selecting your desired CMS and letting our system do the rest. This not only saves you valuable time but also eliminates the potential for errors that can occur during manual setups. Once you have selected your CMS, our hosting platform takes over, automating the installation process to ensure everything is configured correctly. This includes setting up databases, adjusting configuration files, and making any necessary server-side adjustments. You don’t need to worry about the technical details; instead, you can focus your efforts on creating engaging content and building your brand. Our one-click install feature is particularly beneficial for those who may not be tech-savvy. You don’t need to have a background in coding or web development to launch a professional-looking website. The intuitive interface guides you through the process, making it accessible for users of all skill levels. This democratizes the web hosting experience, allowing anyone with a vision to bring their website to life with ease. But it’s not just about ease of use; our one-click install also integrates seamlessly with our other hosting features. For instance, our daily backups ensure that even during the installation phase, your data is protected. If anything goes wrong, you can easily restore your website to a previous state. Coupled with our 99.9% uptime guarantee and round-the-clock security monitoring, you have a comprehensive hosting solution that supports you every step of the way. The efficiency of one-click install also extends to updates and maintenance. Keeping your CMS and plugins up to date is crucial for both performance and security. With our platform, you can easily manage updates directly from the control panel, ensuring that your site remains secure and runs smoothly. Automated notifications and one-click updates simplify the process, allowing you to keep your site current without the need for constant manual intervention. Another advantage is the ability to quickly test different CMS platforms or plugins. If you’re unsure which CMS will best meet your needs, our one-click install allows you to experiment without committing to a lengthy setup process. Install, test, and switch between different systems effortlessly until you find the perfect fit for your project. In addition, our one-click install supports a range of additional applications and plugins. Whether you need e-commerce functionalities, SEO tools, or social media integrations, you can add these features with just a few clicks. This flexibility enables you to customise your site to meet your specific requirements, enhancing its functionality and user experience. Ultimately, the one-click install feature at TroDomains is designed to remove the barriers to entry for creating a website. By simplifying the setup process, we enable you to focus on what truly matters: building a successful online presence. Whether you are a novice or an experienced webmaster, our user-friendly interface and automated processes make web hosting straightforward and stress-free.
Reliability Matters: 99.9% Uptime Guarantee
When considering web hosting, uptime is a critical factor. Frequent downtimes can severely impact your website’s performance, driving away visitors, causing revenue losses, and damaging your reputation. To address these concerns, TroDomains provides an impressive 99.9% uptime guarantee across all hosting plans. This commitment ensures that your website remains accessible to users nearly all the time, providing you with the reliability you need to succeed online. The foundation of our uptime guarantee lies in the cutting-edge technology and infrastructure we employ. Our servers are equipped with the latest hardware and software solutions to deliver optimal performance and stability. Additionally, we utilise high-availability systems designed to handle traffic spikes and unexpected server loads without compromising performance. Strategically located data centres also play a vital role in maintaining our uptime promise. Our data centres are chosen based on factors like connectivity, security, and regional stability, reducing the likelihood of downtime caused by regional issues. This strategic placement ensures that your website remains online, regardless of your target audience's location. Another key component of our uptime guarantee is the dedicated team of experts monitoring our systems around the clock. These professionals are tasked with identifying and resolving potential issues before they escalate into significant problems. Proactive monitoring allows us to address any anomalies quickly, ensuring that your website's performance remains consistent and reliable. In addition to our expert team, we deploy advanced monitoring tools to track server performance and detect potential issues in real-time. These tools provide valuable insights into system health, enabling us to take preventive measures and maintain optimal uptime. Our commitment to transparency means that you can also access uptime reports and performance metrics through our user-friendly control panel, keeping you informed about your website's status at all times. To further bolster our uptime commitment, we incorporate redundancy into our hosting infrastructure. Redundancy ensures that if one component fails, another takes over seamlessly, preventing service interruptions. This approach covers multiple layers of our infrastructure, from power supplies and network connections to storage devices and server clusters. Our comprehensive approach to uptime also includes regular maintenance and updates. While maintenance is essential for keeping our systems running smoothly, we schedule these tasks during off-peak hours to minimise any potential impact on your website. Additionally, our advanced scheduling and automated processes ensure that maintenance is performed efficiently, further reducing the likelihood of downtime. Disaster recovery planning is another crucial aspect of our uptime strategy. We have robust disaster recovery protocols in place to address unexpected events such as natural disasters, hardware failures, or cyber attacks. These protocols involve regular backups, failover systems, and rapid response plans, ensuring that any disruption is swiftly resolved, and your website remains accessible. Finally, our commitment to uptime extends to our customer support services. Should you encounter any issues or have concerns about your website's performance, our support team is available 24/7 to assist you. With a wealth of knowledge and experience, our support professionals can help you troubleshoot problems and provide guidance on optimising your website's performance. In summary, TroDomains' 99.9% uptime guarantee reflects our dedication to providing a reliable and robust web hosting experience. Through a combination of advanced technology, strategic planning, expert monitoring, and comprehensive support, we ensure that your website remains online and performs at its best. Choose TroDomains for a web hosting solution that prioritises uptime and reliability, empowering you to focus on growing your online presence with confidence.
#united kingdom#united states#online businesses#webhosting#web hosting#doamin and hosting bd#digital marketing#b2bmarketing#reseller hosting in saudi arabia#vps hosting#cloud hosting in saudi arabia#socialmedia
4 notes
·
View notes
Note
How do you make a blog? I want to make my own blog of my own but I don't know where to start.
Blogging has become an excellent way to share your thoughts, ideas, and experiences with the world. In this digital era, almost everyone has their own blog, and if you're interested in making one, I'm here to help you. I'll discuss how to make a good blog and how to write a blog that is informative and engaging.
Before we dive into the details, let's understand what a blog is. A blog is a website containing written content that is updated regularly. The content can be about anything you want, such as your personal experiences, your passions, your business, or current events. A blog can be an excellent way to establish yourself as an expert in your field, connect with like-minded people, and build your brand.
Here are some essential steps you should follow to make a good blog:
Step 1: Choose a Blogging Platform
The first step in creating a blog is to choose a blogging platform. There are many platforms available, such as WordPress, Tumblr, and Wix. Each platform has its own advantages and disadvantages, so you need to choose one that best suits your needs. WordPress is one of the most popular platforms and offers a lot of customization options. And Tumblr is one of the easiest and self-customizable blogging websites.
Step 2: Choose a Domain Name and Hosting
Once you have chosen your blogging platform, you need to choose a domain name and hosting. Your domain name should be memorable, easy to spell, and relevant to your blog's content. Hosting is a service that allows your blog to be accessible on the internet.
(Also be sure to think of a blog name before doing this step, for example my blog/brand name is 'The Write Advice For Writers')
Step 3: Customize Your Blog
After you have chosen your domain name and hosting, you need to customize your blog. You can select a theme that suits your blog's content and customize it to your liking. You can also add plugins to enhance your blog's functionality.
Step 4: Create Quality Content
The most important aspect of a blog is its content. You need to create quality content that is informative, engaging, and relevant to your audience. You should also use keywords that are relevant to your blog's content to improve your blog's search engine rankings.
Step 5: Promote Your Blog
Once you have created quality content, you need to promote your blog. You can use social media platforms such as Facebook, Twitter, and Instagram to promote your blog. You can also participate in online communities related to your blog's content to gain exposure.
Now that you understand how to make a good blog, let's discuss how to write a blog that is informative and engaging.
Step 1: Choose a Topic
The first step in writing a blog is to choose a topic. You should choose a topic that you are passionate about and that is relevant to your audience. You can also use keyword research tools to find popular topics related to your blog's content.
Step 2: Create an Outline
Once you have chosen a topic, you need to create an outline. An outline will help you organize your thoughts and ensure that your blog post is well-structured. Your outline should include an introduction, main points, and a conclusion.
Step 3: Write Your Blog Post
After you have created your outline, you need to write your blog post. Your blog post should be informative, engaging, and easy to read. You should also use subheadings, bullet points, and images to break up your content and make it more visually appealing.
Step 4: Edit Your Blog Post
Once you have written your blog post, you need to edit it. You should check for grammar and spelling errors and ensure that your content flows well. You can also use online tools such as Grammarly to check your grammar and spelling.
Step 5: Publish Your Blog Post
After you have edited your blog post, you need to publish it. You should also promote your blog post on social media and other online communities related to your blog's content.
In conclusion, making a good blog requires patience, dedication, and hard work. You need to choose the right blogging platform, create quality content, and promote your blog to gain exposure. Writing a blog that is informative and engaging requires choosing the right topic, creating an outline, writing your blog post, editing it, and publishing it. By following these steps, you can create a successful blog that will attract readers and establish you as an expert in your field.
#thewriteadviceforwriters#on writing#writing#writers block#how to write#tc blog#blogger#how to blog#creative writing#girl blog#tumblog
20 notes
·
View notes
Text

How To Migrate Your Site To WordPress: A Seamless Journey With Sohojware
The internet landscape is ever-evolving, and sometimes, your website needs to evolve with it. If you're looking to take your online presence to the next level, migrating your site to WordPress might be the perfect solution. WordPress is a powerful and user-friendly Content Management System (CMS) that empowers millions of users worldwide.
However migrating your site can seem daunting, especially if you're new to WordPress. Worry not! This comprehensive guide will equip you with the knowledge and confidence to navigate a smooth and successful migration. Sohojware, a leading web development company, is here to help you every step of the way.
Why Choose WordPress?
WordPress offers a plethora of benefits that make it an ideal platform for websites of all shapes and sizes. Here are just a few reasons to consider migrating:
Easy to Use: WordPress boasts a user-friendly interface, making it easy to manage your website content, even for beginners with no coding experience.
Flexibility: WordPress offers a vast array of themes and plugins that cater to virtually any website need. This allows you to customize your site's look and functionality to perfectly match your vision.
Scalability: WordPress can grow with your business. Whether you're starting a simple blog or managing a complex e-commerce store, WordPress can handle it all.
SEO Friendly: WordPress is built with Search Engine Optimization (SEO) in mind. This means your website has a better chance of ranking higher in search engine results pages (SERPs), attracting more organic traffic.
Security: WordPress is constantly updated with the latest security patches, ensuring your website remains protected from potential threats.
The Migration Process: A Step-by-Step Guide
Migrating your site to WordPress can be broken down into several key steps.
Preparation: Before diving in, it's crucial to back up your existing website's files and database. This ensures you have a safety net in case anything goes wrong during the migration process. Sohojware offers expert backup and migration services to ensure a smooth transition.
Set Up Your WordPress Site: You'll need a web hosting provider and a domain name for your WordPress site. Sohojware can assist you with choosing the right hosting plan and setting up your WordPress installation.
Content Migration: There are several ways to migrate your content to WordPress. You can use a plugin specifically designed for migration, manually copy and paste your content, or utilize an XML export/import process, depending on your previous platform. Sohojware's team of developers can help you choose the most efficient method for your specific situation.
Theme Selection: WordPress offers a vast library of free and premium themes. Choose a theme that aligns with your brand identity and website's functionality.
Plugins and Functionality: Plugins extend the capabilities of your WordPress site. Install plugins that enhance your website's features, such as contact forms, image galleries, or SEO optimization tools.
Testing and Launch: Once your content is migrated and your website is customized, thoroughly test all functionalities before launching your new WordPress site. Sohojware provides comprehensive website testing services to guarantee a flawless launch.
Leveraging Sohojware's Expertise
Migrating your website to WordPress can be a breeze with the help of Sohojware's experienced web development team. Sohojware offers a comprehensive suite of migration services, including:
Expert Backup and Migration: Ensure a smooth and secure transition of your website's data.
Custom Theme Development: Create a unique and visually appealing website that reflects your brand identity.
Plugin Selection and Integration: Help you choose and implement the right plugins to enhance your website's functionality.
SEO Optimization: Optimize your website content and structure for better search engine ranking.
Ongoing Maintenance and Support: Provide ongoing support to keep your WordPress site running smoothly and securely.
FAQs: Migrating to WordPress with Sohojware
1. How long does the migration process typically take?
The migration timeframe depends on the size and complexity of your website. Sohojware will assess your specific needs and provide an estimated timeline for your migration project.
2. Will my website be down during the migration?
Typically, no. Sohojware can migrate your website to a temporary location while your existing site remains live. Once the migration is complete, the new WordPress site will be seamlessly switched in place, minimizing downtime and disruption for your visitors.
3. What happens to my existing content and SEO rankings after migration?
Sohojware prioritizes preserving your valuable content during the migration process. We can also help you implement strategies to minimize any potential impact on your SEO rankings.
4. Do I need to know how to code to use WordPress?
No! WordPress is designed to be user-friendly, and you don't need any coding knowledge to manage your website content. Sohojware can also provide training and support to help you get the most out of your WordPress site.
5. What ongoing maintenance does a WordPress website require?
WordPress requires regular updates to ensure optimal security and functionality. Sohojware offers ongoing maintenance plans to keep your website updated, secure, and running smoothly.
By migrating to WordPress with Sohojware's expert guidance, you'll gain access to a powerful and user-friendly platform that empowers you to create and manage a stunning and successful website. Contact Sohojware today to discuss your website migration needs and unlock the full potential of WordPress!
2 notes
·
View notes
Text
How to make a travel website design
how to design a successful travel website, combining best practices and essential considerations:
Planning Phase
Define Your Niche: What kind of travel will you focus on? Luxury, adventure, budget, specific destinations, or a blend? This clarity will guide your design choices.
Target Audience: Understand your ideal customers – their age, preferences, and how they like to research trips. Your design should resonate with them.
Competitive Analysis: Examine other successful travel websites. Note what you like, dislike, and where you can offer an improved experience.
>>>>Please click hare Fiverr<<<<
Design Fundamentals
Simple, Intuitive Navigation: Visitors should find what they need fast. Use clear menus, breadcrumbs, and a strong search function.
Responsive Design: Your site must adapt flawlessly to all devices (desktops, tablets, smartphones). Travel planning happens everywhere.
Visual Impact: Stunning, high-quality images and videos of destinations and experiences are key to inspiring wanderlust.
Compelling Content: Engage with well-written descriptions, travel tips, and blog posts to boost interest and SEO.
Social Proof: Include testimonials, reviews, and social media integration to build trust and credibility.
>>>>Please click hare Fiverr<<<<
Essential Features
Robust Search Functionality: Allow searches by destination, activity, date ranges, and budget. Include advanced filters to refine results.
Detailed Listings: Provide comprehensive information on hotels, tours, flights, etc., including photos, descriptions, pricing, availability, and amenities.
Secure Booking Engine: Integrate a reliable, user-friendly booking system that supports multiple payment methods.
Personalized Recommendations: Use data and AI to suggest trips that align with individual user preferences.
Maps Integration: Use Google Maps or similar to visually display destinations and travel routes.
Trip Planning Tools: Allow users to save itineraries, create wishlists, and compare options.
Customer Support: Provide accessible contact options (live chat, email, phone) for resolving queries.
>>>>Please click hare Fiverr<<<<
Technical Considerations
Website Builder vs. Custom Development:
Website Builders (Wix, Squarespace, WordPress): Offer ease of use and templates but may have limitations in customization.
Custom Development: Provides maximum flexibility but requires coding skills or hiring a developer.
Hosting: Select a reliable host with sufficient bandwidth to handle traffic and ensure a fast-loading website.
Content Management System (CMS): A CMS like WordPress makes managing your content easier.
Design Execution
Color Palette: Choose colors evoking travel (blues for oceans, greens for nature, etc.). Maintain a balanced and visually appealing scheme.
Typography: Use clear, readable fonts. A hierarchy for headings and body text improves scannability.
White Space: Avoid cluttering. White space allows information to breathe and enhances the design.
Call-to-Actions: Place prominent "Book Now", "Learn More" buttons to guide users through the booking process.
Testing and Launch
Thorough Testing: Test on various devices and browsers. Ask friends and colleagues for feedback.
Launch: Once you're confident, launch your site!
>>>>Please click hare Fiverr<<<<
Promotion and Maintenance
Marketing: Utilize SEO, social media, content marketing, and potentially paid advertising to drive traffic.
Updates: Keep content fresh, add new destinations, and enhance features based on user feedback.
>>>>Please click hare Fiverr<<<<
Let me know if you'd like a deeper dive into any of these aspects, or help choosing a website builder or CMS!
Thank you
#websitedesign#ecommerce website builder#wordpress website#web design#web development#wordpress development#ecommerce website templates#wordpresswebsitedevelopment
3 notes
·
View notes
Text
ShopBuildr AI Review – Create Amazon Affiliate Store In 60 Seconds!
Welcome to my ShopBuildr AI Review Post, This is a genuine user-based ShopBuildr AI review where I will discuss the features, upgrades, demo, price, and bonuses, how ShopBuildr AI can benefit you, and my own personal opinion. This is brand new automated AI software that creates 100% done-for-you and ready-to-profit affiliate stores in just minutes no Amazon APIs needed, and no content creation needed.
If you want to earn more affiliate commissions, then you are going to love this new tool. It automatically finds your products to promote, creates the posts for you, inserts content for you, and even adds your affiliate link for you! Affiliate marketing remains a popular way to generate income. It allows you to promote other companies’ products and earn commissions for each sale you make. However, building and maintaining a successful affiliate store can be a daunting task, especially for beginners. This is where ShopBuilder AI steps in. Claiming to be an all-in-one solution, ShopBuildr AI promises to automate the entire process of creating and managing an affiliate store.

ShopBuildr AI Review: What Is ShopBuildr AI?
ShopBuildr AI is a cloud-based software designed to simplify the process of building and managing affiliate websites. It utilizes artificial intelligence (AI) to automate several key tasks, including product selection, content creation, store design, and even content spinning (rewriting) for legal compliance.
ShopBuildr AI integrates with various platforms like Amazon and allows you to import product listings directly. It boasts features that streamline content creation, helping you generate product descriptions and reviews with minimal effort. Additionally, ShopBuildr AI offers built-in social media integration to promote your store and generate traffic.
ShopBuildr AI Review: Overview

Creator: Kurt Chrisler
Product: ShopBuildr AI
Date Of Launch: 2024-May-20
Time Of Launch: 10:00 EDT
Front-End Price: $17 (One-time payment)
Official Website: Click Here To Access
Product Type: Software (Online)
Support: Effective Response
Discount: Get The Best Discount Right Here!
Recommended: Highly Recommended
Bonuses: Huge Bonuses
Rating: 9.3/10
Skill Level Required: All Levels
Refund: YES, 30 Days Money-Back Guarantee
<<>> Click Here & Get Access Now ShopBuildr AI Discount Price Here <<>>
ShopBuildr AI Review: Features
Create Your First Affiliate Store In Just Minutes!
100+ DFY Affiliate Products
Offer Unlimited Products For More Commissions
Integrated with ChatGPT
Newbie Friendly, No Experience Required
No Amazon API is Needed!
Automated Free updates
Unlimited support
ShopBuildr AI Review: How Does It Work?
Creating Your Affiliate Store Has Never Been This Easy!
STEP #1: Install the Software
Simply upload the Shopbuildr AI WordPress Plugin to your WordPress site.
STEP #2: Upload Your Products
Simply upload the 100+ DFY Products we provide to get started fast!
STEP #3: Let ShopBuildr AI Take Over
Click “Post” and ShopBuildr AI will build your site for you! Everything is completely done for you.
<<>> Click Here & Get Access Now ShopBuildr AI Discount Price Here <<>>
ShopBuildr AI Review: Can Do For You
Automatically Creates An Affiliate Store
Automatically Insert the Product Name
Automatically Inserts Content
Automatically Inserts Product Images
Automatically Inserts Your Affiliate Link
Automatically Inserts Custom Ads
Add Your Optin Box to Each Page
Integrated with ChatGPT

ShopBuildr AI Review: Who Should Use It?
Affiliate Marketers
Artists
Content Creators
eCom Store Owners
Blog Owners
CPA Marketers
Video Marketers
Product Creators
Personal Brands
Freelancers
And Many Others
ShopBuildr AI Review: OTO’s And Pricing
Front End Price: ShopBuildr AI ($17)
OTO1: ShopBuildr AI PRO ($37)
OTO2: ShopBuildr AI Unlimited ($47)
OTO3: Done For You Option ($67)
OTO4: iMarketers Hosting ($39/$59 per year)
<<>> Click Here & Get Access Now ShopBuildr AI Discount Price Here <<>>
ShopBuildr AI Review: My Unique Bonus Bundle
My Unique Bonus Bundle will be visible on your access page as an Affiliate Bonus Button on WarriorPlus immediately after purchase.
And before ending my honest ShopBuildr AI Review, I told you that I would give you my very own unique PFTSES formula for Free.
ShopBuildr AI Review: Free Bonuses
Bonus #1: Azon Affiliate Bar Plugin
With this WordPress plugin, you can display a “sticky bar” at the top of your site promoting any Amazon product you want. This plugin makes it incredibly easy to start making more commissions from the Amazon Affiliate program in just a couple of minutes!
Bonus #2: FB Affiliate Alert Box Plugin
This WordPress plugin allows you to use the familiarity of Facebook to increase your affiliate commissions on all your websites. It will create pop-up boxes that resemble those from Facebook and allow you to insert affiliate products into them.
Bonus #3: WP Traffic Domination Training
You can’t make money online without traffic! The Traffic Domination course will show you how to start generating free traffic to all your websites and how to do it the right way to avoid penalties. If you need more traffic. then you need this course!
ShopBuildr AI Review: Demo Video
Just Watch The ShopBuildr AI Demo Video Down Below To Get All The Details:
>>For More Details Click Here<<
<<>> Click Here & Get Access Now ShopBuildr AI Discount Price Here <<>>
ShopBuildr AI Review: Money Back Guarantee
30 day money back guarantee
ShopBuilder AI is backed by a 30-day warranty. If you are having trouble setting up your first affiliate site and our support staff is unable to assist you. Send us an email and we’ll refund your purchase.
That’s it!
ShopBuildr AI Review: Pros and Cons
Pros:
Saves time with automated product selection and content creation.
Beginner-friendly interface for easy website setup.
Built-in social media integration for wider reach.
Cons:
You cannot use this product without an active internet connection.
In fact, I haven’t yet discovered any other problems withShopBuildr AI.
Frequently Asked Questions (FAQ’s)
Q. How many sites can I create?
With the standard version you can create 1 site. However, after you purchase you will have the option to upgrade your account to unlimited, which will allow you to create as many sites as you want.
Q. Do I need to purchase anything else?
You will need to have your own domain name and website that is using WordPress on it
Q. Is ShopBuildr AI completely free?
ShopBuildr AI typically offers a base product at a lower price, with additional features locked behind upsells. There might also be free trials available, so check their website for current pricing details.
Q. Can ShopBuildr AI guarantee my affiliate marketing success?
ShopBuildr AI is a tool to help build your website, but success in affiliate marketing depends on various factors like ongoing content creation, audience engagement, and marketing strategies.
Q. Is the content generated by ShopBuildr AI good enough?
AI-generated content can be a starting point, but it might require editing to ensure quality and uniqueness for optimal SEO impact.
ShopBuildr AI Review: My Recommendation
ShopBuildr AI offers a compelling solution for beginners or those short on time. It streamlines website creation and content generation, but it’s important to remember it’s a tool, not a magic solution. Long-term success requires ongoing effort in content creation, audience engagement, and SEO optimization. Weigh the potential benefits against the limitations to determine if ShopBuildr AI can be a stepping stone on your affiliate marketing journey.
<<>> Click Here & Get Access Now ShopBuildr AI Discount Price Here <<>>
Check Out My Previous Reviews: IntelliVid AI Studio Review, CB Ninja Review, AI Employees Review, OverLap AI Review, AI CaptureFlow Review, FlexiSitesAI Review, WP Defense Review, HostDaddy Review.
Thank for reading my ShopBuildr AI Review till the end. Hope it will help you to make purchase decision perfectly.
Disclaimer: This ShopBuildr AI review is for informational purposes only and does not constitute professional advice. Before making a purchase decision, we recommend conducting your own research and exploring the software.
Note: Yes, this is a paid software, however the one-time fee is $17 for lifetime.
#Affiliate Marketing#Ai#AI Tools#Apps#Artificial Intelligence#Buy ShopBuildr AI#Digital Marketing#Get ShopBuildr AI#How Does ShopBuildr AI Work#How to Make Money Online#Make Money#Make Money From Home#Make Money Online#Online Earning#Purchase ShopBuildr AI#ShopBuildr AI#ShopBuildr AI App#ShopBuildr AI Benefits#ShopBuildr AI Bonus#ShopBuildr AI Bonuses#ShopBuildr AI Bundle#ShopBuildr AI By Kurt Chrisler#ShopBuildr AI Demo#ShopBuildr AI Discount#ShopBuildr AI Downsell#ShopBuildr AI FE#ShopBuildr AI Features#ShopBuildr AI Funnels#ShopBuildr AI Honest Review#ShopBuildr AI Info
3 notes
·
View notes
Text
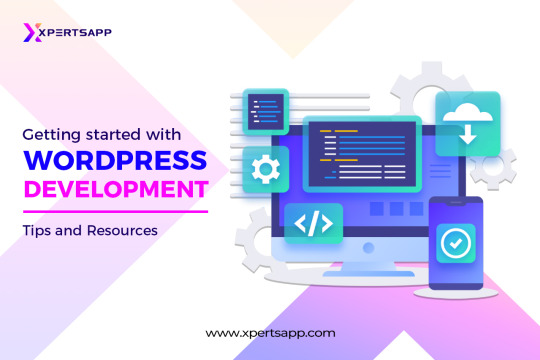
Getting Started with WordPress Development — The Best Tips to Get Started
In the world of digitalization, every business must focus on having a digital presence for their brand to increase their traffic for their business to retain more customers. One of the best ways to have a unique digital presence for your brand is through WordPress web development. One of the most known platforms known for creating a website is WordPress web development. You’re choosing to become a part of the WordPress user community worldwide. The platform is maintained by thousands of web developers who work tirelessly to add new features, enhance functionality, and strengthen security. Even better, it’s far more straightforward than you might imagine joining the WordPress community. You must follow the trend to stay under the umbrella of updates to track your business’s growth.
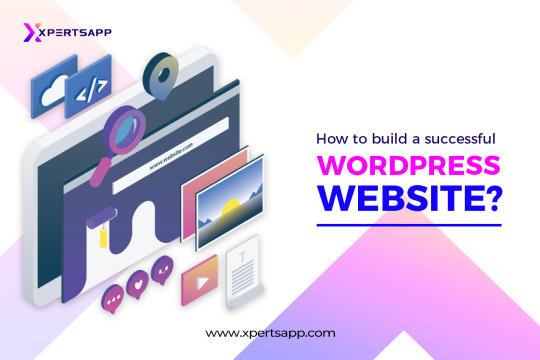
How to build a successful WordPress website?
Once you choose WordPress web development, you must know about the requirements while developing a WordPress website to have a unique and distinctive digital presence for your target audience online and get to know about your brand. Today, launching a website is simpler than ever. The procedure still has several steps. If you pay attention to these steps, your site’s launch might run smoother than you’d like. Additionally, launching a website without any forethought is a formula for catastrophe.
We’ll go through further steps and tips in this article that must be completed before developing a WordPress website. Everything you need to do, from the planning stages of your website to its launch debut, will be covered.
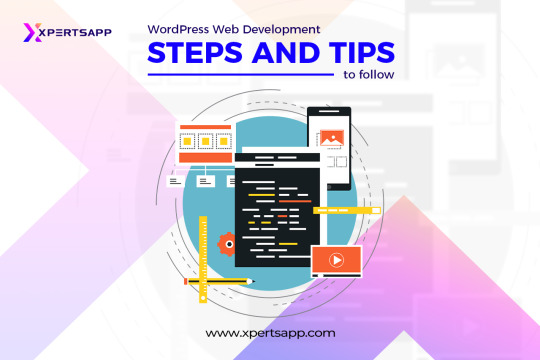
WordPress web development: Steps and tips to follow
Develop the Concept for Your Website
Every successful Website has a concept at its core. You could write about computer lessons, video game reviews, or even movies. Each of those suggestions ought to have a specific objective.
For instance, a website specializing in computer lessons may want to sell products or encourage visitors to enroll in an online course. Before starting to build your website, you must have a solid concept. Otherwise, you’ll aimlessly wander around and squander time.
What you want your website to emphasize should be listed in writing.
Define the main objective of your website (i.e., making you money, positioning you as an expert in your field, just a hobby, etc.).
Consider the demographic of your desired audience.
Think about possible names for your website.
It can take time to identify your intended audience, though. The key is to consider your target audience, which should constitute most of your traffic while choosing the type of material you wish to post. Finally, choosing a name for your website is a very subjective choice. However, since you’ll need to purchase a related domain, we advise sticking with something simple to remember and type.
Choose and Buy a Domain for your WordPress Web Development
Now that the conceptual phase of learning how to establish a website is complete, let’s move on to the technical side. You should sign up for a domain for your website. You can purchase a domain name in many different locations. We advise using a specialized domain registrar in most situations because they frequently have the best selection of Top-Level Domains (TLDs) at affordable pricing. Most of the time, because they are well-established options that people are familiar with, it is usually advised to stick with “.com” TLDs. It’s a minor investment for your website’s future to purchase a regular.com domain, which should cost you roughly $10 per year.
Identify Suitable WordPress Hosting
Finding the web host that will house your website is the next step in your quest. Your choice of provider will be significantly influenced by the platform you use to develop your website. Naturally, it is advised to use WordPress as your Website’s platform because it offers a wealth of tools, plugins, and themes that make it relatively simple to create a unique website. This is the significant role of WordPress when you think of developing a website for your business to have its digital presence. Therefore, the best choice one could make for hosting while developing a website for an online company to a vast audience.
Create the critical content for your website
The majority of new websites launch discreetly. The initial content is mainly ignored until traffic levels go up after an indefinite period. But that doesn’t mean it’s not crucial to start developing the most important content for your website immediately. A new website needs help to gain popularity, especially right after launch. In our experience, writing long-form web copy and blog content focusing on keywords you believe will rank well is the best way to increase traffic numbers.
To make this work, you’ll need to research Search Engine Optimization marketing (SEO) and develop several practical topic ideas. Next, try to write an article that is superior to anything the opposition has on the same topic. In the end, you want to become well-known right away. However, more than a single article will be required, which is where the final step comes into play.
Decide on the ideal theme for your website.
It’s time for your website to start taking shape now that WordPress has been installed and your actual content has been written. Installing a theme that fits the look you want for your website is the first thing we advise you to do.
You can utilize two different types of themes. Also, niche themes are created with a particular kind of Website in mind. You may also look at multipurpose themes, which focus on flexibility and the ability to fit almost any type of Website. Your theme selection should ideally be a long-term choice. In light of this, we advise you to choose the ideal option for you, try it, and proceed to the next stage only after. Your theme selection should ideally be a long-term choice. In light of this, we advise you to choose the ideal option for you, try it, and proceed to the next stage only after.
Install the Required Plugins
It would help if you used “plugins,” one of WordPress’s key selling features, to power the extra functionality on your website. They are simply add-ons, and the ones you choose will primarily rely on the functionality your site will have. The greatest thing you can do is take some time to explore around. The WordPress.org Plugin Directory alone contains over 50,000 free plugins. It has little risk in testing out a plugin if it intrigues you.
However, we advise avoiding plugins with ratings of fewer than four stars and those without any updates in the previous six months. Keeping this general guideline in mind is essential because those can have bugs that haven’t been patched and other vulnerabilities.
Make Your Site’s Design Specific to Your Content and Goals
This process step typically has a big head start because WordPress has a large selection of pre-designed themes and page builders. You get to start with the default design of your parent theme and then modify it to suit your needs. It will probably take some time to combine your site’s design, especially if this is your first attempt. However, it pays to ensure everything looks perfect, so the rest of your site’s launch goes smoothly. Keep in mind to constantly create each page and article to achieve that goal.
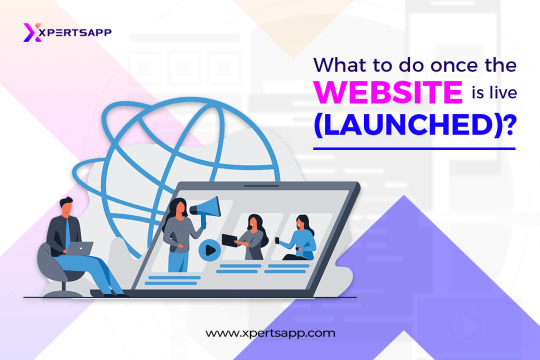
What to do once the Website is live (launched)?
The Website is made once as it has gone through the whole development process. It would help if you created a schedule for new postings after publishing your new site’s first piece of content. An excellent strategy to grow an audience for a new website is to blog at least once every week. It makes sense to compose your website’s critical content before you even launch. As a result, you may devote your whole post-launch weeks or even months to marketing and link-building.
It would be best if you had a social media presence and backlinks to engage with your expanding audience and build an email list. You can launch campaigns and set up autoresponders using a list, which will eventually help drive visitors to your website. How you proceed from here will ultimately depend on your long-term objective. For instance, creating a “passion blog” is not the same as monetizing your website. Finding and fostering guests, however, is a constant concern.
Conclusion
It’s easier to set up a WordPress website than it originally was. Thanks to WordPress’s community-driven, ongoing platform improvements, you can now create a website in a few easy steps. However, you might still require assistance with the trickier aspects. In that case, don’t worry. We are available to you.
For all of your website needs, we provide 24/7 assistance. With the help of our Website Builder, we even further streamline the website-building procedure. Use our Website Builder to access XpertsApp and have your site up and running.
#wordpress#webdevelopment#web developing company#web developers#website design#web hosting#ecommerce#shopify#technology#digital marketing#search engine optimization#search engine marketing
2 notes
·
View notes
Text
Exploring the Realm of cPanel Hosting in Australia: A Comprehensive Guide
In the vast digital landscape of Australia, where businesses thrive and online presence is paramount, finding the right hosting solution is akin to selecting a foundation for a skyscraper. In this digital age, where websites serve as the face of enterprises, the choice of hosting can significantly impact performance, user experience, and ultimately, the success of ventures. Among the plethora of options, cPanel hosting stands out as a popular choice for its user-friendly interface, robust features, and reliability. But what exactly is cPanel hosting, and why is it gaining traction among businesses in Australia?

Understanding cPanel Hosting
What is cPanel hosting?
cPanel hosting is a type of web hosting that utilizes the cPanel control panel, a web-based interface that simplifies website and server management tasks. It provides users with a graphical interface and automation tools, allowing them to effortlessly manage various aspects of their website, such as file management, email accounts, domain settings, databases, and more.
How does cPanel Hosting Work?
At its core, cPanel hosting operates on a Linux-based server environment, leveraging technologies like Apache, MySQL, and PHP (LAMP stack). The cPanel interface acts as a centralized hub, enabling users to perform administrative tasks through a user-friendly dashboard, accessible via any web browser.
Benefits of cPanel Hosting
User-Friendly Interface
One of the primary advantages of cPanel hosting is its intuitive interface, designed to accommodate users of all skill levels. With its graphical layout and straightforward navigation, even those with minimal technical expertise can manage their websites efficiently.
Comprehensive Feature Set
From creating email accounts to installing applications like WordPress and Magento, cPanel offers a wide array of features designed to streamline website management. Users can easily configure domains, set up security measures, and monitor website performance, and much more, all from within the cPanel dashboard.
Reliability and Stability
cPanel hosting is renowned for its stability and reliability, thanks to its robust architecture and frequent updates. With features like automated backups, server monitoring, and security enhancements, users can rest assured that their websites are in safe hands.
Scalability and Flexibility
Whether you're running a small blog or managing a large e-commerce platform, cPanel hosting can scale to meet your needs. With options for upgrading resources and adding additional features as your website grows, cPanel offers the flexibility required to adapt to evolving business requirements.
Choosing the Right cPanel Hosting Provider
Factors to Consider
When selecting a cPanel hosting provider in Australia, several factors should be taken into account to ensure optimal performance and reliability:
Server Location: Choose a provider with servers located in Australia to minimize latency and ensure fast loading times for local visitors.
Performance: Look for providers that offer high-performance hardware, SSD storage, and ample resources to support your website's needs.
Uptime Guarantee: Opt for providers with a proven track record of uptime, ideally offering a minimum uptime guarantee of 99.9%.
Customer Support: Evaluate the level of customer support offered, ensuring prompt assistance in case of technical issues or inquiries.
Conclusion
In conclusion, cPanel hosting serves as a cornerstone for businesses seeking reliable and user-friendly cpanel hosting Australia. With its intuitive interface, comprehensive feature set, and robust architecture, cPanel empowers users to manage their websites with ease, allowing them to focus on their core business objectives.
2 notes
·
View notes
Text
Digital marketing online course in Mohali and Chandigarh | Param digital marketing
Digital Marketing Course – Learn Online and Save Money
Below is an outline of an online digital marketing course content. This content is a general guideline and can be adapted and expanded based on the specific needs of the course and the level of expertise of the learners. Learn Advanced Digital Marketing with DKI and DSA Ads only in 29999/– now – Join Now
Digital marketing online course in Mohali and Chandigarh.

Understanding digital marketing and its importance
Evolution of digital marketing
Digital marketing vs. traditional marketing
Key concepts and terminology
Book Class Now
Module 2: Website Planning and Development
Importance of a website in digital marketing
Domain registration and hosting
Website design principles and best practices
User experience (UX) and user interface (UI)
Mobile responsiveness and optimization
Introduction to Content Management Systems (CMS) like WordPress
Module 3: Search Engine Optimization (SEO)
Want to join click here
Understanding search engines and how they work
On-page SEO: Keyword research, Density and Proximity, meta tags and Description, headings, content and image optimization
Off-page SEO: Link building, backlinks, and domain authority, DA/PA Checking
Technical SEO: Website speed, site structure, and crawlability, Mobile Friendly, Security
Local SEO and Google My Business Page Optimization
Module 4: Content Marketing
Importance of quality content writing in the digital landscape
Creating a content writing strategy
Types of content: blog posts, articles, infographics, videos, etc.
Content promotion and distribution
Content analytics and measuring success
Module 5: Social Media Marketing
Overview of major social media platforms (Facebook, Twitter, LinkedIn, Instagram, Pinterest, Tumblr etc.)
Creating a social media strategy
Social media advertising and sponsored posts, Event Creating
Building and engaging with an online community
Social media analytics and performance tracking
Module 6: Email Marketing
Building an email marketing list
Creating effective email campaigns
Email marketing tools and platforms
Personalization and segmentation
Analyzing email marketing performance
Module 7: Pay-Per-Click (PPC) Advertising
Introduction to PPC Advertising and Google Ads
Creating PPC campaigns and ad groups
Keyword research and selection
Ad copywriting and A/B testing
Bid strategies and budget management
Module 8: Display and Banner Advertising
Understanding display advertising and its formats
Display advertising platforms (Google Display Network, etc.)
Targeting options for display ads
Designing effective banner ads
Display ad performance tracking and optimization
Module 9: Video Marketing
The rise of video content in digital marketing
Creating engaging video content
Video SEO and optimizing for platforms like YouTube
Video advertising and sponsored content
Analyzing video marketing metrics
Module 10: Analytics and Data-driven Marketing
Introduction to marketing analytics
Setting up Google Analytics and understanding key metrics
Data analysis for decision-making
A/B testing and conversion rate optimization (CRO)
Customer journey and attribution modeling
Module 11: Mobile Marketing
Mobile marketing trends and opportunities
Mobile app marketing and optimization
SMS marketing and push notifications
Mobile advertising and location-based marketing
Mobile analytics and tracking
Module 12: Digital Marketing Strategy and Planning
Developing a comprehensive digital marketing strategy
Integrating various digital marketing channels
Budget allocation and resource planning
Measuring ROI and KPIs for digital campaigns
Case studies and real-world examples
Module 13: Legal and Ethical Considerations
Privacy and data protection laws (e.g., GDPR)
Ethical practices in digital marketing
Dealing with online reviews and reputation management
Handling customer data responsibly
Module 14: Emerging Trends in Digital Marketing
Artificial Intelligence (AI) and machine learning in marketing
Voice search and voice-activated devices
Augmented Reality (AR) and Virtual Reality (VR) marketing
Influencer marketing and social media trends
Future outlook and staying ahead in the digital marketing landscape
Module 15: Final Project and Certification
Capstone project applying concepts learned throughout the course
Presentations and feedback sessions
Issuance of course completion certificates
Remember that this is just a general outline, and the content and depth of each module can be adjusted to suit the course’s duration, audience level, and objectives. Additionally, including practical exercises, case studies, and hands-on projects will enhance the learning experience. We provide 100% Job Placement after completion of Course.
Digital marketing online course in Mohali and Chandigarh.
#digital marketing#online marketing#seo services#search engine optimization#mohali#chandigarh#tricity#learning#education#student#university#jobseekers#college#online courses
3 notes
·
View notes
Text
SO WHAT IS TUMBLR'S SURVEY?
I'm not sure if this is something people are seeing site-wide, but the Tumblr staff is asking users to sign up and complete a survey regarding feedback, prototype-testing, and such. You may have seen this banner at the top of your dashboard:

I recognize, after giving them my blog information, that it is very unlikely they will reach out to me for such matters despite giving my consent...
But seemingly unlike Tumblr's staff, I value transparency! So, I'm going to talk about what's on there, and what I personally responded with.
Some quick disclaimers:
I am not asking for people to copy/paste or use my answers to influence their own survey responses. In fact, I discourage directly copying answers or "spamming"/"overloading" the survey. If you, as an individual, agree with the points I have brought up, please voice them in your own words and in your own survey response.
I am not violating any known terms by discussing this survey, as there is no confidentiality agreement present upon beginning the survey.
Everything I mention in this post, as well as in my response, are alleged (excluding details surrounding Tumblr's NYCCHR Settlement, which is publicly accessible information -> Summary of NYC Gov. Settlements [ LINK ] and NYCCHR Settlement Documentation [ LINK ].
With that out of the way, let's get started.
The survey itself is pretty standard in terms of engagement and feedback. It is hosted by Crowdsignal, which is Automatic's own platform hosted under Wordpress (re: you use a Wordpress account, or it is highly encouraged to use said account, to create a Crowdsignal account). It features type-box responses, as well as a few typical Likert-scale questions.
As for the content, it begins standard. As the company states they wish to gain a wide array of responses, the first group of questions is pretty straightforward: When did you first join Tumblr, when is the last time you used Tumblr, how often do you use Tumblr, etc.
There is an interesting question, Question 4, asking users to rank their average activity on Tumblr. The activities are things such as reblogging posts, liking posts, sending direct messages, etc etc., and has a ranking system from "Never" to "Always", with a "Not Sure" option for those who aren't sure how to rank.
Then, we start to get into the meat of the survey a little. At least, for vocal little assholes like me. The next question is "Which of the following purchases have you made on Tumblr?"
And questions structured like this one, with multiple choice boxes and an "Other" type-box… Allow for feedback. So I gave some.
In response to being asked about my purchase history, I selected "None", then used the type-box to respond with the following:
I refuse to financially support Tumblr until the company and its employees uphold the promises made by themselves, and in accordance with the NYCCHR Settlement regarding blatant discrimination against its userbase on the basis of sexual orientation and gender identity, as well as their less-investigated biases against BIPOC bloggers, particularly those that are Black.
There's a few more standard selection questions regarding the method(s) one uses to visit Tumblr, as well as what interest areas (e.g., fandom, gaming) you interact with. They also ask about how many primary accounts and sideblogs you have…
Then they strike again. The first question asking for a solely written response is summarizing the typical activities one does on Tumblr. The second, however, is much more intriguing:
"If you could change one thing about Tumblr, what would it be and why? If you would not change anything, please explain why."
There are… many things. But they asked for one, so I gave them one:
If I could change one thing about Tumblr, it would be the site moderation. Users have brought the seeming lack of moderation to attention time and time again, only to be met with waves of discriminatory moderation application. Appropriately filtered content gets deleted, or a blog banned, whilst hate speech and active harassment campaigns (particularly against LGBTQ+ and BIPOC individuals) are not only allowed to remain on the site, but often allowed/approved to be Blazed. Time and time again, too, the website's staff has promised that things would be fixed. Time and time again, including in the window following the NYCCHR Settlement, the site staff has not only not made any notable work on fixing these rampant issues, but has doubled-down and blamed its userbase for a lack of financial support.
In short, the moderation system. And this should be a surprise to nobody that follows me, as I've posted time and time again about how… poor, this system is. Whether it was my own experiences, or the experiences of those who have since had to rebuild their platforms, or who have had to outright leave the site due to the incessant harassment campaigns.
And then there's another small lull in questioning, which asks about the search functionality. Personally, if I were one to design this survey, I would have swapped Questions 12 and 13… But I acknowledge that 1) I have recency bias in discussing the moderation system and 2) it's possible that whoever is on the metrics team creating this survey simply is unaware that this may be (or is, depending on the crowd) the hottest issue on Tumblr. But I digress, let's jump to Question 13:
"How satisfied are you with the current system for reporting harassment on Tumblr?"
Now… If you've read this far, you know my answer. If you've followed me for more than a day, you know my answer. So I will let the survey response speak for itself:
The current system for reporting harassment is comical at best, and adversarial at worst. There have been many times that I have reported hate speech, graphic depictions of violence, and similarly harmful content, only to receive no follow-up / to see that the content is allowed to remain. This includes things found in tags, on the dashboard, and through the site's Blaze campaign. Yet, I too have seen posts about queerness (posts not sexual in nature, nor depicting anything else violating the ToS) be censored, removed, and flagged for being "inappropriate" for the userbase. At the VERY LEAST, I believe the system could be better if there were actual communication between the staff and the user, and if the report form were easier to locate. Reddit's moderation system, for example, works effectively not only in properly removing harmful content, but in communicating that these reports are being received and acknowledged.
From here, there aren't many options for feedback. The survey's focus shifts into the prototype-testing side of things. Determining what devices the user has access to, if they've been involved in prior research interviews/focus groups, if there's interest in these programs, etc etc.
So I fill it out accordingly (showing interest in providing feedback via virtual tests and sharing screens), give them my preferred email (not the one I use for Tumblr, but the story behind that is long and boring, and I'd rather forget it), age range, and my blog name.
Hello poor staffer who has to vet me! I'm not mad at you, I'm mad at your CEO.
And then you can receive a copy via email, if you provide it again. As someone who values transparency (and receipts), I would recommend doing this regardless of if you give in-depth feedback or not.
It's just nice to have a copy of the information you provided, as you may be asked to recall it upon being selected for any future communications.
In short, Tumblr has opened a channel for feedback and I do encourage people to give that feedback, regardless of if you're interested in the prototypes and interviews and whatever. You are a user of the platform. You have a voice; let it be heard!
2 notes
·
View notes