#design pattern video tutorial
Explore tagged Tumblr posts
Visit Tumblr Blog
Explore Tumblr blogs with no restrictions, modern design and the best experience.
Last Seen Tumblr Blogs


Fun Fact
Users from the US are the majority of Tumblr visitors.
Text
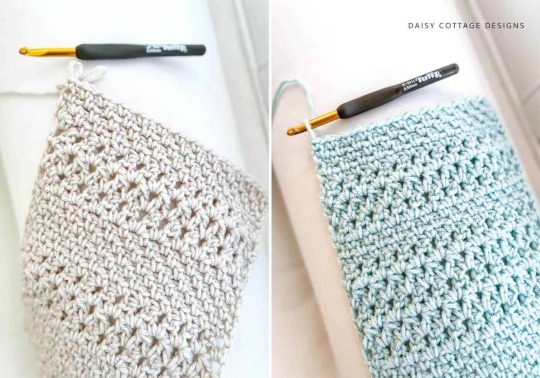
Crochet Throw Blanket Pattern: Cobblestone Pathways
Sharing a free written pattern (and video tutorial) by Lauren over at Daisy Cottage Designs. This makes such lovely use of the 'moss stitch'.
youtube
#moss stitch#crochet#crochet tutorial#video tutorial#how to#diy#pattern#free pattern#daisy cottage designs#Youtube
9 notes
·
View notes
Text
youtube
In this tutorial, I will walk you step by step through making this lined, gathered skirt from one piece of fabric. This pattern is great for beginners, super customizable, and low to zero waste. The possibilities are endless with this skirt! I have a few ideas of my own and will be posting a follow up video covering some easy ways to customize and make it your own. I’m here to help! If you give this a try and get stuck at any step, leave me a comment and I will help you through it. :-)
#design#handcrafted#handmade#fashion#slow fashion#textiles#textile art#youtube#artists on tumblr#outfit inspiration#outfit#one of a kind#fiber arts#fashion art#art#sewing#fashion design#fabric#video#sewing tutorial#my sewing#sewing project#sewing patterns#skirt#gathered skirt#DIY#diy tutorial#Youtube
18 notes
·
View notes
Text
Odysseus having the ultimate storytime youtube channel dedicated to telling stories of his travels, the war, and yapping about his wife and son
#Penelope with the weaving/loom tutorials#she does 'weave with me :D ' livestreams and sometimes you can hear Odysseus and Telemachus off screen playing#when she explains the designs or patterns of her pieces you can hear the love and fondness behind the memory or inside joke its about#she's experimenting with making tapestry clothing and Odysseus wears each piece with pride in his videos#the odyssey#homers odyssey
8 notes
·
View notes
Text
Can You Learn to Sew Online? A Comprehensive Look at Your Options with ONSA
At ONSA - Online Sewing Academy, the world of stitching and garment construction should be accessible to everyone, regardless of location or schedule. In today's digital age, online learning has revolutionized how we acquire new skills, making it possible to master intricate crafts like sewing from the comfort of our homes. But can you truly become an expert stitcher through virtual classes alone? Let's explore the options available and how ONSA empowers you to embark on an enriching sewing journey.
The Beauty of Pre-Recorded Video Lessons
Ah, the world of pre-recorded tutorials - a treasure trove of knowledge at your fingertips! ONSA's extensive library of meticulously crafted video lessons offers a comprehensive exploration of sewing techniques, from the fundamentals of threading a needle to the intricacies of advanced garment construction. One of the most significant advantages of this format is the ability to learn at your own pace, rewinding and revisiting lessons as many times as needed until each stitch and seam becomes second nature.
Our pre-recorded videos are thoughtfully designed to cater to diverse learning styles, combining visual demonstrations with clear, concise explanations. Whether you're a visual learner who thrives on observing each step or an auditory learner who appreciates detailed verbal guidance, our lessons ensure that no aspect of the sewing process is left unexplained.
While budget-friendly and convenient, we understand that pre-recorded content may lack the human interaction that many pupils crave – the ability to ask questions, receive real-time feedback, and benefit from the personalized attention of an experienced instructor. This is where our live, interactive classes come into play.
The Magic of Live, Interactive Classes
Imagine having a seasoned ONSA instructor by your virtual side, guiding you through the intricate sewing world with patience and expertise. Our live, online classes provide an immersive, interactive experience replicating the intimacy of a physical classroom setting. Through video conferencing technology, you can follow along with your instructor, ask questions as they arise, and receive real-time feedback on your technique.
One of the most significant advantages of live classes at ONSA is the ability to learn at a pace that suits your individual needs. Our instructors are adept at adapting their teaching methods to accommodate varying skill levels, ensuring that every student feels included and supported. Whether you're a complete novice taking your first tentative stitches or a skilled stitcher seeking to elevate your art, our talented teachers can customize lesson plans to align with your unique goals and aspirations.
From mastering the art of inserting invisible zippers to acquiring advanced draping skills for haute couture designs, our live classes cover various topics, catering to hobbyists and aspiring professionals. Private one-on-one sessions and small group workshops provide ample opportunity for personalized guidance, fostering an environment where questions are welcomed, and challenges are addressed with patience and expertise.
The ONSA Edge: A Holistic Approach to Sewing Education
At ONSA, we understand that sewing is more than just a practical skill – it's an art form that combines technical precision with creative expression. Our approach to online sewing education is rooted in this philosophy, nurturing both the technical and artistic aspects of this timeless craft.
Our team of expert instructors, each with years of industry experience and a passion for teaching, has thoughtfully crafted a multifaceted curriculum that covers the entire spectrum of sewing, from understanding fabric properties and pattern drafting to mastering advanced construction techniques and exploring fashion design principles.
By combining our comprehensive library of pre-recorded video resources with live, interactive sessions, ONSA provides a 360-degree learning experience tailored to your schedule, skillset, and aspirations. Whether you prefer the convenience of self-paced learning or thrive on the dynamic energy of a virtual classroom, our blend of educational formats ensures that your sewing journey is enriching, engaging, and tailored to your unique needs.
Beyond the technical aspects of sewing, ONSA also emphasizes the importance of nurturing creativity and self-expression. Our lessons encourage students to experiment with fabric choices, color combinations, and design elements, fostering an environment where individuality is celebrated and personal style is cultivated.
Sewing Mastery: A Journey, Not a Destination
At ONSA, we firmly believe that sewing mastery is a lifelong pursuit, a continuous learning and refinement journey. Our online academy is designed to support you at every stage of this journey, from your first tentative stitches to the creation of intricate, couture-worthy garments.
As you progress through our curriculum, you can participate in virtual sewing circles, where you can connect with fellow stitchers, share your creations, and seek inspiration from a community of like-minded individuals. Our instructors are not just teachers but mentors dedicated to your growth and success, offering guidance and encouragement every step of the way.
Sewing is more than just a hobby – it's a powerful form of self-expression, transforming fabric into wearable art that reflects your unique style and personality. At ONSA, we strive to empower you to unleash your creativity, one stitch at a time, by providing a comprehensive and immersive online learning experience tailored to your needs.
Ready to Start Stitching Your Dreams into Reality?
Whether you're a busy professional seeking a creative outlet, a stay-at-home parent looking to explore a new passion, or a lifelong stitcher yearning to elevate your skills, ONSA - Online Sewing Academy supports your sewing journey.
Explore our diverse online sewing courses today, from beginner-friendly introductions to advanced masterclasses, and unlock a world of possibilities that transcends time and space. With ONSA, the art of sewing is no longer limited by your location or schedule – it's a vibrant, accessible realm where your dreams can be woven into reality, one exquisite thread at a time.
Join our virtual community of passionate stitchers, where inspiration, camaraderie, and personal growth intertwine seamlessly. Embark on a transformative journey that will teach you sewing techniques, ignite your creativity, boost your confidence, and empower you to express your individuality through the timeless art of garment construction.
The world of sewing awaits, and at ONSA, we're committed to being your trusted guide every step of the way. Unleash your inner stitching prowess, and let your creativity take flight – the possibilities are endless.
#sewing#sewing classes#online sewing classes#learn to sew online#virtual sewing lessons#sewing tutorials#pre-recorded sewing videos#live sewing classes#interactive sewing instruction#ONSA sewing academy#sewing education#sewing mastery#garment construction#fashion design#pattern drafting#sewing techniques#creative sewing#sewing community#sewing journey#sewing skills#beginner sewing#advanced sewing#couture sewing#self-paced learning#personalized instruction#sewing mentorship#sewing creativity#sewing expression#wearable art#fabric art
15 notes
·
View notes
Text
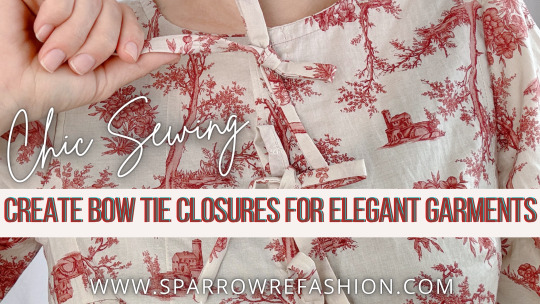
Chic Bow Tie Clasps: Create Unique Bow Button Designs
In this post, you will learn how to sew fabric chic bow tie clasps with free PDF pattern. Welcome to the world of creative sewing! Whether you’re a seasoned seamstress or picking up a needle for the first time, this step-by-step tutorial is designed to guide you through the delightful process of crafting chic bow tie clasps. Perfect for adding a touch of elegance to any garment, these unique bow…
View On WordPress
#Beginner-Friendly Sewing Instructions#Chic Bow Tie Clasps Tutorial#DIY Fashionable Blouse Buttons#Easy Bow Knot Tutorial for Jumpsuits#Free Printable Bow Tie Pattern#How to Sew Bow Knots for Tops#Sewing Bow Tie Closures for Dresses#Step-by-Step Bow Clasp Video#Transform Your Wardrobe with Bow Ties#Unique Bow Button Design Guide
8 notes
·
View notes
Text

Acorn Weevil, a crochet pattern designed by Kylie Slee on Ravelry.
Find the free video tutorial here!
#crochet#full pattern#crochet pattern#free crochet pattern#fiber art#fiber crafts#bugs#critters#weevil#1k#5k#10k
12K notes
·
View notes
Text
#spirograph#spirograph art#spirograph designs#spirograph drawing#spirograph (invention)#spirograph cyclex#spirograph tutorial#easy spirograph designs#spirography#spirograph set#easy spirograph#best spirograph#spirograph asmr#spirograph short#spirograph ideas#super spirograph#spirograph scale#spirograph videos#spirograph basics#spirograph design#holiday spirograph#spirograph rainbow#spirograph pattern#original spirograph#spirograph triangle#Youtube
1 note
·
View note
Video
youtube
(vía https://youtube.com/watch?v=VtGbvrKzhBg&si=uq-O4MawLPxZT-RC)
#youtube#design#patterns#outfit#youtube video#tutorial#blackdress#tulle dress#mididress#sewing#my clothes#young dress#learning#lesson#master class
0 notes
Text


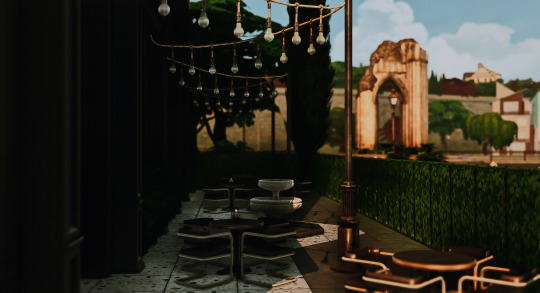
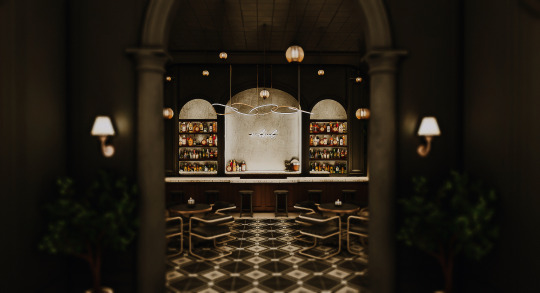
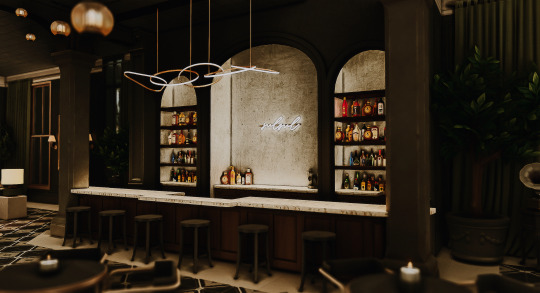
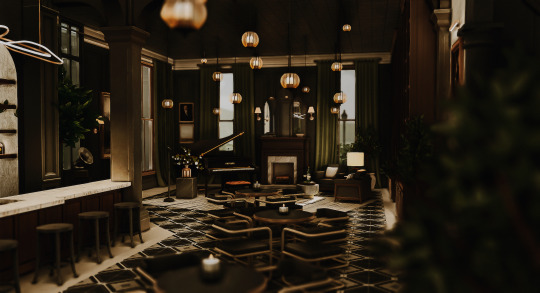
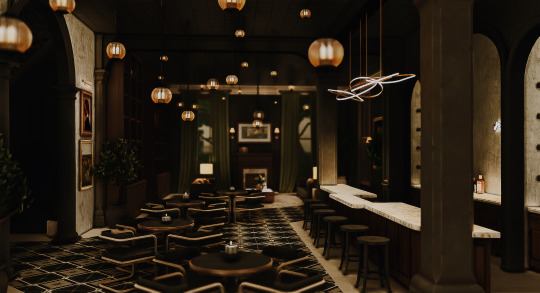
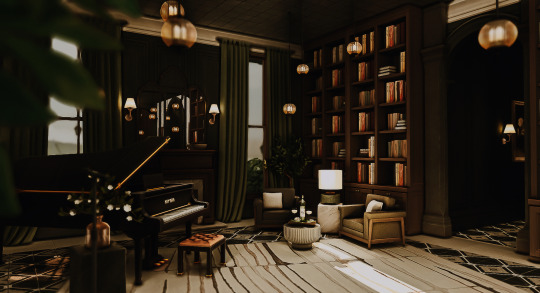

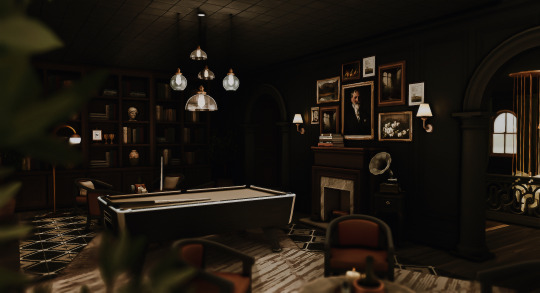
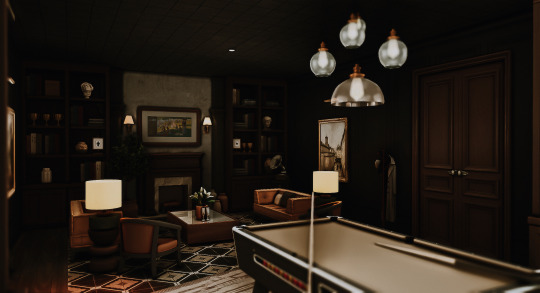
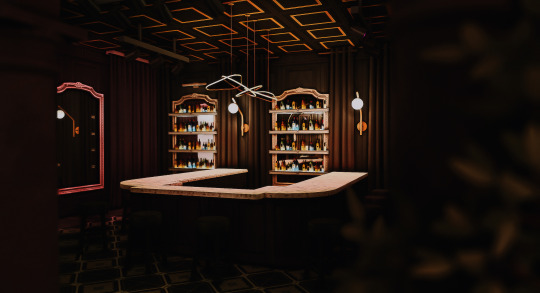
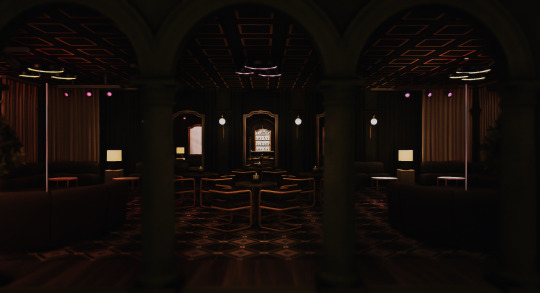
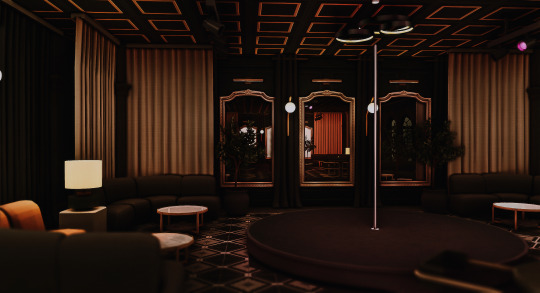
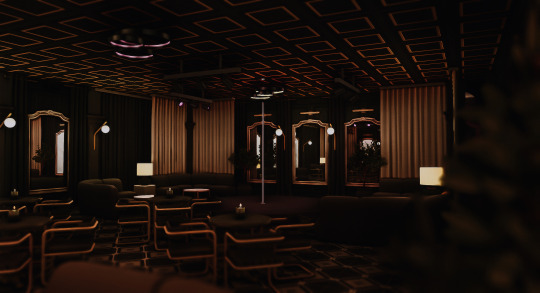

The Crown [ Lounge + Bar] ♥ The Sims 4: Speed Build // CC
Welcome to The Crown, a haven of refined indulgence that seamlessly shifts from an upscale morning restaurant and lounge to a sophisticated evening gentlemen's club. In the daylight hours, experience culinary delights in an ambiance of polished dark wood accents, moody lights, and soft jazz.
As the sun sets, The Crown transforms into an intimate and stylish club, where discreet luxury meets thrilling entertainment. With an emphasis on sophistication, The Crown offers an unforgettable fusion of exquisite dining and sensual experiences in an atmosphere of opulence.
➽ Speed Build Video
➽ Rheya's Notes:
● In order for the adult club function to work, you must download the wicked whims mod [Download at your own risk]. ● This build does not have to be a club, it can be set as a restaurant, a lounge, or a bar. ● I am not 100% familiar with wicked whims so I will not be answering questions regarding the mod. However, I played around with it and did some playtesting as a club owner and everything is functioning correctly on my end. I advice that you look up tutorials if you're not sure to how this lot type works.
● Please make sure to turn bb.moveobjects on! ● Please DO NOT reupload or claim as your own. ● Feel free to tag me if you are using it, I love seeing my build in other peoples save file ● Feel free to edit/tweak my builds, but please make sure to credit me as the original creator! ● Thank you to all CC Creators ● Please let me know if there's any problem with the build
Sim's Featured in the video are by the talented @rhdweauni0 <3
➽ LOT DETAILS
Lot Name: The Crown Lot type: Gentlemen's Club/Str*p Club [Can be set as a lounge, restaurant or bar] Lot size: 30x30 Location: Windenburg or San MyShuno
➽ MODS
● Tool Mod by Twisted Mexi ● Wicked Whims by Turbodriver [optional: This is only required if you want to set this lot as a club] ● Functional Pool Table by Utopya
➽ CC LIST:
Note: I reuse a lot of the same cc in all my builds, specifically cc's from felixandre, HeyHarrie, Tuds, and Pierisim so if you're interested in downloading past, present, future build from me i suggest getting all their cc sets to make downloading a little easier! other creators include Sooky, Charlypancakes, Sixam, Thecluttercat, Myshunosun, awingedllama, Peacemaker. This will also ensure that the lots are complete and are not missing any items upon downloading ! CharlyPancakes ● Miscellanea [books] ● Soak [ Floor pattern, wall lamp] Amelie ● Vintage Art print #3 Severinka ●Aura Bedroom - Ceiling lamp V01, V03 ● Ceiling lamp Alpha ●Industrial Light II Ceiling B, Ceiling D Sooky ● Dark Academia Victorian Oil Paintings 01 ● Horizontal Oil Painting - landscape ● Horizontal Oil Painting - Still Life ● Vertical Oil Painting - Landscape ● Vertical Oil Painting - Portrait ● Vertical Oil Painting - Still Life The Clutter Cat ● Dandy Diary pt 1, 2 ● Hello Horses FelixAndre ● Chateau [all ] ● Berlin pt 1 ● Colonial pt 2, 3 ● Florence pt 2 ● Gatsby ● Georgian ● Grove [ all ] ● London Interior ● Paris pt 2, 3 ● Soho pt 3 House of Harlix ● Harluxe ● Livin Rum ● Orjanic Harrie ● Brownstone [all] ● Baysic ● Brutalist ● Coastal pt 2, 3, 8 ● Klean pt 3 ● Kwatei ● Octave pt 2 ● Shop the look pt 1, 2 ● Spoons pt 3 ● Jardane Kiwisim4 ● Block house dining [dining chairs] Lilac Creative ● The classic Collection Little Dica ● The even Grander Piano Myshunosun ● Garden Stories [patio lights] ● Lottie [candle] ● Simmify pt 2 [book clutter] Pierisim ● Coldbrew pt 3 ● Combles [chair] ● David Apartment pt 1, 2 ● Domain du close pt 2, 3 ● MCM pt 1, 3 ● Oak House pt 4 ● Tilable ● Winter Garden pt 1, 2 ● Wood Land Ranch pt 3 Plush Pixels ● Parisian Apartment [coffee table only] Simcredible ● Bossa Nova Ceiling lamp Simplistic ● Rusticlife area rug Sixam ● Boho Bathroom [floor tiles] Taurus Design ● Lilith Chilling Areas MycupofCC ● The Modernist [wall lamp] Tuds ● Ind Syboulette ● Ratatouille [Sign ] Utopya ● Pool Table [mod]
● DOWNLOAD Tray File and CC list: Patreon Page ● Origin ID: anrheya [previous name: applez] ● Twitter: Rheya28__ ● Tiktok: Rheya28__ ● Youtube: Rheya28__
#ts4#sims 4#thesims4#sims#thesims#showusyourbuilds#sims 4 cc#sims 4 screenshots#sims 4 builds#builds#sims 4 build#sims 4 interior#the sims 4 cc build#the sims 4 restaurant#simblr#sims 4 gentlemens club
2K notes
·
View notes
Text
i wasn't gonna tall about it but since it's relevant now i will say it just for general peace of mind. and i ask you to not post this on twitter please and thank you
the group ( and yes i say GROUP because it was various people who pushed it ) that really badly wants to accuse awesamdude of "stealing" minecraft designs, are well known for stirring up shit like this all the time in discord servers and whatnot
generally amongst the minecraft creator populace ( not video creator, but builders and modders ), it is perceived as a bad thing to attempt to claim ownership of an idea, a piece of code, a block palette, or a block pattern. specific structures and maps of course are okay to claim as your own. this group however thinks they own a redstone door setup
we jokingly call them the anti-tutorials because of a certain comment made trying to defend this gatekeeping, when someone chimed in and said "if i'm doing a showcase video i don't want someone using it as a tutorial". but that has always and forever been the basis of minecraft, to see and recreate, it's part of the game
nobody on the large scale mc community thinks badly of sam. especially the mcprison people, they really like what he did with pandora and how much it popularised the genre. he is just being poked at by well know bad actors. they will find something new to complain next week, it'll pass
247 notes
·
View notes
Text
KnowMe 2011 is currently on clearance from the Simplicity site for $4 (plus shipping)

I really like this pattern--I've made it three times so far, and have plans for many more.


If I didn't have a few copies of it already, I'd probably be ordering more now, since it's the most traditional style of motorcycle jacket pattern I've seen for home sewing.
It's not a beginner pattern, but the instructions are good and there's a video tutorial on the designer's YouTube (which...I haven't watched.) There are also a lot of pattern pieces, and keeping track of them can be frustrating (writing on their inside of the cut pieces of fabric with chalk helps.)
Also, since it's a "men's" pattern, it assumes the body it will go on is on the taller side, so I decided to shorten parts of it, but that's purely an aesthetic choice.
Anyway! I really like this pattern! And I assume it's being discontinued, and that's why it's on clearance.
135 notes
·
View notes
Note
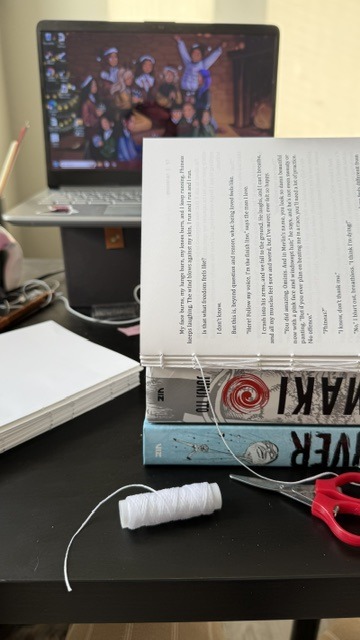
what kind/style of endbands do you usually do? they look so good 👀
hi!! sorry for taking a while to answer, I wanted to make sure I could give you my best answer.
I usually do what's called a "double core" endband. I use double core endbands over the "bead on front" method because bead on front style is not great for uneven distributions of color, irregular patterns, or using more than three colors. Functionally it works by having your extra threads wrapped up inside the thread that is showing, forming the smaller secondary core. Ultimately you are doing figure 8s around the main core & then your secondary core of thread. This keeps things pretty neat & tidy. The tutorial I first used was this one by DAS Bookbinding, though I don't think his endband tutorials are his best ones. Another binder I've spoken with endbands about a lot is maleeka, who recently did an endband tutorial herself.
maybe I should do one... but it takes a lot for me to get enough motivation to make videos. I'll take this opportunity to write up some tips I've shared when people ask instead:
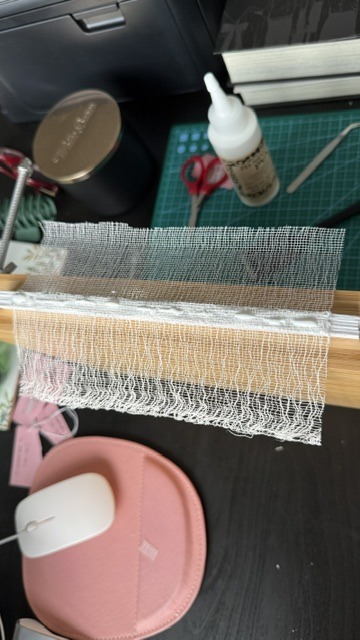
1. Endband core material is the MOST IMPORTANT component. You need a core that is stiff but flexible - it should NOT be floppy because it wiggles everywhere under the tension of the thread, but still needs to flex with the opening & closing of the book. You want something that doesn't compress, to reduce tension shifts in thread creating a lumpy endband. Have a smooth core is less critical but helps to avoid snagging threads & allows you some leeway on sliding threads around for adjustments. My personal choice is smooth leather jewelers cord (link is just an example, I get mine from a local craft store).
2. Thread size. All your threads need to be the same size; it will be visible if you are using two different sizes, and mess with your front core. Additionally, I know lots of people will use larger twists of multiple strands of embroidery thread, which can work, but is more likely to compress & alter its size in unexpected ways. A single strand is preferable. If you want something thicker you can find some thread weights that are heavier twists intended to be used in a single strand, not pulled apart. I prefer smaller sizes because it works better for the gradient designs I like.
3. Silk thread is your friend (if you can spend the money on it). It reduces fuzz (no fuzz like you get with cotton/DMC embroidery thread), it's usually easier to manage, has a more compact twist, and a higher shine. I use Japanese silk hand sewing thread in size #9 (9号). There's multiple brands (Tire, Daruma, KNK/kanagawa, etc). Here's a wholesale listing (minimum 20,000¥ for international). A non-Japanese brand is Guterman silk (German brand). Both the Japanese & German threads come in a heavier weight (Japanese is #16, Guterman is buttonhole).
4. Thread tension is the most important part of the actual technique. You need to ensure the threads currently wrapped in the secondary core keep tension when you are working the thread around them.
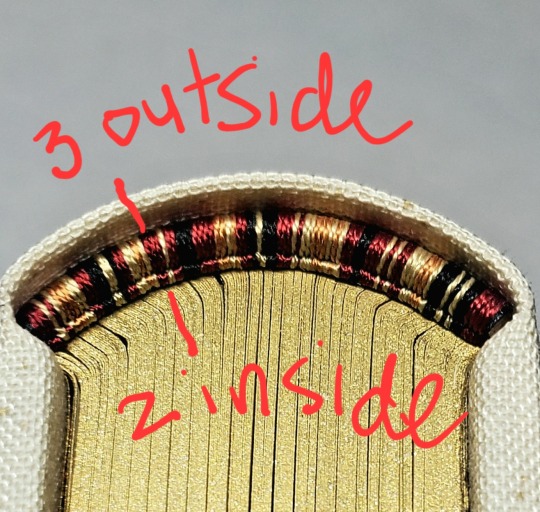
5. Working on a curve. This is only really relevant if you're doing an endband on a rounded book, but the circumference of the curve means there's more real estate on the outside vs inside of the curve. Sometimes this can cause bunching on the secondary core. My own solution to this is that sometimes I wrap the primary core but drop a wrap here or there around the secondary core (only between two wraps of the same color I'm dropping). I uh... don't know of anyone currently recommending this besides myself so I can't point to any pro endorsement for this method, it's just what works for me. Forgive my terrible writing:
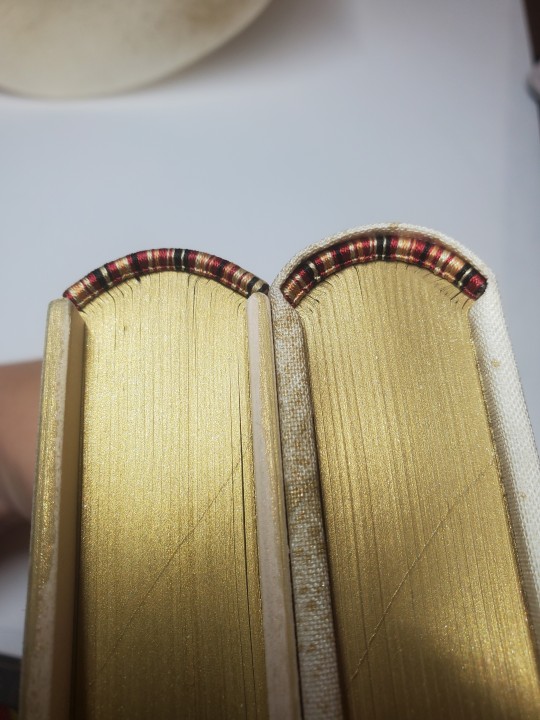
6. Pattern management. I... don't really plan much how my patterns sit on the spine, which is not very helpful. HOWEVER you can do some pattern management on the fly, if you really want your pattern to end at a certain place. Thread can be packed more or less densely on the core, resulting in some pattern compression; you could also strategically drop wraps in less noticeable locations. An unintended example: I was replicating the pattern on this endband (left) when I realize I wasn't packing the thread as densely as I had the first time around (right), which resulted in the overall pattern taking up more space. You can do this on purpose, if you need to.
this was way more than you asked but it gave me a chance to put all this in one spot. Best of luck in vanquishing the dreaded EndWyrms.
#fanbinding#bookbinding#celestial sphere press#in progress review#ask des#i tend to shock ppl a big when i say i don't actually enjoy sewing endbands#i merely Tolerate it#all of this knowledge is 100% spite driven to reduce my own frustration
385 notes
·
View notes
Text
How obsessed and hyper-fixated are you with your fanfic characters?
Me:
BOOKBINDING!
Ominis and Phineas now sit on my shelf along with my other books ♡
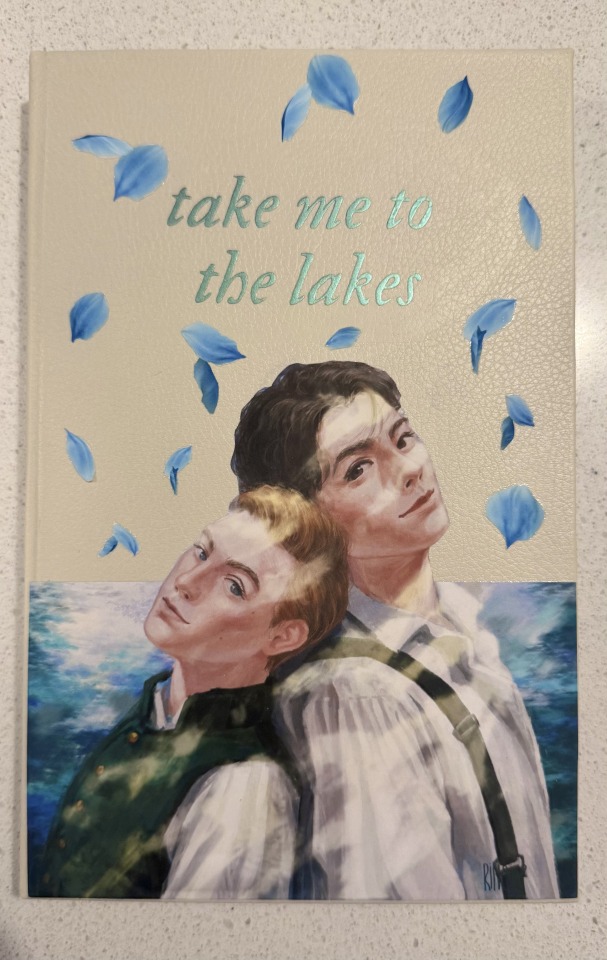
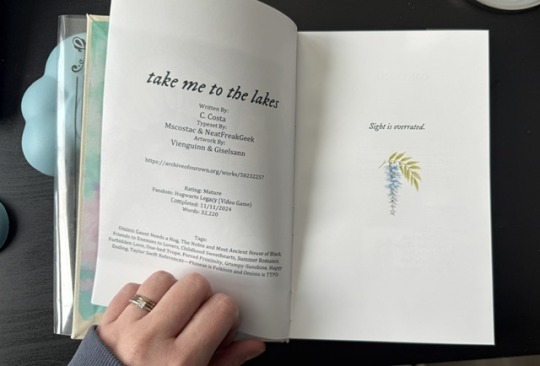
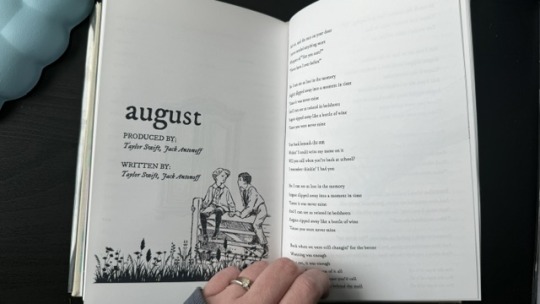
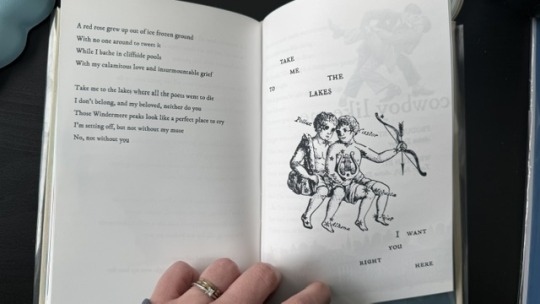
This was my first time binding fanfic, and no better choice than my own, "Take Me To The Lakes" (AO3 / Wattpad)
update (March 30): New cover art by the amazing @rinthecap 🩵
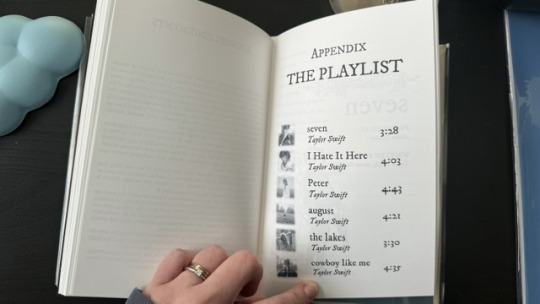
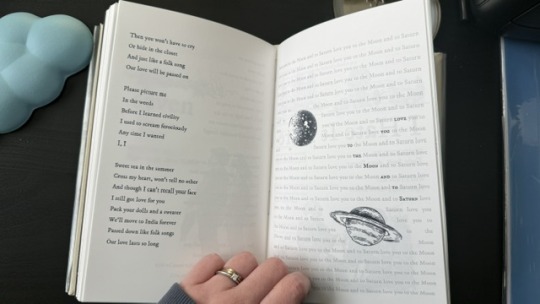
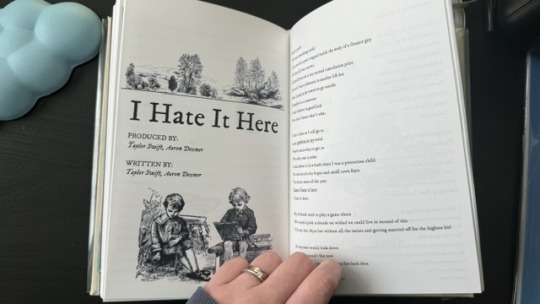
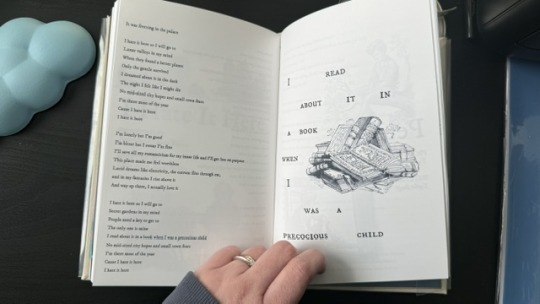
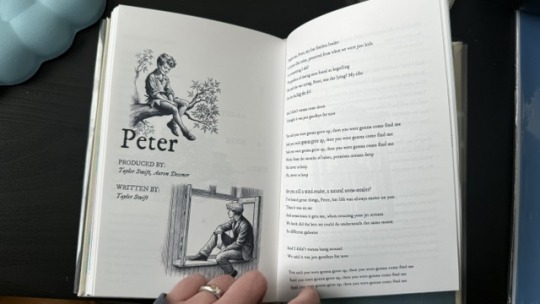
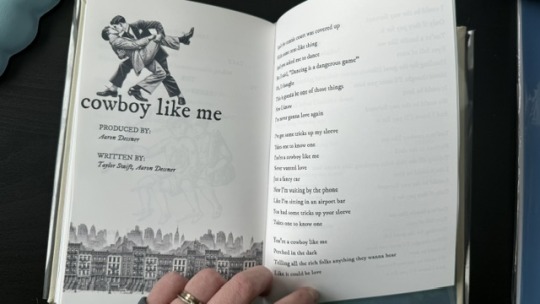
More photos and the step-by-step after the cut! (+ the appendix with Taylor Swift songs in a stylised lyric book)
I'm all about my crafty hobbies. I've been eyeing bookbinding for a while, and the algorithm finally convinced me to dive into it so I'd have a reason to procrastinate on writing
Having written a shorter fic ("Lakes" is roughly 35k words) gave me the perfect opportunity to start with something simpler.
The main tutorial used is the one by NeatFreakGeek on Tiktok.
Step 1: The typeset
I used the base template file by NeatFreakGeek, which already had the settings for printing in formatted book signatures.
With the basic body of the document formatted and ready, I started the personalization: choosing the fonts, spacing, sizing etc.
For the quote at the beginning, I chose one of the lines I wrote for Ominis + the wisteria.
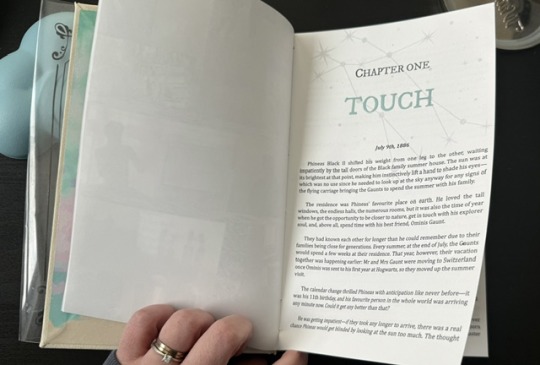
For chapter headers, I chose the Gemini constellation. (In the story, Ominis and Phineas got their middle names from the stars in the same constellation, Castor and Pollux.)
I also made the chapter titles with the HTV to give it an extra glow.
Sight is overrated. Phineas makes all my senses the very essence of life itself.
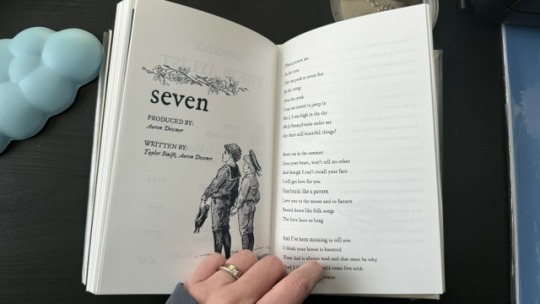
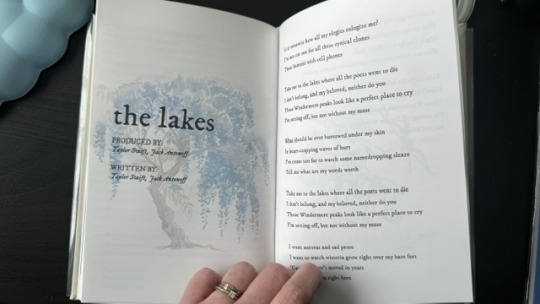
Since the story was rather "short", in order to have a thicker spine, I added an appendix with the stylised "lyric book". This was probably my favourite part of typesetting!

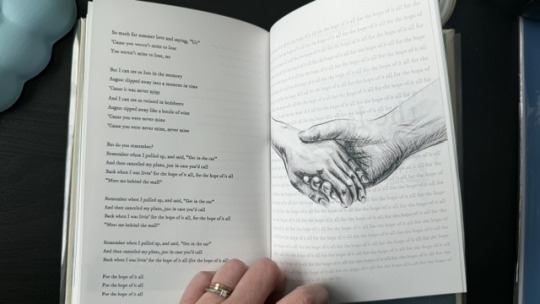
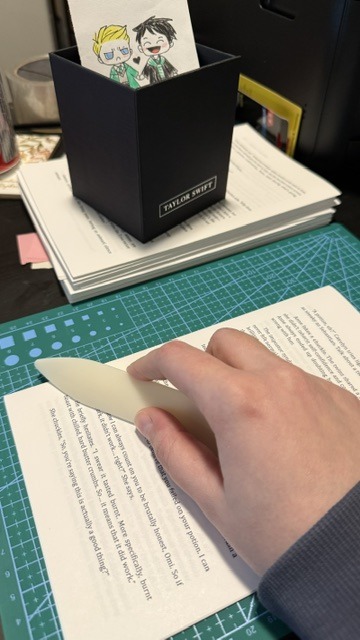
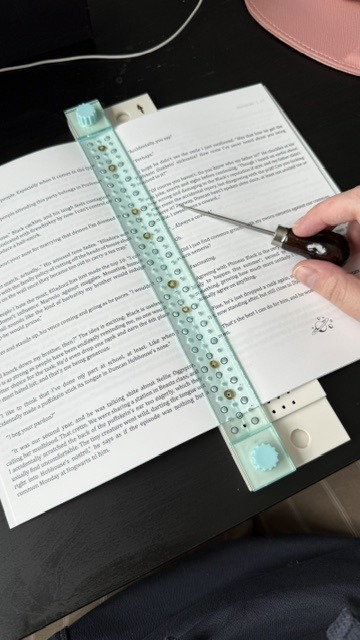
Step 2: The textblock
With a little lot of trial and error and more mathematics than expected, I printed each signature at a time, then folded each at a time, making sure it didn't get mixed up across the signatures. My printer does front/back automatically, but to print the commissioned arts as borderless, I gave myself a headache, printing it separately and manually. This step could have been done considerably faster with a laser printer and b&w content only :)
Next, it was sewing and glueing. I won't go into detail here because the video tutorials are way better at explaining. All in all, with the right tools, this was done rather easily and with barely any mistakes, so I didn't have to print anything again, thankfully.
Step 3: The endpapers
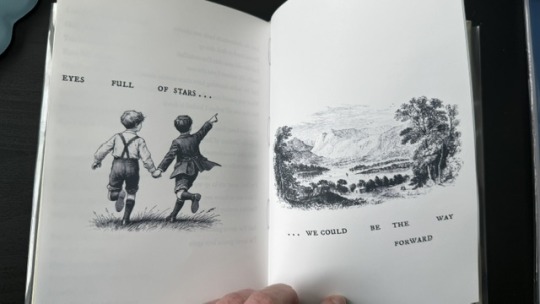
I got a scrapbook 12x12in block in this abstract colours. I had many different ideas on how to match the theme, but I ended up choosing these colourful patterns that align with how Ominis perceives the world. Then, I added the quotes from the story.
The endpaper of the front got this sky-like print to go with the dialogue Ominis and Phineas have when they are children.
P: How would you know what blue skies look like? O: I don't know. And I don't mind not knowing.
The endpaper of the back is in green x blue shades, colours that are also a big part of the story. For the quote, I chose one of their last lines when their relationship is established.
P: Ominis, you always care too much about the others... but who takes care of you? O: No one ever did. P: Let me care for you. Please. Let me love you, Ominis Gaunt. O: Will it make any difference if I say no? P: Absolutely not. O: Will it make any difference if I love you back? P: Fucking absolutely yes.


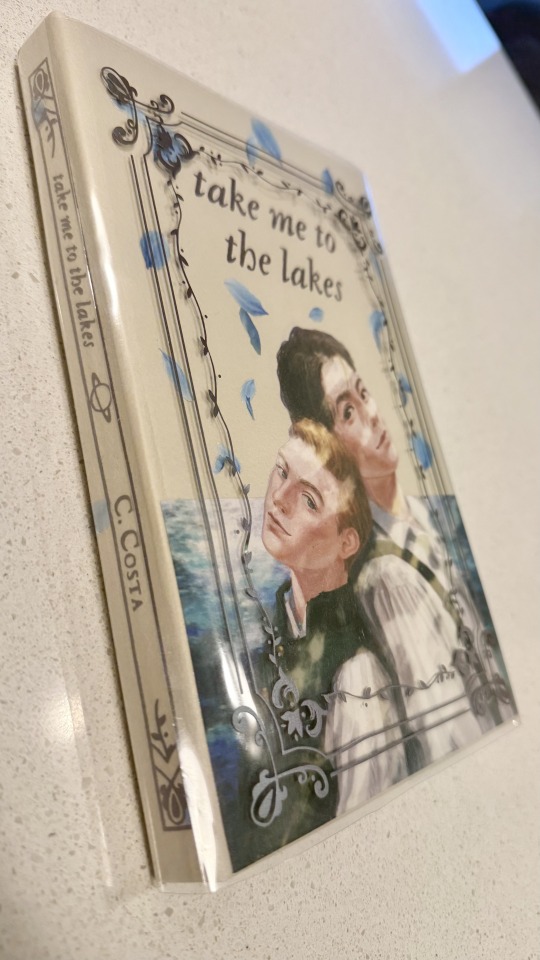
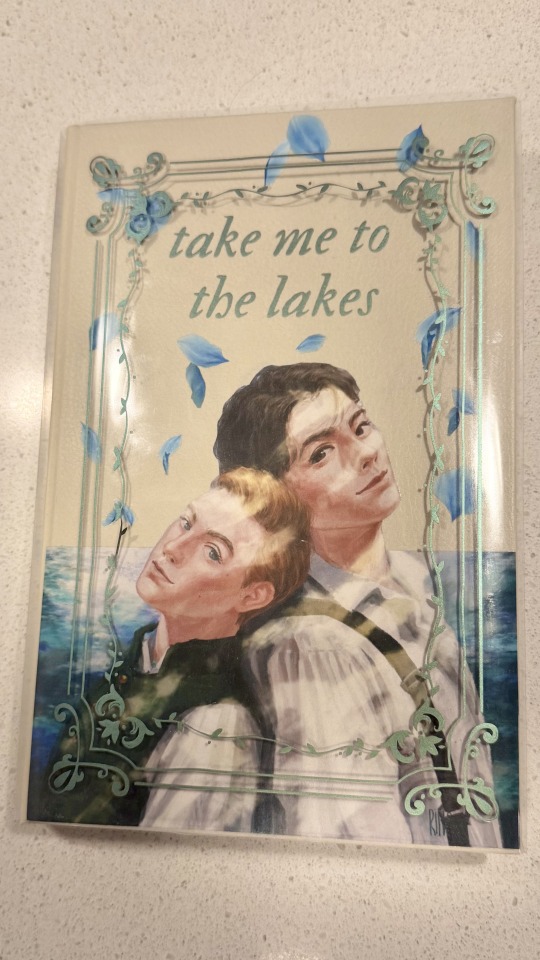
Step 4: The cover! (Yes, the most interesting part!)
This was the most challenging step in both the conception of the design (too many ideas to choose from) and the execution (I've never hated box cutters so much.)
With the basic cardboard casing cut and glued, I chose a faux leather material as a book cloth. This might be the choice I regret the most, because the glue it comes with is not that strong, so it would often unstick easily, and also, it's a bit too thick, leaving the corners a bit weird. But the final result was a bit worth it.
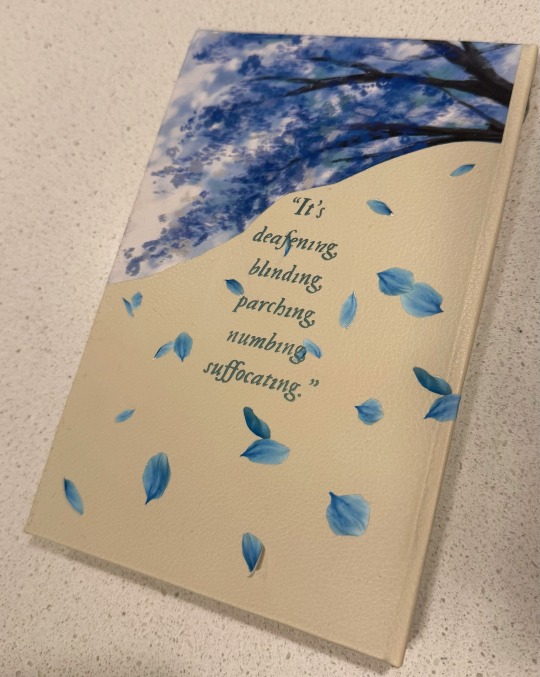
For the cover design, I printed the art with fabric HTV and ironed it on. On top of it, I threw in some wisteria petals (a reference to the song "the lakes", by Taylor Swift), and another quote of the story at the back.
I didn't have a cricut machine back then for the vynil pieces, so I ordered it online. This part was harder than I thought, once again because of the faux leather choice: as I ironed the HTV, some parts of the material melted lol.
Lastly, I decided last minute to create a clear dust jacket because the combination of the faux leather + printed HTV seemed tro fragile to be handled. I liked the final result, but ironing the HTV on the acetate was a pain lol.
In summary, this was so much fun and not as hard as I expected, craft-wise. The designing of it all took the most time just because I wanted every little detail to have a meaning :)
I made two copies to gift one to a friend, so it gave me the opportunity to make the first one and mess it up, then, for the second one, I had already learned from my mistakes.
There are many things I'd do differently for my next binds, but that's the most fun part: experimenting with materials, themes, and processes.
#I have a lot of free time#In crafts we trust#now I'm even more motivated to finish my other fics just so I can print them#my family asked for a copy now I don't know how to explain that I won't let them read my fic in a million years#hogwarts legacy#ominis gaunt#ominis gaunt fanfic#ominis x mmc#book binding#bookbinding#fanfic binding#gay fanfiction#gay#lgbtqia
74 notes
·
View notes
Text
Ok, so my last post about the issues of plus sized patterns popped off in a way I did not expect??
I just want to come back and say: making patterns is hard work and especially those who make their patterns free online, it is a LOT of hard work that the designer gets nothing back for. I didn't mean for it to sound like I thought that was an easy thing to do.
But, like a lot of people pointed out in the tags and comments, fashion world has already done the leg work for us. There are size charts and mathematical equations you can do to scale your pieces in such a way that at least matches what you would see in stores. I think, honestly, that this is where the break down is. I think pattern makers take bust/chest measurements, and scale all of their numbers from there, without thinking about their piece as clothing (instead of just a knitting project, if that makes sense).
And I think that's where fat people get left behind. Because our bodies don't scale the way you would scale up a hat or mittens or something. It takes added work and added care to think about fat people and how our bodies look and work (hence why my previous post said "please talk to a fat person"--it's not that we know how to make patterns, but that we can advise what works for our bodies!)
I want to end on a helpful note, if I can:
My favorite pattern maker for plus sized projects is Jacqueline Cieslak!
I have bought a couple of patterns from them, and I have never had the not-for-fat-bodies problems I have had before. They have a handful of different styles, many of which are very customizable. Not to mention that the patterns themselves are VERY thorough. They link to tutorial videos they have made for anything more complicated than a stockinette stitch, and have lots of detailed diagrams showing different measurements for different parts of the project.
Anytime I am making a piece for myself or my other plus sized love ones, I go to Jacqueline first! Hopefully their patterns will help anyone who identified with my previous post find some patterns that work for them!
#plus sized#knitting#knitting patterns#joy knits#text post#Jacqueline Cieslak#my lord and savior#plus sized knitting#knitting while fat
1K notes
·
View notes
Video
youtube
Affinity Designer Tutorial - Using Appearance to create Multiple Fills This video tutorial is about multiple fills on a single curve. To me, it's somewhat of a 'hidden gem' in Affinity Designer. In this video, I use the appearance panel, the fill tool, gradients, patterns, and bitmap images to create multilayered fills. Combining gradients, patterns, images, and blend modes, lets you create interesting and fully editable design options with a few clicks. I take a look at some of the options - as I am sure there is a lot more you can do with this tool - and explain how I stacked the sample fills before creating a colourful, fruity fill pattern.
#youtube#affinity designer#affinity#tutorial#video#fill#appearance#multiple fills#gradient#pattern#png
0 notes
Text


Strawberry Granny Square, crochet pattern designed by Raffaella Tassoni on Ravelry. Find the free pattern and video tutorial here!
#crochet#full pattern#crochet pattern#free crochet pattern#fiber art#fiber crafts#granny square#strawberries#fruit#foods
223 notes
·
View notes