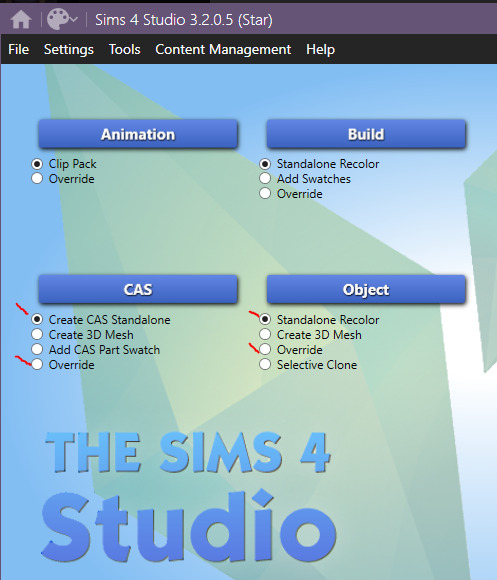
#gimp selection tool
Text
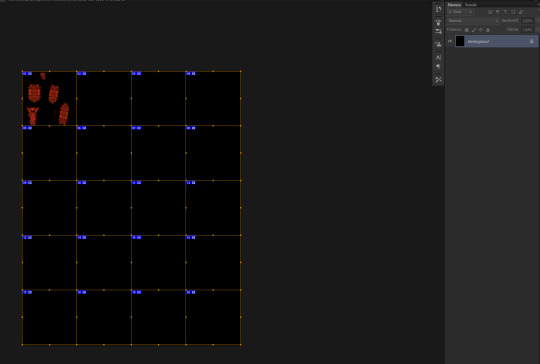
{2022} 01 thwarted desire
"This artificial body may be called the 'medium' (and not just 'material') in the sense that images needed embodiment in order to acquire visibility. To this end, a 𝘭𝘰𝘴𝘵 𝘣𝘰𝘥𝘺 is exchanged for the 𝘷𝘪𝘳𝘵𝘶𝘢𝘭 𝘣𝘰𝘥𝘺 of the image.” (p. 3)
» An Anthropology of Images: Picture, Medium, Body {2001/2012, Hans Belting}
#gif#animation#anna malina#dall-e#black and white#digital collage#ai art#marching ants#formaldehyde#2022#quotes#hans belting#portraits#media theory#reading#gimp#gimp selection tool
90 notes
·
View notes
Text
youtube
NEW VIDEO TUTORIAL 🩷
After almost two years it's time for a new and improved version of my "How to make CAS CC" video. This time I will explain how to create a frankenmesh out of a jumpsuit and a dress for adult Sims! It's VERY beginner friendly so if you weren't successful yet with starting to make CC, maybe this one will give you the help you need!
All the topics I cover in this video below the cut:
00:00 Intro
01:00 Software
01:36 Downloading & Installing Sims 4 Studio
01:56 Downloading & Installing Blender 4.2
02:10 Downloading & Installing GIMP
02:20 Introducing Sims 4 Studio
03:03 S4S | Gathering assets to work with
04:09 S4S | Textures
05:12 Project Folder
05:34 S4S | Gathering assets to work with
07:10 Introducing Blender
10:17 Blender | Edit mode (Select, Delete, Wireframe)
12:38 Blender | Append second mesh (Proportional Editing, UV overlapping)
18:23 Blender | Join two meshes (Material, Merge)
20:03 Blender | Cleaning up the mesh (UV editing, Merge, Rip)
22:14 Blender | Cut number
22:43 GIMP | Making a texture (Select, Delete, Healing, Smudge)
24:52 Photoshop | Making a texture (but make it easy)
25:15 GIMP & Blender | Preview of the texture
25:43 GIMP | Making color swatches (Layers, Lighting, Fill tool)
28:33 S4S | Introducing the CAS area
29:15 S4S | Creating a package file
30:25 S4S | Importing all our assets
31:17 GIMP | Creating a shadow texture
32:24 S4S | The specular map
32:39 GIMP & Browser | Creating a normal map
35:58 S4S | Vertices & Polygons, LODs
37:02 Blender | Creating LODs
38:20 S4S | Categories (Tags, Allow for random, Gender restrictions)
39:36 S4S | Tuning tab (not covered)
39:47 Sims 4 | Results & Outro
117 notes
·
View notes
Note
HOW DO YOU MAKE THESE THIS IS GONNA TAKW FOREVER
omg 😂
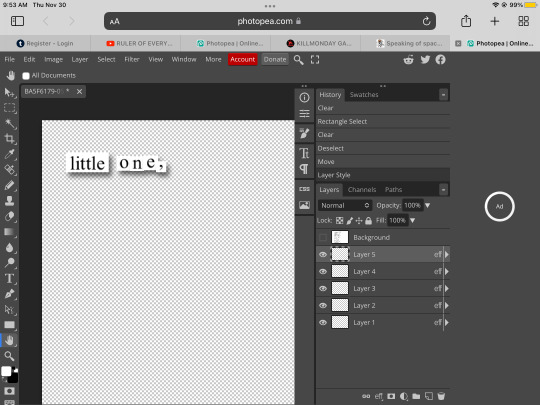
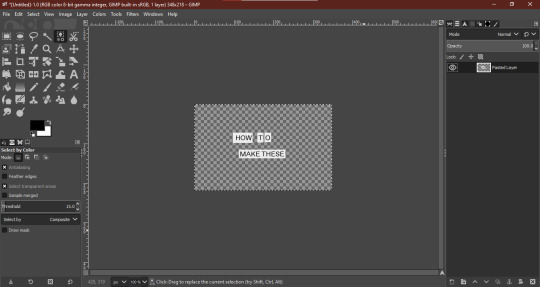
it doesn’t actually take me too long. tutorial under the cut for anyone who wants to know how to make cut-up style poems like this one:

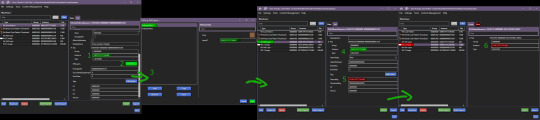
so i take a screenshot and put it into ms paint, where i make myself a working space by setting the background to some colour other than black or white. in the example below, i use purple.
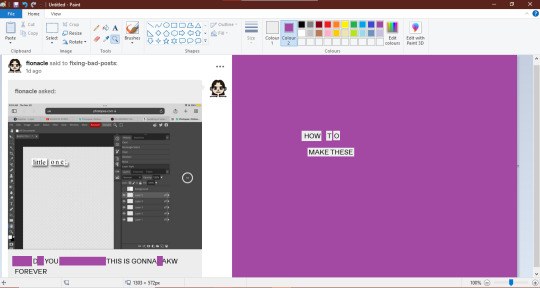
⬆ as you can see above, the left side is a screenshot, and beside it is a working space made of purple. i use the ms paint "select" tool to drag words where i want them.
after i have the text looking how i want it, i once again use the "select" tool to copy + paste my text into GIMP (which is free to download).

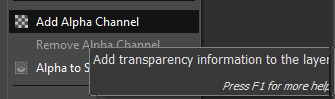
once the image is in GIMP, i make sure that it has an "alpha layer" which basically means that the negative space will be transparent rather than a solid colour.
then i use the "select by colour" tool to erase all the purple, and leave me with floating text strips.

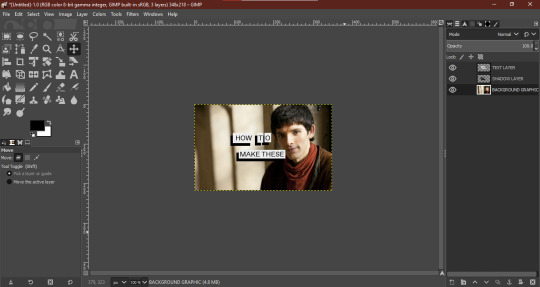
new layer time! i create two: one for the shadow, and one for whatever background graphic i want. sometimes, i rename the text layer.
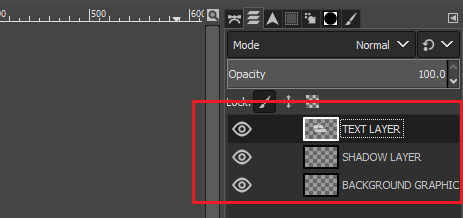
⬆ arranged like so: text layer on top, shadow layer under that, background graphic in the background.
now, using the "fuzzy select tool" (the one that looks like a magic wand in GIMP), i navigate to "TEXT LAYER" and select everything that is not text. then, i invert the selection using the "select" drop-down menu.
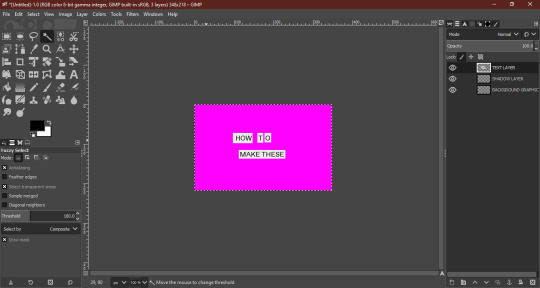
(the hot pink here indicates what i have selected)

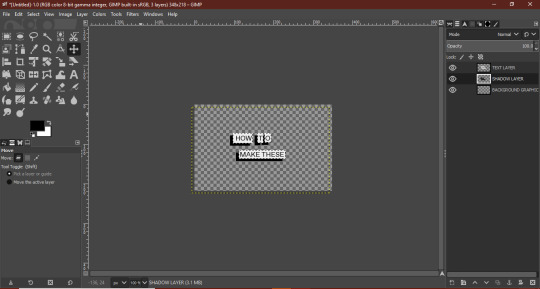
now that you have your selection inverted, navigate to "SHADOW LAYER" and use the "bucket fill tool" to colour in this inverted selection (which should be an exact shape-match for your text). usually, i will set my "TEXT LAYER" as invisible while i do this, so i can see what i'm doing.

then i drag the shadow into place, wherever i want it, using the "move tool"
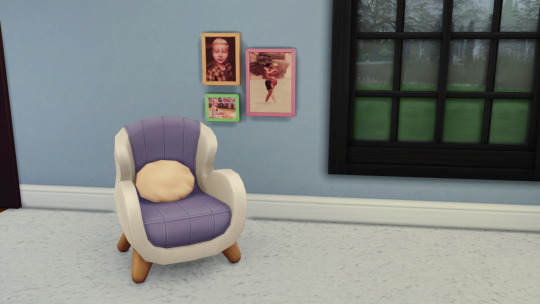
finally, navigate to "BACKGROUND LAYER" and copy + paste any picture or graphic you want as the background. i'm using a picture of merlin, because i love him and he makes me happy.
you may have to fiddle around with image size, and remember to anchor it to the background layer once you're happy with where it sits.
merge all the layers, select all, and paste it into tumblr:

voilà! hope this helped lol—let me know if you have any questions <3
294 notes
·
View notes
Text
[sims 3 tutorial] how to make lazy previews of objects with TSRW & GIMP 2.0
bordered, borderless, and borderless with transparency
You can download this tutorial in .docx form here or read it under the cut -->

-->
P.S for all of these, i made the drop shadow invisible in the mesh tab before starting.
Standard borderless previews for objects without special effects

this circle option is the bump map

this option turns the background white, which we need
Take two pictures of your object, one with the bump map on, and one without.


use the 'magic wand' tool to select the black parts of the bump map version
'copy' the entire regular image, and 'paste' 'into selection in place' on the bump map version. copy while the selection is still active, and paste as a new image.

[black to show no background]

How to make a bordered preview of a standard object with no special effects
this option turns the background white, which we need
Take a picture of your object in TSRW at your desired angle.

Open this image in your desired photo editing program. I am using GIMP 2.0.
Use the magic wand tool at threshold level 1.0 to select the white part of the image. you may need to shift select more parts of the image if they are closed off like the area between the prongs.

go to 'select' and 'invert selection'
depending on the image, you may need to use the 'remove holes' tool.
in the 'select' tab 'grow' the selection to your desired thickness. i like anywhere from 5-10.
'copy' your image while the selection is active, and 'paste' as a new image.

All done!
How to make a borderless preview of an object with transperency…

i have this fruit parfait that has 3 groups [drop shadow, glass cup, and the parfait itself. these groups can be hidden in the mash tab by toggling 'true' or 'false'.
im gonna mark these true or false depending on what i want to take a picture of.
this circle option is the bump map
this option turns the background white, which we need
I need a photo of the parfait only, one regular, one with the bump map on. a photo of the glass only, one regular, one with the bump map on. I do this using "windowed mode" with the snipping tool so that my pictures are in the same location.


Open all of these images in your editing program of choice, however i am using GIMP 2.0 so things might be a bit different.
Open a new transparent image 1000x1000
'select' the black bump map image with the magic wand tool, until it is completely outlined

Then copy the entire regular version and 'paste' into 'selection' 'in place'
copy this while the selection is active and paste it in place to your transparent image.
Now for the transparent part, do what we just did and paste it as a new layer on the transparent image. erase parts of the image that do not appear, for me i erased the top part since its actually behind the parfait.


Much better. now lower the opacity and merge this layer with the one below it

All done!
67 notes
·
View notes
Text
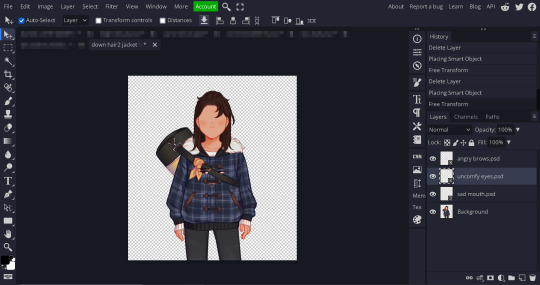
How to position facial features for the Our Life sprites
Idk how many people need this tutorial (especially since I kinda sat on it for like a month...whoops) but I noticed people were starting to make more sprite edits and videos using the in-game sprites and I thought having this tutorial might help for those of you who don't know exactly how to place the expression layers for the sprite.
Part 1: What am I talking about?
Ok so some of you may be reading the post title and thinking "what the hell does that mean?". For those who are unaware, if you decompile OL1 and OL2, you can find the sprites used for the characters in the game. These files are generally in character folders that contain all the bits for each sprite as well as several versions of the sprite itself in different outfits. All these base sprites files look a little like this
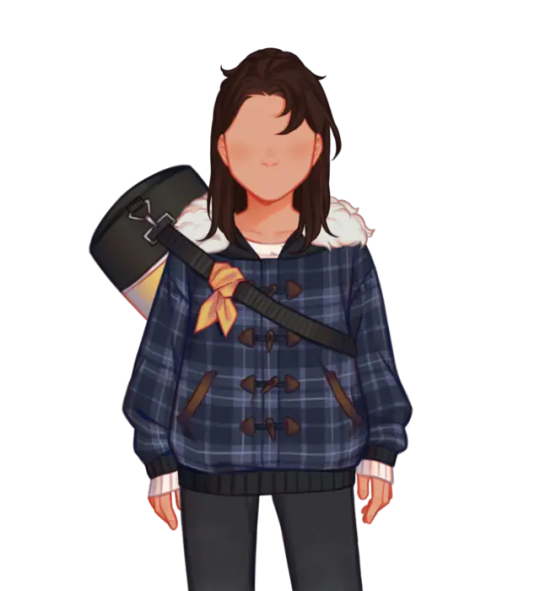
You may have noticed the glaringly obvious detail that Qiu here is missing most of their face. That's because there are several seperate images used for their eyebrows, eyes and mouth. The reason they're all seperated like this is to give more creative freedom over expressions than what would be allowed if there were just already a set number of sprites with set expressions
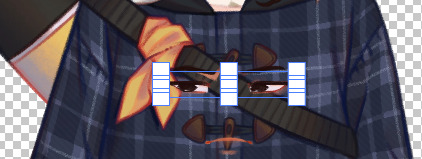
However, if you want to make a spite edit video, that means you have to piece all the expression layers over the sprite and, since the expression layers don't have the same canvas size as the sprite, you have to actually place them on the face yourself. This can lead to stuff like this.
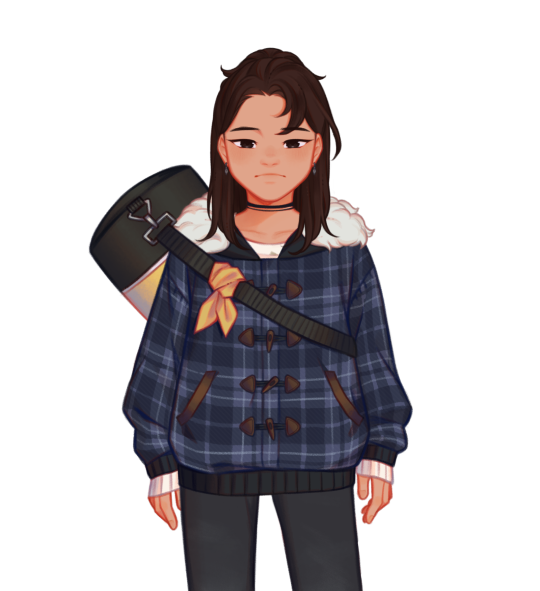
If you're looking at this and thinking it doesn't look quite right, you're correct. This is the issue you're noticing
This is generally what happens when you try placing expression layers by eye, you end up sort of assuming you've got the right spot when you're actually slightly wrong. And this is gif just shows the facial features in the wrong spot vertically
So, I've explained the problem, now how do you fix it? It's simple actually.
Part 2: The actual tutorial part
What you'll need:
The sprites and expression layers you need (this tutorial assumes you already have the game decompiled. If you don't and have no idea how to do so, here's a tutorial for just that)
An editing software that has a tranform tool such as Photopea, Photoshop, GIMP, etc.
Step 1: Open up the sprite you want to use in your image editing software of choice and import in all the expression layers you want to use
Step 2: Open up the transform tool on your editing software. Where this is may vary, on Photopea and Photoshop you can open up either through the shortcut alt+control+t or clicking on edit in the top bar and selecting Free Transform from the menu. If you don't know where the transform tool is in your software, I'd suggest looking it up

(A showcase of where the tranform tool is in Photopea and Photoshop)

(What the transform box should look like
Step 2.5 (This might be photopea specific, idk if other software does this): If your transformation tool box looks like this, cancel out of the tool (using the little x button on the top bar) and then open the transformation tool back up again. Make sure you're not selecting multiple layers and also make sure you didn't open the tool with the transformation controls tick box from the top bar. If none of that works, just delete the layer and grab it from your folder again and try again
Step 3: With the transform tool still open on your desired layer, move the layer so that it snaps against the corner of your canvas. Your image editing software should automatically have layer snapping enabled but, if not, I suggest looking up how to turn it on. If it doesn't have this, the best suggestion I have would just be to make sure the corner of the transform tool's box and the corner of the canvas allign. Zoom in if need be. You then repeat this process for the other expression layers (and any other layers that aren't automatically allighned like the blush layers or the tear layers)
(Notice the red lines that show up when it snaps against the corner)
Step 4: Export your sprite file because that's it, you did it! Now you have a sprite with the layers placed in the right spots! Isn't that great!
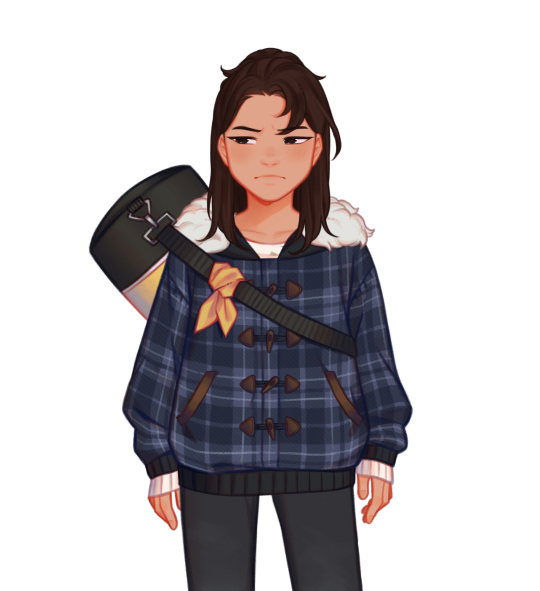
...(maybe I should've chosed a happier expression for this...)
Anyways, I hope this helps!
61 notes
·
View notes
Text
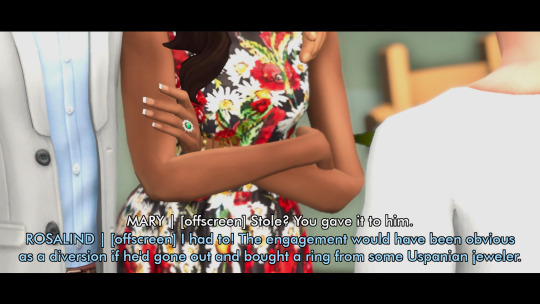
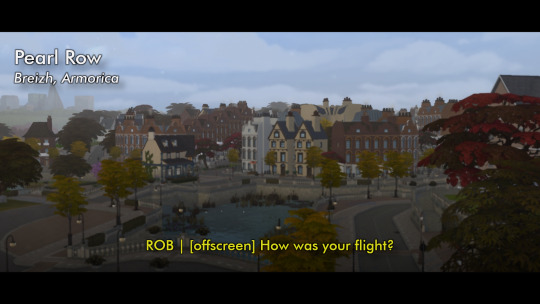
how i (try to) make my text readable
so as a lifelong glasses wearer north of 25, i cannot see shit! I love the look of text on screenshots, but also i have spent a nonzero amount of time squinting at pale text on a busy background and thought "i cannot fucking read that."
there are lots of ways to do this. my method is not perfect. I am constantly tweaking things to try and make the text more readable. if you have suggestions about making the text more readable, please share!
Step One: Open the screenshot in your photo editor
I start with a screenshot and a script. I use Gimp, a free and open-source photo editor, and I pretty much only use it to put captions on my screenshots, so please do not ask me how to actually edit pictures, I do not know. also, please do not ask me how to do this in any photo editor, i prefer to use this one because it is free, ad-free one that I can own legally and download safely.
open-source software RULES, btw.
Step One: Add a text layer with your dialogue

I use the text tool to add the dialogue to the image, copying and pasting from my script. This is not legible. My eyes hurt. I cannot read that, so I can't tell if I've made any typos.
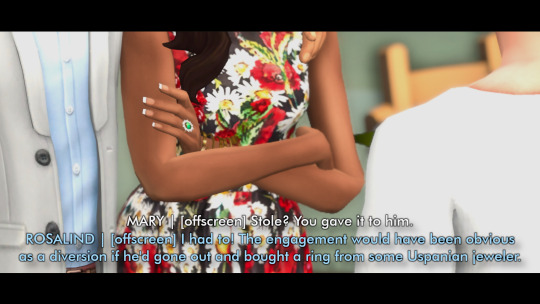
Step Two: Add a black background to the text.
In, Gimp: Right click text layer > "Alpha to Selection." In the top menu, Selection > Grow > 3 pixels. Top menu: Layer > New Layer. (I name the new layer "Text BG ##") Use the bucket tool to fill the selection on the new later.
There's probably a shortcut to doing this in other photo editors (hell, might be a shortcut in Gimp.)
Step Three: Blur the background

In Gimp: Top Menu > Effect > Blur > Gaussian Blur. This may be a step backward in terms of readability, but I like how it looks. Let's try a few other things to help the reader, shall we?
Step Four: Drop Shadow
In Gimp: Top Menu > Light & Shadow > Drop Shadow. Makes the text stand out a bit more. Still not particularly readable, especially the blue on blue on the left side of the image.
Step Five: Gradient layer
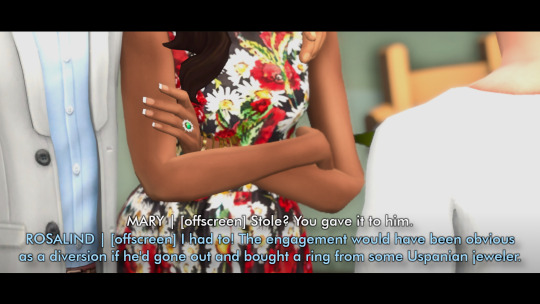
Create a new layer underneath the Text BG, and then add a transparent gradient over the entire image.
This is step is slightly more involved, so I'll just link you to a guide instead of explaining myself: "How to create a gradient transparency in GIMP."
Step Six: Further Tweaks

I still wasn't satisfied with the readability of the text. I duplicated the gradient layer to create a darker background underneath the text. I also repeated the drop shadow step on the Text BG layer. You could also make the text larger or bolder, change font colors, grow the selection by 4 or 5 pixels instead of 3, or skip the blurring step. I change my method frequently to try to get the best look for each individual image, and I don't always do a perfect job.
This is an area where I constantly innovate. I want people to be able to actually read my text, so I try not to let myself be satisfied with "good enough." When I take screenshots, I try to do it with an eye for compositions that give me a nice, blank space on the bottom for text, ex.


131 notes
·
View notes
Note
Do you have any tips/useful information for people who want to start making audio rps?
(Also love ur content sm!!! Mitch is the most lovable little guy)
Aw thank you so much! Love him too!
This is a great question, had to think about it for a bit;
If you want to dabble with making audios, feel free to start off with public scripts! I think there's subreddits like ASMR script haven (IIRC?) that has public scripts that can be filled by anyone. Just be sure to read the author's conditions carefully i.e. credit, terms of use, what can be changed etc. Right at the start I recorded a public script to try and get started, it's a great way to just jump right into making something to learn the ropes of it without also first having to write an entire script for it too. Filling public scripts is a fantastic way to start off, however I reckon writing your own stories is a major part of the fun!
You don't need an expensive mic, but audio quality is a very important factor. Do some test recordings and listen back to them (with headphones!) and see how it sounds. This is especially important for whispered scenes (DO NOT get too close to the mic or breathe on it!) or loud scenes (DO NOT peak the mic!). If your mic has a gain / input dial, play with that before recording! Just start with mono to begin with, play with stereo if your mic supports it after you become familiar with it. Aim for your recording to be no louder than -6db at the highest, if you can keep your voice roughly between like -20 and -6 that tends to sound reasonably natural.
Do your best to eliminate external sounds! If you have AC or anything like that on, turn it off. I have to shut down my main PC and record with only my editing Mac on because the PC fans are much louder and my mic is very sensitive! There'll pretty much always be background fuzz, some mics will just have some, but try to make your room as quiet as you can. Your software may have some background noise removal tools, I use filters for that (expensive so I can't recommend them), but DO NOT use the noise removal tool in Audacity! It's terrible!
Speaking of, Audacity is decent to get started with. It's good basic recording software, plus multiplatform. For a while I preferred recording on Windows with Audiodope, also very simple, plus I liked that it asks me whether I wanted to record in mono or stereo first in case I forget to switch, I currently record on Mac with ocenaudio which does the same, while Audacity won't ask, you have to go into settings. Anyway Audacity is okay to start with for editing, it's free, but from what I understand it's a "destructive" editing software in that after you make a change like adding a filter, you can't then go back in and change it other than just undoing, which I really don't like, plus changing the timing of things looks fiddly. I don't know what to recommend to move up from, I've heard good stuff about Reaper but it looks very complicated. Avoid Adobe unless you have a free subscription from somewhere else. I edit entirely in Final Cut Pro so I can't recommend that unless you're on Mac, plus it's my old work software and expensive! If you need sound effects, I use freesound.org, there are other great free resources as well, but make sure you check each individual sound effect's license before use.
Once you've edited the audio and want to turn it into a video, I've heard good stuff about Da Vinci Resolve and Kden Live, both are free! Make a video canvas of 1920 x 1080, FPS doesn't especially matter if you only have a still thumbnail, 25 or 30 is fine, and render it out as a h264 mp4 if you're not sure what to select! Good compression for internet video, good for streaming. Try to record and export your audio as wav if you have enough space, wav is uncompressed audio so it maintains full quality but they can get large.
I also make my thumbnails in-edit but you may want to use external software like Gimp to make them. Avoid getting random stuff of google especially anime boys / girls, and definitely don't ever use an artist's stuff without asking for permission + giving proper credit. Using pre-built generators like Picrew is totally fine, just be sure to credit where you got it from, but 100% avoid AI generators, obviously. Be careful with Adobe stock images, apparently there's AI slop in there too. You don't need art for audios though, they're a nice to have bonus, but many of my most viewed videos have no art at all. If you need background images, I like unsplash.com because it has a free license! Read over it yourself but basically you're able to use pretty much any image they have in your videos!
Just jump in and try making something small, never start with your magnum opus! I started with the introverted incubus character because I'm a very shy person myself, it was an easier role to get started with! If you want to start writing your own scripts too there's a lot we could talk about there as well, just try to picture the scene from the perspective of the listener, what they may be thinking or feeling at any given moment, not just the perspective of the character you're going to be playing!
This was a lot and I don't think I covered much, I hope some of it helps though!!
30 notes
·
View notes
Text
Tidbit: Placronym Pixelation

So you got this fresh placroynm that you don't want engraved with a sophomoric name? Not a problem. You can reject that stupid shit with a pixelize/pixelate filter.
Photoshop
First, you will have to make two more duplicates of your name text layer, so three text layers in total. One for when it's first displayed, one for the first frame of pixelation, and one for the second frame.
With your first duplicate layer selected, go to Filters>Pixelate>Mosaic..., which is a terrible name for it, but hey, I'm no Photoshop developer. Set the cell size to 11.

For the second duplicate layer, set it to 14.
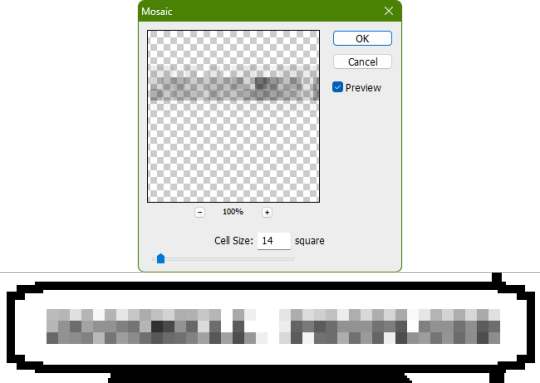
GIMP
Pretty much the exact same steps as in Photoshop, this time the filter is located under Filters>Blur>Pixelize...


I would suggest right-clicking on the text layer and choosing Composite Space>RGB (perceptual) instead of the default (Auto), or going to the top-right corner of the Layers tab and switching the group of blend modes from Default to Legacy. Basically, doing so will make the semi-transparent pixels as dark as they are in Photoshop, otherwise they will appear too light.


Check out the read-more link below for bonus information on easily animating the name being typed out in Photoshop.
ADDENDUM
Typing animation (Photoshop)
Photoshop's frame animation timeline makes doing this a breeze. First, add a layer mask to your text layer. This will add a white box next to the layer's thumbnail.
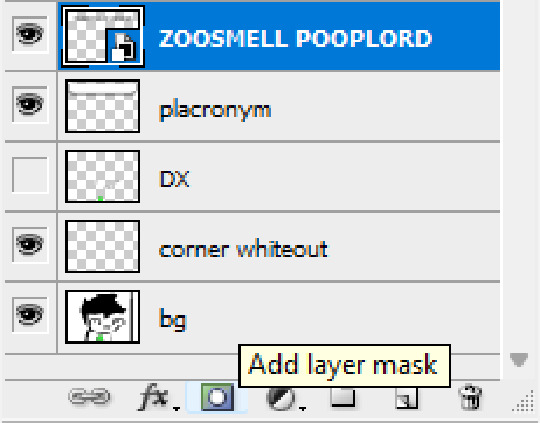
With that layer mask selected (click on it and it will be highlighted in the layers tab), use the marquee tool to make a rectangle selection around the text, then use the paint bucket tool to fill it in with the color black. This will make the text invisible until the layer mask is moved.

Go to Window>Animation if you do not already have the animation timeline open. Click on the little sticky note icon to duplicate the first frame. In newer versions of Photoshop, you will probably first have to click on a button that reads "Create Frame Animation", and the duplicate frames button icon is the "+" in a little square.
Making sure you still have the layer mask selected and not the entire layer, use the move tool and arrow keys to move it all the way to the right, revealing the text on the second frame you've just made. Don't move it too far off now.
Move the typing cursor layer to the right as well, except you don't have to move it all the way at the end, only where it will be last seen.

Make the typing cursor layer visible on the first frame, and not visible on the second.
Select the first frame the animation and click on the tween button. This will add all of the frames in between the first and the second one for you. Make sure you only have "Position" checked under "Parameters". For the numbers of frames to add, here's a neat trick for finding the right amount: count the amount of letters in the name. "ZOOSMELL POOPLORD" is 16 letters, so add 16 frames.
Most of the work is already done, though there might be a couple frames that will need some minor tweaks. Just use the move tool and arrow keys again to finetune the layers' positioning.
This is why it was important to not move the layer mask too far to the right away from the end of the text. Tweening the position spaces it out linearly, evenly, so the farther away the end goal is, the more space each frame will use. Thankfully the font this panel uses is mostly monospaced, and I got a little lucky with my positioning, so I needed to only adjust three or four frames. Way less tedious than having to create each frame of animation myself, at least.

To change the frame delay (the time duration each frame takes up) of the newly created frames, click on the first frame you want to retime, hold down the Shift key, and then click on the last frame. This will make a selection spanning all frames in between. Click on the little dropdown arrow and select 0.1 seconds (100 milliseconds).

Here's the original panel:
And here's my recreation:
Here's the PSD, too.
73 notes
·
View notes
Text
Guide on making custom coat presets. (Allows for better quality custom coats)
31/08/2023: The guide has been updated to reflect a step I missed - when exporting your custom textures, make sure to select "generate mipmaps", the step is reflected in more detail under the appropriate part. Ctrl+f and enter "mipmaps" to skip to it.
16/10/2023: Updated to add more info re: generating hash ID's.
Okay, I decided to throw this together. There's some things I can't figure out still, but oh well, we're just getting through this as we go.
To clarify what I mean - this is not a stencil or a brush.
This will appear here:
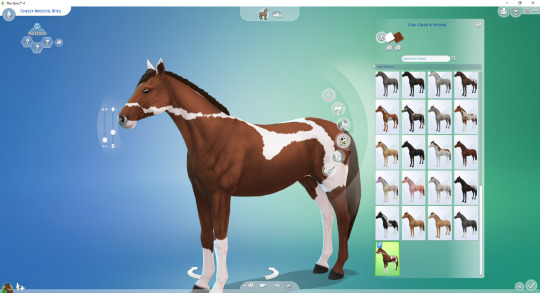
To preface this guide though, I cannot, for the life of me, figure out how to make it appear as an individual option in-game, so, these are considered SWATCHES of the original coats.
Okay, with that out of the way.
Things you'll need:
Sims 4 Studio
GIMP
Probably Notepad, but it's optional on how easy it is for you to track things.
Guide:
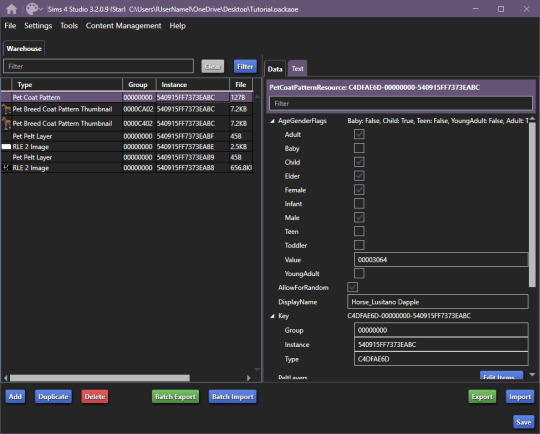
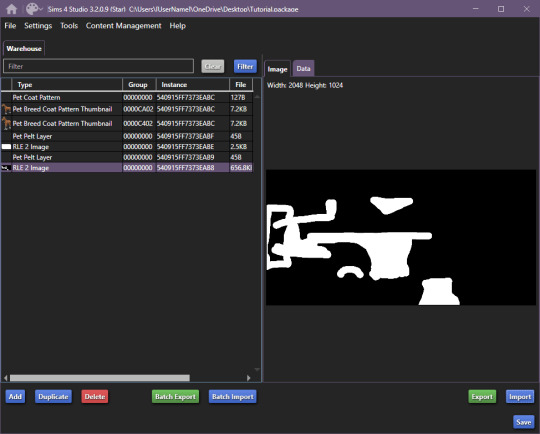
These are the tools we'll be using in S4S.
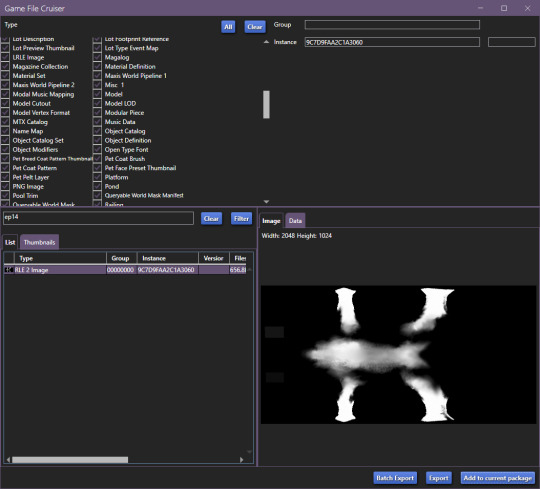
Start by creating your empty package, once you're done, open up Game File Cruiser:
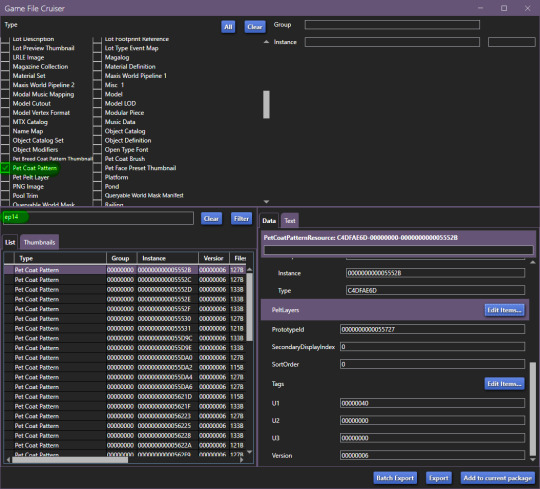
before you do ANYTHING, make absolutely sure that the search bar below the file list has "EP14" in it, otherwise you will 100% end up editing a cat or a dog coat pattern and that's now what we want, at all.
Add the first horse file to your package
In our case, it's the Lusitano Dapple coat, don't worry, if you're making a breed-specific coat, you can change this later.
Now that it's been added to our package file, it should look like this:

We now have two options, I'll explain this to those who don't care about creating a game-generated thumbnail and want to find it easier.
To make your "test" thumbnail, you'll want to copy the instance ID of the file we just added to our package:
It should look like this, the instance ID should be in 2nd from the top search bar, then, select all and click filter (it just makes life easier than finding the specific file type).

These are the current, in-game CAS thumbnails. We'll add both of them to the package, they're for ponies and adult horses.
Now you can export these two pictures (They need to be saved as .png's), edit them as you'd like and then import them back into the package.
Now, you CAN add up to 5 different pelt layers that can be easily recoloured in-game, however, we'll only be working with two pelt layers in this tutorial, because it's a tutorial and you'll learn how to make more of them anyway.
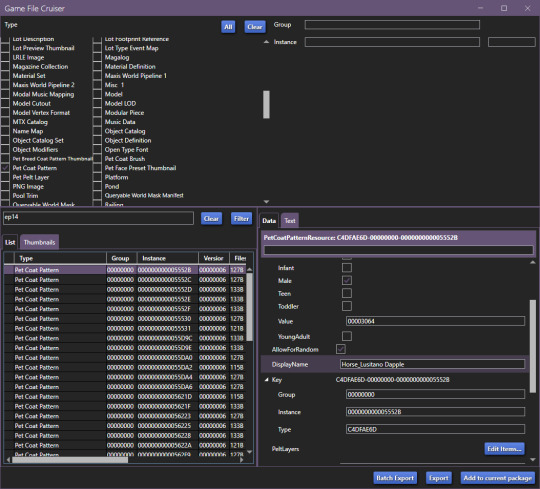
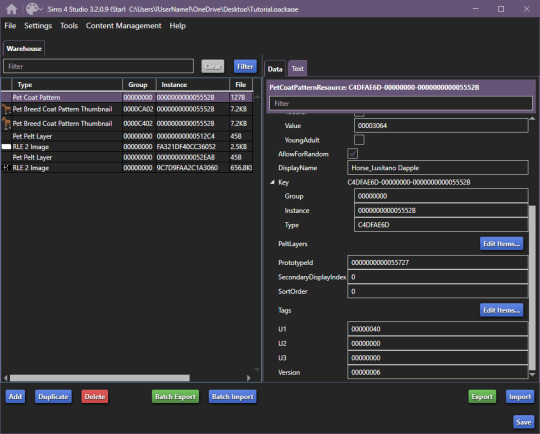
Click on "Pet Coat Pattern" and then look over the data:

From there, Click on "PetPeltLayers":
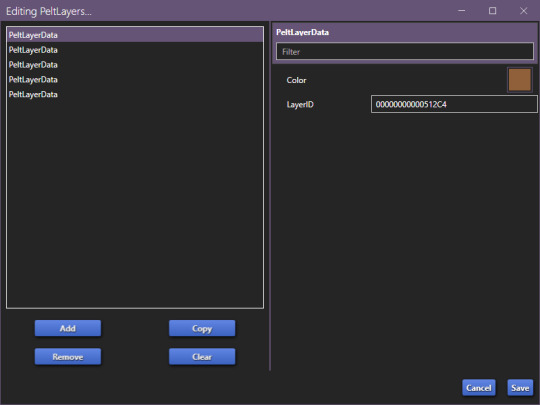
The first pelt layer is ALWAYS a solid colour, we'll begin by copying the LayerID (Instance ID) and going back to game file cruiser.
Just like previously, you should keep EP14 in the search bar and just use the instance ID bar to find things, as that's all we'll be doing.

Add the Pet Pelt Layer to your package file, then, copy the "texture key" from the Pet Pelt Layer:
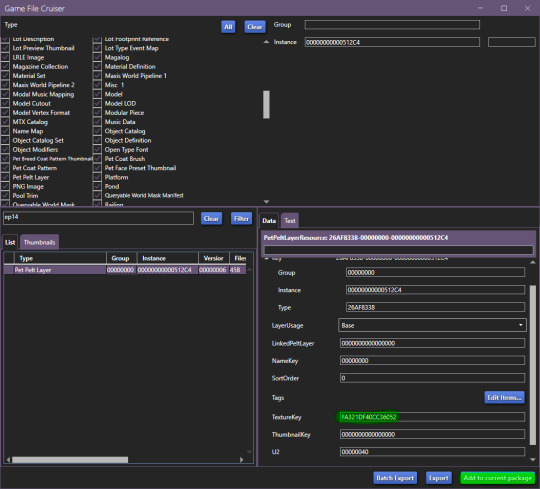
Then find the Texture Key:
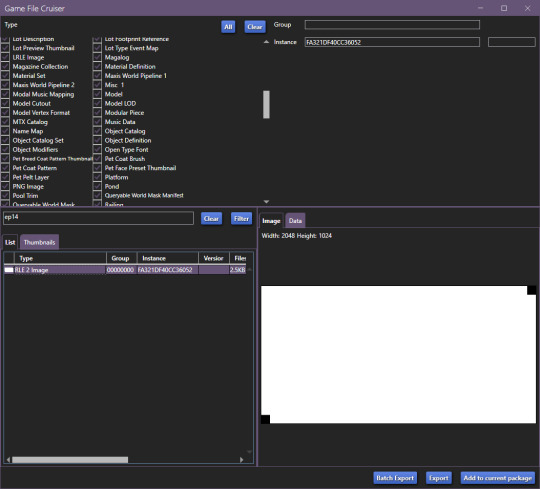
This is the solid colour layer, it HAS to be there as this is what will help you edit your base colour. Add this to your package file.
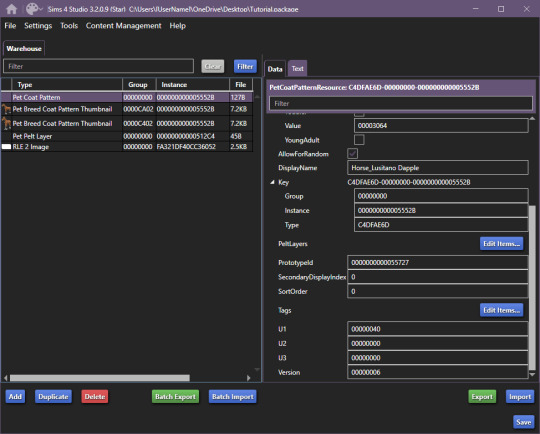
Now, our package file will look like this:
Unfortunately, we're not done, just yet, we'll want to grab at least the second PetPeltLayer:

Just like before, we're going to copy the ID and find the Pet Pelt Layer + the Texture for this layer:

Now, our package file will look like this:
You can now go ahead and close the Game File Cruiser, we won't be using it anymore.
Right now, this is our package file and we need to do some cleanup first.
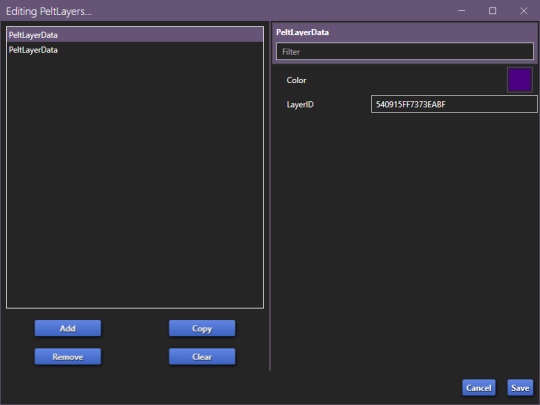
We'll be opening up the PetPeltLayers once more and we'll remove the last 3 entries:
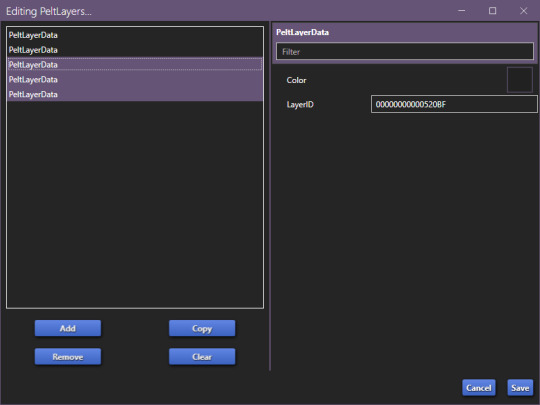
You should be left with only two entries, as that is what we'll be editing (leaving the other 3 will break the preset).
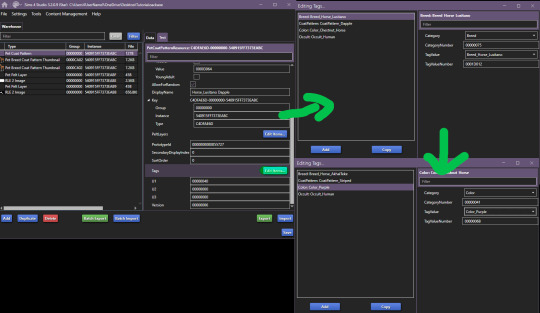
Now, we'll start generating new hash codes for everything:
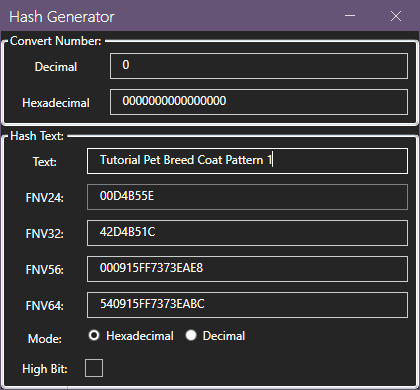
Edited 16/10/2023: When generating your hash ID's, please use your creator name ie.: "[YourCreatorName/Blogname]TutorialPetBreedCoatPattern11", this will give you a more unique hash code than hoping to be as descriptive as possible when generating the hashes (in this case instance ID's).
Thanks to Mizore Yukii for this advice, from Creator's Musings discord.
As in my previous guides, be descriptive with what you're typing there and then just change the last number.
The process is annoying and slow, so bear with the images, and follow along.
The TextureKey coloured in red is the 3rd ID you'll generate, it's what links the texture to the Pet Pelt Layer, which links it to the Pattern we're creating. (Sorry for the squished thumbnail, open it in your browser, I was running out of picture space for the rest of the tutorial lol).
And now we repeat this for the second Pet Pelt Layer.
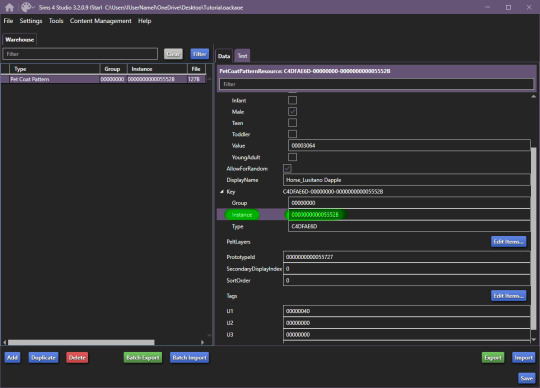
Now, if you want the game to just generate the thumbnail for you, you can skip this step, if you want to make a custom thumbnail, then copy the Pet Coat Pattern Instance ID into the two Thumbnails we've added to our package file:
This is what the package file has to look like at this point.
Now is the relatively easy part, editing the second RLE 2 Image. We won't touch the base, because it's not necessary.
I recommend using the Horse Diffuse Map as a base when you're drawing your pattern. It'll be easier to see what you're doing. You can download it here: Horse Diffuse Map.
Remember, that your pattern HAS to be white, black space is IGNORED by the game and considered a "transparent" layer, so that you can see the layer beneath the you're working on.
This is my quick, and lazy test one I've made, I use a PNG of the Diffuse Map as a base and on a separate layer I draw with white coloured brushes:
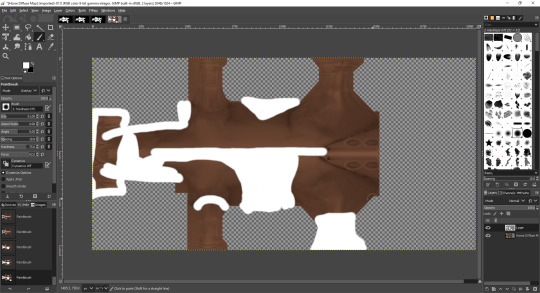
You may notice the very straight lines on the diffuse map - make sure to colour OVER them as if you do not, it will appear in-game because those are the seams where the mesh "meets"
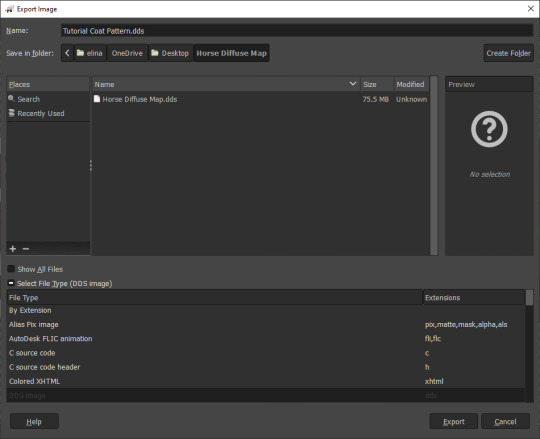
Once you're satisfied with your pattern, you can go to export, just make sure that the white pattern is on a separate layer to the diffuse map. At this point you can add a black background underneath the white and export.
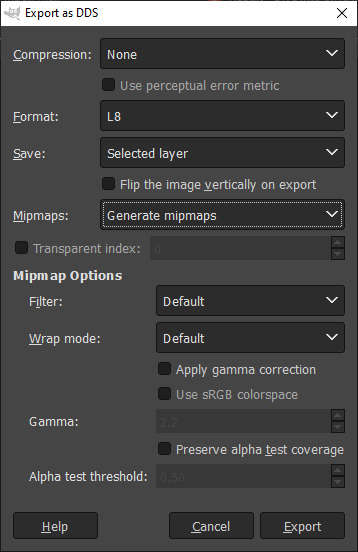
All you have to do is export the RLE2 Image you've edited as a DDS image in the L8 format and (edited 31/08/2023) select "Generate mipmaps" otherwise you will experience a glitch in-game where the coat disappears. You can leave the mipmap options as default, it should work correctly.
Then, we're going to import it into our package and save our package:
Remember to not touch the completely white base coat!
Now that this is over, we'll go back to Pet Coat Pattern and edit some settings.
The first three settings is what I recommend changing around. The first setting changes the breed, the second setting changes how the coat pattern is labeled and the third setting changes the colour it's tagged under.
Only change "TagValue" - it will give you a dropdown menu, don't change anything else. The TagValueNumber changes automatically, so don't worry about it.
EDITED TO ADD:
Additionally, don't forget to go into "PetPeltLayer" and change the colours, this is what will show up as "base" colour that you can change in-game. You can change them for every PeltLayerData file you have.
Now, save and go test it out in game:

Bada bing, bada boom we've got our "custom" coat preset.
If I've forgotten anything, let me know. This took me 2 hours to write, so forgive my typos. If anything is unclear, let me know. I ran into a struggle with the picture limit on Tumblr (found out that it's 30, I should move my guides somewhere else, but where?)
#The Sims 4#Sims 4#The Sims 4 Horses#The Sims 4 Pets#the sims 4 horse ranch#the sims 4 guide#sims 4 guide#sims 4 custom content guide#sims 4 horses guide
143 notes
·
View notes
Note
HII I LOVE UR BLOG SM ITS SO PRETTY😭❤️
I wanted to ask how you make your cute PNGs with no bg and the animated thin lines???
They’re so cute (T T)
Hi nonnie, thank you that's honestly so sweet of you!!! Sorry for the delay, I got a little busy and tried to see if there are any free sites you can use to make these. Before I get to the tutorials tho I’d like you to know that you can totally request animated dividers from me lol (I’ve taken a couple before here!) just send me a few hex codes / theme colors + bg / transition colors (optional) <33
Anywhoooo I use photoshop for everything but the tutorials below the cut have free-to-use friendly options (I believe!!) ++ I made a separate post for the animated thin lines because tumblr only lets me upload one video per post!!

Tutorial on how I make my banners <3

⟢ ┈ for this tutorial, you can use Photoshop (Paid) or GIMP (Free)
GIMP was my 'training ground' for photoshop lol and the tutorial is pretty much the same for both editors.
I use the wand tool to remove plain / obvious BGs and the pen tool to remove any stubborn parts that the wand tool can't detect (some people prefer masking but this is just how I like to do it)
++ YouTube tutorials are pretty much available for both tools, and unfortunately I don't think there's any way around learning how to use them + the pen tool might be a little tough to get the hang of at first, but you'll get there!
FYI, I tried to use a few 'free bg remover' sites and they don't really do the trick for me :c Canva Pro has one bg remover tool but I haven't tested it out for myself!
Here's a quick little vid lol, I used my darling Eliza as an example + it's sped up to 4x!! Tip: You may add a green (or any vibrant color) layer at the bottom just so you can clearly spot any "strays" (also, my apologies just bc this is a very rough clean up pffft)
After 'cleaning up' I like to color panels with my signature colors <33 I usually just add a color overlay (double click / right click the layer + select ‘blending options’) and play around with blend modes
FYI, some people use Picsart to color their banners but tbch, I played around with it once before and I really just have no patience for the tool I'm sorry ;-;

I'm using Vivid Light @ 50% opacity for this example (it's also more or less what I used for the one on my pinned)

The rest is really just about layering + framing!! (if you're happy with the colors of your panel, you can absolutely do everything else on Canva Free)
For my banners, I almost always use this heart shape I got off google:

For the heart layer itself, I set 'Fill' @ 0% and use the outer glow feature in blending options so it looks something like this: (it looks transparent now but it becomes more vibrant when uploaded)

Then I put my 'cleaned' PNGs inside the heart, crop / remove borders (using the wand tool!!!), add sparkles (totally randomly placed lol) or other brushes, add a BG if I want, and that's it! All that's left is to export as PNG <33
BUUUUT AT THE END OF THE DAY If cleaning up panels / images is too much work (I know it is lol), you can always try to look for 'transparent [keyword]’ (e.g., transparent manga) images / panels here on tumblr or on pinterest. Most of them are free to use anyway + recolored too!! That way you can edit them more liberally on sites like Canva (Free) that more or less have similar options.
#nani?!#nonnie chan ♡#!edits#banners#banner tutorial#theme resources#transparent png#manga panel#png#aesthetics
23 notes
·
View notes
Text
Making Baldur’s Gate 3 GIFS Tutorial
TOOLS USED:
Nvidia or alternate game video recording software
PotPlayer
GIMP (Optional)
Adobe Photoshop
PART 1: Recording
I personally use the Nvidia recording software that came with my computer to capture videos of the game, but there are plenty of video recording options out there. I know OBS Studio is a popular one, for example. Whatever your choice may be, here are three important tips for when capturing video:
Use the least amount of compression settings your recording software can output, and I recommend at least 30FPS, though 60 is better
Press F10 to hide the Baldur’s Gate 3 UI and capture the entire screen
Give about three seconds worth of video before and after the section you want to record, as safety buffers, if you can
PART 2: Frame Extraction
Open the video you’ve recorded in PotPlayer in window mode (not full screen), and pause a little bit before where you want to start your GIF. Press Ctrl + G to open up the Consecutive Image Capturer window, and drag it to the side of the video player. These are the settings I recommend in general:
HOWEVER, I suggest playing around with the “Every # frame” option to your own liking. I have a pretty high framerate for this video I’m using, so 5 is fit for me, but if you have a lower framerate, you may want a lower number, like 2.
With your settings in place, click “Start” and unpause the video. Pause the video again after you’ve captured all the frames you want, then click “Stop”. If you’re making a gifset, I recommend then storing each set of frames in a single folder at a time.
PART 3: Resizing
I personally use GIMP to resize/crop the images because I find it easier, then export the image as a PSD for the next steps in Photoshop. But you can use Photoshop for this step too, if you’re more comfortable with that.
The number of frames you can get away with in a single GIF for Tumblr depends on the aspect ratio you plan on saving it as—for example, 270x200 obviously can handle more frames than 540x300 while still fitting within Tumblr’s size limit.
PART 4: Sharpening
In Photoshop, use the Filter > Sharpen > Smart Sharpen tool on each layer. The settings are your choice, but I usually use 200 for the Amount and 0.5 for the Radius.
PART 5: Animation
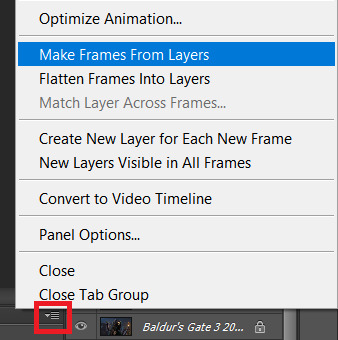
If you don’t yet have the timeline set up in Photoshop, click on Windows > Timeline to bring it up. Then from the arrow, choose “Create Frame Animation” and click on the button to do so. This will insert the first frame into your timeline. Click on “Make Frames from Layers” in the timeline options menu to add them all.
Click on frame 1, then hold down Shift and click on the last frame to select them all. Then click on the drop-down arrow from the last frame and set the delay between each frame changing. I usually use 0.1 seconds.
Change the “Once” option to “Forever” to make the GIF repeat itself ongoing.
PART 6: Editing/Colouring
Click on frame 1. Then click on the top layer, while still keeping frame 1 visible.
You can use a variety of tools in Photoshop to editing the colours, brightness, contrast, etc. of the gif. Make sure the filters are the top layers to apply them to all the frames. If you test out your gif and see that the filters are not applied to all the frames, toggle the visible option on them off and on again.
I’m not going to go into detail of how to edit your GIF here, because each one is different. But I will say the tools I most typically use are Brightness/Contrast and Curves.
PART 7: Export
Click on File > Save for Web. These are the settings I like to use:
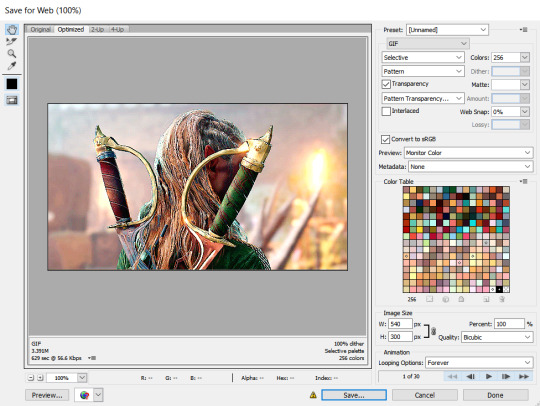
Congratulations, you’ve made a GIF!
146 notes
·
View notes
Text
me: ....and this is the final figure
my boss: can you [minor adjustment]?
me: no.
my boss: why not
me: i don't think you understand how cursed the making of this figure was compared to how good it looks. i used four different programs. do you even know what gimp is
my boss: what--
me: the select tool and the move tool are different buttons. DO YOU UNDERSTAND
#last time i had to make a publishable figure i did the exact opposite#which was ripping my hair out trying to make all the adjustments i wanted in ggplot#trust me that option is better. now if someone is like 'can you change this--' then i just change one code#not..... whatever the fuck i just did#don't do that. if you're busting out gimp you've made a mistake#mixed bag
41 notes
·
View notes
Text

here's the new icon... surprisingly I saw no trans flag edits of her portrait so I decided to make this in GIMP. fuzzy select tool saving my ass. anyone is welcome to use it!
22 notes
·
View notes
Text
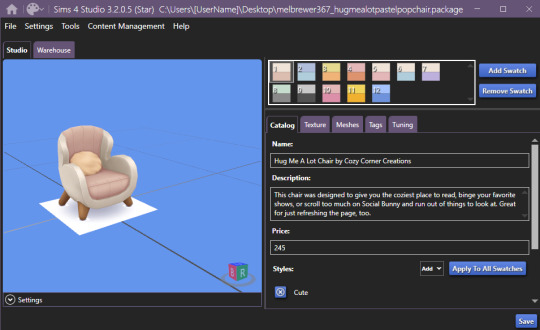
So you want to make a recolor...
I made a quick recolor tutorial for a friend group so I thought I'd go ahead and share here too. This is just a super quick guide for how to recolor an object/cas item.
There are two types of recolors. Standalone and Overrides. Overrides will replace the item/swatches that exist in the game. Standalone recolors create an additional item with it's own swatches. This tutorial works for both kinds, you just pick which one in Step 1, and then the rest is basically the same.
This tutorial also works for pretty much all buy mode items and CAS items. Anything that is tileable...I think maybe that's what you could call it...anything that can be stretched across multiple tiles, for instance, wallpapers, flooring, roofing, fencing...these types of items require a few more steps that I will not be covering here.
Ok so you want to recolor something, you need Sims 4 Studio (S4S) and a photo editing program like photoshop (there are plenty of free alternatives out there too, like Gimp is one I know a lot of people use).
Step 1! Open up S4S and pick either "Standalone" or "Override" depending on what your end goal is. Generally, you'll probably do standalone. I usually reserve overrides for permanent world items I want to change, like changing the images on the billboards in San Myshuno, for instance.
For this, I'm going to make a standalone recolor of an object so you would make sure Standalone Recolor is selected and then click "Object."
Step 2. Find the thing you want to recolor. Across the top there's filters so you can narrow it down by pack or search keywords to help find what you're looking for. Pick your item and click "next" at the bottom. A save window is going to pop up, save your file and make sure to name it something useful that's actually identifying so you can easily find it and remove it/update it/etc in the future. If you just hover your mouse over an item, it will give you the game's name for that item.


Congrats, you've created a Sims 4 package.
Step 3. (Optional) If you want to make changes to the in game display name, description, price, or style tags...you can do that on this first screen and then just hit "Apply To All Swatches." You do not have to make changes here if you don't want to though.
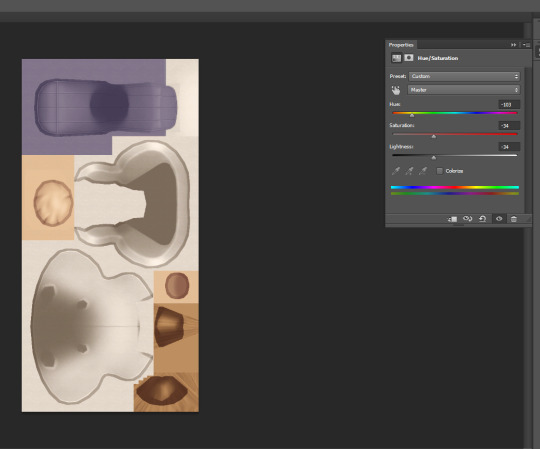
Step 4. This is where the fun begins. Click on the "Texture" tab. This is where you're going to get the file that you actually need to recolor. If there's a plain white swatch, I would pick that one, otherwise, I would go with whatever the lightest and most blank swatch is to make it easier on you to recolor. You just click one of the numbered swatch boxes at the top and then in the lower section make sure you have "Texture" highlighted, in this case it is my only option, and then click "Export." Another save window will pop up, just save that texture file somewhere easy to find, it'll only be there temporarily. (Or, if you want to be really smart and you plan on recoloring many things, you should make a project folder for each thing and save your texture files and things in there so you can always come back to them later.)

Step 5. So the exact tools and steps and such will kinda vary here based on what you want to accomplish and what program you use but, the broader overall process is the same. Open your texture file in an image editing software, change the colors/patterns/etc how you want, and then save that texture file. For instance, on this one I'm just going to change that pink section to a different color by just selecting the pink area with a marquee/quick selection tool and then using the Hue/Saturation tool to change the color.
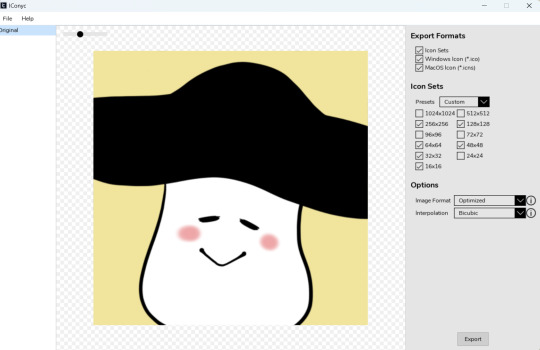
Another example, this is something James Turner did in a recent video that someone asked about, you could choose some in game frames with images, put your own screenshots onto that image, and then boom you have your screenshots in game as framed photos. You would simply add your screenshot on top of the framed image as a second layer, line it up nice and neat, and you're good to go. Here's an example of what that would look like:
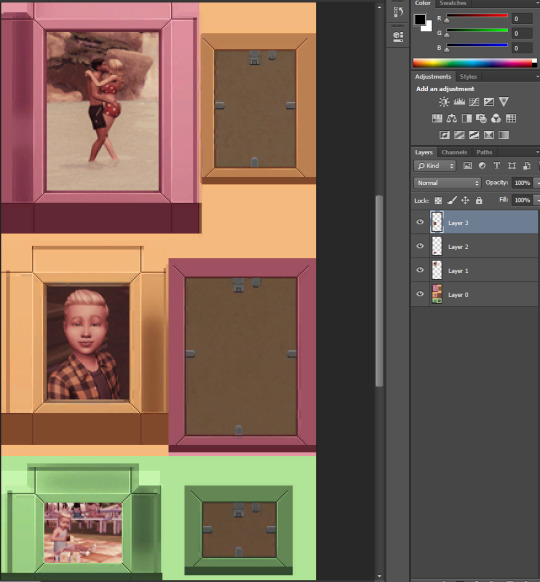
That's also basically how you could quickly add patterns to something. Lay your pattern image over top of the texture, change your layer style to something like "Multiply" or "overlay" depending on the look you're going for. Either way you do these, just remember to save your final product as a .png file.
Step 6. Back to S4S! Same place you were before, except now you need to click "Import" down in that lower texture section, select your texture file you just made. While you're on this screen, you should also update the colors in the "Swatch Thumbnail" section to match your new recolor, and you can also "remove swatch" to get rid of any additional swatches you don't need. Once you're done with all of this, hit save, and then go throw that .package file into your Mods folder.

Step 7. Go in game and check out your items and then pat yourself on the back.
Now you too can be cursed with this knowledge so that every time a new item/clothing is added to the game and you think, "wow I'd really like this if it was in better swatches" you can just...make those swatches.
123 notes
·
View notes
Text
Godot Tutorial: Creating a Custom Windows Icon
I had a little trouble with this, so I made a tutorial in case anyone needs it!
Download IConyc. This is a cool tool (made in Godot!) that you can use to generate ICO files for Windows and ICNS files for Mac.

2. Use it to generate an icon with these sizes: 256x256, 128x128, 64x64, 48x48, 32x32, and 16x16. (Note that you can also make ICO files in GIMP. In order to do this, create different sizes of your image on different layers and order them from largest on top to smallest on bottom. Then export as an ICO file.)
3. Add your ICO to your project.
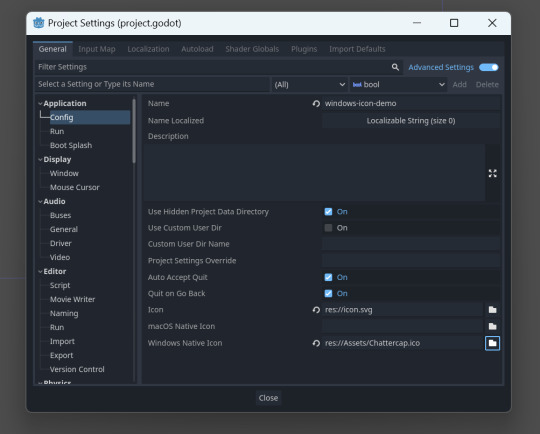
4. Go to Project -> Project Settings -> Application -> Config. Check "Advanced Settings." Go to "Windows Native Icon" and select your ICO file.
5. Download rcedit.
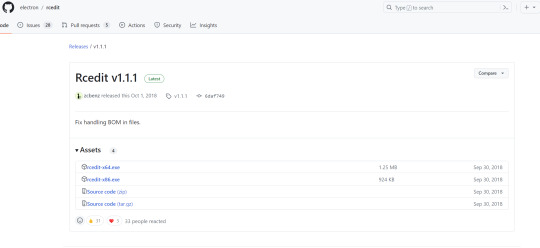
6. Go to Editor -> Editor Settings -> Export -> Windows. Under "rcedit," find where you downloaded the rcedit executable.
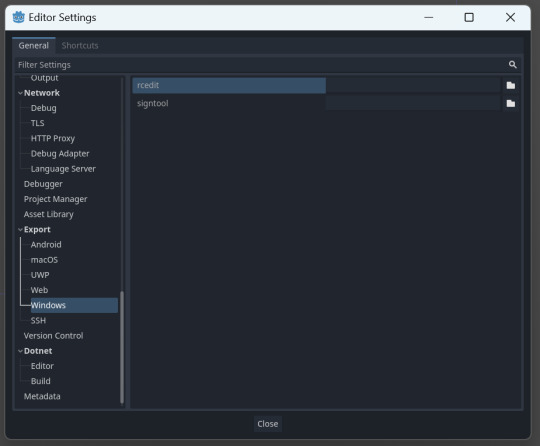
7. Go to Project -> Export. Select your icon in ICO format in the Application -> Icon field. Check "Embed PCK."
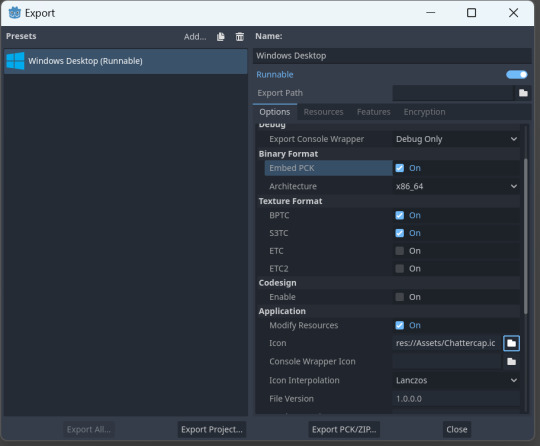
8. You should have your custom icons!
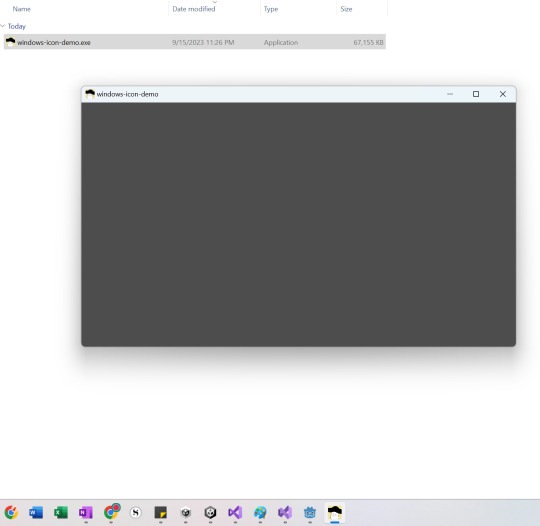
(Note, if this does not work, try renaming the exported executable. Sometimes that "refreshes" the icon.)
63 notes
·
View notes
Text
BG3 Modding Tutorial - Tattoos
Part II Body Tattoos
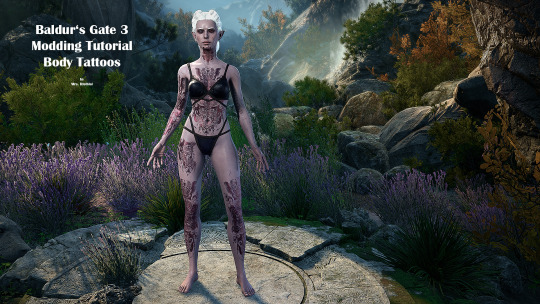
Reworked Tutorial...because people still like it and reblog my crap :D
Now you can have your unique tattoo file and you don't have to paint on the body texture as I did when I made the old tutorials.
PART I - Face Tattoos -> here
You need:
A photo editor as PS or gimp etc.
Body uv-map
Body textures
The file from the unique tav_mod by kartoffels as a template. Grab it on the Nexus or make your own.
Phantasy, brushes, time...
Or download my file here
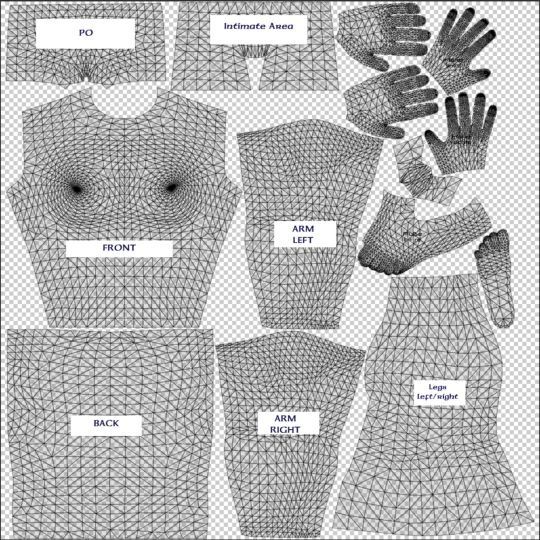
Load your necessary files in Gimp or PS etc. The body texture will not be exported- it's just a help/ orientation where the tattoo is placed.
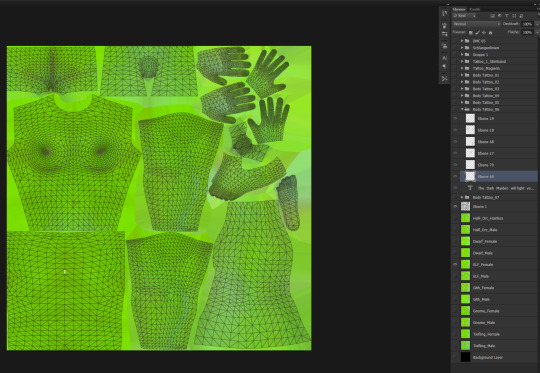
The next pic above shows the uv-map with the different body parts. Watch out when you make tattoos for the arms or legs. The left side of the uv map body part represents the back of the arm or leg. Hm, writing this I'm not sure anymore-- try it out :D
Then create your stuff on different layers:
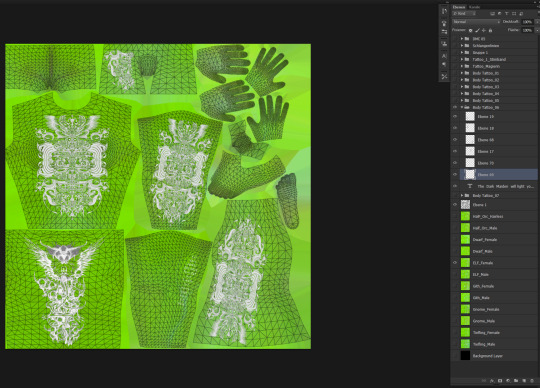
and merge your levels together when you are finished. The same prodcedure as for the face tattoos.
Don't forget to deselect the uv-map and the body texture!
Your merged file should look like this:
Now load the tattoo file from Kartoffels mod in your editor or create your own.
Your own should look like this.

You have to use the slice tool to subdivide the file.
Then copy paste your tattoo in your new tattoo file in the red channel

Then drag/ move it in the left corner..

and scale it that it fits in the first square of your tattoo file

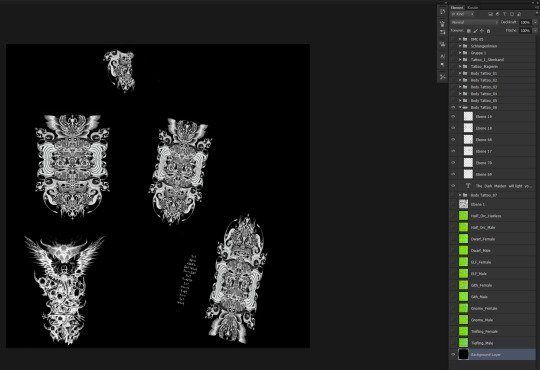
Select all channels before you export. Your file should look like this:
Export your file:

Name of the file is: Skin_Atlas_Body_UNI_Tattoo_A_MSK.dds
And your new creation goes here:
Games\Baldurs Gate 3\Data\Generated\Public\Shared\Assets\unique_tav\BODY\TATTOO
Happy Modding!
#bg3 mod tutorial#bg3#baldur's gate 3#bg3modding#if something changed or is wrong please let me know#full release
87 notes
·
View notes
Last Seen Blogs

bottomhanniballecter
My Compassion For You Is Inconvenient, Will

devshirt
Devshirt

remojade
Untitled

ahadserenity-org-in-fan
Ahad Apartments Choodasandra, Near Sarjapur Road

cellus17
Untitled