#how hard is it to learn a vector based program
Explore tagged Tumblr posts
Visit Tumblr Blog
Explore Tumblr blogs with no restrictions, modern design and the best experience.
Last Seen Tumblr Blogs


Fun Fact
Tumblr’s website traffic is steadily declining.
Text

constantly rotating hockey lawlight in my head
#listen we are NOT gonna talk about how their jerseys are blank#I have really been meaning to make logos#or hire someone tbh#there are four major teams I need logos for#oh who you might ask?#the New Jersey killers#the New York Scouts#the Ottawa Reapers#the Toronto Bells#not really a spoiler for anyone reading fic#but I mean#things will happen down the line#how hard is it to learn a vector based program#and would it be insane to do it for yaoi#death note#death note AU#lawlight#light yagami#l lawliet#hockey au#FSOTC#forty seconds on the clock
273 notes
·
View notes
Text
Fun Facts About TROJAN HORSE!
The original concept of TROJAN HORSE actually dated back to February of 2023 (At the time, Illusion of Flattery was my most recently posted song). I previously only had the original melody thought out at the time as well as some basic plot details (The subject of the song's name was Troy and he was like some sort of guy obsessed with a girl who didn't reciprocate his feelings and he had eventually plotted an attack on her after becoming a Trojan Horse). However, I had originally scrapped the song due to audio mixing issues and overall lack of skill (I hadn't even started implementing proper keys into my songs until Wanderlust and Illusion of Flattery). I had briefly revisited the song in October of 2023, but then I forgot about it again until May of this year.
The fake BSoD that I made for the warning screen at the beginning of the song was edited in MS Paint, of all programs. This was because it was the only program I had where the "System" font (the font that used to be used on Windows BSoDs (or at least Windows 9x systems, because the base of the edit was a BSoD from Windows Me)) rendered correctly (I couldn't access the font in FireAlpaca, and the font looked blurry in Krita because Krita renders fonts as vector images with no feature to turn off anti-aliasing) The edit was hard to pull off and I ended up having to make some minor adjustments to the edit in FireAlpaca, but the edit was certainly doable because, well, I made it.
Some more fun stuff about the fake BSoD I made is that does include a reference to a genuine error code (In this case, the error code "04" refers to an "overflow trap"). Also, if you compare the string of numbers in the error message to this Base64 index alphabet table, the numbers actually spell out a word in Base64 code (but then you'll have to decode that yourself 😏)
While I'm aware that TROJAN HORSE's very premise is bound to spark some KinitoPET jokes (even I've made my fair share of jokes about it), I actually envisioned the whole premise of the song long before KinitoPET was released to the public (The KinitioPET game's release was in January of this year, although I didn't learn of its existence until March. Funny enough, I had even envisioned Troy having a pink color scheme and wearing black tights (or maybe that just IS his leg color, since he chooses how he looks? 🤔) before the release of KinitoPET. However, I still think the release of KinitoPET did have some effect on the final version of the lore and song I settled on (for extra funnies, it turned out the creator of KinitoPET is named "troy_en").
Before that whole crisis I had on deciding what voice would play Troy in TROJAN HORSE, the placeholder voicebank I had used for testing the vocal tuning was Solaria's lite voicebank.
10 notes
·
View notes
Text
Decoding CISA Exploited Vulnerabilities

Integrating CISA Tools for Effective Vulnerability Management: Vulnerability management teams struggle to detect and update software with known vulnerabilities with over 20,000 CVEs reported annually. These teams must patch software across their firm to reduce risk and prevent a cybersecurity compromise, which is unachievable. Since it’s hard to patch all systems, most teams focus on fixing vulnerabilities that score high in the CVSS, a standardized and repeatable scoring methodology that rates reported vulnerabilities from most to least serious.
However, how do these organizations know to prioritize software with the highest CVE scores? It’s wonderful to talk to executives about the number or percentage of critical severity CVEs fixed, but does that teach us anything about their organization’s resilience? Does decreasing critical CVEs greatly reduce breach risk? In principle, the organization is lowering breach risk, but in fact, it’s hard to know.
To increase cybersecurity resilience, CISA identified exploited vulnerabilities
The Cybersecurity and Infrastructure Security Agency (CISA) Known Exploited Vulnerabilities (KEV) initiative was created to reduce breaches rather than theoretical risk. CISA strongly urges businesses to constantly evaluate and prioritize remediation of the Known Exploited Vulnerabilities catalog. By updating its list, CISA hopes to give a “authoritative source of vulnerabilities that have been exploited in the wild” and help firms mitigate risks to stay ahead of cyberattacks.
CISA has narrowed the list of CVEs security teams should remediate from tens-of-thousands to just over 1,000 by focusing on vulnerabilities that:
Been assigned a CVE ID and actively exploited in the wild
Have a clear fix, like a vendor update.
This limitation in scope allows overworked vulnerability management teams to extensively investigate software in their environment that has been reported to contain actively exploitable vulnerabilities, which are the most likely breach origins.
Rethinking vulnerability management to prioritize risk
With CISA KEV’s narrower list of vulnerabilities driving their workflows, security teams are spending less time patching software (a laborious and low-value task) and more time understanding their organization’s resiliency against these proven attack vectors. Many vulnerability management teams have replaced patching with testing to see if:
Software in their surroundings can exploit CISA KEV vulnerabilities.
Their compensatory controls identify and prevent breaches. This helps teams analyze the genuine risk to their organization and the value of their security protection investments.
This shift toward testing CISA KEV catalog vulnerabilities shows that organizations are maturing from traditional vulnerability management programs to Gartner-defined Continuous Threat Exposure Management (CTEM) programs that “surface and actively prioritize whatever most threatens your business.” This focus on proven risk instead of theoretical risk helps teams learn new skills and solutions to execute exploits across their enterprise.
ASM’s role in continuous vulnerability intelligence
An attack surface management (ASM) solution helps you understand cyber risk with continuous asset discovery and risk prioritization.
Continuous testing, a CTEM pillar, requires programs to “validate how attacks might work and how systems might react” to ensure security resources are focused on the most pressing risks. According to Gartner, “organizations that prioritize based on a continuous threat exposure management program will be three times less likely to suffer a breach.”
CTEM solutions strengthen cybersecurity defenses above typical vulnerability management programs by focusing on the most likely breaches. Stopping breaches is important since their average cost is rising. IBM’s Cost of a Data Breach research shows a 15% increase to USD 4.45 million over three years. As competent resources become scarcer and security budgets tighten, consider giving your teams a narrower emphasis, such as CISA KEV vulnerabilities, and equipping them with tools to test exploitability and assess cybersecurity defense robustness.
Checking exploitable vulnerabilities using IBM Security Randori
IBM Security Randori, an attack surface management solution, finds your external vulnerabilities from an adversarial perspective. It continuously validates an organization’s external attack surface and reports exploitable flaws.
A sophisticated ransomware attack hit Armellini Logistics in December 2019. After the attack, the company recovered fast and decided to be more proactive in prevention. Armellini uses Randori Recon to monitor external risk and update asset and vulnerability management systems as new cloud and SaaS applications launch. Armellini is increasingly leveraging Randori Recon’s target temptation analysis to prioritize vulnerabilities to repair. This understanding has helped the Armellini team lower company risk without affecting business operations.
In addition to managing vulnerabilities, the vulnerability validation feature checks the exploitability of CVEs like CVE-2023-7992, a zero-day vulnerability in Zyxel NAS systems found and reported by IBM X-Force Applied Research. This verification reduces noise and lets clients act on genuine threats and retest to see if mitigation or remediation worked.
Read more on Govindhtech.com
4 notes
·
View notes
Text
tools_and_technologies
In creating the final solution, I'll first test different programs and software to understand their capabilities and scope out what features and functions I would need.
Below I have created a checklist of the different softwares I plan to use/test out, as well as their advantages and disadvantages.
Blender3D: A 3d modelling software. I'd like to learn how to use this software more as it's free and there are plenty of resources online that I can use and has numerous features that I can utilise for the solution. The disadvantage to this software is that although its a good starter in learning to 3D model, I've already found the UI of the program to be quite hard to navigate through and there are possible better alternatives.
Procreate - A drawing app. This software I am already very familiar with and have a good understanding on its capabilities and features, however, they are very limited. This app will definitely be useful in creating iterations and prototypes, but the final solution may need to be produced through a different software due to its limited capabilities e.g. vectors and 3D elements.
Adobe Illustrator - A graphic design software. I'm not too familiar with this program yet, but I am very interested in learning how to use it due to its vector-based software that I believe will be very useful in learning for the project, and outside. My only limitation is that there are limited resources available in learning how to use it and the limited time I have.
Garageband/Logic Pro - Both are DAWs (digital audio workstations) that I have little to no experience with. However, I feel that it will be useful, and even essential, in producing my sound element for a VR environment. I'll have to learn how to use either software which might require some time and a great amount of attention. Although I do have available resources (my boyfriend) that will be able to teach me how to use Logic Pro, I believe that I'd possibly have the capacity to fully utilise this program into my solution.
Oculus Quest VR Headset - A VR Headset. In all honesty, I don't have much knowledge on this product, let alone any other VR headset. This headset is also the only option available for me when testing out my solution. Although, from what I've gathered from online resources, this headset is easy to use, portable and at a cheaper price range in comparison to other VR headsets. The downside being its limited performance and a limited screen sharing.
Reference Pilgaard, M. L. (n.d.). Should you use Oculus Quest in your business? 3 pros and cons you need to know. www.linkedin.com. https://www.linkedin.com/pulse/should-you-use-oculus-quest-your-business-3-pros-cons-pilgaard/#:~:text=As%20with%20any%20technology%2C%20Oculus,methods%20of%20circumventing%20these%20issues.
6.08.23 9.14pm
2 notes
·
View notes
Text
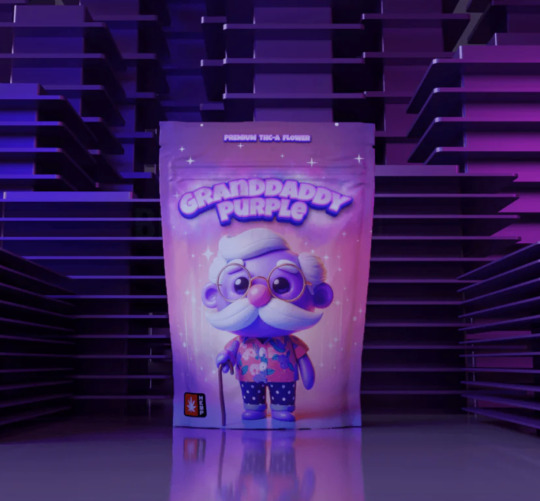
How to make a mylar bag template
Designing a mylar bag template opens doors to a world of personalization and precision in packaging, giving your creations a vibe that’s all your own. But where to begin? It's not as intimidating as it sounds. This guide will walk you through each step, peppered with insights and a few clever tricks along the way. Let’s dive in, and who knows? You might even find yourself reveling in the simplicity of building something so unique.
What's a Mylar Bag Template, Anyway?
A mylar bag template isn’t some high-tech contraption—it’s a straightforward, blank design, often whipped up in a graphic program, that maps out the dimensions of your bag. Think of it as your staging area for all those snazzy logos, eye-popping colors, and clever text you want splashed across your packaging. Having a go-to mylar bag template means you’re setting yourself up for an easy, fuss-free production that’ll stay consistent every time. No second-guessing. No surprises.
Step 1: Measure Twice, Cut Once (Metaphorically, of Course)
First thing’s first: get those dimensions right. Grab a ruler, caliper, or whatever measuring doodad you have on hand and take down every little detail. Learn more on how to make a mylar bag template here.
Height – from top-seal to bottom edge (don’t cheat; every millimeter counts).
Width – side-to-side, hugging the edges.
Seal Space – that upper lip reserved for sealing.
Gusset (if it exists) – a fold at the base to keep things sturdy and upright.
Got all that? Great. Scribble it down somewhere handy—you’ll be reaching for these numbers a lot as we go.
Step 2: Choose Your Creative Arsenal
Here comes the fun part. Which tool will you wield? The big guns like Adobe Illustrator and CorelDRAW, or maybe a freebie like Inkscape? Any of these design powerhouses will let you craft your masterpiece with the precision of a seasoned pro. Vector design’s the name of the game here. Why? Because it scales up (or down) without a single pixel out of place.
Step 3: Lay Down Your Canvas
Set up a new document with the measurements you lovingly jotted down.
Add a snug little margin around the edges for “bleed”—about 0.125 inches (3mm). Bleed is your safety net, helping you dodge any nasty surprises if your print job wobbles slightly.
Example time: If your custom mylar bag measures a humble 5 by 8 inches, set your canvas to 5.25 by 8.25 inches. Simple? Absolutely. Necessary? You bet.
Step 4: Outline the Framework
Now, here’s where it all comes together. Draw a rectangle to match the width and height of your custom mylar bag. Voila! You’ve just made the skeleton of your mylar bag template. If your custom mylar bag’s got a gusset (a little stand-up bottom fold), toss in an extra box at the bottom to mark that territory.
Mark the sealing area with a horizontal line.
Include a guideline for any folds or gussets.
Double-check everything; it doesn’t hurt to be cautious here.
Step 5: Drop In the Placeholders (for Logos, Text, and Such)
This is your playground. Adding placeholders for brand elements ensures every custom mylar bag will flaunt your style. Toss in some boxes for the logo, text, or any eye-candy you want to slap on there.
Front Panel: Place main artwork, a logo, or a bold product name front-and-center.
Back Panel: Typically, this is where the nuts-and-bolts info goes—nutrition facts, barcodes, or maybe even a quirky tagline.
One little trick? Think about readability. Don’t cram the design; leave a little breathing room. Crowded text isn’t just ugly; it’s hard to read.
Step 6: Save Your Masterpiece
Finally, save this mylar bag template as your secret weapon for future designs. Adobe Illustrator lets you save it as an AI file, or PDF if you need to pass it off. The beauty here? Once you’ve crafted this baby, it’s rinse and repeat for any design you can dream up.
Step 7: Test Run Your Mylar Bag Template
Before you send your precious work off to the printer, do a trial run. Create a mock-up with actual branding elements, then print a draft copy. Hold it in your hands. Squint at it. Imagine it on the shelf. Does it hit all the right notes? Make adjustments as you go, fine-tuning your layout until every inch of it feels just right. See how brandmydispo is changing custom mylar bags and flexible packaging.
Tips for Rocking Your Template
Stick to Your Guns: Consistency’s your friend. This mylar bag template will make all your custom mylar bags look sharp and on-brand.
Time Saver Extraordinaire: Imagine shaving hours off each project because you’ve got a template at the ready.
Make It Look Pro: A thoughtfully made template means a polished, professional look that people will notice.
Wrapping It All Up (Pun Fully Intended)
Setting up a mylar bag template might seem like an ordeal, but the payoff is real. With a little time and a few personal touches, you’ve got a template that’ll make every project after this one a whole lot easier. So, go ahead—craft a template that screams “you” every time.
Now, aren’t you glad you took the plunge?
0 notes
Text
Profile Pictures from Bocchi The Rock!
ぼっち・ざ・ろっく!からの山田リョウと伊地知虹夏のLOINEのプロフィール画像
The 2022 Fall Season series Bocchi The Rock (ぼっち・ざ・ろっく!) based on the manga series of the same name has veritably captured the attention of fans during a season packed with other remarkable shows. What stood out to me was the creative use of the animation medium in order to emphasize characters' emotions as well as add to the slapstick nature of some of the comedy. This is one of the advantages of animation compared to live action, where the suspension of disbelief is heightened allowing for greater freedom of expression in the medium. Here's the part where we transition back on topic.
In short, one of my interests is in graphic design and art and as such I am always looking for small projects I can tackle that challenge myself to learn more about the tools used in those disciplines. When watching the aforementioned series, I saw the profile pictures that the characters Yamada Ryou and Ichiji Nijika used for their "LOINE" accounts and immediately thought about how great they would be for recreation. For reference, screenshots of the profile pictures from the anime are below.

Nijika's profile is not that hard to recreate as it is only a few shapes, a circle for the head, a square for the background and for the other shapes, tracing with the bezier curve tool in any vector editing program would recreate easily.
For Ryou's profile picture, which is an artistic interpretation of Japanese clay figures known as Haniwa, is slightly harder to recreate. For symmetrical shapes, generally I like to create half of the design at first and then mirror the shape and join them so that a perfectly symmetrical version can be made. For both the body and the arms, I traced each half using the bezier curve tool, and later joined each to form the shape. After colouring and exporting to photoshop, I drew on the highlight marks that can barely be discerned from the reference image. Below are the finished products.


My one gripe with the finished products is the saturation of the colours, as the colours shown on my monitors are desaturated compared to what they actually are and as such the images appear a tad too saturated for my liking.
I have included both the high quality final pngs as well as the project files in the download link below for those who want to tweak the colours:
Of the platforms I have tested, which include LINE, Instagram and Discord, these profile pictures all seem to work fine, although Nijika's may need some fiddling as the bottom dark border may get into frame.
Other than that, I hope you enjoy these profile pictures and if you haven't I suggest giving Bocchi The Rock! a watch as its a pretty fun show to watch.
信じて
#ぼっち・ざ・ろっく!#プロフィール画像#anime#graphic art#bocchi the rock#ryou yamada#ijichi nijika#yamada ryou#kessoku band#結束バンド#アニメ
15 notes
·
View notes
Text
PIN MAKING TIPS
Hellos! This is Lu, the owner of ETERNO. I was asked on multiple occasions to talk about how I started pin making and thought it would be nice to share it with you all :)
Please keep in mind that everyone's journey is different and how you will start will be different from mine and others. What I will share is my personal experience and is not meant to reflect the entire community as a whole! Another thing to keep in mind, I am based in California, USA. A lot of what I will be talking about (legally that is), is how I've done it and what I've been advised to do, please speak to a legal consultant regarding any legal paperwork, this post is simply meant to be a guide to make it easier for you!
I began thinking of opening up my own business in late 2020, I knew I wanted to make something I liked and to be completely honest, I did not intend on becoming a pin maker at first, but the more I collected, the more I enjoyed it and wanted to make pins of the characters I liked the most, so with that being said, here are a few tips and things I've learned along the way:
-PAPERWORK & INTRO-
Before you do anything, think of it this way, are you planning to only make a few designs a year or are you planning to start a business that you plan to work on for the long while?
If it's simply just a few designs that will not impact your taxes, you will not have to worry about it reaching the threshold, but please check the amount for your state/country as every place is different with its rules and requirements. On the other hand, if you're planning to work on a lot more than a few designs or even expand your business to more than just pins, I'd highly suggest to consider opening an LLC from the get-go.
-DESIGNING-
Legal matters aside, what you'll have to think about next would be your designs. Are you planning to draw them yourself or commission an artist? Are you planning to sell fanart or original designs?
First, you'll have to understand the process of creating the artwork, keep in mind that enamel pins are made of metal (regardless of the plating), so there are two major things that you'll need to think about while creating the designs; the line art is where the metal will be raised, and the colors in-between is where the enamel filling will go.

above is an example of one of the pins I've had the chance to make this year, the black lines are an indication of where I wanted to have the metal be raised, and the colors are the enamel fillings! This particular one also included screen printing, but I'll get to that in a bit!
I use the Procreate app on my iPad, but you can use any program/app that allows you to save the designs as PNG, which seems to be more preferable by manufacturers than JPEG. Most manufacturers are fine with just the design being submitted as PNG, but do keep in mind that you will have to discuss changes for the final artwork a bit more than submitting a vectored artwork! Here's a great video that goes in-depth about how vectoring works! The simplest thing to do is to have two different PNG documents, one for the line art alone, and the second for the line art + colors.
Additionally, what will impact the final look of your pin is the size and plating. Say you're making a pin without any screen print or additional effects, the smaller the pin, the more details you'll have to consider taking out, or else they might not turn out too well. One thing I did to help me understand how my first pin will turn out, once I finished the drawing, I resized it and printed it out to the size the actual pin will be made!
Plating also plays a huge role in how the result will look like. The two major enamel pin types are soft enamel and hard enamel. Soft enamel allows you to add more details as the result will not be polished down as much, but the filling will not be leveled up to the raised metal. On the other hand, hard enamel is a lot more durable and gives off a better shine, but do keep in mind that to level everything, the front of the pin will have to be polished down, which results in the raised metal lines becoming thicker, it may also distort the final look.
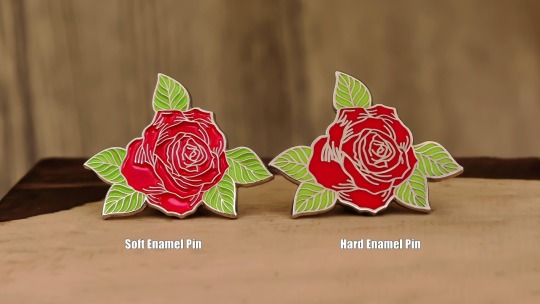
MORE EXAMPLES < this video shows more examples of how the two platings differ.
-MANUFACTURING-
Now that you have your design ready, how will you find someone to turn them into pins? There are A LOT of manufacturers out there and please, do not go with the first manufacturer that contacts you/you find!! I’ve worked with Manus from both IG and Alibaba, and so far I’ve found the ones on Alibaba to be more reliable. It gives an extra step of protection, unlike manufacturers who work solely on IG, which typically ask for money to be sent via PayPal, which only allows protection for up to 90 days, but don't let that discourage you from reaching out to representatives on IG as well.
I would highly recommend opening up an Alibaba account before speaking to manufacturers, regardless of the platform. Most of them are also on Alibaba, so you can ask them to send you the invoice through there, even If your entire conversation was through elsewhere!
Helpful Manu Video < this is a video talking about Washi Tape manufacturers, but it’s essentially the same concept when you’re looking for a supplier.
Before reaching out to a supplier, have the following ready to discuss with them:
Quantity of pins you’re planning to make (most suppliers ask for an MOQ)
Size + Colors
Any additional effects?
Plating option(s): Soft enamel or Hard enamel?
Backstamp (this is your logo/backing design if you’re planning to include it)
Most of what will be discussed below are about pricing and how each of the above points impacts the price:
The reason why you’ll need to have those ready, especially the MOQ, which is the Minimum Order Quantity, is to make it easier for the suppliers to quote you. Most manufacturers ask for a MOQ of 50 pieces to account for the metal sheets they have to use and prevent them from wasting the rest of the sheet. It is also cheaper for you to stay at or above the MOQ, that way you’ll avoid paying the “Small Quantity Fee”. However, some suppliers say they are willing to go below 50 pieces or do not have a MOQ, but once you receive your invoice you’ll notice an additional $10-20, which is typically under the header “MOQ fee”.
The size of the pins will drastically change the price for you, a 1-inch pin is a lot cheaper than a 3-inches pin, but keep your design in mind when you think of the size! Some suppliers are also limited on their pin sizing, make sure to discuss that with them before you pay for anything, especially if your design will include small cutouts in between. Since every manufacturer is different, not all of them are capable or have the machinery to help them make those small cutouts, which will affect the look of your pin. Same thing with coloring. While most suppliers base their prices on the size of the pin, some charge more for any additional color above their limit. Most of the ones I’ve seen require your artwork to be 6-9 colors max, anything more and it’s an additional fee.
Additional effects will always be an extra fee regardless of who you end up working with. Those include and are not limited to, screen-printing, sandblast, glitter, pearl effect, etc. If you’re considering variants, you might want to think of adding effects.
Plating is another that will either hike up your price or keep it within budget. Typically soft enamel pins are cheaper to make than hard enamel, the reason for that is because they wouldn’t have to use as much enamel filling and polishing isn’t necessary at the end. Plating is also isn’t limited to just the enamel type, but the type of metal used for the pins, too; black nickel, gold, silver, rose gold, copper, etc. The most common ones are black nickel, gold, and silver. In some cases, suppliers may charge more for any other plating. Consider discussing with the supplier whether they’re able to use a certain metal with your desired plating. For example, one of my suppliers recently told me that they avoid using copper for soft enamel pins as it has a higher flaw rate.
Lastly, do you want a back stamp? That is where your logo/business name goes on the back of the pin. Not every supplier will be willing to go with whatever you desire to have on the back, some only agree to simple lettering, so it’s always best to ask them about that beforehand if you’re only looking to make a design on the back rather than simply your shop’s name. Keep in mind that back stamps almost always, if not always, come at an extra cost.
Side note: ask multiple manufacturers for quotes, do not go with the first person that will respond to you! I asked for quotes from about 9 different manufactures that I found on Alibaba before I settled on one!
Once you gain momentum, they will start reaching out to you asking if they can quote on a design, especially on IG, which happens very frequently for pin makers, which is also why most of us ask to not send any order inquires on there as it might get lost! One thing I’ve learned the hard way about working with a well-known supplier, meaning they cater to well-known makers that request high quantity of pins, they will push your design to the end of the queue!! Do not make the same mistake and go with a popular supplier! I worked with one once and that was the biggest mistake I’ve made in my entire journey, it was money wasted.
If that’s the case, how will you know which one to choose then? It’s always tough to work with a new supplier regardless, but a rule of thumb, self-fund your first design! Whether it be your first pin ever, or when working with a new supplier. Never, ever, mess with other people’s money especially if you don’t have an idea of how the pins will turn out! Not only would you save yourself the hassle of worrying about the wait time and people asking for updates, you’ll have a better understanding of how that supplier works, how long it takes them to produce your desired quantity, and also you’ll have something to present to your customers that if they’ll plan to support you with pre-ordering, they’ll know what to expect.
PS: ask your supplier to ship your pins facing each other (enamel side towards each other) to avoid as much damage as possible!!!
-BACKING/APPRECIATION CARDS-
Say now that you’ve found a manufacturer to work with and your design is in production, are you planning to have backing cards that go along with the pins? Or do you want to just include a Thank You card?
Although this is an added step, one that I think is worth it!
GotPrint and Vistaprint are always great options to consider if you’re looking to make either or both made! Both are suppliers in the U.S. and they have discounts now and then!
-BUDGETING-
How much should you save? Well, it all depends on which route you’ll end up taking. It is expensive if you’re opening up a business regardless, but generally, you’ll want to have $1000-1500 saved up to account for production and any additional costs you might need to consider along the way.
-PRICING-
Ultimately it’s up to you how much you’ll want to price your products, but you will always have to consider the following:
Did you commission an artist? Or how much time did you spend on the design?
Production cost (this is the entire amount the supplier charged including their shipping and transaction fees)
Backing cards?
Shipping products: bubble mailers, boxes (for bigger orders if necessary)
Labels + label printer (you do not need a label printer to start! You can use a regular printer too)
Selling platform fees
-SELLING PLATFORM-
Now that you have everything you need, where will you sell it?
A lot of people, including myself, started on Etsy. It is a great place to gain traction as it is a marketplace so it's very easy to use, plus it allows you to ship worldwide. Eventually, most people move on to either BigCartel or Shopify. There are other selling sites as well, but those seem to be the most common two out there. Each site has its handful of Pros and Cons.
Here's a VIDEO that does a great job explaining the highs and lows of each one of the most popular sites.
Some obstacles that I've faced and have learned from:
Buying more stock that I was able to sell.
Placing too much trust on the voting polls (NEVER rely on that, however many voted yes on getting a design, if you're self-funding it, only get 1/2-3/4 the amount...)
I priced most of my pins very low, which worked against me considering how much stock I had left.
higher flaw rate than I accounted for, which resulted in having far more seconds than standard grade pins.
I hope this post has helped you in a way! If you have anymore questions, you're always welcome to DM or send an email :)
13 notes
·
View notes
Note
Hey! I just had a little idea for the Modern AU! Since El likes drawing, how about Byleth gets her a drawing tablet?
Yes!
At first she is confused. Very confused. “I thought you said you were going to get some drawing supplies?”
“El, this is for drawing! Look, you plug it into the computer here. And then you take this pen and hold it close to the pad, and it moves the cursor around like the mouse does.”
“...Ok... But how does it draw?”
“I was getting to that.” Byleth opens up a program she already downloaded. It was a design app, not the expensive subscription-based one but maybe if El gets into this she might consider getting that one. She sets up a blank page and hands El the pen.
“These little buttons along the side all have different functions. That one there is the paintbrush,” she said, pointing to the little brush icon. El’s a little clumsy with the stylus at first, but manages to drag the cursor over to the icon. Without question, she tapped the pen down on the tablet to click the icon before Byleth could explain, and Byleth felt a little rush of pride that her former student was so intuitive.
“So imagine the tablet is that white space. Whatever you draw on there will show up wherever the cursor is.”
Edelgard experiments by drawing a few lines and squiggles. “This is...certainly different,” she comments, “It’s hard to draw when I can’t look down at what my hands are doing.”
“That takes some getting used to,” Byleth assured her, “But look!” She reached for the keyboard and tapped two buttons at the same time, and the last line El had drawn vanished without a trace.
“Wh...what was that? How did you do that without an eraser?”
“‘Command-Z’,” Byleth told her, “I’m not much of a graphic artist, but I do know about that one. It’s basically an ‘undo’ button. Any mistake you made that you don’t like, you can just undo it with that, rather than fight with an eraser or try to fix it with paint.”
“Well, that’s certainly much more forgiving,” El sighed in relief, “That...would make things a lot easier.”
“It gets better! Here, let me show you how to find brushes.”
The first few drawings El does aren’t masterpieces in any respect. They were mostly for her to get used to using the program and the tablet. But she’s hooked almost instantly. Byleth comes home often finding her either drawing, or watching tutorials about drawing or the program itself, learning new tips and techniques to improve her skills.
Not everything is smooth sailing. Byleth was worried El was going to launch the computer monitor off the balcony when she was trying to learn the pen tool.
She starts experimenting with vectors once she does learn, however, and finds she almost likes the simplistic graphic style better than strict realism. She takes inspiration from some of the tattoos she’s gained to cover scars and remember friends. She starts hoarding books on design and form. And font. She still hates all the grammar rules but begins to actually understand why the rules exist after discovering typeface.
It blows her mind when she realizes that she can turn her own handwriting into a font.
She also learns that she can bring photos into the drawing program and change and enhance them there, too. The concept of photography itself was wild to her - the fact that a single moment could be captured in an instant, preserved forever in the purest form of realism. But then to take the realistic quality of a photo and change it! From something as simple as removing a blemish on a face to fully changing the colours and background! Even in this modern age with all this technology, people are still finding ways to alter reality through art and it amazes her.
She gets herself a camera not long after that revelation, and Byleth often accompanies her out on trips through the city. She photographs things no one in their right mind would photograph, and while some find it strange she’s so intent on getting a perfect shot of a pigeon, Byleth finds it endearing. She had grown so used to this world that banal things like pigeons went unnoticed by her. But El saw this world with wonder and amazement in a way she never could before. This world hadn’t hurt her the way her old one had. She wasn’t jaded and bitter about this one, and could still find beauty in everything. Even in pigeons.
Byleth suggests she create a blog to share her art. And she never really expected the small but notable following El gained as a result of that. Yet she was not at all surprised.
#ss/modern!au#fe three houses#au ideas#el isn't a quitter#i can totally see her stubbornly refusing to give up on the tablet#despite it being really hard to learn at first#but then once she's in she's IN#she always wanted to be an artist#but being emperor got in the way of that#now nothing is stopping her#and there are so many ways to BE an artist now#i also hc she'd be big on photography#just because she never wants to forget the people she cares about#drawing is only so reliable#especially if she can't remember already#but a photo perfectly captures someone's likeness#so she doesn't have to strain to remember#she just wishes it existed back in her time#she goes to the palace and photographs the last family portrait of the hresvelgs#and has it as her phone background#also as a print on her desk#it's the best she can do#auralite776#a world without gods
88 notes
·
View notes
Text
Is using an appointment booking plugin for a WordPress website safe?
According to a 2016 research by Wordfence of hacked website owners, plugin weaknesses affected 55.9% of WordPress websites. That's how it makes sense! While the core of WordPress can be secure, plugins introduce a wildcard that the WordPress core cannot always compensate for.
One of the reasons WordPress is so popular is the ability it gives users to add any number of functionalities using plugins. Users can choose from up to 50,000 plugins accessible for download in the WordPress plugin. That's not even taking into account the plethora of third-party free and expensive plugins.
However, too much variation frequently leads to future issues. Rogue plugins and out-of-date plugins can all be used by hackers to get access to your website. Here are a few suggestions for keeping the web safe by deleting WordPress plugin flaws as much as possible to fix specific security weaknesses.
How can I look for bugs in the WordPress Appointment Booking Plugin?
The WordPress Vulnerability Index is a useful tool for determining whether or not a plugin poses a security risk. The service detects plugins as well as issues found in them. You can search for a plugin by name or alphabetize all plugin bugs. If you see a specific appointment booking plugin on the list, look for an update on the plugin listing page. If no patch for the flaw is released, you should disable the plugin for the time being.
Another option is to use paid services like Plugin Vulnerabilities to detect such problems in real time. You can also get an email notice if you're using a plugin that's at risk. When you receive a warning from this service, you are far more likely to be able to respond immediately. You can also spot these dangers by periodically conducting a search on your website. Plugin Vulnerabilities, for example, will not only scan for all of your installed plugins, but will also alert you to the most prevalent security vulnerabilities.
You can choose to get notifications about the risks that will undoubtedly arise. Hackers are attempting to target WordPress websites on a nearly daily basis. As a result, you must check for vulnerabilities on a regular basis.
The Plugins Are Being Tested
It may seem strange to install a plugin to verify your appointment booking plugins. There are, however, a number of WordPress plugins that can help you improve your security, and the two we'll look at here will scan the databases of WordPress bugs for you and notify you if you have any questionable plugins installed.
It's important to realize that these security measures aren't just plugin checks; they're both round security devices for WordPress.
Select the appropriate plugin
There is no such thing as a completely safe plugin. However, learning to identify and select excellent plugins before installing them will dramatically reduce appointment booking WordPress plugin risks. Choose required plugins from reliable marketplaces such as CodeCanyon, the WordPress Plugin Registry, or trusted third-party vendors. Each plugin is vetted by the WordPress registry before being made available to the general public, and CodeCanyon has its own testing procedure in place.
So, how can you determine whether or not a plugin is safe to download? Begin with:
Total User Ratings
User Reviews
Amendments and compatibility
Documentation and assistance were provided by the installations
When installing a plugin to your website, it's preferable if you keep the following things in mind:
You can install as many plugins as you like once you have the cloud infrastructure to support it. What's most important is that they're well-coded for plugins. However, one badly coded plugin can bring the entire website down.
The plugin is supported by the inventor and responsive to user needs, according to a portion of the live update log. Only a few entries in this section, on the other hand, may indicate that the plugin does not require any updates or enhancements.
There are hundreds of fantastic free WordPress plugins to choose from. But keep in mind that premium plugins have more responsive support and are compatible with the latest WordPress versions.
It's a good idea to practice downloading plugins only when they're needed.
Also, consider this: "Are all WordPress appointment booking plugins safe?" as a gentle reminder before going ahead and installing another plugin The answer is no, as you may recall. Are you looking for that particular plugin? Do you require the extra security hole?
Keep the WordPress Appointment Booking Plugins checked
An out-of-date appointment booking WordPress plugin is one of the most common attack vectors for hackers. Three prominent out-of-date plugins were discovered to be the root of 18 percent of hacked WordPress sites in 2016, according to a survey. It's important to highlight that while the plugin developers quickly corrected the issues, many users failed to update their plugins, resulting in a slew of hacked websites.
And even if you started with the correct plugins, if you don't keep them updated, you're still vulnerable. But how can you be sure that all of the plugins are up to date? Check your WordPress dashboard for an upgrade button as one option.
An out-of-date appointment booking WordPress plugin is one of the most common attack vectors for hackers. Three prominent out-of-date plugins were discovered to be the root of 18 percent of hacked WordPress sites in 2016, according to a survey. It's important to highlight that while the plugin developers quickly corrected the issues, many users failed to update their plugins, resulting in a slew of hacked websites.
And even if you started with the correct plugins, if you don't keep them updated, you're still vulnerable. But how can you be sure that all of the plugins are up to date?
Check your WordPress dashboard for an upgrade button as one option
Booknetic is one of the most secure appointment scheduling plugins for WordPress. Booknetic has a Helpful Hacker badge, which is crucial for the plugin's security. What exactly is the Helpful Hacker initiative?
People can use the Helpful Hacker software to complain to Envato about product flaws. The software is operational and is based on the following principles:
Reported complaints will be prioritized based on their impact on people, not on financial rewards.
Our neighborhood effect was the topic of a quick resolution, which was set for less than 72 hours after the report was generated.
Envato will report identified problems to the group shortly after the problem has been solved.
Responsible disclosure means giving us a chance to address the problem before it's revealed to the rest of the world. This ensures the safety and privacy of customers.
If you believe you have discovered a broad security issue in an Envato product, you can use the form to report it to the Envato market. Following resolution with verification and a target date, they will confirm receipt and follow up for comprehensive disclosure.
Booknetic is safer than other WordPress appointment booking plugins using this program. You don't have to be concerned about Booknetic's security. Simply download and install our booking plugin to begin using it. To see all of our features, try our Demo version.
Final words
But, for the most part, we know that these often used and acknowledged WordPress appointment booking plugins are reliable. They have millions of installs, valuable comments, and plugin creators who have worked hard to earn a solid reputation in the community by producing error-free plugins and giving excellent support.
Plugins are fantastic. They enable you to achieve amazing things with WordPress. However, plugins that are either poorly developed or out-of-date on your WordPress platform can expose your site to hackers.
By using the Booknetic appointment booking plugin, you'll reduce your chances of becoming a victim of WordPress plugin vulnerabilities.
#appointmentsceduling appointmentbooking wordpressplugin bookingplugin#wordpressdevelopment#wordpressplugin#wordpressappointmentbookingplugin#appointmentscheduling#paypal#wordpress#appointment booking#appointment reservation#booking#booking calendar#booking schedule#booking services#Booknetic#online booking#online payment#Scheduling#stripe#system
1 note
·
View note
Text
Week 1 - Uni Begins
So I’ve made it through week 1 of uni 🥳! Here is the weekly update:
Physics
Everything has been revision so far, and I guess that’s not a bad way of starting. We reviewed kinematics, dynamics and Newton’s laws.
Also, my lab tutor is a 2nd year PhD student in astronomy (which is a field of my interest), so that made lab very exciting despite the fact that our first experiment involved measuring the height of my desk (for illustrative purposes and commenting on the nature of doing experiments obviously).
Reality, Ethics and Beauty
The professor is extremely engaging, and the class is almost entirely based on discussions. We closely examined the first two arguments for the existence of God by Aquinas, whilst clarifying concepts such as validity, soundness and lemma (which I thought sounds rather cute). Besides the lectures, we also have weekly workshops, and our first session was just a really open space in which we could discuss philosophical concepts relevant (or sometimes slightly tangential) to the course material.
Linear Algebra
Vectors and vectors and vectors. Nothing was new until I watched the pre-lecture videos for next week where we are introduced to cross products. My high school physics teacher brought it up multiple times regarding its relevance to Electromagnetism (more specifically Maxwell’s Equations if I recall correctly), so it was fairly exciting to find out what it actually involves. I’m also starting to get used to the formal notations. And although I haven’t had a tutorial, the first worksheet looks pretty manageable.
Calculus of One Variable
Complex numbers! We basically had an introduction to complex numbers which I was already confident with. However, I was able to gauge the pace of the class, and I’m pretty sure once the introduction is over, things are gonna go pretty fast.
Introduction to Programming
The lectures were... pretty bad. But thank god it’s programming, and you learn by coding, not listening to the professor. The 2-hour lab was very fruitful for my learning, and I felt an immense sense of accomplishment when I was able to finally (after so many failed attempts at learning how to code) code something! I also managed to complete the Weekly challenge without much trouble.
Other comments
I participated in an online welcome event where I was able to chat to a Physics professor for an entire hour. He told me about his journey in STEM, his research in nanotechnology and what it’s like to be an academic. It was a really insightful and inspirational hour for me.
I met with my mentor group, and the biggest advice I received was to stay on top of things: try not to miss any lectures, and always catch up as soon as possible.
Uni offers so much freedom, and that is precisely what makes it so hard. I am still getting used to managing pre-studying, homework, after-class reviews and deadlines for all sorts of tasks. Things can quickly get out of control without a system.
I am really looking forward to week 2 where I might be able to learn some new concepts in Physics and Maths. Overall, week 1 was a nice start 🎓
3 notes
·
View notes
Note
I noticed you did graphic design and I was wondering if you could talk a bit about your experience? I was having doubts abt a career choice and I love art but just as a hobby, however when I went to see a counselor for it graphic design was heavily recommended to me, but I just feel that if I were to work with art it would become an obligation rather than something that I do for fun and then I wouldn't like it anymore? Did you ever feel like that or have a similar experience? Thank you ^^
Hey! I’d love to talk about it, especially since I’m fresh out of college. So I chose graphic design because it was logical to me not because I had a deep passion for it. Graphic Design and illustrating are very different (to some people) and it took me a while before I could really understand how to integrate my illustrative passion with my designer career choice.
The truth is with graphic design, it’s the most profitable art degree you can get there’s more jobs that you can receive as a graphic designer than you can taking your chances with illustrating freelance or even animating, it was also within budget for me as the fine arts program at my school and all the material and supplies were pretty expensive and for the most part graphic design just required I keep a subscription to Adobe and occasionally buy materials for certain print projects.
I really value the skills that I learned as a graphic designer, I think it made me a better illustrator and animator in the long run. I think it’s an important skill for most people that have especially if you’re looking to be comfortable in a job. However, graphic design is a step up from an office job to me, because at the end of the day I’m still creating art but it still business-heavy business-smart art.
Graphic design comes in a lot of different forms but for the most part you can expect to be doing things like creating logos, doing typography, editing photos, editing vectors and shapes, and generally everything about graphic design is about perfectionism and also selling a product.
Obviously a lot of graphic designers come up by making creative works and if you can do that and have fun with it that’s a very good thing. But from what I can tell from the fact that I shared a class with a lot of fellow illustrators and passionate animators — Graphic design can start to be a struggle because so much of it is centered around the business of art and not necessarily the creation of art.
That’s not by design that is simply how majors treat it because they want to get you prepared for a job. It’s not necessarily an awful thing, but I do want to say for any art career or really any career in general that you pursue, you should prepare for burnout. Instead of asking “will this burn me out? Will I get sick of this in the future?” You should really be asking “If I had to sit down and do one thing every day even if it made me miserable is this something I would be able to do?”
Also ask, “are there skills that I would like to learn in any particular field that I don’t have, what can I gain from being in this major and spending money on college that will help me in the long run? Do I value what I’m going to learn by picking this major or do I need to go another direction?”
Try not looking at college as something that’s going to set you for life, and look at college as an opportunity to really gain some new knowledge and have fun gaining that knowledge. It’s hard when you’re an artist and you don’t want that passion and drive to go away. The choice of making art a career is going to make you susceptible to burn out automatically it’s going to happen, so if you choose to go the graphic design route know that you’ll probably get burnt out by it especially if you’re not ready for what it entails. That being said, I don’t think you shouldn’t do graphic design if you’re an artist, I almost think everyone should have a graphic design knowledge because it will help you with your portfolio and it will help you stand out in the pool of other artists in the world.
Right now I get most of my money from doing logos for people. Because I understand how logos work and because I have that skill set I am able to do this work freely and consistently while I apply to other jobs in my passion like freelancing illustration or storyboarding which is what I really want to do. This is how I’ve chosen to move forward, look at your skill set, think hard about what you really love doing and what you can do, consider what it is you want to learn, and decide which direction you wanna go in based on those decisions. Not based on the fear of burn out because whatever you choose to do you will get burned out you just have to understand and learn the coping mechanisms to be able to climb out of it.
10 notes
·
View notes
Note
i am SO curious about Toon Boom Harmony! In my college we only did 2D Animation in Photoshop and tbh I am not a fan. Since Toon Boom is not a game industry standard tool, I understand we didn't got the license but as someone who's a big fan of animation I am just so curious: What are Harmony's strengths and weaknesses? How's the learning curve and UX? How's it different than other programs? What's it's standard workflow? I'm sorry if this is much ;; Thank you for answering!!
Oh maaaan, ToonBoom Harmony is a GREAT animation program which I can’t recommend enough! It’s honestly not that hard to learn once you practice and get familiar with the program. There’s big reasons why ToonBoom is widely used for TV animation nowadays.
And here’s what I know about the pros and cons of ToonBoom Harmony based on personal experiences so far, hope these helps!
Pro:
Sharp vector line. Same as Flash, the lines stay sharp no matter how much you change the line or zoom.
You can easily erase lines with ‘Cutter’ tool. For example, you drew a square but the lines turn out to be intersecting. You don’t have to carefully erase the additional line all the way. Just use the ‘Cutter’ tool and drag across the line you want to erase in one stroke, and POOF it’s gone!
ToonBoom rarely crashes whereas Flash is notorious for crashing alot.
It comes with Camera function. You don’t have to think about how big you have to set your stage and import it into Premiere or After Effects for camera panning anymore with this function around. You can even set the camera curve for better timing and have the scene looks more impact.
It has auto-save function.
You can easily change the coloring. For example, if you finish color a character in white, but suddenly realize that you have to change the character in red. You don’t have to go back and change the color frame by frame, instead just change the white color box to red. It will automatically change all the frames with white color to red.
It has both stop-motion tween and motion tween.
You can set and fill in gradient color in ToonBoom.
You can link your layers together which is super useful for lip sync. For example, you link a ‘AHHH’ mouth layer with a jaw layer. Everytime you copypaste the ‘AHHH’ mouth layer, it will come with the same jaw layer. And if you lower the jaw even more in the jaw layer, the same change would be applied to the rest of the jaw layer which linked to the ‘AHHH’ mouth layer.
Con:
Coloring may be a hassle. Depending how heavy the vector lines are, filling in the color can take several minutes. (As someone who colors super fast in animation, this frustrates me a lot of time)
Whenever you save ToonBoom file, it would come with a lot of files in a folder unlike most of the other animation programs which only come in one single save file. (this may confuse some people but honestly it’s no big deal once you get familiar with it)
89 notes
·
View notes
Note
It's no problem, you deserve all the praise with your hard work! Do you actually have any advice to share on beginner animators like myself? And which programmes to use to make animating easier?
Hiya! Sorry to take so long to reply! I’ve been under a huuuuge workload the past months, and I when I finally got more time for myself I was just too tired to do anything else than simply rest. But here it is! I listed couple things I could think about how to think when you animate. Of course this is only my personal list, so I understand if someone disagrees.
It goes a bit in-and-out the range of actually animating things - but I feel like there cannot be one without the other, so here we go!
Hopefully this will be helpful!
1) Animating is SLOW
The biggest advice I can give is that animation is not easy. It’s hard. It’s tedious. It’ll always take like double the time you think it will. And that’s not on a scale of hours, but days and weeks. You think your scene will take 3 days to rough out? It’ll probably take 6. You think you can clean it up in 1 week? Book in 2,5. Just get some coffee and continue. It’ll be there. Eventually.
2) Take breaks
After a while you’ll become blind to the animation you’re making, so remember to take breaks. Take 30 min break, and when you get back to your animation and play it through you can usually spot a thing or two you just couldn’t see before. It’s also good for your body - I have to admit I tend to sit at my desk way too long hours, but I’m trying to get better.
3) Work out
I feel like I say this every time, but be considerate of your body. I’ve seen so many people having problems with their wrists and elbows, and the best thing to prevent those is to exercise. It also clears your head and ALMOST prevents you from getting sleepy while animating.
4) Start loose
I tend to start with really loose thumbnails in order to get the movement I want. Sketch those thumbnails in so loose that only you can tell what’s happening. You want to feel the movement, making the character pretty comes later. If I start with the construction, I realize half way that the character moves more like a machine than a living thing. Of course this is different for everyone. Some people can be like super humans and draw the final line in one try - I’m not one of them.
5) Kill your babies
Don’t be scared to ditch something that doesn’t work. Of course you want to keep the perfect looking key that you used so much time to finish, but if the movement doesn’t flow, it’s fine to get rid of it. You can use it as a base for your new better drawing
6) Toon Boom vs. TVPaint
These are the two programs I’ve used for 2D animation (+ Photoshop, but that was a bad idea). I actually started with Toon Boom and learned about TVPaint only later. I really like both of the programs, but they have some significant differences.
Toon Boom
Toon Boom is really advanced, bit confusing, originally vector-based 2D animation program. It’s really good, but learning to use it is bit of a work. I started with Toon Boom, and I’ve done most of my personal animations with it. My favorite part of the program is the vector line. You can tweak the line, resize, recolor, do almost anything you want even after you’ve finished your animation. Of course sketching with vector doesn’t feel as good as sketching in Photoshop, but nowadays the newest Toon Boom has been really improving with the feeling of the drawn line and they have even introduced bitmap based layers.
TVPaint
TVPaint is bitmap based program and much easier to learn than Toon Boom. It’s basically Photoshop with proper timeline and light table. The bad thing about it is that if you want to change something after drawing the frame, you better draw the whole frame again. It does feel much more natural to rough out the animation than Toon Boom though. Also the timeline and light table are better than the ones in Toon Boom. If you want to just find an animation program to start with, I guess TVPaint is a better choice. I did start with Toon Boom though, so can’t say learning it would be impossible. It just needs slightly more work.
#animation advice#blah blah blah#animation#tutorial#ask#human-reject#gotta stand up my tumblr game again#ive been dead this whole spring#sorry about that#it's been hard spring#leenalecklin#toon boom#tvpaint#2d
4K notes
·
View notes
Text
Interests in Game Design
From arcade games to console games, I had an interest in games, particularly how the characters looked and having a good time playing the games. I remember playing Sonic the Hedgehog and Megaman on my little brother’s game cube whenever I got the time back in elementary school. From there, I had only played website games such as gaiaonline, Bomb It, and Neopets. For a long time, I did not play any other games until senior year of high school. Friends who play games usually suggest their own group circle of friends the game they are playing. My friend did that and recommended that I play the famous MOBA (Multiplayer online battle arena) video game and I enjoyed it. However, I did not take interest in game design until I discovered that it is a possible learning skill until four years ago.
Back in high school, my physics teacher also decided to teach the basics of Python and C since there are physics-related given assignments. While learning how to code, the class worked on Arduinos, which are digital devices where if you change the code, the devices can do different activities. First, the devices are assigned the roles given from the computer. Then, the devices can turn, rotate or move depending on what the device is capable of doing. Also, LED lights were being experimented with the Arduinos, so the assignments were not only interesting, but educational.
Design skills where I am more familiar with are Photoshop and Illustrator. I did not learn these skills until I got admitted to the Fashion Institute of Technology. Most of the time, I enjoy painting in Photoshop characters and the assignments related to concept art given by the school. As Illustrator is a vector based program, I tend to find making art with it harder since it has to do with straight or curved line segments being connected. Painting backgrounds in Photoshop was new to me however, but I enjoyed the process and how the artwork turned out.
In addition, I try to expand my horizon in learning more design skills such as ZBrush and 3DS Max. I thought that learning those skills would be helpful in creating 3D character designs in the future even when the models I try making in class are not well rendered yet. While learning about the interface in ZBrush, such as knowing what brushes to use, palettes, and the shelfs where the shortcuts and controls are. The first time that I made a hand in ZBrush was difficult as I never had experience sculpting anything before, but I did make a decent looking hand. Moving on to 3DS Max, using this program was also a difficulty for me like any other new software programs. Making 3D models with shapes had been hard at first, especially when trying to know the keyboard shortcuts and navigating the interface. Some 3D models I did were a background with a snowman, pumpkin, chair, and a cat mask. Currently, I am learning Adobe After Effects, which seems more engaging as I can see a small clip of what I am animating.
1 note
·
View note
Text
What was the Best Graphic Design Software in 2019
The graphic design process requires software tools that can provide solutions to real-time design problems. Ranging from free tools for a beginner designer to paid ones for a pro, you can find all sorts of tools to suit your design niche. If you are in need of any kind of design, a placeholder will do, but for anything beyond that you will simply have to dig deep to find the exact design software that fits your needs. From simple to complex and free to paid, here are some examples of the best graphic design software in 2019.
1) Adobe Illustrator CC
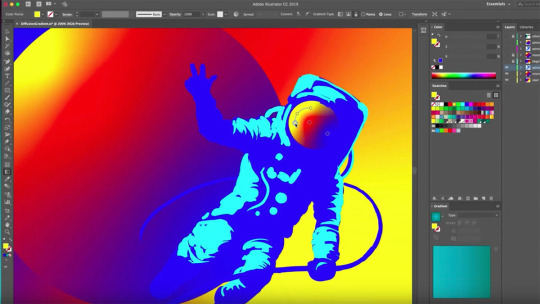
Image source: Digital Arts Online This program is Adobe’s flagship product, perhaps even more so than Photoshop. With hundreds of useful and imaginative options available, Adobe Illustrator allows you to create perfection down to the very last vector of every image. In fact, Adobe Illustrator is considered to be the software that most professional graphic designers use to create high-quality and complex designs. The main focus of Adobe Illustrator is to create pictures from scratch or edit one of the stock photos from its built-in library. More importantly, Adobe Illustrator receives two major updates a year, offering 100 GB of cloud storage with the subscription. Why choose Adobe Illustrator? Adobe Illustrator is a great graphic design tool that doesn’t have a 100% compatibility with other software outside the Adobe software suite, a.k.a the “Creative Cloud”. While Adobe Illustrator is perfectly usable on its own, it truly shines when coupled with the rest of the Adobe graphic design tools. If you’re planning on using other Adobe tools or already are, definitely use Adobe Illustrator to maximize the compatibility synergy. Pros: Supreme precision Professional results Synergizes with other Adobe tools Cons: Subscription based, costing $20.99/month Not 100% compatible with non-Adobe products
2) Adobe Photoshop
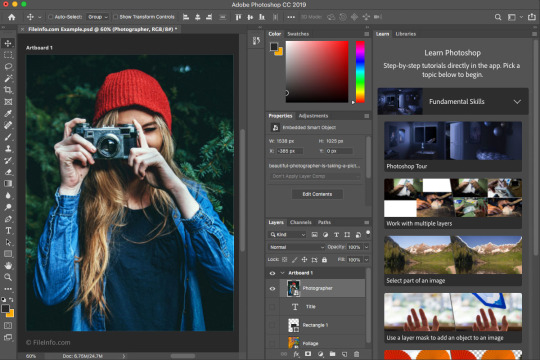
Image source: FileInfo The classic and one of the most well-known graphic design software out there, Adobe Photoshop was initially created in 1988 and has been steadily improved since. The software mostly deals with raster images, which are those that are made using a pixel-based program or a digital camera. Professionals wanting a smooth blend of photorealistic elements would definitely want to pick Adobe Photoshop. The various intricate shadow and color manipulation options enables you to take any number of pictures, perfectly splice them together, and achieve something that looks completely real to the point that today, there’s even a verb created out of this which is “photoshopped”. Why choose Adobe Photoshop? The biggest advantage of Photoshop is in its wealth of options and how well they’re documented. Thanks to Photoshop’s popularity, there’s literally hundreds of tutorials and walkthroughs for any given option to help ease a newbie into becoming a graphic design pro. While there is still a learning curve, it’s easier than ever to get into Photoshop and become a pro at using it, which is considered to be a skill in its own right. Pros: Extremely well supported Most compatible graphic design software on the market Professional-quality results Intricate graphic design options Best suited for photorealistic (raster) images Cons: Subscription based, costing $20.99/month Requires some learning
3) Pixlr
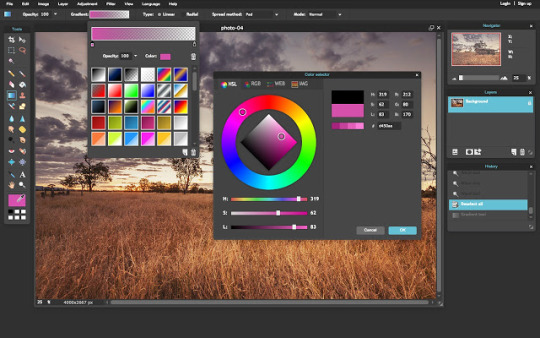
Image source: Chrome Web Store In 2019, browsers have become better than ever before. They are versatile and have moderate hardware requirements, allowing them to do everything except graphic design; for that, you’ll also need to use something like Pixlr. Serving as an internet-based collection of graphic design tools, Pixlr allows anyone to jump right in and start creating wonderful graphic design content using only a browser or Pixlr app within seconds. From taking a screenshot to editing and downloading it, Pixlr covers all the basics of capturing photos and editing. Why choose Pixlr? The biggest advantages of Pixlr are the mobility and immediacy it affords. By using only a browser (or app for mobile devices), you can edit, save, and continue editing on the go whenever you’ve got a few minutes of spare time. Professional graphic designers tend to pack it for travel because they can’t work without their special hardware. Hence, Pixlr allows for a very convenient and lightweight work schedule that adapts to you. Advanced Pixlr editor costs $5/month but also reveals its biggest downside – the dearth of options in the free version of Pixlr. Pros: Low hardware and software requirements Free Beginner-friendly Cons: Not suitable for detailed, in-depth work
4) Sketch
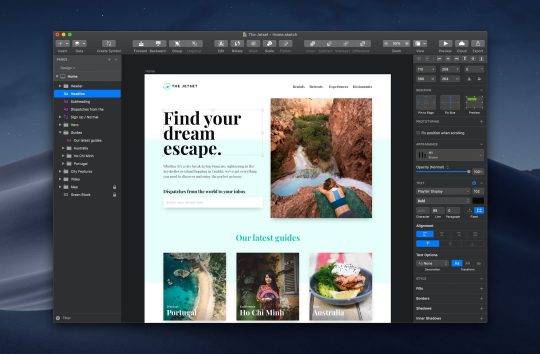
Image source: PC Mag Some graphic design projects are so complicated that they require an entire team to complete. That’s where Sketch comes in. Focusing on collaborative solutions, Sketch allows an entire team to coordinate and stay up-to-date through innate Sketch tools while still being a highly competent program for graphic design. Why choose Sketch? In a large organization, it’s hard to keep track of who’s doing what and when. Using Sketch Libraries, the entire company can be on the same page, with designers having a consistent style and managers able to keep track of the progress and make sure everyone is synchronized. Even better, Sketch also works with Dropbox and GitHub. Pros: Contains collaborative tools Free trial Cons: Only available on Mac Not ideal for a single user
5) Inkscape
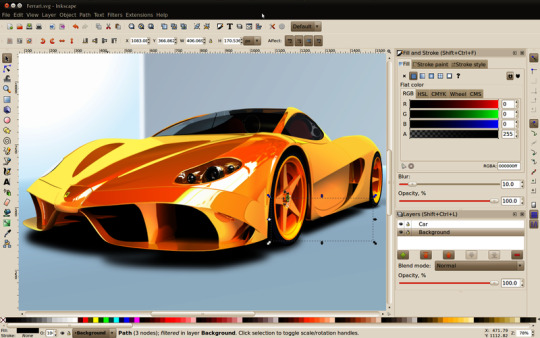
Image source: Techworld This is a free graphic design tool that can be used for vector-based images. Like other free solutions, it is supported by the community, often leaving you to scratch your head if you were to get stuck on it. If you have any questions, you are meant to engage with the community until you find the answer you were looking for. Inkscape is a welcome addition to the graphic design market, mainly because by using it, we support the idea of free software. It is free both in terms of it costing $0 and it not being constrained by anyone. Why choose Inkscape? Inkscape is an open source, meaning that everything surrounding its functionality is under public scrutiny. You could, in theory, check out the code used to create it and tweak it to your heart’s desire or make your own version of Inkscape and sell it for profit. There is no company lording over how you should use Inkscape – it truly is a free and flexible graphic design tool. The idea of building a community through joint effort is present in every aspect of Inkscape. In fact, users are even able to contribute to translations and write help articles for the program. Although Inkscape is close to being completely finished, it is still considered to be a program that has quite some bugs and quirks you’ll have to find workarounds for. Pros: Free Open source Has a community built around it Cons: Lack of professional support Still in beta as of October 2019
6) Apple Motion
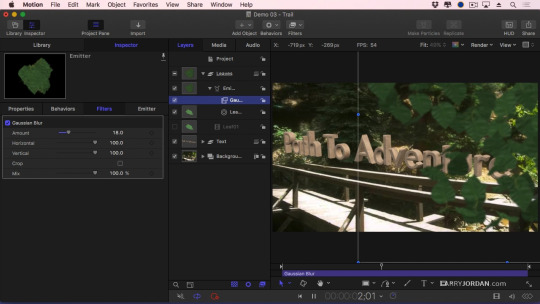
Image source: Larry Jordan More and more static content is being woven together into animations and hosted on video platforms. In cases where you want to rehash and reuse static graphic design leftovers to create an animation, Apple Motion will be a suitable choice. Why choose Apple Motion? Animations and animated transitions are the forte of Apple Motion. The program is well-stocked with pre-made effects that make it easy for anyone to ‘drag & drop’ their way to glitzy and shiny animated content made out of scraps. Pros: User- and beginner-friendly In-depth controls for nuanced effects Cons: Only available on Mac
7) CorelDRAW
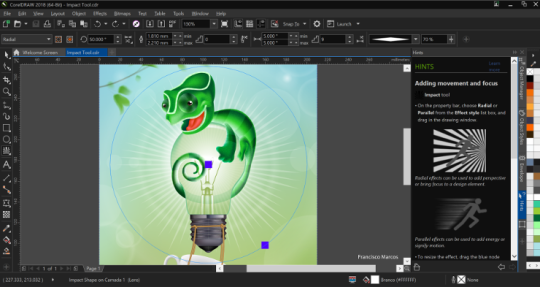
Image source: PC Mag Clean, professional, and detailed – those are the main attributes of CorelDRAW. Using the symmetrical drawing function, you can produce mirrored images of anything you draw and edit them however you see fit. From tiny details to massive projects, CorelDRAW does everything a professional graphic designer could ever want a software to do. However, learning how to handle the wealth of options it offers is another challenge for a beginner graphic designer. Why choose CorelDRAW? CorelDRAW is an extraordinary tool with a price to match it. If you’re designing the most intricate and complex graphic designs out there, CorelDRAW is truly one of the best and most reliable software solutions to use. For everything else, there are cheaper and more accessibles programs out there that will do the job just fine. Pros: Interface compatible with touch devices Scalable graphics engine allows adding tiny details to massive projects Produces results of professional quality Cons: Price Steep learning curve
8) Affinity Designer
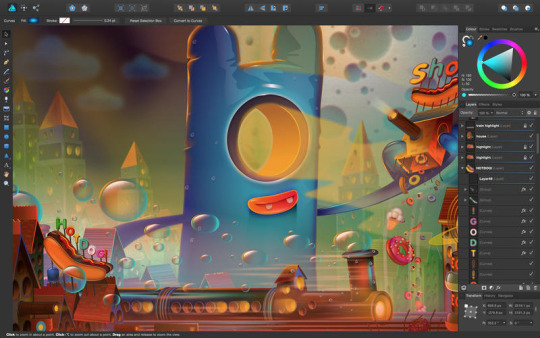
Image source: AppKed Affinity Designer is a graphic design tool capable of producing designs of sublime quality. You can zoom in and out to your desire, allowing you to screen the details or take a look at the larger image. From miniature designs to massive projects, Affinity Designer can handle it all, provided that you have the hardware to match. Why choose Affinity Designer? Affinity Designer excels at producing otherworldly, creative art that’s inspired by meditation and religious works. If you’re the type of designer that isn’t content with fiddling with stock photos, give Affinity Designer a spin and see what you end up with. Pros: Realistic shadow editing Layered editing One million percent zoom Cons: Hardware requirements
9) Canva
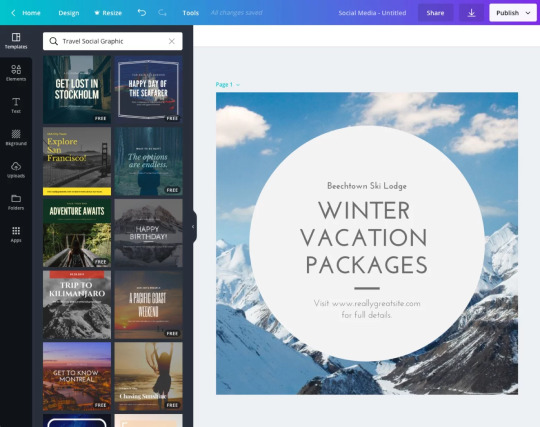
Image source: Canva If Pixlr is too complicated for you, luckily there’s Canva for you to use. With simple graphic design options, Canva isn’t meant to compete with the likes of Adobe Photoshop. However, it merely provides the bare minimum of utility for any user, even those with very little to no graphic design experience, wanting to start their own business or print out a graphic design without having to call anyone to walk them through it. Templates automate the design process even further and now graphic design is doable with just the simple use of a mouse. Why choose Canva? Canva has a clean, minimalistic interface and options to match. There’s not much depth in Canva but that’s actually perfect for senior users who might get flustered encountering the wealth of editing options in a more professional editor. Pros: Perfect for layman users Free Cons: Requires an internet connection
10) Adobe InDesign
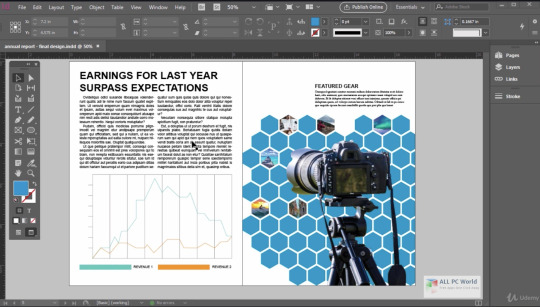
Image source: All PC World This is another one of Adobe’s products with the same monthly subscription but a slightly different toolset. It is mainly used for print and publishing design, such as books or any other document that contains multiple pages. The interface is balanced and smartly adjusts to the user’s needs, providing them with contextual information on the go. Plus, the main benefit of Adobe InDesign is that it provides a comprehensive overview of the project, allowing you to troubleshoot problems before you send the file off for printing. Just like with all other Adobe products, you will be nudged towards buying as many other Creative Cloud programs as possible since they all coordinate seamlessly. For example, it’s possible to get the entire Adobe font library within InDesign and then have specific fonts from it used across the entire project done in other Adobe software solutions. Why choose Adobe InDesign? Complex publishing graphic designs that have an intricate structure or layout will be those that will benefit from Adobe InDesign the most. The more different parts there are in the project, the more work there is to be done when changing anything. Thankfully, InDesign allows you to view the entire project at once to find out what should be changed and where. Changes and adjustments become a breeze when InDesign is involved. Pros: Integration with other Adobe products Huge font selection Overview and easy adjustment of the entire project Cons: Subscription based, costs $20.99/month Some features are still barebones
11) Xara Designer Pro X
Image source: Magix Different stages of design might require changes to be made to its parts or the entire project while still maintaining the color and font. Changing individual elements in the projects while keeping its integrity will require a special type of graphic design software, and this is where Xara Designer Pro X comes in. Xara Designer Pro X comes with over a million stock photos and templates. Why choose Xara Designer Pro X? This is one of those software products that attempt to be a single solution for all your graphic design needs, and when it comes to desktop publishing, Xara Design Pro X definitely succeeds. This is quite a capable tool that can equally handle both raster and vector images with ease. However, it can also output documents, images, or even entire HTML websites. Pros: Extensive templates library Available on Steam Cons: Pricey at $299 Windows only
12) Gravit Designer
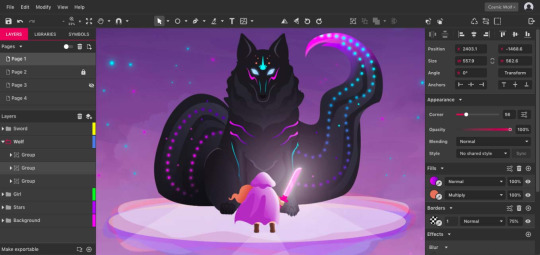
Image source: Gravit Designer In some instances, you simply can’t do without Windows but that’s an operating system that does become oppressive after a while. The ideal graphic design software would thus allow you to skip and hop from one operating system to another as you please, maintaining all your projects in sync. Gravit is one such cross-platform graphic design solution meant for professionals. Why choose Gravit Designer? Precision vector tools in Gravit Designer make it a child’s play to make creative, dreamy designs out of any shapes and colors imaginable. You can create all the print and digital designs for a product from start to finish, including stationery and app UI. A neat feature of Gravit Designer is the ability to import an image and turn it into a set of fully editable vectors. Pros: Trial and free version Cross-platform Flexible vector editing options Cons: Subscription based, $49/year Read the full article
1 note
·
View note
Text
FREE GRAPHIC DESIGN SOFTWARE 2019
Graphic design is necessary for effective marketing. Did you know that people can retain 65% of information three days after when it’s paired with an image?
Premium software and exclusive memberships are usually costly, meaning it can be hard for professionals to invest in the best software out there (especially if they’re just starting out).
Fortunately, you can create your own amazing graphics, illustrations and infographics without having to spend a fortune! We’ve compiled a list with the best free graphic design software for 2019.
Keep reading it to find out everything you need to know about each and every one of them!
1. Inkscape
Inkscape is an open-source graphics software that comes with a consistent and stable interface. The editor runs smoothly on Windows, Mac and Linux.
It comes with a huge array of advanced tools and effects and can easily compete against Adobe’s Illustrator.
With Inkscape, you can create stunning vector art that no one will be able to tell was made using a free, open-source program.
Here are some of Inkscape’s main features:
A wide range of pen tools, including pencil, brushes as well as drawing and calligraphy modes.
Perfect for designing SVG (Scalable Vector Graphics).
Compatible with multiple file formats, making it so much easier to import graphics from your own library without having to worry about compatibility.
Node editing functionality that allows users to manipulate vector images, graphics and objects. With Inkscape, you can move, edit or delete nodes with ease.
Maximise creativity with a multi-functional object creation tool. Combine the pencil and pen tools to alternate between freehand drawing and intricate line and Bézier curve designs.
That being said, the program is slow at times as processing slows down editing.
While it’s true that Inkscape doesn’t run as smoothly as its premium competitors, it’s still impressive that it manages to do the things that it does for free.
Definitely give this one a try. You really have nothing to lose.
2. Canva
Canva is an online graphic design tool that allows for extensive customisation, allowing users to create unique and distinctive designs.
You can choose from a range of preset layouts and dimensions to create the perfect design. Canva features:
A rich collection of layouts, uniform graphics and vectors.
A plethora of graphics allow users to quickly create unique designs from zero; makes it easy for non-professionals to come up with interesting and professional-looking designs. There are literally hundreds of templates to choose from.
Intuitive UI that’s user-friendly and extremely easy to use. Canva is an amazing tool can help businesses cut down on budget and design time by creating graphics in-house.
Cross-platform compatibility makes it easy to come up with designs on the spot. You can create a first draft on your phone using the mobile app and add the finishing touches later using the web version.
However, Canva’s free plan comes with some restrictions that may annoy some. Custom resizing is only available on premium plans and the majority of graphics are not available for free.
Paid plans open up further customisation capabilities that free users don’t have access too.
It’s also impossible to filter image and graphic searches so that the free options appear on top.
This is frustrating and inconvenient, especially if you’re using Canva as a free alternative to other premium graphic design tools!
3. GIMP
We can’t talk about free graphic design software and not mention GIMP.
GIMP is an incredible tool for any designer or marketer that works with photos.
It is another open-source image editing application that’s completely free but is fitted with professional-quality features.
You can start with a blank template or import your own photos and images for fine-tuning.
Some of its features include:
Photo enhancement. After Photoshop, GIMP is probably the best choice for photo editing. It comes packed with tons of customisation options.
Creation of original artwork. GIMP is known for its retouching and editing capabilities but can also act as a well-rounded creative design tool.
The software runs smoothly across all platforms. The web version has its issues but has been running better with the new updates.
It’s community-developed, meaning you have direct input as a user. It can also be manipulated and re-purposed by users who know how to code.
It’s easily expandable and regularly updated. You can add plugins and scripts to help you perfect your creations and designs the way you envisioned them.
GIMP is one of the best free graphic design software out there but suffers from poor UI design.
The interface can be inconsistent at times, which might slow you down during work.
Photoshop is still the king of editing, but if you’re looking for a free alternative that will get the job done, GIMP may be the best option for you.
4. Blender
Blender is an amazing design tool for animators, designers, scientists and artists who work in 3D graphics.
This computer graphics suite is intuitive and feature-rich.
It can be used to create 3D models and applications for video games, animated films and video ad campaigns.
When you look at its tool set and features, you’ll find it hard to believe that Blender is open-source and completely free:
Blender does animation flawlessly and is highly customisable. You can replace its base theme to suit your needs.
Comes with a large number of hotkey commands, meaning you don’t have to navigate through the interface, which can drastically increase your working speed.
The software is lightweight and runs well on all platforms. Blender boots up in just a few seconds and does not struggle even when multiple assets and graphics are loading and interacting with each other.
As with other open-source tools, Blender is constantly improved and updated based on immediate user feedback.
Blender’s community is helpful and always quick to help users solve problems.
Although Blender comes with many features and can do a lot of things well, it’s not often used professionally.
It’s unnecessarily complex and users have to rely on the community to resolve common issues.
Autodesk Maya is still preferred by most major studios.
Blender, like most open-source and free software tools, suffers from poor interface design.
Users are often put off by the amount of information that’s on the screen that often times doesn’t seem to serve a specific purpose.
Artists without a developer background may have a hard time navigating through Blender’s confusing interface.
5. Krita
Free graphic design software can get the job done, and Krita is a testament to that.
Krita is great for both amateur and professional artists looking for a drawing and sketching platform to transform their ideas into art.
Krita is a powerful program that comes with many advanced drawing aids and templates.
It was created by artists for artists, with the idea that top-notch drawing software should be accessible to all graphic designers.
It’s especially useful if you’re interested in illustration or comics.
Here are some of its features:
A great number of masks, filters and layer styles that help you create the perfect drawing.
Highly intuitive UI that makes navigation easy and drawing a pleasure.
Several animation features that can help breathe life into your creations. Krita uses frame-by-frame raster animation.
The software is highly customisable, meaning users have the ability to change most of the shortcuts to improve workflow.
Included vector tools. You can also import and edit vectors that you’ve created with the help of other programs (e.g. Inkscape).
Wrap around and canvas only modes allow for more detailed fine-tuning and versatility.
Krita seems to eat up a lot of memory, which can slow your computer and negatively impact your workflow as a result.
It also has a steep learning curve and takes some time to get used to, which might scare some graphic designers away.
Other known issues include buggy text tools and a hard-to-control smudge brush (blending may be challenging for beginners).
Free graphic design software may not be perfect but can help graphic designers get things done. Because all these programs are free, anyone can download and try them out.
Unless you’re willing to invest in premium graphic design software, you’ll have to combine and utilise different free tools.
Different tools are good for different jobs: Some are better for designing raster images while others specialise in SVG or 3D designs.
Want to know exactly what a graphic designer does? Find out why graphic designers are the backbone of every successful marketing campaign by clicking here!
Article first published here: FREE GRAPHIC DESIGN SOFTWARE 2019
2 notes
·
View notes