#keyboarding
Text
Optional: share your answer in the tags along with what generation you belong to, whether or not you successfully learned how to touch type, etc.
#poll#typing#touch typing#keyboarding#school#my poll#original post#my school taught it to everybody in 6th grade (age ~11) and I'm a Millennial#but my parents' school only taught it as an elective (which they both took) and they're Gen X
94 notes
·
View notes
Text


190316 nature republic fan festival
keyboarding (1,2,3)
4 notes
·
View notes
Text
About My Stenograph Machine
I thought I'd share some information on the equipment I use for stenography.
This is a very long post with several images (with image descriptions), technical explanations, and two videos attached. Thank you for reading, if you do!
I learned a lot about my machine after delving into the manual and trying to explain what I read, so I hope you do, too.
Note that while I am heavily biased towards stenograph machines, there are hobbyist keyboards made for steno that are much cheaper and readily accessible. If you would like to learn more, please click this link.
This is a Stentura 400SRT.
It's an older electric stenograph machine model, refurbished for student use.

[Image description: Photo of an electric Stenograph Stentura 400SRT Paperless Student Writer. The Stenoworks logo watermark is at the bottom left of the image. At the top of the machine are the black Platen Roller and the Paper Feed Roller. Below that is the cover/nameplate. An on/off switch and two indicator lights are at the top right of the nameplate. The first is green. Its label is to the left: a long line, with five dashes below it. Below the green indicator is a red indicator. Its label, to the left, reads: "DATA TRAN". Below the lights and switch are the words: Stentura 400SRT electric. Below that, the word Stenograph. Directly below the nameplate, on the left and right, are two horizontal Cover Release Levers. Even further below is the Stentura keyboard. At the top is a long bar called the number bar. Below that are 22 keys. At the lower left of this image is the Stenoworks watermark.]
It plugs into an outlet to keep power, has a removable battery, and uses a serial to USB adapter cable to connect to my computer. It's pretty old but sturdy and quite reliable.
The Front of the Machine
The cover of the machine, also called the nameplate, can be lifted up for further inspection and maintenance of the internal mechanisms. It also has a power switch and two indicator lights, one in green and one in red. Both flash or light up when set to different modes. If you wish to know more about the machine's various modes, please click this link to read the manual.
Below the cover are the keys of the machine.
Stenograph machines do not have the keys labeled in any way. This is to prevent writers from looking down at their hands when writing. Looking down at your hands while writing will ultimately slow you down, preventing you from reaching high speeds. This is sorta like how touch-typing is considered a faster way to type than looking down at your keyboard.
I will write a post summarizing the keys of the machine at some other point. Just know that each key doesn't represent individual letters but instead sounds, and that each stenograph machine has 22 keys plus a number bar. The keys at the far left and the middle of the machine are actually each one key, just with the appearance of being split in half.
The Bottom of the Machine
This part is not pictured, unfortunately. This is the area where you would install your external battery pack and your tripod.
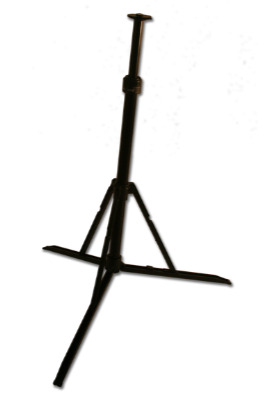
[Image description: Photo of a stenograph machine tripod.]
Above is an example of a tripod. The underside of the machine has a hole for attachment. This lets you write with the machine between your legs rather than with it sitting on a desk.
My model also has a wire bar at the bottom used for writing at a desk or table while standing called the "Bench Conference Stand". This is typically used for bench conferences, wherein the plaintiff and defendants' team will speak with the judge but exclude the jury and anyone else besides the court reporter from overhearing.
The Paper Tape Mechanism
Pictured below, the top of the machine isn't something I personally use. According to the manual, the silver bar and attached lined roller are called the "Paper Feed Roller" and the black roller it's grazing is called the black "Platen Roller". You might have already guess it, but this mechanism is used to print ink on what is called "paper tape".

[Image description: Close-up of the top of the Stentura. Middle of the image is the black Platen Roller and the Paper Feed Roller.]
Paper tape is just a very long sheet of paper you would use, before the task was automated using computers, to record your stenography notes. Stenographers would typically read directly from the paper in order to prepare transcripts or when asked to repeat, in verbatim, something that had been said in court.

[Image description: Photo of the back of the Stentura. Top, centermost part of the machine are the Paper Feed Roller, Platen Roller, and the paper apron. Below that is where you would, presumably, attach the paper tray. Bottom left of the machine is the 9-pin Communications port. On the bottom right, a hole for plugging your machine into an outlet. The Stenoworks website watermark is at the bottom left of the image.]
The above is a photo of the back of the machine. Underneath the paper feed roller is a barely visible silver landing strip called a silver apron.
On the bottom left is a 9-pin Communications port. You use that to connect the writer to your computer.
Then to the far right is a hole for connecting your machine into a power outlet.
In case you're curious as to how add paper tape to a stenograph machine, below are the steps:
Attach a paper tray to the back of your machine
Add paper to the tray
Take the top-most fold
Thread the paper between the black roller and the silver apron
Roll the black roller to "feed" the paper tape into it
When the paper comes up through the top of the roller, lift up the silver paper feed roller
Place the end of the paper coming up through the top underneath the paper feed roller
Pull the paper out a few inches
Place the top of the paper tray beneath the paper
For a video representation of these steps, below is someone adding tape to their own machine:
youtube
[Video description: A stenographer giving instructions and demonstrating how to load paper tape into their stenograph machine.]
Each depression of the keys, called a stroke, would print a letter or group of letters onto the tape. Below is what the paper tape's printout would look like using Plover's paper tape plug-in. The chords here spell out "hello world".
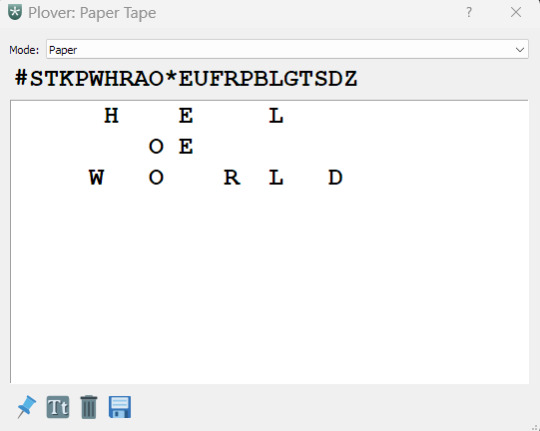
[Image description: Screenshot of the Plover paper tape plug-in. Top of the window has the Plover icon, which is a white asterisk on a green key. The window name is "Plover: Paper Tape". To the far right of the window name are the help (?) and cancel/exit (X) buttons. Below the window name is a drop-down menu labeled "Mode:". "Paper" mode has been selected. Below that is a line of the keys from the machine. The keys are: # S T K P W H R A O * E U F R P B L G T S D Z. Below that, in a white text box, are the following chords: H E L, O E, and W O R L D, each set on separate lines. At the very bottom of the window are four icons: a push-pin for pinning the window above other windows; a button with a capital and lowercase T for editing the font appearance; a garbage can for deleting what is on the paper tape; and a floppy disk for saving what you've written to the tape as a text file.]
The Longest Section: Inside the Machine
Below is an image of the internals of the stenograph machine.

[Image description: A photo of the inside of a Stentura 400SRT. All the parts that I could identify are labeled with a number. The parts are numbered from 1 to 17 in black text on top a black circle with a white outline. The Stenoworks website watermark is in the bottom left of the image.]
All the parts that I could identify with the manual are labeled with a number. After trying to write the image description for it, I decided that I should provide the names for each part below, then separately explain what each part is or does.
Parts Labeled
Cover Release Levers
key levers
blue Ribbon Advance knob
an unpictured red knob called the Depth of Stroke knob
an empty space where the Ribbon Cartridge would be installed when using paper tape
white Keystroke Pressure knob
green strip overlay with key adjustment screws
number bar lever
black Paten Roller
orange Platen Drive Gear
Platen Bearings
Manual Platen Advance Linkage
silver Paper Feed Roller
red Electric/Manual mode lever
machine handles
Cover/nameplate
An Explanation of Each Part
The first two things labeled in the image are the Cover Release Levers. You lift those horizontal bars/levers to release the cover and lift it up to reveal what's underneath. Then there are what I presume are just called the key levers.
Following that is the blue Ribbon Advance knob.
From what I understand after fiddling with the machine, each key depression and release causes this blue knob to automatically advance number 5, the ribbon cartridge, which typically contains a self-inking, continuous loop ribbon. This ensures the machine will continue to apply ink to the paper tape with every rotation.
Not pictured is a red knob called the Depth of Stroke knob.
You turn the wheel upward or downward to adjust how far down the keys go when you press them. There are ten settings available. Adjustment also lets you decrease or increase spacing.
To the far right of the blue Ribbon Advance knob is number 6, the white Keystroke Pressure knob.
Turning it lets you adjust the amount of pressure needed to press the keys.
Above where the ribbon cartridge would be, I think, is number 7, the key contact assembly.
The green overlay strip has all the keys of the machine labeled with corresponding screws above each one, called contact adjustment screws.
The number bar's screw is to the top-right of the others. The two big screws on either side are for removing the overlay.
You would insert a 0.35 inch Allen wrench into a screw. Then you would turn it after determining that the corresponding key's switch is in need of adjustment.
Immediately above the green overlay is number 8, the machine's number bar's lever used for printing numbers into the paper tape.
Above that is number 9, the black Platen Roller.
To the left is number 10, an orange knob called the Platen Drive Gear.
On either side of the Platen Roller are number 11, the Platen Bearings. They are a single frame, identifiable by the holes located at the center of each side. Those holes are specifically for lube.
Number 12 is the Manual Platen Advance Linkage, which is to the bottom-right of the Platen Roller. Above the Platen Roller is number 13, the Paper Feed Roller. Below that, not pictured, is the silver paper apron.
All these parts work in tandem to smoothly apply ink to the paper tape when a key is depressed, and then to advance the paper to the next available line when a key is released.
If you were using the Stentura with paper tape and an ink cartridge, you would also have to apply StenoLube1 to the Platen Bearings and Platen Drive Gear, and StenoLube2 to the Paper Feed Roller.
To the right of the Platen Roller is number 14, the red Electric/Manual lever.
You would typically change from one mode to the next when either trying to make adjustments to the machine's keys or when your machine is running low on battery and you have to switch to writing on the paper tape.
Number 15 looks like it's labeling two empty areas, but those are the handles for the machine. And of course, above all of these parts is number 16, the lifted cover/nameplate.
Keystroke Emulation
As you can see, each stenograph machine is a lever-based machine, just like a typewriter. Each key on the machine connects to an electronic switch.
After completing a stroke, the machine will send that input through the real-time cable connected to your computer. Software -- Plover or CAT (Computer-Aided Transcription) -- will emulate that stroke and translate it from shorthand into something else, presumably English or a command, using a dictionary.
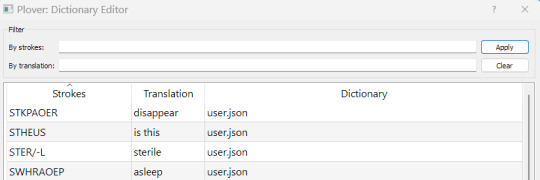
Above is a screenshot of the Plover Dictionary Editor. You can filter by strokes or by translations. You use this pop-up to edit, add, or delete strokes from the dictionary. All Plover users are given a pre-named dictionary called "user.json".
Rather than editing the "main.json" dictionary, which is a free user-created dictionary distributed through downloading the program, you would typically make changes to other dictionaries, especially user.json. This is to ensure that if Plover were to be updated even if your main.json were to be accidentally overwritten, you would not lose your dictionary changes.
Production of a Chord
Below is an attempt I made on December 25th, 2022, to write the top 100 English words using a metronome set to 140 bpm.
The bottom right corner of the video shows the digital paper tape emulated by Plover. Each stroke is then translated into English, as demonstrated by my completion of the drill at the center of the video.
youtube
[Video description: A video of my screen as I write to a Top 100 English Words drill on the website Stenojig. It begins with me setting a metronome to 140 bpm with stress on the 2nd of the 2 beats. In the top right is a WPM plug-in measuring my speed; on the lower right is a plug-in displaying emulated paper tape. Soon after setting the metronome, I switch tabs to Stenojig and begin the exercise. Green highlight indicates whether I've written a word correctly. And the end of the video are a set of stats indicating that I did not erase anything during the practice session, I averaged 2.15 strokes per second, and that it took me 0:47 seconds to finish the exercise, giving me an approximated WPM of 114. Then the video ends.]
#stenography#steno#open steno project#plover#education#court reporting#stentura#stenograph#stenographer#transcription#studyblr#accessibility#keyboarding#infodump#steno resources#long post#munchlax's musings
19 notes
·
View notes
Text
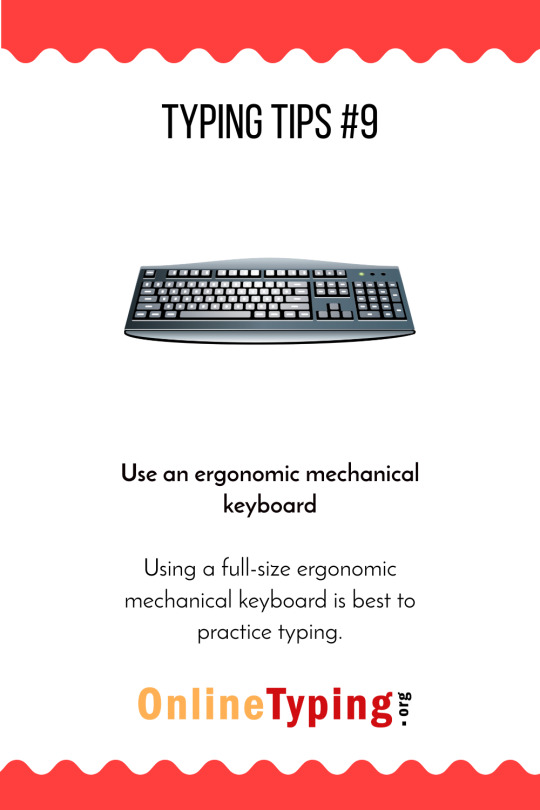
Typing Tips 9
Learn to type without looking at the keyboard.
When you memorize the keyboard layout and type without looking at it, your typing speed will automatically increase. visit: https://onlinetyping.org/
#writing#writingtips#typing#writingsociety#contentwriting#keyboarding#touchtyping#education#onlinetyping#fasttyping#typingtutor
2 notes
·
View notes
Photo
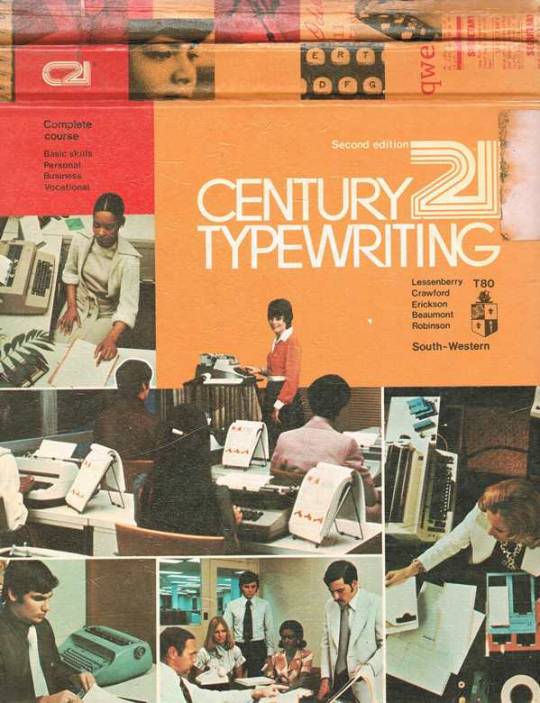
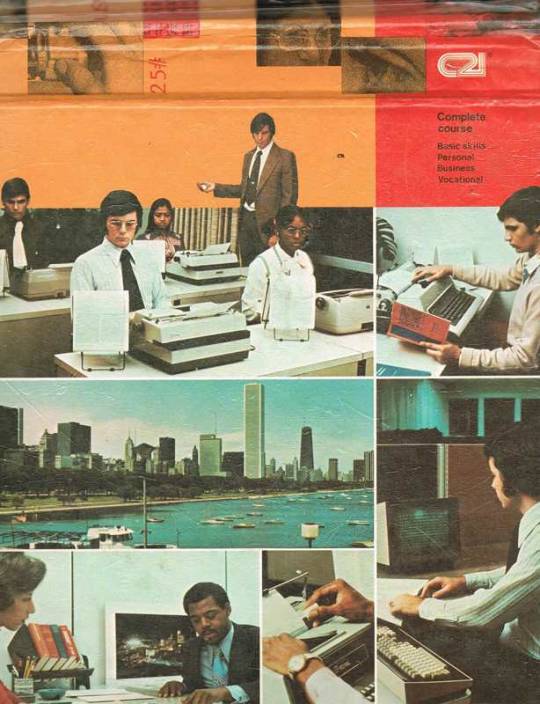
Century 21 Typewriting
Lessenberry, Crawford, Erickson, Beaumont, Robinson
2nd Ed, 1977
57 notes
·
View notes
Photo
1984
17 notes
·
View notes
Text
audibly moaned after unboxing my mochi 40
2 notes
·
View notes
Text

Practice touch typing on TypingMentor. On TypingMentor you get effective lessons and a great user experience for learning touch typing.
2 notes
·
View notes
Text
because sometimes there are invisible tests and invisible rules and you're just supposed to ... know the rule. someone you thought of as a friend asks you for book recommendations, so you give her a list of like 30 books, each with a brief blurb and why you like it. later, you find out she screenshotted the list and send it out to a group chat with the note: what an absolute freak can you believe this. you saw the responses: emojis where people are rolling over laughing. too much and obsessive and actually kind of creepy in the comments. you thought you'd been doing the right thing. she'd asked, right? an invisible rule: this is what happens when you get too excited.
you aren't supposed to laugh at your own jokes, so you don't, but then you're too serious. you're not supposed to be too loud, but then people say you're too quiet. you aren't supposed to get passionate about things, but then you're shy, boring. you aren't supposed to talk too much, but then people are mad when you're not good at replying.
you fold yourself into a prettier paper crane. since you never know what is "selfish" and what is "charity," you give yourself over, fully. you'd rather be empty and over-generous - you'd rather eat your own boundaries than have even one person believe that you're mean. since you don't know what the thing is that will make them hate you, you simply scrub yourself clean of any form of roughness. if you are perfect and smiling and funny, they can love you. if you are always there for them and never admit what's happening and never mention your past and never make them uncomfortable - you can make up for it. you can earn it.
don't fuck up. they're all testing you, always. they're tolerating you. whatever secret club happened, over a summer somewhere - during some activity you didn't get to attend - everyone else just... figured it out. like they got some kind of award or examination that allowed them to know how-to-be-normal. how to fit. and for the rest of your life, you've been playing catch-up. you've been trying to prove that - haha! you get it! that the joke they're telling, the people they are, the manual they got- yeah, you've totally read it.
if you can just divide yourself in two - the lovable one, and the one that is you - you can do this. you can walk the line. they can laugh and accept you. if you are always-balanced, never burdensome, a delight to have in class, champagne and glittering and never gawky or florescent or god-forbid cringe: you can get away with it.
you stare at your therapist, whom you can make jokes with, and who laughs at your jokes, because you are so fucking good at people-pleasing. you smile at her, and she asks you how you're doing, and you automatically say i'm good, thanks, how are you? while the answer swims somewhere in your little lizard brain:
how long have you been doing this now? mastering the art of your body and mind like you're piloting a puppet. has it worked? what do you mean that all you feel is... just exhausted. pick yourself up, the tightrope has no net. after all, you're cheating, somehow, but nobody seems to know you actually flunked the test. it's working!
aren't you happy yet?
#almost wrote the champagne line as ''effervescent'' but legit could not write it without saying ''effervescent like a snail''#ah tumblr...#writeblr#warm up#idk . having trouble writing rn#ps i don't like to talk about it . it is my medical information. but before you ask. yes this is about being on the spectrum#i really don't like when ppl make my writing about how im [whatever ID]. i want it to ring true for the people who it rings true for#i don't want it to be like ''awwwww look at this person!!! she's the EXCEPTION!!! :)" .....#no.... not really.....#idk something gross happens whenever i admit to certain conditions and i turn into like inspiration p*rnography#like yes they actually let us use keyboards these days#furthermore i just... dont feel comfortable talking about this part of me. i had too bad of a childhood. adhd is one thing...#this one im like. still coming to terms with. which is like. my own journey.#idk. just please be kind. some things are more private than others. this one feels private to me.#i do not know how to help others w/this . and i do not know how to help myself. i will talk about it if im ever ready. idk if that will#actually ever happen#ty in advance i love u im kissing you we are kissing somewhere on the spectrum
47K notes
·
View notes
Text

i mean i think she would've had the time
#my art#digital circus#drawing#art#doodle#meme#the amazing digital circus#tadc#tadc pomni#terrible gaem#i know the computer nor the mouse nor the keyboard isn't connected to anything i can't draw setups. im so sorry everyone
25K notes
·
View notes
Text
Suggestions for Steno Warm-Ups
It's often suggested that when preparing to practice stenography, people should do a warm-up, first.
I find warm-ups to be very helpful, so here is a list of suggestions for anyone looking to add them to their daily routine.
For many of these, you can write them forwards, backwards, in abbreviated forms, fingerspell, and stenotype.
I'm also currently pulling together a Google doc full of many of these warm-ups for pasting into Stenojig.
You can also try TypeyType for a curated selection of exercises.
Click read more to see the list of suggested warm-ups!
Numbers 0-100 using the number bar
Writing out numbers 0-100
Days of the week
Months in the year
US states
US state capitals
Fingers drills from Da Dreaded Dueling Digit Duo Finger Drills (also available on Stenojig)
Finger drills from Fast Track to Machine Shorthand Speed
Finger drills from Stephen Shastay's Steno Finger Drills
Pangrams
Write from a list of the most popular baby names
The alphabet
Pyramid drills
Writing from a list of your trouble words/briefs/phrases
Writing from a list of words/briefs/phrases you would like to memorize, such as from Shastay's Steno Phrase Dictionary or Top 1000 Briefs and Words
#steno resources#stenography#steno#keyboarding#practice#drills#warm up#court reporting#transcription#education#stenojig#typeytype#studyblr#daily routine#munchlax's musings
4 notes
·
View notes
Text

Typing Tips 8
Use 10-keypad to type numbers and symbols.
If you are working on accounts or the billing department 10 key typing can save a lot of time. visit: https://onlinetyping.org/
#writing#writingtips#typing#writingsociety#contentwriting#keyboarding#touchtyping#education#onlinetyping#fasttyping#typingtutor
2 notes
·
View notes
Text
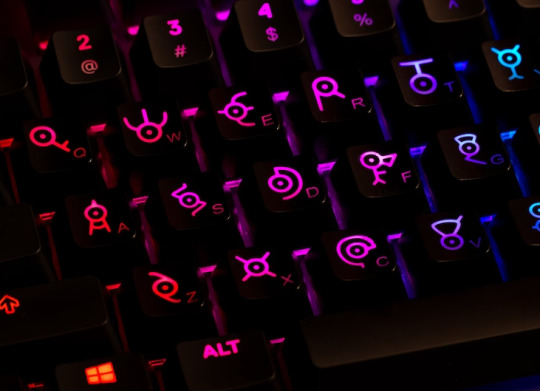
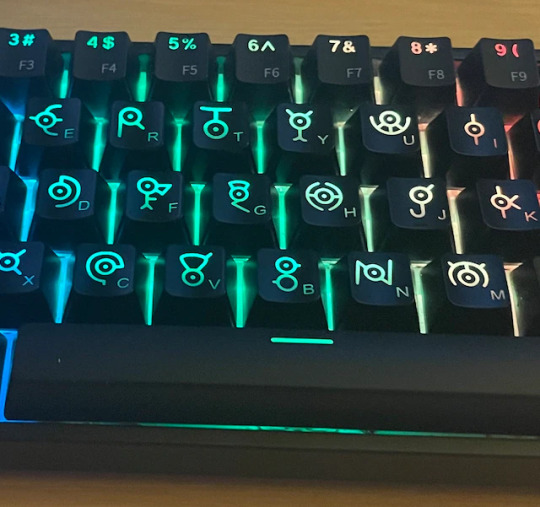
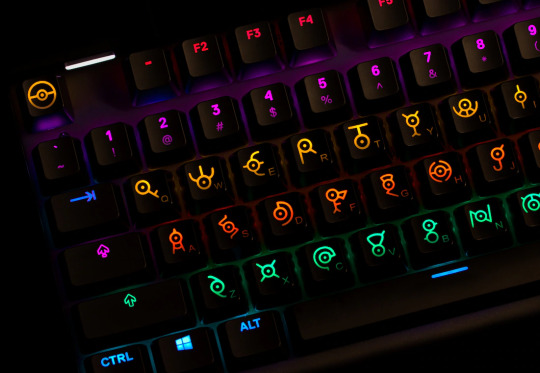
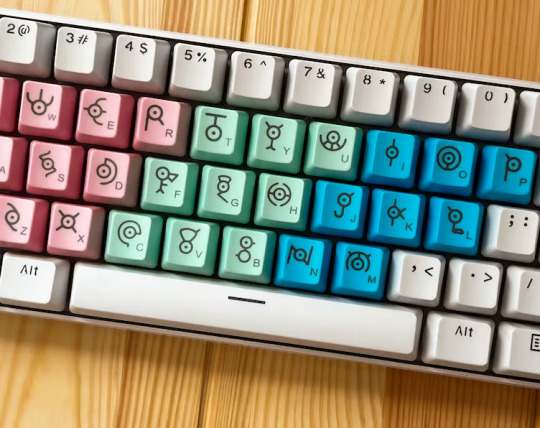
Unown Pokemon Key Caps made by RoyalKeycaps
#pokemon#nintendo#pc#keyboard#gaming#video games#cute#retro#gameboy#anime#90s#pc gaming#computers#art#crafts#johto#pokemon gold#pokemon silver#pokemon crystal#pokemon heartgold#pokemon soulsilver#ds#nintendo ds#retrogaming#gen 2
12K notes
·
View notes
Text
its been a while...
since i’ve showed off one of my keyboards, all of which i love in some degree… you can’t call me a collector, i have less than ten. the fact of the matter with this board is that if you had it built for you by a small proprietor, it would probably cost you about five hundred dollars plus. i got mine from amazon for 240$ American and i don’t regret it. i’ve loved the “Alice” form factor ever since…
View On WordPress
#blogging#content creation&039;#flagship keyboards#keyboarding#keychron#mechanical keyboards#touch typing
0 notes
Text

Happy Neil banging out the tunes day!
#the day is almost over in germany but animating this took longer than expected#neil banging out the tunes#animation#gif#rat#neil banging out the tunes day#stream art#happy neil banging out the tunes day#animated gif#digital art#bruneburg#keyboard#music#jamming#artists on tumblr#artists of tumblr#animators on tumblr#animators of tumblr#anita bruneburg#bruneburg art#bruneburg neil#bruneburg neil banging out the tunes#art#rats#musician#2d animation#neil
40K notes
·
View notes
Text

AAAA/The Useful Idiot
2024
INSTAGRAM
#cat#cats of tumblr#early internet#keyboard#keyboard cat#cat portrait#contemporary art#artists on tumblr#airbrush#painting#art#airbrush art#cat art
11K notes
·
View notes
Last Seen Blogs

bookkeeperslondon2022
Bookkeepers London

firenagy
"In the mean time rest well"

bassemz1970-blog
Untitled
trauma-rat
ROTTEN

facesittingdreams
Stinking Desires