#reshade tutorial
Text
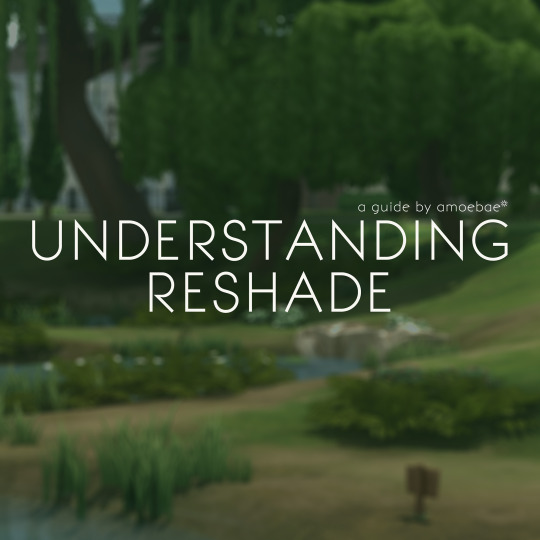
UNDERSTANDING RESHADE - a guide by amoebae
This guide aims to give a general overview of what ReShade actually is, and a working understanding of the difference between the ReShade binary, ReShade shaders, and ReShade presets.
Additionally, at the end of the guide you'll find basic installation instructions, information about how to make a backup of ReShade, how to uninstall ReShade, and a few other helpful tips and tricks, including troubleshooting.
---
I've wanted to make a basic overview like this for a long time. I didn't realise how long the guide would end up! It's text-heavy, no screenshots, no videos.
I initially wanted to write something to solve the problem of people getting confused about the difference between ReShade (the tool) and shaders when they update to a newer version and find their presets might not look quite the same. I quickly realised that required a proper understanding of what ReShade actually is and how its different constituent parts work.
Never one to do things by halves, I got stuck in.
The result is something that hopefully gives a solid grounding in the way ReShade works, so people are better equipped to solve their own problems as they arise.
UNDERSTANDING RESHADE - a guide by amoebae
792 notes
·
View notes
Text
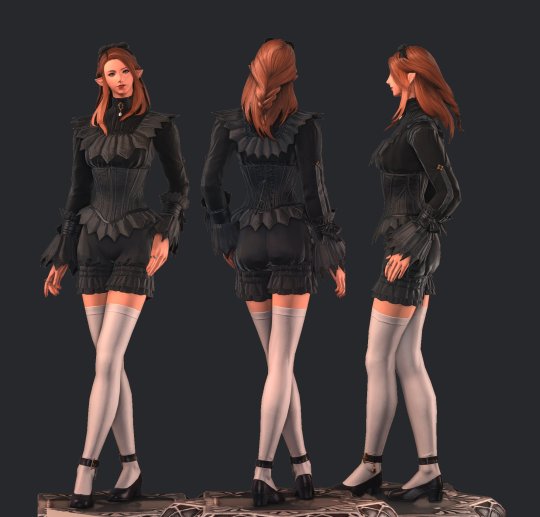
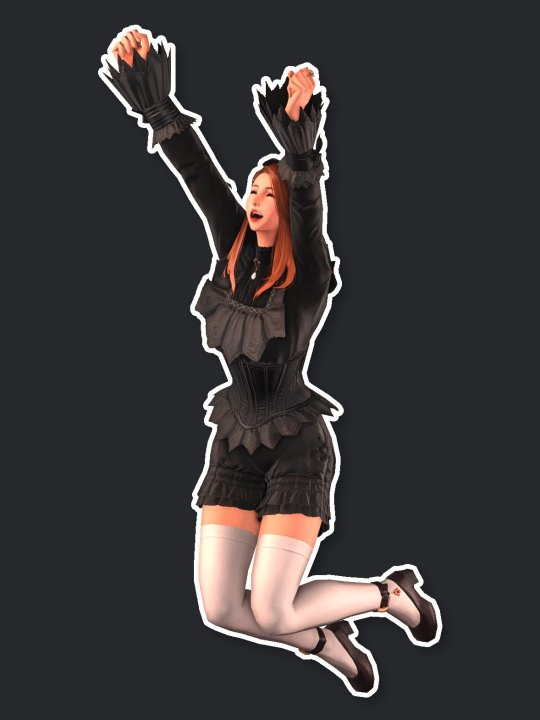
ReShade Guide: Transparent Screenshots
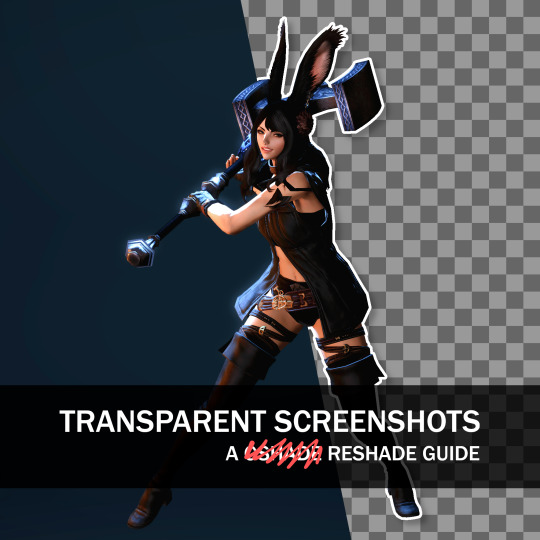
Want a nice cut-out picture? transparent chromakey shots are here to save the day!
You can achieve this with a combination of two features in ReShade: ChromaKey.fx, a technique that generates a greenscreen effect, and Clear Alpha Channel, a toggle located under the Settings tab.
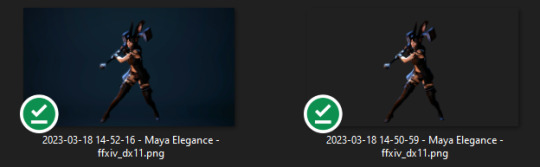
1 - Setup

Make sure PNG is selected as the target format since JPG doesn't preserve transparency!
Also, don't forget to re-enable Clear Alpha Channel after taking your shots - otherwise, you may capture completely black shots!
2 - Enabling the Shader

Place Chromakey.fx right after FFRestoreUI.fx- otherwise, your UI may be hidden by the shader.
3 - Take your screenshot!
You should now be able to capture shots with transparency properly preserved!
Chromakeyed, transparent images can be used in several different situations! For example, I often use it to create tutorial slides.

What about reference cards for art commissions?
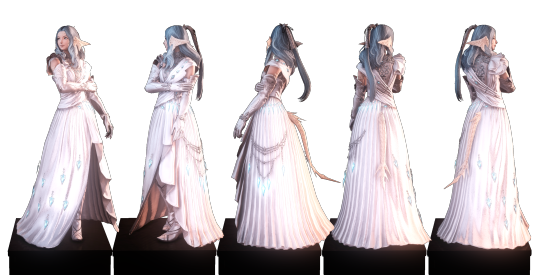
Or maybe stickers with your friends. Or Discord emotes. Or whatever strikes your fancy. The sky's the limit!
This is my first guide adapted to ReShade. If you have any questions about this feature or other aspects of ReShade or GPose, feel free to ask!
And if you need a handy guide to help you migrate from GShade to ReShade, here's a link!
#reshade#reshade tutorial#ffxiv#gposers#aquitaine studio#leon aquitaine#gpose guide#reshade guide#gpose
955 notes
·
View notes
Note
Heyy, I want to ask if you have any tips on the ”DOF” setting in reshade. I find myself struggling to edit the setting and want to find a good balance, right now it makes everything blurry and it’s a total mess! I love how in your photos it’s perfect and not crazy like i have it now. Not sure when you are gonna see this but Happy new year! <3
Hello nonny, I always go for a subtle bokeh versus the super blown out look. Ideally, I'm trying to emulate the focal lengths of an actual camera. I also use 4 different DOF shaders that can be layered on top of one another depending on the scene. Two of them are mouse driven auto focus, and the other two are static blur for items in the distance.
In general you want to focus on adjusting the following areas to control which parts of your image are subject to blur:
Near Blur Curve (amount of blur in foreground, i.e. objects closer to the camera)
Far Blur Curve (amount of blur in the distance, i.e. everything far away from the camera)
Generally, 0 = no blur, and 1 = blur. DOF shaders are quite sensitive. I do not like any blur in the foreground therefore, I usually have this set to 0 for my non mouse driven DOF shaders.
Then for the actual blur strength effect, I leave this very low too, usually around 5-10 at maximum.
Hope that helps!
27 notes
·
View notes
Video
youtube
Reshade 3.4.1 Installation Guide for Guild Wars 2
Due to what’s been happening with GShade I did a little video to help some folks on a GW2 discord I’m at and decided to go a lil further and post it on Youtube in case it’s useful for anyone else, as I haven’t seen many tutorials oriented to how installing Reshade on this game.
Note please that this is about the 3.4.1 version of Reshade. I don’t know how the actual ones work, but this one works very good for me and it’s the one I’ve been using so far.
There is a good surce and compilation of what happened here and links to other tutorials on how to migrate from GShade to Reshade and other options as well.
52 notes
·
View notes
Text
RESHADE PRESET: AMAZING BY FEFYLA
DOWNLOAD ON MY BLOG:
#how to install reshade on sims 4#how to download reshade on sims 4#how to download reshade sims 4#how to install reshade sims 4#sims 4 reshade#the sims 4#sims#mods#cc#reshade#preset#sims 4#sims 4 lighting mod#reshade tutorial#sims 4 reshade mod#how to install reshade#sims 4 reshade tutorial#the sims#sims 4 tutorial#reshade mod tutorial#sims 4 reshade preset#sims 4 how to#reshade preset#the sims 4 mods
2 notes
·
View notes
Photo

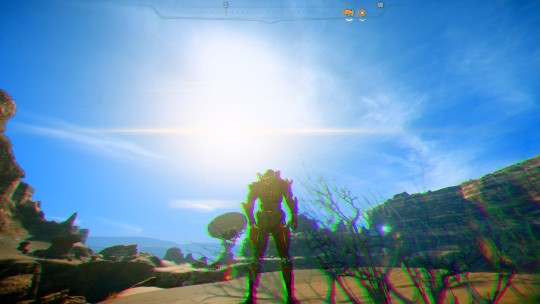


Mass Effect Andromedas Planets with a cool trippy Reashade Mod, and other games
https://www.youtube.com/watch?v=DWYP4_PEdSY
#reshade#reshade mod#reshade modding#reshade tutorial#trippy#cool looking#gameplay#mass effect andromeda#mods#modding
1 note
·
View note
Text
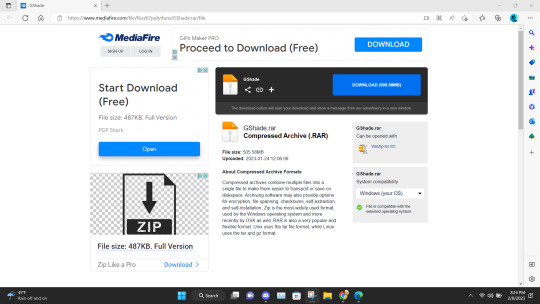
GSHADE 3.5.0 Cracked Tutorial Feb.2023
‼️Update:3/2023‼️ Due to gshade somehow being online again! You can still install the program with this tutorial but to avoid the update to version 4.2 notification keeping you from proceeding-Download the program from mediafire and then turn your pc to airplane mode and continue the process below! Note that when you turn your internet back on that your going to get the notification still ignore it. That what I’m doing.
Alright with the recent events regarding the development team of GShade figuratively going under and the current version of this program available being far from perfect. It would be lovely to back to a version of GShade that doesn't have malware, the changes that disabled the depth of field effects, and the removal of some older shaders. So here's a tutorial on how to install 3.5.0 of GShade. It's the version that we as a collective switched to all those months back, when GShade popped off in the community. Also the version I used to take this picture and got from @toskasimz who sent me the files. She's the reason why I have my pretty pictures back. It took a long time to get my preset to look like this and the modern versions of Gshade and Reshade don't have the shaders for this anymore. The suggested skill level for this is basic knowledge of how to install Reshade/Gshade and knowledge of where to find the game Bin file and Program Files on your pc.
Note: This version is before the code that shut down your PC, if you manipulated the code of the program, was introduced. Use at your own risk. I personally have no issue with using it. I'm using my laptop I do school work on and I have no money to buy a new one so that's my assessment on how safe it is.
To start download this media fire file. It's a Rar file. Unzip it.
In the unzipped version of this file, you should have a folder that's highlighted below called GShade.
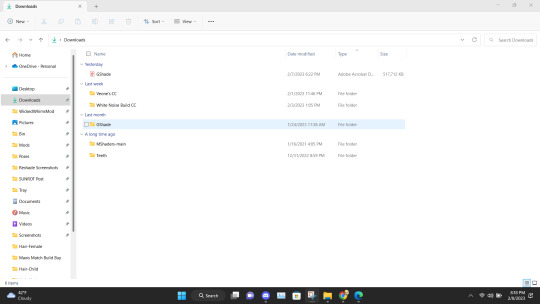
Inside that file are two folders. Program Files-G-Shade and TS4 Bin Folder. These folder names correspond with where the contents of these will go on your pc.
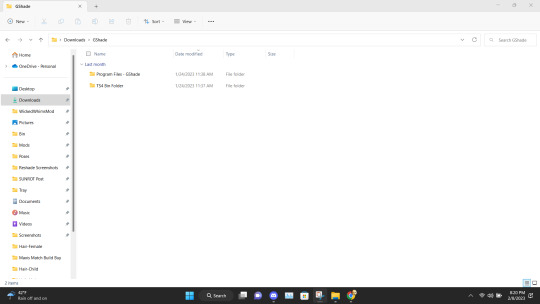
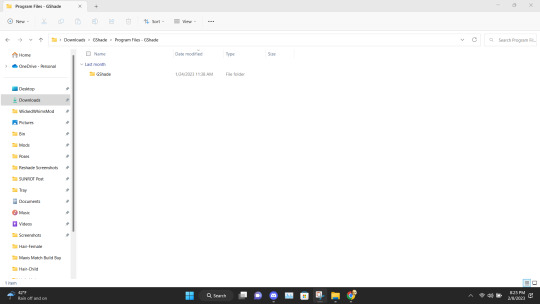
Alright inside the folders you should have the following content in the Program Files-G-Shade
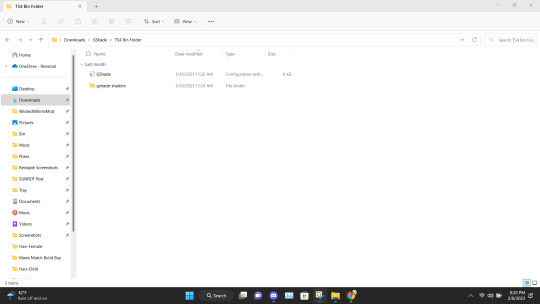
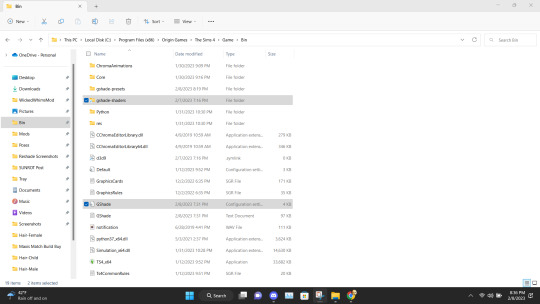
Inside the TS4 Bin Folder, you should have the following contents inside it.
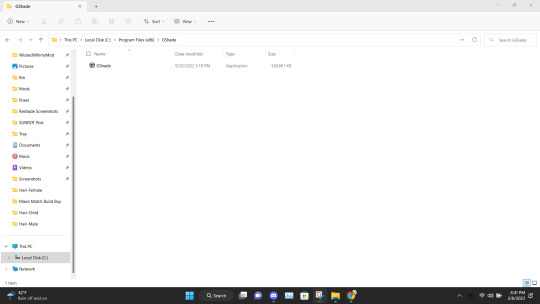
Place the GShade folder from the Program Files-G-Shade into your computer's Program(x86) file. This may have a different name based on your computer.
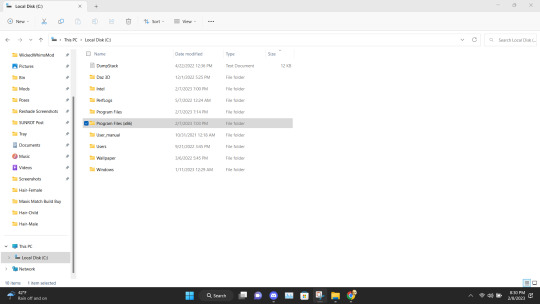
Next Place the contents of the TS4 Bin Folder which should be the G-Shade configuration file and the folder of GShade-Shaders into your Bin folder. (note I have gshade installed already so you won't have the extra files before installation.)
Now go back to the Program(x86) file on your PC and go into the G-shade folder.
Double Click to run the program.
This is where you gonna need to pull your Reshade/Gshade knowledge. You just install the program as normal to the game. I will say I don't know if this will work with other games.
Alright, this is what you should be left with after installing G-Shade. Everything transferred to the Program Files with the exception of this folder. Leave it be and go to the Program Files file on your pc.
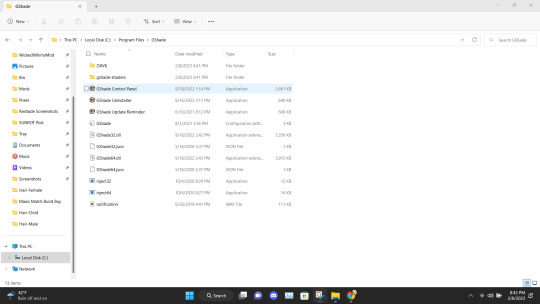
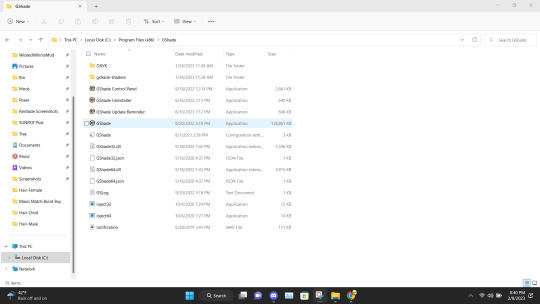
Once in the Program Files folder double click the GShade Control Panel.
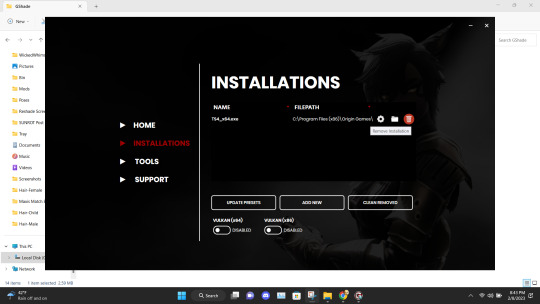
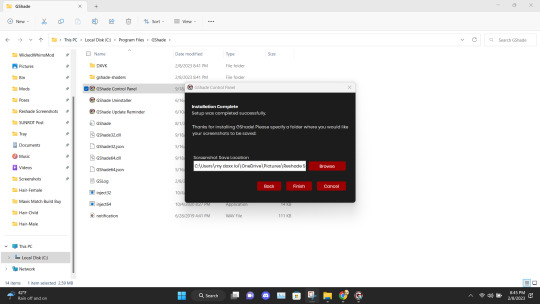
You should get the following screen Go to the Installations tab. Delete this file path. This is a very important step. It's not gonna work if you don't reinstall the program. Delete it and click Add New.
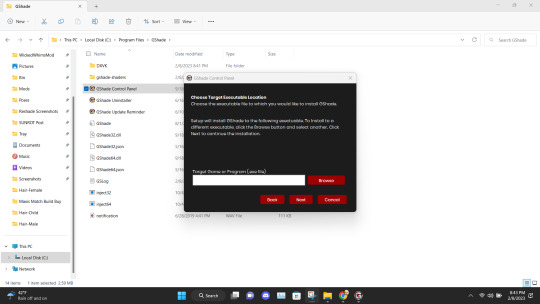
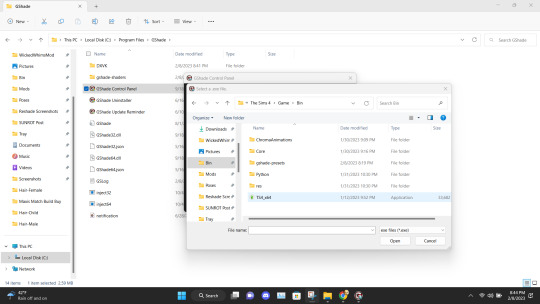
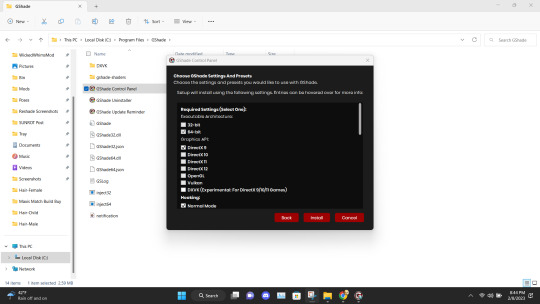
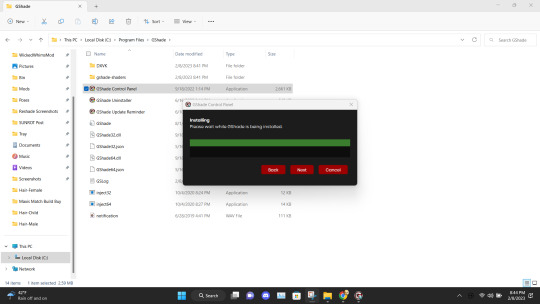
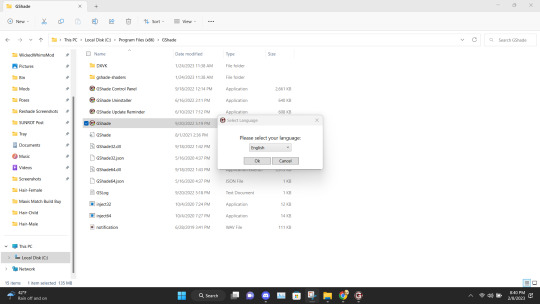
Install the program as viewed above. Click Next and set up your screenshot folder.
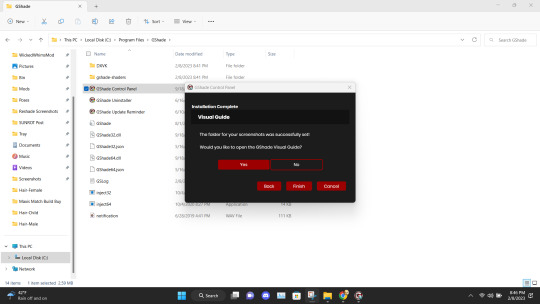
Click No on viewing the guild. You should have a control panel on your desktop. You can go in a convert you reshade presets if needed.
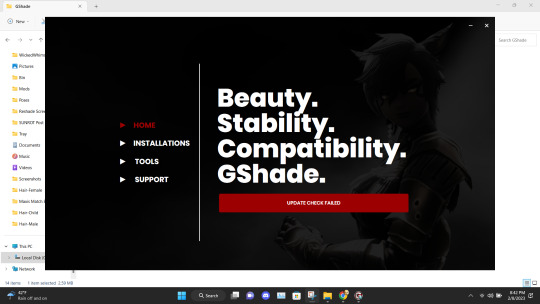
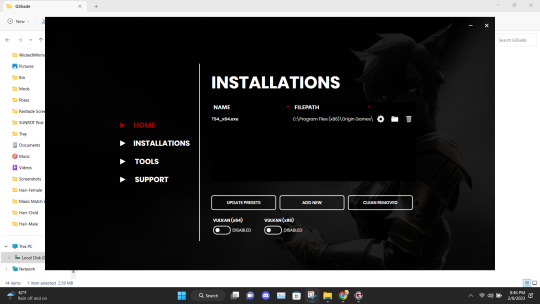
Alright if everything was done correctly open your game. It'll take a moment to load and when it does you greeted with the following screen on start-up.
Ignore the yellow text on the top. It says that your effects are disabled because it's not online. It works I could be misinterpreting what "effect" means but my shader work so I'm not complaining.
And there you go. Installed, and works perfectly. Don't update it. I don't know what it'll do. I have not tried. I will upload an edited version of my preset later this week or tonight. I have to tweak the color of the fog and make a decent post. Enjoy! I am open to helping under this post and in dms!
#if something you download thats for cosmetic reasons can shut down your PC that's not a normal function the program is free and basically#reshade it one of the same developers#gshade#sims 4#gshade help#ts4#simblr#tutorials
2K notes
·
View notes
Text
The Sims 2: An ultimate guide for letting the bodyshop slay in 2024 by celestialspritz
Here's my comprehensive guide to overhauling bodyshop! You guys really wanted to know how to get SRWE and Reshade working, so here it is :D
160 notes
·
View notes
Text
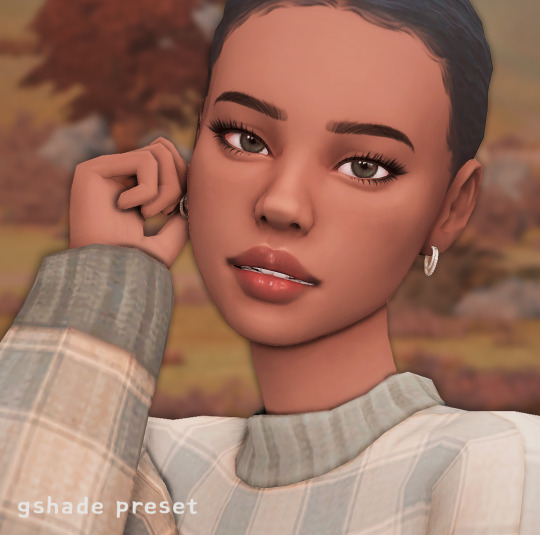
cinnamon bear: aesthetic gshade preset
~ ver video
~ gshade tutorial ~ descargar gshade
download
#the sims 4#los sims 4#the sims#los sims#sims#sims 4#simmer#simblr#youtube#ts4 simblr#ts4#sims 4 gameplay#ts4 gameplay#the sims 4 reshade#sims 4 gshade#sims 4 preset#gshade#sims 4 tutorial#sims 4 tumblr#content creator#sims 4 gshade preset#sims 4 lets play#tianaberrie#tianaberrie reshade#tianaberrie gshade#gshade preset
615 notes
·
View notes
Text
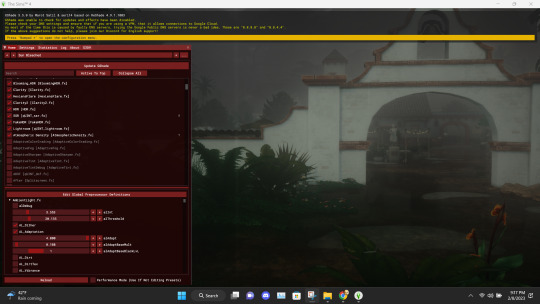
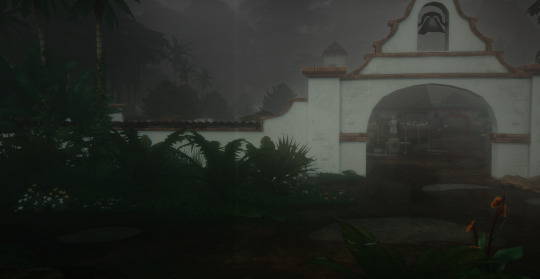
How to fix ReShade MXAO, DOF issues
Hey, guys! Recently I moved from GShade to ReShade and faced quite unpleasant issue with MXAO and DOF shaders. I was ready to give up on having any ReShade in my game when finally found a solution from @pictureamoebae. Well, it was rather a hint on the solution in the comments, but nevertheless! Thanks to @pictureamoebae for giving me the right direction!^^ After updating my ReShade I faced the same problem again and decided to make this mini tutorial:3
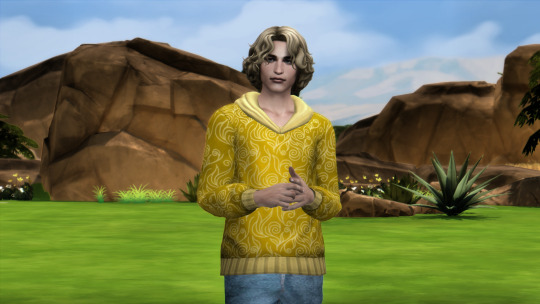
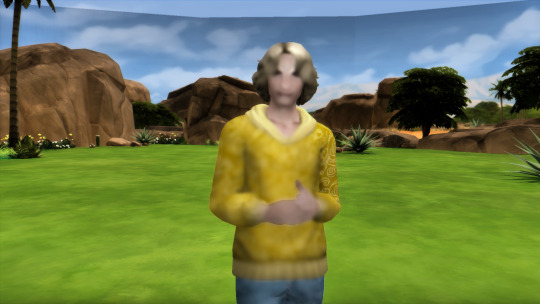
SO! If you’re *lucky* as I am and after installing (or updating/reinstalling) your ReShade, using MXAO or any DOF you see your game looking like this:
Then, here’s how you can fix it! Open your ReShade, find “Edit global processor definitions” and click on it. RESHADE_DEPTH_INPUT_IS_REVERSED most likely would have 1 annoying cupcake next to it.
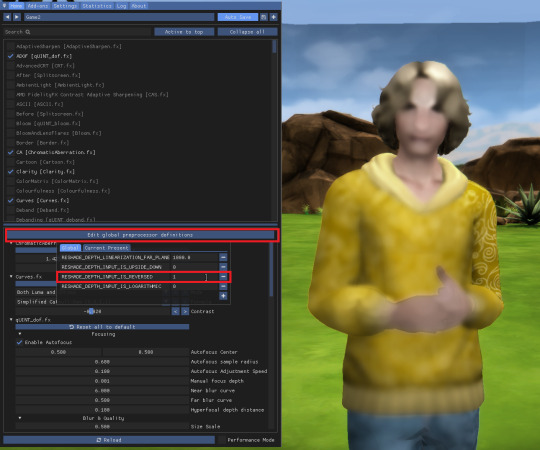
CHANGE IT TO 0! No cupcakes for this line. Not a single one!
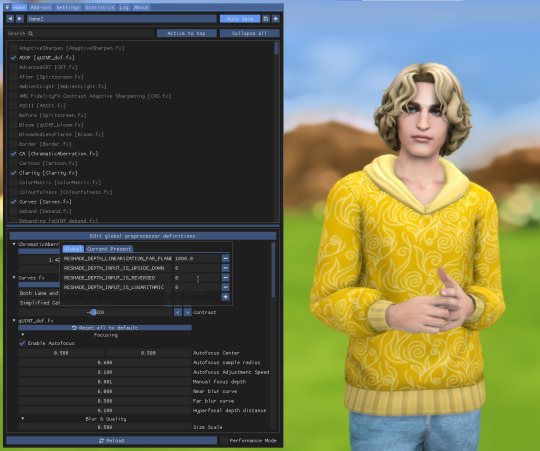
TADA!

#sims 4 tutorials#sims 4 reshade#sims 4 reshade issues#sims 4 reshade issues fixed#reshade fixed mxao#reshade fixed dof#sims 4 mxao issues#sims 4 dof issues#sims 4 reshade mxao issues#sims 4 reshade dof issues#sims 4 reshade the picture looks dark#sims 4 reshade dof doesn't work#sims 4 reshade doesn't work#sims 4 reshade fix#wistfultutorialsims4
199 notes
·
View notes
Text
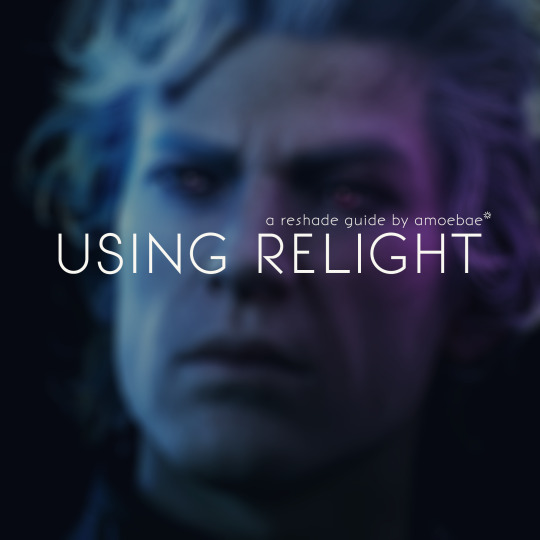
USING RELIGHT FOR RESHADE - a tutorial by amoebae
[You can also find this tutorial over at imgur and patreon]
ReLight is a premium shader for ReShade made by Marty's Mods (Pascal Gilcher). It allows you to add four new lights to your scene that help illuminate, and create realism and drama. To download and use ReLight you need to subscribe to the Path Tracers tier on Gilcher's Patreon to get access to the iMMERSE Ultimate package of shaders. Once subscribed, you'll be prompted to link your Patreon account to discord, and then you'll be granted access to his discord server, and, most importantly, to the Path Tracers discussion channel and the Downloads Level 2 channel, which is where you will find ReLight (along with the other premium shaders included in that tier).
Be sure to also download the up-to-date free iMMERSE shader package, because you'll need the Launchpad shader and some of the other included files.
The following guide is for the older qUINT_relight.fx version of ReLight. The latest version of ReLight is MartysMods_RELIGHT.fx, released on 31st December 2023. Many of the settings have changed in the newer version, but you can still use this guide to help understand how to enable and position lights. The guide will be updated/rewritten once I've had time to properly play around with the new version. You can continue to use the older version if you'd prefer.
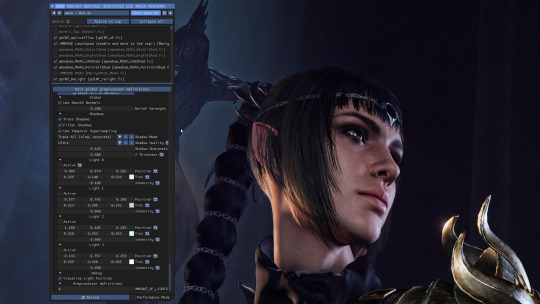
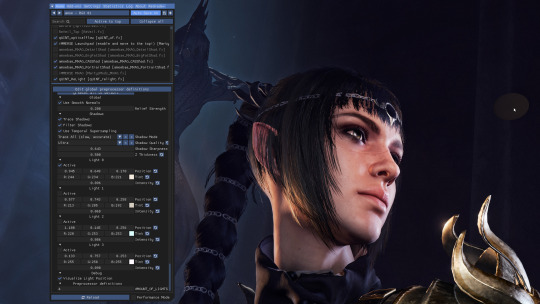
When you turn on ReLight in the ReShade menu you'll be greeted with these settings. Yours may look different because I've used it a lot and it remembers your last settings.
Take a look at the settings at the top.
Use Smooth Normals = On
Trace Shadows = On
Filter Shadows = On
Use Temporal Supersampling = On
Shadow Mode = Trace All
Shadow Quality = Ultra (change this if you get bad performance)
Shadow Sharpness = I have mine set around 0.65 but you can play around with whatever looks best
Z Thickness = Play around with this too. It controls how realistically shadows fall on and around objects
At the very bottom of the settings is Visualize Light Position. Turn this on so you can easily see where your lights are.
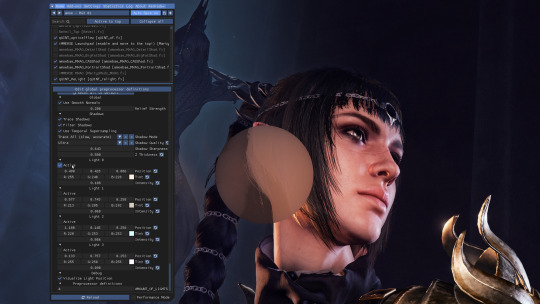
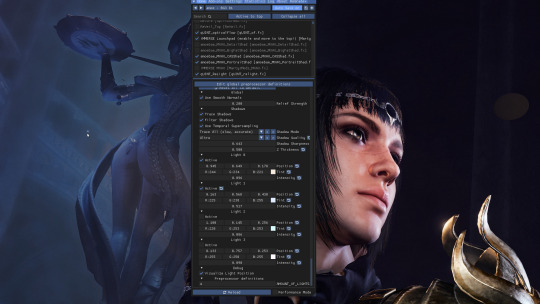
Now we can turn on one of our lights. Remember, it remembers your previous settings so yours will look different to mine the first time you use it.
Under Light 0 check the Active box.
You should see a big circle appear somewhere on the screen. If you have any object close enough to it, you should see them get brighter. If nothing is close to the circle you may not see any difference.
You can see a difference between this screenshot and the last - Shadowheart's face is brighter.
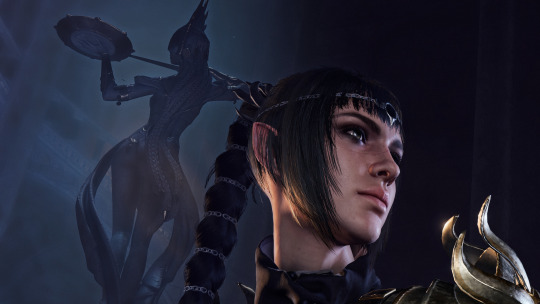
Now it's time to move the light where we want it and change it to a colour we like.
Under the Active box you'll see a row of 3 boxes containing numbers, next to the word Position. These control the coordinates of your circle of light in relation to the screen. You can place your mouse inside these boxes and move it while holding down left-click to change the value a little like a slider.
Left box = moves the circle left/right
Middle box = moves the circle up/down
Right box = moves the circle forward/back
In this shot I've moved the circle of light over to the right and a little further back so it better illuminates the front of Shadowheart's face.
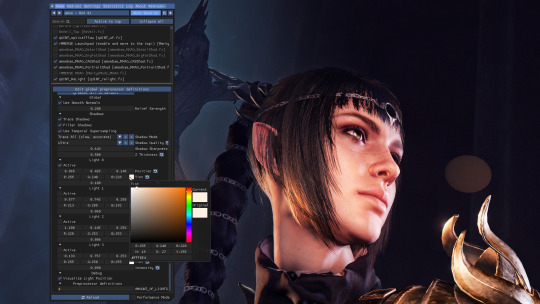
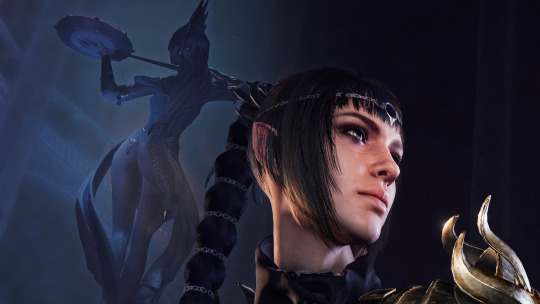
Next you can choose the colour of your light.
In the row below Position you'll see it says Tint. Click on the coloured box next to Tint and it will bring up the colour picker you see in the screenshot. Choose your colour from here. Click anywhere in the main ReShade menu to close the colour picker.
I adjusted the position and the tint a little more until I had it exactly where I wanted it. You can see a darker circle now over in the top right of the screen (my mouse cursor is hovering over it to make it easier to see).
You can use the Intensity slider (directly below Tint) to control how bright the light should be.
You may need to go back and forth between the Position, Tint, and Intensity settings until you get just the right effect.

Here's a reminder of what the picture looks like without that added light. Compare it to the screenshot above to see how great our new little light has been at helping illuminate Shadowheart.
You can turn individual lights on and off whenever you want by checking or unchecking the Active box next to the light in question. It will save your settings.
Now I want to add a second light. I've moved my ReShade window over a little so I can see what I'm doing.
I turned on the Active box under Light 1, and positioned my new light where I wanted it. Look over to the left of the statue in the background. You'll see my mouse cursor, and directly above it is a tiny blue circle. That's our second light!
The further you move the light away from the camera (using the right-hand box under Position) the smaller the circle gets, because it's further away!
I made this light blue, and I turned the intensity up quite high. This has helped illuminate the statue and added nice shadows that help give it some depth.
Here's a screenshot to remind you what everything looks like without any of the ReLight lights I added.
And here's a screenshot showing how everything looks with ReLight turned on and my two lights in action. I chose a subtle effect because I just wanted to draw attention to Shadowheart's face and to the statue behind her.
When you close the ReShade menu the circles that helped you know where your lights were will go away, but the light they cast will remain. Notice how you can't see the two circles in this shot?
You can also uncheck the Visualize Light Position box if you want to hide the circles while keeping the ReShade menu open. This can be helpful if they're obscuring parts of the scene that you need to see while you continue editing.
---
And that's it! You can add up to 4 lights and control them independently from one another. You can use them to just help illuminate a character for a portrait, to add drama with bold lighting, or to increase the realism of a scene with better shadows and light falling where you would expect it to. If you have a big fiery sword you can add a light to it that makes orange light cast onto the character who is holding it, which can look really cool. The only limit is your imagination.
(If I ever learn how to make videos I'll translate this tutorial into an easier format, but for now I hope this helps.)
683 notes
·
View notes
Text
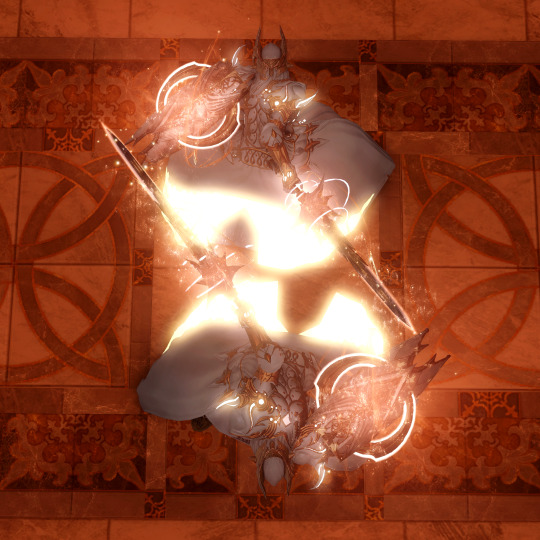
Virtual Photography Guide: Composition

One of the in-game activities I enjoy the most is trying to replicate real-life photography techniques in gpose, and it’s surprising how much can be achieved. So today, let’s play around with composition!
Leading Lines
Leading lines can help guide the viewer's eye through an image. They’re visual elements that form lines, like buildings or roads, or even an area with high contrast, like the horizon line. So by aligning convergent lines to create these ‘focal zones’ you build a sense of depth and lead the viewer's gaze toward it.


Framing
You can use elements within the scene to enclose or surround your main subject. These elements could be natural, like branches or foliage, or architectural, like doorways or windows. This adds depth and context, and helps the viewers immerse themselves in the scene:

Symmetry
Symmetry creates a pleasing sense of order and balance in an image. You can do this by dividing your frame equally and positioning similar elements on either side:

Depth and Layering
Adding depth to your virtual photographs enhances the sense of immersion. By placing objects of interest in the foreground, middle ground, and background, you can create a layered effect that adds depth and dimension to your composition. DoF (Depth of Field) shaders are particularly well suited for cases like these:

Point of View
Experimenting with different and unusual camera angles and perspectives can yield surprisingly dynamic and engaging shots. For example, positioning the camera at a low angle and looking up at the character can create a very impactful composition:
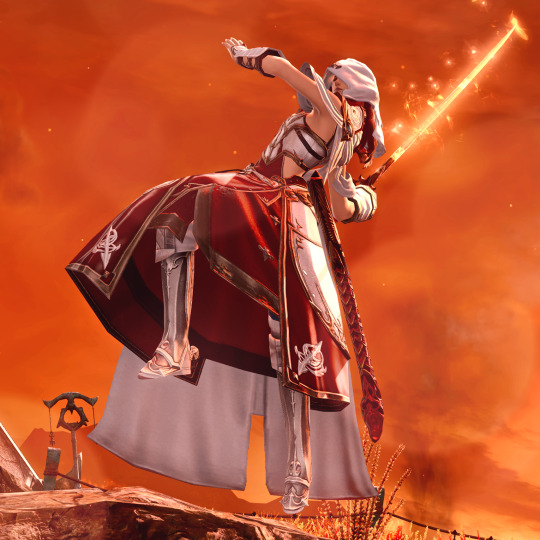


On the other hand, top-down pictures can not only give the viewer a sensation of being ‘in the scene’ but also help put elements together that would otherwise be scattered around in a horizontal shot:

Negative Space
Negative space refers to the empty or minimalistic areas in your composition. It provides breathing room for your main subject and can evoke emotions, or create a sense of balance and calmness.


And let’s not forget the most important rule of all:
Break the rules
These principles serve more as guidelines than anything. Sometimes trying to force a composition into one of those categories can detract from an unusual yet powerful shot, so trust your eye and aesthetic sense.
I'll cover more composition techniques like the Rule of Thirds, Rule of Odds, Rule of Space, Golden Ratio, and others in part 2. Enjoy!
551 notes
·
View notes
Text
PXL'S Anatomy of Screenshots
So you want to take better screenshots? There are multiple factors to consider, and if you don't enjoy tweaking reshade settings for every image, my ultimate method may not be for you. That being said, there are tips and resources in this guide that are applicable to everyone and you can select to explore those that are useful to your specific situation.
Disclaimer: I am not claiming to be an expert, nor am I offering to provide troubleshooting on an individual basis. This is a general guide and if you are unfamiliar with any of the concepts, please use the mighty power of the internet to find tutorials. I promise everything that I have learned over the years has been published and documented a thousand times better than I ever could.
There are five factors to address:
Your computer's inherent capabilities
The game's limitations
The mods you're using
Reshade
Post Processing
Graphics Card Settings & Drivers:
Become familiar with your graphic options. If you don't have a dedicated graphics card (i.e. a desktop or gaming laptop, these features may be unavailable and you should skip.)
I have an AMD Radeon Pro card which is designed for workstation level systems. It's overkill for sims, but useful for 3D rendering and modelling work. I have changed the following settings for DirectX 9 applications:
anti-aliasing - enhance application settings
anisotropic filtering - enabled
anisotropic filtering level - 16x
texture filtering quality - high
surface format optimization - high
Consider overclocking your graphics card to unlock it's full potential. DO NOT pursue this venture unless you are ok with the risk of burning out your card prematurely. I use at present, overclocked Bootcamp Drivers from BootcampDrivers.com obviously, if you're not playing on an intel based mac through Bootcamp, this is irrelevant to you.
None of these settings are useful until you address the default games limitations, which leads nicely into the next factor.
Addressing The Sims 4's Graphic Limitations:
Everyone should be familiar at this point with lighting mods, 4k, textures, disabling ssao, etc. but, I'm still going to spell it out. None of this is new information and has been covered many a time by various players ad nauseum.
remove ugly blue toned lighting in the world by choosing a lighting mod from @softerhaze here
overhaul your graphics.cfg file (i use a custom blend with features specific to me), however @simp4sims has done a ridiculous amount of work in providing a simple to install file that can be found here - read through their tutorials!! they have provided an excellent oversight of exactly what this does and why it matters
improve the indoor lighting for your sims - previously i used @luumia's no blu, no glo - recently i switched to @northernsiberiawinds better in game lighting mod here, though i have tweaked some of the settings to suit my own personal preferences
i don't use the HQ mod, i don't find that it makes enough difference for the amount of effort it requires to convert CAS CC
It should go without saying, but tweaking your graphics config file is absolutely useless if you can't play TS4 at it's maximum in game graphic settings!
The Mods You're Using:
Now that you've put in all this work into getting the game ready to make use of quality mods where do you start? Well, the CC you install matters. Whatever your preference, whether it be maxis-match, alpha or somewhere in between, priority should be given to using items textured in 2k or 4k resolutions, and specific attention should be paid to using wall and flooring textures with bump maps, and or high quality resolutions (this is important later for reshade if you intend to learn about ray tracing).
I will separately post a guide to creators with crispy textures because that is it's own novel.
Reshade:
Phew. Still with me?
There are many many many reshade presets out there, most are alike, but none employ ray tracing, and that is because a) it needs to be manually adjusted for every screenshot, b) they are paid shaders, and c) this requires advanced knowledge of reshade and a decent enough graphics set up that won't overheat - games running native ray tracing recommend a minimum VRAM of 8GB (please note RAM and VRAM are not the same) - i therefore do not recommend pursuing this option if your system does not meet those minimum requirements.
Start here to understand what ray tracing for reshade is. In my opinion, the shaders are well worth the price of $5 for the amount of work that has gone into creating them by the talented Pascal Gilcher. That link is a comprehensive starting point into expanding your knowledge of reshade and it's capabilities.
I have always created my own reshade presets from scratch, and while the core colorization settings I utilize remain largely the same, using ray tracing and re-light means every screenshot needs to be manually adjusted (lights repositioned, bounce and AO factors adjusted, etc) before being captured. @pictureamoebae just published a very timely post discussing the re-light shader and you can read it here.
Post Processing
Reshade does 99.99% of the work that traditionally would be accomplished in a photo editing software like photoshop. Occasionally, I need to adjust exposure manually, add depth of field manually, or color correct. Beyond that I use it to scale images to fit the resolution and file size limits of various platforms. Conceptually this reduces the amount of uncontrolled loss encountered when platforms like tumblr auto compress files that are too large. In reality, tumblr still makes images crappy compared to how they appear in my file folder.
optimize your images for various social media platforms using this guide
fix exposure or colorization issues using a software like photoshop
I hope that this gives you a starting point into expanding your methodologies. My process is continuously evolving and I find this aspect of the game most entertaining. For others who don't enjoy this process, it's probably not worth it!
Thanks for reading ❤ PXL
273 notes
·
View notes
Text
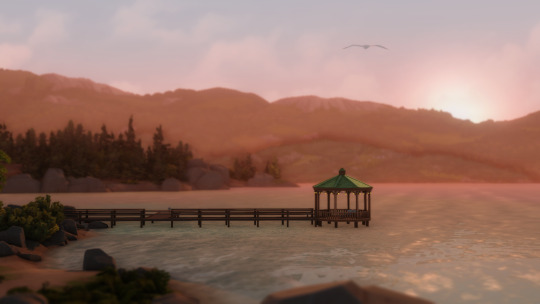
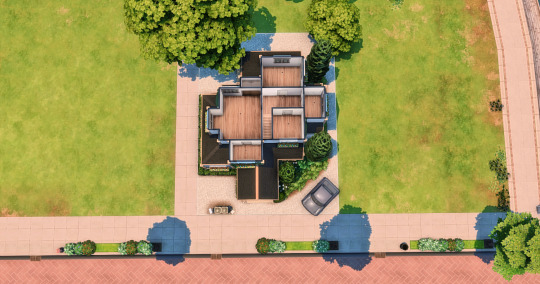
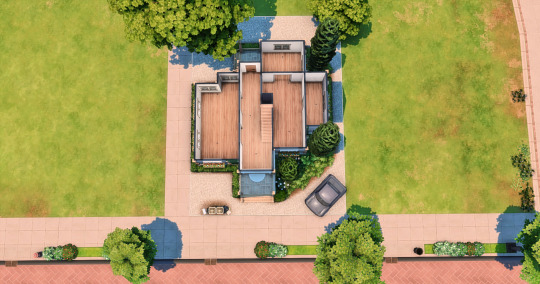
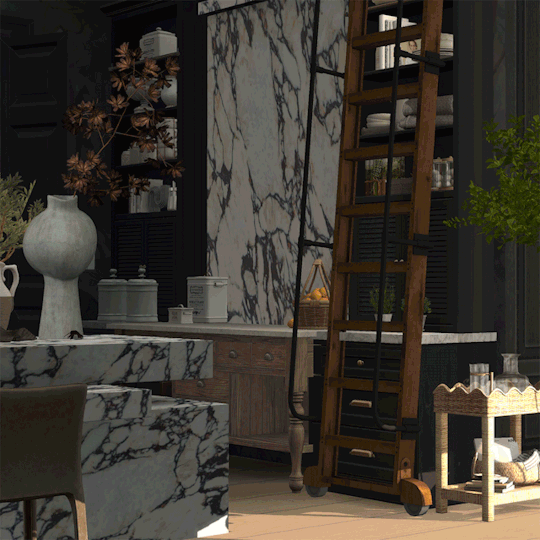
test screen shots for a preset ive been tweaking for a whole year ;-; i think im finally happy w/ it!
#copperdale + sunblind is so sexy#umm idk if ill release this i feel like its so generic since theres so many reshades out there itd be like reinventing the wheel ya know?#but also i love it and i wanna make a reshade overview yt video for it and then maybe an in depth 'how to make a preset' tutorial#ill add it to my list of things i wanna do but never hv time for#ts4 scenery#sims 4#s#simblr#also im finally in a building mood again so gameplay is on a short pause sorry yall idk how to multitask lol
88 notes
·
View notes
Photo
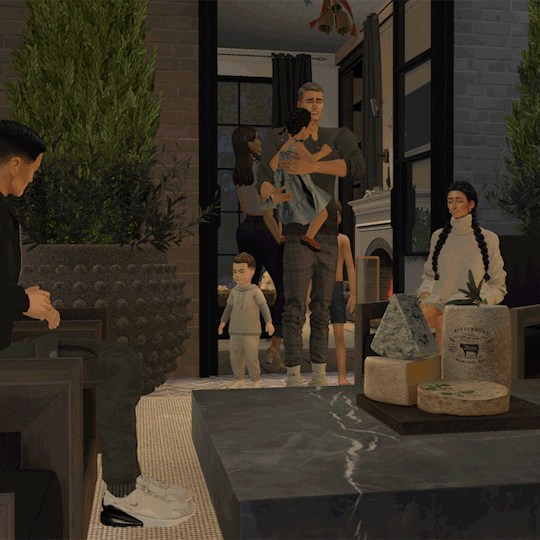
rusty always makes the best cc like idk how they do it
#they need 2 start making tutorials or something#my sims#ts4 screenies#inna cents#i updated the games graphic card to remove the ssao and holy shit why didnt i do this sooner!!!#still need to tweak the setting of reshades ssao so its not 2 dark when i zoom in on thier faces
136 notes
·
View notes
Video
youtube
Fallout 3 Dowloading and using Reshades over explained with diffrent Mods
#youtube#reshade#reshade mods#reshade modding#fallout 3 mods#fallout 3 modding#Fallout 3 mod#fallout 3 reshade mod#prey reshade#stray reshade#tutorial#reshade tutorial
0 notes
Last Seen Blogs

hellraisins
Quinton's Yarn Depot

aa-labo
AA-Labo

killingkathy
H I

roundbyroundboxing
Round By Round Boxing (RBRBoxing)

pearljam
Pearl Jam