#sims 4 custom content tutorial
Explore tagged Tumblr posts
Visit Tumblr Blog
Explore Tumblr blogs with no restrictions, modern design and the best experience.
Last Seen Tumblr Blogs


Fun Fact
Hackers stole 65M passwords from Tumblr in 2013.
Text
Sims 4 CC Tutorial: How to make a 'Neon' Wall Light
This was a tutorial I made ages ago and have lost twice due to deleting my Tumblr account. I've decided to post it on my tutorials blog where it won't get mega-deleted by accident by my stupid ass.
I un-shamefully admit to say a lot of this is based off of @/simmerkate's Neon Lights tutorial, but the reason I have made this tutorial is because of the differences in steps with my own method:
using a vector image instead of Blender Text and how to make that vector image and import it
Some people like me prefer written tutorials
How to decimate meshes and help ensure a flat, crinkle-less surface whilst also keeping polys as low as possible
How to use the base finished .package file to make other-coloured neon lights from it
I hope this tutorial is helpful to some of you. I find written tutorials much easier personally. I try to explain everything as clearly as possible.
You can download this white bird light from SFS or MediaFire. DO NOT PAYWALL ANY EDITS OR RECOLOURS OF THIS LIGHT, NO CURSEFORGE AND NO ADFLY. My Terms of Use apply. The polys are 2.5k highest.
@thefoxburyinstitute
#sims 4 cc tutorial#ts4 cc tutorial#sims 4 tutorial#ts4 tutorial#freezerbnuuy#sims 4 custom content tutorial
9 notes
·
View notes
Text
TheStarTome A Sims 4 Lightmaptex tutorial. ✨💖✨

Credits for tutorials that made this tutorial possible:
•orangemittens •@sp-creates •@alistu •sim_man123
This would not be possible without the help of
•@brainstrip •@aj-nebula •@itsonlythee-sims
I thank you all, I am ever grateful for your help!
#TheStarTome#thestartome#thestartome-tutorials#sims 4#sims 4 simblr#sims 4 custom content tutorial#the sims 4 tutorial#sims 4 cc tutorial#ts4 tutorial#sims 4 tutorial#tutorial#cc tutorial#the sims 4 custom content#content creator
14 notes
·
View notes
Text
Since the new eyelash update is here, I'm gonna teach you how to convert old eyelash cc into the new eyelash option!
First of all, we will need the Sims 4 Studio. The download link can be found here: https://sims4studio.com/board/6/download-sims-studio-open-version
Now, head into the app and click the "My Projects" button on the main menu.

Open the eyelash file (.package file) you want to convert. I'll just pick a random one for reference. Once you picked the one you want, hit open.
You will be directed into the studio, which will look like this:

Now on the right side of the screen, find the CATEGORIES button and click on it.

Once there, change the OUTFIT TYPE to MASK DETAIL EYELASHES and APPLY TO ALL SWATCHES. Save the file, and the .package file will be updated in your game. Also, make sure to double check in-game before continuing with your other custom content.

As you can see in my game, It worked! Hopefully it works for all of you, too.

And that's about it. Thanks for reading all the way.
And by the way, If you're going to distribute these publicly without the original creators consent, just don't do it. This is meant for private use only or for content creators who want to convert their eyelashes into the new eyelash section.
EDIT: As trillyke has said, This does not work with eyelashes in the glasses section as they will collide with rings and most of the accessories
#sims-4-custom-content#ts4#thesims4#customcontent#ts4cc#the sims 4 cc#the sims 4 custom content#tutorial#the sims 4#the sims community#the sims cc#sims#sims 4#simblr
4K notes
·
View notes
Text

IF YOU CAN'T ENABLE CC 🌸
Sul sul ^^
After today updates, I wasn't able to enable CC again. It doesn't matter how many times I closed and launched the game.
So I remembered that this had already happened to me before.
If you're going through the same problem, this is how you can fix it:
🌸🌸🌸🌸🌸🌸🌸🌸
HOW TO ENABLE CC AGAIN:
1- On the game home page, in the bottom right corner of the screen, you can see what the current game version is. After today's update, mine was: 1.108.318.1020. Launch the game and check the number that appears for you.
2- In your game folder (Documents>Electronic Arts> The Sims 4) you'll find a file called "GameVersion". There will be a number.
The number in that file has to match the current game version number.
When I opened mine, it was "1.107.151.1020". So I just updated it to "1.108.318.1020" and saved. Then when I launched the game I could enable CC again.
Note 1: There's a "space" before the number in "GameVersion" (as if it were a paragraph). Keep that space. Change the numbers exactly where they are.
Note 2: If you prefer, before changing the number, make a backup copy of "GameVersion" just in case. It won't harm your game, but it's better, just to prevent and make it safer.
💎 If you want a tutorial video, I made one about it some time ago. You can watch it here :)
🌸🌸🌸🌸🌸🌸🌸🌸
ALSO IMPORTANT AFTER UPDATES:
Remember to delete "localthumbcache". You can find the tutorial here.
🌸🌸🌸🌸🌸🌸🌸🌸
I'm currently checking my CC to see if they're still working.
If anything, I'll let you know :)
I hope it helps you if you're having any problems :)
Happy Simming ^^
3K notes
·
View notes
Text

hey guy's i made a quick and easy tutorial on youtube about how you can frame your sims screenshots with any cc frame you want, you don't need photoshop or any other of these overwhelmimg programs and you also don't need any kind of photo editing skills! you can find the video here. i hope it's helping some of you. love, jodie ♡
#tuts*#sims 4 mods#sims 4 cc#sims 4 simblr#sims 4 custom content#the sims 4#the sims#the sims community#sims 4 tutorial#the sims 4 custom content#sims 4 maxis match#sims custom content#sims 4#ts4 simblr#sims community#ts4
444 notes
·
View notes
Text

Quick Guide: Stay Safe While Downloading Sims 4 CC & Mods
I just published a quick guide to help you download Sims 4 CC & mods safely. ⚠️ From trusted sources to spotting red flags. Keep your game clean and secure! 😊
Read it now
#avoid malware in sims 4 mods#how to avoid malware sims 4 mods#how to download mods safely sims 4#patreon sims 4 cc download#safe sims 4 cc creators#safe sims 4 download sites#sims 4 cc best practices#sims 4 cc community guide#sims 4 cc download checklist#sims 4 cc education#sims 4 cc folder structure#sims 4 cc mod manager#sims 4 cc mod security tips#sims 4 cc mods support guide#sims 4 cc protection#sims 4 cc safe download#sims 4 cc safe hosting platforms#sims 4 cc safety guide#sims 4 cc safety tutorial#sims 4 cc virus warning#sims 4 cc zip file tips#sims 4 custom content security#sims 4 custom content tips#sims 4 mod folder organization#sims 4 mod malware prevention#sims 4 mod safety#sims 4 mod safety checklist#sims 4 modding guide#sims 4 mods antivirus#sims 4 script mod warning
281 notes
·
View notes
Text
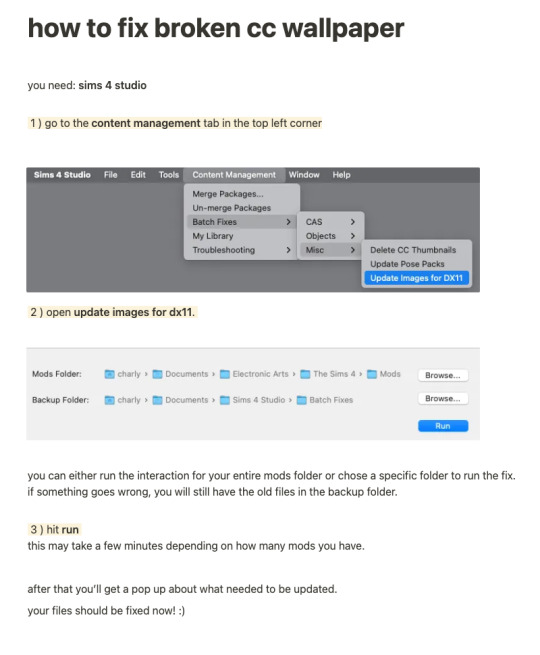
while finally (!!!) fixing my own cc for the dx11 update, i put together a little tutorial on how to fix broken cc by yourself because there might be a lot of cc you can't connect to the og creator anymore, the creator doesn't exist anymore or whatever. there's also a lot of other batch fixes in this menu tab so maybe you can even find some fixes for other cc that's been broken in your game as well :)
there's quite a few things i have to update since i didn't take proper care of some older sets as well as the recent update that stopped custom content tv's from working with the consoles in game since they got a few new interactions. so, i am onto that, too!
i will put out my own updated files asap 💛
306 notes
·
View notes
Text

Create Your Own Main Menu for The Sims 4 - Tutorial
Hey folks!
This tutorial will walk you through creating your own main menu override for The Sims 4 based on my custom repository.
_________
What is required:
JPEXS Free Flash Decompiler
Sims 4 Studio
Raster graphics editor (e.g. Photoshop, Gimp, Photopea)
Your Own Main Menu repository
_________
Step 1: Download and unzip the Your Own Main Menu repository
It's available on my Patreon page for free.
_________
Step 2: Prepare your custom images
There are two images that you need to customize:
SimMattically_YourOwnMainMenu_MainBG.pngThis is the main background image, where you want to put the desired graphic.Size: 1440px x 1200px
SimMattically_YourOwnMainMenu_BarBG.pngThis is the second background for the navigation bar on the right.Size: 480px x 1200px
Prepare your own images based on these templates. Do not change the size of the images.
Tips: If you're using a more complex background, such as a screenshot from your game, I recommend blurring the Bar_BG with a Gaussian Blur (~60px). Additionally, I suggest adding a white overlay with ~50% opacity and a 5-pixel wide white bar on the left edge with ~10% opacity. This helps improve the readability of the navigation bar buttons and adds an extra layer of detail to your menu design.

The repository also contains the optional file "SimMattically_RefreshedMainMenu_ScenarioButton.package" from my other mod, which replaces the Scenario button icon with a semi-transparent white version. It's up to you whether you want to use it.
_________
Step 3: Import the images to the .GFX file
Firstly, open JPEXS Free Flash Decompiler and then open my SimMattically_YourOwnMainMenu_Template.gfx with it.


Select "No to all" when prompted.

On the left, choose "images" and scroll to the bottom where you will see the images you just edited in their original form. Right-click on each and select "Replace." Select the custom images you prepared in step 2.


Save the file.
_________
Step 4: Import the .GFX file into the .package file.
Open Sims 4 Studio, then click on "My Projects" and open SimMattically_YourOwnMainMenu.package. Select "Scale Form GFX" (the one with the "gameentrylauncher" description) and click on "Import." Select the modified .GFX file and import it. On Windows OS, you need to switch from .binary to all file types to see the file.


Save the .package file via File -> Save As... Give it a custom name and place it in The Sims 4/Mods folder.
That's it! Enjoy!
_________
IMPORTANT INFORMATION/TERMS OF USE:
Main menu overrides can become outdated with some game updates, causing them to break the game. You will have to remake your custom main menu with a new, updated template in this case. Always make sure you are using the latest available template and that it's not outdated.
Since these mods can break the game, I do not advise sharing your custom main menus with other players. You are free to do so, but be aware that since you're relying on this repository to create your own version, you most likely won't be able to update the mod and resolve issues for other players on your own, so you take responsibility for breaking their game.
If you decide to share your version with other players, please credit my repository and link to my Patreon post.
Do not put your custom main menu based on this repository behind any paywall or early access. I made this repository and tutorial free for everyone, so keep it fair.
I do not take responsibility for people misusing this repository or breaking your game with incorrectly modified files. I do not provide support for custom main menu overrides created by other creators using this repository.
_________
#sims#thesims#thesims4#sims4#sims 4 mods#sims 4 custom content#simblr#s4cc#ts4#main menu override#sims tutorial
314 notes
·
View notes
Video
youtube
How To Convert CC Hair Sims 4 to 2| Part 1 extracting the mesh
Hey everyone just wanted to let you all know I’ve published my first episode of my new series on cc as I really just wanted to gather all the information I’ve found in my hours on research reading lots of different methods and opinions including everything especially things I struggled with, especially the milkshape section which I will be publishing next, anyways I hope someone finds this useful and yeah Keep an eye out for the next parts x
SUBSCRIBE
#youtube#sims#sims 2#sims 2 tutorial#sims 2 tutorials#sims 4 to 2#sims 4 to 2 cc#sims 4 to 2 conversion#sims 4 conversions#sims 2 conversions#sims 2 hair#sims 2 cc#sims 2 cc hair#sims hair#sims custom content#sims 2 custom content tutorial#subscribe#that one british simmer#sims 4#the sims#ts#ts2#ts2 hair#ts2 hair cc#ts2 hair custom content#ts2 cc#ts2 custom content#custom content creator#cc creator#sims cc creator
40 notes
·
View notes
Text
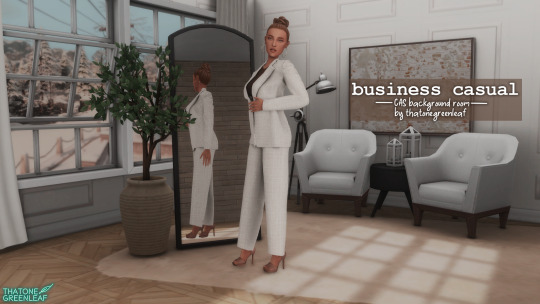
~business casual CAS background room~ (with mirror!) + tutorial!
-
A bunch of you have asked, so here it is! You can watch my tutorial on how to make your very own CAS background room with a mirror right here!
(and you can also download the room I made while filming this tutorial below!)
♥ Download the package file and put it right in your Mods folder! (up to 5 folders deep)
♥ You can only have one CAS background/room in your game at once, remove any other before putting this one in!
♥ Reflections need to be set to low, medium, or high but not OFF in your game's graphics settings for the mirror to be functional.
♥ Base Game Compatible!
♥ DX11 and DX9 compatible!
-
Follow me on twitch!
Support me on patreon!
DOWNLOAD "BUSINESS CASUAL" CAS BACKROUND ROOM ON SIM FILE SHARE!
WATCH THE TUTORIAL ON HOW TO MAKE YOUR OWN HERE!
-
TOU: do not redistribute, reupload, or claim my cc/CAS rooms/presets as your own! recolour/convert/otherwise alter for personal use OR upload with credit. (no paywalls)
♥ built using littledica's original CAS room files ♥
stuff I'm using here: reshade | cas lighting | (send an wcif if you want anything on the sim!)
#sims 4#ts4#sims4#thesims4#maxis match#maxis mix#s4cc#sims 4 cc#sims 4 custom content#cas background#sims 4 cas#cas room#ts4 cas background#sims 4 cc tutorial#cas background tutorial#cas background with mirror
373 notes
·
View notes
Text
how to create Sims 4 custom poses
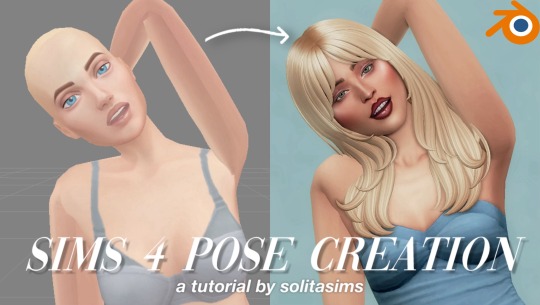
hello all! I’ve just released a new YouTube video on how to create custom Sims 4 poses in the Sims 4 with Blender & Sims4Studio. you can watch the video here if you’re interested.
if you're interested in downloading the Sabrina Carpenter "Espresso" Poses I created in this video, you can download them here.
down below is a list of all the programs needed for this tutorial. thanks for your support always!
Blender 2.70
Sims4Studio
Teleport Any Sim
Pose Player Mod
Sabrina Carpenter Sim (optional)
#solitasims#solitasims4#sims 4#the sims 4#thesims4#ts4 simblr#the sims#solita sims#sims 4 pose pack#sims 4 pose packs#sims 4 poses#sims 4 cc#sims 4 custom content#sims 4 pose creation#sims 4 tutorial#sims 4 blender#solitas poses
85 notes
·
View notes
Text

📗 The Sims 4 Flawless Posters Tutorial | Beginner Friendly
READ ON PATREON (FREE)
This is basically a comprehensive tutorial on making flawless posters. I know a lot of simmers start their modding journey with custom paintings and it can feel a bit overwhelming at first.
But don't worry, I'm here to make everything crystal clear and show you just how easy it really is. With just a little guidance, anyone can create amazing CC right from the start! So, if you’ve always wanted to make posters for The Sims 4 but didn't know how, this is your chance! 😊
I would love to hear your feedback on this tutorial! And feel free to share it with other simmers to help them create perfect posters as well!
#sims 4#sims 4 mods#sims 4 cc#ts4 cc#sims 4 sexy#sims 4 wall art#sims 4 wall decor#sims 4 aesthetic#sims 4 interior decor#sims 4 custom content#sims 4 creator#sims 4 decor#the sims 4#ts4#ts4cc#sims 4 download#sims 4 cute#ts4 deco cc#ts4 decor#simblr#sims 4 tutorial#ts4 tutorial#sims 4 how to make posters#sims 4 poster tutorial#sims 4 painting tutorial#cc tutorial#making posters is easy lol (it really is!)
78 notes
·
View notes
Text

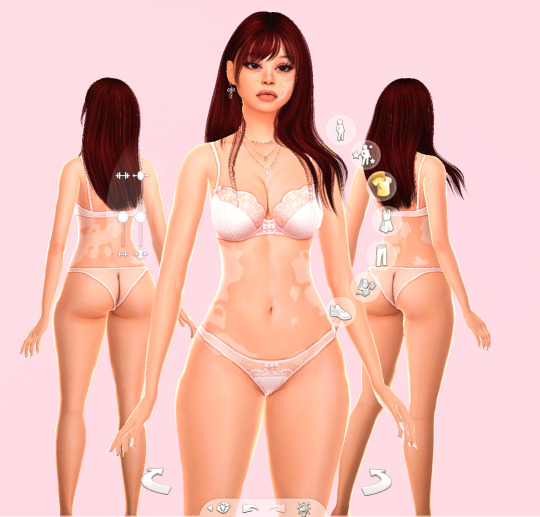
CAS UNDERWEAR OVERRIDE TUTORIAL!

faq/before you begin: This is a tutorial for personal use ONLY. If you use this tutorial DO NOT reupload your overrides unless it the original creator gives you permission to do so. reuploading a creator's custom content IS theft. I do not condone stealing cc from hard working creators, so please only use this as a tutorial for yourself! to get started, you will need: ꣑ৎ sims 4 studio ꣑ৎ the underwear you want to make your default ꣑ৎ and patience ( ,,◕ ̫ ◕,, ) this tutorial is aimed towards people who have never used ts4 studio before! so if it seems too hand holdy im sorry, i just want to make sure everyone can understand! If you don't understand something, please don't feel shy about reaching out! either through a dm or an ask! i'll be happy to help!
start by downloading TS4 studio. The process is fairly simple, but if you get stuck here's a great tutorial you can follow!
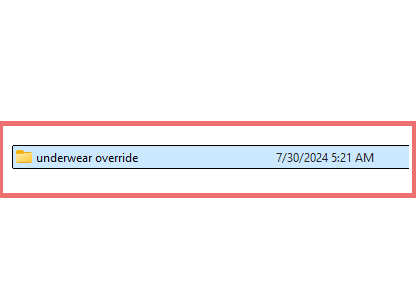
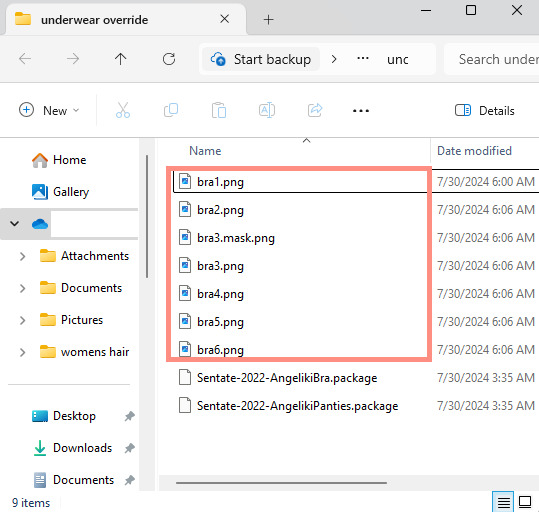
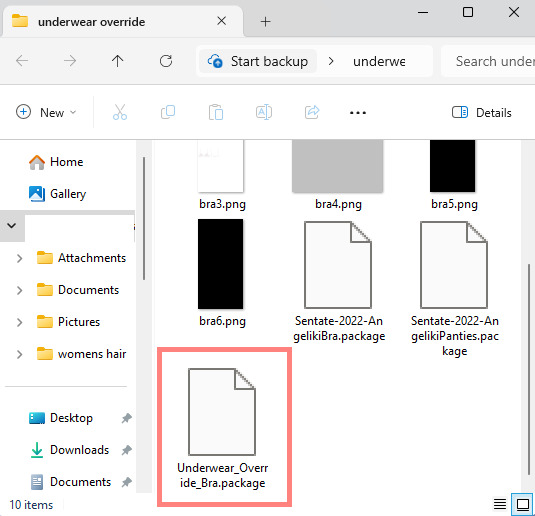
once you have it all installed, you'll want to make a folder on your desktop. This is just for organization purposes, to make digging for the files easier later on:
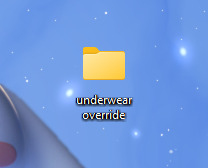
here's an example of what i named my folder! for simplicity's sake though, i'll be referring to the desktop folder as the "underwear override" folder, but you can name yours whatever you want! Just make sure its on your desktop~ ( ˶ˆᗜˆ˵ )
────୨ৎ────────୨ৎ────────୨ৎ────────୨ৎ────
next you'll want to find the underwear you'd like to make a default replacement. I'm using the Sentate's Angeliki set (bra and panties) from their midnight collection found HERE. (Also a gentle reminder, this is for PERSONAL USE only. Sorry i keep repeating this, i'd just hate for people to use this tutorial for bad 。°(°.◜ᯅ◝°)°。 )
any underwear SHOULD work, unless the underwear you pick has 3D pieces. I wish i could explain why, but i honestly have no clue. Im a noob at this haha. Just make sure your mesh isn't 3D!
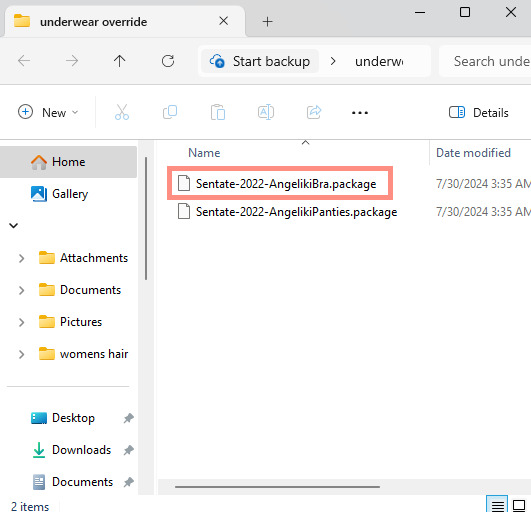
once you have the undies of your choice secured, go ahead and place both into the "underwear override" folder on your desktop! (photo below)
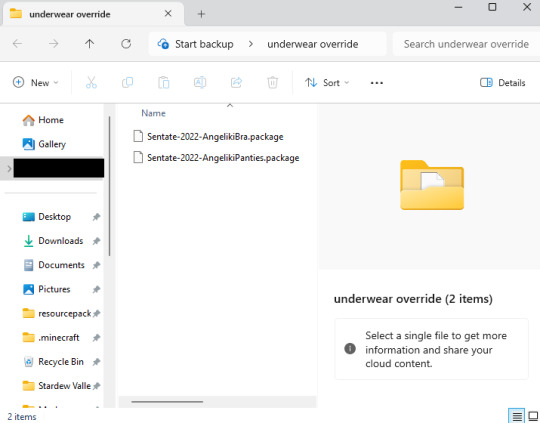
────୨ৎ────────୨ৎ────────୨ৎ────────୨ৎ────
now it's time for the fun part! You'll go ahead and open sims 4 studio, once in there, you'll want to click where it says "my projects" (photo below)
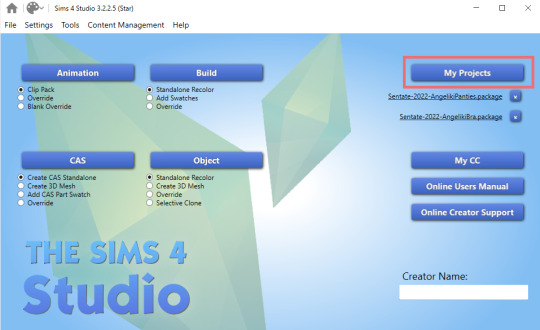
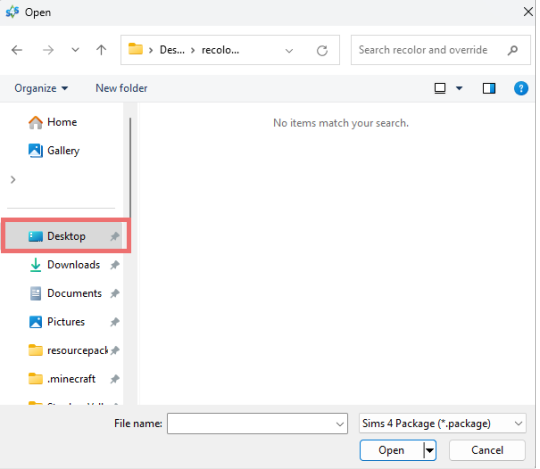
Once you do that, your files should all pop up. It doesn't matter where it takes you, you'll just want to find the "desktop" section of your file menu! Then, you'll find the "underwear override" folder and open that~ Now you'll just go ahead and open the package that you want. I'm going to start with the bra, but the process for the underwear is exactly the same! so it doesn't matter which one you choose to do first ദ്ദി ˉ͈̀꒳ˉ͈́ )✧ (photo below)
────୨ৎ────────୨ৎ────────୨ৎ────────୨ৎ────
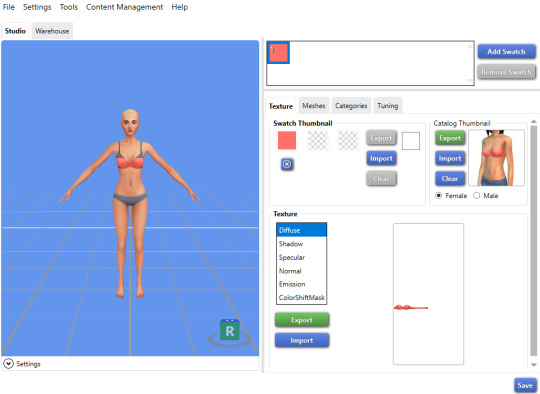
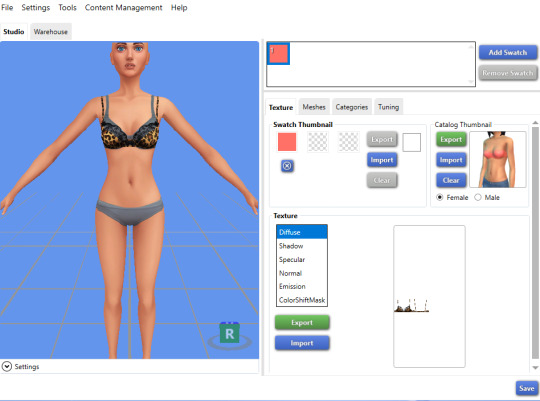
if you did it right, your screen should look similar to mine! ¡¡¡( •̀ ᴗ •́ )و!!! (photo below)
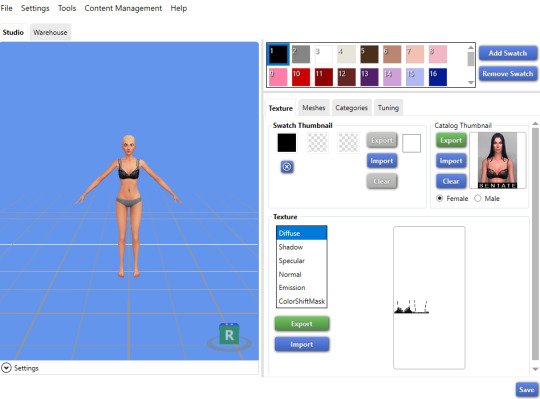
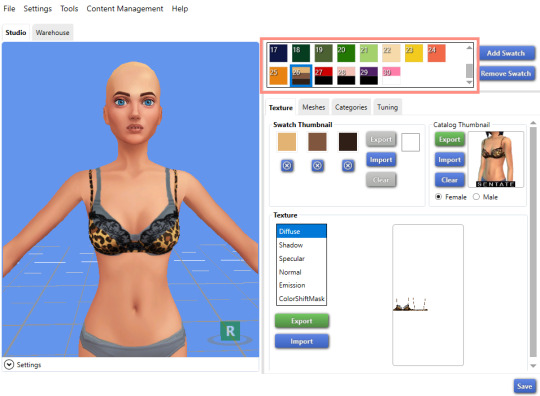
now, you'll just want to select the swatch you'd like at the top! (if you've never used the sims 4 studio before, you can use your mouse wheel and the right mouse button to control the camera in the blue area with the weird bald sim lol- that way you can see the swatch you're picking a bit better! (photo below)
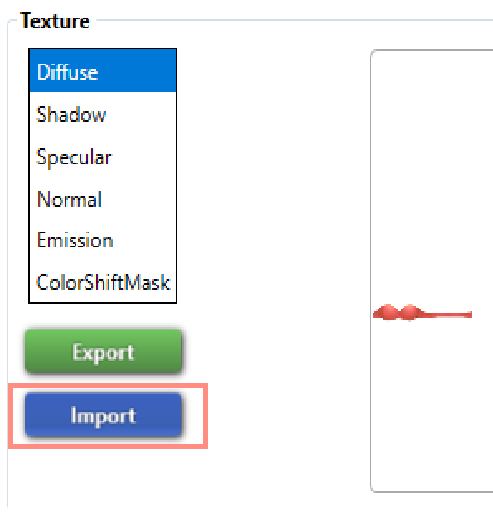
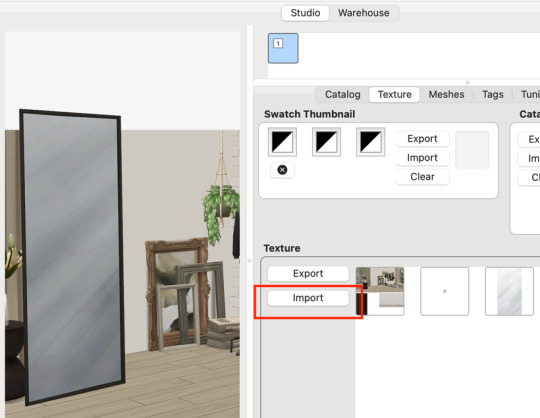
now that you have the swatch you like, in the texture setting, diffuse should already be selected. You'll want to go ahead and click "Export", then name the file "bra1". If you did it correctly, it should save as a PNG! (photo below)

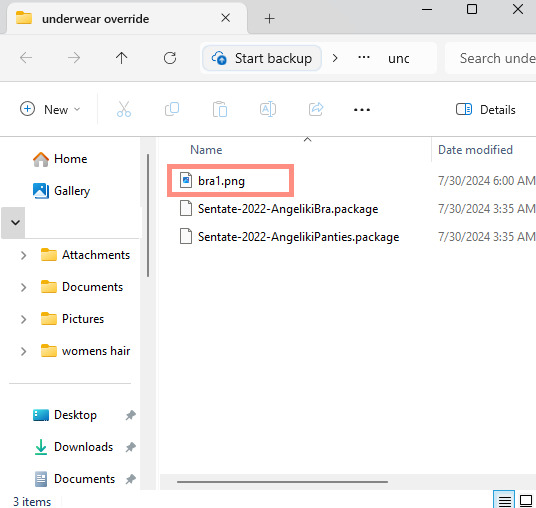
then, you'll want to go down the line of textures (shadow, specural, normal, emission, colorshiftmask) and continue to number them (EX: shadow is bra2, specural is bra3, ect ect) til your folder is full with each texture! It should look like this if you've done it right! (photo below)
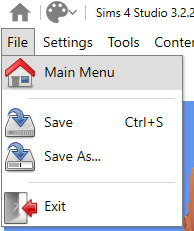
after you're done with that. You'll go ahead and click "File" and "main menu" in your sims 4 studio! (no need to save!) from here, you'll go ahead and select "Override" under the CAS section on the main menu then click the CAS button at the very top. (photo below)

the menu here might look confusing if you've never used sims 4 studio before, but just copy the way mine looks to make the process a bit easier! At the top drop down menus, you'll want to select "Gender: female, Age: Adult, Part Type: Clothing Top, Game Pack: base game" This should narrow down the menu a bit! (photo below)

then, you'll scroll til you find THIS exact bra. This is the bra the sims 4 uses as their default, and we're overriding this, so please be sure to select the exact one! (photo below)

once you select it, click "next", and it should take you to your files once more. You'll want to name THIS file something unique, that way there's no conflicts! I suggest something like: "Underwear_Override_Bra" just so you know which one you're working on, and you also know that this is an override (๑˃́ꇴ˂̀๑)
once you've named your package at the bottom, go ahead and click enter, and the studio should open back up~ (photo below)

now, you'll want to repeat the same export process from before, but use import instead! Then, you'll import the pngs the same way you saved them. (EX: diffuse is bra1, shadow is bra2, ect). Once you've done that, you should immediately see the textures change (photo below)
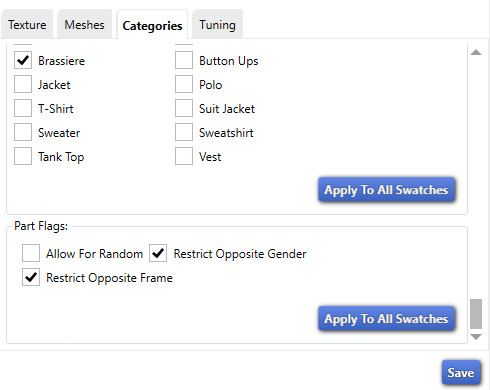
now that your textures are changed, you'll want to make sure to catagorize it properly, just to prevent your male sims from getting a bra when you take their shirt off as well. If you for some reason want your male sims to have an unremoveable bra, feel free to skip this step! if not, then you'll want to click the "catagories" tab right beside "meshes"
once there, you'll scroll all the way to the bottom til you hit "Part Flags", then you'll check "restrict opposite gender" and "restrict opposite frame" (i'm not sure if these mean the same thing, but i just checked both to be extra sure!) (photo below)

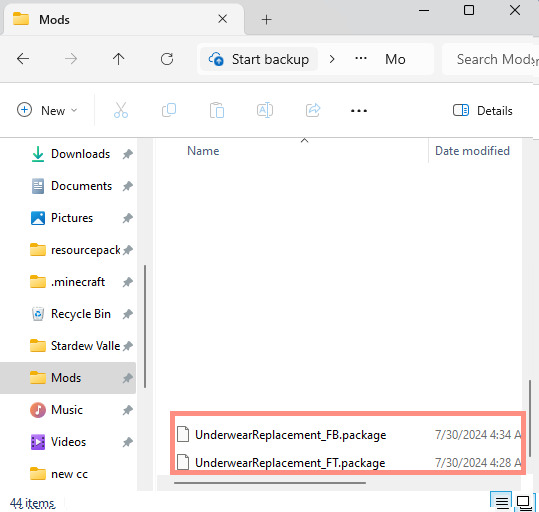
once you've finished replacing all the textures and catagorizing the override, you'll go ahead and click the save button at the bottom right hand corner, then open your "Underwear Override" folder. You should have your "Underwear_Override_bra" package now saved! yay! All that's left to do is repeat these steps with the panties of your choice, then drag both package files into your mods folder just like you would any other cc! (photo below)
(mine are named differently because i already made my own recolors + default replacements ( 〃..).. i'll try and upload a recolor tutorial later today for anyone curious!)
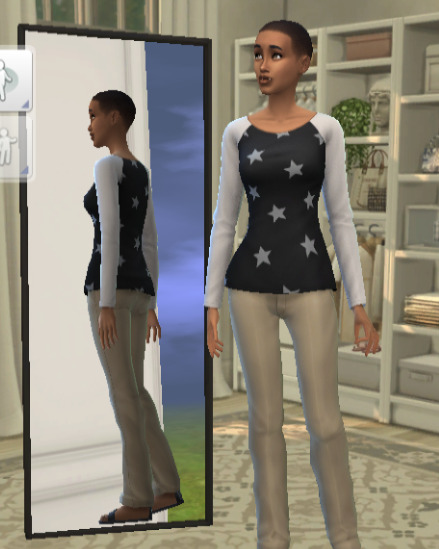
but now, you're done! all that's left to do is open your game and see your overrides in cas! If you did everything correctly, the undies should just appear when you take your sim's clothes off (⁄ ⁄•⁄-⁄•⁄ ⁄)
heres how mine turned out! (˵ •̀ ᴗ •́ ˵ ) ✧ im super proud of them!
it took me a few hours to get this tutorial together, so im a bit loopy signing off. If this is completely incomprehensible and confusing im so sorry, again if anyone has questions please do send an ask or message me! i'll do my best to answer any questions :) and also please remember; DO NOT REUPLOAD ANYONE ELSES CUSTOM CONTENT! this is for PERSONAL USE!
thank you for reading! (。•̀ᴗ-)✧
#the sims 4#ts4#sims4#maxis match#maxis mix#s4cc#sims 4 cc#ts4 cc#sims 4 custom content#cc tutorial#cc rec#cc cas#sims 4 cas#sims tutorial
91 notes
·
View notes
Text
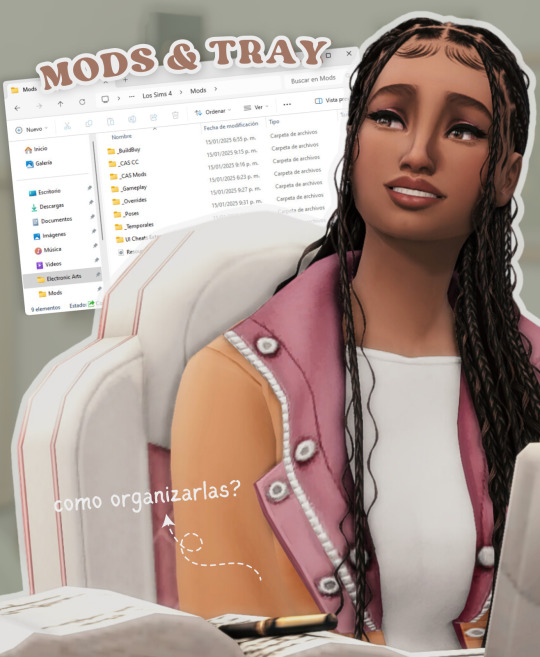
todo lo que necesitas saber sobre las carpetas mods y tray en los sims 4
aprende cómo usar y organizar las carpetas mods y tray en los sims 4 para personalizar tu juego y compartir tus creaciones fácilmente. no te pierdas los próximos videos!
ver video aquí
#ver video#the sims 4#los sims 4#sims 4#the sims#sims#ts4#ts4 cc#simmer#simblr#ts4cc#ts4mm#ts4 custom content#the sims 4 custom content#sims 4 custom content#sims 4 cc#sims 4 maxis match#cc finds#ts4 cc finds#tianaberrie#cc haul#sims 4 aesthetic#maxis match#sims 4 tutorial#sims 4 2025#sims 4 serie#ts4 tutorial#los sims 4 tutorial#sims 4 mods#sims 4 tray
29 notes
·
View notes
Text
Tutorial: How to Make a CAS Background With Functional Mirror
Overview
This is something that has been highly requested so I hope this tutorial will be helpful for the sims 4 cc community!
This tutorial will have 2 parts for creating 2 different types of CAS "room" backgrounds. Part 1 (The Easy Way) uses a template I created for you to use your own 2D images/screenshots with a simple rectangular mirror. Part 2 (The 3D Room) will result in a better quality background, but it’s not a beginner friendly project so I don’t recommend trying it if you’ve never made any cc before. I will not cover the basics of cc making here, only what’s relevant to making a CAS bg using my template specifically. The Sims 4 Studio forum has a ton of great tutorials for everything else.
In my own research & experimentation, I noticed that (as far as I can tell) EVERY other CAS room with a functional mirror seems to be derived originally from LittleDica's CAS room [link] I want to acknowledge credit to LittleDica for their CAS background which I studied as a reference. But to be clear this tutorial and my templates are NOT derived from another creators' work; I created mine from scratch and it took a lot of time and effort. My version is much more simple and more compatible with Sims 4 Studio because there are no extra mesh groups or diffuse maps. I also made a great effort to make the reflection in the mirror more realistic for the size of the room. I hope you will be able to use this resource to create your own beautiful CAS backgrounds! ♥
Also in case you missed it, you can download my CAS background used in the preview [here] (it is slightly different from the template package.)
Requirements:
Sims 4 studio
Image editor (Ideally photoshop)
my templates (attached below)
—————
Part 01: The Easy Way
The easiest way to create a CAS background with mirror is to use my attached templates.
The PSD template is the best option, but for those of you that don’t have Photoshop, there is a PNG version as well.
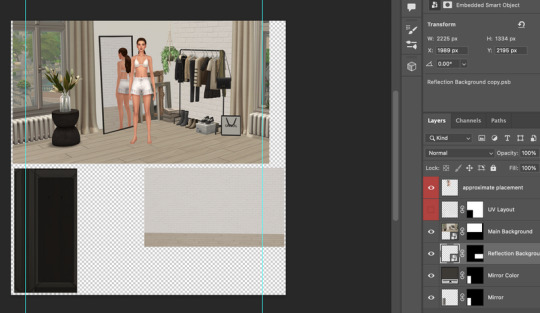
You will need 2 images; one for the main background, and one that will be reflected in the mirror. The large top area is the main background, and the smaller rectangle at the bottom is what will be reflected in the mirror behind your sim.
In the image editor, paste your images and resize them to fit into the outlined areas.
For framing your screenshots, it’s important to understand that the mirror is actually just floating in space in front of a flat background. That means you’ll have to fake the perspective a bit and that may require some trial and error to get right. I recommend taking multiple screenshots at a variety of angles so you have options to work with. Use the model sim as a guide to help you with placing your background image. (Don’t forget to hide the model sim and UV layout when you’re done!)
Save as .PNG or .DDS and import it into the template package in Sims 4 Studio.
That’s it! My goal was to make it super easy for you. Remember to only use one CAS background in your mods folder at a time since it's an override. Also note that it is not compatible with 'cas blob remover' since the instance for the dropshadow is now used as the mirror.
TOU — PLEASE READ:
I give permission to the Sims community to use my template files and modify them as needed to create your own CAS backgrounds. This took months of work, researching and experimenting, so please respect the effort I put into creating this resource by agreeing to these simple terms:
Don’t re-upload my files. Don’t claim my work as your own. If you use my templates for your cc, please share credit with my username (Lijoue) and link to my Patreon page. If you make any money from cc created with my templates, please consider making a donation via my Patreon. It is greatly appreciated.
download template files here
Part 02: The 3D Room
to be continued…
This part will take more time to finish because there’s a lot more steps involved in creating a 3D CAS room. In the meantime, the template should be enough of a starting point for those of you that already know how to make cc objects, since I already handled the hardest parts. Just understand that the mirror reflection is not automatically calculated, meaning that if you move the mirror in the mesh, you will need to change the Mirror Plane Normal and Mirror Plane Offset in S4Studio Warehouse to match the new angle or position. Otherwise it may look unrealistic or worse, it could reflect the eerie wasteland world that the CAS room is set in. (pictured below)
#sims 4 creator#sims 4 tutorial#the sims cc#ts4 maxis cc#maxis match cc#sims 4 maxis match#ts4 tutorial#sims 4 studio#ts4 custom content#ts4 cc#cas backgrounds#sims 4 cas
215 notes
·
View notes
Text
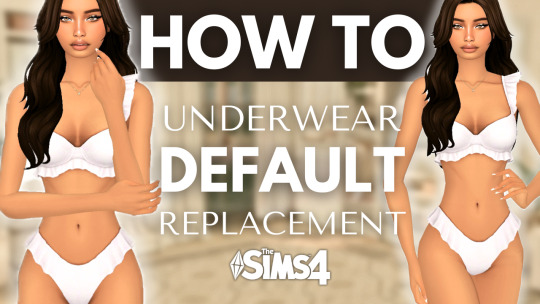
How to create Underwear Default Replacement from ANY CC | Sims 4 CAS | (Also for WW!)
Hello, my loves! ☁️🍸 In today's video, I'll be guiding you through a step-by-step tutorial on creating a Sims 4 underwear default replacement. Get ready to follow along as we customize and personalize your game like never before! Let’s dive in! ✨
You can watch the video here: [x]
I am using examples from @sentate and @bbygyal123 🤍
#the sims 4#sims 4#the sims#sims 4 mods#sims 4 cc#sims 4 custom content#sims 4 maxis match#sims 4 best cc#sims 4 cc finds#sims 4 cc haul#how to make underwear default replacement#underwear cc#how to underwear cc#sims 4 tutorial#sims 4 video#sims 4 youtube
23 notes
·
View notes