#unity shader graph
Explore tagged Tumblr posts
Visit Tumblr Blog
Explore Tumblr blogs with no restrictions, modern design and the best experience.
Last Seen Tumblr Blogs


Fun Fact
Celebrities use Tumblr as well.
Text
youtube
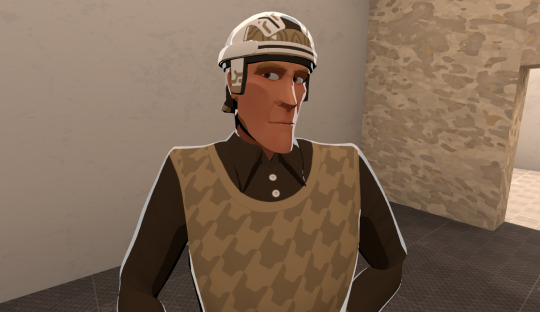
If you are interested in getting a VRChat avatar like this,
please visit my Commission page down below!
👇👇👇
[ https://vgen.co/UberTheMeh ]
👆👆👆
I made a VRChat avatar with a custom shader that changes sprite based on the camera angle!
It was made with Unity's ShaderGraph, which I am planning to share it publically soon.
I have yet to test it with a quest build, which im not sure will work fine with custom shaders.
#myart#my art#vrchat#vrchat avatar#vrchat model#2D art#2d animation#unity#unity shaders#unity shader graph#comissions#commissions#Youtube
13 notes
·
View notes
Text
I'm actually getting pretty into Unity Shaders. Wish I had realized they weren't so scary before now. Unfortunately I'm apparently the ONLY PERSON at my school who's interested in them, everyone else is into Unreal, so I'm having to figure out a lot of this stuff on my own.
4 notes
·
View notes
Text
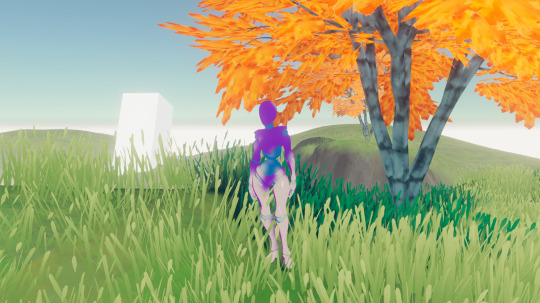
3D background made with Unity for Wallpaper Engine
Took the original N64 model with 660 tris and carefully smoothed and added to the asset, ending with 3200 tris. Applied this concept to similar models from the N64 game. Upscaled all textures or applied new ones. Created animations for the scene. Built shaders with Shader Graph. Songs done with BeepBox.
This was a mockup project to explore Ocarina of Time assets in a modern engine, where I recreated the atmosphere as accurately as possible using in-game screenshots.
There is an easter egg when Link plays his ocarina. Song of Storms will trigger a storm and the plants and his tent will blow in the wind.
#unity#gaming#legend of zelda#3d#animation#background#wallpaper engine#wallpaper#shader#shader graph#hd#camping#fire#navi#song of storms
0 notes
Text
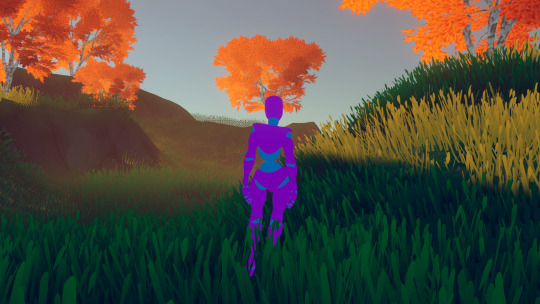
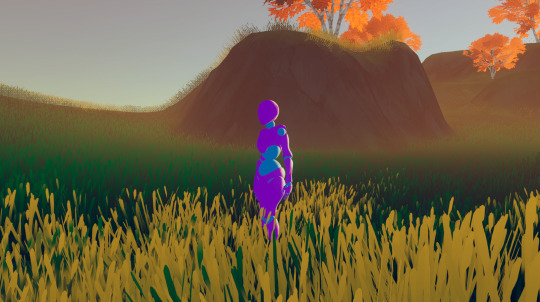
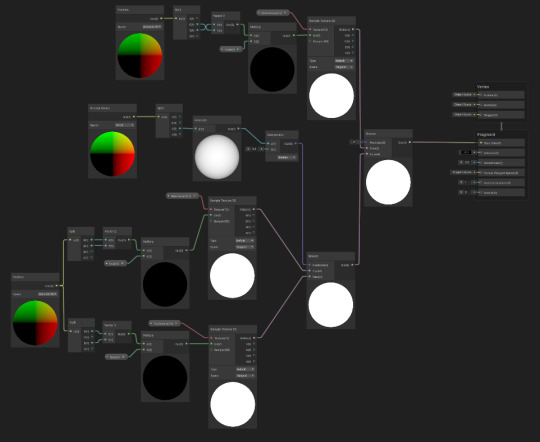
My model appeared on the Tumblr radar! I appreciate all the comments! It was interesting to hear that multiple people didn't realize it was a 3D model. I work a full-time job and modeling in Blender is one of my hobbies. Whenever I look back at my earliest models, I'm always shocked at my improvement. I look forward to seeing where I'll be at a year from now.
Multiple people asked how I was able to get my cel shader to look good. I've learned a lot from watching multiple videos and reading various blogs over the years. Here are a few things that I did for this model.
To start, here is how my shader graph looks like.
I have the Layer Weight plugged into the Color Ramp. This creates a soft outline around the model so that when objects of the same color overlap, it doesn't look flat. I've been experimenting with the options, but as of now, I like the way the B-Spline option looks.
Something else that I change is the shadow color on the color ramp. By default, it's set to black. This always felt dull to me, so I will usually change it to a magenta or purple. I also keep an Emission node ready so I can switch the model to all white. This mostly helps when modeling so I can see how the light will interact with the model in this style. Adjusting the settings of the light also improves the shadows.
Also, change the Color Management from Filmic to Standard. This ensures that the colors you're using to paint your model will look the same in the viewport. This option can be found at the bottom of the Render Properties.
Check out these resources for more useful tips. Also, the props are from a Synty pack. I picked them up years ago when they were on sale.
Anime Shading In Blender (INTRODUCTION) Lightning Boy Shader - Beginner Guide - Shading & Modeling Tips
Synty™ Store - 3D Assets for Games (Unity + Unreal) – Synty Store
#3dmodeling#character modeling#cel shaded#blender3d#character design#character art#plus size art#tutorial#blender#original character
122 notes
·
View notes
Text
I had a bit of a breakthrough with learning Shader Graph and finally figured out how to combine my outline shader with my shadow shader. And as a bonus treat I got the water shader working! (Thank you Unity tutorials!!)
And I started building up the background environments to make it look prettier to look at. (The most important part, heehee)
Next up I'll start to decorate and really build out the different paths you can walk around next!
13 notes
·
View notes
Text
Currently trying to learn hlsl. Specifically the syntax, in the context of Unity.
I hate my fucking job. The syntax is barley readable and any intuition I build on it is thrown out the window 5 minutes later. Documentation has no examples nor does it says if imports are necessary for using specific functions. Extremely importants details are mixed in with shit that are absolutely useless, so removing anything to see a change vary from doing nothing to destroying the whole thing. With minimal feedbacks on errors. I just want a stretched out noise function I know all the maths behind it implementing it shouldn't be that hard.
I'm trying to get away from graph shaders because 1) they are incomplete 2) any math expression becomes 90% of the screen in a huge pile of mess 3) they make "code" reuse extremely hard 4) they??? are??? incomplete??? 5) really specific math things becomes hell with them
I get the feeling that so many people develop wonderful projects and then show their hatred for it by making sure the least number of people can genuinely access and enjoy it.
If someone finds a comprehensive tutorial on the subject, I will perform any sexual favor of your choosing*
I will now scream into the void** for the next 2 hours.
*offer not legally binding. Consent may be retracted at a further point with no guarantee for a refund. Ask your doctor is this offer is fit for you
**a pillow
24 notes
·
View notes
Text
VR observations, 10 months in
I've been a game dev for 10 months now. It's pretty great, I'm enjoying it a lot, I get to spend my days doing crazy shader shit and animations and voxels and visual effects. Hopefully the game that will come out of all this will be one people enjoy, and in any case I'm learning so much that will eventually come back to the personal ~artistic~ side of things. I can't talk about that game just yet though (but soon it will be announced, I'm pretty sure). So this is a post about other games.
Mind you, I don't actually play very many VR games, or games in general these days, because I'm too busy developing the dang things. but sometimes I do! And I think it's interesting to talk about them.
These aren't really reviews as such. You could project all sorts of ulterior motives if it was. Like my livelihood does sorta depend on people buying VR headsets and then games on them. This is more just like things I observe.
Headsets
The biggest problem with VR at the moment is wearing a headset for too long kinda sucks. The weight of the headset is all effectively held on a lever arm and it presses on your face. However, this is heavily dependent on the strap you use to hold it to your head. A better balanced and cushioned strap can hold the headset still with less pressure and better balance the forces.
The strap that comes with the Quest 3 is absolute dogshit. So a big part of the reason I wouldn't play VR games for fun is because after wearing the headset for 30-60 minutes in the daily meeting, the absolute last thing I'd want to do is wear it any longer. Recently I got a new strap (a ~£25 Devaso one, the low end of straps), and it's markedly improved. It would probably be even better if I got one of the high end Bobo straps. So please take it from me: if you wanna get into VR, get a decent strap.
I hear the Apple Vision Pro is a lot more comfortable to wear for long periods, though I won't have a chance to try it until later this month.
During the time I've been working at Holonautic, Meta released their Quest 3, and more recently Apple released their hyper expensive Vision Pro for much fanfare.
The Quest 3 is a decent headset and probably the one I'd recommend if you're getting into VR and can afford a new console. It's not a massive improvement over the Quest 2 - the main thing that's better is the 'passthrough' (aka 'augmented reality', the mode where the 3D objects are composited into video of what's in front of you), which is now in full colour, and feels a lot less intrusive than the blown out greyscale that the Quest 2 did. But it still has some trouble with properly taking into account depth when combining the feeds from multiple cameras, so you get weird space warping effects when something in the foreground moves over something in the background.
The Vision Pro is by all accounts the bees knees, though it costs $3500 and already sold out, so good luck getting one. It brings a new interaction mode based on eye tracking, where you look at a thing with your eyes to select it like with a mouse pointer, and hold your hands in your lap and pinch to interact. Its passthrough is apparently miles ahead, it's got a laptop tier chip, etc etc. I'm not gonna talk about that though, if you want to read product reviews there are a million places you can do it.
Instead I wanna talk about rendering, since I think this is something that only gets discussed among devs, and maybe people outside might be interested.
Right now there is only one game engine that builds to the Vision Pro, which is Unity. However, Apple have their own graphics API, and the PolySpatial API used for the mixed reality mode is pretty heavily locked down in terms of what you can do.
So what Unity does is essentially run a transpilation step to map its own constructs into PolySpatial ones. For example, say you make a shader in Shader Graph (you have to use shader graph, it won't take HLSL shaders in general) - Unity will generate a vision pro compatible shader (in MaterialX format) from that. Vertex and fragment shaders mostly work, particle systems mostly don't, you don't get any postprocessing shaders, anything that involves a compute shader is right out (which means no VFX graph), Entities Graphics doesn't work. I don't think you get much control over stuff like batching. It's pretty limited compared to what we're used to on other platforms.
I said fragment shaders mostly work. It's true that most Shader Graph nodes work the same. However, if you're doing custom lighting calculations in a Unity shader, a standard way to do things is to use the 'main light' property provided by Unity. On the Vision Pro, you don't get a main light.
The Vision Pro actually uses an image-based lighting model, which uses the actual room around you to provide lighting information. This is great because objects in VR look like they actually belong in the space you're in, but it would of course be a huge security issue if all programs could get realtime video of your room, and I imagine the maths involved is pretty complex. So the only light information you get is a shader graph node which does a PBR lighting calculation based on provided parameters (albedo, normal, roughness, metallicity etc.). You can then instruct it to do whatever you want with the output of that inside the shader.
The upshot of this is that we have to make different versions of all our shaders for the Vision Pro version of the game.
Once the game is announced we'll probably have a lot to write about developing interactions for the vision pro vs the quest, so I'll save that for now. It's pretty fascinating though.
Anyway, right now I've still yet to wear a Vision Pro. Apple straight up aren't handing out devkits, we only have two in the company still, so mostly I'm hearing about things second hand.
Shores of Loci

A few genres of VR game have emerged by now. Shooting and climbing are two pretty well-solved problems, so a lot of games involve that. But another one is 3D puzzles. This is something that would be incredibly difficult on a flat screen, where manipulating 3D objects is quite difficult, but becomes quite natural and straightforward in VR.
I've heard about one such game that uses 3D scans of real locations, but Shores of Loci is all about very environment artist authored levels, lots of grand sweeping vistas and planets hanging in the sky and so on. Basically you go through a series of locations and assemble teetering ramshackle buildings and chunks of landscape, which then grow really big and settle into the water. You can pull the pieces towards you with your hand, and then when you rotate them into roughly the right position and orientation relative to another piece, they snap together.

It's diverting, if kinda annoying when you just can't find the place the piece should go - especially if the answer turns out to be that there's an intermediate piece that floated off somewhere. The environments are well-designed and appealing, it's cool to see the little guys appearing to inhabit them. That said it does kinda just... repeat that concept a bunch. The narrative is... there's a big stone giant who appears and gives you pieces sometimes. That's it basically.
Still, it's interesting to see the different environment concepts. Transitions have this very cool distorted sky/black hole effect.
However, the real thing that got me with this game, the thing that I'm writing about now, was the water. They got planar reflections working. On the Quest! This is something of a white whale for me. Doing anything that involves reading from a render texture is so expensive that it's usually a no-go, and yet here it's working great - planar reflections complete with natural looking distortion from ripples. There's enough meshes that I assume there must be a reasonably high number of draw calls, and yet... it's definitely realtime planar reflections, reflections move with objects, it all seems to work.
There's a plugin called Mirrors and Reflections for VR that provides an implementation, but so far my experience has been that the effect is too expensive (in terms of rendertime) to keep 72fps in a more complex scene. I kind of suspect the devs are using this plugin, but I'm really curious how they optimised the draw calls down hard enough to work with it, since there tends to be quite a bit going on...
Moss
This game's just straight up incredibly cute.
youtube
Third person VR games, where you interact with a character moving across a diorama-like level, are a tiny minority of VR games at the moment. I think it's a shame because the concept is fantastic.
Moss is a puzzle-platformer with light combat in a Redwall/Mouse Guard-like setting. The best part of Moss is 1000% interacting with your tiny little mousegirl, who is really gorgeously animated - her ears twitch, her tail swings back and forth, she tumbles, clambers, and generally moves in a very convincing and lifelike way.
Arguably this is the kind of game that doesn't need to be made in VR - we already have strong implementations of 'platformer' for flatscreen. What I think the VR brings in this case is this wonderful sense of interacting with a tiny 3D world like a diorama. In some ways it's sorta purposefully awkward - if Quill walks behind something, you get a glowing outline, but you might need to crane your neck to see her - but having the level laid out in this way as a 3D structure you can play with is really endearing.
Mechanically, you move Quill around with the analogue stick, and make her jump with the buttons, standard stuff. Various level elements can be pushed or pulled by grabbing them with the controllers, and you can also drag enemies around to make them stand on buttons, so solving a level is a combination of moving pieces of the level and then making Quill jump as appropriate.
The fact that you're instantiated in the level, separate from Quill, also adds an interesting wrinkle in terms of 'identification with player character'. In most third person games, you tend to feel that the player character is you to some degree. In Moss, it feels much more like Quill is someone I've been made responsible for, and I feel guilty whenever I accidentally make her fall off a cliff or something.
A lot is clearly designed around fostering that protective vibe - to heal Quill, you have to reach out and hold her with your hand, causing her to glow briefly. When you complete some levels, she will stop to give you a high five or celebrate with you. Even though the player is really just here as 'puzzle solver' and 'powerful macguffin', it puts some work in to make you feel personally connected to Quill.
Since the camera is not locked to the character, the controls are instead relative to the stage, i.e. you point the stick in the direction on the 2D plane you want Moss to move. This can make certain bits of platforming, like moving along a narrow ledge or tightrope, kinda fiddly. In general it's pretty manageable though.
The combat system is straightforward but solid enough. Quill has a three button string, and it can be cancelled into a dash using the jump button, and directed with the analogue stick. Enemies telegraph their attacks pretty clearly, so it's rarely difficult, but there's enough there to be engaging.
The game is built in Unreal, unlike most Quest games (almost all are made in Unity). It actually doesn't feel so very different though - likely because the lighting calculations that are cheap enough to run in Unity are the same ones that are cheap enough to run in Unreal. It benefits a lot from baked lighting. Some things are obvious jank - anything behind where the player is assumed to be sitting tends not to be modelled or textured - but the environments are in general very lively and I really like some of the interactions: you can slash through the grass and floating platforms rock as you jump onto them.
The story is sadly pretty standard high fantasy royalist chosen one stuff, nothing exciting really going on there. Though there are some very cute elements - the elf queen has a large frog which gives you challenges to unlock certain powers, and you can pet the frog, and even give it a high five. Basically all the small scale stuff is done really well, I just wish they'd put some more thought into what it's about. The Redwall/Mouse Guard style has a ton of potential - what sort of society would these sapient forest animals have? They just wanted a fairytale vibe though evidently.
Cutscene delivery is a weak point. You pull back into a cathedral-like space where you're paging through a large book, which is kinda cool, and listening to narration while looking at illustrations. In general I think these cutscenes would have worked better if you just stayed in the diorama world and watched the characters have animated interactions. Maybe it's a cost-saving measure. I guess having you turn the pages of the book is also a way to give you something to do, since sitting around watching NPCs talk is notoriously not fun in VR.
There are some very nice touches in the environment design though! In one area you walk across a bunch of human sized suits of armour and swords that are now rusting - nobody comments, but it definitely suggests that humans did exist in this world at some point. The actual puzzle levels tend to make less sense, they're very clearly designed as puzzles first and 'spaces people would live in' not at all, but they do tend to look pretty, and there's a clear sense of progression through different architectural areas - so far fairly standard forest, swamp, stone ruins etc. but I'll be curious to see if it goes anywhere weird with it later.
Weak story aside, I'm really impressed with Moss. Glad to see someone else giving third person VR a real shot. I'm looking forward to playing the rest of it.
...that's kinda all I played in a while huh. For example, I still haven't given Asgard's Wrath II, the swordfighting game produced internally at Meta that you get free on the Quest 3, a shot. Or Boneworks. I still haven't finished Half Life Alyx, even! Partly that's because the Quest 3 did not get on well with my long USB A to C cable - for some reason it only seems to work properly on a high quality C to C cable - and that restricts me from playing PCVR games that require too much movement. Still though...
Anyway, the game I've been working on these past 10 months should be ready to announce pretty soon. So I'm very excited for that.
9 notes
·
View notes
Text
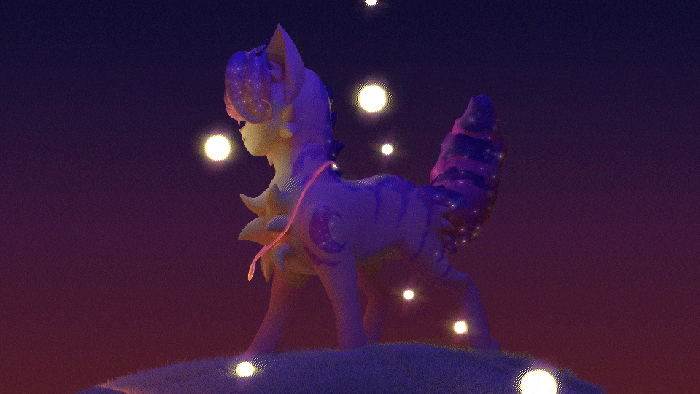
Kat turnaround Blender vs Vnyan
more info under the cut~
She's done! I've been working on her for months trying to get her jussstt right. Still not perfect but I am so proud of her ;w; Minus the face and ears (they are from a vroid model just heavily edited and with more blendshapes) I made her all by myself in blender!
Most 3D vtuber models have to be humanoid to work with tracking so she has a hidden human skeleton in her! Her back legs are controlled by her front legs and can either be linked to the same side or the opposite side. I used rotation constraints in unity to get this to work (and boy did it take a lot of trial and error!)
The Blender render was done in cycles and it was my first time trying to light something and render in cycles! It took forever lol Plus cause I don't know what I am doing I did a second render where I changed all the textures to black and added a few stars here and there and left the globes colored in and added the glow in after effects. There's probably a better way to do that but I am still learning and it worked so that's what I did.
The Nyan one I placed her on a cloud prop I'm still working on and had her spin around a skysphere that I had made from blender for a different project. Didn't end up adding it to the Blender render because I didn't want to absolutely kill my pc. The Vnyan one is also using different shaders (poyomi toon) and she has some movement because of breath graphs, and idle animation, and because she's smiling (her tail wags when she smiles ;3)
I could go on and on maybe I'll make a behind the scenes video at some point.
Oh and I stream on twitch if you want to see her in action! Same name.
Anywho have a great day/night!
6 notes
·
View notes
Text
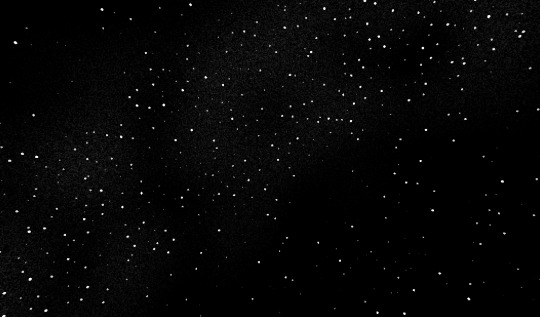
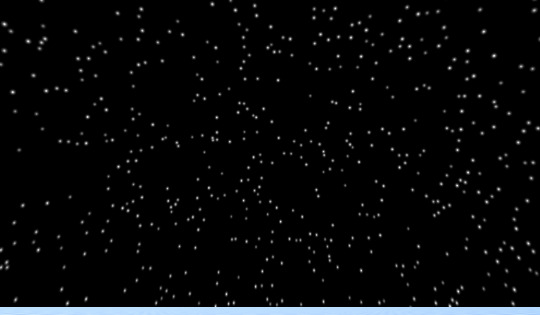
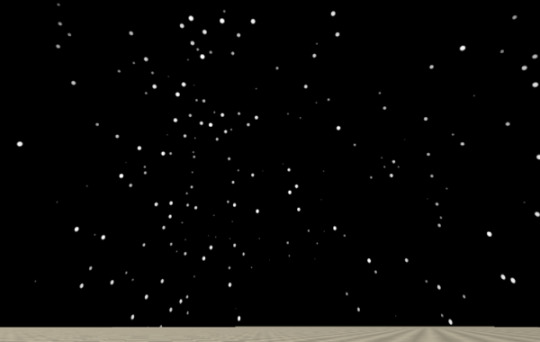
Procedural Skyboxes 2 - Stars


This time I need to credit a second excellent tutorial, this time by Tim Coster. My end result looks very different from this, but the underlying principles were essential.
Process and discussion below the cut.
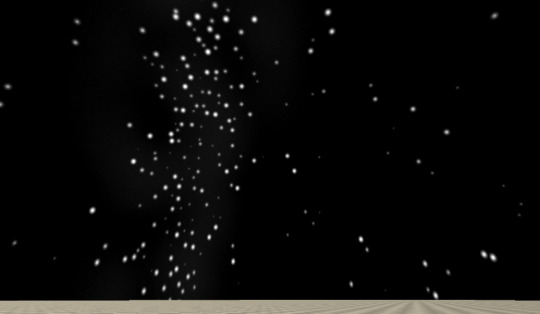
Mk0 - Voronoi
My first attempt at stars was based off the same tutorial I referenced in the previous post, using Voronoi noise to space the stars. Two inputs control star density and star size.
This might work fine for the use case in the tutorial, but in trying to adapt it for mine I immediately encountered some major issues.
the very even spacing feels kinda unnatural, especially with fewer, larger stars
there’s a seam in the sky (probably wouldn’t be visible with smaller stars)
heavy distortion around the sky zenith

Kinda looks like you're going to hyperspace every time you look up.
The seam and distortion issues are a result of the UVs (the coordinates that determine how the shader wraps around the sky). I solved this by moving to a kinda parachute-shaped UV as outlined in this incredibly helpful post on the Unity forums.
The unnaturally even distribution is a consequence of using Voronoi noise as a base. An entirely new approach was called for, which is where the Coster tutorial comes in.
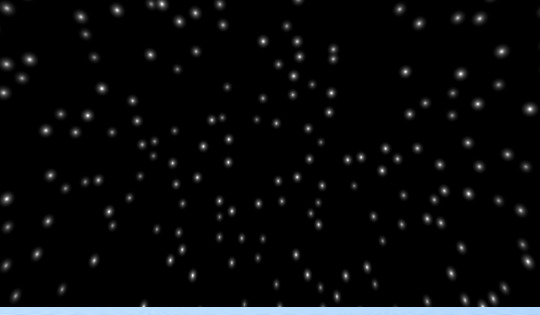
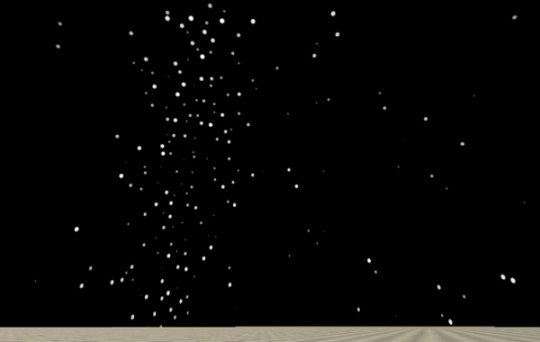
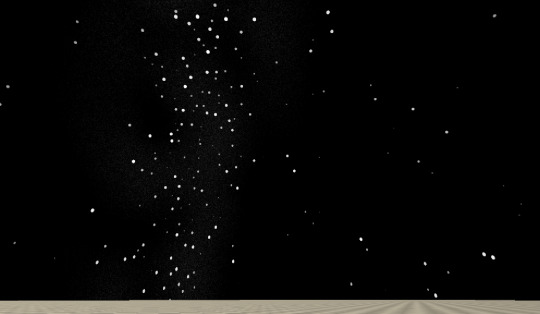
Mk1 - Tiling with displacement
I skipped the addition of the spiky light flares (not the aesthetic I’m going for) and worked through the tutorial as far as the section on size variation.
The Mk1 shader is a much better fit for the feel I’m looking for, and also looks good when you stare directly up into the sky, not just at the horizons. It also has a lot more controls. Star size remains, and gains an extra control for how much variation in size.


Density now has two controls: one which controls the density of the “tiling” (it’s not a repeating texture, because each tile is randomised, but there is tiling) and one which randomly omits a certain proportion of stars, making the distribution more gappy.


There’s also a control for how randomly the stars are spaced. I probably won’t want to move this much from a value of about 0.8 (1 produces a little more tight bunching than I like), but it’s there.
Last but not least, there is a setting for the hardness of the stars. This is going to be important later for modelling the effects of different amounts of atmosphere on the visible starfield.

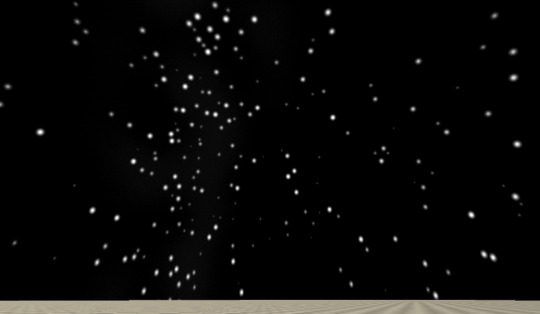
Mk2 - Galaxy Band
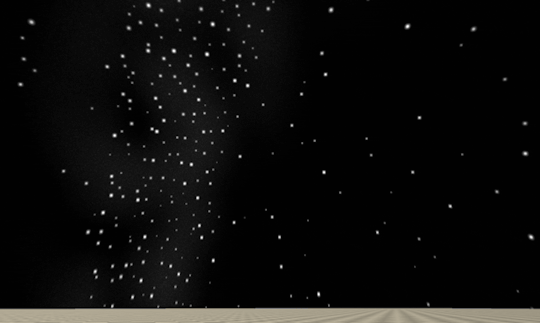
In the Mk1 shader, star distribution is even in all directions. The next thing I wanted to add was a band of denser stars across the sky to represent the bulk of the galaxy - as we see the Milky Way as a band across the sky from Earth.
Up to this point I had been using the purely-Shadergraph approach from the tutorial – which involves a very clunky grid of nine nearly-identical subnodes to perform an operation that is much more neatly executed by a for loop in code.
When I started trying to vary star density across the sky, this clunky 9-way graph was no longer adequate. Maybe I could have made it work with the right transformation of inputs, but it reached the point where it made more sense to bite the bullet and learn how to include the HLSL code from the tutorial and edit it to suit.
Once I managed that, feeding in variable density across the sky got a lot easier.
A new control variable, BandIntensity, controls how dramatically stars are grouped into the galactic band.
It was also at this point that I added twinkle, with controls for rate and magnitude. Eventually twinkle and hardness will be tied together, because they’re both functions of amount of atmosphere, but for now they’re separate controls.
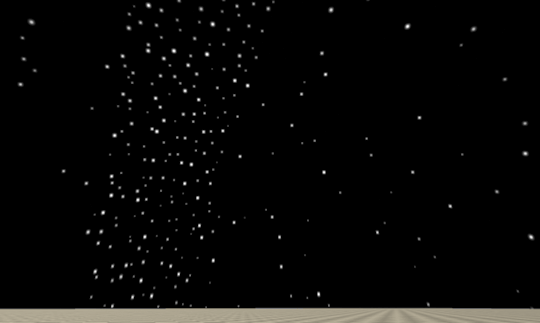
Next I added a band of faint texture behind the stars.
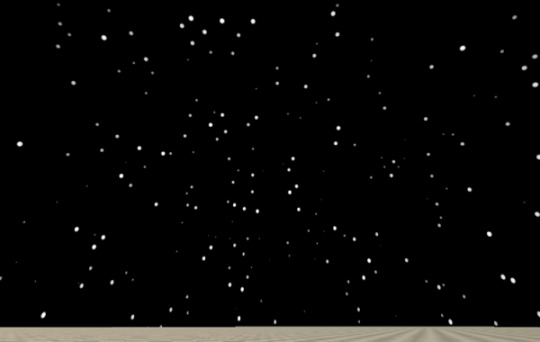
At low hardness, it’s just a soft stripe of Unity’s Gradient Noise. At high hardness, to make it seem “sharper” and more like a dense field of points instead of a smudge, the gradient noise is multiplied by some Simple Noise.

The end result – a pretty good looking, flexible starfield.
Next up, combining it with the atmosphere shader from pt1.
2 notes
·
View notes
Text

Finally, after months of waiting for Unity to fix some major URP Shader Graph bugs, Min-Max now has the cel shading style from the Blender renders carried over in-game.
The final graph is pretty insane since its doing the 4-color palette generation and the fake chrome effect for metal objects which had additional bright and dark areas painted on meshes.
The cel shading may look a bit subtle, and that's because I wanted a solution that preserved regular lighting, but still had a harsh cutoff- and one that could dynamically change with interiors (since otherwise characters would always be fully in shadow when inside)
The main thing going on is that the "bright" half of the cel shading is a normal lit shader. The dark half is the raw diffuse texture multiplied by an extremely blurry reflection probe of the room. This makes neither side flat looking.
The determiner of which half to use is sampling the same reflection probe, with anything below the probe value using shading. This determiner is also lowered since sampling the average light value of a room would also just make everything shaded.
19 notes
·
View notes
Text
youtube
Here's a little teaser video of my Synthwave Inspired VRChat world that I've been making over the past month in my spare time
I still need to add some more UI elements and fix some Udon Graphs in Unity for the video player, and create more bottles to be placed on the shelves of the bar, but I very much feel like I am finally nearing completion!
It's a small world, but hopefully it'll feel fun and cozy to those that check it out when it's done and published ^^
All the 3D meshes were modelled by me within Blender, the textures are from ambientcg.com, the skybox from the unity asset store, and the shader used is poiyomi~
9 notes
·
View notes
Text
⋗ SMALL UPDATE
Guess who did basically none of what they said they'd do... It's ME!
So, instead of adding any actual gameplay I spent a bunch more time on the graphics... (I like to make my games look nice, OK).
First off, I spent ages making my own textures (I was previously using textures from this asset pack), I wanted them to have kinda like a messy painted look, so here is a quick screenshot of some rock:

After I had finished with that, I spent an embarrassingly long amount of time trying to make some nice looking trees:
It was worth the wait though, because they look amazing!
Finally, I made some custom fog, because unity's default fog sucks, and I'm not paying £100 just for some volumetric fog that runs at 2fps. This fog works as a post-processing effect and uses the position and depth of the scene to blend between the scene's colour and the fog colour (which is just the light's colour + the sky's colour), I then also get the height of the camera so that I can add some overall fog and make it look like you're actually entering the fog.
I also did a few other, less cool stuff:
I made the grass fade out when you get too far away to hide the clipping (that's what those little squares you can see in some of the images are).
I added actual shadows to the player (not just doing the whole thing at once).
I switched most of my shaders from using Amplify Shader Editor to Shader Graph because I noticed an increase in performance (and there are a few things I need that I can only do in Shader Graph).
I optimised the player's animations to only play when we are moving or are doing something (not sure if it does much, but in my mind it does).
Here are a few more screenshots:


2 notes
·
View notes
Text
This version assumes a mix of keyframed cameras, VFX triggers, material animation, and timeline sequencing (Unreal Level Sequence or Unity Timeline) for in-engine visualization or cinematic export.
🎬 Shot List: “Caesar’s Watch”
Scene Type: Cinematic Sequence (1–2 min runtime) Delivery Format: 21:9 ultrawide or 16:9 (4K render target) Frame Rate: 24fps (cinematic) or 30fps (engine-native smooth) Lighting Style: Low-key space ambient, volumetric nebula rim lights, backlit plating
📽️ SHOT 001: “Darkness & Pulse”
Purpose: Cold open. Introduce atmosphere, mystery.
CAMERA: Locked-down, wide lens. No ship visible yet.
SCENE: Starfield slowly parallaxing. A spiral galaxy flickers faintly at far left.
VFX CUE: Subtle lens flare.
FX AUDIO: Deep subsonic hum begins.
🕒 0:00–0:05
📽️ SHOT 002: “Iron Moth Reveal”
Purpose: Dramatic entry. Establish form and scale.
CAMERA: Slow dolly-up from below as hull moves into view — beetle silhouette against stars.
LIGHTING: Faint glow begins along dorsal ridge (aetheric pulse).
VFX CUE: Material shimmer (glow veins animate across hull).
🕒 0:06–0:14
📽️ SHOT 003: “Sensor Lattice Whisper”
Purpose: Psychic anomaly & mood setting.
CAMERA: Tight pan across dorsal plating. Tilted angle, handheld feel.
FX: Light ripples across the ship’s surface, glyphs briefly appear then vanish.
CAPTION (UI Overlay): “A whisper in vacuum. Psychic anomaly registering across dorsal plates…”
🕒 0:15–0:20
📽️ SHOT 004: “Quantum Forges Engaged”
Purpose: Show the power and alien ritual.
CAMERA: Low orbiting dolly around left reactor tower.
VFX: Arcs of plasma leap between sigil-covered spires. Glowing trails draw runes midair.
CAPTION: “Plasma stable. Myths transmuting. Alloy soul requested: Origin—Starsteel, Intent—Judgment.”
🕒 0:21–0:30
📽️ SHOT 005: “Swarm Nest Deployment”
Purpose: Show activity — scale, motion, complexity.
CAMERA: Pull-back dolly from underbelly. Wings of the bay unfold slowly.
ANIMATION: Swarm drones rise in synchronized arcs. Faint trails curve behind them.
VFX: Iridescent shimmer, ambient lighting pulses with motion.
CAPTION: “Swarm units primed. Diplomatic escort or resource containment? Classify intent.”
🕒 0:31–0:42
📽️ SHOT 006: “Accord Field Activation”
Purpose: Political tension. Defensive tone.
CAMERA: Static side shot showing fin-like projectors along perimeter.
FX: Field activates — expanding translucent barrier, concentric hex glow appears.
Sound: Resonant harmonic pulse.
CAPTION: “Sanctity affirmed. Accord Field active. Unauthorized weapons discharge will trigger memory deletion sequence.”
🕒 0:43–0:53
📽️ SHOT 007: “Moon Debris and Distant Scale”
Purpose: Environment and consequences.
CAMERA: Wide establishing. Ship in foreground, shattered moon in distance.
FX: Small bits of debris drifting; flickering comms pings from other ships.
SCALE CUE: Tiny silhouettes of nearby frigates/station anchors.
🕒 0:54–1:00
📽️ SHOT 008: “Closing Slow Rotation”
Purpose: Reflective end. Final emotional tone.
CAMERA: Super slow rotation above the dorsal ridge. Faint light spirals pulse outward.
CAPTION (Optional): “Awaiting decree... Caesar observes.”
🕒 1:01–1:15
🎮 Technical Tags for Unreal/Unity Team:
Element System Implementation Notes Psychic Ripple Material FX World-aligned UV animation + noise distortion Plasma Arcs Niagara / VFX Graph Beam particles + glow overlay Drone Launch Trails Spline + Particle Trails Use noise displacement for spiral wake Accord Field Shader Panner Shader + Mask Custom translucent shader with tiling hex mask Caption Dialogue UI UMG (Unreal) / Canvas UI (Unity) Positioned relative to object or fixed frame Cinematics Sequence Unreal Sequencer / Unity Timeline Use camera rig track + VFX toggle track Audio Cues Timeline-synced Low-end sub, ambient pads, glyph whispers
Would you like this turned into a .CSV for shot logging, camera rig plan, or a Sequencer timeline file structure for direct Unreal/Unity work? Or — would you like me to generate key camera focal lengths, lens types, and DOF settings next?
0 notes
Text
Real-Time VFX Revolution: Transforming the Future of Games and Film

From the pixelated worlds of early video games to today’s hyper-realistic cinematic universes, the evolution of visual effects (VFX) has reshaped both gaming and filmmaking. Among the most exciting shifts in this landscape is the surge in real-time VFX—a field that's not just transforming how media is made but is also placing new demands on animation professionals across the globe. As real-time engines like Unreal Engine and Unity blur the lines between post-production and live creativity, the race for talent skilled in real-time VFX is heating up.
What Is Real-Time VFX?
Real-time VFX refers to the creation and rendering of visual effects instantaneously, as the content plays or is interacted with. Traditionally, VFX was done in post-production, requiring long hours of rendering for even short clips. Real-time VFX, on the other hand, allows artists to create effects—like explosions, magic spells, environmental effects, or weather changes—that can be seen immediately in engines used for games and virtual productions.
This real-time rendering capability is crucial for immersive experiences, particularly in gaming, virtual production (as seen in The Mandalorian), and interactive media like AR/VR. Real-time VFX artists are now expected to blend both artistic creativity and technical fluency with game engines, scripting, shader development, and particle systems.
Why the Surge in Demand?
The real-time VFX industry is growing rapidly, and this isn’t just because of entertainment. Let’s explore why:
Gaming's Evolution: AAA studios and indie developers alike are pushing visual fidelity further than ever. With more players engaging with hyper-realistic games like Hogwarts Legacy or Call of Duty: Modern Warfare III, the demand for real-time effects is increasing exponentially.
Virtual Production: As seen in major Hollywood productions, virtual production techniques using LED walls and game engines are becoming the new norm. This shift requires real-time rendering for everything from environments to lighting.
Metaverse and XR: The metaverse, though evolving, still fuels interest in interactive and immersive environments. Real-time VFX is foundational for augmented and virtual reality experiences.
Streaming and Cloud Gaming: As streaming platforms adopt cloud gaming (e.g., Nvidia GeForce Now), instant loading and rendering capabilities demand real-time optimization.
AI Integration: Generative AI tools are accelerating asset creation, but still require human-guided real-time VFX to maintain quality and creative control.
Latest News: Unreal Engine 5.4 and Real-Time VFX
In May 2025, Epic Games released Unreal Engine 5.4, boasting enhanced Niagara VFX system capabilities. This version introduces real-time fluid dynamics and volumetric smoke simulations, empowering artists to push visual boundaries even further without expensive hardware. Developers can now simulate cinematic-quality fire and smoke in real-time, which traditionally required hours of offline rendering.
Moreover, Unity’s latest roadmap promises better real-time lighting and improved shader graph tools aimed at easing the workflow for artists entering the real-time VFX space. The shift is not just in capability but also in accessibility—these powerful tools are becoming more artist-friendly, lowering the barrier for newcomers.
Core Skills Required for Real-Time VFX Professionals
Given the technical depth and creative scope, here are key skills that are increasingly sought-after:
Game Engine Proficiency: Knowledge of Unreal Engine, Unity, or proprietary engines is non-negotiable.
Shader and Material Creation: Understanding HLSL or node-based shader creation is vital.
Particle Systems & Simulations: Fluency in Niagara (Unreal) or Visual Effects Graph (Unity) is in high demand.
Scripting Knowledge: Python, C#, and Blueprint scripting help automate and enhance workflows.
Lighting & Rendering: Real-time lighting, shadowing, and optimization are essential.
Understanding GPU Workflows: Efficient use of GPU for performance-focused rendering.
Studios aren’t just looking for animators anymore—they want tech-savvy artists who can bridge storytelling with engineering.
Real-Time VFX in Film: A Game-Changer
The influence of real-time VFX in film has shifted the traditional post-production timeline. Productions like The Lion King (2019) and Avatar: The Way of Water adopted real-time techniques to visualize scenes on set, saving both time and cost.
In recent months, major studios like Warner Bros. and Disney have increased investments in virtual production stages. These setups depend on real-time VFX pipelines that integrate directly with pre-visualization, offering directors live feedback and more efficient shooting schedules.
It’s no longer about what can be done in post—it’s about what can be done in the moment.
Global Demand, Local Impact
Cities around the world are rising to the challenge of supplying talent for this booming field. Studios in Canada, the U.S., the UK, and parts of Asia are expanding their teams, offering remote roles and hybrid opportunities. Interestingly, Bengaluru has become a vibrant hub for creative technologies, combining its IT legacy with creative media innovation. Institutions and production houses are fostering a new generation of artists equipped with skills in real-time pipelines, drawing global attention to Indian talent.
Professionals enrolling in advanced programs like an Animation course in Bengaluru are exposed to not just foundational principles of animation but also the latest in real-time production workflows. This hybrid skillset is what makes talent stand out today.
The Future of Real-Time VFX
As hardware continues to improve—think GPUs with AI cores and real-time ray tracing—the creative ceiling keeps lifting. Artists can now iterate faster, experiment boldly, and produce content that’s both technically and emotionally impactful.
In education, the lines between departments are also blurring. Animation is no longer confined to keyframes and storyboards; it's about live interaction, system logic, and visual scripting. The artists of tomorrow will be part designer, part coder, and fully adaptive.
The demand for such hybrid talents is already evident, and the next five years will likely witness exponential growth in industries seeking them—not just in gaming and film but also in architecture, advertising, education, and even healthcare.
Conclusion
Real-time VFX is not just a trend—it’s a paradigm shift in the way digital content is conceptualized and created. The demand for skilled professionals continues to rise globally, and India, particularly cities like Bengaluru, is keeping pace with this momentum. With dedicated programs like the 3D animation course bengaluru, aspiring artists are gaining the tools and industry exposure needed to thrive in this fast-evolving domain. Whether it’s cinematic production, immersive storytelling, or virtual experiences, real-time VFX is where imagination meets immediacy—and those who master it will lead the next chapter of digital creation.
0 notes
Text
• Updating the Volumetric Fog
• Introduciton
In my previous post about the lanterns, I didn't entirely explain the whole "light cookie" part. That was because it also involved modifying the volumetric fog slightly. But because of this modification, I realised I also needed to give it a little re-write, so here's how that went.
• What I Did
Unity's Universal Render Pipeline makes things quite a lot easier than with the built in render pipeline, so much so that all I needed to do to get light cookies to work with my fog was to add this single line:

This is because the light cookie texture is sampled alongside the light's colour, meaning where I include the additional lights:

I don't actually have to change anything, because the colour also contains the light cookie.
Now here's the issue. Repeatedly sampling textures is generally not very efficient, and volumetric fog isn't exactly a fast rendering effect in the first place. And this is where I decided to use the standard method of making volumetric fog run faster, and just lower it's resolution.
Previously, I was using Unity URP's built-in "Full Screen Pass Renderer Feature", which just applies a post processing material to the screen at full resolution. This meant I had to make my own renderer feature to render the fog at a lower resolution. The method of doing this has changed over the years, with Unity 6 using the Render Graph system, but this project uses an older version, meaning I'm using the "Blitter" system.
In short, we need a render pass and a renderer feature. The feature basically makes the pass run, and the pass controls how the effect is rendered.
My system's not too different to the sample effect shown on Unity's website, but its also a little different.
As well as assigning the source and destination texture, I need to define another texture to render the fog to, using RTHandles.Alloc. When doing this, it is EXTREMELY IMPORTANT that you use [texture name].Release(), otherwise very bad things will happen.
Anyway, now that we have the texture, I can just use a bunch of blits to render the material to different textures, eventually putting it back onto the original image:

The numbers at the end of the functions refers to the shader's pass we want to use. Shaders can have multiple passes, which is basically an extra shader inside another. Pass 0 is the pass where the actual fog texture is rendered, and pass 1 is where the fog texture is denoised and applied to the screen.


And now, the difference is not too noticable, but having the fog render at a quater resolution definately increased performance significantly, and I can afford to render the fog with more samples.
Of course, I could do much better in terms of denoising, as a 3x3 gaussian blur isn't exactly going to do too much, but it's clear enough and there aren't too many artefacts.
0 notes
Text
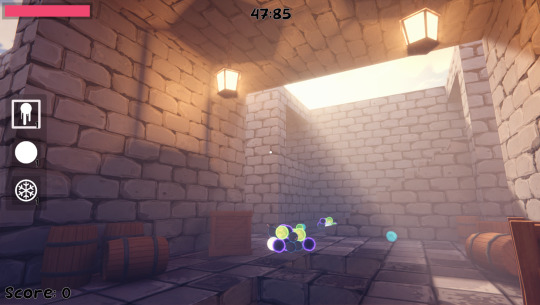
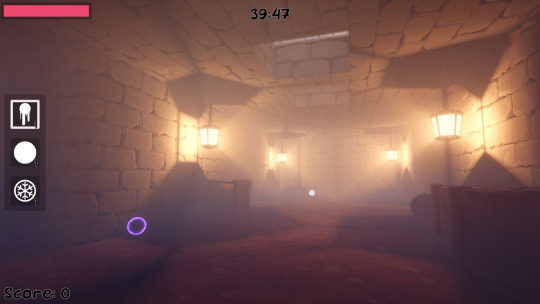
Development - 24/04
Now that I have mostly finished the gameplay, I want to make the maze look better:

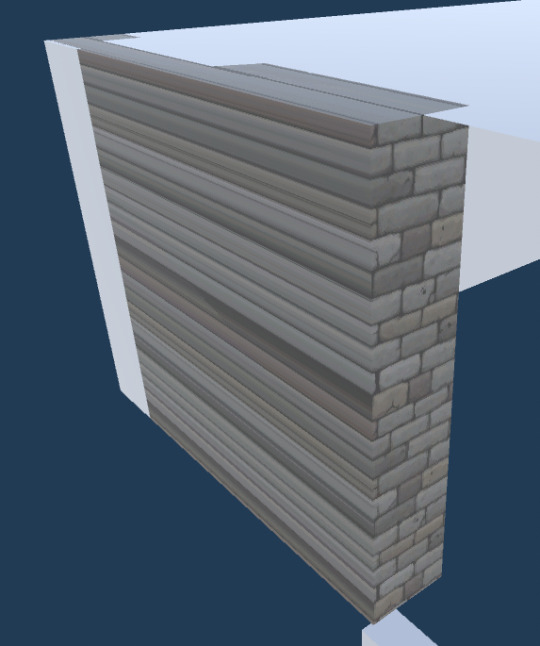
First things first, I want to give the walls a texture so that they don't look so bland. I was going to create a 3d model of a brick wall that I would replace all the existing walls with, but then I remembered what happened last time I did that in Project #2; where the game became unplayable.
So I think I will result to getting a texture and adding it to the current walls, which should be quicker and more efficient to do instead.
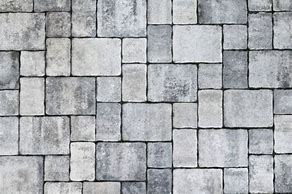
I found this model by Belén Navone on ArtStation:

So I tried just adding the texture to the wall objects, but this scaled the texture according to the size of the object:
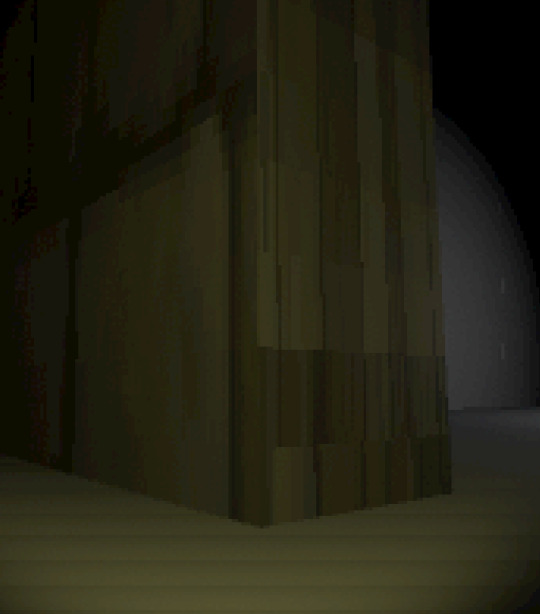
Now I am following a tutorial that is showing me who to make this texture able to be tiled:
youtube
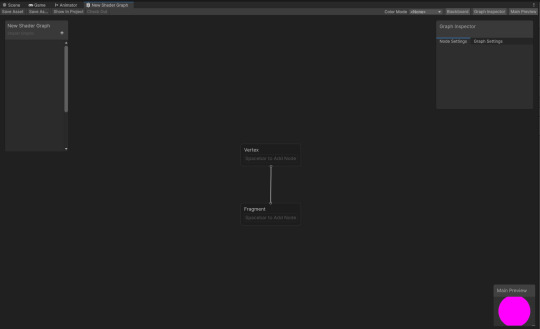
So first I have to install the shader graph package by Unity:

This is my first time doing anything with shaders, so I'm having a little play around with the different options:
After learning some basic stuff, like how to add new inputs, I continue the tutorial.
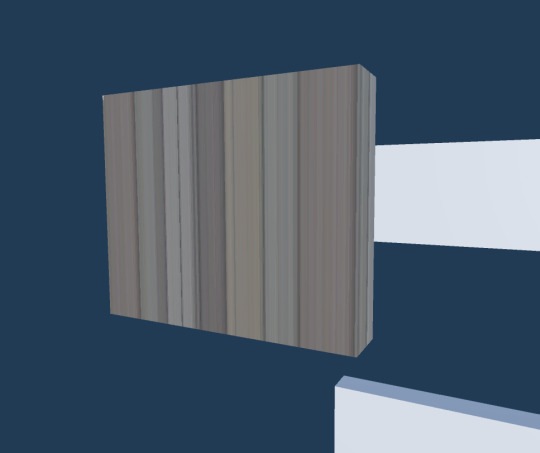
I've gotten to here with my shader:

Which when added to an object along with the texture again, provides this:
The tutorial I'm following is a few years old and uses an older version of Unity so I wasn't to surprised, then I saw the top:

Don't worry about the shape seemingly being strange, that's just the ceiling clipping into the walls (which I'll have to fix some point soon).
The texture on the top is perfect as it stays in the same place, at the same scale if I move or scale the object it is on!
By copying the previous split and changing a few values:

I managed to reverse the effects of the texture:

By adding a condition that checks the position of the side with the texture on it, now we have 2/3 of the axis working:

Now adding another branch that does the same as before, but on the Z axis rather than the X, we get this:
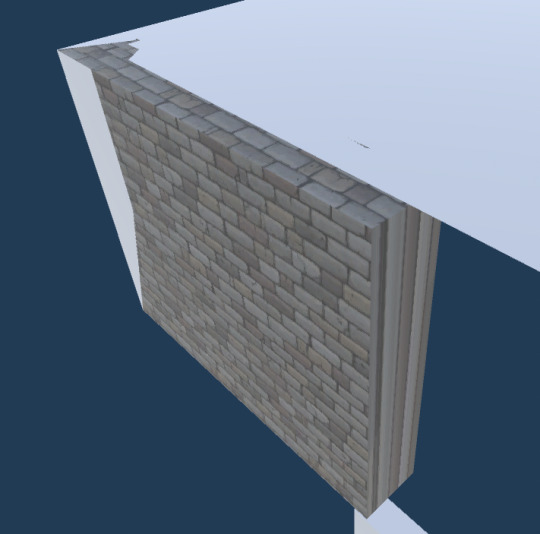
Finally with another condition, we have all 3 axis's working:

So now I got another texture for the floor (this was a stock image):
I'll post a video showing the end results in a different post as Tumblr's one video per post is annoying.
0 notes