#web application development tutorial
Explore tagged Tumblr posts
Text
#Technology News#Software Reviews#Internet of Things#Artificial Intelligence#Robotics#Web Development#Tech Trends#Gadgets#Cybersecurity#Cloud Computing#Digital Marketing#SEO Strategies#Mobile Applications#Smart Devices#Programming Tutorials#AI in Business#Tech Innovations#Web Accessibility#Integrated Marketing#Payroll Budgeting.
0 notes
Text
Building a Chat Application with Node.js
Building a Real-Time Chat Application with Node.js
Introduction Chat applications have become a staple in modern web applications, providing real-time communication between users. Node.js, with its non-blocking I/O and event-driven architecture, is an excellent choice for building chat applications. In this guide, we will walk through the process of building a simple chat application using Node.js, Express, and Socket.io. Overview We will…
#chat application#Node.js#Node.js tutorial#real-time web applications#Socket.io#web development#WebSockets
0 notes
Text
#iot#iot application development#iot applications#iot application development company#iot development#iot app development#iot application development ideas#iot application development platform#iot development company#iot applications development company#iot applications development services#what is iot#web application development#rapid application development#mobile application development#mobile application development (industry)#iot app development 2021#aws iot analytics#iot tutorial#iot projects#business#newblogflo#secretstime#iot technology#tech
0 notes
Text

Hello! In this post I will share some tips I have to help you on your custom content making journey. These are more general rather than creating a specific item, but I may make another part in the future!
Things covered: learning curve of blender, free resources, learning your computer, using references

1️⃣ There’s no need to pay for anything
The only money I have spent on anything related to TS4/custom content is for some of the expansion packs. Every resource I have used I have only had to pay with time. Blender, Sims 4 Studio, and Sims 4 Tray Importer are all free! And for Photoshop, a good free alternative I use is Photopea, which is just a web version. Another good alternative is GIMP, which is an application.
There are applications like Substance Painter and Marvelous Designer, but I would only recommend those if you have a genuine interest in 3D modeling outside of TS4.
And in terms of finding tutorials, scouring the internet will always lead to some result. A good tumblr page is @thefoxburyinstitute, which has many sections based on your level of experience. Adding “reddit” to the end of a search helps too!

2️⃣ You can export anything from Sims 4 Studio as a reference (mod or EA object)
For an EA item, In S4S, go to Tools -> Browse Game Content -> then select the category you need a ref. If it’s a mod, click on My Projects and find the package you want.

From here, you can export the mesh, images, or any textures you need without having to create a new package for it! Best used when you have already created your own package and just need one aspect of the object.
If you want to append in Blender, go to File -> Append (works with any .blend file exported from S4S), then find the location of whatever you exported. Go to the Object folder, find anything labeled s4studio_mesh_number, then append. I just append all of them, then delete ones I don’t need.

Also, in the Scene tab, make sure the cut box is blank for the reference you imported! S4S will confuse this with your mesh if not, as the cut number determines which mesh will replace the EA one.

3️⃣ File management is important!
The more you create, the more random things you’ll download on your computer. You need to be aware of where you’re downloading things from, duplicate files, how much storage it’s taking up, etc. I recommend the Sims 4 Mod Manager by GameTime. Back up your files often and learn how your computer works because every device is different! Below is how I organize my CC (could use some improvement), but use whatever keeps you organized.


4️⃣ Learn Blender outside of Sims 4 CC
There have been so many times when I’m so frustrated about Blender that I have to take a step back and focus on a different hobby. The first time that happened years ago, I decided to learn how to make simple models in Blender, and not only did I enjoy it, but I also learned so much that can be applied to CC! Below are some tutorials that I watched.
Blender 3D Beginner Tutorial by 3DGreenhorn
A simple room tutorial.
3D Isometric Bedroom by artbytran
Another simple room tutorial, but with more cute details.
Creating Stylized Low Poly Characters by lacruzo
How to make a low-poly character and texture paint on it (I used this tutorial to texture paint on a hair clip!)
Intro to Creative Web Development by Andrew Woan
Okay I know the 5 hours is daunting, but only (lol) the first 2 hours are Blender. This video goes more into the technological aspect and making models optimized for video games/web (ahem TS4). After the 2-hour mark, it's all coding, which is not needed for CC making.

5️⃣ It takes time/consistency
As a person who only makes CC once every other month or so, it’s mostly muscle memory and consistent practice that makes someone feel confident in their CC making abilities. Remember how as a kid typing was the slowest thing ever, and today you’re (hopefully) better? It’s cause you kept practicing over a long period of time.
The first time I opened Blender to make poses was in 2021, and 4 years later, there’s so much that I have learned from others, and 10x more that I don’t know due to the endless possibilities of what can be created. But hey, I’m confident enough that I made this post of tips, right? Take small steps, the end goal is to make something you or others enjoy.

Thanks for reading this if you’ve come this far, and here are two pages I recommend reading to help you on your CC journey! :D
Internet safety regarding TS4 by crazy-hazy-sims (pls read this) Custom Content Creation by simlaughlove
6 notes
·
View notes
Text
Crafting Web Applications For Businesses Which are Responsive,Secure and Scalable.
Hello, Readers!
I’m Nehal Patil, a passionate freelance web developer dedicated to building powerful web applications that solve real-world problems. With a strong command over Spring Boot, React.js, Bootstrap, and MySQL, I specialize in crafting web apps that are not only responsive but also secure, scalable, and production-ready.
Why I Started Freelancing
After gaining experience in full-stack development and completing several personal and academic projects, I realized that I enjoy building things that people actually use. Freelancing allows me to work closely with clients, understand their unique challenges, and deliver custom web solutions that drive impact.
What I Do
I build full-fledged web applications from the ground up. Whether it's a startup MVP, a business dashboard, or an e-commerce platform, I ensure every project meets the following standards:
Responsive: Works seamlessly on mobile, tablet, and desktop.
Secure: Built with best practices to prevent common vulnerabilities.
Scalable: Designed to handle growth—be it users, data, or features.
Maintainable: Clean, modular code that’s easy to understand and extend.
My Tech Stack
I work with a powerful tech stack that ensures modern performance and flexibility:
Frontend: React.js + Bootstrap for sleek, dynamic, and responsive UI
Backend: Spring Boot for robust, production-level REST APIs
Database: MySQL for reliable and structured data management
Bonus: Integration, deployment support, and future-proof architecture
What’s Next?
This blog marks the start of my journey to share insights, tutorials, and case studies from my freelance experiences. Whether you're a business owner looking for a web solution or a fellow developer curious about my workflow—I invite you to follow along!
If you're looking for a developer who can turn your idea into a scalable, secure, and responsive web app, feel free to connect with me.
Thanks for reading, and stay tuned!
2 notes
·
View notes
Text
JavaScript Tutorial: A Beginner's Guide to the World of Web Development
Welcome to the exciting world of JavaScript! If you're looking to dive into web development, understanding JavaScript is essential. This versatile programming language powers the interactive elements of websites and is a key component of modern web applications. In this tutorial, we'll cover the basics of JavaScript, its syntax, and some practical examples to get you started.
What is JavaScript?
JavaScript is a high-level, dynamic, and interpreted programming language that is primarily used for enhancing the interactivity of web pages. It allows developers to create rich user experiences by manipulating HTML and CSS, responding to user events, and communicating with servers.
Why Learn JavaScript?
Ubiquity: JavaScript is supported by all modern web browsers, making it a universal language for web development.
Versatility: Beyond the browser, JavaScript can be used on the server-side (with Node.js), in mobile app development (with frameworks like React Native), and even in game development.
Community and Resources: With a vast community and numerous resources available, learning JavaScript is more accessible than ever.
Getting Started with JavaScript
Setting Up Your Environment
To start coding in JavaScript, you don't need any special software. All you need is a web browser and a text editor. Here’s how to set it up:
Choose a Text Editor: Popular options include Visual Studio Code, Sublime Text, and Atom.
Open Your Browser: You can use any modern browser like Chrome, Firefox, or Edge.
2 notes
·
View notes
Text
So let's get into the nitty-gritty technical details behind my latest project, the National Blue Trail round-trip search application available here:
This project has been fun with me learning a lot about plenty of technologies, including QGis, PostGIS, pgRouting, GTFS files, OpenLayers, OpenTripPlanner and Vita.
So let's start!
In most of my previous GIS projects I have always used custom made tools written in ruby or Javascript and never really tried any of the "proper" GIS tools, so it was a good opportunity for me to learn a bit of QGIS. I hoped I could do most of the work there, but soon realized it's not fully up to the job, so I had to extend the bits to other tools at the end. For most purposes I used QGis to import data from various sources, and export the results to PostGIS, then do the calculations in PostGIS, re-import the results from there and save them into GeoJSON. For this workflow QGIS was pretty okay to use. I also managed to use it for some minor editing as well.
I did really hope I could avoid PostGIS, and do all of the calculation inside QGIS, but its routing engine is both slow, and simply not designed for multiple uses. For example after importing the map of Hungary and trying to find a single route between two points it took around 10-15 minutes just to build the routing map, then a couple seconds to calculate the actual route. There is no way to save the routing map (at least I didn't find any that did not involve coding in Python), so if you want to calculate the routes again you had to wait the 10-15 minute of tree building once more. Since I had to calculate around 20.000 of routes at least, I quickly realized this will simply never work out.
I did find the QNEAT3 plugin which did allow one to do a N-M search of routes between two set of points, but it was both too slow and very disk space intense. It also calculated many more routes than needed, as you couldn't add a filter. In the end it took 23 hours for it to calculate the routes AND it created a temporary file of more than 300Gb in the process. After realizing I made a mistake in the input files I quickly realized I won't wait this time again and started looking at PostGIS + pgRouting instead.
Before we move over to them two very important lessons I learned in QGIS:
There is no auto-save. If you forget to save and then 2 hours later QGIS crashes for no reason then you have to restart your work
Any layer that is in editing mode is not getting saved when you press the save button. So even if you don't forget to save by pressing CTRL/CMD+S every 5 seconds like every sane person who used Adobe products ever in their lifetimes does, you will still lose your work two hours later when QGIS finally crashes if you did not exit the editing mode for all of the layers
----
So let's move on to PostGIS.
It's been a while since I last used PostGIS - it was around 11 years ago for a web based object tracking project - but it was fairly easy to get it going. Importing data from QGIS (more specifically pushing data from QGIS to PostGIS) was pretty convenient, so I could fill up the tables with the relevant points and lines quite easily. The only hard part was getting pgRouting working, mostly because there aren't any good tutorials on how to import OpenStreetMap data into it. I did find a blog post that used a freeware (not open source) tool to do this, and another project that seems dead (last update was 2 years ago) but at least it was open source, and actually worked well. You can find the scripts I used on the GitHub page's README.
Using pgRouting was okay - documentation is a bit hard to read as it's more of a specification, but I did find the relevant examples useful. It also supports both A* search (which is much quicker than plain Dijsktra on a 2D map) and searching between N*M points with a filter applied, so I hoped it will be quicker than QGIS, but I never expected how quick it was - it only took 5 seconds to calculate the same results it took QGIS 23 hours and 300GB of disk space! Next time I have a GIS project I'm fairly certain I will not shy away from using PostGIS for calculations.
There were a couple of hard parts though, most notably:
ST_Collect will nicely merge multiple lines into one single large line, but the direction of that line looked a bit random, so I had to add some extra code to fix it later.
ST_Split was similarly quite okay to use (although it took me a while to realize I needed to use ST_Snap with proper settings for it to work), but yet again the ordering of the segments were off a slight bit, but I was too lazy to fix it with code - I just updated the wrong values by hand.
----
The next project I had never used in the past was OpenTripPlanner. I did have a public transport project a couple years ago but back then tools like this and the required public databases were very hard to come by, so I opted into using Google's APIs (with a hard limit to make sure this will never be more expensive than the free tier Google gives you each month), but I have again been blown away how good tooling has become since then. GTFS files are readily available for a lot of sources (although not all - MAV, the Hungarian Railways has it for example behind a registration paywall, and although English bus companies are required to publish this by law - and do it nicely, Scottish ones don't always do it, and even if they do finding them is not always easy. Looks to be something I should push within my party of choice as my foray into politics)
There are a couple of caveats with OpenTripPlanner, the main one being it does require a lot of RAM. Getting the Hungarian map, and the timetables from both Volánbusz (the state operated coach company) and BKK (the public transport company of Budapest) required around 13GB of RAM - and by default docker was only given 8, so it did crash at first with me not realizing why.
The interface of OpenTripPlanner is also a bit too simple, and it was fairly hard for me to stop it from giving me trips that only involve walking - I deliberately wanted it to only search between bus stops involving actual bus travel as the walking part I had already done using PostGIS. I did however check if I could have used OpenTripPlanner for that part as well, and while it did work somewhat it didn't really give optimal results for my use case, so I was relieved the time I spend in QGIS - PostGIS was not in vain.
The API of OpenTripPlanner was pretty neat though, it did mimic Google's route searching API as much as possible which I used in the past so parsing the results was quite easy.
----
Once we had all of the data ready, the final bit was converting it to something I can use in JavaScript. For this I used my trusted scripting language I use for such occasion for almost 20 years now: ruby. The only interesting part here was the use of Encoded Polylines (which is Google's standard of sending LineString information over inside JSON files), but yet again I did find enough tools to handle this pretty obscure format.
----
Final part was the display. While I usually used Leaflet in the past I really wanted to try OpenLayers, I had another project I had not yet finished where Leaflet was simply too slow for the data, and I had a very quick look at OpenLayers and saw it could display it with an acceptable performance, so I believed it might be a good opportunity for me to learn it. It was pretty okay, although I do believe transparent layers seem to be pretty slow under it without WebGL rendering, and I could not get WebGL working as it is still only available as a preview with no documentation (and the interface has changed completely in the last 2 months since I last looked at it). In any case OpenLayers was still a good choice - it had built in support for Encoded Polylines, GPX Export, Feature selection by hovering, and a nice styling API. It also required me to use Vita for building the application, which was a nice addition to my pretty lacking knowledge of JavaScript frameworks.
----
All in all this was a fun project, I definitely learned a lot I can use in the future. Seeing how well OpenTripPlanner is, and not just for public transport but also walking and cycling, did give me a couple new ideas I could not envision in the past because I could only do it with Google's Routing API which would have been prohibitively expensive. Now I just need to start lobbying for the Bus Services Act 2017 or something similar to be implemented in Scotland as well
21 notes
·
View notes
Text
Top Free Python Courses & Tutorials Online Training | NareshIT
Top Free Python Courses & Tutorials Online Training | NareshIT
In today’s tech-driven world, Python has emerged as one of the most versatile and popular programming languages. Whether you're a beginner or an experienced developer, learning Python opens doors to exciting opportunities in web development, data science, machine learning, and much more.
At NareshIT, we understand the importance of providing quality education. That’s why we offer free Python courses and tutorials to help you kick-start or advance your programming career. With expert instructors, hands-on training, and project-based learning, our Python online training ensures that you not only grasp the fundamentals but also gain real-world coding experience.
Why Choose NareshIT for Python Training?
Comprehensive Curriculum: We cover everything from Python basics to advanced concepts such as object-oriented programming, data structures, and frameworks like Django and Flask.
Expert Instructors: Our team of experienced instructors ensures that you receive the best guidance, whether you're learning Python from scratch or brushing up on advanced topics.
Project-Based Learning: Our free tutorials are not just theoretical; they are packed with real-life projects and assignments that make learning engaging and practical.
Flexible Learning: With our online format, you can access Python tutorials and training anytime, anywhere, and learn at your own pace.
Key Features of NareshIT Python Courses
Free Python Basics Tutorials: Get started with our easy-to-follow Python tutorials designed for beginners.
Advanced Python Concepts: Dive deeper into topics like file handling, exception handling, and working with APIs.
Hands-on Practice: Learn through live coding sessions, exercises, and project work.
Certification: Upon completion of the course, earn a certificate that adds value to your resume.
Who Can Benefit from Our Python Courses?
Students looking to gain a solid foundation in programming.
Professionals aiming to switch to a career in tech or data science.
Developers wanting to enhance their Python skills and explore new opportunities.
Enthusiasts who are passionate about learning a new skill.
Start Learning Python for Free
At NareshIT, we are committed to providing accessible education for everyone. That’s why our free Python courses are available online for anyone eager to learn. Whether you want to build your first Python program or become a pro at developing Python applications, we’ve got you covered.
Ready to Dive into Python?
Sign up for our free Python tutorials today and embark on your programming journey with NareshIT. With our structured courses and expert-led training, mastering Python has never been easier. Get started now, and unlock the door to a world of opportunities!

#python#pythontraining#freepythoncourse#onlinetraining#coding#pythontutorials#pythonforbeginners#programming#pythononline#learnpython#softwaretraining#freelearning#pythonprogramming#onlinetutorial#techtraining#pythoncourses#onlineeducation#pythoncode#codingforbeginners
2 notes
·
View notes
Text
Component Libraries: Should You Build Your Own or Use a Prebuilt One?

Component libraries are a vital tool in web application development in maintaining uniform design, shortening the time taken to develop web applications and improving reusability of the code. Some developers find this dilemma; should they create a component library or use an existing one? In addition, they help reduce the struggle while building well-designed and interactive websites because of the availability of animation-oriented UIs such as Accentricity UI among others. Now, let’s get more to the point in order to help you find the right way.
What is a Component Library?
Component libraries are collections of reusable UI elements such as buttons, forms, modals, and more— and are intended to reuse the components across several projects. Such libraries not only guarantee a consistent look of an application but also save time and costs during its implementation because the elements have been already coded. So, there's no need to build components from scratch.
Prebuilt Component Libraries

Prebuilt Component Libraries
Prebuilt component libraries are the ready-made collections of different UI components that are specifically designed and optimized for common use cases that developers can face during development. Some well-known examples include:
Material-UI (MUI):
A library based on React and it follows Google's Material-UI design, MUI allows a comprehensive set of components customization.
Ant Design:
It's an UI design system framework for enterprise-level products, ant design offers built-in themes and a rich set of UI components.
Bootstrap:
It's an widely-used CSS framework that provides basic components and a responsive grid system.
Pros of Prebuilt Libraries :
Rapid Development: Prebuilt libraries save a lot of time of the developers by providing pre-designed reusable components that you can quickly integrate into your project.
Standardized Design: They help ensure a consistent user experience across different screens and features.
Community Support: Many prebuilt libraries come with robust community support, providing a wealth of tutorials, plugins, and enhancements.
Cons of Prebuilt Libraries
Limited Customization: Customizing components to fit your unique design can sometimes be difficult, leading to constraints on flexibility.
Performance Overhead: Many prebuilt libraries come with extra features you may not need, which can bloat your codebase.

Pros And Cons of Prebuilt Libraries
Animation-Centric Libraries: Bringing UIs to Life
In recent years, a new category of libraries has emerged, specifically focused on providing built-in animations and smooth UI transitions. These libraries not only offer pre-designed components but also emphasize adding dynamic, interactive features to web applications.
Here are some popular examples of animation-focused libraries:
Lottie
Category: Animation Integration Library

Lottie:The industry standard for motion design
What it Offers: Lottie allows you to render animations created in Figma or Adobe After Effects as JSON files using the built-in plugins. These animations are then rendered natively on the web, offering high-quality motion without a heavy performance impact.
Why It’s Useful: Lottie is perfect for apps or websites requiring rich, scalable animations that are lightweight. It’s commonly used for logos, loading animations, and subtle UI effects. Unlike other component libraries, it focuses purely on bringing visual design elements from tools like Figma & After Effects into the web environment.
Accentricity UI
Category: Hybrid Component and Animation Library
What it Offers:
Accentricity UI combines traditional UI components with built-in support for smooth animations and transitions. It offers a wide range of components like buttons, forms, modals, and navigation menus, but with an added layer of predefined animations, making it easier to create interactive, dynamic interfaces.
In addition to these standard components, Accentricity UI provides responsive behaviors and subtle animation effects like hover states, fade-ins, and sliding transitions that enhance user engagement. The library's components are fully customizable, allowing developers to easily adjust animation timings, easing functions, and durations to match the look and feel of their brand, ensuring both visual appeal and performance across devices.
Why It’s Useful:
Think about it, what would be easy for a dev? Making a custom component with tons of animation which the dev has to write from scratch and polish it before the deadline or use a library, where the dev can make use of the library with the built-in support to combine the custom designed elements with smooth animations and transitions offered by the library.
It’s particularly helpful for developers who want the convenience of a prebuilt library but need polished, built-in animations to enhance user experience without writing complex animation code from scratch.
Framer Motion
Category: Animation-focused Component Library (React)

Framer Motion
What it Offers:
Framer Motion is a powerful library for React that allows you to create fluid animations and micro interactions with minimal effort. It supports interactive features like drag, scroll, and spring-based animations, which makes it ideal for interactive & highly animated UIs. It also provides easy-to-use APIs for gesture-based animations and layout transitions, offering developers extensive control over complex animations while maintaining simplicity in implementation.
Why It’s Useful:
Framer Motion combines the simplicity of component libraries with the flexibility of advanced animation frameworks, making it easy to enhance user interfaces with dynamic visual effects. It’s a great choice for React developers who want to integrate animation without compromising performance or adding significant overhead. With its built-in optimizations for smooth rendering, Framer Motion ensures high-quality animations that enhance both usability and visual appeal.
Should You Use Prebuilt Animation Libraries?
The role of animations is really important in web applications to enhance the UX(user experience), by making interfaces feel more fluid and interactive makes user's remember the website due to its great experience. Since users are constantly getting used to smooth effects, micro-interaction and dynamic feedback, animations are no longer viewed as a good to have feature but are rather considered as a must have feature. Prebuilt animation libraries like Framer Motion and GSAP (GreenSock Animation Platform) simplify this process by providing powerful, flexible tools that allow developers to integrate complex animations without having to manually manage every aspect of motion or dive deep into animation theory.
Advantages of Animation-Centric Libraries

Advantages of Animation-Centric Libraries
Ease of Use
Prebuilt animation libraries abstract away the complexities of coding animations from scratch. Without manually writing keyframes, easing functions, or browser-optimized transitions, developers can simply use predefined APIs to implement fluid animations. This drastically reduces development time, as many animation details are handled by the library, letting developers focus on building features and interactions rather than tweaking animations for performance or cross-browser compatibility. For example, with a few lines of code, animations can be applied to any UI element, making the development process much more efficient.
Advanced Features
Many animation libraries offer advanced features that go far beyond basic transitions like fade-ins and slide animations. These include timeline control, scroll-triggered animations, physics-based interactions, and even 3D transformations. For instance, timeline control allows developers to create synchronized sequences of animations, which can be used to create smooth, coordinated interactions across multiple elements. Scroll-based animations enhance user engagement by triggering effects as the user scrolls, perfect for parallax websites or content reveal effects. Physics-based animations, such as spring-based drag-and-drop or object bouncing, add natural, realistic movement to interactive elements, elevating the overall experience. Additionally, 3D transformations provide extensive control over how objects rotate, scale, or move in three-dimensional space, something that is cumbersome to achieve with native CSS alone.
See What Happens Next
#webdevelopement#werbooz#own website#build vs prebuilt component library#custom UI components#prebuilt UI libraries#web development#Material-UI#Ant Design#Bootstrap#Framer Motion#Accentricity UI#animation libraries#best UI libraries 2024#component library pros and cons#web app development#UI design optimization#web performance#web development trends
2 notes
·
View notes
Text
allinonetechs
I am lanzoe working for allinonetechs as PR consultant. With more than 6 year’s experience in PR and Digital Industry, helping teams to achieve goals by streamlining the process
#Technology News#Software Reviews#Internet of Things#Artificial Intelligence#Robotics#Web Development#Tech Trends#Gadgets#Cybersecurity#Cloud Computing#Digital Marketing#SEO Strategies#Mobile Applications#Smart Devices#Programming Tutorials#AI in Business#Tech Innovations#Web Accessibility#Integrated Marketing#Payroll Budgeting.
1 note
·
View note
Text
Real-time Web Applications with Socket.io and Node.js
Building Real-Time Web Applications with Socket.io and Node.js
Introduction Real-time web applications have become increasingly popular, allowing instant updates and interactions. Applications like chat rooms, live notifications, and collaborative tools benefit greatly from real-time capabilities. Socket.io is a powerful library for building real-time applications, providing a simple and reliable way to implement WebSockets in Node.js. This guide will walk…
#chat application#Node.js#Node.js tutorial#real-time web applications#Socket.io#web development#WebSockets
0 notes
Text
"DCA"(DIPLOMA IN COMPUTER APPLICATION)
The best career beginning course....

Golden institute is ISO 9001-2015 certified institute. Here you can get all types of computer courses such as DCA, CFA , Python, Digital marketing, and Tally prime . Diploma in Computer Applications (DCA) is a 1 year "Diploma Course" in the field of Computer Applications which provides specialization in various fields such as Fundamentals & Office Productivity tools, Graphic Design & Multimedia, Programming and Functional application Software.

A few of the popular DCA study subjects are listed below
Basic internet concepts Computer Fundamentals Introduction to programming Programming in C RDBMS & Data Management Multimedia Corel draw Tally ERP 9.0 Photoshop
Benefits of Diploma in Computer Application (DCA)
After completion of the DCA course student will able to join any computer jobs with private and government sectors. The certification of this course is fully valid for any government and private deportment worldwide. DCA is the only best option for the student to learn computer skills with affordable fees.
DCA Computer course : Eligibilities are here... Students aspiring to pursue Diploma in Computer Applications (DCA) course must have completed their higher school/ 10 + 2 from a recognized board. Choosing Computers as their main or optional subject after class 10 will give students an additional edge over others. Apart from this no other eligibility criteria is set for aspirants. No minimum cutoff is required.

"TALLY"
A Tally is accounting software. To pursue Tally Course (Certificate and Diploma) you must have certain educational qualifications to thrive and prosper. The eligibility criteria for the tally course is given below along with all significant details on how to approach learning Tally, and how you can successfully complete the course. Generally, the duration of a Tally course is 6 month to 1 year ,but it varies depending on the tally institution you want to join. Likewise, tally course fees are Rs. 10000-20000 on average but it also varies depending on what type of tally course or college you opt for. accounting – Accounting plays a pivotal role in Tally
Key Benefits of the Course:
Effective lessons (topics are explained through a step-by-step process in a very simple language) The course offers videos and e-books (we have two options Video tutorials in Hindi2. e-book course material in English) It offers a planned curriculum (the entire tally online course is designed to meet the requirements of the industry.) After the completion of the course, they offer certificates to the learners.
Tally Course Syllabus – Subjects To Learn Accounting Payroll Taxation Billing Banking Inventory
Tally Course
Eligibility criteria: 10+2 in commerce stream Educational level: Certificate or Diploma Course fee: INR 2200-5000 Skills required: Accounting, Finance, Taxation, Interpersonal Skills Scope after the course: Accountant, Finance Manager, Chartered Accountant, Executive Assistant, Operations Manager Average salary: INR 5,00,000 – 10,00,000

"In this Python course"
Rapidly develop feature-rich applications using Python's built-in statements, functions, and collection types. Structure code with classes, modules, and packages that leverage object-oriented features. Create multiple data accessors to manage various data storage formats. Access additional features with library modules and packages.
Python for Web Development – Flask Flask is a popular Python API that allows experts to build web applications. Python 2.6 and higher variants must install Flask, and you can import Flask on any Python IDE from the Flask package. This section of the course will help you install Flask and learn how to use the Python Flask Framework.
Subjects covered in Python for Web development using Flask:
Introduction to Python Web Framework Flask Installing Flask Working on GET, POST, PUT, METHODS using the Python Flask Framework Working on Templates, render template function
Python course fees and duration
A Python course costs around ₹2200-5000.This course fees can vary depending on multiple factors. For example, a self-paced online course will cost you less than a live interactive online classroom session, and offline training sessions are usually expensive ones. This is mainly because of the trainers’ costs, lab assistance, and other facilities.
Some other factors that affect the cost of a Python course are its duration, course syllabus, number of practical sessions, institute reputation and location, trainers’ expertise, etc. What is the duration of a Python course? The duration of a basic Python course is generally between 3 month to 6 months, and advanced courses can be 1 year . However, some courses extend up to 1 year and more when they combine multiple other courses or include internship programs.
Advantages of Python Python is easy to learn and put into practice. … Functions are defined. … Python allows for quick coding. … Python is versatile. … Python understands compound data types. … Libraries in data science have Python interfaces. … Python is widely supported.

"GRAPHIC DESIGN"
Graphic design, in simple words, is a means that professional individuals use to communicate their ideas and messages. They make this communication possible through the means of visual media.
A graphic designing course helps aspiring individuals to become professional designers and create visual content for top institutions around the world. These courses are specialized to accommodate the needs and requirements of different people. The course is so popular that one does not even need to do a lot of research to choose their preferred colleges, institutes, or academies for their degrees, as they are almost mainstream now.
A graphic design course have objectives:
To train aspirants to become more creative with their visual approach. To train aspirants to be more efficient with the technical aspects of graphics-related tasks and also to acquaint them with relevant aspects of a computer. To train individuals about the various aspects of 2-D and 3-D graphics. To prepare aspirants to become fit for a professional graphic designing profession.
Which course is best for graphic design? Best graphic design courses after 12th - Graphic … Certificate Courses in Graphic Design: Adobe Photoshop. CorelDraw. InDesign. Illustrator. Sketchbook. Figma, etc.
It is possible to become an amateur Graphic Designer who is well on the road to becoming a professional Graphic Designer in about three months. In short, three months is what it will take to receive the professional training required to start building a set of competitive professional job materials.

THE BEST COMPUTER INSTITUTE GOLDEN EDUCATION,ROPNAGAR "PUNJAB"
The best mega DISCOUNT here for your best course in golden education institute in this year.
HURRY UP! GUYS TO JOIN US...
Don't miss the chance
You should go to our institute website
WWW.GOLDEN EDUCATION
CONTACT US: 98151-63600
VISIT IT:
#GOLDEN EDUCATION#INSTITUTE#COURSE#career#best courses#tallyprime#DCA#GRAPHICAL#python#ALL COURSE#ROOPAR
2 notes
·
View notes
Text
How do I learn Python in depth?
Improving Your Python Skills
Writing Python Programs Basics: Practice the basics solidly.
Syntax and Semantics: Make sure you are very strong in variables, data types, control flow, functions, and object-oriented programming.
Data Structures: Be able to work with lists, tuples, dictionaries, and sets, and know when to use which.
Modules and Packages: Study how to import and use built-in and third-party modules.
Advanced Concepts
Generators and Iterators: Know how to develop efficient iterators and generators for memory-efficient code.
Decorators: Learn how to dynamically alter functions using decorators.
Metaclasses: Understand how classes are created and can be customized.
Context Managers: Understand how contexts work with statements.
Project Practice
Personal Projects: You will work on projects that you want to, whether building a web application, data analysis tool, or a game.
Contributing to Open Source: Contribute to open-source projects in order to learn from senior developers. Get exposed to real-life code.
Online Challenges: Take part in coding challenges on HackerRank, LeetCode, or Project Euler.
Learn Various Libraries and Frameworks
Scientific Computing: NumPy, SciPy, Pandas
Data Visualization: Matplotlib, Seaborn
Machine Learning: Scikit-learn, TensorFlow, PyTorch
Web Development: Django, Flask
Data Analysis: Dask, Airflow
Read Pythonic Code
Open Source Projects: Study the source code of a few popular Python projects. Go through their best practices and idiomatic Python.
Books and Tutorials: Read all the code examples in books and tutorials on Python.
Conferences and Workshops
Attend conferences and workshops that will help you further your skills in Python. PyCon is an annual Python conference that includes talks, workshops, and even networking opportunities. Local meetups will let you connect with other Python developers in your area.
Learn Continuously
Follow Blogs and Podcasts: Keep reading blogs and listening to podcasts that will keep you updated with the latest trends and developments taking place within the Python community.
Online Courses: Advanced understanding in Python can be acquired by taking online courses on the subject.
Try It Yourself: Trying new techniques and libraries expands one's knowledge.
Other Recommendations
Readable-Clean Code: For code writing, it's essential to follow the style guide in Python, PEP
Naming your variables and functions as close to their utilization as possible is also recommended.
Test Your Code: Unit tests will help in establishing the correctness of your code.
Coding with Others: Doing pair programming and code reviews would provide you with experience from other coders.
You are not Afraid to Ask for Help: Never hesitate to ask for help when things are beyond your hand-on areas, be it online communities or mentors.
These steps, along with consistent practice, will help you become proficient in Python development and open a wide range of possibilities in your career.
2 notes
·
View notes
Text

Comparing Laravel And WordPress: Which Platform Reigns Supreme For Your Projects? - Sohojware
Choosing the right platform for your web project can be a daunting task. Two popular options, Laravel and WordPress, cater to distinct needs and offer unique advantages. This in-depth comparison by Sohojware, a leading web development company, will help you decipher which platform reigns supreme for your specific project requirements.
Understanding Laravel
Laravel is a powerful, open-source PHP web framework designed for the rapid development of complex web applications. It enforces a clean and modular architecture, promoting code reusability and maintainability. Laravel offers a rich ecosystem of pre-built functionalities and tools, enabling developers to streamline the development process.
Here's what makes Laravel stand out:
MVC Architecture: Laravel adheres to the Model-View-Controller (MVC) architectural pattern, fostering a well-organized and scalable project structure.
Object-Oriented Programming: By leveraging object-oriented programming (OOP) principles, Laravel promotes code clarity and maintainability.
Built-in Features: Laravel boasts a plethora of built-in features like authentication, authorization, caching, routing, and more, expediting the development process.
Artisan CLI: Artisan, Laravel's powerful command-line interface (CLI), streamlines repetitive tasks like code generation, database migrations, and unit testing.
Security: Laravel prioritizes security by incorporating features like CSRF protection and secure password hashing, safeguarding your web applications.
However, Laravel's complexity might pose a challenge for beginners due to its steeper learning curve compared to WordPress.
Understanding WordPress
WordPress is a free and open-source content management system (CMS) dominating the web. It empowers users with a user-friendly interface and a vast library of plugins and themes, making it ideal for creating websites and blogs without extensive coding knowledge.
Here's why WordPress is a popular choice:
Ease of Use: WordPress boasts an intuitive interface, allowing users to create and manage content effortlessly, even with minimal technical expertise.
Flexibility: A vast repository of themes and plugins extends WordPress's functionality, enabling customization to suit diverse website needs.
SEO Friendliness: WordPress is inherently SEO-friendly, incorporating features that enhance your website's ranking.
Large Community: WordPress enjoys a massive and active community, providing abundant resources, tutorials, and support.
While user-friendly, WordPress might struggle to handle complex functionalities or highly customized web applications.
Choosing Between Laravel and WordPress
The optimal platform hinges on your project's specific requirements. Here's a breakdown to guide your decision:
Laravel is Ideal For:
Complex web applications require a high degree of customization.
Projects demanding powerful security features.
Applications with a large user base or intricate data structures.
Websites require a high level of performance and scalability.
WordPress is Ideal For:
Simple websites and blogs.
Projects with a primary focus on content management.
E-commerce stores with basic product management needs (using WooCommerce plugin).
Websites requiring frequent content updates by non-technical users.
Sohojware, a well-versed web development company in the USA, can assist you in making an informed decision. Our team of Laravel and WordPress experts will assess your project's needs and recommend the most suitable platform to ensure your web project's success.
In conclusion, both Laravel and WordPress are powerful platforms, each catering to distinct project needs. By understanding their strengths and limitations, you can make an informed decision that empowers your web project's success. Sohojware, a leading web development company in the USA, possesses the expertise to guide you through the selection process and deliver exceptional results, regardless of the platform you choose. Let's leverage our experience to bring your web vision to life.
FAQs about Laravel and WordPress Development by Sohojware
1. Which platform is more cost-effective, Laravel or WordPress?
While WordPress itself is free, ongoing maintenance and customization might require development expertise. Laravel projects typically involve developer costs, but these can be offset by the long-term benefits of a custom-built, scalable application. Sohojware can provide cost-effective solutions for both Laravel and WordPress development.
2. Does Sohojware offer support after project completion?
Sohojware offers comprehensive post-development support for both Laravel and WordPress projects. Our maintenance and support plans ensure your website's continued functionality, security, and performance.
3. Can I migrate my existing website from one platform to another?
Website migration is feasible, but the complexity depends on the website's size and architecture. Sohojware's experienced developers can assess the migration feasibility and execute the process seamlessly.
4. How can Sohojware help me with Laravel or WordPress development?
Sohojware offers a comprehensive range of Laravel and WordPress development services, encompassing custom development, theme and plugin creation, integration with third-party applications, and ongoing maintenance.
5. Where can I find more information about Sohojware's Laravel and WordPress development services?
You can find more information about Sohojware's Laravel and WordPress development services by visiting our website at https://sohojware.com/ or contacting our sales team directly. We'd happily discuss your project requirements and recommend the most suitable platform to achieve your goals.
3 notes
·
View notes
Text
Mastering Java: Your Comprehensive Guide to Programming Excellence
Embarking on the journey of mastering Java is akin to entering a realm of endless possibilities. Java, a versatile and widely-utilized programming language, offers a broad spectrum of applications, from crafting web and mobile applications to powering robust enterprise systems. Whether you are a novice in the realm of coding or a seasoned programmer looking to broaden your skill set, the path to proficiency in Java is an exciting one.

In this comprehensive guide, we will be your guiding light through the intricacies of Java, starting from the foundational basics and progressing to the more advanced aspects of the language. Our objective is to equip you with the knowledge and skills that form a robust and unshakable foundation for your journey into the vibrant world of Java. Fasten your seatbelt as we embark on this exhilarating exploration, charting a course that will empower you to thrive in the ever-evolving landscape of software development.
Here's a 8-step guide to effectively learn Java
Step 1: Setting Up Your Development Environment
Your journey to becoming a proficient Java developer commences with setting up your development environment. The essential components are the Java Development Kit (JDK) and an Integrated Development Environment (IDE) like Eclipse or IntelliJ IDEA. These tools aren't just convenient; they're the gears that will drive your Java programming endeavors. They streamline the coding process, provide useful features, and offer an organized workspace, making your coding experience efficient and enjoyable.
Step 2: The Foundation - Learning the Basics
With your development environment ready, it's time to delve into the fundamental building blocks of Java. Begin by acquainting yourself with data types, variables, operators, and control structures. These are the nuts and bolts of the language, and a solid grasp of these concepts is essential. You'll find an abundance of online tutorials and beginner-friendly Java books to assist you at this stage.
Step 3: Navigating the World of Object-Oriented Programming (OOP)
The object-oriented programming (OOP) approach is well known in Java. To harness the true power of Java, immerse yourself in the world of OOP. Understand the concepts of classes, objects, inheritance, encapsulation, and polymorphism. This knowledge forms the bedrock of Java programming and enables you to design efficient, organized, and scalable code.
Step 4: Mastering Data Structures and Algorithms
Data structures (such as arrays, lists, and sets) and algorithms are the secret sauce behind solving real-world problems efficiently. As you progress, dive into the world of data structures and algorithms. These are the tools that will empower you to handle complex tasks and optimize your code. They're your go-to assets for creating efficient and responsive applications.
Step 5: The Art of Exception Handling
Java boasts a robust exception-handling mechanism. Understanding how to handle exceptions properly is not just an add-on skill; it's a vital aspect of writing reliable code. Exception handling ensures that your code gracefully manages unexpected situations, preventing crashes and delivering a seamless user experience.
Step 6: Exploring Input and Output Operations
In this step, you'll explore the realm of input and output (I/O) operations. Mastering I/O is crucial for reading and writing files, as well as interacting with users. You'll gain the ability to build applications that can efficiently process data and communicate effectively with users.
Step 7: Conquering Multi tasking
Java's support for multi tasking is a significant advantage. Understanding how to manage threads and synchronize their actions is vital for creating concurrent applications. Multithreading is the key to developing software that can handle multiple tasks simultaneously, making your applications responsive and scalable.
Step 8: Building Projects and Real-World Practice
Theory is only as valuable as its practical application. The final step involves applying what you've learned by building small projects. These projects serve as a proving ground for your skills and provide valuable additions to your portfolio. Whether it's a simple application or a more complex project, the act of building is where the real learning takes place.

As you step into this vibrant realm of Java, remember that continuous learning is the key to staying relevant and effective in the ever-evolving field of software development. Be open to exploring diverse applications, from web development to mobile apps and enterprise solutions, and never underestimate the power of hands-on practice. Building projects, no matter how small, will solidify your knowledge and boost your confidence.
In your quest to master Java, ACTE Technologies stands as a valuable ally. Their expert guidance and comprehensive training programs will sharpen your skills, boost your confidence, and pave the way for a rewarding career in software development. Whether you're embarking on your Java journey or looking to take your skills to the next level, ACTE Technologies offers the resources and support you need to thrive in the world of Java programming.
So, with Java as your trusty companion, and ACTE Technologies as your guide, the possibilities are boundless. Your journey is just beginning, and the world of software development awaits your innovation and expertise. Best of luck on your path to mastering Java!
9 notes
·
View notes
Text
Top 10 Front-End Frameworks and Libraries for 2024
As the web development landscape continues to evolve, staying updated with the latest front-end frameworks and libraries is crucial for any developer. Whether you're a seasoned pro or just starting out, knowing which tools to use can significantly impact your productivity and the quality of your projects. In this post, we’ll explore the top 10 front-end frameworks and libraries that are set to dominate in 2024.
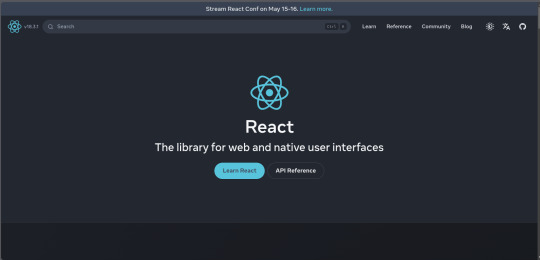
1. React
React remains one of the most popular front-end libraries, known for its simplicity and flexibility.
Key Features of React
Component-Based Architecture: Reusable components make development efficient and manageable.
Virtual DOM: Enhances performance by minimizing direct DOM manipulation.
Strong Community Support: A vast ecosystem of tools, libraries, and tutorials.
2. Angular
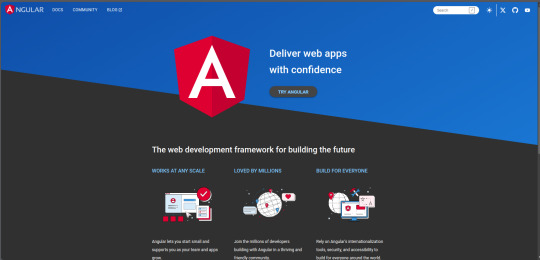
Angular, backed by Google, is a powerful framework for building dynamic single-page applications (SPAs).
Why Choose Angular?
Two-Way Data Binding: Synchronizes data between the model and the view.
Dependency Injection: Improves code maintainability and testability.
Comprehensive Documentation: Extensive resources for learning and troubleshooting.
3. Vue.js
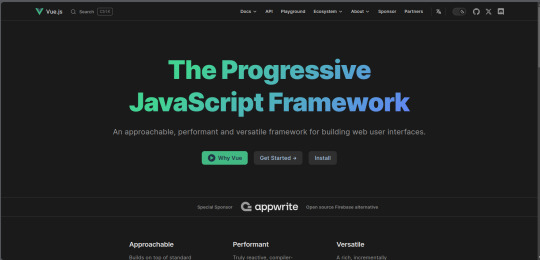
Vue.js has gained popularity due to its gentle learning curve and versatility.
Advantages of Vue.js
Reactive Data Binding: Simplifies state management.
Single-File Components: Encapsulate HTML, CSS, and JavaScript in one file.
Flexibility: Can be used for both large-scale and small-scale applications.
4. Svelte
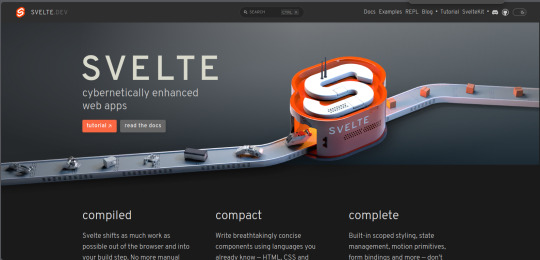
Svelte is a relatively new player that compiles components into highly efficient vanilla JavaScript at build time.
Svelte’s Standout Features
No Virtual DOM: Directly manipulates the DOM for better performance.
Less Boilerplate: Cleaner code with minimal overhead.
Ease of Use: Intuitive and straightforward syntax.
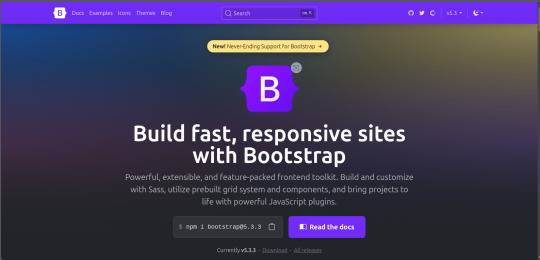
5. Bootstrap
Bootstrap is a front-end framework that provides pre-designed components and a responsive grid system.
Benefits of Using Bootstrap
Responsive Design: Ensures your site looks great on all devices.
Pre-Styled Components: Saves time with ready-to-use UI elements.
Customizable: Easily customize with Sass variables and Bootstrap’s extensive options.
6. Tailwind CSS
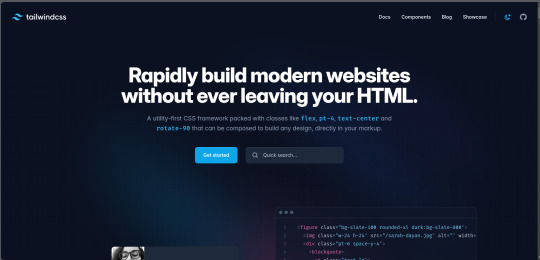
Tailwind CSS is a utility-first CSS framework that allows for rapid UI development.
Tailwind CSS Features
Utility-First Approach: Use utility classes directly in your HTML.
Customizable: Extensive configuration options to suit your project’s needs.
Consistency: Enforces a consistent design language across your project.
7. Ember.js
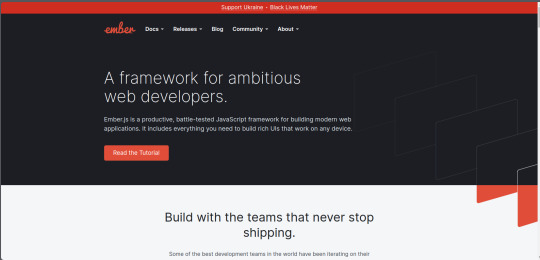
Ember.js is a robust framework for building ambitious web applications.
Why Ember.js Stands Out
Convention over Configuration: Reduces the amount of decision-making and boilerplate code.
Strong Routing: Powerful routing capabilities for managing application state.
Productivity: Focuses on developer productivity with built-in best practices.
8. Alpine.js
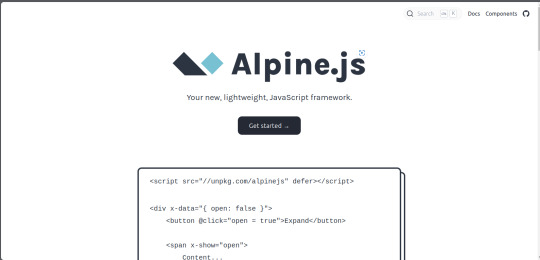
Alpine.js offers a minimal and lightweight way to add interactivity to your websites.
Key Features of Alpine.js
Lightweight: Small footprint with only a few kilobytes.
Declarative Syntax: Similar to Vue.js, making it easy to understand and implement.
Ease of Integration: Can be easily integrated into existing projects.
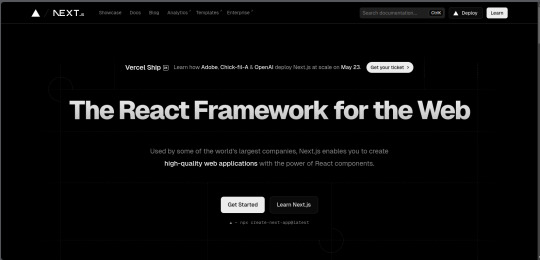
9. Next.js
Next.js is a popular React framework that enables server-side rendering and static site generation.
Benefits of Using Next.js
Server-Side Rendering (SSR): Improves performance and SEO by rendering pages on the server.
Static Site Generation (SSG): Pre-renders pages at build time for fast load times.
API Routes: Allows you to create API endpoints within your application.
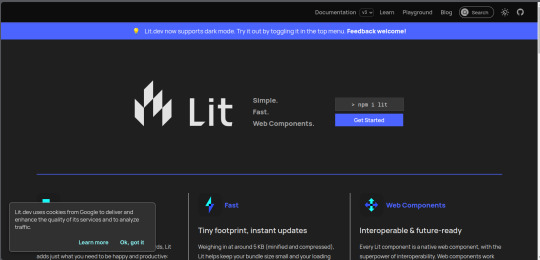
10. Lit
Lit is a simple library for building fast, lightweight web components.
Advantages of Lit
Web Components: Embraces the web components standard for reusable, encapsulated HTML elements.
Performance: Lightweight and highly performant.
Simple API: Easy to learn and use with a minimal API surface.
Conclusion
Choosing the right front-end framework or library can significantly impact your workflow and the quality of your projects. Whether you prefer the flexibility of React, the structure of Angular, or the simplicity of Svelte, there's a tool out there to suit your needs.
Final Tips for Selecting a Framework or Library
Project Requirements: Consider the specific needs of your project.
Community and Support: Look for frameworks with strong community support and documentation.
Learning Curve: Choose a tool that matches your current skill level and the time you have available to learn.
By staying informed about the latest tools and trends, you can ensure that your skills remain relevant and that you can deliver the best possible results in your projects. Happy coding!
Remember, the best tool is the one that helps you get the job done efficiently and effectively. So, dive into these frameworks and libraries, and take your front-end development skills to the next level!
Share Your Thoughts
I'm curious to know your thoughts on these front-end frameworks and libraries. Have you used any of them in your projects? Which one is your favorite, and why? Share your experiences and insights in the comments below.👇
2 notes
·
View notes