#without following a pattern or tutorial
Explore tagged Tumblr posts
Visit Tumblr Blog
Explore Tumblr blogs with no restrictions, modern design and the best experience.
Last Seen Tumblr Blogs


Fun Fact
130K people were victims of a chain letter scam that affected Tumblr in May 2011.
Text
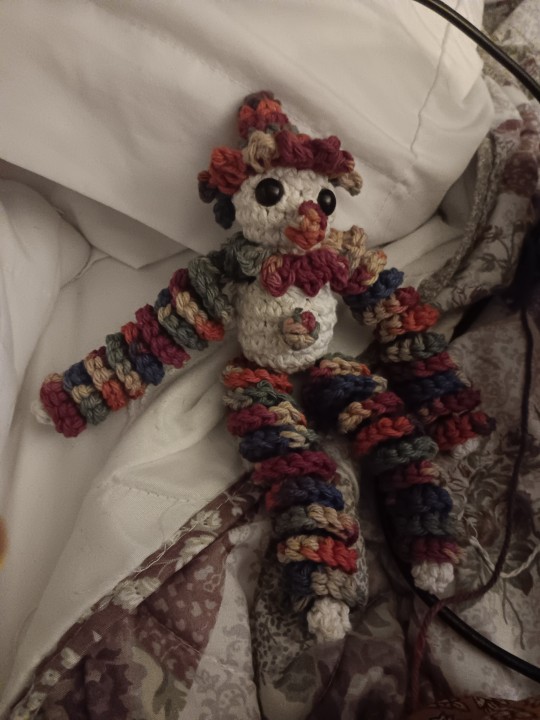
My attempt at a little clown doll inspired by the lovely @minkerverse 's clown sons!! Thank you for letting me try my hand at a take on ur clowns I think this little guy is my favorite creation yet :D
Bonus under the cut ;)
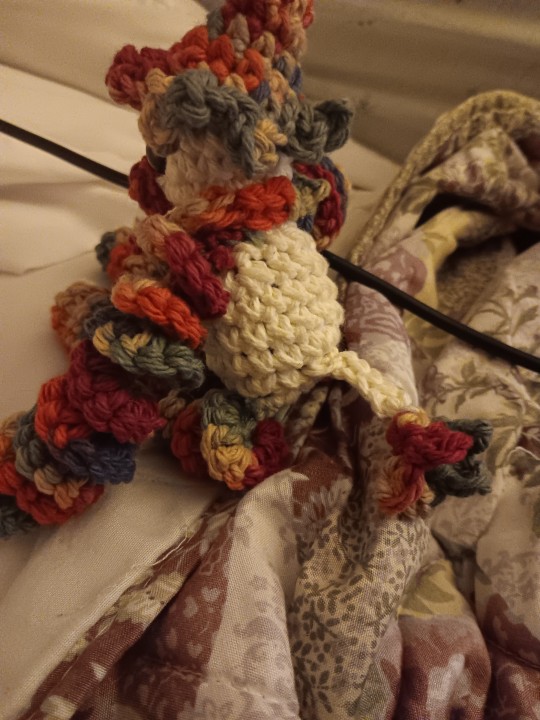
Tail!!!!!!!!
#im so so glad to have a use for this yarn it is so pretty#eventually i may redo the nose and the button but im not sure how yet#i think i struggled the most with the ruffles im still figuring that part out but this shell stitch did ok as a substitute haha!!#for context i eyeballed this so it was also an awrsome exercisr to see how far ive come in crochet to be able to aply what i know#without following a pattern or tutorial#i think it will help a lot making my own plushies in the future#crochet#art#amigurimi#clown
21 notes
·
View notes
Text
Stay calm, guys, I might have... get this... a second kippah to wear in a few hours 😱
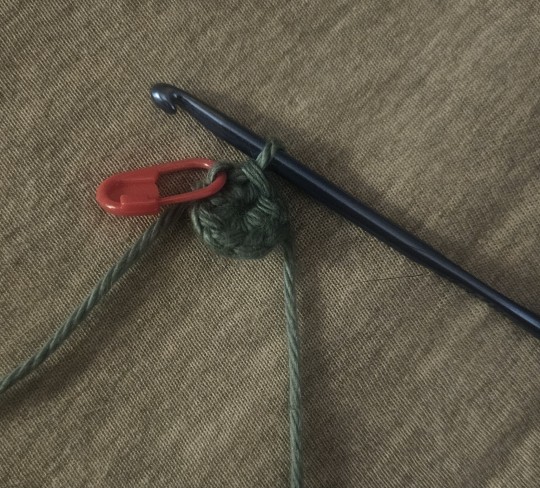
#jumblr#jew by choice#jewish conversion#shalom crafts#personal thoughts tag#i'm following a pattern that did the alternate magic ring start (ie ch 4 then slst) but i decided No#and guys....... i did the magic ring ALL BY MYSELF without ANY youtubing a tutorial!!!!!!#this is my SECOND magic ring ever :3#if this blog gets even one (1) singular person to start crochet or to specifically crochet judaica i can die happy 🙏#but i've been wearing my same rainbow kippah for months now and it's not okay 😭#because i always wear it i can't wash it all the time (don't judge)
27 notes
·
View notes
Text
🔬HOUSE PLACEMENTS IN SIGNS OBSERVATIONS 🔬
Note : These are all my personal observations and patterns I've seen over the years and based on western astrology. Take what resonates and leave the rest. One placement isn't enough to predict and should look at the whole chart to analyze what's in there. Lemme know in the comments whether it hits home or not!
1st house placements in fire signs loves the spotlight or at least love taking selfies and posting it on social media. If in earth signs, looks in the mirror frequently to make sure they look good when crying and takes mirror selfies. If in air signs, their style changes everyday and in some cases, loves to color their hair especially if they have moon in 7th, 9th or 11th houses. If in water signs, has this " cry now, think later" energy or " I'm fine" energy even if they're not.
2nd house placements in fire signs are prone to impulsive buys and spend recklessly. If in earth signs, affordable shopping or hoard things like there's no tmrw. If in water signs, holds onto things and get emotionally attached to stuffs like that's my grandma's watch or this recipe is from my great grandma from world war 2. If in air signs, cheap buys and looks for discounts, thrift stores, spends too much on something and then live on pennies for the next whole month.
3rd house placements if in fire signs, can jump to conclusions or interrupt without realizing it. If in earth signs, waits for their turn to speak which never comes if in retrograde motion, could be too blunt and brutal with their words and insult you wrapped up as a compliment. If in air signs, convos are all over the place and ends Convo abruptly and moves on to next and struggle with articulating words if in retrograde as mind processes 120 words and in 5 topics at once, they end up with speaking 20 words. If in water signs, overshares and take things personally even when others meant in a general way.
4th house placements if in fire signs, stubs their toe constantly or just prone to little/major accidents at home. If in earth signs, black sheep of the family, might seem too distant or emotionally closed off, selective affection. Constipated at times. If in water signs, can't let go of toxic people around them and pretends they're happy even though they're not. If in air signs, selective communication, gossips within family, argues sometimes and reconcile with the other person like nothing happened. Also forget things quickly like where is my key?
5th house placements if in fire signs, defensive and loves riding a bike to watch the sunrise or such. Short-tempered and into games. If in earth signs, stingy when it comes to spend for others they don't wanna spend money on. Classic "I have nothing to wear" energy. Loves desserts and likes to try new restaurants/dishes. If in air signs, smart and would navigate their way out of trouble. Doesn't like relatives showing up. Watches bad movies knowing it's bad like The Room or Neil Breen movies. The kind to spread a rumor for fun. If in water signs, never asks their crush out and daydreams about their crush like having kids and dying of old age together. Bathroom/Kitchen singer like sings while doing household chores. OCD in some cases.
6th house placements if in fire signs, watches at least 5 shorts/reels a day. Doomscrolls their feed. Watches cooking tutorial or natural skin care remedies. If in earth signs, has a schedule for when to clean and when to run errands and expects their kids to follow/help. Learns new hobbies later in life like in their 40's. Prefers a clean kitchen. If in water signs, breaks things accidentally and spills coffee or other drinks often. Religiously drinks coffee or at least into green tea and such. Into collecting things they like such as pokemon cards, art collections and such. If in air signs, they are their worst enemy and comes up with worst scenarios in their head which never happens in reality. Talks and smiles to self like if someone seen them smiling, talking to themselves, would be seen as a crazy or a weirdo. Inner voice is their best friend. Unemployed/underpaid in some cases.
7th house placements if in fire signs, has this "world is your oyster" vibe and grass is always greener on the other side for them. Has Plan B. If in earth signs, multitaskers. When comes to love, juggles between two people and also loves architectural designs like interior designs and all(eg: Pinterest and Zillow). If in water signs, never satisfied with things or people. Either a drunk or the sober friend. Also a hopeless romantic. If in air signs, struggles with decision making. Migraines and hate loud noises or loud people. If single, in a relationship with their bed.
8th house placements if in fire signs, sexual tension or sexual conquest. Loves the chase and an ego boost and defensive in relationships. One-night stands/flings. If in earth signs, picky with whom they let in. Asexual in rare cases. Transactional relationships or relationships based on sex rather than any real love in some cases. If in water signs, one-sided sexual attraction, BDSM and such. Fantasizes about their interest sexually and watches p*rn to get off. If in air signs, into hard-core p*rn fantasies, abused/cheated on in relationships, sex when travelling, aquaphobia if moon is placed, quickly jumps from one interest to another. LGBTQIA+ in some cases.
9th house placements if in fire signs, smells BS from a mile away. Likes k-pop or other culture movies/songs than their own. Would leave everything behind to pursue their passion and start from scratch. Into animal rescues and like action movies. If in air signs, prefers an apartment/penthouse/condo than a home in the suburbs. Loves to attend concerts, rallies, festival events and all. Not a homebody or gets depressed if stayed home for longer periods of time. Likes stand-up comedy. Watches true crime. If in water signs, loves to travel via water or at least swim in lakes or rivers in the weekend. Fishing/sea food in some cases. Potential to become a chef/ just food business or simply eat at buffets. If in earth signs, watches home building tutorials/DIY construction kits. Loves snow/rain. Spends at least an hour/day on shopping apps or might even sell stuffs online. Could be into vintage/futuristic fashion and buys gadgets/antiques. Into old model cars/scifi cars in some cases.
10th house placements if in fire signs, have a start-up founder like passion and energy. Moves away for career. Has Plan B,C,D like an accountant in the morning and comedian in the evening. Career change might happen later in life to follow passion. If in earth signs, two or more sources of income is possible. Strategist and an "insider". Knows things most of us don't have access to or not known by public. Sometimes becomes a stay-at-home parent after kids enter the picture and willingly takes a backseat in their career. If in water signs, values connections which sometimes gets romantic. Co-workers/colleagues are like family. Fakes their smile or acts friendly to people they don't like but do so to avoid being called rude. If in air signs, trusts people blindly sometimes, gets betrayed by people they knew well, unemployed/underpaid in some cases.
11th house placements if in fire signs, debates in the comment section, struggles to stand out from crowd/find their community or niche, feels lonely even when surrounded by people. One man army. If in earth signs, feels too old for trends like a grandma/grandpa to tech or live in the 2050s. Struggles to be heard in groups or spends time and money on people as what others think of them matters. If in water signs, talks to strangers online looking for love and connection. Long-distance relationships which might or might not develop further. Spends on celebrity products/merch in some cases. If in air signs, send pics to strangers online or an active OF account in some cases. Could get blackmailed/hacked in some cases. Probably has a troll account.
12th house placements if in fire signs, feels like the side character in their own life. Fire on the inside, calm and composed on the outside. If they do succeed in life, people around them won't even believe they can do great things. Hides their true self. If in earth signs, clean and tidy when happy, poor hygiene and unkempt hair/nails if depressed. Skin and food allergies. Body image issues/self-harm tendencies. If in water signs, falls for unavailable people, hypochondriacs, diabetes/blood pressure issues later in life in some cases. Dehydration/over-indulgence. Cries under the sheets or in the shower. If in air signs, might develop su*cidal thoughts/self-destructive tendencies, stalk exes online or gets stalked. Hides their true opinion on things and says what's acceptable in the society. Writes under a pen name. When 12th house placements move far away from native, they usually get seen/recognized by people there and loved more.
Wanna go deeper into the layers of your placements? DM me for a complete astrology reading or a 5 year/8 year marriage report🌙💬 and check out my pinned post for pricing + details 💫💸
Let’s decode your cosmic chaos together ⭐
#astrology#astrology readings#birth chart#astro observations#astro notes#spirituality#spiritual awakening#zodiac signs#spiritual journey#western astrology#natal placements#natal aspects#natal astrology#natal chart#astrologer#astro community#astro placements#astrology tumblr#astrology notes#astro tumblr#astrology signs#astrology placements
563 notes
·
View notes
Text
("Sonic") Hands Study
I get asked a lot how I draw hands, and particularly how I draw hands in the "Sonic" style. Let me preface by saying I am mostly self-taught, so please do your research and study what techniques work best for you. The following demonstration is what I personally use to help me draw hands in general and–more specifically–how I draw “Sonic” hands. This is less of a tutorial and more of a series of observations.
*And remember, there are always exceptions to the rules!*
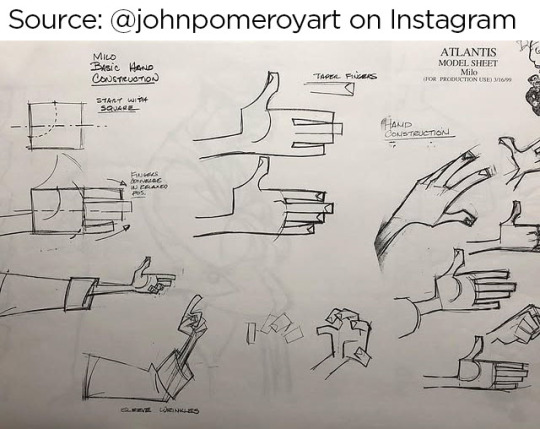
I personally believe before you can go about stylizing hands, you have to understand how to draw hands in the first place. Afterall, I think you have to know the rules before you can best bend/break them. Think about super stylized hands in animation like the characters from Atlantis or Hercules. Even though these hands are unlike what we see in real life, they still look and feel ‘natural’ because the artists understand how hands function and are able to bend the rules while still demonstrating proper anatomy.
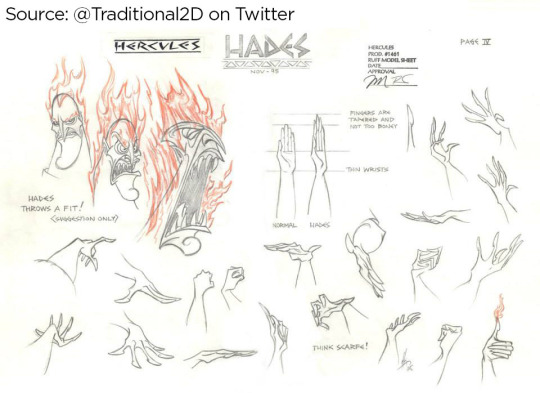
Sources: [x] [x]
I highly recommend studying the anatomy of a hand. It’s educational and fascinating! There are plenty of free resources online!
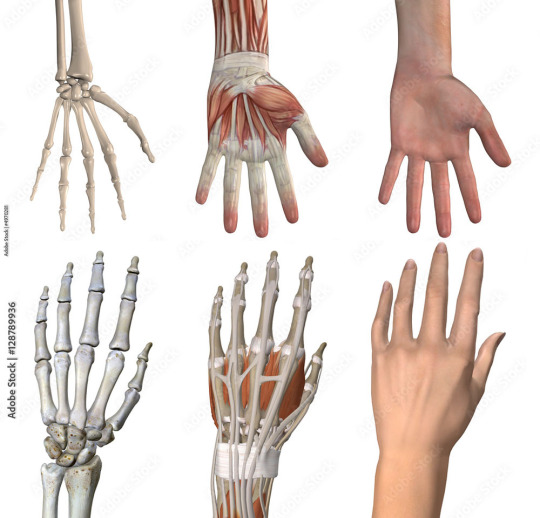
I understand many people find hands intimidating to draw, but the best way to learn how to draw anything is by breaking it down into shapes. Everything is made up of shapes.


3 is the magic number
In simple terms, our hands can be seen in patterns of 3. Your palm can be broken into 3 segments that can move semi-independently. Your fingers are composed of 3 segments each (proximal, middle, distal). There are 3 phalangeal joints per finger. The average shape a person’s fingertips make when aligned is a triangle (a 3-sided shape), with the middle finger being the highest most point of the triangle and the other fingers cascading down (there are exceptions to this rule). Keeping the number 3 in mind will help you remember how hands/fingers articulate.
Everything is connected
Even though elements of your hand can move somewhat independently, every movement influences the other segments of the hand. Notice when you put one finger down how (most likely) at least one other finger moves slightly? Or notice how you can only do certain gestures with the assistance of your other fingers or sections of your palm? Keeping in mind how segments of the hand affect the others will help make your drawings feel more organic and less stiff.

I usually start with the palm (or back of the hand) first and that determines where everything else falls into place.

Once you grasp how hands work, that’s when I believe you can determine how stylized you want to get. There is a very large range of drawings hands from super realistic to very simplistic.

If you’re wanting to emulate a certain style, you have to study it and learn how it works.
"Sonic" hands
As far as Sonic hands go, it depends on which version you’re best hoping to emulate. Notice how the styles vary even throughout the franchise?
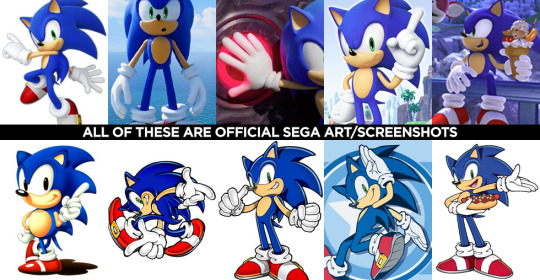
In the 3D video games, Sonic characters tend to have what I classify as more ‘cartoon-y’ hands while in illustrated media, it often leans more towards realism. (Note I said ‘leans towards,’ not full realism). How and why is that?
Let’s break it down into shapes again, Sonic Style! Pt 1
In many of the 3D rendered media, the characters’ fingers are made of more round shapes. The models also don’t conform to realistic proportions. The tips of the fingers are usually larger than the segments closer to the palms (the middle and proximal phalanges), and this helps to deviate them from a more realistic look. Speaking of proportions, the hands overall tend to be disproportionately larger than the rest of the characters’ bodies. This also makes it feel more like a cartoon, even without resorting to a super simplified, 3-fingered hand like Mickey Mouse or Bob Belcher.

Breaking down shapes, Sonic Style! pt 2
Illustrated samples vary depending on the artist/studio, but I’ve noticed that in general, illustrated Sonic characters’ hands tend to have more square/rectangular shapes. The phalanx proportions often resemble what we see in real life, with the fingertips tapering down in size compared to the segments closest to the palm. The overall size of the hands in proportion to the body are still larger than that of real humans, but they tend to be closer in proportion compared to their 3D counterparts. This is why in illustrations, the characters are more capable of crossing their arms, interlacing their fingers, or making other natural hand gestures.

Also, notice in these examples, there’s more detail to the hands than what you’d find on a Looney Tunes character? There are often folds in the material of the gloves, some knuckle definition present, more natural bends to the fingers. However, the hands are almost never as detailed as that of say, a Dragon Ball character where you’re seeing muscle tendons, veins, definition of each finger segment, finger nails, etc.

Sources: Dragon Ball Z, The Looney Tunes Show
MY STYLE
With all that in mind, I happen to find the sweet spot for the Sonic character style right in this range:

Everyone has their own preferences and it’s up to you to decide what you like best, but this is what I prefer.
MY STYLE - Cont’d
I use a blend of the two previous Sonic styles I mentioned, Cartoon-Round + SemiRealistic-Square. I like to go with a more “Squoval” shape (rounded squares) to the fingers. I try to keep the fingers in a naturally proportionate scale with the ends tapering down in size, but the overall size of the hands are still bigger than what you’d see in real life. I like to add a bit more detail when warranted, but I personally rarely resort to definition in the tendons/veins or complex wrinkles in the bends of the fingers (unless it suits a specific character or emotion).

Like I said, this is less of a tutorial and more a series of observations. But perhaps looking at hands in the way that I do might help you with your own drawings! You should absolutely do your own studies to find what works best for you. But I hope you found this helpful in some way!
#study#art study#hands#drawing hands#cartoons#sonic#reference#long post#advice#tutorial#sth#sonic the hedgehog#sonic trash
419 notes
·
View notes
Text
Review: First Stop Cosplay's Lolita Patterns
So a while back I saw some patterns from a company called First Stop Cosplay. I asked them if I could review their patterns (since the last time I reviewed a small pattern company they did not appreciate it) and they actually sent me some patterns for free.
I had a lot of fun making these. Unlike when I reviewed Cut/Sew, I ended up with actual lolita garments, didn't get confused by any steps, and actually had a lot of fun. And at no point did I have to make this face:

So, here's our reviews.
First Stop Cosplay isn't a EGL fashion company or even a fashion company at all. They're a cosplay pattern company that happened to make five different lolita fashion patterns. Their lolita options consist of a petticoat, some short bloomers, a capelet, and the blouse and skirt that I'm reviewing. I don't have any evidence that anyone in their team wears lolita regularly or outside of comic conventions, although that isn't inherently a negative thing.
First Stop Cosplay's entire goal is to make handmade cosplay inclusive and accessible to everyone. They do this by making patterns that are very simple, and that have instructions that are so detailed and easy that new sewists can follow along without a problem. Their normal women's size catalog includes 14 different size options. We're going to stick a pin in "inclusive for new sewists" and "inclusive for all sizes" because I'm going to come back to those points in a minute. The patterns are sold as a single size, and are a bit on the expensive side relative to their market. Printed versions of both the patterns I received would run $50, though they do have a lolita bundle option. They are currently discontinuing their paper patterns and going fully digital, and there is a slight discount for buying the digitial download instead. Unlike most digital download patterns, there is a sizeable gap time between when you buy the pattern and when you receive it. I bought some digital patterns from them yesterday afternoon, put in the activation codes, and am still waiting to actually receive my patterns. For comparison, I bought some digital patterns off Etsy yesterday and had them within minutes. They have an elaborate and non-automated anti-piracy system to make sure their patterns and instructions are protected from people who didn't buy them. I don't think they have quite the right balance of intellectual property protection vs customer convenience, but that's maybe just my opinion.
I do think that First Stop's prices are justified by how high quality their instructions are. They really do walk through every step, and I think that most people whose sewing knowledge is how to thread their sewing machine and sew a pillow would have enough prerequisite knowledge to make their skirt pattern. I think anyone who successfully made their skirt pattern could follow the blouse pattern and have at least most success. Basically, with a First Stop Cosplay pattern, you're not buying a sewing pattern. You're buying a how-to-sew tutorial that's tailored to make the item you want to make. They are offering genuinely the best indie patterns I've found on the market. I do respect that they want to keep these pattern instructions secure, and I do think I'd have been a little bit annoyed if I spent $50 on some patterns and then found out that all the expensive instructions that I bought the pattern for were just available for free online. However, I don't love that there's several days between when you receive the product and when you're allowed to actually use the product.
When you buy their pattern, you get a single size. This is an absolutely horrible idea that I know for a fact is costing them a lot of business and also is building up a reputation that their garments won't fit and therefore aren't safe to invest in and it's also actively working against their pledge to be size inclusive and inclusive to new sewists, but we'll go into that later. We don't need to lead with me going over the worst decision they've made and why it sucks.
(But, while we're on the subject of bad inclusivity, y'all need to fix the pop ups on your site. I'm over there grabbing screenshots and data and I'm also in hell because I have one pop up go OVER the second pop up every single time that I tab between different pages. There's a whole chunk of disabilities for whom this is an absolute accessibility nightmare. Also if both pop ups happen at the same time, the page can get scroll-locked and you have to refresh the page. I want to give you money so please don't make it hard for me to buy your product. I only need to X out of your newsletter pop up one time, I won't change my mind the 12th time I'm shown it)
Let's review the actual patterns now.
0024 Customizable Lolita Skirt:

This is a fun, basic rectangle skirt. It's got an interfaced, non-shirred waistband, with non-removable waist ties inserted at the side seams. I loved that the instructions included how to do the kind of tasks that most patterns just assume you would automatically do. Instead of, "transfer all markings," it will show you each marking and how to transfer it. Instead of "press seams as you sew," it will stop the instructions and tell you what to press and how to press it. In addition to helping out new people who don't have someone to teach them how to do these things, it's helpful for lazy sewists like me who tend to want to skip these steps.
This pattern comes with three PDF instruction files. The first is for how to cut the pattern, fuse the interfacing, and transfer all the markings. The second is all of the sewing instructions. The third one is the "bonus content," and is where the skirt gets its "customizable" name. Sadly, there's not as much bonus content for these skirts as I would really like. The instructions include different ways to sew on trim, like sewing the trim under the hem, sewing it on top of the hem, applying it to the skirt body, or applying it to the waistband. There's not any actual direction for how to select good lace or trim or how to apply it to make it look the most lolita. Again, they're cosplayers, so I won't fault them for not knowing lolita fashion the way that a lifestyler lolita would, but it did feel like a bit of a let-down. For a product with "customizable" in the name, I wanted some more options.
In terms of actual design, though, it's a pretty solid skirt. if I was to throw you RhodyGunn's lolita skirt tutorial and say, "just interface the waist band!" and you didn't feel confident making that with no help, this would be a really good skirt for you. I have three problems with it, which is actually a pretty small number of problems by my standards.
My skirt did not fit me, but that was my fault. I just ordered totally the wrong size, and didn't realize it until it was too late. I made it work just by using the waist ties to cinch it in tighter. I wanted to make the skirt again, and if I'd had multiple size options with my purchase then that wouldn't have been a problem. Instead, when I remade my skirt, I had to use my sewing patterning skills to fix it. That's not a huge problem for me, but it would be a huge problem for First Stop Cosplay's target audience.

I added a ruffle and a few lines of lace onto my skirt, because I don't want to put a lot of work into a skirt and then have it not be an actual lolita skirt. This is what it looked like before my customizations. Please note that my skirt is extra long due to me ordering like 2 sizes too large, as their longer sizes are longer than their smaller sizes.
My other critiques sum up to, "lolita isn't patterned like that" in a couple of cases. While skirts with suspenders are definitely a thing, I couldn't find any that tie at the shoulders. I know that this is probably a way to make sure that the straps will fit everyone, but I'd love to see a piece manufactured by any brand that would give inspiration about how to wear it. The other thing that's just not patterned like lolita garments is the waist ties.. It would be possible to replace the pattern piece with one that's actually lolita-shaped without modifying the instructions at all. If no one at First Stop wants to do a re-drawn waist tie, I'll do it and post it here, since I think the info would benefit the handmade community at large.

Lolita waist ties are very flared, which is how we get the cute waist bow, so pattern them like this next time and it'll be correct. I'm not saying this as a preference or a style choice, lolita waist ties are just shaped like this 85+% of the time.

As previously mentioned, I made each garment twice. On the second one, I re-patterned the waist tie, and then I just slapped a bunch of lace on the hem. It made a perfectly acceptable lolita skirt, in my opinion. Please note that, if I was a new sewist, I wouldn't have been able to make this skirt a second time, since I wouldn't have the skills to resize the waistband to fit me. In order to make this pattern for myself a second time, I would have needed to receive multiple sizes when I bought my pattern.
Blouse time.
FSCO Whimsical Lolita Blouse:

Button front, puff sleeve, peter pan collar blouse, two sleeve variations. I did not make the long sleeves because I live in Sacramento, which is one windy day apart from being in an air fryer.
I want to start by saying that I've officially made this blouse my favorite handmade lolita blouse pattern, and I'm going to make it in more colors and fabrics. I love how fast it comes together, and I love that a lot of really time-consuming techniques have a more simple technique instead. I like sewing fast and this feels good to sew fast.

However, this blouse suffers pretty badly from "close, but not quite," in the same way the waist ties are. Yes, lolita blouses can have flat roll peter pan collars, but they're usually not this size, or this shape, or sit this close to the neck. Yes, lolita blouses usually have puff sleeves, but they're shorter and puffier. These were super easy modifications for me to make, but again, it's not an easy modification for a new sewist to make. But these are adjustments that First Stop COULD make. They could adjust 2 pieces and one line of text in their instructions and have what would actually be the only good lolita blouse pattern aimed at the absolute beginner. These patterns are so close to being so good. Two pattern pieces and one line of text away from having THE lolita blouse pattern that we recommend to all the new kids.
To anyone making this blouse: if you don't want to make adjustments to the pattern, the collar more or less isn't going to read as lolita at the size it is at. I got around it by using some 3.5" gathered lace. That ended up being a pretty big lace, but you will need to put a ruffle or some wide gathered lace on the collar if you want to wear this as a lolita blouse. It would be nice for there to be instructions for that.

Just if anyone is curious, here's the changes the pattern needs to really read as lolita. Sleeve shorter and more volume at the hem, collar wider especially at the shoulders, neckline farther away from the actual neck. Change that and you're golden. The picture on the right is the collar in the pattern laid over the collar that I redrew.
My original blue blouse up there didn't fit me, and that was actually not my fault this time. I bought the right blouse for my bust size, as I was recommended to do. However, relative to their sizing, I have a smaller bust and a larger waist. This meant that a fitted blouse like this was too small in my waist. When I made my purple blouse, I just added 3/4 of an inch to each side seam and re-patterned the bust dart, but again, First Stop Cosplay's target audience does not know how to do that.
When you're selling a product, not posting a tutorial online or giving comments on a forum, but are actually selling a product for real money, it's your responsibility to give your customers the things that they need to succeed. That includes making sure that they have the info needed to make their pattern fit.
First Stop Cosplay is a really promising company, and I really enjoyed most of the process of their patterns. This is why I'm going to spend some time talking about the thing that's stopping people from buying and successfully completing their products, which is the thing that I think is going to kill this company and make them go out of business. First Stop, I really don't want. you to die, so I need you to listen:
The single size pattern thing is a problem. it stops new customers from choosing your product. it stops existing customers from being successful with your product. It stops you from completing your mission to be both ability-inclusive and size-inclusive. It's working against you to such an extreme that I'm stunned that no one in the company with the power to change this can see it.
In the 2.5 months that I've been working on this project, I've talked to a lot of people about your company. "I would buy from them, but I'm afraid I'm going to get the wrong size," was a common sentiment I got. "I won't buy from that company, because they're charging a lot of money for just one size," was another. It stopped ME from trying your company; if I had to buy these patterns out of pocket then I would not have reviewed them. This is because I, a very experienced sewist, didn't want to get the wrong pattern size--and i STILL GOT THE WRONG PATTERN SIZE, twice, even after being PERSONALLY GUIDED by an FSCO employee. How are other companies dealing with the problem of customers buying the wrong size of pattern? They're giving people multiple pattern sizes when they sell the pattern.
I will admit that it's beginner-friendly to not confuse your customer with nested pattern sizes. However, y'all are going digital, and it will cost you no more money or and more paper to just give separate PDFs for each size. You already have the PDFs. You're selling them separately. Just put them in a group. Then, you're still fulfilling your goal of not confusing your customer with multiple sizes, but you're also not trapping a beginner into a single size with no chance of correcting that mistake. When you're asking a beginner to pick their size before they're allowed to look at the pattern, you're potentially dooming their project before it starts. In my market research, I encountered two people who bought First Stop Cosplay patterns, followed them all the way to the end, used their limited time and their expensive fabric. They made cosplays that they were happy with and proud of...until they put them on, and then they didn't fit. That's a story that should not happen. And I get it, it's not super easy to help a beginner pick a size when you're not present to help and they don't totally know what they're doing. But you know what is a thing you can expect a beginner to do, that will make their finished product better and make their garment reflect positively on your company? Telling them to make a mockup before they use their expensive fabric. You don't need to know how to resize a pattern. You just need to know how to follow the basic mockup instructions and then try it on. Just like shopping at Walmart, if your mockup garment is too small, you make the size larger. If it's too big, you make the size smaller. This is also very newbie-inclusive because it introduces them to the steps they're going to follow so that they're more familiar with them. The fact that even one person did everything right and still wasn't able to get their working garment is a fact that you should be trying to figure out how to fix. When you're a small pattern company, your reputation of, "I made their stuff and it doesn't fit," is a very dangerous reputation.
Your product, as it is, is inclusive to all body sizes, but it's not at all inclusive to all body shapes. You offer one shape in all sizes, and then don't provide the information necessary to help people who are not that shape choose between sizes. The information provided for body measurement and for finished garment sizes are not complete enough to confidently choose what size will fit my shape. I understand that more information is confusing to newer people with less experience, but less information is denying people the opportunity to make things that fits. I can see two options for solutions for this, both of which will cost y'all no money. One is to have a supplementary page that has ALL the body measurements for each size. If you're making patterns 14 different sizes, someone in the company has a chart that shows inseam length and shoulder width for those sizes. Your main audience probably doesn't know what to do with that, but if that information isn't posted then no one can ask a more experiences sewist for how to use that info. The other solution is, wait for it, just give people more sizes when they buy the pattern. This means that, if I bought my blouse pattern based on my bust measurement like I thought I should, and then I see that waist measurement is more important for my specific shape, I am not stuck trying to modify a blouse pattern that won't fit me. Y'all already have all the sizes. Just put three of them in each download. Give people the tools they need to make your company look good. Because, right now, "we're inclusive of all sizes as long as you don't have an apron belly or narrow shoulders," is not a look that lines up with the values and mission that you posted on your site.
First Stop Cosplay recently had to downsize. You got rid of some of their staff. You closed their Discord. You're going to sell through their current stack of paper patterns and then go digital only. You're not currently producing new patterns. Who in your company is so tied up in the single size thing that they're willing to throw away new customers when you're already struggling? When you're selling a digital pattern, it doesn't cost you any more money or labor to include multiple patterns. You can sell multiple sizes of digital patterns without selling nested patterns. I don't know if it'd somehow have an additional cost associated with selling multiple patterns at once, but if it is, I recommend that you do whatever every successful pattern company selling multiple sizes of digital patterns is doing to stop that from costing money, because First Stop Cosplay is the only company I know of that seems to have that problem.
I don't know. It's not my company. I'm just one girl who made their patterns four times and did a couple of months of casual market research. Take my stuff with a grain of salt.

Anyway, here's how my full lolita set turned out. Took a total of three days and a $8 bedsheet set from Goodwill, lace was all from Cheeptrims so it was less than $1 per yard. Even with $50 worth of patterns, this is still cheaper than buying it anywhere, and I got the fun of making it. I had a really good time and I want to have a good time with this company in the future.
So please use the resources you have to solve your problems.

Good night.long post
#20dollarlolita#egl fashion#first stop cosplay#handmade lolita#egl community#cosplay community#handmade#handmade blouse#lolita blouse#lolita skirt#review#sweet lolita#classic lolita#20dollarcoordposts#sewing#long post#very long post#dash stretcher#your dash is going to be so stretched that its pants will never fit again
149 notes
·
View notes
Text
I made a pattern for the terror gloves!!
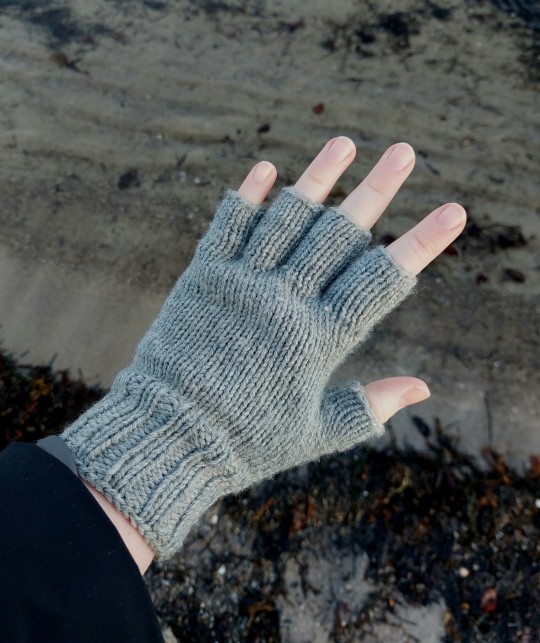
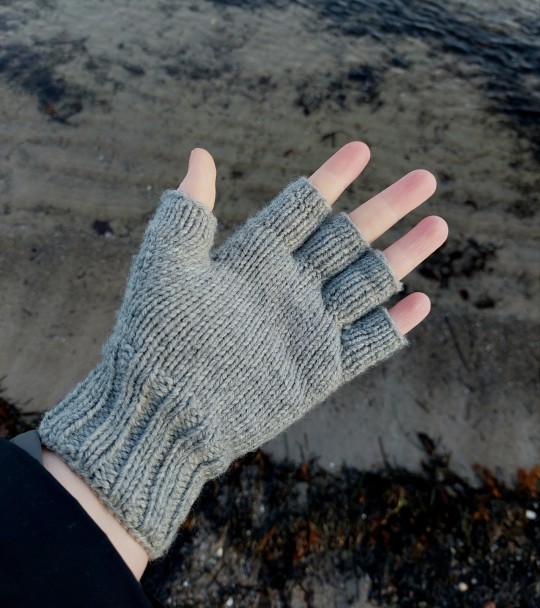
Please note I'm not a professional and this is just for funsies, sorry for my clunky english but knitting terminology is a whole other beast lmao
I hope you can make some sense of this
Full tutorial under the cut
Terror Gloves Tutorial
Disclaimer: I’m not a professional and I’ve never written a knitting pattern before, I just made this up as I went tbh, basing it on a german tutorial I used for regular fingerless gloves I had made a couple of times already, the fingers I made up on my own. Unfortunately, I don’t have the time to make another pair to document the process for you as of right now, so you’ll have to work off of the pattern alone. Sorry for all the weird terminology, translating german knitting vocab to english fried my brain real good lads.
I’d say this is a beginner to intermediate level project, you should know how to purl and knit and how to make left leaning and right leaning increases. For the latter one I’ve linked a tutorial on YouTube at the part where it comes up in the pattern.
All that being said: I hope you enjoy making these gloves! Feel free to @ me on tumblr if you’d like to show them off :D
What you need:
- Yarn that requires you to use size 4 needles (3,5mm in the german/european system, the UK doesn’t carry the equivalent of this size for some reason, so use a size 10 or 9 depending on how tight you’re knitting); the color is obviously up to you, I used a grey close to the one most of the boys are sporting. I also used a 100% wool yarn, but I know those can be pricy so feel to use whatever is available to you :) I used about 50g, maybe a little more for my pair
-> Please note that I didn’t make a test swatch since I’ve used the base pattern of these gloves before and know that this size of needle works for me. I’d say I my tension when knitting is normal – tight so if you knit more loosely maybe choose smaller needles
- Size 4 double pointed needles (3,5 german/european, 10/9 UK)
- Safety pins
- Darning needle to weave in the ends
- Scissors
Tutorial:
- Cast on 11 stitches on four of your five double pointed needles
-> If you have smaller hands you might need to start with 10 instead of 11 stiches on each needle
- Join in the round and start the pattern for the ribbing that will make the glove a little tighter around your wrist, which means purl 2, knit 2, until the end of the row
- Repeat the purl – knit pattern for 20 rows
- Knit 10 regular rounds
- Now for the thumb: Knit 1, pick up 1 new stitch (it doesn’t matter if it’s left or right leaning), knit 1, place a safety pins on the needle behind that stitch so you can keep track of your increase section (tutorial for increases)
- Knit the rest of the round normally, as well as the round that follows
- Knit 1, make 1 left leaning increase, knit 1, make 1 right leaning increase, knit 1, slide the safety pin over
- Knit the rest of the round normally, as well as the round that follows; from now on the pattern will be one row with increases, one row without increases
- So in the next round with increases you will knit 2, make 1 left leaning increase, knit 1, make 1 right leaning increase, knit 2, slide the safety pin over
- Continue with this for 14 rounds (7 with and 7 without increases) until you have 15 stitches in the section framed by the safety pin
-> If you have small hands you might need to stop before reaching 14 rounds, your work should just about cover the first bone (going upward from the base) in your thumb. Maybe stop at 10 or 12 rounds, make sure you end on one without any increases
- After your last “no increases” round, before you start with the next round put the 15 stitches for the thumb on hold by sliding 7 of the stitches onto one safety pin, the other 8 onto another; you will not continue to work with these stitches (for now)
- Continue like normal and start knitting the rest of the stitches on the needle, making sure to join tightly to avoid a gap and finish the round
- Knit 11 regular rounds or until you reach the base of your pinky finger; you should have 42 stitches on all of your four needles right now
- We will start by knitting the pinky finger: For this knit normal until you’re at the second needle and have 5 stitches left on it
- Put all but 10 stitches (the ones on the second needle and the first 5 on the third needle) on hold by placing them ideally on two big safety pins or several smaller ones
- Knit normally until you reach the end of the second needle; here you will take a third needle and pick up 2 more stitches, one from the side the second needle is on, one from the side the first needle is on, so ideally, you’re keeping the gap that’s going to form between the fingers as small as possible
-> If you have small hands, you might only have to pick up 1 stitch or none at all; if you find that that’s the case split the 10 stitches onto three needles so they’re easier to work with and continue as written down below
- This was the first round; knit 9 more or until your work almost reaches the second bone in your pinky finger or just until you decide that it’s enough (feel free to try the gloves on as you go!), cast off and cut the yarn
- For the ring finger, pick up 10 stitches from the ones you put on hold, once again two needles with 5 stitches
- Join the yarn in the same place you started with the pinky finger
- Knit the first needle, then pick up 2 stitches on a new needle as I described it for the pinky finger
- Knit the 5 stitches on the second needle, then use yet another needle to once again pick up 2 stitches. You now have 14 stitches on 4 needles
-> If you have small hands, you might only have to pick up 1 stitch per new needle or just one stitch on one new needle
- Knit 14 more rows like this or until your work almost reaches the second bone in your ring finger or once again until you decide that it’s enough, cast off and cut the yarn
- The middle finger works exactly the same: Pick up 10 stitches from the safety pins, pick up 4 new stitches on two new needles, knit 15 rounds or however many, cast off and cut the yarn
- For the pointer finger you should have 12 stitches left since we started off with 42 in total (30 already “used” leaves 12) which means we only need to pick up 2 new stitches on one new needle (whether you pick them up on the side facing the thumb or the one facing the other fingers is up to you; I picked the one facing the thumb but picking the other one will probably look better)
-> If you have small hands, you might only have to pick up 1 stitch or none at all
- Knit 14 rounds or however many, cast off and cut the yarn
- Now to finish off the thumb: Put the stitches back onto your needles, 7 on one needle, 8 on another; now taking up a third needle slide the last stitch on the second needle onto it, pick up 2 new stiches around the base to make sure there’s minimal gaping, then pick up the first stitch on the first needle. You should now have a total of 17 stitches, split on three needles (6, 7 and 4 stitches) forming a triangle
- For the first round, join the yarn into the first stitch on the first needle; knit normally until you reach the third needle: Here you knit the first 2 and the last 2 stitches together, leaving you with 2 stitches on that needle
- Repeat this for the next round and knit the remaining 2 stitches on the third needle together, leaving you with 1 stitch on that needle (it can be finicky handling this third needle but it makes working the rounds a lot easier)
- Knit 5 rounds or until your work reaches over the second bone in your thumb, cast off and cut the yarn
- Weave in the ends; you might have to go back in with extra yarn if the holes between the fingers are too big for your liking
Yay!!! You finished it, congrats!! :D
233 notes
·
View notes
Text
Collection of Free Art Tutorials
I don't usually make text post on this blog, but a nice artist I know was asking for tutorials a while back and I forgot to send some to them while in school. So here's a post on it since it's easiest to grab and go this way. :)
This list focuses on the basics. I'm focusing on the foundations of art, so medium is generally irrelevant and you can use physical or digital with these. You'll have to google more specific tutorials on things like character design and such.
One of the biggest pieces of advice I can give to you is strangely, introduce things to yourself one at a time. In art class, we took whole topics week by week. For high school, we did a few exercises then spent a week drawing/painting and doing your piece(s). For basic art 1 & 2 in college, we did 1-2 exercises and then did 1-2 drawings, followed by HW (which we turned in next week) and sketchbook practice (which she'd check at midpoints). For basic art lessons with a tutor, we did practice then our own art. You can see the pattern here - the point is don't be distressed if you don't get everything at once, or the lesson in 2 weeks, or the lesson in 3 years - we practice and do a lot over time, and you'll pick up on things you need to improve naturally and through help with others. Take time to be proud of your art in mini steps too, even if it's not the best! You tried and attempting to climb an obstacle over and over again before finally leapfrogging it is still progress to it.
Overall tutorials:
DrawABox.com is a site that's dedicated to art exercises and practicing when you can. They talk about the basics of art as well as how practice is important. It can get tough at times and it's ok to stop and do a balance of say those practices and doodles if you choose to try and do all of it's stuff - but you don't have to either. It's just a nice basic education done by some art nerds who like going hard.
Ethering Brothers - these guys are famous for their 40billion tutorials. If you need help on a specific idea, search their gallery and you'll likely find something.
Thundercluck's Art Fundamentals - She did a good huge ass tutorials on how things work, and it's the least overwhelming of the 3 I got in this section, so I suggest it as one of the first to look at for digital stuff.
Art Instructions Blog - Another good & simpler website that goes great into fundamentals. They focus more on traditional art but if you're digital, you can replicate most of the techniques - art fundamentals and subjects cover all mediums. Very important
Drawsh - Particularly notes on Construction: construction is the basics of building an illusion of a 3D image on a page. Figuring out how to build shape gives depth to your work, and learning how to see in 3D lets you be able to draw an item then move it around in your head (sometimes, when you're good enough, don't be afraid to pull out a reference or use live subjects). Construction is how to figure out the foundation of your drawing, and good planning = better picture! This link starts at the back, hit newer post to go forward.
There's a lot on anatomy and other nitty gritty details for when you want to practice those as well.
Griz and Norm's Assorted tips - Long time artist talk about various tips and tricks they use in art and how to avoid certain pitfalls. It's eclectic but great to look through.
James Gurney's Blog - He's got a lot of thoughts, a lot of tips, and a lot of adventures he catalogues. It's the least organized out of these but fortunately he has plenty of tags and most post have something neat going on. He's fantastic!🥰
BEFORE ALL OTHER BASICS….
How to Make Your Art Look Nice: Mindset
There's a lot of artist with different perspectives on how to approach art and your mindset while doing it, but the general consensus is that it's a process and sometimes you have to remind yourself to enjoy art!
Line
How to draw straight lines without a ruler. ��but for the love of all that's good do NOT feel bad about using one! This talks about how to hold your pencil and how to do some good freehand stuff, some good practice.
5 grips for holding a Pencil for Drawing - This goes for pencil, pen, tablet, etc.. Get comfortable and figure out what's right for you and your pictures. I'd like to note that paintbrush holding will overlap, but some will differ.
A few line drawing exercises that help with line confidence.
Types of line drawings & what they are.
Contour Line & exercises with Mrs. Cook - Contour lines are one of the first art exercises I do in all the drawing classes I've taken. The good news is that they're surprisingly fun & look neat, even the blind contours!
Good deep thoughts on lines and how to use them.
Line Weight Tutorial
Lineart Weight Tips!
How to show variation in your line art: part 1 & part 2.
Some teacher's Drawing 1 & 2 lessons put online.
Light, Shadow, & Value
An introduction to tonal values.
Why values are important. The main reasons are that they give depth to a piece, and values literally shape our world.
Tonal Values: Everything you need to know
How does light work & the basics on Light
Light & Shadow in Art - much more in depth of the above! Highly recommended if you have time to spare.
Understanding grayscale/monochrome art. Great for shading & planning.
A guide to Cross Hatching (and hatching in general) - As a side note, crosshatching is one of the early things taught as it marries Line + Value into a nice neat package and helps add form with just a pen.
Crosshatching for Comics
Learn more about coloring by working in grayscale
How to Make Your Art Look Nice - Contrast!
Using lighting to make your art look nice.
Some light & shadow classifications.
Edges - notes on how they work in shading.
Color
A side note - color theory doesn't differ much, but color MIXING will change between mediums. If you're doing traditional colored pencil, you're overlapping 2 or more pigments on top of each other. If you're doing traditional paint, you're mixing & creating a solution/emulsion (depends on the pigment and binding) of pigments with the particles reflecting light in different ways. In digital, overlapping colors & blending colors depend on how the program you use calculates it if you're not just putting 2 color side by side. This just means you have to adjust your mixing when you switch between them. :)
Slawek Fedorczuk's Light & Color Tips - also shows how to guide through a scene.
The Color Tutorial Part 1 & 2 by Sashas - A personal favorite.
Color Studies 1-6 by Sheri Doty Amazingly nice breakdown on how color works in simple terms.
Sarah Culture's Tips on Color
The value of underpainting
A few notes on reflective light.
Experimental color techniques with Alai Ganuza: first post, second, & third.
Color zones of the face charts
Composition
Good Tips on Composition
Here's an example of how you can search the Etherington Brothers' stuff and get like 10 tutorials and tips on one subject. Composition & Cover Design, Shadow Composition, Two Line Composition - plus more.
How to make your art look nice: Thumbnailing!
And don't be afraid to make silly thumbnails or sketches.
Composition Examples - charts like these are great when you can't think of something yourself. There's no shame in using them.
Flow and Rhythm
Formulas for landscape composition.
Perspective
Perspective Drawing Tutorial by Julie Duell
Linear & Atmospheric Perspective Guide
One Point Perspective City Tut by Swingerzetta
Niso Explains Perspective - these are great for drawing figures in perspective!
Putting characters into scenes and drawing backgrounds
Backgrounds that make your character stand out!
Using background detail to guide the eye.
Odds and Ends
I shit you not, probably 1/3rd of my color, value, & structure knowledge comes from pixel art since I've done so much of it and it is all about challenging yourself to do the most you can with limitations. Check out lospec's tutorial database for fun and see how it compares to art techniques you're doing - even if you never try a medium, it's always interesting to see how it works. :D
How to Make Your Art Look Nice: Reference Images & Style, Pushing Proportions, and developing style.
Foervraengd talks about how he expanded his comfort zone with concept art & landscape drawing.
Luna Art talks about what they're thinking when doing concept art.
Repeating visual motifs in character design looks cool.
Eric's Thoughts on Drawing Backgrounds and Props.
Show vs. Tell: Why Visual is Not Optional in comics.
The Lost Vocabulary of Visual Story Telling Day 1, Day 2, Day 3, & Day 4.
Traditional Animation's 2 Digital Library books, The Know-How of Cartooning by Ken Hultgren & Advanced Animation by Preston Blair are two books from the golden age of animation they have up on their site for free viewing!
Animation resources dot org has a lot of cool stuff. Here's Nat Falk's How to Make Animated Cartoons (part 1). Their pages on Instruction & Theory are a good start.
Books
Good news: the internet archive has a TON of resources. Make sure to check around and toggle filters, it's a bit weird with organization. For example, a book can be under art or drawing - techniques, depending on who catalogues it.
Andrew Loomis is someone artist tend to die-hard reccomend. His work is collected here & here on the internet archive (one is Andrew Loomis, the other is Loomis, Andrew - thanks). I own Figure Drawing for All It's Worth and I recommend checking all of his stuff out, especially if you're having trouble with bodies and hands.
The Animator's Survival Guide by Richard Williams is mandatory in animation classes for good reason - it's fantastic!
Perspective for Comic Book Artist by David Chelsea is great for any type of artist. So is Extreme Perspective & Perspective in Action.
Scott McCloud's Understanding Comics, Reinventing Comics, & Making Comics. The first one is on the internet archive, the second two are likely avaliable at your library or at a bookstore as they're pretty popular.
Speaking of comics, Drawing Comics the Marvel Way has been a favorite of comic artist for years no matter what comic book companies and artist you like, it's a good introduction.
Anything by or endorsed by James Gurney, Color and Light: A Guide for the Realistic Painter is one of my favorites (this is his official page but you can get them elsewhere for cheaper too).
Art resource blogs with good tagging systems: @artist-refs , @help-me-draw , @helpfulharrie , @art-res , @drawingden , & @how-to-art
Lastly, I suggest if you find something you like online for free, SAVE IT! Whether it is through the Wayback Machine, screenshotting a whole webpage, reblogging/retweeting something, or putting it on pinterest, digital media is fickle and tends to go up in smoke when you least expect it. I have a partially organized Pinterest board that helped me find most of the stuff I wanted to keep. Figure out what works for you and save what you can.
1K notes
·
View notes
Text
Scumtober- Day 10 (Knotting)
Legoshi x Male!reader
If someone had told you at the beginning of your relationship with Legoshi that he would be the one to initiate sex, you probably would have laughed in their face.
So imagine your surprise when, after a particularly amazing date, Legoshi proposed that the two of you have sex the next night.
You didn't know what to expect. You're a virgin and as far as you know, he was too. To be honest, you were scared. You took enough biology to know that wolf knot plus a human ass would definitely mean pain. That's not even taking into consideration that Legoshi was way taller than wolves of his own species.
But you had time to prepare, so you did.
You followed every tutorial on Furrchan and Beastube, especially that one gay dude who Nair'd his ass on video and posted it onto the site. He seemed like the expert to go to. You went out shopping and frantically bought everything you might need for such a challenge. Lube, condoms, douche, and information pamphlets went into your cart.
You currently sat on Legoshi's bed bunk, waiting for him to arrive. You had showered, cleaned yourself out, and even used the shampoo that Legoshi liked. Everything had to go perfectly. You even had some soft music playing through a small speaker.
As you waited anxiously, the atmosphere in the room seemed to thicken with anticipation. Every sound that echoed down the hallway amplified your heartbeat just a little more, making each moment feel like an eternity.
Finally, after what felt like hours, there was a gentle knock on the door followed by its slow creak open. In walked Legosi, looking quite flustered as nervously walked over and sat on the bed with you.
"So…uhh," You muttered, not sure how to initiate sex. You were in the dark about these kinds of things.
At your hesitation, Legoshi's eyes darted around nervously before returning to meet yours halfway. He swallowed hard, taking a deep breath as he tried to find the words within him. His cheeks flushed under his fur even deeper at his own embarrassment.
Finally, he managed to squeak out softly, "Um... do you want me to undress first?" It was clear from his voice that this was foreign territory for him too; there was an uncertainty lacing every syllable.
You pause for a moment, trying to remember the pamphlet about healthy sexual relationships. "What if.....what if we help remove each other's clothes?" You finally manage to recite meekly as you fiddled with your thumbs.
At your suggestion, Legosi's eyes lit up slightly as he nodded eagerly. "Yeah," he murmured softly, "that sounds good."
With a snail's pace, he began reaching out to gently grab hold of your shirt hem. With a hesitant look in his eyes, he began to tug lightly, urging you to move closer so he could pull it off properly without letting go entirely. As he did so, he took note of your reaction—whether you were uncomfortable or enjoying the contact between them. You nod timidly and lift your arms up.
As soon as Legosi felt your permission through your lifted arms, he quickly grasped onto the idea and began pulling your shirt upwards with newfound confidence. His fingers brushing against your skin sent shivers down your spine. Once fully off, Legoshi started at your bare torso. He shifted closer as if wanting to take in the sight.
As Legoshi moved closer, his hot breath danced along your neck sending shivers down your spine. He couldn't resist taking in your scent, trying to commit it to memory forever. The way his nose grazed against your skin ignited a spark inside him, awakening primal desires that he didn't know existed until now. His heart raced faster as adrenaline coursed through his veins—this was intoxicating!
This set the pattern.
One of you would take off the other's article of clothing, then stare at their body. As the two of you progressively shed layers of clothing, the air between you became charged with electricity. Every brush of fingers against skin sent ripples of pleasure through your bodies. Even though you were both nervous and unsure, something about this exchange felt right.
Finally sitting face to face in nothing but their underwear, Legoshi couldn't tear his gaze away from you. He traced delicate patterns over your chest with his fingertips, marveling at how soft your skin felt beneath them. Meanwhile, you reached out to feel his soft fur.
Both of you blushed deeply as you realized where this was heading. Neither of you wanted to make the first move, fearful of crossing boundaries or being rejected. But despite your hesitations, neither could bring themselves to break eye contact either.
Slowly, almost reluctantly, Legoshi reached out towards your boxers, his fingers trembling slightly as they hovered just above the fabric. With bated breath, he slowly pulled down the waistband of your boxers, revealing your erect cock beneath. Your member twitched slightly at the sensation of cool air bathing it. After a few minutes of Legoshi staring in awe at your dick, You decide to return the favor and pull his briefs off.
As you pulled Legoshi's underwear off, exposing his hardened cock tentatively, he let out a soft moan of relief. Feeling increasingly bold, he reached out to touch your cock once again, stroking it slowly with his palm while looking into your eyes for any sign of discomfort.
Taking courage from his touch, you leaned in close, wrapping one arm around him to pull him close for a kiss. Your lips met in a tender kiss as your bodies pressed flush together. Your tongues tentatively explored each other's mouths as you began grinding your hips together in sync, rubbing your cocks against each other.
You shifted to lay in the bed. Legoshi didn't stop kissing you as he followed your movements. Fortunately, you had prepared for the next part since you didn't want to waste precious time. You had already lubed your hole prior. But it was still worrying to think about Legoshi's knotted cock fitting into your ass.
As you lay back on the bed, Legoshi couldn't help but stare at your ass, his heart pounding with desire. He knew that this was going to happen eventually, but seeing it right here in front of him made it all the more real.
His brow furrowed in concern when he saw the expression on your face, worry written all over it. "I don't want to hurt you," he murmured softly, his voice full of regret.
You shook your head reassuringly, trying to calm him down. "It's okay," you whispered back, placing a hand on his chest to steady him. "We can take things slow."
With a deep breath, Legoshi nodded slowly, still uncertain but willing to trust in your words. Together, you guided him closer, positioning his tip at your entrance. He had a strong grip on your hips and you placed your hands over his.
"Are you ready?" you asked quietly, meeting his eyes for reassurance. He nodded again, biting his lip as he prepared for the inevitable penetration. Slowly, carefully, he eased himself inside you, groaning softly at the tightness surrounding him.
As Legoshi pushed further into you, a sharp stab of pain shot through your body. You winced and let out a small cry, causing him to freeze midway. "Did I hurt you?" he asked worriedly, pulling back slightly. Closing your eyes tightly to block out the pain, you forced yourself to relax and breathe steadily. When you opened your eyes again, you saw the genuine concern reflected in Legosi's gaze. He looked truly frightened at the prospect of hurting you.
Reaching up, you cupped his cheek gently and smiled reassuringly. "No," you said softly, "just a bit of discomfort. Keep going..." Your voice trailed off as he resumed his thrusts, slowly pushing further into you. Despite the pain, you couldn't deny the intense pleasure mixed with it. The sensation of being filled by your boyfriend was overwhelming. As Legoshi picked up speed, his hands entwined with yours.
As Legoshi's pace quickened, sweat dripping down his fur, his movements became erratic yet powerful. Drool slipped past his parted lips, trailing down his chin as he lost himself in the motions. His eyes were glazed over, focused solely on you and the rhythmic movement of their bodies. His muscles tensed with each thrust, the sounds of fur slapping against skin filling the room.
Every time you cried out in pleasure or arched your back, it drove him even harder, his cock throbbing with need inside you. He lost track of time and place, consumed by the primal desire pulsing through him. All he could see was you and all he wanted was more.
Legoshi's voice cracked as he tried to speak, the heat building up inside him making it difficult to form coherent sentences. "Mmm... God, you feel so good," he moaned, his tongue tangled in his attempts to express himself.
As he continued to pound into you, his hips slapping against your ass, he managed to gather enough strength to whisper, "Please... tell me how much you love this... Tell me it's amazing!"
Despite his plea, he doubted anything could have prepared him for the wave of emotion that crashed over him when you finally answered, your voice hoarse with passion, "Yes... yes, it's incredible. Don't stop."
Legoshi's hand slid down between your legs, his rough fingers curling around your cock as he began to stroke it in time with his thrusts. Your moans of pleasure echoed off the walls, driving him wild with lust. Unable to contain himself any longer, he threw his head back and roared, the sound reverberating throughout the room.
Legoshi's moans grew more intense as his pace increased, his body trembling with the effort of holding back his climax. "I love you," he chanted between ragged breaths, his voice breaking with emotion. "God, I love you so much."
"I love you too," you replied between heavy pants as you felt your world spinning. Your body quivered with each thrust, the sensations overloading your senses. You clung to Legoshi and wrapped your legs around his waist for dear life as he stirred your guts with his cock. Before you knew it, your entire body tensed up as you came with a loud moan.
As you came, your body convulsing in pleasure as you spilled seed onto your stomach, Legoshi growled low in his throat. The sound vibrated against your skin. Seeing your release only fueled his desire further, and he continued to pound into you, determined to claim his own release.
Legoshi's entire body tensed up as he felt his orgasm approaching, his movements becoming more frantic as he neared the edge. Just as he felt like he couldn't hold back anymore, he let out a loud, primal yell. In one thrust, he slammed his knot into you, locking into place with a wet popping sound. He released himself inside you, filling you up with his warm cum as his knot kept you in place. You whimper as you feel it coat your insides. His body shuddered violently as he let out a long, drawn-out moan.
Legoshi stayed buried deep inside you, his body still trembling with excitement. He nuzzled against your face affectionately, soft kisses scattered across your neck and shoulders. "I'm so sorry if it hurts," he whispered softly.
You ran your fingers through his fur gently, offering reassurance as you spoke, "It's okay." You paused for a moment before adding, "Besides, maybe it won't be so bad having us stuck together like this for a while." You gave him a playful smirk which only served to make him flustered even more.
You both spent the rest of the night cuddling closely together, occasionally shifting positions to ease the discomfort caused by his knot. As sleep claimed you both, you drifted off happily knowing Legoshi was connected to you, physically and emotionally.
Scumtober 2023 Masterlist
#beastars#beastars x reader#legoshi#legoshi x reader#male reader#male!reader#legoshi x male!reader#legoshi beastars#beastars legoshi#scumtober#scumtober 2023#kinktober 2023#kinktober#knott
1K notes
·
View notes
Note
Reader is a WOC and Emily wants to learn how to do their hair for when they have kids in the future
Reader lets her play around in it and falls asleep
when they wake Emily has a tutorial of how to braid hair up on the tv while trying to follow the instructions in readers hair
Reader hearts swells with love and passionately kisses Emily.
The End :)
Enjoy :)
The Learning Process 🎀
The living room was warm with afternoon light, golden rays spilling over the couch where Y/N sat cross-legged, half-watching a nature documentary and half-scrolling on her phone.
She wore a soft hoodie and worn sweatpants, her long braids tied into a loose high ponytail that still grazed her shoulder blades. The house smelled like cinnamon tea and fresh laundry.
Everything about the moment was quiet and slow, until Emily appeared in the doorway with that specific look, the one that made Y/N set her phone down without even being asked.
Emily padded over in thick socks and one of Y/N's old shirts, oversized and comfy. She stood behind the couch, biting her lip a little. Y/N tilted her head. “What’s up, babe?”
Emily exhaled. “Will you teach me how to braid?” Y/N blinked. “My hair?” Emily nodded, then climbed over the back of the couch and sat behind Y/N, legs on either side, hands hesitating just above her shoulders.
“Not just your hair. I wanna know for... ” she paused, cheeks pinking slightly, “... our future kids. If they’ve got your curls, your texture, I want to be able to care for it. For them.”
Y/N didn’t answer at first. Her lips parted, but nothing came out. Her chest rose slowly as she turned just enough to look at Emily over her shoulder.
The love in her eyes was instant, soft, deep, and trembling a little. “You serious?” she asked, barely above a whisper. Emily only nodded again, her hand reaching to gently touch a braid. “Show me.”
So, Y/N scooted closer to the edge of the couch, explaining how she parted her hair, what products she used depending on texture and curl pattern, how she sectioned everything off to keep it clean.
She guided Emily’s hands through the motion of a simple three-strand braid, gently correcting her fingers, occasionally glancing up at the TV as she talked.
Her voice lulled into something low and soft, sleepy. The slow rhythm of teaching, the comfort of being between Emily’s legs, made her eyes close somewhere halfway through the second demonstration.
Emily noticed. She smiled as Y/N's head tilted forward just slightly, her breathing evening out. Warmth bloomed in her chest. She reached for the remote, turned on YouTube, and found a video titled “Braiding 101: For Beginners Learning Black Hair.”
She turned the volume low and began to practice, over and over, undoing the braid she’d just made and trying again. She listened closely, eyes flicking between the screen and Y/N's head.
Her touch was gentle. Her hands fumbled more than once, but she didn’t give up. Because this wasn’t just about hair, it was about care, about history, about showing up for the people you love in the little ways that matter.
An hour passed before Y/N stirred. Her brow furrowed as she woke, eyes fluttering open to the feeling of Emily’s hands moving slowly through her hair. She sat up straight.
Emily startled. “Sorry... d-did I wake you?”
“No, no,” Y/N said, voice still heavy with sleep. “You were… following a video?” Emily shrugged, a bit bashful. “I figured I’d keep going while you napped. I wanted to get better.”
Y/N turned fully, twisting in Emily’s lap to look at her. Really look. Her eyes were glassy, her lips parted like she might say something, but she didn’t at first.
Instead, she kissed Emily.
It wasn’t rushed or playful. It was slow and full of something that hummed beneath the surface, an overwhelmed kind of love. A future-looking, forever kind of love.
Her hands came up to cup Emily’s face, thumbs tracing over her cheekbones like a prayer. “You learning to braid for our babies,” she whispered against her lips.
“You don’t even know what that does to me.”
Emily pulled her into a hug, her nose in the crook of Y/N's neck. “I just want them to feel seen. Loved. Taken care of. By both of us.” Y/N was crying. Just a little.
Just enough that Emily felt the dampness at the edge of her collar. “I love you,” Y/N breathed, pulling back just enough to say it like it was the only truth that mattered.
“I love you more,” Emily said. Y/N laughed, watery and quiet, wrapping her arms tighter around Emily. “Okay,” she whispered. “Then you’d better practice. Because if our kid’s anything like me, you’ve got a whole jungle of curls coming.”
Emily grinned and kissed her again. “Then I’m learning every style there is.”
#criminal minds#emily prentiss#ao3 writer#poc#emily prentiss x reader#emily prentiss is cute#braids#braiding#learning#youtube#video#following along
75 notes
·
View notes
Text
Writing Notes: Glitch Art

Glitch Art - a type of media art where video and image files are already or intentionally corrupted to include glitches, creating a stylized viewing experience. What may look like an imperfection is the end goal and a result of the visual artist’s pixel sorting.
The glitch aesthetic includes:
elongated images,
pixelization,
color degradation, and
double exposure.
How to Create Glitch Art
Consider the following ways to create this unique form of visual art:
Digitally engineer glitches. Video editing software or apps can let you safely play with your hardware without damaging it. You can play with databending in video files in a photo or video editor and add in manufactured, intentional glitches.
Use magnets on screens. You can also play a video on a screen and employ a heavy-duty magnet, holding it close to the front to warp the pixels on the screen. Note that this has the potential to have long-lasting effects on the quality of your screen, so use this tactic wisely.
Work with broken devices. Damaged devices can yield the glitches that glitch artists seek in their media. Busted but still usable DVD and VHS players can warp the presentation of the video.
Forms of Glitch Art
Since glitch art is often not static, it takes forms outside of still .jpegs or .jpgs. Some forms include:
Glitch music: Glitch music involves the playing of distorted records, CDs, cassettes, or sound files that feature glitches, which may include skips or missing moments of music.
Glitch videos: Glitch videos are the most common type of glitch art, and you can create them by damaging e-files or hard media such as DVDs or video tapes. Artists can also warp videos by toying with a VHS or using magnets to distort pixels on the screen.
Glitch websites: These websites with errors coded within can make for more interactive pieces. Glitches spread throughout the website enhance the user experience and operate as a form of art.
A Brief History of Glitch Art
In technology, a digital glitch refers to a malfunction, often in video games or software development.
Intentional glitches: As technology evolved, artists harnessed the creative opportunities glitches presented and began deliberately incorporating them into various formats in the 1970s, popularizing an intentional glitch aesthetic. The Cubist movement influenced many glitch artists.
JODI: In 1994, Joan Heemskerk and Dirk Paesmans started the highly generative art collective JODI, which purposefully coded errors into website pages to display underlying error messages. The movement weny by the name “net.art.”
Global conventions: The glitch moment gained traction in the 2000s. The tech-art collective Motherboard hosted an international symposium for this new media style in 2002 in Oslo, Norway. In 2010, Nick Briz, Evan Meaney, Rosa Menkman, and Jon Satrom led the GLI.TC/H convention in Chicago with tutorials, performances, and screenings.
GIFs: Over the years, conventions have taken place in Minnesota, Croatia, and Iran, showing how popular the art form has become. Today, GIFS (.gifs), in many ways, echo some of the elements of early glitch art, where a single file repeats its media in a cyclical pattern.
Artists can use digital or analog modifications to create this type of modern art.
To produce glitch videos, artists distort pixels by placing large magnets near the screen or artificially create glitches in Photoshop.
Famous glitch artists include Len Lye, Daniel Temkin, Nam June Paik, and Rosa Menkman.
Source ⚜ More: Notes & References ⚜ Writing Resources PDFs
#glitch art#art#writing reference#writeblr#dark academia#literature#writers on tumblr#spilled ink#creative writing#writing prompt#light academia#writing ideas#writing inspiration#writing resources
52 notes
·
View notes
Text
Balor and Nanite Maintenance
A lot of younger Lancers ask me how to best take care of their mech, since (most of the time) they appear without a straightforward manual. I hope to share my experiences with the Balor and maybe provide a few helpful tips.
1. Your mech will be fine. Balors can, even without proper maintenance, take very good care of themselves. Everything you end up doing is simply a nice little extra for them.
2. Ask yourself: what is Balor? I don't mean this in a philosophical way, but rather straightforward. Try to figure out which part of your mech consists of Nanites and which parts of it are a more traditional mech. A Balor doesn't always take over your entire mech. For example: my leg joints are, for the most part, still normal joints and need to be maintained as such. The nanites may repair them, but they don't get rid of any squeaking.
3. In my case, I noticed that it was beneficial to 'feed' my Balor additional oil from time to time. It is not unusual for enemy units to burn after they've been defeated (especially if your team has HA tech installed), so nanites may have a hard time scavenging it.
4. Reactor. I think most Balor pilots know how difficult it can be to manage heat. Your poor reactor is always working overtime for you, so show it the respect it's earned. Visit a proper reactor expert if your nanites are mellow enough for it and you have the opportunity to do so. If not, look up tutorials for it. I know the omninet can be a bit untrustworthy from time to time, but the big manufacturers should provide a general idea about how to maintain their reactors.
5. Wash your mech! Your nanites will get covered in a lot of different materials and substances, even hazardous ones. They don't always properly remove it from themselves, so it may be advisable to clean the exterior of your Balor once in a while.
I hope this gives newer lancers a few helpful ideas on how to properly care for their mech. But please keep in mind that Horus-patterns can vary wildly from one another, so you should also trust your gut. If your nanites try to tell you that something is a bad idea, don't do it! I'm always open to answering follow-up questions or hearing from your experiences, so don't be shy.
64 notes
·
View notes
Text


the lace socks are done~ 🐑🤍 they looked really wonky until i blocked them - i think they look super cute when worn despite my many mistakes lol (and my tenssion is always weird on magic loop technique?? why is that..) made them shorter as i prefer my socks this way and also had to go down a needle size (2mm) because i have small feet...
pattern & tutorial by handemade by florence (yt video / ravelry link) cant recommend her patterns enough they are perfect for beginers, easy to follow, simple yet cute!
next id like to knit those again possibly with a cotton or bamboo yarn cause i sadly cannot wear wool directly against my skin very long without my eczema acting out 🫠
46 notes
·
View notes
Text
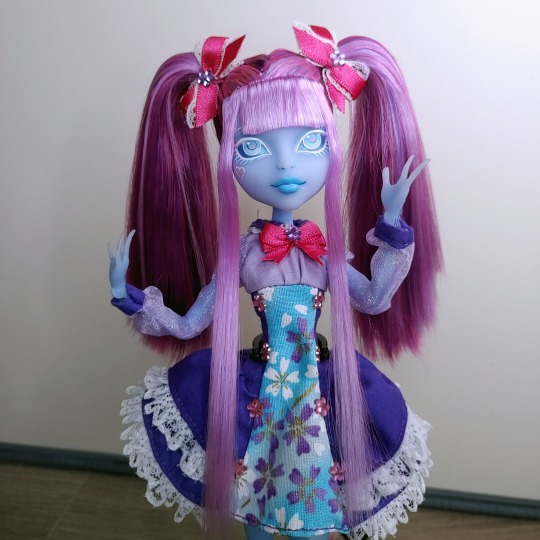
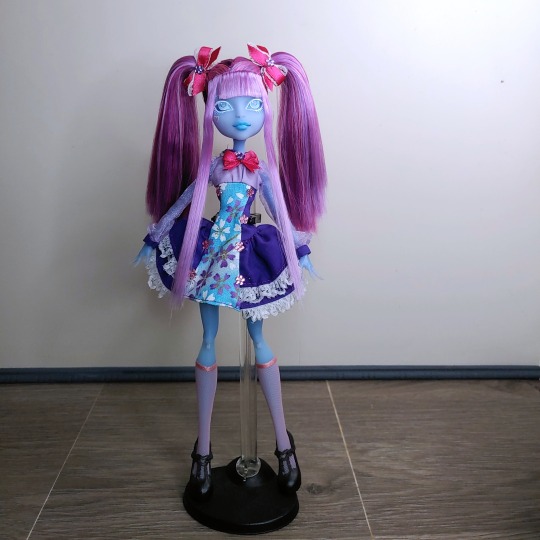
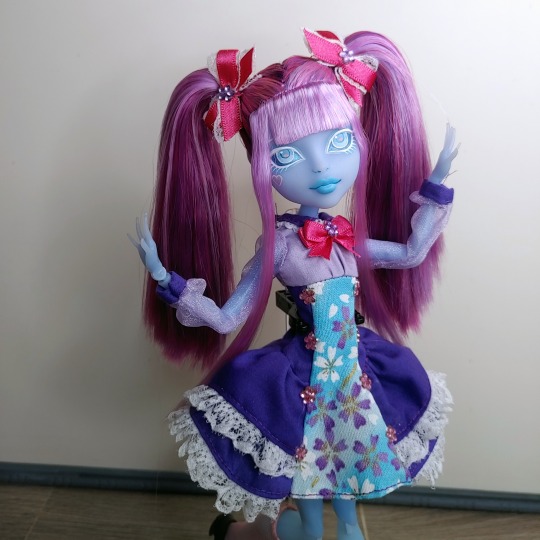
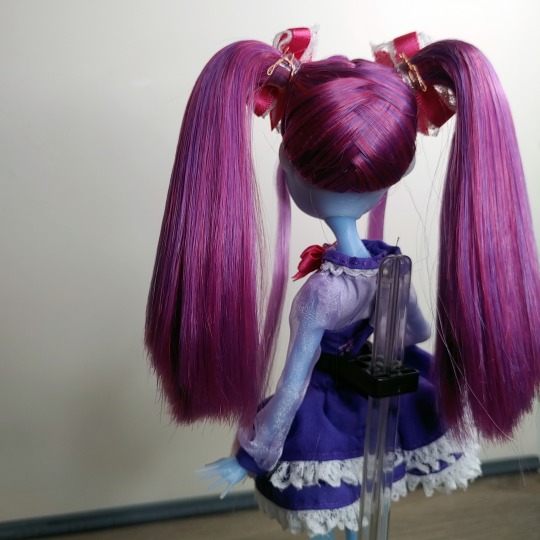
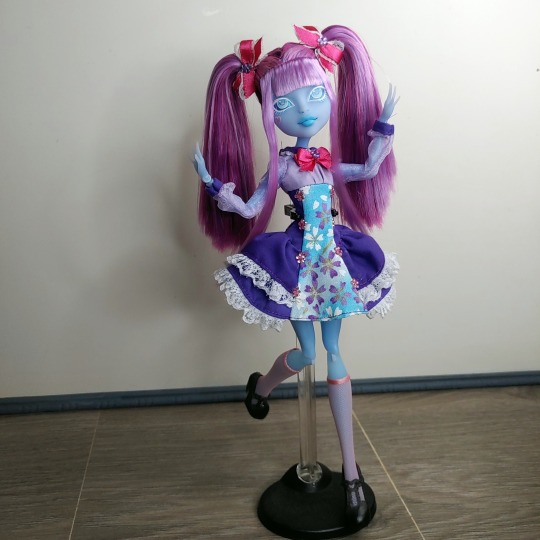
Since I didn't have any of Kiyomi's outfit complete, I figured I would design a School's Out outfit for her inspired by Draculaura's Forbitten Love dress.
TheUkelele on Deviantart released a pattern of the dress, which I followed pretty closely and had no issues recreating in a new colourway for Kiyomi. I really did like Kiyomi and Draculaura's dynamic, so this was mostly a joke with my friends about how Kiyomi's subsequent releases would just be recoloured versions of Draculaura if G1 kept going.
For her hair, I actually followed a Jenny doll magazine tutorial on doing pigtails for dolls without rooting on the back, where you would thatch the hair in larger chunks to cover the bald patch.
For her front, I decided to give her a hime cut to lean into the Japanese street influence for her fashion as I didn't just wanna stick her in a kimono and call it a day, lol.
Her shoes are Haunted Draculaura shoes and a pair of Rochelle socks to complete the look.
167 notes
·
View notes
Text
Cig Knits: A Rananculus
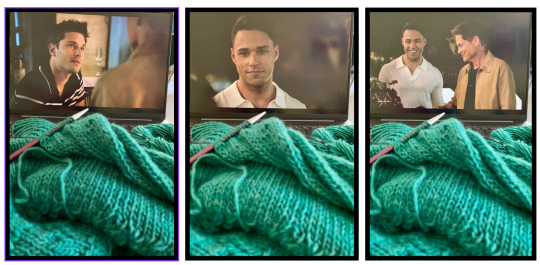
The Rananculus is one of the most popular patterns on Ravelry, so I thought I'd check it out for myself as a beginner who wanted to try lacework. Although it's notoriously oversized, I somehow managed to make myself the world's tightest version lol - despite getting gauge with my swatch?! But that might be because of the yarn I chose (for the colour vs. how it would behave because I'm a sucker for a good green and also an idiot). Or maybe I was knitting more tightly when I felt more pressure? Idk. Anyway, I went for Rowan Sock in Emerald. It's lovely and has still made for a wearable garment that fits - I just think if I knitted this again (which I want to!) I'd go for a DK wool and go up a size or two. Make an actual cosy jumper out of it.
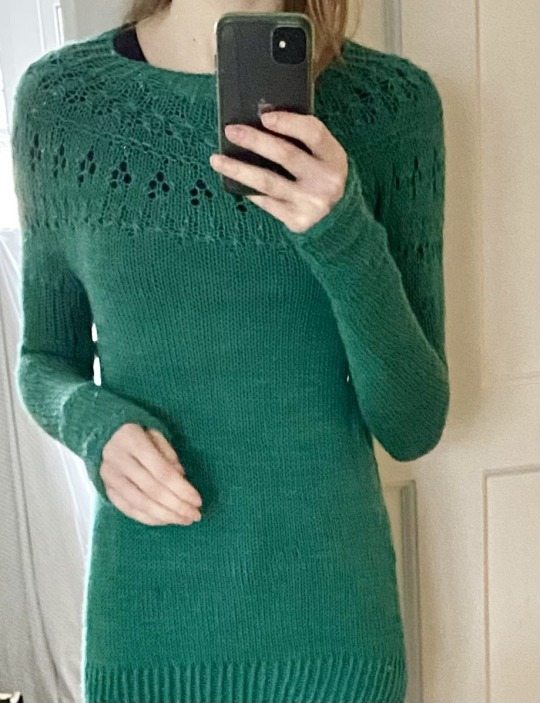
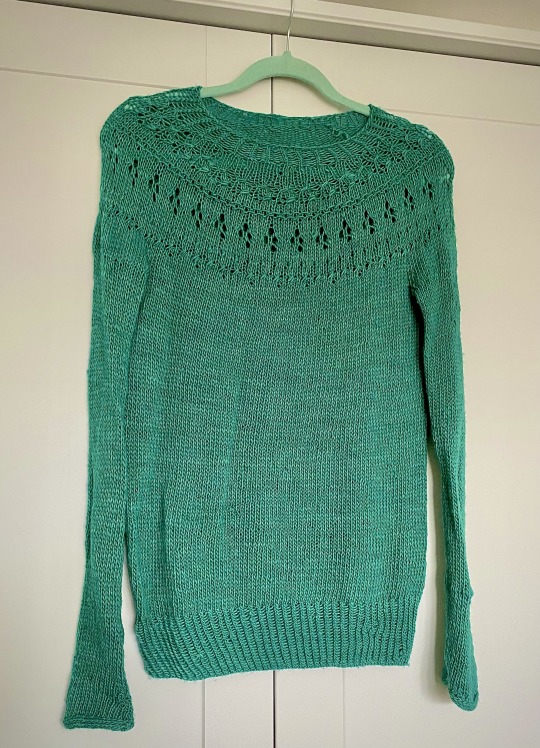
The yoke was exactly as engaging as everyone says, and then it's just stockinette in the round while watching Lone Star (a requirement). This is the first project I didn't have to frog at all?! But I put that down to following the tutorials on Youtube by Sundragon Tips and Tricks - I couldn't have done it without her. I loved this project for teaching me the logic of lace, and it's definitely made me a more confident knitter. (Tbh I've been stupidly confident from the start - far more than I have any right to be, but still, feel like I've earned some stripes with this!)
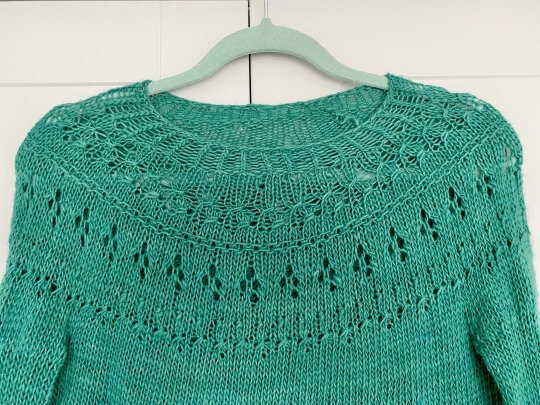
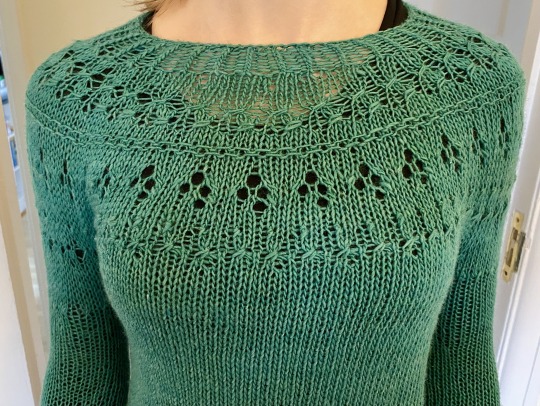
So, while I want to knit this again, what I really want to do is try my hand at more complex things. I'm currently knitting up my first cardigan - which is patchwork! I'll be tackling a button band, and that's extra fun because I get to choose buttons when I'm done! Can't wait!
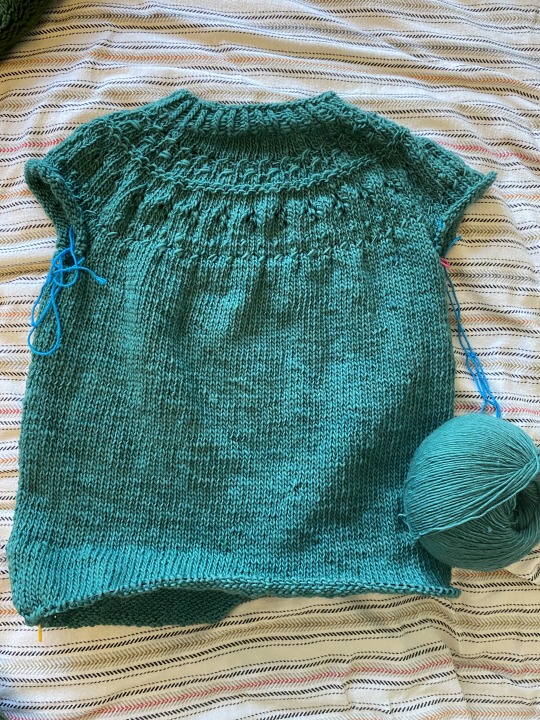
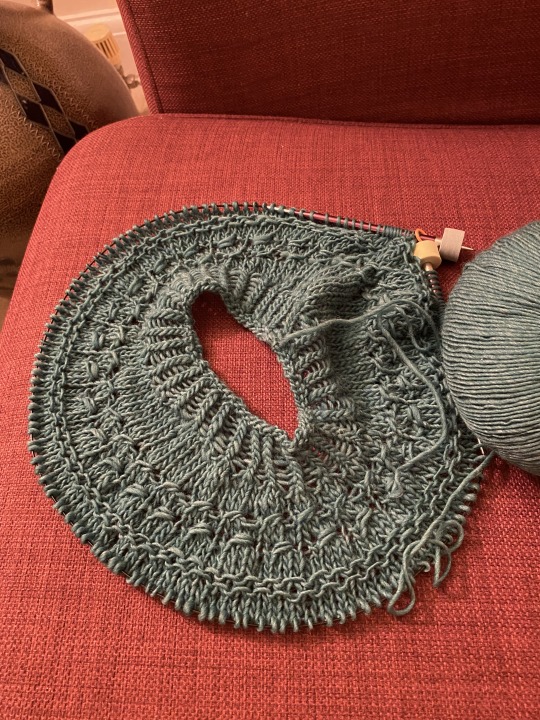
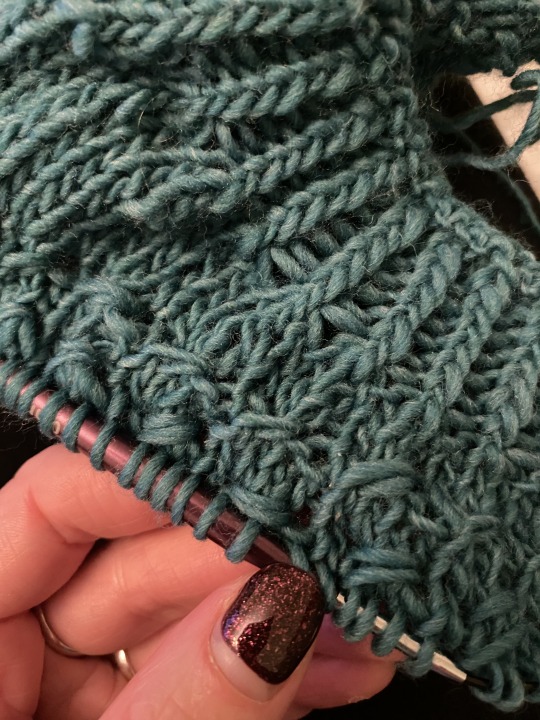

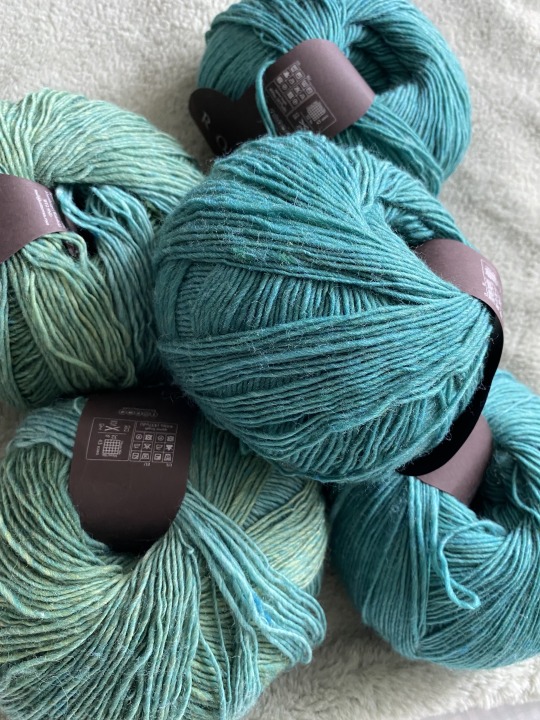
#Cig knits#cig knitting#rananculus#rananculus pattern#knitting#beginner knitter#cig personal#knitters of tumblr
32 notes
·
View notes
Text
Inès - an 1890s daydress
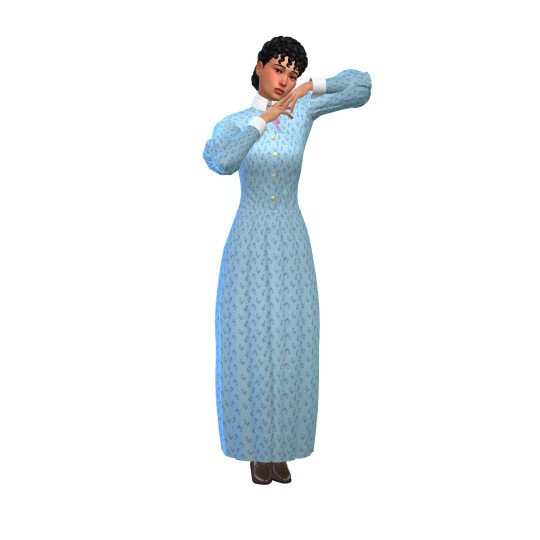
Here's a not-so-little recolor of this dress by Kizaragy. I'm not sure if they have a tumblr, which is unfortunate because all I want to do is tell them how absolutely BREATHTAKING their dress is, and how well it works for the 1890s. Oh well. I'm telling the world instead, I suppose.
I'd say this style of dress was most fashionable between around 1892 and 1894, but you could probably use it for the whole 1890s, maybe even up to the early 1900s. It really depends on how closely your Sims follow fashion trends, I suppose.
There are swatches in more extravagant, "expensive" colors, as well as simpler, less bright ones. This means it's a very versatile dress in terms of class as well. Anyone from a farmer's wife to a noblewoman could wear it.
I also noticed that the mesh and texture are quite nicely divided into a top and bottom half, so I made some swatch overlays for the skirt as well. There's a separate link to that underneath the download links for the dress itself.
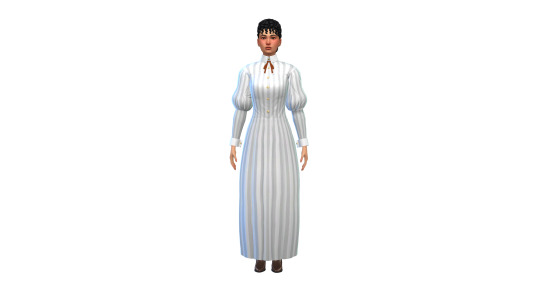
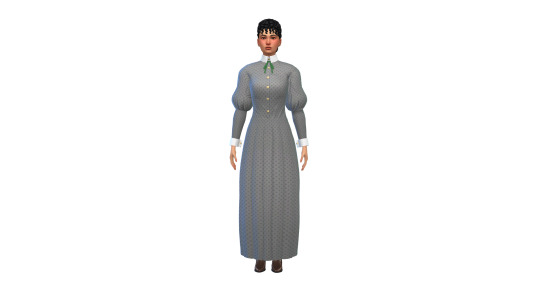

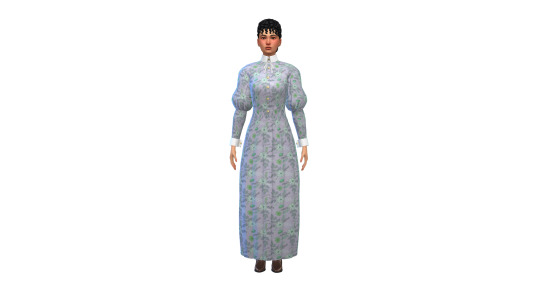
150 swatches - plain colors and 6 different patterns
Mesh is required (TSR warning)
Tagged as feminine
Tagged as Casual, Formal, Athletic, Party, Hot Weather and Cold Weather
Found in the Long Dress category
Disabled for random
Display index by decade
Download Inès Dress (SFS)
Alt Download (Mediafire)
Download SKIRT COLOR OVERLAY
Known issues: The original has a thing where it makes certain hats invisible, similarly to how a long-sleeved shirt makes bracelets invisible, except it's much more annoying, because what's an 1890s dress without hats? I can't fix this in a recolor since the mesh isn't included, but I've provided a short tutorial on how to fix this in the original. You're gonna need Sims 4 Studio (Star) installed.
Tutorial HERE
@twentiethcenturysims @decadesfinds @maxismatchccworld @mmoutfitters
#decades challenge#sims 4 decades#ts4 decades challenge#victorian cc#ts4 victorian#ts4 1890s#1890s cc#19c#sims 4 historical#ts4 historical#fullbody#historical cc#my cc#sims 4 cc#sims 4 custom content#ts4cc#af cc#recolor#the sims 4#sims 4#ts4#the file size of the original is like 1 mb and then there's this monster with its 30+ mb lol#all those swatches really add up!
374 notes
·
View notes
Text
GROWING LONG HAIR TUTORIAL


If you’re aiming to grow your hair long, specifically to achieve beach-wave, women’s-length hair, the best starting haircut should focus on the following principles:
1. Medium-Length Layered Cut ✨
• Why? Layers will help add shape and prevent your hair from looking too bulky as it grows. This cut also allows for a natural wave pattern to form.
• What to Ask For: A medium-length cut with subtle layers that frame the face and taper naturally toward the ends.
2. Tapered or Shaggy Cut ✨
• Why? Tapered ends or a shaggy look will allow your hair to grow without looking too heavy or awkward during the transition phase.
• What to Ask For: A scissor cut with soft, natural texture and no harsh lines to maintain a relaxed look.
3. Surfer Cut (Messy and Textured)
• Why? This look already mimics the beach wave style you’re aiming for, making the grow-out process seamless.
• What to Ask For: Longer layers on top with a natural, tousled finish to encourage movement.
Tips for Growing Out Your Hair:
1. Regular Maintenance Trims: Get a trim every 8-12 weeks to remove split ends and shape the growth.
2. Hydration and Moisture: Use a hydrating shampoo and conditioner to encourage healthy hair growth and prevent frizz.
3. Avoid Excessive Heat Styling: Minimize blow-drying and straightening to maintain natural waves. Stop rocking a pony tail all day.
4. Use a Sea Salt Spray: This helps to enhance those natural waves and achieve that beachy texture as your hair grows.

26 notes
·
View notes