#React router dom redirect
Explore tagged Tumblr posts
Visit Tumblr Blog
Explore Tumblr blogs with no restrictions, modern design and the best experience.
Last Seen Tumblr Blogs


Fun Fact
Mobile Tumblr US users spend an average of 4.04 minutes per session on the app.
Text
#Redirect to Component with Props Using useNavigate Hook#usenavigate react-router-dom#usenavigate#react-router usenavigate#react redirect component#usenavigate react#usenavigate redirect#usenavigate hook#react usenavigate#Step By Step Tutorials
0 notes
Text
React Router Installation and Configuration
A Comprehensive Guide to React Router: Installation and Configuration
React Router is an essential library for creating dynamic and navigable single-page applications (SPAs) in React. It enables developers to map different URLs to specific components, allowing users to navigate between pages without the need to reload the entire application. In this article, we will cover the installation and basic configuration of React Router, setting you up to create efficient and user-friendly web applications.
1. Why Use React Router?
React Router is widely used in React applications due to its flexibility and powerful features. It allows you to:
Manage Navigation: Seamlessly handle navigation between different components or pages.
Dynamic Routing: Create dynamic routes that respond to user inputs or interactions.
Nested Routes: Organize your application with nested routes, allowing complex UI structures.
Easy Redirection: Implement redirections and conditional rendering based on user actions or authentication status.
2. Installation of React Router
To start using React Router, you first need to install it. React Router has different packages for web and native applications. For web applications, you'll use react-router-dom. Follow these steps to install React Router in your React project:
Install React Router: Open your terminal in the root directory of your React project and run the following command:
npm install react-router-dom
Or if you're using Yarn: yarn add react-router-dom
Update Your React Project: Ensure that your React project is up-to-date with the latest versions of React and React DOM to avoid any compatibility issues.
3. Basic Configuration of React Router
Once installed, you can configure React Router in your application. Here’s how you can set up basic routing:
Import BrowserRouter: In your index.js or App.js file, import BrowserRouter from react-router-dom. This component wraps your entire application and enables routing.
import { BrowserRouter as Router } from 'react-router-dom';
Create Routes: Define your routes within the Router component using Route components. Each Route specifies a path and the component that should render when the path matches the URL.
import { Route, Switch } from 'react-router-dom'; import Home from './components/Home'; import About from './components/About'; function App() { return ( <Router> <Switch> <Route exact path="/" component={Home} /> <Route path="/about" component={About} /> </Switch> </Router> ); }
<Switch>: Ensures that only one route is rendered at a time.
<Route>: Defines individual routes; the exact prop ensures the route only matches the specified path exactly.
Linking Between Routes: To navigate between different routes, use the Link component from react-router-dom instead of traditional anchor tags.
import { Link } from 'react-router-dom'; function Navbar() { return ( <nav> <Link to="/">Home</Link> <Link to="/about">About</Link> </nav> ); }
4. Advanced Configuration
React Router offers advanced configurations, such as nested routes, route parameters, and programmatic navigation.
Nested Routes: To create nested routes, simply nest Route components within each other.
Route Parameters: Use parameters in paths to capture dynamic values from the URL.
Programmatic Navigation: Use the useHistory or useNavigate hooks to navigate programmatically within your components.
5. Conclusion
React Router is a robust tool for managing navigation in React applications. With simple installation and configuration, you can create a fully navigable single-page application. By understanding the basics of routing and how to implement them, you can enhance the user experience and create more dynamic web applications. As you become more familiar with React Router, you can explore its advanced features to further optimize your application’s navigation.
#reactjscourse#job support#react js online training#placement service#reactjs#reactnativecourse#web development#web design
0 notes
Text
How to Redirect URLs in ReactJS

Redirecting URLs is a common task in web development, and ReactJS provides several methods to achieve this. In this blog post, we will explore how to redirect URLs in a React application and provide a practical example to illustrate each method.
Method 1: Using React Router
React Router is a popular library for handling routing in React applications. It offers a convenient way to navigate and redirect URLs. Here’s how you can use it:
Step 1: Install React Router
If you haven’t already, install React Router in your project:
npm install react-router-dom
Step 2: Import and Set Up BrowserRouter
In your index.js or App.js, import BrowserRouter and wrap your entire application with it:
import React from 'react';
import ReactDOM from 'react-dom';
import { BrowserRouter } from 'react-router-dom';
import App from './App';
ReactDOM.render(
<BrowserRouter>
<App />
</BrowserRouter>,
document.getElementById('root')
);
Step 3: Redirecting with <Redirect>
In your React component, you can use the <Redirect> component from React Router to redirect to a new URL:
import React from 'react';
import { Redirect } from 'react-router-dom';
function MyComponent() {
// Redirect to '/new-url' when a certain condition is met
if (someCondition) {
return <Redirect to="/new-url" />;
}
return (
// Your component content
);
}
export default MyComponent;
Method 2: Using window.location
If you need to perform a simple URL redirect without the need for React Router, you can use the window.location object:
import React from 'react';
function MyComponent() {
// Redirect to '/new-url'
if (someCondition) {
window.location.href = '/new-url';
}
return (
// Your component content
);
}
export default MyComponent;
Practical Example:
Let’s create a practical example using React Router for URL redirection:
import React from 'react';
import { BrowserRouter, Route, Redirect, Switch } from 'react-router-dom';
function App() {
return (
<BrowserRouter>
<Switch>
<Route exact path="/" render={() => <Redirect to="/home" />} />
<Route path="/home" component={Home} />
<Route path="/about" component={About} />
<Route path="/contact" component={Contact} />
<Route path="*" component={NotFound} />
</Switch>
</BrowserRouter>
);
}
function Home() {
return <h1>Welcome to the Home Page!</h1>;
}
function About() {
return <h1>Learn more about us on the About Page.</h1>;
}
function Contact() {
return <h1>Contact us on the Contact Page.</h1>;
}
function NotFound() {
return <h1>404 - Page not found</h1>;
}
export default App;
In this example, we use React Router to handle different routes, and we set up a redirect from the root URL (/) to the /home URL.
Conclusion:
Redirecting URLs in ReactJS can be achieved using various methods. React Router provides a powerful and flexible way to handle routing and redirection within your React applications. Whether you prefer using React Router or simple JavaScript for redirection, these methods will help you efficiently navigate and redirect users to different parts of your application.
If you have any questions or need further assistance, please don’t hesitate to contact us for more details. We’re here to support your React development journey.
Follow The React Company for more details.
0 notes
Text
React Router vs React Router DOM: What's the Difference?
React is a JavaScript library that is widely used for building user interfaces. It allows developers to create reusable UI components and offers a declarative programming model that makes it easy to manage the state of an application. When it comes to routing in React, developers have two options: React Router and React Router DOM. Both of these libraries are designed to help with managing routes…
View On WordPress
#Declarative routing#nested routes#react router#react router dom#react router dom redirect#reactjs#route matching
0 notes
Text
React router dom redirect

REACT ROUTER DOM REDIRECT HOW TO
REACT ROUTER DOM REDIRECT INSTALL
REACT ROUTER DOM REDIRECT CODE
So to make it an authenticated route, create a Higher-Order component (HOC) to wrap the authentication logic.// BookCreateForm.test. We will grab the user's name from the URL using route parameters.Ĭurrently the profile page can be accessed directly. Donec dui urna, vehicula et sem eget, facilisis sodales Sollicitudin porttitor, tortor urna tempor ligula, id porttitor mi This component will make use of the component from react-router-dom.Ĭreate a directory called "components" inside the src folder. By default, the query parameters will just pass through but you can specify them if you need to. The path you want to redirect from, including dynamic segments.
Let's start by creating the navigation bar for our app. A sets up a redirect to another route in your application to maintain old URLs.
We will create the Profile page later on in the article. Vestibulum ante ipsum primis in faucibus orci luctusĮt ultrices posuere cubilia curae Duis consequat nulla ac ex consequat, Lorem tortor dapibus turpis, sit amet vestibulum eros mi et odio.Ĭlass aptent taciti sociosqu ad litora torquent per conubia nostra, per Pellentesque dignissim, sapien et congue rutrum, Risus at dapibus aliquet, elit quam scelerisque tortor, nec accumsan eros Lorem ipsum dolor sit amet, consectetur adipiscing elit. Paste the following inside the Home and About components. Creating the Page ComponentsĬreate a pages directory inside the src folder where we will park all the page components.įor this demo, create three pages - Home, About, and Profile. Now that you have the project set up let's start by creating a few page components.
REACT ROUTER DOM REDIRECT CODE
Next, import in the index.js file and clean up all the boilerplate code from the App.js file. yarn add react-router-domįor styling the components, I'm going to use the Bulma CSS framework. is used to build a website for one static page.
uses the hash () in the URL to create a component. Basically, react-router-dom has 2 types of routers used, namely and Both have their advantages depending on what type of Web we are building.
REACT ROUTER DOM REDIRECT INSTALL
I'll be using yarn to install the dependencies, but you can use npm as well. React Router Dom Component Router components. Setup the projectĬreate a new React project by running the following command. Version 6 of React Router is here React Router v6 takes the best features from v3, v5, and its sister project, Reach Router, in our smallest and most powerful package yet. So open up your favorite text editor, and let's get started.
REACT ROUTER DOM REDIRECT HOW TO
In this article, you'll learn how to use React-Router and its components to create a Single Page Application. There is no flashy blank page in between route transitions. React-Router matches the URL and loads up the component for that particular page.Įverything happens so fast, and seamlessly, that the user gets a native app-like experience on the browser. The browser will make a GET request to the server, and the server will return an HTML page as the response.īut, with the new Single Page Application paradigm, all the URL requests are served using the client-side code.Īpplying this in the context of React, each page will be a React component. If you are using routes in your app you are also using react-router-dom. Traditionally routing works like this: let's say you type in /contact in the URL. React router dom redirect Routing is an important task for the proper functioning of a website or application. If you have just started with React, you are probably still wrapping your head around the whole Single Page Application concept.
0 notes
Text
Export 'Redirect' (imported as 'Redirect') was not found in 'react-router-dom'
Export ‘Redirect’ (imported as ‘Redirect’) was not found in ‘react-router-dom’
After updating your react-router-dom NPM you may fetch this error: export 'Redirect' (imported as 'Redirect') was not found in 'react-router-dom' (possible exports: AbortedDeferredError, Await, BrowserRouter, Form, HashRouter, Link, MemoryRouter, NavLink, Navigate, NavigationType, Outlet, Route, Router, RouterProvider, Routes, ScrollRestoration, UNSAFE_DataRouterContext,…

View On WordPress
0 notes
Text
#reactjs#angularjs#JavaScript#webdevelopment#website#webdesign#Vuejs#India#usa#college#education#digitalmarketing#entrepreneur#exams#marketing#nonprofit
1 note
·
View note
Text
Something Awesome: Data Thief or Gift Recipient
Okay, we’ve seen more than a few attacks that can be performed when someone clicks a link or navigates to a website.
Cryptojacking
Cross Site Request Forgery
Drive-By Attacks
Zoom 0day
But it’s time to pay homage to the attack that’s hidden in plain site.
tldr; head over to https://fingerprintme.herokuapp.com/ for some fun.
Passive Data Theft
I hesitate to call it theft when in fact we are giving all of this data to every website we visit like a little gift.
Please, accept this bundle of quasi-identifiers as a token of my appreciation.
Many internet users have no idea just how much data is available to websites they are visiting, so it’s worth exploring just what is in our present.

IP Address and Geolocation API
Like any good gift giver, we better write on the tag.
To: <website server> From: <your IP address>
Your IP (Internet Protocol) address is a little 32-bit (now possibly 128-bit) number that uniquely identifies your device on the Internet. This is by design; people need to be able to address you to be able to send you any packets. A static 1:1 mapping of devices to IPs is definitely a massive exaggeration today as as we use technologies to let multiple devices share one IP, dynamically acquire an IP for each session, and our ISPs (Internet Service Providers) may also dynamically assign our IP address.
Nonetheless, IP addresses have (again by design) another function; location addressing. This is because when you’re internet traffic is propagating through the Internet (a global network of routers) it needs to know where it physically needs to go, and fast. Owing to this, the internet has taken on a hierarchical structure, with different ISPs servicing different geographical regions. These ISPs are tiered such that lower tier ISPs service specific subsets of the upper level tier’s region, providing more geographical specificity. It is this property of IP addresses that allows anyone with your IP address to get a rough idea where you are in the world. Moreover, IP addresses from specific subnets like AARNet (for Australian Universities) can be a giveaway for your location.
Try Googling “my ip” or “where am i”. There are many IP to Geolocation API services available. I have made use of https://ipgeolocation.io/, which has a generous free tier 🙏.

User Agent
Every request your browser makes to a server is wrapped up with a nice little UserAgent String bow, that looks a little like this,
User-Agent: Mozilla/<version> (<system-information>) <platform> (<platform-details>) <extensions>
Oh how sweet 😊 it’s our Operating System, our browser and what versions we of each we are running, and if the server is lucky, perhaps a few extra details.
Here are a few examples from MDN:
Mozilla/5.0 (Windows NT 6.1; Win64; x64; rv:47.0) Gecko/20100101 Firefox/47.0
Mozilla/5.0 (Macintosh; Intel Mac OS X x.y; rv:42.0) Gecko/20100101 Firefox/42.0
Mozilla/5.0 (X11; Linux x86_64) AppleWebKit/537.36 (KHTML, like Gecko) Chrome/51.0.2704.103 Safari/537.36
Why might this be a problem? Allow me to direct you towards my earlier post on Drive-By Attacks. Vulnerabilities are often present in specific versions of specific platforms. If an exploit server detects that your particular version of Chrome for Windows (for example) has a known vulnerability, well then prepare to be infected.

Navigator
Okay, I think we’ve been polite enough, it’s time to rip this packaging open! Ooh what is this inside? It’s an invitation to our browser of course!
When we send off a request to a web server complete with our IP and User Agent string, the web server will typically respond by sending us a web page to render. These days a web page can be anything from a single HTML file with a few verses from a dead poet, to a fully fledged JavaScript application. To support this development, browsers are exposing more and more functionality/system information through a special JavaScript interface called Navigator.
From MDN,
The Navigator interface represents the state and the identity of the user agent. It allows scripts to query it and to register themselves to carry on some activities.
...to carry on some activities... I wonder. The list of available properties and methods is pretty comprehensive so I’ll just point out a few interesting ones.
getBattery() (have only seen this on chrome)
connection (some details about your network connection)
hardwareConcurrency (for multithreading)
plugins (another important vector for Drive-Bys)
storage (persisted storage available to websites)
clipboard (requires permissions, goodness plz be careful)
doNotTrack (i wonder who checks this...)
vibrate() (because haptic is the only real feedback)
While I’ve got it in mind, here’s a wonderful browser localStorage vulnerability I stumbled across https://github.com/feross/filldisk.com. There’s a 10MB per site limit, but no browser is enforcing this quota across both a.something.com and b.something.com...
I have no idea why Chrome thinks it’s useful to expose your battery status to every website you visit... Personally, the clipboard API feels the most violating. It requires permissions, but once given you’re never asked again. Control/Command + V right now and see what’s on your clipboard. I doubt there’s many web pages that you’d actually want to be able to read your clipboard every time you visit.

Social Media Side Channel / CSRF
Okay, now we’re getting a little cheeky. It’s actually possible to determine if a browser has an authenticated session with a bunch of social media platforms and services.
It’s a well known vulnerability (have a laughcry at some of the socials responses), which abuses the redirect on login functionality we see on many of these platforms, as well as the Same-Origin Policy SOP being relaxed around HTML tags, as we saw was sometimes exploited by Cross Site Request Forgery attacks.
Consider this lovely image tag.
<img src="https://www.facebook.com/login.php?next=https%3A%2F%2Fwww.facebook.com%2Ffavicon.ico%3F_rdr%3Dp">
As you can see, the image source (at least originally) doesn’t point to an image at all, but rather the Facebook login page. Thanks to SOP, we wouldn’t and shouldn’t be able to send an AJAX request to this website and see the response. But this HTML image tag is going to fire off a GET request for it’s source no problem.
Thanks to redirect on login, if a user rocks up to the login page with the correct session cookies then we won’t have them login again, but rather we redirect them to their newsfeed; or, as it turns out, whatever the URL parameter next points to. What if we point it to an actual image, say the website icon, such that the HTML image tag loads if we are redirected, and fails if not.
Simple but effective. You can try it for yourself here, by opening my codepen in your browser when you’re signed in to Facebook, and when you’re signed out (or just use Incognito).

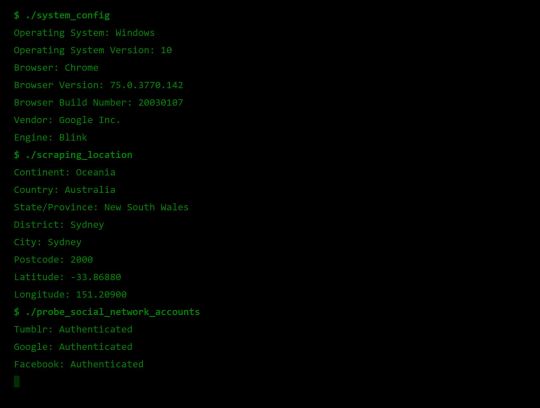
Fingerprint Me v1.0
Okay, time for a demonstration. I took the liberty of writing my own web page that pulls all this data together, and rather than store it for a rainy day (like every other page on the web), I present it to the user on a little web dashboard. It’s like a mirror for your browser. And who doesn’t like to check themselves out in the mirror from time to time 🙃
Random technical content: I had to fetch the geolocation data server-side to protect my API key from the client, then I sneak it back into the static HTML web page I’m serving to the user by setting it on the window variable in some inline script tags.
I bust out some React experience, and have something looking pretty (pretty scary I hope) in some nondescript amount of time (time knows no sink like frontend webdev). I rub my hands together grinning to myself, and send it off to some friends.
“Very scary”. I can see straight through the thin veil of their encouragement and instead read “Yeaaaah okay”. One of them admits that they actually missed the point when they first looked at it. But.. but... nevermind. It’s clearly not having the intended effect. These guys are pretty Internet savvy, but I feel like this should be disconcerting for even the most well seasoned web user...
Like that moment you lock eyes with yourself in the mirror after forgetting to shave a few days in a row.

Fingerprint Me v2.0
An inspired moment follows. I trace it back to the week ?7 activity class on privacy:
It is very hard to make a case for privacy. What is the inherent value of privacy? Why shouldn’t the government have our data, we give it to a million services everyday anyway, and receive a wealth of benefits for it. Go on, have it. I wasn’t using it for anything anyway.
It is very easy to make a case for privacy, if there is any sense that someone malicious is involved. As soon as there is someone who would wish us ill it becomes obvious that there are things that the less they know the better.
<Enter great The Art of War quote here.>
~ Sun Tzu
Therein lies the solution. I need to make the user feel victimised. And what better to do it than a green on black terminal with someone that calls themselves a hacker rooting your machine.
DO CLICK THIS LINK (it’s very safe, I promise) https://fingerprintme.herokuapp.com
Some more random technical content: Programming this quite synchronous behaviour in the very async-centric JavaScript was quite a pain. It was particularly tricky to get around the fact that React renders it’s component hierarchy top down, so I needed the parent components to mount empty in order for them to be correctly populated with child components later. It was also a pain to access and render child components conditionally, especially if you want to have sets of child components in different files, as though they aren’t ultimately nested in the DOM, React will treat them as if they are.
Some User Reviews:
“It feels like I should shut the window”
“This is SO RUDE”
“Battery level. I mean. Literally. How.”
Excellent.
Recommendations
Know what’s in your present, and who you’re gifting it to 🎁
To protect your IP address/location consider using a VPN or ToR
Check out NoScript, a browser plugin that will block JavaScript by default, but allow you to enable it for trusted sites.
Check out and share https://fingerprintme.herokuapp.com 😉
3 notes
·
View notes
Text
React Router DOM Custom 404 Page Template Tutorial
React Router DOM Custom 404 Page Template Tutorial
Hello Dev’s today now in this post i will show you React Router DOM Custom 404 Page Template. Now in general, 404 is a status code that occurs when we are visit a web page that does not exist. So Ideally, the user is redirected to a custom 404 page, which is informs that the requested page is no longer available. Then if we want to set up a custom 404 page template in React application. Then this…
View On WordPress
0 notes
Text
React router dom history push

#React router dom history push how to#
#React router dom history push install#
Note: You can only use () function inside the component page that already listed on your project route, or simply use the withRouter() HOC if the component is not available in the route list. You can navigate to another path by using a. This is also the only way to access history in Class Components, which aren’t compatible with hooks. React Router (react-router-dom) is one of the most popular React libraries with over 46k stars on GitHub and nearly 7 million downloads per week on npmjs. Let’s say we want to move to the dashboard page, all we need to do is: class M圜omponent extends React.Component ) Version 4 of React Router doesn’t include a useHistory hook, so you’ll have to pass down the history object via props. history.push(path, state) Depending on your requirements, you may want to pass update as part of the location state, or the query string.
Consider we have a component, on click of a button we want to get redirected to a '/product' route and pass a product details along with the route, later display the product details on the.
It takes the first argument as a destination path and a second argument as the state. The second parameter in the history.push() method is actually known as the location state. We can pass data in route using browser's History API, which is possible in React through a custom hook useHistory () available in react-router-dom. The history.push() function belongs to react-router-dom and used to move from the current page to another one.
#React router dom history push install#
If you find yourself using both, it’s OK to get rid of React Router since you already have it installed as a dependency within React Router DOM. Use the following command from a terminal window to generate the project directory, then navigate inside the project directory and install required dependencies to add React Router v6 library: npx create-react-app react-router-v6-example cd react-router-v6-example yarn add history react-router-domnext. In other words, you don’t need to use React Router and React Router DOM together.
#React router dom history push how to#
In this article, you will learn how to use in your react project. React Router DOM contains DOM bindings and gives you access to React Router by default.
1 note
·
View note
Text
donkey ears chrome extension + blockchain +react 개발
https://youtu.be/8OCEfOKzpAw
react+ chrome extension 개발 세팅설명 매우 좋은 설명
.
npm install --save react react-dom
npm install --save-dev webpack webpack-cli
npm install --save-dev babel-loader @babel/core @babel/preset-env @babel/preset-react
.
.
아래 과정은 django + django rest framework 세팅 과정
https://vomtom.at/how-to-use-uniswap-v2-as-a-developer/virtual env설치
pip install virtualenv
python3 -m venv venv
venv/Scripts/activate
requirements.txt만들어서 django 와 djangorestframework를 타입
pip install -r requirements.txt를 통해 설치
내용은 아래 그림과 같이 설치할 라이브러리를 파일안에 기입
django-admin startproject donkey_ears
django-admin startapp api
python manage.py migrate
python manage.py makemigrations
python manage.py createsuperuser
.
npm install --save react-router-dom
npm install --save semantic-ui-react.
.
.
npm install --save cryptico
.
npm install --save bip39
bip 39을 이용하여 mnemonic phrase를 얻으려 했으나 chrome extension에서는 사용하려면 자꾸 에러 발생
npm install --save bitcore-mnemonic
npm install --save url
를 대신 사용
사용법 https://www.npmjs.com/package/bitcore-mnemonic
.
npm install --save ethereum-hdwallet
npm install --save crypto
npm install --save assert
npm install --save crypto-browserify
npm install --save stream
.
.
error solution
설치후에 계속 Module not found: Error: Can't resolve 'crypto' 에러 발생 해결은 아래와 같이 했다.
https://stackoverflow.com/a/67076572
*******************************************************************
react + web3, ethers
기본적으로 react를 사용할때 function , class스타일 두가지로 이용가능하다.

react 사용시 import하는 내용
.
클래스 스타일로 이용
.
함수형태이용

.

Web3.providers.HttpProvder를 통해서 만들어진 provider를 ethers에서도 provider로 사용가능할줄 알았는데 약간 다른 형태의 provider였다.
.
react에서 하위 component에게 데이터 전달하는 방법


.
react 에서 useState사용하는 방법
const [] 에서 첫번째는 state variable 이름이고 다음은 set 함수이름
useState()안은 초기값
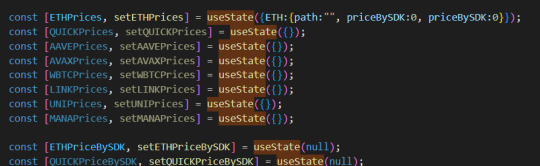
.
componentDidMount과 같은 역활하는 useEffect
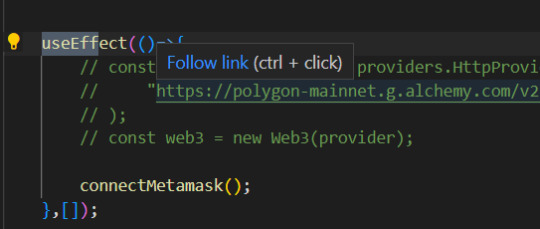
.
window.web3에 값이 할당되면 window.ethereum 에도 비슷한 값이 할당된다.
즉 window.ethereum을 통해서도 window.web3를 통해 하던 데이터를 얻을수 있으나 정확하게 같지는 않다.
window.web3안의 eth값이 있지 않은점이 크게 다른점이다. 그래서 window.ethereum.eth는 불가능하다는 이야기다.
metamask를 이용하는 경우 Web3.providers.HttpProvider()의 작업이 필요하지 않다 metamask안에 자체 provider를 이용한다.
metamask를 이용하는 경우 자동으로 window.ethereum 값이 설정되어있으므로 이를 이용하면 된다.
.
.
.
.
.
***********************************************************************************
***********************************************************************************
redirect 작업을 위해 useNavigate()를 이용하려고 했지만 react router를 사용해야지만 사용할수 있어서 사용하지 않고 window.location.href = '/popup.html?target=CreatePassword'; 와 같은 방법을 사용했다.
https://ncoughlin.com/posts/react-navigation-without-react-router/
.
react router 를 사용하지 못하고 (chrome extension에서는 일반 router기능을 이용할수 없음. 메타메스크의 경우 anchor # 를 이용했다. 아니면 query string을 이용해야 한다.)
.
useState를 통해 주입되는 component 내부에서 useState를 또 사용하는 경우 에러 발생
avubble 프로젝트의 app.js참고해 볼것
.
jsx에서 collection data type을 iterate 하면서 tag만들어내기

.

.
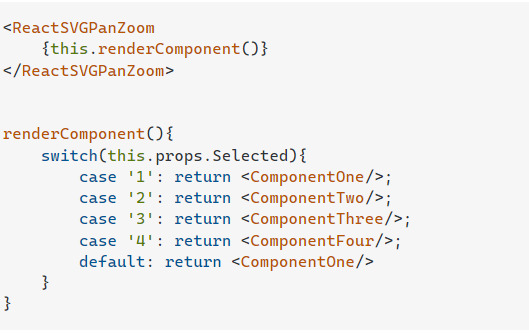
switch를 이용한 경우에 따른 component 삽입
.
chrome storage sync 삭제하기

.
pass parameters executeScript
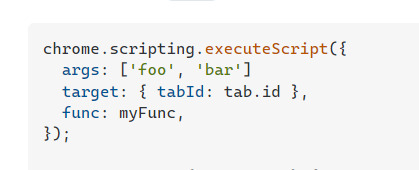
https://stackoverflow.com/a/68640372
.
opensea get sing asset
https://docs.opensea.io/reference/retrieving-a-single-asset-testnets
{ "id": 132352212, "num_sales": 0, "background_color": null, "image_url": "https://i.seadn.io/gae/zNAGqUNWdnYZQDWe9NnswJrQjRAspk8MlwCvRlsdGN6UOPc1Lzc6ZmPliqUMEmyRe1fVyjwm6w-5fr__pfA7hQNC_27RCj5-iLVjNDQ?w=500&auto=format", "image_preview_url": "https://i.seadn.io/gae/zNAGqUNWdnYZQDWe9NnswJrQjRAspk8MlwCvRlsdGN6UOPc1Lzc6ZmPliqUMEmyRe1fVyjwm6w-5fr__pfA7hQNC_27RCj5-iLVjNDQ?w=500&auto=format", "image_thumbnail_url": "https://i.seadn.io/gae/zNAGqUNWdnYZQDWe9NnswJrQjRAspk8MlwCvRlsdGN6UOPc1Lzc6ZmPliqUMEmyRe1fVyjwm6w-5fr__pfA7hQNC_27RCj5-iLVjNDQ?w=500&auto=format", "image_original_url": "https://nftstorage.link/ipfs/bafybeig76mncgmub2f7m7mordkveptk3br4wu6u6j4fhwqznez2ugiskku/0.png", "animation_url": null, "animation_original_url": null, "name": "Test 0", "description": "Test 0", "external_link": null, "asset_contract": { "address": "0xcfaf8eb5546fae192916f73126ea2d5991cb2028", "asset_contract_type": "semi-fungible", "created_date": "2022-09-29T09:41:30.559731", "name": "Example Game ERC 1155", "nft_version": null, "opensea_version": null, "owner": 12540403, "schema_name": "ERC1155", "symbol": "", "total_supply": null, "description": null, "external_link": null, "image_url": null, "default_to_fiat": false, "dev_buyer_fee_basis_points": 0, "dev_seller_fee_basis_points": 0, "only_proxied_transfers": false, "opensea_buyer_fee_basis_points": 0, "opensea_seller_fee_basis_points": 250, "buyer_fee_basis_points": 0, "seller_fee_basis_points": 250, "payout_address": null }, "permalink": "https://testnets.opensea.io/assets/goerli/0xcfaf8eb5546fae192916f73126ea2d5991cb2028/0", "collection": { "payment_tokens": [ { "id": 1507176, "symbol": "ETH", "address": "0x0000000000000000000000000000000000000000", "image_url": "https://openseauserdata.com/files/6f8e2979d428180222796ff4a33ab929.svg", "name": "Ether", "decimals": 18, "eth_price": 1, "usd_price": 1592.29 }, { "id": 1507152, "symbol": "WETH", "address": "0xb4fbf271143f4fbf7b91a5ded31805e42b2208d6", "image_url": "https://openseauserdata.com/files/accae6b6fb3888cbff27a013729c22dc.svg", "name": "Wrapped Ether", "decimals": 18, "eth_price": 1, "usd_price": 1593.2 } ], "primary_asset_contracts": [ { "address": "0xcfaf8eb5546fae192916f73126ea2d5991cb2028", "asset_contract_type": "semi-fungible", "created_date": "2022-09-29T09:41:30.559731", "name": "Example Game ERC 1155", "nft_version": null, "opensea_version": null, "owner": 12540403, "schema_name": "ERC1155", "symbol": "", "total_supply": null, "description": null, "external_link": null, "image_url": null, "default_to_fiat": false, "dev_buyer_fee_basis_points": 0, "dev_seller_fee_basis_points": 0, "only_proxied_transfers": false, "opensea_buyer_fee_basis_points": 0, "opensea_seller_fee_basis_points": 250, "buyer_fee_basis_points": 0, "seller_fee_basis_points": 250, "payout_address": null } ], "traits": {}, "stats": { "one_hour_volume": 0, "one_hour_change": 0, "one_hour_sales": 0, "one_hour_sales_change": 0, "one_hour_average_price": 0, "one_hour_difference": 0, "six_hour_volume": 0, "six_hour_change": 0, "six_hour_sales": 0, "six_hour_sales_change": 0, "six_hour_average_price": 0, "six_hour_difference": 0, "one_day_volume": 0, "one_day_change": 0, "one_day_sales": 0, "one_day_sales_change": 0, "one_day_average_price": 0, "one_day_difference": 0, "seven_day_volume": 0, "seven_day_change": 0, "seven_day_sales": 0, "seven_day_average_price": 0, "seven_day_difference": 0, "thirty_day_volume": 0, "thirty_day_change": 0, "thirty_day_sales": 0, "thirty_day_average_price": 0, "thirty_day_difference": 0, "total_volume": 0, "total_sales": 0, "total_supply": 1, "count": 1, "num_owners": 1, "average_price": 0, "num_reports": 0, "market_cap": 0, "floor_price": 0 }, "banner_image_url": null, "chat_url": null, "created_date": "2022-09-29T09:41:30.933452+00:00", "default_to_fiat": false, "description": null, "dev_buyer_fee_basis_points": "0", "dev_seller_fee_basis_points": "0", "discord_url": null, "display_data": { "card_display_style": "contain", "images": [] }, "external_url": null, "featured": false, "featured_image_url": null, "hidden": false, "safelist_request_status": "not_requested", "image_url": null, "is_subject_to_whitelist": false, "large_image_url": null, "medium_username": null, "name": "Example Game ERC 1155", "only_proxied_transfers": false, "opensea_buyer_fee_basis_points": "0", "opensea_seller_fee_basis_points": "250", "payout_address": null, "require_email": false, "short_description": null, "slug": "example-game-erc-1155", "telegram_url": null, "twitter_username": null, "instagram_username": null, "wiki_url": null, "is_nsfw": false, "fees": { "seller_fees": {}, "opensea_fees": { "0x0000a26b00c1f0df003000390027140000faa719": 250 } }, "is_rarity_enabled": false }, "decimals": null, "token_metadata": "https://nftstorage.link/ipfs/bafybeihfcvvlchgu6wogre4ae3jqwigyey3kgb2ur5o3jajv3zsmyve32q/0.json", "is_nsfw": false, "owner": { "user": null, "profile_img_url": "https://storage.googleapis.com/opensea-static/opensea-profile/1.png", "address": "0x0000000000000000000000000000000000000000", "config": "" }, "seaport_sell_orders": null, "creator": { "user": { "username": null }, "profile_img_url": "https://storage.googleapis.com/opensea-static/opensea-profile/2.png", "address": "0x72cebbf26f93cc5913fd87076c59428b794d6786", "config": "" }, "traits": [ { "trait_type": "Base", "value": "Starfish", "display_type": null, "max_value": null, "trait_count": 0, "order": null }, { "trait_type": "Eye", "value": "Big", "display_type": null, "max_value": null, "trait_count": 0, "order": null } ], "last_sale": null, "top_bid": null, "listing_date": null, "is_presale": false, "supports_wyvern": true, "rarity_data": null, "transfer_fee": null, "transfer_fee_payment_token": null, "related_assets": [], "orders": null, "auctions": [], "top_ownerships": [ { "owner": { "user": { "username": null }, "profile_img_url": "https://storage.googleapis.com/opensea-static/opensea-profile/2.png", "address": "0x72cebbf26f93cc5913fd87076c59428b794d6786", "config": "" }, "quantity": "3", "created_date": "2022-09-29T09:44:15.755541+00:00" } ], "ownership": null, "highest_buyer_commitment": null, "token_id": "0" }
.
solidity development
title generator
https://patorjk.com/
.
spdx license
// SPDX-License-Identifier: MIT
.
mumbai test contract
0x383A22a13D2693ecE63186A594671635a4C163fB
0 notes
Text
How I have created QUIZ-APP using React and MUI
Lets Create a Quiz App in React JS and Material UI with support of over 22 Categories.
React-Quiz-App
How to apply css to show the fullscreen Image;
.app {
background-image : url();
min-height : 98.5vh;
border : 8px solid #39445a;
}
File structure
Component
Pages
Creating the HOME PAGE of QUIZ Page
1.Import the TextField from @material-ui/core
import axios from "axios";
import { useState } from "react";
import { BrowserRouter, Route, Switch } from "react-router-dom";
import "./App.css";
import Footer from "./components/Footer/Footer";
import Header from "./components/Header/Header";
import Home from "./Pages/Home/Home";
import Quiz from "./Pages/Quiz/Quiz";
import Result from "./Pages/Result/Result";
<TextField
style = {{marginBottom : 25 }}
label="Enter your Name",
varient="outlined"
/>
//For outlined property Enter your name Field
<TextField
select
style = {{marginBottom : 30 }}
label="Select Category",
varient="outlined"
>
{
Categories.map((cat) => (
<MenuItem key={cat.category} value={cat.value}> {cat.category}
</MenuItem>
))}
//Menuitem will drag the all data from the cat.categories and Select Menu are MenuItem
</TextField>
We can similarly do for Selecting Easy, Med and Difficult.
Add Button comoponent using
<Button varient="contained" color="primary" size="large" onclick={handleSubmit}>Start Quiz
</Button>
Now, create a handleSubmit event on Home upon clicking the Button.
handleSubmit = () =>{
if(!category || !difficulty || !name){ //Validation
setError(true);
return;
}else{
setError(false); // If false only then
fetchQuestions(category, difficulty);
history.push('/') //ON BTN CLICK
}
};
In order to use history.push('/'), we should have to import useHistory Hooks from react-router. This would help to redirect to page on button click.
State Hooks in Home.js
const [category, setCategory]=useState("");
const [difficulty, setDifficulty]=useState();
const [error, setError] = useState(false);
// No error by Default
const history = useHistory();
return(
<div className = "content">
<div className = "settings">
<span style={{fontSize : 30}}>Quiz Details</span>
<div className = "settings_select">
{
{error && <ErrorMessage> Please Fill all the Fields </ErrorMessage>
//error are boolean value. So, if error is true then display
<ErrorMessage> Please Fill all the Fields </ErrorMessage>
}
</div>
</div>
</div>
)
Now Let's create <ErrorMessage> Component inside of Component/ErrorMessage/ErrorMessage.js
ErrorMessage.js
const ErrorMessage = ({}) => {
return(
<div
style={{
}}
>
{children} = "Please Fill all the Fields "
// Children prop is come from <ErrorMessage> Please Fill all the Fields </ErrorMessage>
</div>
);
};
export default ErrorMessage;
App.js
Let's call ques from the api :
function App(){
const fetchQuestions = async(category='', difficulty='')=>{
const {data} = await axios.get(https://opentdb.com/api.php?amount=10${category && `&category=${category}`}${difficulty && `&difficulty=${difficulty}`}&type=multiple`);
};
setQuestions(data.results);
}
return(
<Router>
<div className="app">
<Header />
//We shouldn't have to put Header cause it include on each page
<Switch>
<Route path="/" exact>
<Home
name={name}
setName = {setName}
fetchQuestions = {fetchQuestions}
</Route>
<Route path="/quiz" >
<Quiz
name={name}
questions = {questions}
setScore = {setScore}
</Route>
<Route path="/result">
<Result name={name} score={score} />
</Route>
</Switch>
</div>
<Footer />
</Router>
)
Quiz.js
import {useEffect} from "react";
import {CircularProgress} from @material-ui/core;
const Quiz = ({name,score,questions, setQuestions, setScore}) => {
const [options, setOptions] = useState();
const [currQues, setCurrQues ] = useState();
useEffect(()=>{
setOptions(questions && handleShuffle([
questions[currQues]?.correct_answer,
...questions[currQues]?.incorrect_answer,
/*
...questions[currQues]?.incorrect_answer will spread all the three incorrect options individually
*/
]);
);
},[questions, currQues];
// It means that, everytime the currentQues changes, it will swap the option
Alert! [Incase of not putting dependencies currQues, it will not update OPTIONS.
const handleShuffle = (optionss) = >{
return optionss.sort(()=>Math.random-0.5)
}
return(
<!__ All of UI Goes Here JS part complete -->
<div className="quiz">
<span className="subtitle">Welcome, {name}
</span>
{
question ? (
<>
<div className="quizInfo">
<span>{questions[currQues].category}</span>
<span>Score : {score} </span>
Here, category means, either computer, science, and arts etc and currQues gives index.
<Question
currQues={currQues}
setCurrQues={setCurrQues}
questions={questions}
options={options}
correct={questions[currQues]?.correct_answer}
score={score}
setScore={setScore}
setQuestions={setQuestions}
/>
</>
) :
//This is loader if content NOT ready
(<CircularProgress style={{margin : 100}}
color : inherit;
size : {150}
thickness : {1}
/> )
}
</div>
)
};
export default Quiz;
Question.js
Requirements:
⦁ Current ques
⦁ Ability to set the current ques
⦁ current option
⦁ Correct options
⦁ All of the ques
⦁ Score and setScore
⦁ On Quit terminate
Question.js
import { Button } from "@material-ui/core";
import { useState } from "react";
import { useHistory } from "react-router";
import "./Question.css";
import ErrorMessage from "../ErrorMessage/ErrorMessage";
const Question = ({
currQues,
setCurrQues,
questions,
options,
correct,
setScore,
score,
setQuestions,
}) => {
const [selected, setSelected] = useState();
const [error, setError] = useState(false);
const history = useHistory();
const handleSelect = (i) => {
if (selected === i && selected === correct) return "select";
else if (selected === i && selected !== correct) return "wrong";
else if (i === correct) return "select";
};
/*
Here, This logic is applicable incase,
1) if selected=== i === correct then return select.
2) if selected=== i !== correct return wrong
3) if i === correct then return select.
Here, we have created 2 css class named select and wrong. On correct hit the className="singleOption select" whereas upon wrong choose className="singleOption wrong"
*/
const handleCheck = (i) => {
setSelected(i);
if (i === correct) setScore(score + 1);
setError(false);
};
const handleNext = () => {
if (currQues > 8) {
history.push("/result");
} else if (selected) {
setCurrQues(currQues + 1);
setSelected();
} else setError("Please select an option first");
};
const handleQuit = () => {
setCurrQues(0);
setQuestions();
};
return (
<div className="question">
<h1>Question {currQues + 1} :</h1>
<div className="singleQuestion">
<h2>{questions[currQues].question}</h2>
<div className="options">
{error && <ErrorMessage>{error}</ErrorMessage>}
{options &&
options.map((i) => (
<button
className={`singleOption ${selected && handleSelect(i)}`}
key={i}
onClick={() => handleCheck(i)}
disabled={selected}
>
{i}
</button>
))}
</div>
<div className="controls">
//controls class have gap and space around style property
<Button
variant="contained"
color="secondary"
size="large"
style={{ width: 185 }}
href="/"
onClick={() => handleQuit() || handleQuit }
>
Quit
</Button>
<Button
variant="contained"
color="primary"
size="large"
style={{ width: 185 }}
onClick={handleNext}
>
{currQues > 20 ? "Submit" : "Next Question"}
</Button>
</div>
</div>
</div>
);
};
export default Question;
Finally , Now Create the result.js
Result.js
import { Button } from "@material-ui/core";
import { useEffect } from "react";
import { useHistory } from "react-router";
import "./Result.css";
const Result = ({ name, score }) => {
const history = useHistory();
useEffect(() => {
if (!name) {
history.push("/");
}
}, [name, history]);
return (
<div className="result">
<span className="title">Final Score : {score}</span>
<Button
variant="contained"
color="secondary"
size="large"
style={{ alignSelf: "center", marginTop: 20 }}
href="/"
>
Go to homepage
</Button>
</div>
);
};
export default Result;
0 notes
Link
Angular 12, the most recent production unharness of Google’s widespread TypeScript-based net framework, has received an associate update. Angular 12.1, arrived quarter day, adds compiler support for shorthand property declarations in addition to fixes for the compiler, compiler interface, router, and repair employees.
The Angular twelve.1 purpose unharness additionally introduces Apis to prefer into correct take a look at teardown behavior. The compiler fixes pertain to problems like unterminated interpolation and consider restoration, whereas the service employee fixes pertain to the naming, accessing, and clean-up of service employee caches.
[ additionally on InfoWorld: Angular, React, Vue: JavaScript frameworks compared ]
Published could twelve, Angular twelve is out there on GitHub, following varied beta unharnesses and release candidates. Angular twelve deprecates the heritage read Engine compilation and rendering pipeline in favor of the newer vine technology, a next-generation compilation and rendering pipeline that gives quicker AOT (ahead of time) compilation.
The Angular team noted that read Engines are removed during a future unharness. Current libraries victimization read Engine can still work with vine apps, however, library authors square measure suggested to begin transitioning to the vine.
Also in Angular twelve, the Ivy-based language service, providing capabilities like code completions and hints within templates, moves from opt-in to on by default. different new options and enhancements within the version twelve release:
To improve compiler interface performance, the progressive compilation is allowed within the presence of redirected supply files.
Nullish coalescing, to write down clearer code in matter categories, currently works with Angular templates.
Both Angular CDK and Angular Material expose a replacement Sass API surface designed for consumption with the new @use syntax. once change to Angular twelve, the associate app can mechanically switch to the new API by change via metric weight unit update.
Tools square measure on the market to migrate heritage localization IDs to IDs victimization the most recent algorithms.
Components currently support inline Sass within the designs field of the @component decorator.
Running metric weight unit build currently defaults to production, saving steps, and serving to forestall accidental readying of development builds.
Strict mode, to catch errors earlier within the development cycle, is enabled by default within the interface.
The Webpack five-module bundler is production-ready.
Support for the IE11 browser has been deprecated.
For the compiler, support is obtainable for reworking element vogue resources.
For the language service, Angular property completions square measure provided solely in templates.
For the compiler-cli, a context possibility is introduced for any request that permits the provision of capricious knowledge during a type-safe method. This feature addresses the necessity to piece interceptors in hypertext transfer protocol shopper on a per-request basis.
For animations, DOM components currently square measure properly removed once the basis read is removed. this can be a breaking amendment.
To improve performance, unused strategies are aloof from DomAdapter.
A new format is extra to localize-extract, referred to as legacy-migrate, to get a JSON file which will be wont to map heritage message IDs to canonical ones.
Strict null checks can report on a fraction doubtless being null. this can be a breaking amendment.
The form of the APP-INITIALIZER token has been modified to a lot of accurately replicate the categories of come back values handled by Angular. this can be a breaking amendment.
Support has been extra for disabling animations through BrowserAnimationsModulewithConfig.
The emit event possibility was extra for FormArray and FormGroup. this can be a breaking amendment.
More fine-tuned management has been extra in routerLinkActiveOptions.
Custom router outlet implementations are square measure allowable.
Support has been extra for matter four.2, and support for matter four.0 and matter four.1 has been born.
Implementing the appendAll() technique on HttpParams.
For forms, min and Georgia home boy validators square measure being introduced.
Exporting an inventory of hypertext transfer protocol standing codes.
Addition of a feature to the Angular Language Service that allows accessing the locations for parts that use a templet file.
The addition of nosology to counsel turning on strict templates, providing the way for the language server to retrieve compiler choices nosology.
A patch adding associate API to retrieve the templet type check block for a templet, if any, at a file location, and choice of the TS node within the TCB cherish the templet node at that the request for a TCB was created. this can facilitate debugging.
A variety of bug fixes additionally were featured, moving the compiler, compiler-cli, Bazel build tool, the router, and different elements of Angular. Angular 12 has arrived with a pile of improvements to its performance, language service, compiler, form validation, and much more. The deprecation of the View engine and incorporation of the Ivy ecosystem is certainly one of the major enhancements considered in version 12.
Angular 12 has witnessed improvement in styling, Nullish Coalescing, and shifting from Legacy i18n Message IDs as some other important features that make this release a stable one. AngularJS training in Kochi is one of the trending programs that every developer desires to master in Angular JS. AngularJS training institute in Kochi with all prerequisites is provided by the best Angular JS training.
0 notes
Text
React Router Tutorial for Beginners
#React #reactjs
React Router is a popular routing library for the React.js library. It allows developers to easily create Single Page Applications (SPAs) with multiple views, by providing a way to handle routing and rendering of components based on the URL. In this article, we’ll cover the basics of React Router and how to use it to build a basic SPA. What is Routing? Why use React Router? Installing React…

View On WordPress
#browserrouter#React#react router#react router dom#react router dom link#react router dom redirect#react router dom v6#react router example#react router history#react router link#react router npm#react router params#react router query params#react router redirect#react router switch#react router v6#react routing#reactjs#route react#useparams
0 notes
Text
To Better Understand React Router
As I worked through phase 2 at Flatiron school, studying React, I felt it helped me understand JavaScript better. I made my way through this phase and was able to comprehend more about it than I expected. I was able to complete my final project and do my final review. During this review I found out I knew less about React than I thought, and I am thankful that my reviewer was able to point this out to me. This way I could go back and learn what I need to, to be able to know how React really works. I struggled with describing what React Router is and how it works when I was asked. So I would like to discuss what I have learned and have this blog as a reference to look back on if a reminder is needed.
To start, I now know React Router is a client-side routing library, "...React are libraries with prewritten code snippets that we can use and reuse to build applications." - Khan, Shahzad, et al. So it is this prewritten code that you can use for routing to different components within your application. It is client-side because the client/user handles when and where the routing takes place. React Router actually contains components and hooks that do that job and that is the prewritten code. Both these components and hooks work with the components you have created in your code. How they do this is with conditional rendering components based on the URL. If the current URL matches with what your components path is then it will display it. Also, uses JavaScript for programmatic navigation, programmatic meaning, "of, relating to, resembling, or having a program" - Merriam-Webster. If there is a link clicked to a certain page, it then changes the URL for that page, and updates/displays that page without requesting for a new HTML document. Or, it can also change the URL, and display a new page without the user clicking on a link. As mentioned before, it manages all of these tasks and actions with the prewritten components and hooks. I will now discuss some and how they work.
You first need to have react-router-dom installed in order to use React Router. Then it must be imported like so:

BrowserRouter is a component and is also the base for your whole app's routing. Doing that declares how you will be using React Router. You would want to wrap this around your whole app component, so that it can contain all the other components and hooks. You could also just use Router instead of Browser Router to shorten it up.
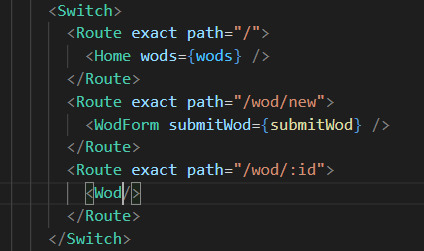
Next, you have your Route and Switch component for handling routing to your components. Route is given a path attribute which is given a certain URL, and it says if the current URL matches the path render the child component, your component. You then want to wrap all of your Route components within your Switch component. This is because if not, any of the routes that match the current URL all will render. Switch says to only render the first Route that matches, so yes the order you put them in is important. If it was not used a good example of what could happen is it would always render a home page because its URL usually is similar to the other's. It is recommended to move that Home component to the bottom of the others. The Switch definitely gives more predictable behavior. To keep from also rendering components with URL partial matches you can give your Route component an attribute of exact. This will only render if the URL matches exactly with the path. Some of my code for example:
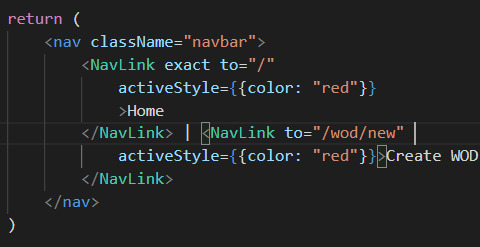
Using Link and NavLink components are what is going to make these Routes conditionally rendered. These both render a link or <a> to the DOM, when it is clicked, it changes the URL, re-renders Routes, and then displays the component whose path matches that new URL. Link is good for standard hyperlinks, where NavLink is better for a navigational bar. What makes it good for the bar is that you can add styling attributes to it. Like adding an active style to show which link is currently selected.
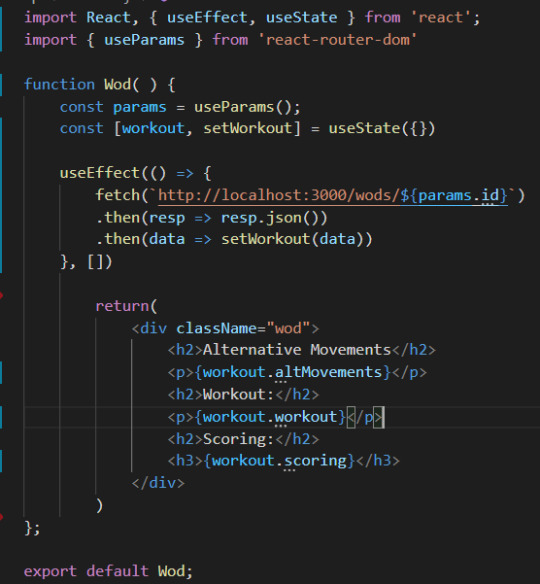
There is as well two hooks that can be used to get parts of a URL dynamically, the useRouteMatch and useParams hooks. This can be useful for when you have a component that gets rendered multiple time with different dynamic info. Or as well as nested information. For both hooks you want to create a variable; const match = useRouteMatch() and const params = useParams(). useRouteMatch returns an object with info about currently matched route and is good for nested info. useParams returns key/value pairs of the URL's parameters and is good for grabbing one specific component out of many. This is done usually by the components id. In my code below Wod stands for workout of the day. My Wod component gets rendered for each workout that comes from my JSON file. I used params to grab the to match the components path and single out specific workouts. So then it will only display that workout and the info that goes with it.
Finishing it off, we have a hook that can help give your app programmatic navigation. The hook is called useHistory and it can navigate the user to a new page based on any event that gets triggered, not just a click. For example, if the user logs out you can have it redirect them to the log in or home page. There is, as well, a component that is good for conditional rendering. The Redirect component does as it sounds, redirects the user to a new location. You can use this to redirect the user to the home page if a certain component is not found when an event is triggered, and other uses for it as well.
To conclude, having gone back and reading through lessons at Flatiron I know have a better understanding of React Router, and the hooks and components that make it up. I am thankful to my reviewer for assigning me to this, because now I feel more confident in using React. I also now know how to take better notes and plan to really make sure I understand all the material by the time of my next review. I hope this may help others if not just only me! Have fun coding all!
Sources:
“Programmatic.” Merriam-Webster.com Dictionary, Merriam-Webster, https://www.merriam-webster.com/dictionary/programmatic. Accessed 16 Sep. 2021.
Khan, Shahzad, et al. “What Is a JavaScript Library?” General Assembly Blog, General Assembly, 31 Mar. 2021, generalassemb.ly/blog/what-is-a-javascript-library/.
0 notes
Text
A Beginner’s Guide to React Router Hooks (Fundamentals of Routing in React)
Introduction
ReactJS is a front-end library based on Javascript, which helps us to create the user interface at our ease. And for managing the navigation of a multipage website, we’ll be needing a third-party library like React Router. Thus, in this React Router tutorial, we’ll dig deep and understand routing in React.
What is React Routing?
React Routing is a process of showing various pages on their respective URL. Users can have the liberty to navigate the pages by manually writing the URL or clicking the element. You need to install the react-router library to enable the routing in the React application.
React Router library provides three packages:
react-router, react-router-dom, and react-router native.
The react-router offers you the core functionality; react-router-dom and react-router-native are dependent on your projects’ environment. One should use react-router-dom for website development and React-router-native for mobile application development.
How to install react-router-dom?
For installing React Router, you can use npm or yarn and run the following commands.
yarn add react-router-dom OR npm install react-router-dom
We have done the installation of the router successfully! Let’s move ahead to get some knowledge regarding the basics of React Router.
React Router: Fundamentals
Router Component
We have to wrap our < App > component with component. As far as this is a website development, we can use either BrowserRouter Component or Hash Component. We will be using the BrowserRouter Component here.
So, let’s wrap the < App > component by importing the component from react-router-dom.
// /src/index.js import React from "react"; import ReactDOM from "react-dom"; import App from "./App"; import { BrowserRouter as Router } from "react-router-dom"; ReactDOM.render( < Router > < App / > < /Router >, document.getElementById("root") );
By this, we can apply the routing to our entire application.
You are free to use BrowserRouter directly. I prefer to write it like this. The code written above will create the history object for the component.
Every < Router > component written for wrapping a parent component (here < App > component) will generate the stack of previous locations and keep the record of the current location (history.location).
Whenever the current location changes, the view re-renders, and you can see navigation between the pages.
There must be a question about how does the current location change? Or what makes it update the current location?
Here is the answer, the history object consists of these two methods- history.push and history.replace.
On clicking the component history.push will invoke and < Redirect > component history.replace.
Link and Route Component, read more....
0 notes