#SAI tutorial
Explore tagged Tumblr posts
Visit Tumblr Blog
Explore Tumblr blogs with no restrictions, modern design and the best experience.
Last Seen Tumblr Blogs


Fun Fact
The average Tumblr user visits about 67 pages every month.
Text

small riso postcard design for one of my classes!!
#(this is the illustration from my tutorial but with a few small changes)#irl oomfs are saying i should turn this into a riso postcard series with different fruits... what do we think#my art#illustration#riso#risograph#print#strawberry#fairy#whimsical#fairytale
4K notes
·
View notes
Text

How to color lineart in SAI2
It's been 1000 years since I last made a tutorial so excuse me for the quality
0 notes
Text
🎮 HEY I WANNA MAKE A GAME! 🎮
Yeah I getcha. I was once like you. Pure and naive. Great news. I AM STILL PURE AND NAIVE, GAME DEV IS FUN! But where to start?
To start, here are a couple of entry level softwares you can use! source: I just made a game called In Stars and Time and people are asking me how to start making vidy gaems. Now, without further ado:
SOFTWARES AND ENGINES FOR PEOPLE WHO DON'T KNOW HOW TO CODE!!!
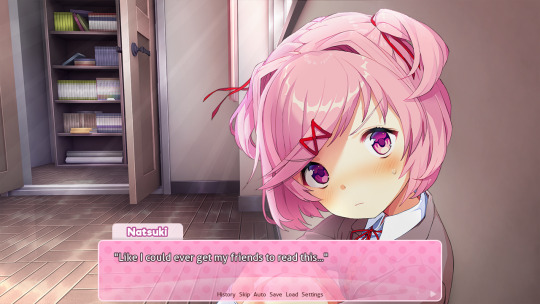
Ren'py (and also a link to it if you click here do it): THE visual novel software. Comic artists, look no further ✨Pros: It's free! It's simple! It has great documentation! It has a bunch of plugins and UI stuff and assets for you to buy! It can be used even if you have LITERALLY no programming experience! (You'll just need to read the doc a bunch) You can also port your game to a BUNCH of consoles! ✨Cons: None really <3 Some games to look at: Doki Doki Literature Club, Bad End Theater, Butterfly Soup
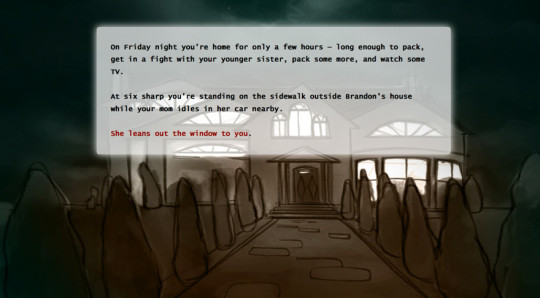
Twine: Great for text-based games! GREAT FOR WRITERS WHO DONT WANNA DRAW!!!!!!!!! (but you can draw if you want) ✨Pros: It's free! It's simple! It's versatile! It has great documentation! It can be used even if you have LITERALLY no programming experience! (You'll just need to read the doc a bunch) ✨Cons: You can add pictures, but it's a pain. Some games to look at: The Uncle Who Works For Nintendo, Queers In love At The End of The World, Escape Velocity

Bitsy: Little topdown games! ✨Pros: It's free! It's simple! It's (somewhat) intuitive! It has great documentation! It can be used even if you have LITERALLY no programming experience! You can make everything in it, from text to sprites to code! Those games sure are small! ✨Cons: Those games sure are small. This is to make THE simplest game. Barely any animation for your sprites, can barely fit a line of text in there. But honestly, the restrictions are refreshing! Some games to look at: honestly I haven't played that many bitsy games because i am a fake gamer. The picture above is from Under A Star Called Sun though and that looks so pretty
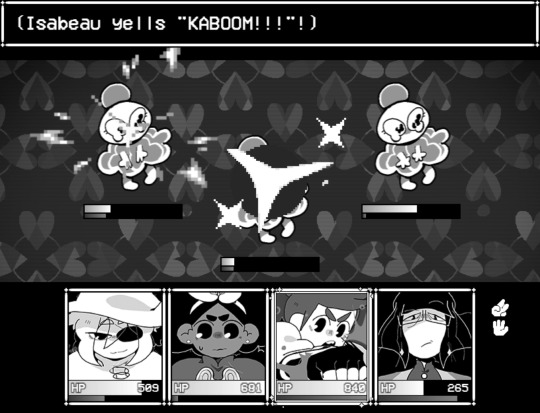
RPGMaker: To make RPGs! LIKE ME!!!!! NOTE: I recommend getting the latest version if you can, but all have their pros and cons. You can get a better idea by looking at this post. ✨Pros: Literally everything you need to make an RPG. Has a tutorial inside the software itself that will teach you the basics. Pretty simple to understand, even if you have no coding experience! Also I made a post helping you out with RPGMaker right here! ✨Cons: Some stuff can be hard to figure out. Also, the latest version is expensive. Get it on sale! Some games to look at: Yume Nikki, Hylics, In Stars and Time (hehe. I made it)
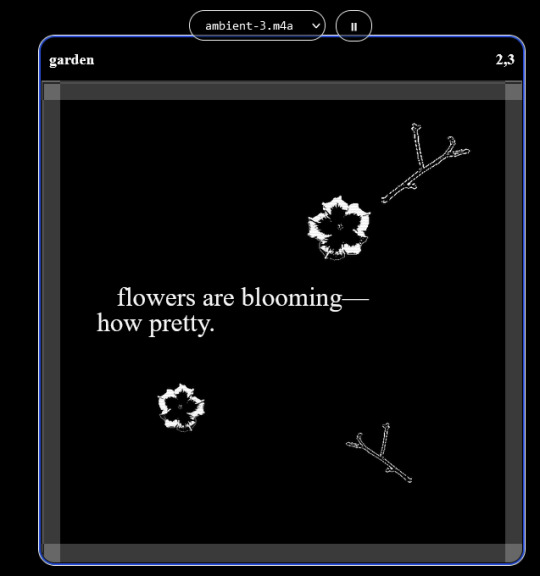
engine.lol: collage worlds! it is relatively new so I don't know much about it, but it seems fascinating. picture is from Garden! NOTE: There's a bunch of smaller engines to find out there. Just yesterday I found out there's an Idle Game Maker made by the Cookie Clicker creator. Isn't life wonderful?
✨more advice under the cut. this is Long ok✨
ENGINES I KNOW NOTHING ABOUT AND THEY SEEM HARD BUT ALSO GIVE IT A TRY I GUESS!!!! :
Unity and Unreal: I don't know anything about those! That looks hard to learn! But indie devs use them! It seems expensive! Follow your dreams though! Don't ask me how!
GameMaker: Wuh I just don't know anything about it either! I just know it's now free if your game is non-commercial (aka, you're not selling it), and Undertale was made on it! It seems good! You probably need some coding experience though!!!
Godot: Man I know even less about this one. Heard good things though!
BUNCHA RANDOM ADVICE!!!!
-Make something small first! Try making simple: a character is in a room, and exits the room. The character can look around, decide to take an item with them, can leave, and maybe the door is locked and you have to find the key. Figuring out how to code something like that, whether it is as a fully text-based game or as an RPGMaker map, should be a good start to figure out how your software of choice works!
-After that, if you have an idea, try first to make the simplest version of that idea. For my timeloop RPG, my simplest version was two rooms: first room you can walk in, second room with the King, where a cutscene automatically plays and the battle starts, you immediately die, and loop back to the first room, with the text from this point on reflecting this change. I think I also added a loop counter. This helped me figure out the most important thing: Can This Game Be Made? After that, the rest is just fun stuff. So if you want to make a dating sim, try and figure out how to add choices, and how to have affection points go up and down depending on your choices! If you want to make a platformer, figure out how to make your character move and jump and how to create a simple level! If you just want to make a kinetic visual novel with no choices, figure out how to add text, and how to add portraits! You'll be surprised at how powerful you'll feel after having figured even those simple things out.
-If you have a programming problem or just get confused, never underestimate the power of asking Google! You most likely won't be the only person asking this question, and you will learn some useful tips! If you are powerful enough, you can even… Ask people??? On forums??? Not me though.
-Yeah I know you probably want to make Your Big Idea RIGHT NOW but please. Make a smaller prototype first. You need to get that experience. Trust me.
-If you are not a womanthing of many skills like me, you might realize you need help. Maybe you need an artist, or a programmer. So! Game jams on itch.io are a great way to get to work and meet other game devs that have different strengths! Or ask around! Maybe your artist friend secretly always wanted to draw for a game. Ask! Collaborate! Have fun!!!
I hope that was useful! If it was. Maybe. You'd like to buy me a coffee. Or maybe you could check out my comics and games. Or just my new critically acclaimed game In Stars and Time. If you want. Ok bye
#reference#gamedev#indie dev#game dev#tutorial#video game#ACTUAL GAME DEVS DO NOT INTERACT!!!1!!!!!#this is for people who are afraid of coding. do not come at me and say 'actually godot is easy if you just--' I JUST WILL NOT.#long post
36K notes
·
View notes
Note
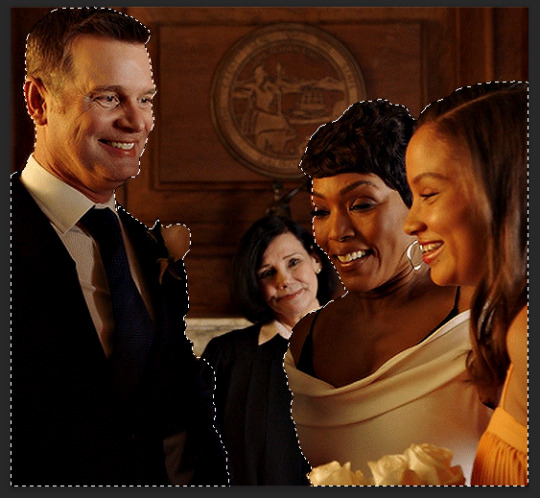
Hi! Absolutely adore your work 💗 I’m not sure if you’ve gotten a question like this before, so feel free to ignore, but do you have any tips for capturing likeness of characters you draw? You manage to stylize characters, especially live action characters, just right!


Thank you <3
#anon ask#ask box#to be deleted later#personal#my art#please don't repost#tutorial#reference#art resources#artists on tumblr#i tried very hard to explain how i do it but im not a good teacher and it shows#don't listen a word i say#gosh i suck at this#thank you for your lovely words#sarah michelle gellar#christopher plummer#lionel astier#daniel davis#robert downey jr
565 notes
·
View notes
Text
Bynine Art Rendering Tutorial
i've gotten about eight billion asks about how i render my art, so here's a full-scale tutorial! (this consolidates a lot of smaller past tutorials, so my apologies if this is old news to you lol...)
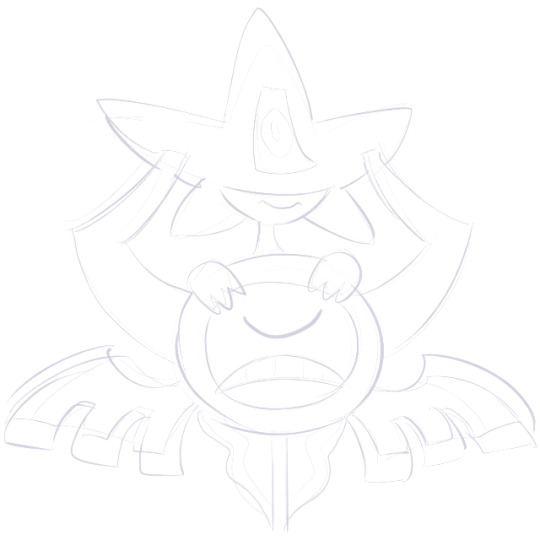
Step 1 - sketch! I draw multiple iterations in my real-life sketchpad first until I'm happy with the concept, then I either scan it or reference it for the digital sketch.

Step 2 - Lineart! I use a pixelated brush in Paint Tool SAI, as I find it makes the final result look nicer.

Step 3 - Flat colors! Good ol' paint bucket is all I need for this
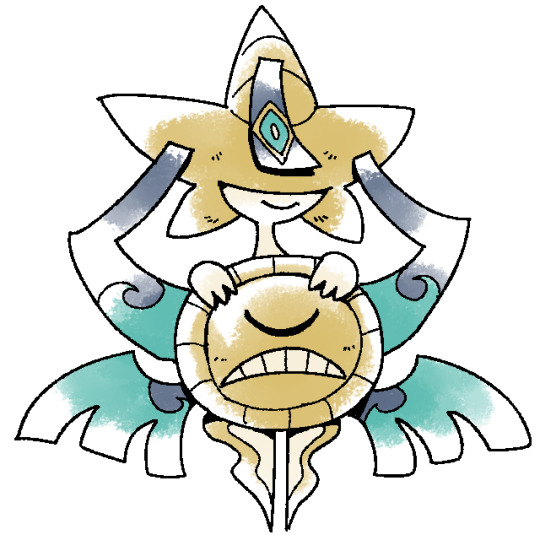
Step 4 - Shading! What I'll do is copy the flat color layer and set it to pure white as an overlay. Then I'll shade this new layer with black so the original colors can peek through.

Step 5 - Noise! Switching over to paint.net, I apply a noise effect to add texture to the art.

Step 6 - Blur! A slight blur changes the feel from digital to traditional, or at least like scanned art.
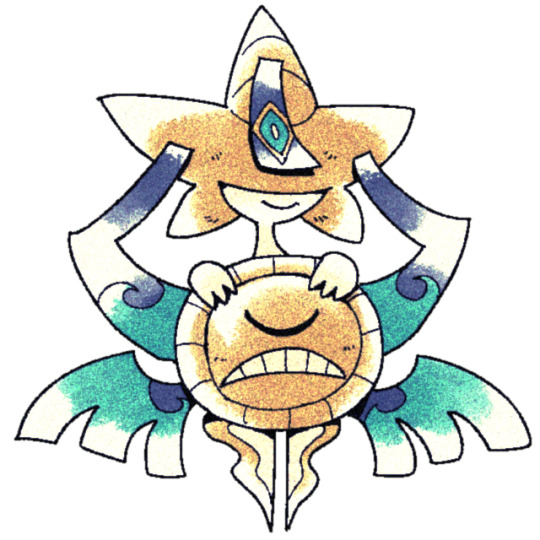
Step 7 - Color correction! I bring out the yellow in the highlights and the blue-purple in the shadows, using paint.net's Curves tool.
There we go! I hope that's helpful. Let me know if you have any other questions!!
604 notes
·
View notes
Text
THE DIFFERENCE IN THE LINE DELIVERY AND OVERALL VIBE BETWEEN THE PROSHOT AND THIS SLIME TUTORIAL HAS ME SCREAMING 😭😭
#LIKE HE SAYS IT SO GENTLY AND HIM HOLDING WHIZZERS FACE ITS FHSHAGHEH#christian borle when i catch you istg#falsettos slime tutorial#falsettos proshot#whizzvin#whizzer brown#marvin falsettos#christian borle#andrew rannells
584 notes
·
View notes
Text
Hello! I’m a maker of the once popular 3D wire mandala trinket from the 90’s era. During those “ancient” times, people would often enjoy this as a nifty hair piece, or fashionable bracelet. Nowadays it is more commonly used as a fidget toy and/or desk ornament. What makes this special is its hyper-versatility and the freedom of being able to use this however you can imagine.
I invite you to discover my handmade Fidget Blooms, and browse my hundreds of styles and colours favourited & reviewed by thousands of happy customers. Very demurely, use code TUMBLR at checkout for a special discount. Thank you for discovering my art, I do hope you enjoy it! :)
“The entire point of life is to take chances on dreams that seem crazy to most but feel like destiny to you.” -Timothy Shriver
I wanted to share this quote as it relates to my journey as an artisan specializing in wire art. It is a statement about pursuing one’s passion, even when others might find it unconventional or risky, as long as it feels personally meaningful and aligned with one’s purpose. <3
PS: 90s kids, don’t forget to take that Ipuprofen today for that back pain. XD
#artists on tumblr#90s nostalgia#tickle my brain#dopamine decor#random cool#de stigmatize fidgets#visual stim#crafts#video tutorial#witchcraft they say#handmade on Etsy#stress relief art#rainbow horizon x dark grey wire x standard size
667 notes
·
View notes
Text
the less fun part about literatureposting on tumblr dot com is that if you make a joke about a classic novel then all the people who are excluded from the joke (rightfully) (didn’t read the book) will insert themselves anyway and try to argue the only piece of trivia they know about said book. brother this discourse is so bottom-tier that it was put to rest in 1818. we already talked about that without you. before you were born actually
#barbi.lit#barbi.txt#if you want a tutorial on how to recieve hundreds of ice cold takes in ur notifs. look no further#‘frankenstein is the name of the doctor not the monster’ yep that is established in the book#‘victor frankenstein is not even a doctor hes a college dropout’ yet another point explicitly established in the book#you guys are really batting a thousand today. just lobbing snowballs at me i see#‘barbi you’re acting kind of pretentious’ i am pretentious. hope that clears things up#say something new and interesting im about to get violent#lit#frankenstein
214 notes
·
View notes
Text


I didn't realize how yellow season 1 was until I started giffing. I actually think it's so fun learning new ways to de-yellow this show! This post brought to you by this channel mixer tutorial I stumbled across and just had to try it! Of course there are a million other color layers on this too but channel mixer really did give me such a great base!!
#i love a tutorial omgggg#love learning new things too#and like not to say the final product is perfect idk but i think it looks better than with the tint at least haha#also i love this scene#911 abc#learning to gif#week 3 i guess#lmaoo#bobby nash#evan buckley#hen wilson#my gifs
272 notes
·
View notes
Text
??????? im doing this now???
#whatever. go my blorbo#how am i animating#i guess this is what happens when you look critically at every piece of art you see#ive watched enough animation tutorials#my art#eddsworld#sketch#ew tom#animation#animated#animatEDD#that pun will never not make me happy#monster tom#@the anon thata asked about painful transformation i hope this works#toms transformations arent painful so much as they are uncomfortable and scary#this bitch is saying 'STOP'#no way#time: unspecified
212 notes
·
View notes
Text
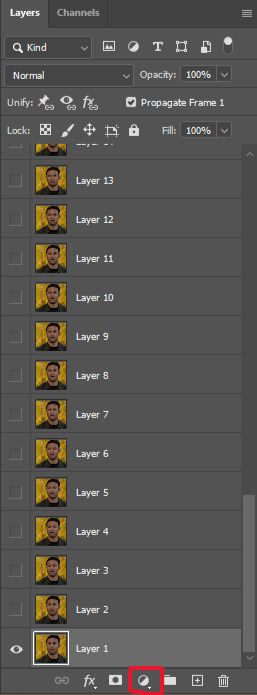
tutorial — changing the background color in a gif
sofia & remy asked for this tutorial so here it is :)
note: i pay for photoshop and currently own the most recently released version of april 2025 - some things might be different if you're working on earlier versions of photoshop
i've made several gifsets (x, x, x, x) where i've isolated the gif subject so i can change the background into a bright, colorful background or into b&w backgrounds - in this tutorial i'll explain how i do that :)
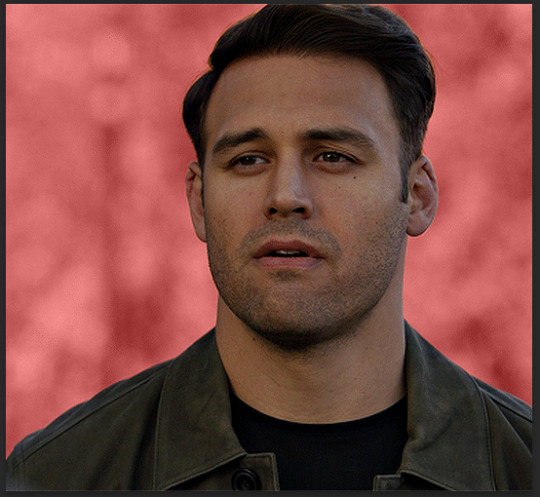
in this tutorial we'll be going from this:
to this:

putting the tutorial under a read more!
step 1 — open your gif
i usually tend to make my gif beforehand, fully colored and sharpened and everything else, and save it before reopening it (as a gif) in photoshop cause i find it's the easiest way!
you'll have to work in frames mode when isolating the background color (because as said, you'll have to do this frame by frame) and it's important to always have the same frame and layer selected, otherwise you might run into some issues

for the purpose of this tutorial my premade gif (eddie<333) has not been colored, only sharpened
step 2 — selecting your subject
next up we're going to select our subject by going to the select category up top and clicking subject

↓ you'll now have a marching ants line around your subject ↓

sometimes photoshop will be silly and select either too much or too little, and you'll have to manually make sure (for every frame) that your subject is correctly selected - but i'll get back to that later!
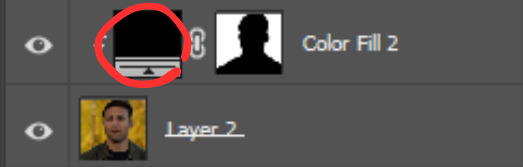
step 3 — adding a solid color (/gradient color) layer mask
once you have your subject selected the way you want it, we're going to add a solid color (or gradient color) layer mask by clicking this half filled circle icon in your layers tab - from here on out you can choose whether you want to add a solid color or gradient (for this tutorial - we'll go with a solid color)


photoshop will ask you to pick a color (or gradient) so just go ahead and pick whatever color you wish to make your background! the lighter your color the brighter your background, and the darker your color the duller your background (for b&w backgrounds you can use black or white, it makes no difference) - once you're happy with your color, just press ok :)
step 4 — create a clipping mask
this might seem like nothing, but is actually an important step in the process! you want to make sure that the color fill layer you just created is clipped to the corresponding frame like so:


you can do this by pressing cmd/ctrl + alt + g or clicking right on your color fill layer and selecting create clipping mask

by clipping your color fill layer to the corresponding gif layer, you avoid this happening:

the color fill layer for the last gif layer has been applied on all gif layers before that, which will make it so that your subject will move in and out of the colored background and makes your gif look silly ↓

obviously this is what we want to avoid so clipping your color fill layer to your gif layer is an essential step!
step 5 — invert the layer mask of your color fill layer
next up we're going to select the layer mask and invert it by pressing cmmd/ctrl + i


this way we go from this

to this

step 6 — changing the blend mode of your color fill layer
the final step (!) is changing the blend mode of your color fill layer - i tend to just use the blend mode color on most of these as this mode tends to give the brightest results but you can definitely mess around and see what you prefer :)

(for this set i actually put the blend mode to soft light to create a duller background, for a gradient background just follow the exact same process but in step 3 choose gradient instead of solid color)
and you're done! now you only have to repeat this process for every. single. gif. frame. :)
and that's all there is to it really, so happy creating <3 see more tips/comments below and if you have questions, my askbox is always open!
tips / comments
1.- record this entire process into an action (tutorial on how to create actions) – this way you'll only have to select the correct frame/layer combo before pressing play and letting photoshop do the work for you! i made two general actions;
bw with subject select: use this action when photoshop can select your subject without issues!
bw without subject select: use this action when you need to manually edit the selection of your subject! (see 2.-)
feel free to download and use these actions! they will turn your background b&w - you can change the background color by clicking this square;
sofia @sadgayeddie made an action to select next frame + layer so you don't have to move your cursor around as often and graciously allowed me to share it <3 you can find it here
2.- (circling back to step 2) make sure photoshop correctly selects your subject – when using the select subject feature, photoshop may fuck up the selection of your subject, as such ↓

i don't want the lady in the background included in my subject - you'll have to use the quick selection tool to manually unselect whatever you don't want in your subject and/or manually select what you do want in your subject
from personal experience i know photoshop tends to fuck up with;
hair (especially when it moves around a lot)
blurry subject (eg eddie dancing in 8x06
one or more colors in your subject being too close to the background color(s) (such as bobby's suit in this example)
hands (the smaller the hands, the more photoshop makes a mess)
this is what the subject looks like without the lady in the back selected:
it's a bit more work if you have to edit the subject selection for every frame (and you might make small mistakes), but it's worth it! we want the gif looking like this in the end (sneak peek for my bobby set!!)

#resources#tutorial#itsphotoshop#usergif#i say tutorial but it's just me rambling sjkfhskdf#i hope this makes at least a little sense :') otherwise i'm always ready to answer questions!
229 notes
·
View notes
Text
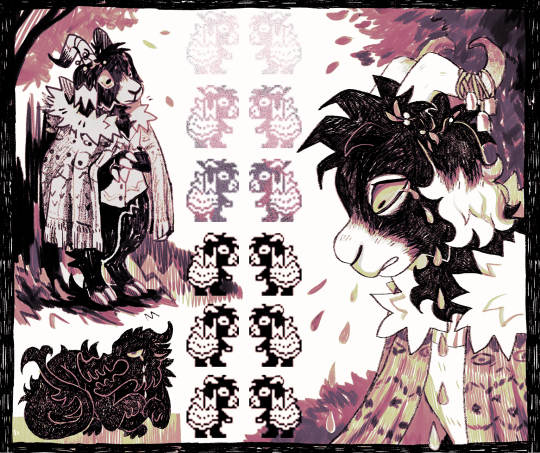
more svanhildr - trying new things, like a brave boy
#my art#anthro#furry#illustration#oc#svanhildr#dysterel#i have so many great brushes i never use for no reason so i'm expanding my horizons and using like 10 brushes instead of 3#and i used the pencil tool for the first time so i could make a sprite of svanhildr#btw don't do pixel art without looking at multiple tutorials first. worst mistake of my life#i think my blobby indeterminate sprite daughter looks great though#also has anyone seen brass eye and if so have you seen when the posh reporter lady is walking to the prison#and she turns to the camera and says something like “i'm going going inside now. like a BAD boy”#anyway it gets me every time and writing brave boy made me remember it
2K notes
·
View notes
Text
ok guys paris under siege is actually legitimately better than mrots (gameplay wise). like you can actually move the camera and the characters actually semi-respond to your button presses. this is so much more of a game than the other one
#i won't tag this as spoilers but#like. i'm not here gonna say this is SUUUCH a good game and i'm only past the tutorial level#but like. omg. this is so much better. <3 i love you mrots and your awful controls but mpus has you beat
376 notes
·
View notes
Text
Transcript:
Don't give up. Don't be a quitter, a spitter.
Follow through on what you started.
Swallow.
Audio source
#gabriel ultrakill#ultrakill#thank you for the tutorial#suggestive#hes saying this while spraying cleaning supplies at my face#putting soap in my mouth for the things ive written#sorry for the next tags#no regrets#I cant stop drinking oil. I CANT stop drinking oil..#I just can't stop I can't stop drinking crude oil#I just can't stop I can't stop drinking crude oil. You know the black stuff that comes in barrels? I can't stop drinking it.#I just cant! It's TANTALIZING#its ADDICTING! It is... A DELICACY I LOVE IT I cant stop drinking oil#<- these tags + this post = the result of gabe + v1 + me being locked in a room for 5 mins#its all over the screen. and the floor. and me. the military will be arriving soon.
305 notes
·
View notes
Note
Hey, how do you draw sonic characters? I love you art so much!
no good at explaining so instead here are some notes
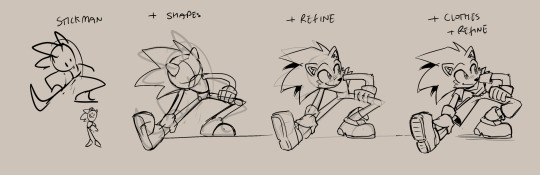
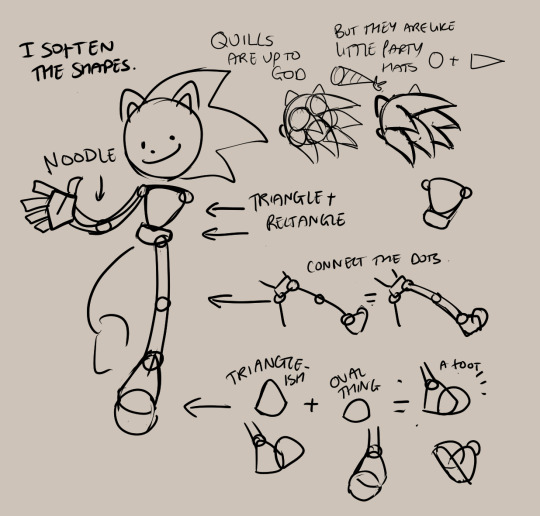
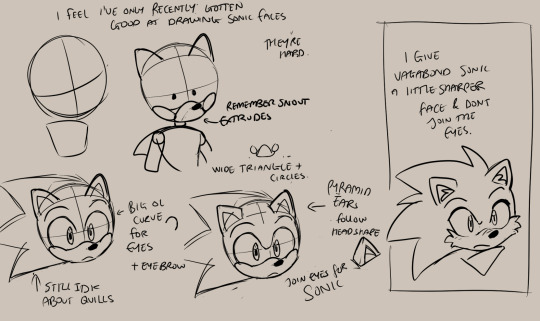
#hhwAsk#Anonymous#sonic#sth#sonic the hedgehog#tutorial#i suppose#stvh#forgot to say thank you!#my doodles
2K notes
·
View notes
Text
Dear person on the bus this morning with the Dracula quote tattoo whose phone was open to my youtube channel, sorry I pretended not to notice and also was too shy to say hello
#what does one say??? 'oh! I happened to glance at your phone and I see my youtube thumbnails!'?#also I'm SO SO CLOSE to finishing the shirt video I swear it's coming soon!!#I need to finish adding the music and pictures and also do the written version of the tutorial that I've been neglecting#alas I can't post the video until I finish the blog posts because I say in the video that I have a full written tutorial#actually the tattoo Might not have been for Dracula quote reasons because it was 'Denn die Todten reiten schnell' but idk
408 notes
·
View notes