#blender overview
Explore tagged Tumblr posts
Visit Tumblr Blog
Explore Tumblr blogs with no restrictions, modern design and the best experience.
Last Seen Tumblr Blogs


Fun Fact
After the announcement of the deal with Yahoo!, there were 170K signatures of unhappy Tumblr users petitioning to prevent the sale in 2013.
Text
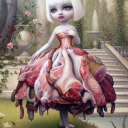
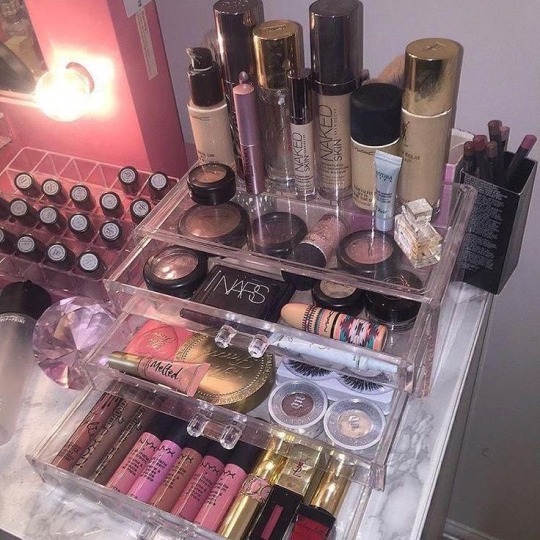
my updated dolly morning routine⋆.ೃ࿔*:・🌟💞

OVERVIEW ; having my morning drink and vitamins -> oral hygiene routine -> pilates regimen -> morning beauty regimen -> breakfast and start my day...💬🎀

FIRST AND FOREMOST ;
first thing i do in the morning before i even reach for my phone, when my subconscious is like a SPONGE is repeat my morning mantra to myself. im a law of assumption girlie so i always start my days telling myself how im in control, how im the best to ever do it etc. i fix my bed and just think to myself about how today is going to be the most fabulous day ever, how i have everything i want etc.
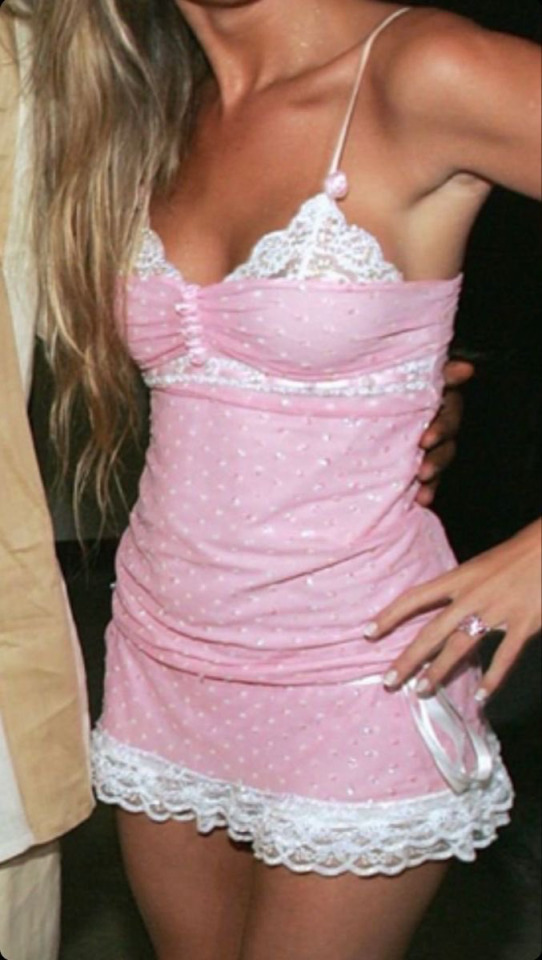
❤︎ wearing robes in the morning just make me feel SO much more glamorous and they're literally a part of my routine. i wear my silky victorias secret robe everyday, but if its a little cold i'll wear my fluffy pink one.
MORNING DRINK LINE UP ;
in the morning i like to have a drink thats good for my body. usually i pick between a few drink options but the ones i almost always drink are green tea with a lemon wedge, a ginger shot, some okra water or some chia seed water. sometimes i'll have two or just one. i'll also take my vitamins and supplements.
the supplements i take are iron (cuz im a low iron baddie), my hair skin and nail vitamins and a multivitamin gummy or capsule. thats just about it, i try not to overdo it with things like this especially if i dont need it...💬🎀
HOW TO MAKE A GINGER SHOT ;
so i own a juicer but assembling it and disassembling it is soo tedious and i'd rather just use my blender so im going to be talking about how i make ginger shots using a blender. all ur going to need are the following...
🌟 a few pieces of ginger (i usually just use one or two small pieces)
🌟 some water
🌟 cayenne powder if u want an extra kick (optional)
🌟 some lemon
🌟 strainer
and all u have to do is lightly peel ur pieces of ginger, dont worry about getting all the skin off but just get as much as u can off. put it into ur blender with some water and squeeze half a lemon into it before blending. next ur going to take ur strainer and separate the pulp from the juice and ur all done!
ORAL HYGEINE ROUTINE ;
so my oral hygiene routine is super basic, i just brush my teeth, tongue scrape and use my mouthwash. but i never ever want to miss it because one, its really good for my mental health. like when im having bad mental health days brushing my teeth is the first thing i always do.

second of all, during this time i like to "pre-game" for my day. so i'll affirm in my head and tell myself good things like "todays going to be such a perfect day, cuz im so perfect duh" or just talk to myself about self concept. if i dont do that i listen to 2010's pop music and its just the perfect way to start my day cuz it fills me with so much dopamine and i'll dance a little bit and its just made my happiness as a whole sky-rocket. PLEASE try this guys and get back to me. i listen to the following songs...
♡ california girls - katy perry
♡ party in the USA - miley cyrus
♡ 24K magic - bruno mars (any bruno mars song for that matter his songs are literally a potion)
♡ classic - MKTO
♡ heart shaker - twice
AND songs like that in general, whatever songs make you feel happy or give u a rush of excitement and nostalgia, start ur days with them and watch how happy you feel...💬🎀
MOVEMENT ;
doing my workout regimen in the morning is something that i've always done. i find that it sets the tone for my day and gives me so much energy, plus later on in the day im just not in the MOOD to workout... and i dont ever force myself to do something i rly dont wanna do, so doing it in the morning is just better for me. my everyday workout routine always includes some cardio, i love pilates but i also incorporate weight training with my workouts.

if im like, REALLY not in the mood for a workout or if im menstruating and cant rly give my all, i'll still incorporate movement by going on a walk. to get some fresh air and enjoy my mornings some more yk?
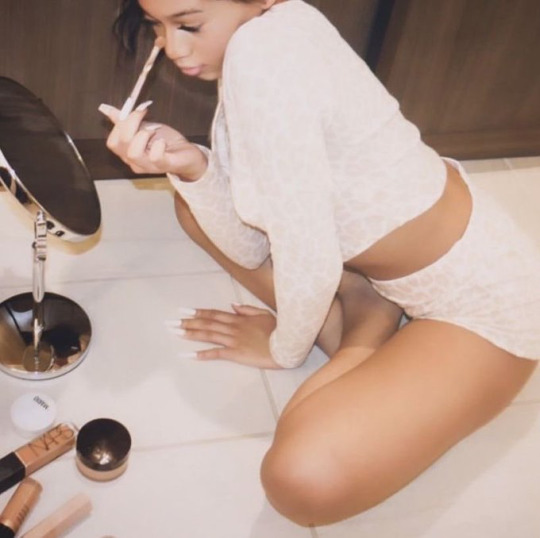
DOLL UP FOR THE DAY ;
then of course i'll doll up for the day. take a shower, brush my hair, do my makeup etc etc. all in my V.S. robe for the glamorous vibe. im super detail oriented and intricate when it comes to my appearance, maybe its somewhat vain but whatever. i take my time and get myself ready with INTENTION. i always tell myself how pretty i am and i truly think it makes a difference.
#honeytonedhottie⭐️#it girl#advice#becoming that girl#that girl#it girl energy#self concept#self care#self love#rituals#beauty rituals#beauty tips#morning routine#routines#girly routines#girly#girl blogger#dolling#doll#dolly#pampered#pampered princess#princess#hyper femininity#hyper feminine#glamorous#fabulous#fabulously feminine#self improvement#productivity
500 notes
·
View notes
Text
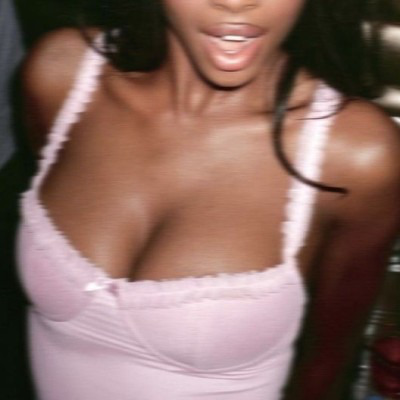
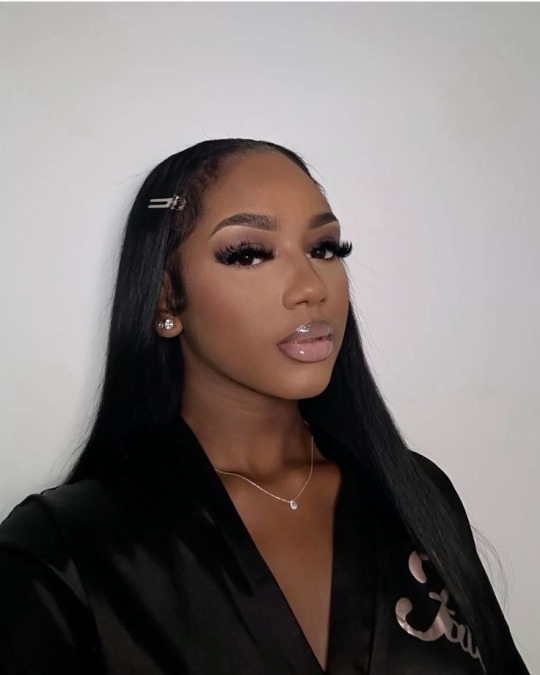
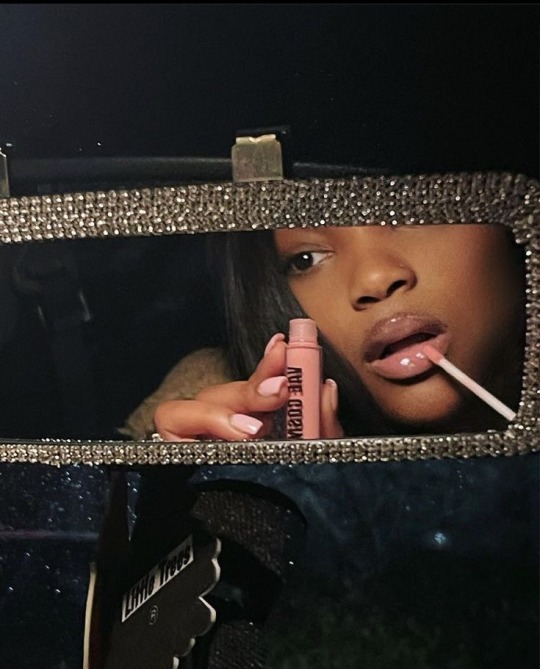
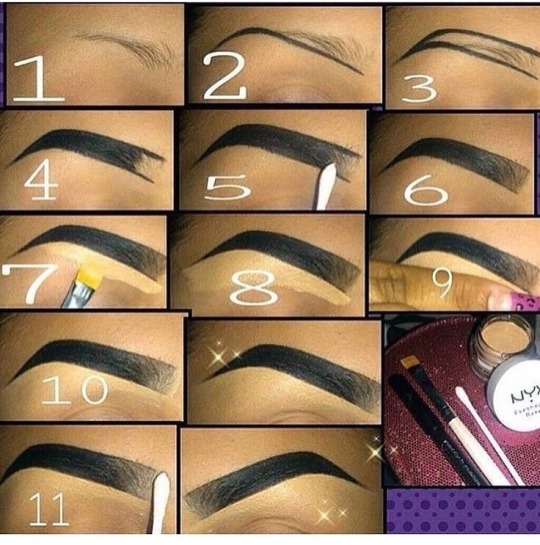
2010'S GLAM - DARK EYES, PINK LIPS: FAITH’S GUIDE


OVERVIEW
This look mixes a matte base with glossy lips. The emphasis is placed mainly on the eyes, and the other focus is the lips. This is a good everyday look that can be worn for any occasion.
YOU WILL NEED
PRODUCTS
Primer
Baby Powder
Foundation/ Tinted Moisturiser
Concealer (not too light)
Pressed Powder
Setting Powder
Brow Gel
Brow Pomade
Lashes
Lash Glue/ Bonding Glue
Highlight
Brown Lip Liner
Pink Lip Gloss
Setting Spray
TOOLS
Powder Brush
Beauty Blender
Small Flat Brush
Eyebrow Brush
BASE
Apply primer all over your face
#faithtip: use a powder brush to apply baby powder all over your face
Your face will look ashy after this step, but applying foundation/tinted moisturiser will fix this
Blend it in with a damp beauty blender
#faithtip: dampen your beauty blender with setting spray for easier blending and a longer lasting base
After blending in your foundation/tinted moisturiser, apply a concealer that is only slightly lighter than your skin tone to the inner corner of your under-eye
Place concealer to the end of your under-eyes following the shape of your eyes
Blend it in well with a beauty blender
Take a powder brush and some pressed powder and apply all over your face
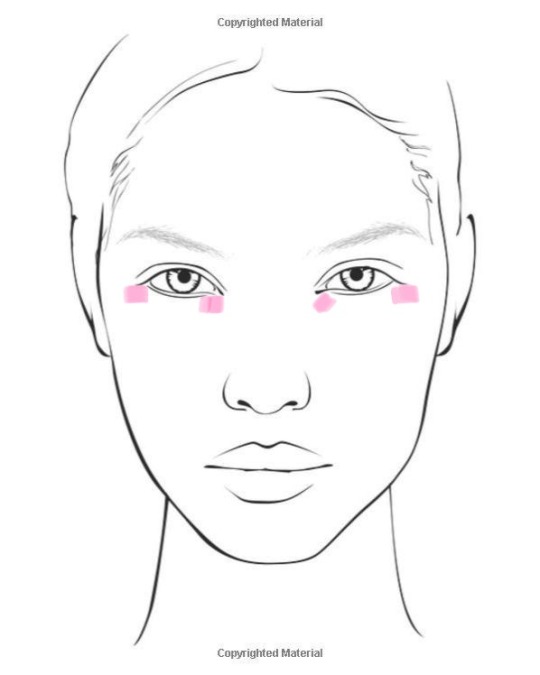
Now, apply setting powder to your under eyes following your eye shape.
Place a line of setting powder under your cheeks
Let the setting powder sit whilst you focus on another part of your face
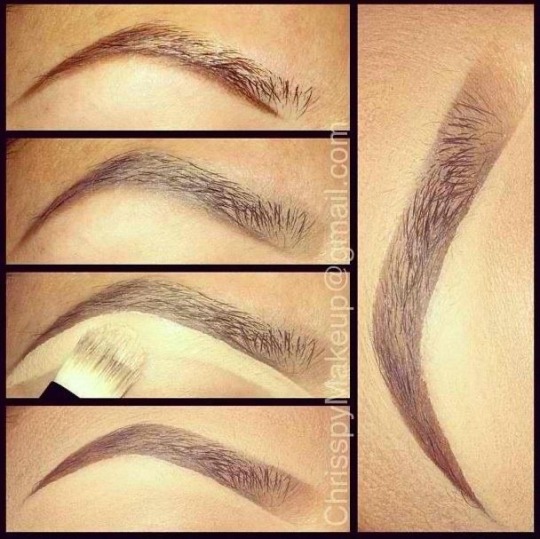
EYEBROWS
Eyebrows play a very vital role in this look, they help your eyes stand out more
This step will be easier if your brows have a defined shape
Brush through your eyebrows with brow gel
Use a brow brush dipped in pomade, to draw a line at the bottom of your brow starting from the front of your brow to the end
Draw a similar line at the top of your brows
Fill in the space (don't fill in the very front of your brows to create an almost ombre effect)
Apply eyebrow gel on top
Then use a small brush to apply concealer underneath your eyebrows
Blend well with a beauty blender
Apply setting powder to under your brow
youtube
LASHES
Lashes are the main event for this look
Select thick and long lashes/ lash clusters that suit your eye shape
#faithtip D-Curl lashes are your best friend
STRIP LASHES
But for this step apply glue to strip lashes
Wave the lashes around for a bit so the glue dries a tiny bit and feels a little bit sticky
Place them on the lash line and adjust where needed (using tweezers or fingers)
youtube
youtube
CLUSTER LASHES
Strip lashes can also be cut into smaller pieces or use cluster lashes
Dip them into glue and wipe off the excess
Use tweezers to hold the lashes
Pull the top of your eyelid upwards so you can see underneath your eyelashes
#faithtip Wipe the glue on the part you are applying to then you can dip the lash in glue again before actually placing it underneath your lash
This make the lashes more firm and secure
Make sure it is not too close to your eye as this can be irritating
Fan your eyes if you can still feel wet glue
youtube
BACK TO BASE
Brush the setting powder away with a powder brush
You will need to make sure you do this properly because the powder won't move easily, because of how long it has sat there
Apply highlighter to the tip of your nose, your brow bone and your cupid's bow
Make sure to keep the highlight application light and smooth it out, so as to not look ashy and to keep the focus on your eyes and lips
Spray setting spray all over your face
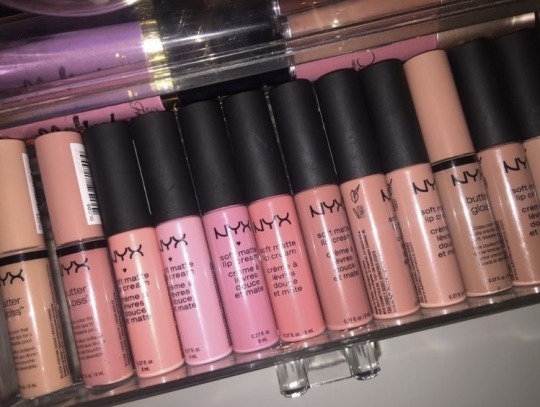
LIPS
Use a brown lip liner, slightly darker than/ similar to your skin tone, to outline your lips
Apply pink lip gloss to your lips
Then top it all off with clear lip gloss.
youtube
#Youtube#black women beauty#black women makeup#black tumblr#black girl aesthetic#black girl tumblr#black girls of tumblr#black girl beauty#black girl moodboard#makeup#2016 makeup#2010s#2010s baddie#2010s aesthetic#2014#2014 aesthetic#glam#high maintenance#black barbie#cosmetics#cosmetology#face card#prissy#insta baddie#ig baddie#girly#just girly things#girly girl#pink aesthetic
1K notes
·
View notes
Text

Date Night Dinner & Dessert by Twinsimming 🍷
This mod adds the Rack of Lamb and SimCity Cheesecake recipes from The Sims 4, and a new custom Lamb ingredient to The Sims 3!
The recipes and ingredient can all be placed in your Packages folder. They were created and tested on 1.69, but should work fine on 1.67.
Merry Christmas to everyone who celebrates!! 🎄🎄🎄
Requirements
This mod requires CCLoader to function.
Overview
New Recipes
Lamb Ingredient
New Recipes
The Rack of Lamb recipe is for dinner and the SimCity Cheesecake recipe is for dessert, but they’re both enabled to be prepared at any time of day. The cheesecake is also Vegetarian safe!
Rack of Lamb (Level 6): Lamb, Onion, and Potato
SimCity Cheesecake (Level 5): Cheese, Egg, and Any Fruit
Lamb Ingredient
Lamb is a new, non-plantable ingredient that can be purchased at the grocery store for §30.

Conflicts & Known Issues
This is a new script mod so there shouldn’t be any conflicts.
Credits
EA/Maxis for The Sims 3 and The Sims 4, Blender, s3pe, TSRW, Gimp, Milkshape, Notepad++, and CCLoader.
Thank You
To everyone in the Sims 3 Creators Cave discord!
If you like my work, please consider tipping me on Ko-fi 💙
Download @ ModTheSims
431 notes
·
View notes
Text
[Simmerianne93]Request_poses_13

----------
Hello everyone!! How are you today??
I'm a little late today, but here's a new posepack that I made for personal use a while ago. I didn't plan on sharing these poses when I made them, I made them for a post on instagram and I made them for blender, but then I was like: mayyybe someone would like them... So I decided to finish them all to work ingame with no problems. I think they might be useful for some of you.
It's a random pack, I know... with not a real sequence or a real theme, but I hope you like it anyway.
Enjoy!!!
----------
What is on it?
1 Groupal pose for 5 sims.
3 Trio poses.
3 Duo poses.
A bonus solo pose.
--- What do you need?
Andrew poses player.
Teleport any sim by Scumbumbo or Mccc by deaderpool.
A fence.
Optional: BaseGame or Seasons HAT for pose #1
[Simmerianne93]Victomiguel_NikonCam_Poseacc_AU_STIGMATA (Download it down below)
———
Instructions in the original post.
——
TOU
Do not claim my creations as your own.
Do not re-upload or modify my creations.
Do not make money of my creations.
Do not include my creations in Mods folders to download.
Please follow my Term Of Use.
——
Download it now here — [EARLY ACCESS UNTIL FEB 21st, 2025]
——————
If you want to support me: Patreon | Ko-fi
All my poses overview: Pinterest | Wix | Tumblr
More in-game preview pics of all my poses: Instagram
My socials: Twitter | BlueSky | Instagram | Tumblr
Lives and videos: Youtube
——————
I really hope you like them and I will say in advance: Thank you so much for using them.
@ts4-poses
--
#poses#simmerianne93#ts4#sims4poses#thesims4#posesforsims#sims4#thesims#ts4poses#creator content#requestposes#groupalposes#trioposes#duoposes#coupleposes
174 notes
·
View notes
Text
research & development is ongoing
since using jukebox for sampling material on albedo, i've been increasingly interested in ethically using ai as a tool to incorporate more into my own artwork. recently i've been experimenting with "commoncanvas", a stable diffusion model trained entirely on works in the creative commons. though i do not believe legality and ethics are equivalent, this provides me peace of mind that all of the training data was used consensually through the terms of the creative commons license. here's the paper on it for those who are curious! shoutout to @reachartwork for the inspiration & her informative posts about her process!
part 1: overview
i usually post finished works, so today i want to go more in depth & document the process of experimentation with a new medium. this is going to be a long and image-heavy post, most of it will be under the cut & i'll do my best to keep all the image descriptions concise.
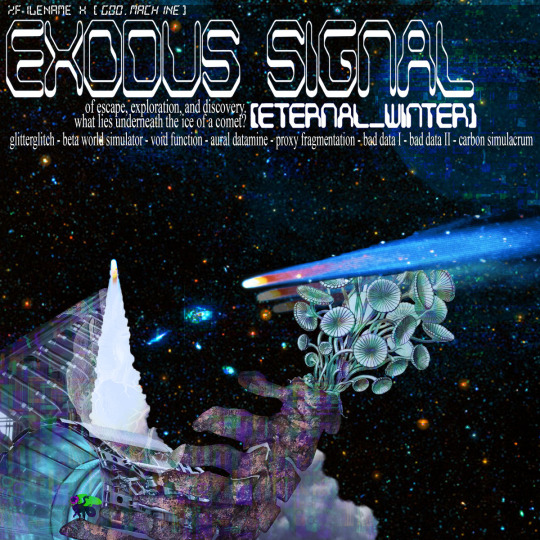
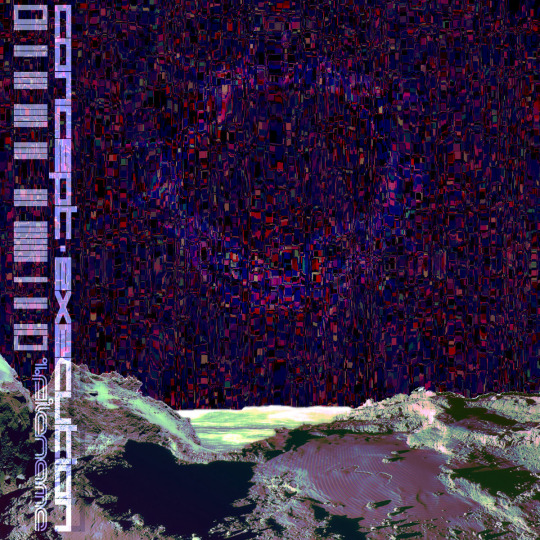
for a point of reference, here is a digital collage i made a few weeks ago for the album i just released (shameless self promo), using photos from wikimedia commons and a render of a 3d model i made in blender:
and here are two images i made with the help of common canvas (though i did a lot of editing and post-processing, more on that process in a future post):

more about my process & findings under the cut, so this post doesn't get too long:
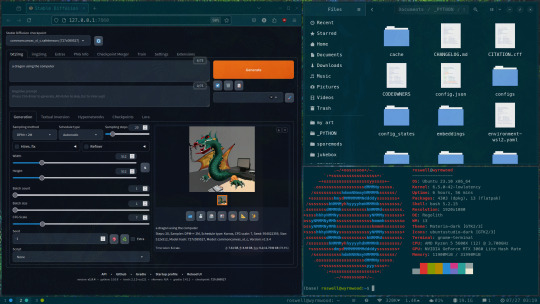
quick note for my setup: i am running this model locally on my own machine (rtx 3060, ubuntu 23.10), using the automatic1111 web ui. if you are on the same version of ubuntu as i am, note that you will probably have to build python 3.10.6 yourself (and be sure to use 'make altinstall' instead of 'make install' and change the line in the webui to use 'python3.10' instead of 'python3'. just mentioning this here because nobody else i could find had this exact problem and i had to figure it out myself)
part 2: initial exploration
all the images i'll be showing here are the raw outputs of the prompts given, with no retouching/regenerating/etc.
so: commoncanvas has 2 different types of models, the "C" and "NC" models, trained on their database of works under the CC Commercial and Non-Commercial licenses, respectively (i think the NC dataset also includes the commercial license works, but i may be wrong). the NC model is larger, but both have their unique strengths:
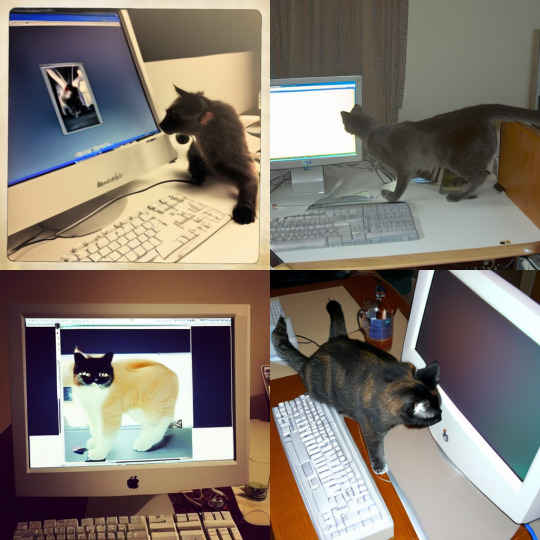
"a cat on the computer", "C" model
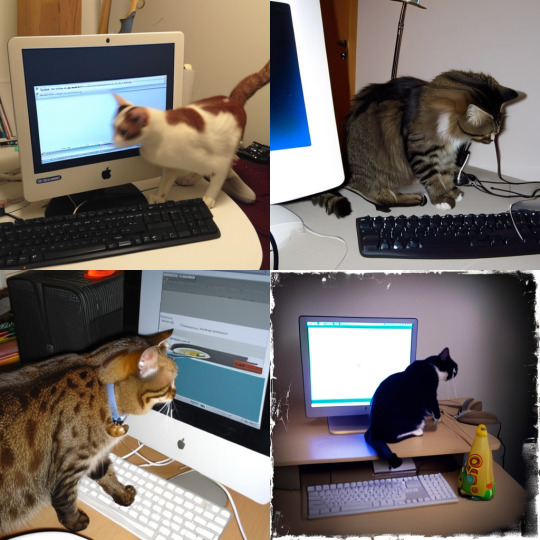
"a cat on the computer", "NC" model
they both take the same amount of time to generate (17 seconds for four 512x512 images on my 3060). if you're really looking for that early ai jank, go for the commercial model. one thing i really like about commoncanvas is that it's really good at reproducing the styles of photography i find most artistically compelling: photos taken by scientists and amateurs. (the following images will be described in the captions to avoid redundancy):
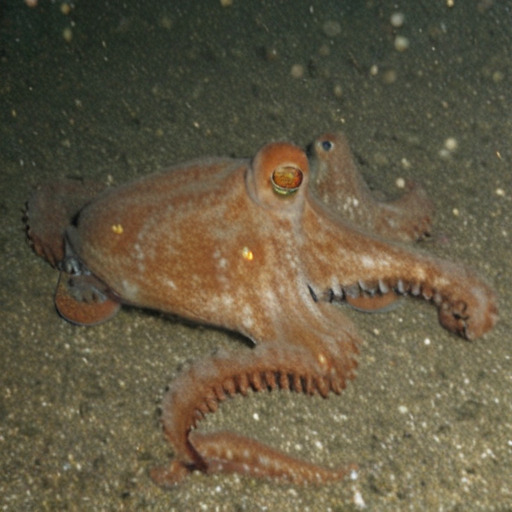
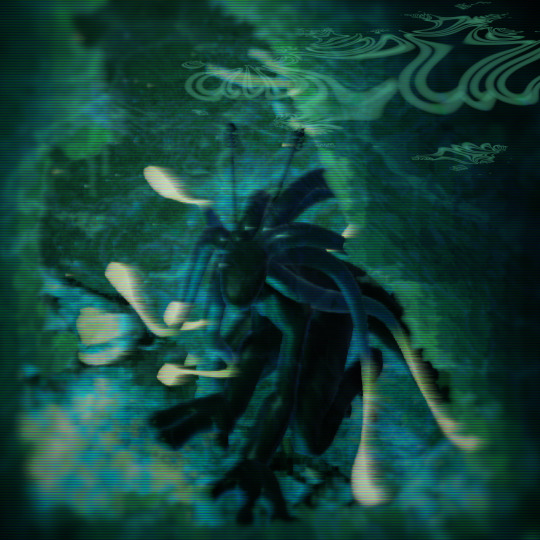
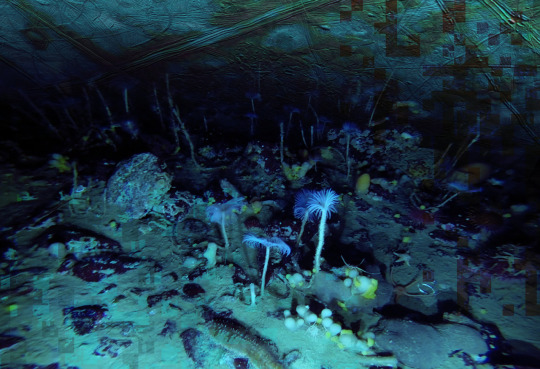
"grainy deep-sea rover photo of an octopus", "NC" model. note the motion blur on the marine snow, greenish lighting and harsh shadows here, like you see in photos taken by those rover submarines that scientists use to take photos of deep sea creatures (and less like ocean photography done for purely artistic reasons, which usually has better lighting and looks cleaner). the anatomy sucks, but the lighting and environment is perfect.
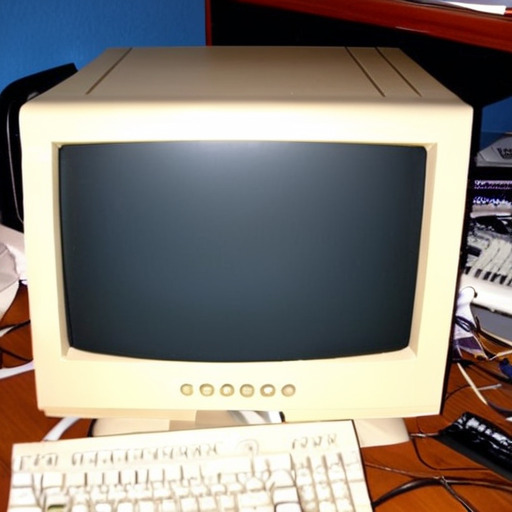
"beige computer on messy desk", "NC" model. the reflection of the flash on the screen, the reddish-brown wood, and the awkward angle and framing are all reminiscent of a photo taken by a forum user with a cheap digital camera in 2007.
so the noncommercial model is great for vernacular and scientific photography. what's the commercial model good for?
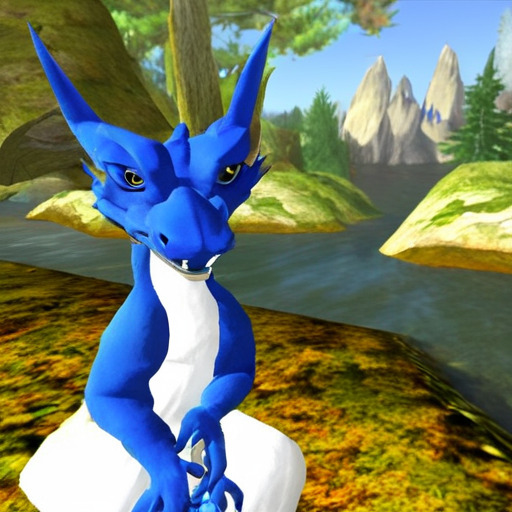
"blue dragon sitting on a stone by a river", "C" model. it's good for bad CGI dragons. whenever i request dragons of the commercial model, i either get things that look like photographs of toys/statues, or i get gamecube type CGI, and i love it.

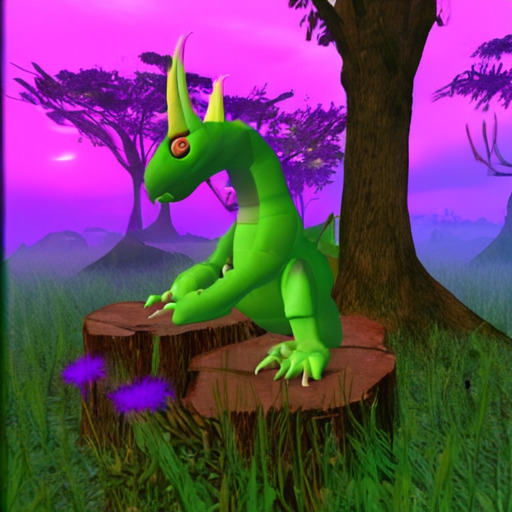
here are two little green freaks i got while trying to refine a prompt to generate my fursona. (i never succeeded, and i forget the exact prompt i used). these look like spore creations and the background looks like a bryce render. i really don't know why there's so much bad cgi in the datasets and why the model loves going for cgi specifically for dragons, but it got me thinking...
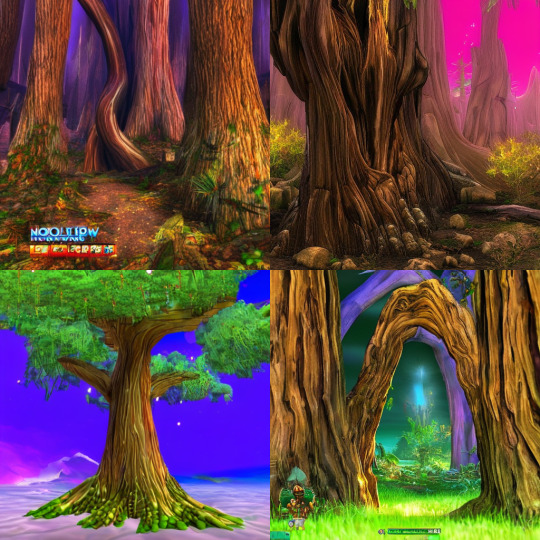
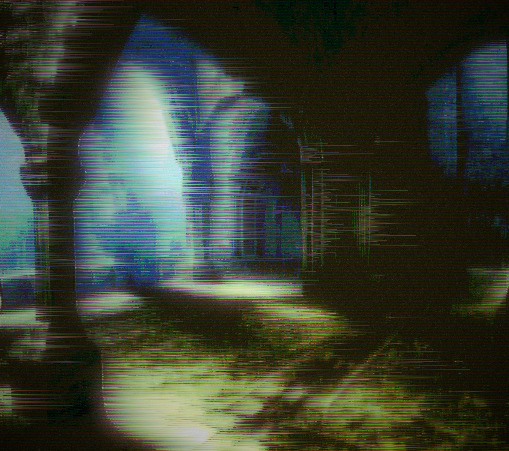
"hollow tree in a magical forest, video game screenshot", "C" model
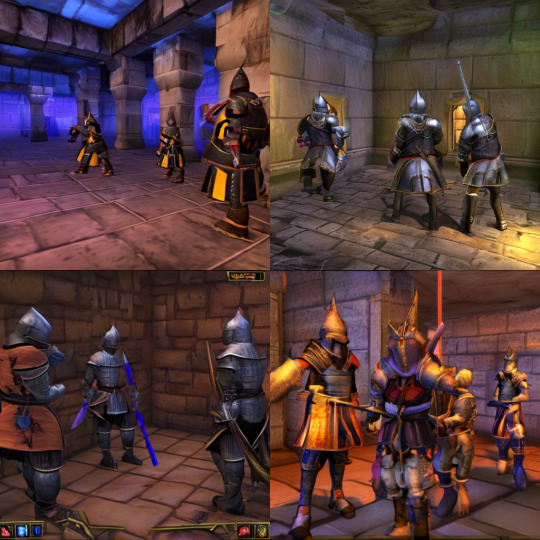
"knights in a dungeon, video game screenshot", "C" model
i love the dreamlike video game environments and strange CGI characters it produces-- it hits that specific era of video games that i grew up with super well.
part 3: use cases
if you've seen any of the visual art i've done to accompany my music projects, you know that i love making digital collages of surreal landscapes:
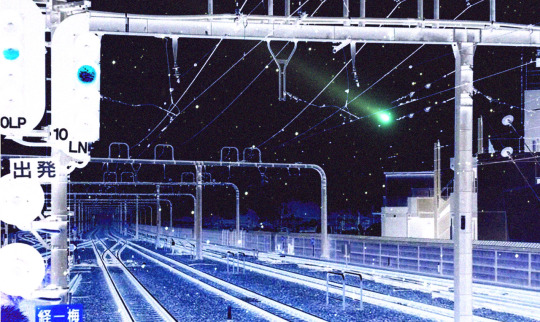
(this post is getting image heavy so i'll wrap up soon)
i'm interested in using this technology more, not as a replacement for my digital collage art, but along with it as just another tool in my toolbox. and of course...
... this isn't out of lack of skill to imagine or draw scifi/fantasy landscapes.
thank you for reading such a long post! i hope you got something out of this post; i think it's a good look into the "experimentation phase" of getting into a new medium. i'm not going into my post-processing / GIMP stuff in this post because it's already so long, but let me know if you want another post going into that!
good-faith discussion and questions are encouraged but i will disable comments if you don't behave yourselves. be kind to each other and keep it P.L.U.R.
201 notes
·
View notes
Text
BMOP: A history of the Abandoned Koro
Now that things have all come out, and the project is well and truly over, I thought I'd take a moment to talk a bit about something I worked on in the game, the "Abandoned Koro" area, now that there's video footage of a playthrough I can easily reference.

I suppose as a quick primer, I was with the BMOP team from around March of 2021 to November of 2022, serving as both 3D art lead and Level design lead for a time. There's a post out there about my experiences with the leadership of the team that I mostly stand by still, I do feel bad for how the project ended, and I have come around a bit to remember the positive times more than the negative, but that doesn't erase what happened.
So to begin, when I came on level design was a fairly inactive sub channel of the game development discord, some ideas got tossed around occasionally, but not much seemed to be happening, before I'd joined there was a rough map drawn up by the then current level design lead.

It was very basic stuff, there was a version of this map in engine that had been extruded a bit to make it a kind of playable space, one area had some trees on it and some random platforms.

One area that interested me greatly was this part in the south, the so called "Abandoned Koro"

The rough idea being that it was the Le-Koro seen in the GBA game Bionicle: Quest for the Toa, that had been abandoned in favour of the one seen in the browser game Mata Nui Online Game and the cancelled PC game Bionicle: Legend of Mata Nui, as the one in QFTT had a lot of wooden structures while the one seen in the other two was more like a woven nest.
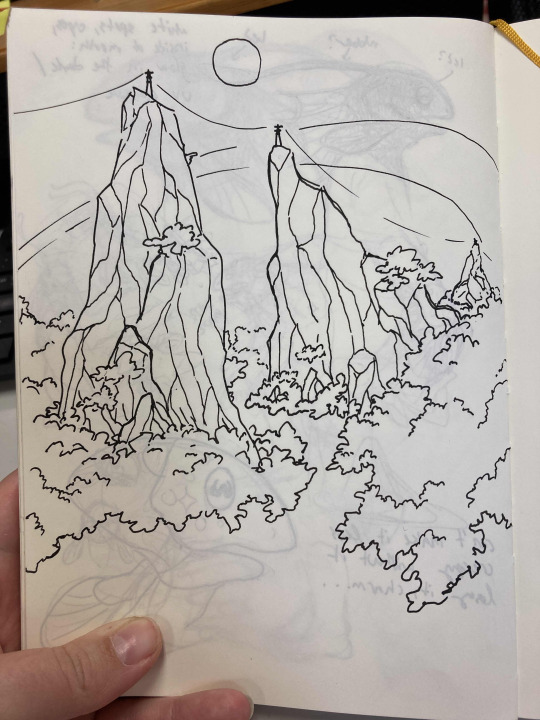
At the time I was just a 3d modeller, and had never really done any real level design, but the concept just really inspired me, so I went off and in blender sketched out a possible level layout for this area.

I made a bunch of renders and wrote out how I thought the level could work, which can be seen in this document HERE.
For a quick overview, the idea was you'd enter the area, the bridge would break, you'd have to clear a river to activate the water wheel on a large mechanical tree that would allow you passage upwards, and then navigate through the Nui-Rama infested ruins of the village before coming to a cave.


The tree was something I poured a lot of time in to, its worthy of its own post at some point in the future.
Now I'll be honest, I was super nervous about releasing this document to the team, I thought I was overstepping my bounds. I was just a relatively new 3d modeller on the team, I didn't have the right to be talking about level design, but to my surprise people were really receptive to it, and I very quickly got added to the level design team¹.
I ended up doing a rough blockout in engine. This was back in the time before Lewa had been chosen to be the main player character, so it was still Tahu.
youtube
This was the first time I'd ever touched Unreal, so it took a while. That's why the sky is black, I didn't know how to add a skybox.

I never got in to level scripting, but as a proof of concept, I think it was successful.
You can see that in this version of the level it had already progressed, now there was the idea of using the Pakari to break the dam, so finding it was the first task on the ground.
This version wasn't in the actual demo map, because as I said before the demo wasn't really very fleshed out at the time. One thing my map showed though was that the demo was way too big. The level design lead at the time had decided the size based on how long it took to get around the map as a perfectly flat plane with no terrain, at max run speed, with no obstacles. This is a very flawed methodology to say the least. Having an actual level with things scaled to the character really started to show the holes in this, and eventually, once I became lead, the demo area was massively shrunk.
Here's a version from just a month later. The version is now part of the new, more compact demo area, but its mostly barren at this point.
youtube
This version was actually completely rebuilt from the ground up because it had been decided to try out voxels as a basis². They were a pain to deal with and this was overturned eventually. I'd say in total, including the 3d sketch I did, I re-built this map maybe 4 times.

One benefit of voxels was it was trivial to have caves, so this is where the idea of the pakari being found in a cave started to emerge.
As I continued to play and refine the demo it became clear how much the movement systems would need to be tweaked. There seemed to be this idea in the team that everything could be done separately and bolted together later, so character moment was all handled by someone jumping around on some big blocks in a test map whereas level design was off doing their own thing, but it really wasn't working. So while the movement felt good in a vacuum, actually putting it in context really exposed a lot of issues. You could easily jump over any enemy you could come across, as said earlier maps had to be huge in order to make the world seem big while you were running at full speed, and after about 3 jumps you'd be 20 metres in the air.
At this point the idea still was to have the entire island of Mata Nui be one large open area you could freely explore, so the sheer size of the maps resulting from the over powered movement was a major issue. I lobbied very hard to have things pulled back and eventually they were.

its a bit out of order, but here's the demo area from closer to when I left. Its a fraction of the size of the original map
Here's another video from a month later.
youtube
As much as it pains me to say it, this is basically it in terms of meaningful development. By this point Lewa had been locked in as the playable character, and the movement had been dialed back to a more reasonable degree, so I was able to really start trying to refine the area. This is where I ran in to a fatal issue.
No one else wanted to play the game.
And what was worse barely anything worked.

The level is still in what I would call a grey box state. I used a couple tree trunk assets I'd made here and there, and put in a big canopy asset from one of the many asset packs we had for a bit of ambience, but it was all still very basic geometry, easily changed or modified.
Unfortunately, there's only so much you can do for playtesting your own area. You built it: you know where everything is, what's supposed to happen, where you're supposed to go. You can try to pretend to play it as a new player, but that only gets you so far. I was hoping people on the team would play it and provide feedback³, but outside of maybe one or two people a handful of times⁴, trying to get any really feedback was was a futile effort.
The thing was that this area was very complex. If the demo was a vertical slice of the game as a whole, this area was itself a microcosm of the demo⁵. It had platforming, puzzle solving, combat, mask powers, the lot. Now unfortunately for me, barely any of those systems actually worked.

As an example, this long ledge was for a long time a stand in for vine swinging, then rail grinding⁶, then was ultimately just replaced by a platform.
So things had kind of hit a wall. I couldn't properly design areas with combat in them until combat existed in a more stable state, I couldn't design platforming sections until platforming worked in a consistent way. I couldn't even adjust the overall flow of the level because everyone else basically refused to give feedback.
But the unfortunate thing is, in August of that year they'd released a teaser trailer.
And that trailer had gotten hundreds of thousands of views.
This is where the whole development of this game really went off the rails. Now there was this push to get things in a presentable state, start set dressing and making final assets so things could be shown off.
But I refused. Everything was too up in the air to commit to set dressing, this is why block out exists, if the jump changes height its no big issue to grab the couple cubes an area is made out of and shift them up or down, if combat is found to need more space its easy to make things bigger, or add or take away walls. If something is confusing things can be shifted. Once set dressing starts now you're dealing with dozens to hundreds of objects being scattered about, even the smallest tweak can lead to a mess.
Not to mention set dressing raised its own series of issues, from plants triggering the IK on the toa's feet, making their knees go up to their chin when walking through a bunch of ferns, to collision volumes being oversized or offset, meaning that big rock face they just added has now created a massive invisible wall in another area. Once the addition of some plants caused all ledges within a wide radius to no longer work⁷.
It was a miserable state of affairs. My mental state rapidly deteriorated as I fought against this, I became very short tempered and irritable, and eventually near the end of 2022 I was kicked from the team. It was such a relief honestly.
I think the tragic thing is, set dressing is actually quite a fast process. The starting area went from looking like this to something quite like the final in about a month?


But you can't show off the first screenshot on twitter⁸.
I guess I'll spare a quick moment to talk about the final version seen in the video.
youtube
Its at 46 minutes in if the link doesn't work
Its...fine? The assets they've made are all good, though I think they lost the QFTM inspiration along the way. The thing that stands out to me is just how...little its moved on from 2022. Just look how much progress was made in like 3 months, compare that to now, 3 years later. Temporary platforms I placed are still in the exact same spot. I do find the addition of a matoran with a key for the cave to be a not great addition, if only for the fact that you need to find a tiny green man in amongst the overwhelming greenery to proceed.


One part I found quite amusing was the final enemy encounter. It was supposed to be this large hut, probably Matau's, that had been completely overtaken by a hive, and Nui-Rama would spawn constantly from it until the encounter was over.

There were a lot of concepts drawn up, but I guess it just...never happened. I also don't know why there's waves of fikou there either, that was after my time I think.


So that's really all I have to say about that version, it looks okay. Its still clearly unfinished. It kinda works more than it did when I left, but its shockingly not that much different, outside of some new assets.
I'll be honest, I did intend this to be more of a happy, reflective post, but when watching part of the developer commentary a quote stood out to me.
"Traditionally you would kind of have really basic blockout for an environment and play test that to see how the level design is working. Because of the the situation we had we were kind of forced to just go ahead with set dressing and prettying it up and everything so if it were in a perfect world I would have loved to have gotten to do some more play testing early on but we did what we could with it. And I mean you basically had to just blindly trust the process because many systems weren't working at the time things were designed." -AN UNKNOWN BMOP DEVELOPER (2025)
And I just fundamentally disagree. This was a fan project, there were no deadlines but those that were self inflicted. This process they blindly trusted just lead to a thing that on the surface looks okay, but is still riddled with bugs that were well known for years. I've seen some people on the team say the game was 90% completed, feature locked, just 3 more months of polish and it would have all been working, but from what I've seen of the game I really doubt it. They say themselves in the commentary that there's bugs they've been fighting for nearly a decade still rearing their head.
So yeah, its not exactly a happy tale. I'm quite proud of the work I did, I learned a lot, and met a lot of people I'm still friends with to this day. Its a shame the project had to end this way, and I'm sad everyone's work has gone to waste, but I'm also not going to pretend this was some amazing project that was struck down right before achieving greatness.
But most of all: Fuck you lego.

If you're interested in seeing a few more of the things I worked on in my time with BMOP, go HERE. I may post more publicly about some of them in the future, who knows. I have a post about the regional Kini temple I designed and built for the game HERE. Also some renders I did for some of my game design reports HERE.
¹-I say team, it was maybe two other people who were barely around. ²-I'll be honest here: Some people wanted to have the entire map destructible so that they could have Bohrok dynamically destroy it. For the post game DLC after we'd finished this Zelda sized free fan game⁹. ³-💯👍👀 isn't helpful feedback at the end of the day. Its supportive I'll give you that. But sometimes you need more. ⁴-One person on the team even outright refused to play the game until final release, to "save their first reactions for their stream"... ⁵-idk if its clear at this point but the "demo" is, was, and now always will be the entirety of the existing game. Oh there were ideas for other things, but nothing concrete ever materialised⁹. ⁶-You know, like Sonic⁹ ⁷-The ledge's over sensitive detection for something blocking it is one of the most frustrating things about the game's development for me. ⁸-You absolutely can show off real development stuff, there are lots of people who find that fascinating. ⁹-This game was nothing if not ambitious.
You see that kind of mop is called a "Bee Mop", because of its sponge's resemblance to honey comb.
66 notes
·
View notes
Text
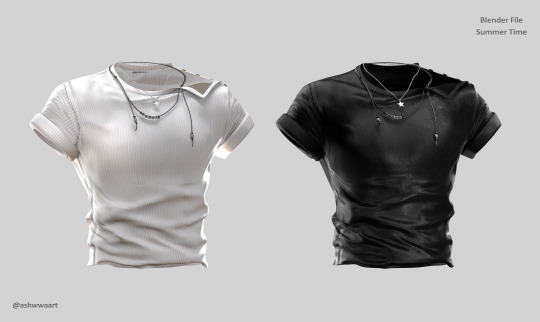


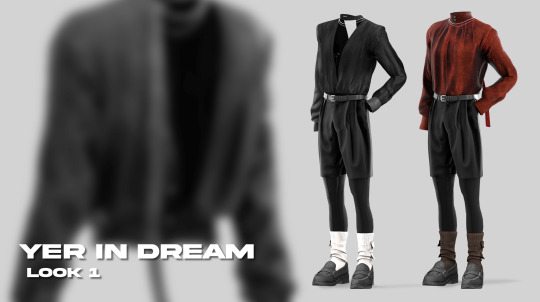


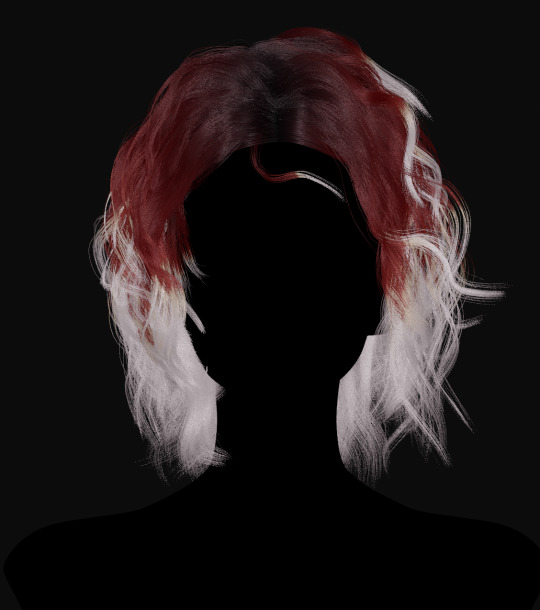
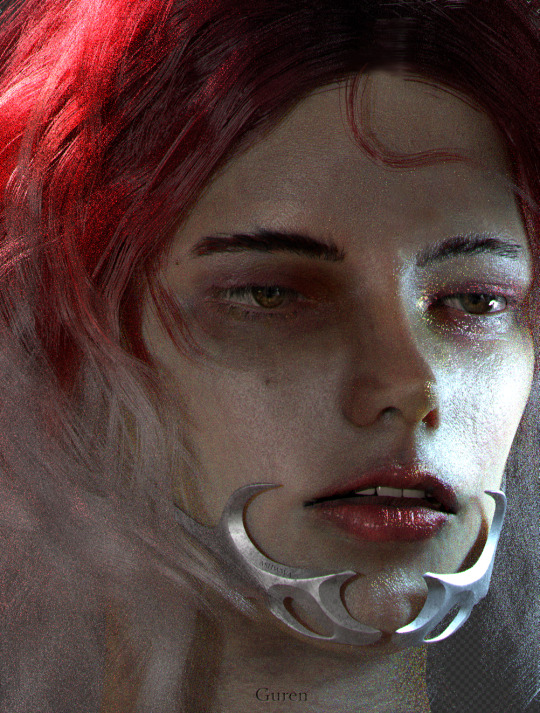
ASHwwa 2024 Jul overview
2024 Jul.02 (sims4) Summer Time
2024 Jul.03 (sims4) Beaded Leather Necklace
2024 Jul.05,06,07,08 (sims4) Male Summer Look
2024 Jul.01 (Blender) Guren Hair
2024 Jul.02 (Blender) Summer Time
2024 Jul.04 (Blender) DownTime Summer Set
2024 Jul.09 (Blender) Yer in dream look 1
342 notes
·
View notes
Text
Animation Night 189: Nonphotorealistic
There is a funny trend in animation-related terminology to define things by what they aren't. Animation is any technique for creating film that isn't live action. Limited animation is any style of 2D animation that doesn't follow the conventions of Disney's 'full animation' on 1s and 2s - a category that includes a wildly diverse range of approaches and techniques, as this wonderful history by Animation Obsessive describes.
In 3DCG circles, there is a similar term: nonphotorealistic. Which describes, naturally, anything that isn't trying to look like a photograph of a real scene. There has been a real boom in this of late, and just like the other terms, it really doesn't narrow it down very much. Other terms like 'hybrid animation' add a bit more hints.

Of course, if you've been anywhere near animation in the last few years, you'll probably know another term: 'Spiderverse style'.
There is no denying that Spider-Man: Into the Spiderverse (2018) by Sony Pictures Animation was an absolute landmark for animation. (I wrote about it way back on AN21, focusing more on the cultural angle.) The ludicrously stylish film pretty much set the direction for animation in the 2020s - making a bunch of money and awards and thus finally throwing open the door to 3DCG animation that doesn't look like the style set by Pixar/Dreamworks in the 2000s. Its sequel, Across the Spiderverse (2023), was even more ambitious and successful (despite a troubled production involving a lot of needless crunch). We'll be showing that soon in a Spiderverse double bill so look forward to it!
So perhaps not surprising that when people see the use of graphical styles, 2D elements, limited framerates and the like in 3DCG these days, Spiderverse comes to mind. In its wake have come various films and series that apply these and related techniques: 3DCG animation is more varied than ever, and it's cool.
It isn't really a style, tho.
youtube
Here I'm indebted to youtuber Camwing who has made a nice video overview breaking down the animation of recent movies in this vaguely defined paradigm. Among them we have The Mitchells vs the Machines (2021, also Sony), Puss in Boots: The Last Wish (2022, Dreamworks), and Teenage Mutant Ninja Turtles: Mutant Mayhem (2023, animated at the French/Canadian studio Mikros animation), and of course over on Netflix you got the wildly popular League of Legends spinoff series Arcane (2021, Fortiche Productions), and the romance film Entergalactic (2022, DNEG), tying in with an album of the same name.
None of these films has exactly the same style, but they all pull from a related bag of tricks. The core techniques are animating on reduced framerates for a 'snappy', high-clarity feeling, the combination of 2D and 3D elements in some fashion, and taking inspiration from traditional media such as paintings or comic books.
For example, Arcane and Entergalactic both use the trick of 2D backgrounds/projecting paintings onto 3D geometry, inhabited by 3D characters with a stylised shader. Arcane is dripping with 2D visual effects. Puss in Boots drops the framerate during its action scenes - the opposite of the old paradigm of full animation, where fast actions would get more frames. Spiderverse draws 2D expressions onto its 3D models to push them further, and is full of all kinds of colourful stylised rendering - screentone effects, kirby dots, outlines, the works.

It's tempting to link this to 2D-in-3D animation, and certainly many of these films apply this technique - this is the major niche where Blender has found its way into industry pipelines. But using 2D isn't mandatory to count here. For example, TMNT Mutant Mayhem has an incredibly striking storybook-painting style, accomplished largely by clever shader work and a strong sense of graphic design. Genndy Tartakovsky's canned 2014 Popeye project was planning to use a ton of 2D-style posing and squash-and-stretch, accomplished largely with rigged 3D models. There are many paths to take!
And mind you, I haven't even covered one of the biggest angles here. Search for nonphotorealistic 3DCG on Youtube and what you'll probably find most is information about cel-shading - aka 'anime style'. This has also advanced considerably in the last few years, with the techniques pioneered by Arc System Works in Guilty Gear such as editing the normals of characters for more precise control over shading, and minute adjustments to break up the mechanical feeling of 3D, becoming widely copied in both games and films. (And particularly, animated porn.)
youtube
Vtubers in particular have really run with this technique, generally speaking using cel-shaded models with edited normals, inverted eyes, etc. etc. to try and get the feeling of an anime character come to life. [You can see a lot of these state of the art techniques if you download Pixiv's free VRoid Studio software and import the model into Blender using the VRM plugin.]
Naturally this kind of cel-shaded approach has found a particular home in Japan. In anime, the biggest champions of it are certainly Studio Orange, whose hybrid approach involves planning out shots with 2D animation before matching them with the rigs. We've covered their adaptation of Houseki no Kuni in great detail on Animation Night 97; their Trigun reboot was perhaps even more popular. But cel-shaded techniques, 3D previs and the like have also made their way into big films like Eva 3.0+1.0 (AN66).
Although this type of rendering aims to recreate the look and feel of 2D animation as much as possible, it always ends up being something new: character models that would be too complex to draw, an ease to 3D movements and camerawork that would be challenging in 2D, and generally a new hybrid style. This is good! 2D animation is already very good at being 2D animation - it's fascinating to see what 3DCG becomes with that inspiration.
So with that brief overview, where does that take us tonight?
I'm not quite ready to do a Spiderverse double bill tonight, so instead the plan is to check out a couple of recent American franchise films that are taking on the new suite of techniques. I've mentioned them up above, but let me introduce them more fully here.

Puss in Boots: The Last Wish is a sequel to a fairly unpopular spinoff about a side character of the Shrek franchise (AN75). Not, on its face, very promising - which is why it is all the more striking that I was told on all sorts of sides that I must watch this movie. I'm finally going to make good on that.
The title character is a kind of feline musketeer type, now facing the end of his swashbuckling career as he's lost 8 of his 9 lives. Not wanting to hang up his hat, he goes on a quest to restore them. What makes it stand out its the action scenes, which go all in on the anime-influenced, extreme perspective and lighting, limited framerate style that we're discussing above. Apparently it looks sick as shit.

Teenage Mutant Ninja Turtles: Mutant Mayhem is a fresh reboot of the venerable TMNT franchise, which pretty much describes itself in the title: four turtles (named after Renaissance painters, of course!) live in a sewer as ninjas, led by their aging master who is a rat. Starting as a comic book, it became one of the iconic toyline-driven TV shows of the 80s - but it's still going! Indeed, Turtles has been on a roll of late (at least going by animator scuttlebutt), with Australian studio Flying Bark Productions turning a lot of heads with their neo-Kanada School style (and for really stretching the definition of 'storyboard').
This new film takes a different approach to the bombastic action of Rise. It focuses on a new origin story for the turtles, telling a kind of coming of age story - but what makes it unique is the animation style and cinematography. Cinéma vérité is not a phrase you really expect to be associated with ninja turtles, but the film seems to really go all out in a way you wouldn't really expect from a franchise movie, shooting the young turtles in a handheld style and focus heavily on character. Marcel Reinhard's shader work, allowing the animators to isolate lights to specific objects and characters and introducing graphical elements of cross-hatching, stippling, etc. etc. to the lighting, gives it a uniquely painting-like feeling, augmented by a lot of 2D creativity in lighting and effects.
Turtles has never really been my thing, but this film looks unique enough that I really want to see it - and I hear it's a good film too.
So that's our bill for tonight! Puss and Turtles. Let's see what the big studios have been cooking of late...
Animation Night 189 will be starting around 10pm UK time (roughly three hours hence) and carrying on til about 2-3am same! We'll be on twitch.tv/canmom as usual. Hope to see you there!
157 notes
·
View notes
Text
Okay, time to serve some SPN tea.
Gotta be honest, as a Christian, there is so much about Supernatural that makes me really uncomfortable, ESPECIALLY the later seasons. Which sucks, because Sam and Dean are my favourite kind of characters, and hunting monsters is super cool, but there's all... that.
I mean, I never wanted to watch a whole 15 season show anyway, but digging into the story and some of the lore to gain a clearer overview makes me even more picky and choosy. Yeah, I see some great characters, some really cool adventures, some beautiful relationships, and some genuinely good storytelling. But I cannot in good conscience watch any of this show at all, without talking about what is wrong with it too.
Like, I have a bunch of you my friends who are getting into it, and like I said, Sam and Dean's relationship is like a siren call to me, but I'm beginning to think I can't just enjoy this on some fun surface level; I can't just take what I like and ignore the rest. Because the rest is a dangerously twisted mess of truth, but not just any truth, the kind of truth that means the difference between eternal life and death.
Like, yeah, it's a joke how nothing dies more in Supernatural than the fourth wall, but there is something about this show, and the way they take VERY REAL spiritual elements and blur them across the line between fantasy and reality that feels wrong. Of course I'm an adult, of course I can parse out the difference between truth and fiction. But the fact remains that there is Ultimate Truth, and this show often (especially in the last 7 or 8 seasons) feels like it's deliberately taking that truth and subverting it or twisting it because it doesn't want you to know that Tuth.
At it's heart, I find Supernatural to be hollow and hopeless. Hang on, hang on, hear me out!
Yeah, that sounds crazy when the fans have long talked about how much of a family they find in each other, how many hard times they got through by being inspired by the characters determination to "Keep Fighting" (which I 100% support by the way!), and how the core of the show is supposed to be Dean and Sam and their love for each other. And on a two dementional plane, that's fine, that's good. But there is a major flaw in the theme of a story being 'all we have is each other as human beings, and if we just love each other enough, we can fix this world, we can make things right'. Because it's a lie.
That is not a message we can take away from a story and apply to real life, because we can never make each other complete, we can never save each other, not for eternity, no matter how much we love. We need God, the Creator and Sustainer and Lover of the universe, of US, us messy broken people, to be the ultimate source of love and strength and forgiveness and understanding.
Supernatural says that there may be Higher Powers, but you can't count on them, you can't trust them, in fact, the conclusion it vomes to is that they're couldn't-care-less a**holes, who will turn on you and destroy you if you don't do what they want. Uh, hang on, that sounds like the Roman gods. And the Greeks. And all the gods of history people hated even as they worshipped, because they were so hungry for someone to be watching over them, to be in charge of this crazy thing called life. The sad thing is that Supernatural does this using the title that basically everyone in the Western world knows to reference the Christian God. At least the writers had enough sense to leave Jesus alone, yeesh. But that really makes me wonder how many people out there have horribly messed up thoughts about God because of this show. Like seriously, that does worry me.
There is no final authority in Supernatural, good and evil are thrown into a blender and if you like the character that flies out enough they get to live, no matter what 'side' they seem to be on. Sam and Dean start out with pretty decent moral compasses, but again, as the show goes on and changes hands, that gets more and more distorted. Morality becomes whatever best benefits Sam and Dean, and we ALL know how badly they screw with each other's internal compasses. There's also no clear explanation of what you do to get to heaven?? Is it just if Jack likes you enough? Ugh *throws up hands*, there's NO logic in it.
But, Rain, you say, why must it be logical? Or truthful?
Okay, you're right, logic isn't always necessary. But truth is! Because there is no getting around the fact that this show plays some very stupid games with very serious concepts. Demons and angels are very real! Heaven and Hell and the Apocolypse aren't jokes. I'm not saying they can never be directly incorporated into stories, but when we do it carelessly or flippantly or even rebelliously, we really are starting down a dangerous path. Stories have power. Positive and negative.
And at the bottom of it all, the 'fight' of Supernatural, the cycle of die and come back and keep going, just feels futile and empty. This is such a niche reference, but I've been watching the furor surrounding the story that twenty-one pilots have built, and how it swirls with questions of how the story will end. Will it end hopeless and defeated with Clancy trying to save himself (you can't save yourself, but what matters is that you keep fighting and trying anyway!), or will he accept the help and power of the Torch-bearer?
How do Sam and Dean get a happy ending and find peace in their heaven? All I see is the writers giving them the ending that they want them to have, honestly, the cycle is only broken because the characters get outside help.
But why is Supernatural so fascinating? Why is Sam and Dean's relationship so attractive? Because they are willing to do ANYTHING for each other, and we all want to be loved that much. They die for each other over and over, and we all want someone to consider us worth their own soul. (I know Someone who did that, btw, who literally became the worst of everything I am, and died to save me from Death and Hell, all in one go.) We all want to be loved that fiercely.
Of course, their relationship has it's dark side too. I think in a lot of ways, their love for each other becomes their god, especially Sam toward Dean, I think, and as CS Lewis said, "Love, having become a god, becomes a demon." They are, quite frankly, the snake eating it's own tail. As much as their love is also what sustains them, they remain stuck in a loop, and the cycle is only broken when one of them is able to let the other go. (And then they find their way back to each other, of course they do.)
Look, am I asking everyone else to deconstruct this show as thoroughly as I seem to find necessary? No. Do I think this show is okay for anyone to watch? Defnitely no. But I say all this in hopes of having someone converse with me about it, without hating me for it, lol. Like a lot of other sketchy-at-first-glance, but super popular, media, I want to engage with this thoughtfully, not flippantly, and be able to have some deeper conversations with you guys about the deeper stuff.
And so I remain, a Sam and Dean fan splashing in the shallows and digging up the lake.
#i have no idea how well i articulated any of this#i am kinda tired but i feel better now that all this isn't going aroundin my head like a washing machine on the agitate cycle#ugh i'm possibly taking my life in my hands here#not with the moots though!#it's just something i want to talk about#this is the post i alluded to last night#anyway#christianity#supernatural#twenty one pilots#truth#amen#raindrops
50 notes
·
View notes
Text
The global food blenders and mixers market is projected to reach USD 10.8 billion by 2027 from USD 8.2 billion in 2022, at a CAGR of 6.0% during the forecast period in terms of value.
#Food Blenders & Mixers Market#Food Blenders & Mixers Market Size#Food Blenders & Mixers Market Share#Food Blenders & Mixers Market Growth#Food Blenders & Mixers Market Trends#Food Blenders & Mixers Market Forecast#Food Blenders & Mixers Market Analysis#Food Blenders & Mixers Market Report#Food Blenders & Mixers Market Scope#Food Blenders & Mixers Market Overview#Food Blenders & Mixers Market Outlook#Food Blenders & Mixers Market Drivers#Food Blenders & Mixers Industry#Food Blenders & Mixers Companies
0 notes
Text

🎬 Animated Deco Sim Tutorial is Coming!
You’ve seen them in action—now I’m finally showing how I make them 👀
🎓 Lite version dropping on YouTube 💎 Deep-dive version with extra files & tips for my Patreon members
✅ What’s Included in the Patreon Edition:
🎙️ A full, narrated walkthrough of every step from start to finish
📚 Clear explanations not just of what to do, but why — so you truly understand the process
🛠️ Troubleshooting tips from my own trial and error over time
⚠️ How to avoid easy mistakes before they happen
🔧 Fixes for common issues like mesh glitches or broken animation loops
📁 Exclusive access to starter files that will save you time
💬 Direct support from me if you need help or run into roadblocks
✅ What’s in the YouTube Version:
A basic narrated overview of each step in the process
A complete example from Blender to Sims 4 Studio
Perfect for those curious about how it works or just getting started
Whether you want your Sims to dance, vibe, or do the most in the background, I’ve got you.
#the sims 4#ts4 simblr#ts4 cc#sims 4 cc#sims 4#sims 4 custom content#sims 4 animation#ts4#s4cc#ts4 deco sims#ts4 decor#ts4 animated deco sims
48 notes
·
View notes
Note
Do you have any tip on writing character that smarter than you? Like I need to write about prowl solving case, but I barely passed my math exam.
I do have a few tips!
One, research. The more you know about a subject matter yourself, the more you can BS your way through it. You don't have to go write a thesis or anything like that, but knowing key phrases, terms, and ideas can help you make crap up on the fly. For example, if you want to write a battle scene, do a quick look into a historical figure who you want to model your character after. Look at an interesting battle and analyze key elements. Then take the vague overview of it and go buck wild. Throw it into a blender in order to create a believable plan/tactic for your character to follow.
Two, foreshadow and develop a reputation. This will cover for a lot of things for your character and save you the slog of explaining everything. If your character is established to have a reputation for being intelligent and/or capable, you can have your character glance over things and leave readers confident that something was actually accomplished. Of course, you need to be careful with this. If you establish your character to be a brutal strategist and then have said character go out of their way to care about civilians the next moment, you will run into problems with consistency.
Three, include other characters in the scene. You can draw attention away from your own lack of knowledge by having several things moving at once to add to the overall scene. A character can look far more complex and wise if they are seen interacting with others and using different tools to help accomplish their goals. Not everyone can be Sherlock Holmes. Some characters can express their cunning and intelligence via interacting with others and through dialogue. Be careful not to be too hamfisted with it though, otherwise it feels forced. I personally tend to spend chapters upon chapters foreshadowing and establishing the capabilities and reputation of a character that is meant to be smarter than me.
Four, lean on a character's traits. If you are writing a character with highly noticeable traits, you can lean on those to help rationalize their actions even if they end up being inconsistent later. I am personally a huge fan of this since emotion can make an otherwise very intelligent character brutally ineffective in the right situation.
Regarding your example of Prowl, I would first study whatever it is he is meant to be looking into. If it's a murder, I'd look into a few interesting real life murder cases for example. I personally studied true crime to write Prowl chapters in my fic. Then, apply that basic knowledge and have Prowl be capable of assessing the situation quickly and logically. Next, or perhaps also first, I would establish his reputation and background to give him a base of knowledge that is believable. This can be done through background dialogue, his thoughts, or through setting details.
Then, to really sell it, I would have Prowl contact associates, dig up old data, and otherwise showcase his knowledge base and intelligence through organic means. Pulling up other characters can make him seem far more calculating than you, the author, may be. And lastly, I would pull on his lack of empathy to help guide how he makes his decisions. This way, you can still slip up a bit as an Author in his conclusions so long as they relate back to Prowl's weaknesses somehow.
These are rather vague, but I hope this helps!
70 notes
·
View notes
Text
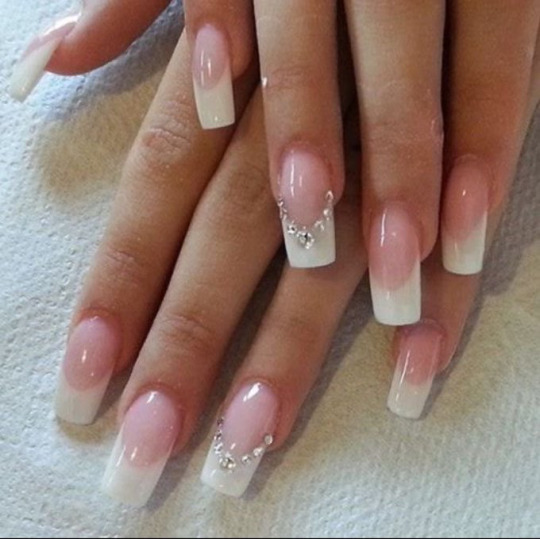
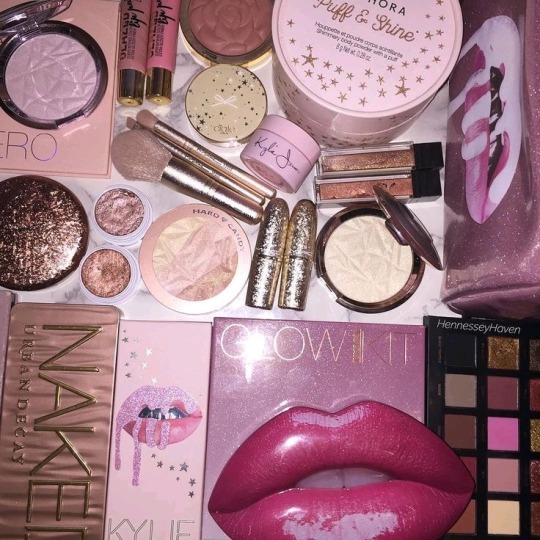
2016 NATURAL GLOW: FAITH’S GUIDE


OVERVIEW
This one’s my personal favourite. Simple, yet effective. A look to enhance your natural beauty. The eyebrows are very 2016, the lashes are bold, but everything else is quite toned down and simple. This look is perfect for everyday and special occasions. You can also do it without foundation to make it even more simple.
PRODUCTS
Primer
Baby powder
Foundation, tinted moisturiser(can be done without)
Concealer
Setting/loose powder
Pressed powder
Eyebrow gel
Brow pomade
Highlighter
Lashes
Lash glue
Lip gloss
Setting spray


TOOLS
Powder brush
Beauty blender
Tweezers
Brow brush
STEPS
BASE
Apply primer to skin, (skincare should be done before this step) make sure primer is applied ALL OVER your face
#faithtip After applying primer, use a brush to apply baby powder to your skin
These two steps will keep your makeup intact for AGES and prevent a lot of sweating through makeup
Then apply foundation or tinted moisturiser and blend well with a beauty blender (you can skip this step to keep your makeup light)
#faithtip wet your beauty blender with setting spray for better hold and easier blending
Apply pressed powder with a powder brush and blend well with a brush
This look is quite light, so instead of under-eye concealer apply loose setting powder from under your eyes to your temples, using a beauty blender
Apply loose setting powder from the side of your lip to the side of your face, under your cheek

Leave the setting powder unblended for now
BROWS
One of the KEYS to this look is eyebrows, make sure your brows have a defined shape
Brush through your brows and shape them with brow gel
Use pomade and a small brow brush to draw a line on the bottom of your eyebrows, following the shape of your brows

Draw a line at the top of your brows following the shape of your brows again

Fill your brows in within the lines

Brush through your brows again with brow gel

After this, apply concealer under your brows
The concealer should look like you have painted an outline of your eyebrows

Blend this in with a beauty blender
Use a beauty blender to apply loose powder underneath and on top of your brows, let it sit.
LASHES
When I do this look I don’t apply lashes because I wear cluster lashes/extensions, I find it quicker and easier for me to get ready
People who wear lash extensions/clusters can also skip lash application
STRIP LASHES
But for this step apply glue to strip lashes
Wave the lashes around for a bit so the glue dries a tiny bit and feels a little bit sticky
Place them on the lash line and adjust where needed (using tweezers or fingers)
youtube
youtube
CLUSTER LASHES
Strip lashes can also be cut into smaller pieces or use cluster lashes
Dip them into glue and wipe off the excess
Use tweezers to hold the lashes
Pull the top of your eyelid upwards so you can see underneath your eyelashes
#faithtip Wipe the glue on the part you are applying to then you can dip the lash in glue again before actually placing it underneath your lash
This make the lashes more firm and secure
Make sure it is not too close to your eye as this can be irritating
Fan your eyes if you can still feel wet glue
youtube
BACK TO THE BASE
Using a powder brush, brush away/blend out the loose powder, under your eyes, under your cheeks and around your eyebrows
Blend VERY well, as the powder has been sat on your face for a while, so it will not move easily
After this, apply a gold/bronze tone highlighter on the tip of your nose, on your cheek bones, your brow bone and cupids bow
Apply in moderation and blend slightly with finger to avoid looking ashy
Now use setting spray (holding it not too close to your face) over your face 3-4 times
LIPS
Add more highlighter to cupids bow if needed
Apply Vaseline/lip balm for moisture
Apply clear lip gloss
#Youtube#makeup#2016 makeup#mac#high maintenance#2010s#2010s aesthetic#black barbie#black women beauty#black women of tumblr#baddie aesthetic#ig baddie#girly#just girly things#girly girl#black women makeup#2010s baddie#insta baddie#glam#fabulous
685 notes
·
View notes
Text
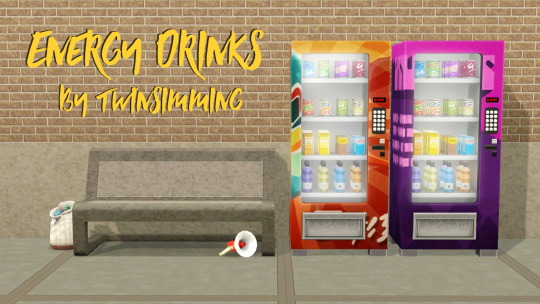
Energy Drinks by Twinsimming 🥤
This mod adds custom Energy Drinks to a new type of vending machine.
This is a script mod that can be placed in your Packages folder. It was built and tested on 1.69 but should work fine on 1.67.
Requirements
The Sims 3: Late Night
The Sims 3: Seasons
The Sims 3: Supernatural
The Sims 3: University Life
Overview
Soda-Lightful Vending Machine
Energy Drinks
Side Effects
Flavors
New Moodlets
Soda-Lightful Vending Machine
- Price: §1250 - Category: Large Appliances - Includes all 11 original swatches + 1 recolorable option (3 channels) - Poly Count: 2346 - Originally created for The Sims 4 by RAVASHEEN, converted to The Sims 3 by me
Like the vending machines that came with University Life, sims can Buy Energy Drink, Shake Machine, or Slam Machine.
Energy Drinks
Teen and older sims can purchase energy drinks from the Soda-Lightful Vending Machine for §5 each.
Energy drinks boost the Energy need, give sims the custom Energy Rush moodlet, and remove any moodlets related to low Energy (Tired, Sleepy, Exhausted, Buzz Crashed, etc.), similar to drinking coffee, but the effect lasts twice as long (6 hours instead of 3 hours).
Drinking multiple energy drinks in a row will boost how long the Energy Rush moodlet lasts, as well as increase the moodlet's value, up to 18 hours and +30 mood.
Once the Energy Rush moodlet expires, sims get the custom negative Energy Crash moodlet.
Side Effects
If your sim goes more than 24 hours without another energy drink, they'll start to suffer from caffeine withdrawal and gain the custom negative Craving Caffeine moodlet for the next 2 days. Drinking coffee, tea, barista bar beverages, or another energy drink will remove this moodlet.
Drinking more than 2 energy drinks at a time also carries the risk of a sim being electrocuted and dying.
Teens and Elders both have a 5% chance of being electrocuted, while YA have a 1% chance and Adults have a 3% chance.
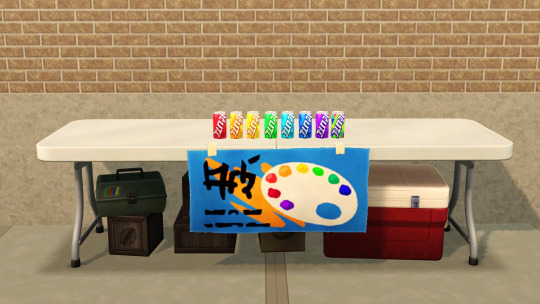
Flavors
There are 8 different energy drinks to choose from. 6 provide flavor-related moodlets from the snow cone machine from Seasons and the bubble blower from Late Night. These moodlets last for 4 hours.
From left to right in the second preview photo:
Charged Cherry (Cheery Cherry)
Pineapple Power-Up (On a Beach)
Lightning Lemon (Laidback Lemon)
e-Lectric Lime (Lucky Lime)
Blue Raspberry Blitz (Raspberry Romance)
Gigawatt Grape (Gleeful Grape)
The Unidentified Fizzy Ooze energy drink replenishes Alien brain power, but makes non-Aliens nauseous.
The last energy drink is called Mystery Flavor and it works like the jelly bean bush from Supernatural; including carrying the risk of death, so proceed with caution.
New Moodlets
Energy Rush: Given when sims drink an energy drink, lasts 6 hours, +10, +20, or +30 mood
Energy Crash: Given when the Energy Rush moodlet expires, lasts 7 hours, -15 mood
Craving Caffeine: Given when sims go more than 24 hours without another caffeinated drink, lasts 2 days, -30 mood
Tuning
All of the tunable values can be found on the mod download page under the header “Tuning”.
Script Namespace
If you want to turn a different vending machine into an energy drink vending machine, open your desired object in s3pe and replace the current script name with the following:
Sims3.Gameplay.Objects.Twinsimming.EnergyDrinksMod.VendingMachine
Conflicts & Known Issues
This is a new scripted object, so there shouldn’t be any conflicts.
All of the drink cans are different colors when placed in the world and during the drinking animation, but they all have a red can icon when placed in a sim's inventory. I'm not sure how to fix this right now, but that should be the only issue of note.
Credits
EA/Maxis for The Sims 3 and The Sims 4, mesh by RAVASHEEN, Visual Studio 2019, ILSpy, s3pe, Notepad++, Sims4Studio, TSRW, Blender, Milkshape, Gimp, and Script Mod Template Creator.
Thank You
Thank you to RAVASHEEN and everyone in the Sims 3 Creators' Cave Discord!
If you like my work, please consider tipping me on Ko-fi 💙
Download @ ModTheSims
427 notes
·
View notes
Text
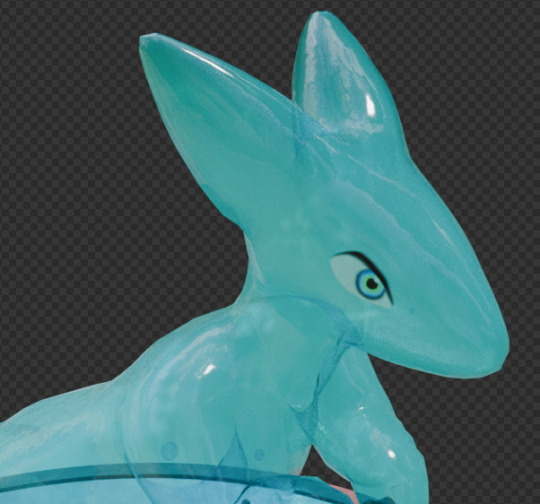
I've gotten a few people asking about how I did the bubbly slop slime material for the blender slime fox so heres a quick overview. the bubbles are the interesting part so ill go over those first

the bubbles are 100% geometry nodes. i use this big box just to control the bounds of where bubbles show up. i first spawn in a bunch of points randomly inside the box, and i use a 3d noise texture to set their radii.

i also have this simulation zone that just increases a vector by (0,0,0.1) every frame. i modulo (that vector + every point's position) with the bounds of the bubble area and i get a nice scrolling effect. (i also move the NOISE texture DOWNWARDS with the same vector and that causes the radii of the points to fluxuate.

in a separate geometry node for the mesh, i have it first check every point whether that point is inside the mesh or not, and delete it if it's not. you can do that by raycasting in some direction, getting the normal of the face you hit, and dotting that normal with the direction you raycasted in. if the result is positive then the point is inside the mesh!

i do a few extra checks besides that - i use a geometry proximity node to get rid of points too close to the surface of the mesh. finally for each of the remaining points i instance an inverted sphere with a radius given by the point's radius. originally I was using a boolean mesh node but i realized just creating a bunch of inverted spheres was way faster and gave the same result. heres the mesh without any kind of refraction so you can see the bubbles more clearly

okay now for the actual slime material. i just had a texture for the eye, and used an alpha(transparency) texture as well as a regular albedo(color) texture so i could edit the color of the goop in blender. one silly issue that this setup actually allowed me to fix was this.(refraction is off here but you get the idea):

the other eye is visible through the head! whadda hell! well, i had a node to check if the incoming ray was a camera ray (i.e. it's not light bouncing through the mesh) and by changing the alpha of the eye texture based on that i could make the eyes only visible on the outside of the mesh (as they should be. imo at least.
the refracting light effect is due to the IOR being cranked up to 1.3 and also due to the noise texture normal map i applied, which makes the light bounces look WAY more interesting. it also causes the bubbles to appear to wobble as they pass through the mesh even though they're moving straight upward - kinda neat i think.

anyways heres the actual material graph i used if you wanna look at the specifics. i dont know why i connected the camera ray multiply bit to the transmission i think it looks kinda darker and worse that way but it's whatever. hope this was somewhat enlightening

38 notes
·
View notes
Text
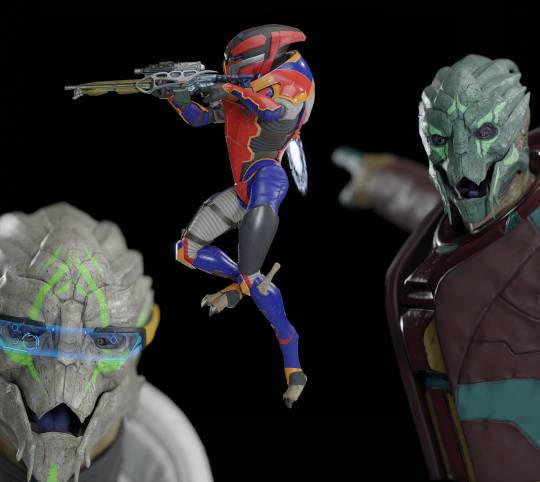
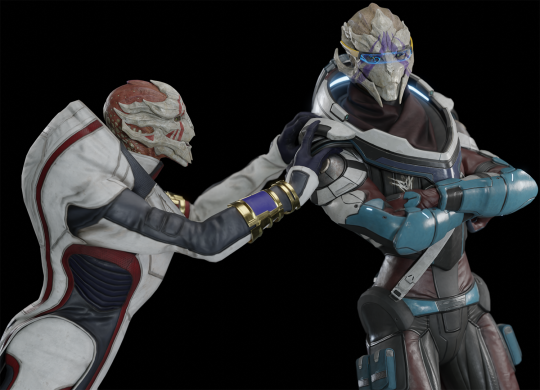
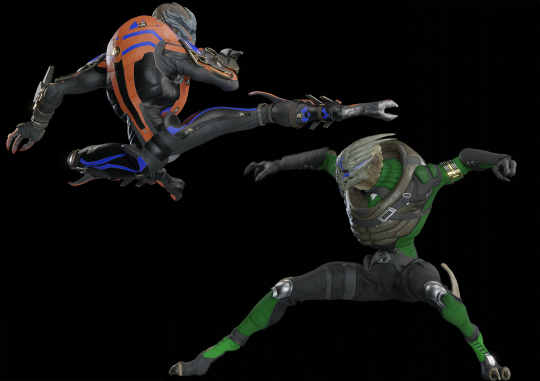
Comprehensive MEA Turian models for Blender (4.1+) is now available

Open3DLab link
Mega Link
The Blender port for the ME:A Turian character models are now available!
Video Overview
Features:
Fully Rigged (both the body and the face) using the original weights from the game.
Fully customizable appearance! Use configuration bones to easily cycle between different head, body, and armor types.
Fully customizable colors and materials! Use the configuration bones to completely customize the colors for each part of the model, all without having to touch the shader editor. This includes base colors, stripe type & color, camo intensity & color, metal color, and glow intensity & color. Most components can be independently customized.
Materials work in Cycles and Eevee.
Togglable cloth physics for the jetpack cloth.
Textures are in .png and are NOT packaged into the .blend file. The .blend file uses relative file references and therefore should still work fine as long as the Textures folder and the Blend files are in the same location.
All original mesh files are included in case you want to tackle doing a better job at rigging this yourself.
A separate set of .blend files are included which just includes the heads. MEA alien heads are fkd - this is the Turian heads, unfkd.
As usual, all thanks goes to:
BioWare for the Mass Effect Andromeda Assets.
The FostyEditor team for the mod tools that this could not have been accomplished without.
More previews:


49 notes
·
View notes