#cgtalks
Explore tagged Tumblr posts
Visit Tumblr Blog
Explore Tumblr blogs with no restrictions, modern design and the best experience.
Last Seen Tumblr Blogs


Fun Fact
Total funding amounts to $125.3M.
Text
Get all these fucking Yelena Belova ship posts of my fucking dash
#cgtalks#marvel#mcu#yelena belova#aroace#yelena is aroace#none of you really know how to ship qpr properly#so don���t ship her at all
136 notes
·
View notes
Text
I have solitaire on every device I own, I own many decks of playing cards just to play solitaire.
I was playing solitaire on this bad boy:

Don’t mess with my solitaire 😂

for my fellow solitaireheads
73K notes
·
View notes
Text

The reviews for the first 2 episodes of X-Men ‘97 are in!
589 notes
·
View notes
Text
#cgtalks#marvel#wolverine#logan howlett#laura kinney#x23#honeybadger#gabby kinney#daken akihiro#Daken#snikt family
516 notes
·
View notes
Text
I’m sorry, are we really thirsting over “Frank” (whatever his real name was) when he is literally right there?

#cgtalks#I went into the Abigail tag and did not like some things that I found#😔#abigail 2024#abigail 2024 spoilers#spoilers#Abigail
206 notes
·
View notes
Text
I make my Microsoft Surface pro look like a Star Trek next generation LCARS padd, I also have a LCARs app installed that like has a calculator, a pdf viewer, a doc editor, a camera, and basically a captains log that lets you record video and/or audio and/or text, (as well as any other basic app on a laptop) also has a Star Trek ship simulation akin to a Starfleet test
Also my google chrome looks like a Starfleet LCARS database
what do you guys have as desktop background? I always find the basic ones too boring and the pretty art too distracting
47K notes
·
View notes
Text
Sometimes I remember William Nelson exists and everything seems ok:


Baby 🥺
95 notes
·
View notes
Text
If the MCU is dead, it’s not because The Marvels killed it but you’re not ready for that grown up conversation.
325 notes
·
View notes
Text
Excelling in the Visual Effects Industry: Strategies for Success
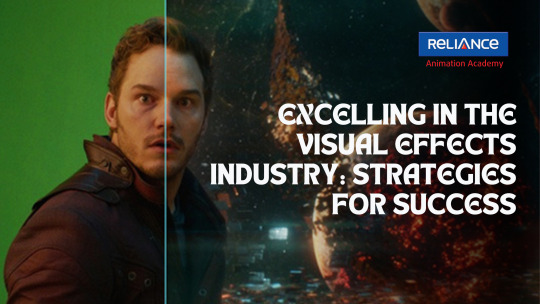
The Visual Effects (VFX) industry is a dynamic space where creativity meets cutting-edge technology. To remain competitive, it’s essential to stay updated with industry advancements and trends. Whether you’re an aspiring artist or an experienced professional, equipping yourself with the right tools and knowledge is key. At Reliance Animation Academy, we empower students to achieve excellence in this ever-evolving field. Here’s how you can stay ahead and how the Reliance Animation Andheri Course can support your journey.
Why Staying Updated is Vital in VFX
VFX plays a pivotal role in modern storytelling, transforming ideas into visual masterpieces for films, games, and advertisements. Rapid technological advancements make staying informed essential to delivering innovative and high-quality work.
1. Learn from Industry Experts and Reliable Platforms
Staying informed begins with following trusted leaders and credible platforms that share insights about VFX advancements.
Tips to Stay Informed:
Explore platforms like Animation World Network and CGSociety for expert articles and tutorials.
Follow renowned studios like Pixar and Weta Digital on LinkedIn and YouTube for updates and inspiration.
How Reliance Animation Andheri Course Helps: Our curriculum integrates insights from industry experts, ensuring students remain at the forefront of trends. Learn more Reliance Animation Andheri Course.
2. Join Vibrant VFX Communities
Engaging with a community of VFX enthusiasts and professionals allows you to exchange ideas and gain valuable feedback.
Communities to Join:
Showcase your work on ArtStation and Behance to expand your reach.
Join forums like CGTalk and Reddit’s r/VFX to stay connected and updated.
Reliance Animation Academy Advantage: We encourage students to actively engage with global VFX communities to foster growth and collaboration. Learn more Reliance Animation Academy.
3. Participate in Webinars and Workshops
Interactive learning sessions, such as webinars and workshops, provide hands-on experience and exposure to emerging tools and techniques.
Where to Begin:
Attend sessions hosted by industry leaders like Adobe, Autodesk, and Foundry.
Explore VFX and animation festivals to discover innovative solutions and trends.
Why Reliance Animation Andheri Course Stands Out: Our programs feature expert-led workshops designed to bridge the gap between learning and industry practices. Learn more Reliance Animation Andheri Course.
4. Master Advanced VFX Tools
Proficiency with industry-standard tools is essential to succeed in the competitive world of VFX.
Key Tools to Master:
Hone your skills in Houdini, Blender, Maya, and Nuke.
Explore emerging tools powered by AI and real-time rendering engines.
How Reliance Animation Academy Prepares You: Our hands-on training ensures students are adept with the latest tools. Discover more Reliance Animation Academy.
5. Embrace Emerging Technologies
To stay ahead, it’s crucial to understand and adopt cutting-edge technologies that are transforming the VFX industry.
Technologies to Explore:
Virtual Production: Revolutionize workflows with tools like Unreal Engine.
AI in VFX: Automate complex processes like motion tracking and compositing.
Real-Time Rendering: Enhance productivity and creativity with advanced rendering tools.
Reliance Animation Andheri Course Edge: Our curriculum incorporates these innovations, preparing students to thrive in a tech-driven landscape. Learn more Reliance Animation Andheri Course.
6. Analyze Iconic VFX Projects
Studying successful VFX projects helps you understand the creative and technical elements that define excellence.
Projects to Analyze:
Films like Avatar and Inception.
Games like Cyberpunk 2077 and The Last of Us.
Reliance Animation Academy’s Methodology: We guide students in breaking down iconic projects to uncover the strategies behind their success. Learn more Reliance Animation Academy.
7. Build Strong Professional Connections
Networking with industry professionals can open doors to mentorship opportunities and career growth.
Networking Tips:
Attend industry seminars and events to meet leaders and collaborators.
Develop a portfolio that highlights your unique skills and creativity.
Reliance Animation Academy Support: We provide opportunities for students to connect with industry experts and expand their networks. Learn more Reliance Animation Academy.
8. Commit to Lifelong Learning
Continuous learning is the cornerstone of success in an ever-evolving industry like VFX. Regularly updating your skills ensures you stay competitive and innovative.
How to Stay Engaged:
Enroll in advanced courses to refine your expertise.
Take on challenging projects to push your creative boundaries.
Reliance Animation Andheri Course Commitment: Our programs are designed to encourage lifelong skill development and professional growth. Discover more Reliance Animation Andheri Course.
Conclusion
Success in the VFX industry requires adaptability, curiosity, and a commitment to growth. By leveraging trusted resources, embracing innovative technologies, and building strong networks, you can establish yourself as a leader in this dynamic field. At Reliance Animation Academy, we are dedicated to equipping you with the skills and knowledge to excel.
Take the first step toward mastering Visual Effects. Let’s create something extraordinary together.
Discover how Reliance Animation Academy can transform your career: Reliance Animation Academy.
0 notes
Text
Get his ass (both literal and metaphorical) out of that suit right now!
bruce thomas wayne take that shit off NOW

8K notes
·
View notes
Text
How to Get the Most Out of V-Ray Assignment Help: Tips and Resources

In the realm of 3D rendering and visualization, V-Ray stands out as one of the most powerful and versatile tools available. Whether you're a student tackling complex assignments or a professional enhancing your skills, mastering V-Ray can significantly boost your ability to create photorealistic renderings. However, understanding and utilizing V-Ray effectively can be challenging. This is where V-Ray assignment help comes into play. Here’s how to maximize the benefits of such assistance, along with tips and resources to help you excel in your 3D projects.
Understand Your Assignment Requirements
Before seeking V-Ray assignment help, it’s crucial to have a clear understanding of your assignment’s requirements. Take time to thoroughly read the assignment brief and identify key objectives. Are you required to create a specific type of scene, apply certain textures, or render images with particular lighting conditions? Knowing exactly what is expected will help you communicate your needs more effectively to your assignment help provider.
Leverage Professional Expertise
One of the significant advantages of V-Ray assignment help is access to professional expertise. Experienced professionals can provide valuable insights into best practices, advanced techniques, and troubleshooting strategies. When working with a service like BookMyEssay, you gain access to experts who can guide you through complex processes, ensuring that your work meets high standards of quality.
Explore Online Resources and Tutorials
In addition to personalized help, there are numerous online resources and tutorials available to enhance your V-Ray skills. Websites like YouTube, Udemy, and Coursera offer comprehensive tutorials ranging from beginner to advanced levels. Utilizing these resources alongside professional help can deepen your understanding of V-Ray’s features and functionalities.
Utilize Forums and Community Support
Engaging with online forums and communities can also be beneficial. Platforms like Reddit, CGTalk, and various V-Ray-specific forums provide a space to ask questions, share experiences, and receive feedback from peers and experts. These interactions can provide practical solutions to common problems and expose you to new techniques and workflows.
Implement Feedback and Revisions
When working with V-Ray assignment help, be open to feedback and revisions. Constructive criticism from experts can significantly improve the quality of your work. Take note of their suggestions, implement the recommended changes, and ask for further clarification if needed. This iterative process helps refine your skills and ensures that your final submission is of the highest standard.
Practice Regularly
Mastering V-Ray requires practice. Regularly working on projects and experimenting with different features will help you become more proficient. Set aside time to practice outside of your assignments. The more you work with V-Ray, the more comfortable you’ll become with its tools and capabilities, which will enhance your overall proficiency.
Integrate with Other Tools
V-Ray is often used in conjunction with other software such as AutoCAD, SketchUp, and 3ds Max. Understanding how V-Ray integrates with these tools can improve your workflow and efficiency. Seek help with these integrations if necessary, and explore resources that cover the compatibility and best practices for using V-Ray with other software.
Apply What You Learn to Other Areas
The skills and techniques learned through V-Ray assignment help can be applied to other areas of your academic and professional life. For instance, if you’re also working on Visual Basic assignment help, the problem-solving and technical skills gained from V-Ray can be beneficial. Similarly, if you’re handling Marketing assignments or other subjects, the ability to present complex information visually can enhance your work.
Invest in Quality Assignment Help Services
Choosing the right assignment help service is crucial. Services like BookMyEssay offer specialized assistance not only for V-Ray assignments but also for a range of academic and professional needs. Whether you need help with Visual Basic assignments, Marketing assignment help, or even buying essay papers, investing in a reputable service can ensure that you receive high-quality support tailored to your specific requirements.
Stay Updated with Industry Trends
The field of 3D rendering and visualization is constantly evolving. Staying updated with the latest trends and advancements in V-Ray and related technologies will keep your skills relevant and competitive. Follow industry blogs, attend webinars, and participate in workshops to remain informed about new features and best practices.
Conclusion
Getting the most out of V-Ray assignment help involves a combination of understanding your requirements, leveraging professional expertise, utilizing online resources, engaging with communities, and applying feedback. By integrating these strategies and investing in quality help from services like BookMyEssay, you can enhance your V-Ray skills and produce exceptional 3D renderings. Remember, the knowledge and techniques you gain through V-Ray assignments can benefit various other areas of your academic and professional journey. Embrace the learning process, practice regularly, and stay connected with industry advancements to continue growing as a proficient 3D artist.
#V Ray Assignment Help#Visual Basic Assignment Help#Marketing assignment help#Buy Essay Paper Writing help
0 notes
Text
Me calling Bruce Wayne a good father when he deals with his other children:

Me when Bruce so much as looks at Damian funny:

#cgtalks#do I think that Bruce is a good father in general#yes#do I think he’s a good father for Damian#absolutely not#don’t look at baby dami#dc#batfam#bruce wayne#batman#damian wayne#robin#jason todd#dick grayson#tim drake
87 notes
·
View notes
Text
I always loved morph in the original cartoon, I’m so glad he’s (or they, the pronoun situation isn’t clear but I love that we’re both nonbinary now ) getting the attention and love he deserves.
75 notes
·
View notes
Text
I learned that you can get to YouTube through the gifs feature on the iPhone when that feature first rolled out.
I learned that you could get to literally any website through a shitty app game with even shittier ads that open a basically incognito website browser in the app.
I learned these things because my parents restricted my internet access and took safari off my phone and I couldn’t download any app without my parent’s permission.
Strict rules create sneaky kids.
the notes on any post about kids and the internet are always so rancid first of all even if monitoring and surveilling them 'worked' it would be damaging and not just to those with outright abusive parents. second of all i can tell that some of you were not subjected to rigid internet surveillance growing up because if you were you would know all it does is encourage more sophisticated forms of sneakiness and discourage open conversation, including of things online that may be genuinely disturbing to the kid. "oh but there's fucked up shit online" yes and you are in fantasyland if you think increased parental control protects from that
7K notes
·
View notes
Text
Want to practice art so give me a batfam (or maybe any dc if I run out of batfam) character and a face and I’ll try to draw it!

40 notes
·
View notes
Text
Recently had my first patch expire on Etsy with no sales. I’m still very early in my career selling on Etsy so it’s not supper surprising but still makes me a bit sad. All those wasted hours and materials etc etc etc. Guess people aren’t that into No Game No Life.

“I <3 humanity” but humanity doesn’t love you sorry.
1 note
·
View note