#create zip file in android
Explore tagged Tumblr posts
Visit Tumblr Blog
Explore Tumblr blogs with no restrictions, modern design and the best experience.
Last Seen Tumblr Blogs


Fun Fact
The Tumblr office adopted Tommy, an 11-year-old Pomeranian.
Text
Hey, you!
Is your computer and/or mobile phone dry?
Would you like it not to be?
then BOY DO I HAVE JUST THE THING FOR YOU!!
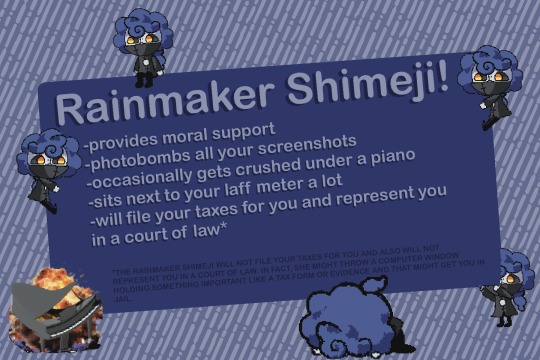
So I made a Rainmaker shimeji! Download and installation instructions under the cut!
HOW TO INSTALL
Windows:
You will need:
A Windows computer
A .zip and .rar software. like winrar or 7zip or whatever, doesn't matter.
The latest version of Java 8
Basic knowledge of how to unzip and move files on your computer
IF YOU DO NOT HAVE ANY OTHER SHIMEJIS:
Download the .zip file
Unzip it wherever you like
Open the folder and make a shortcut to "shimeji-ee.jar"
Move this shortcut to your desktop
Double click the shortcut
There she is!
If shimeji-ee.jar doesn't want to open and instead prompts you to use winrar, right click it and change the application you prefer to open it with to Java
IF YOU HAVE OTHER SHIMEJIS ON YOUR COMPUTER:
This Shimeji was made for Shimeji-ee. I cannot guarantee it will work with other software.
Make a new subfolder in the /img/ folder of your shimeji software. Title it "rainmaker". Or anything else, I'm not your dad.
Download the .zip file
Extract it wherever you want
Copy all the images from my .zip file's /img folder into the shimejiee/img/rainmaker subfolder
Copy the "conf" folder from my zip file into the shimejiee/img/rainmaker subfolder
Open shimeji-ee.jar
Right click on the app icon, and go to settings -> Choose Shimeji
Select Rainmaker
Done!
Android:
You will need:
A shimeji app that supports custom shimeji. I prefer this one:
A file explorer for your phone, if it did not come preloaded with one.
Download my zip file
Unzip it somewhere you'll be able to find it
In the app, create a new shimeji. Direct the file to the /img/ folder of your extracted zip file
Mess around with the animations a bit if you'd like -- this app can mess up the frame order for some animations but it's fixed pretty easily.
Spawn her in.
You're done! Have fun throwing her away from your keyboard every 2 seconds while you text.
DOWNLOAD:
119 notes
·
View notes
Text
How to get Utau and other voice synthesizers on your phone
Hi! Here's the tutorial on how to get Utau or any voice synthesizer on your cell phone
First you need to install a Windows emulator,In this case since I'm using Winlator
-Download winlator
Winlator is for Android however there are alternatives for iOS that also work
After installing the APK you open it and create a new container

You will change on settings "Windows 7" for Windows 11 or 10,why? Because some voice synthesizers don't work on Windows 7
After creating a container and configuring the settings you will open it and you'll see this
You will go to "D:" and touch date two times, so it will put first the setup files that you downloaded because since it is in Japanese sometimes phones don't recognize it and don't show it on normal search so it's better and easier searching for date of downloading
Once you find the setup file of the voice synthesizer that you want, you will cut it with the bottom of cut that's on top of the screen and I recommend pasting it on the desktop or creating a carpet on the desktop and pasting it inside,then you will open it and do the whole setup thing (To open you have to touch the screen 2 times however it's very hard and is easier to select it with the finger and the option to open will appear)

Don't worry, the shortcut will automatically appear on the desktop and will be saved in the container so you just have to install it once then you just run it and congratulations! You have Utau on your phone now

Personal recommendation:
I recommend installing Desh keyboard because it allows you to write on Romanji or Hiragana which is pretty useful when using japanese voice synthesizers,also add Japanese to your phone system so there isn't any issue but if there was,then here's a tutorial that can help if Winlator doesn't recognize japanese
Configuring Winlator if it gives you issues (It didn't happen to me but depends on the phone):https://youtu.be/0rRexzzijWw?si=5wTA3UA4uKqNzb4l
-Downloading Desh keyboard
Another solution to this is using Romanji encode voicebanks which you can find some here
Also some voice synthesizers are in zips and not in setups so to solve this you click it and use the unzipper Winlator has,however if you want something better I recommend installing WinRAR on Winlator.
Btw:You can get all the zips on my pinned post
Also thanks @jevinthecomputer for asking for this tutorial <3.
3 notes
·
View notes
Text
Hi, my name is Lenore. I'm an Android user (and if you judge me I will block you, I'm not in the mood rn).
I am looking for a photo app that can store up to 1 terabyte (or at LEAST like 80GB), as well as allow me to sync my photos and arrange them by date taken, NOT date modified. Ideally, I would also like to be able to create albums for my photos in the app, but tbh, it's not a deal breaker at this point. I want to be able to delete photos from my phone without deleting them from the app, but have the photos still easily accessible in the app without having to deal with compressing or zip files.
Does this exist? And if it does, does it cost $30 a month? I'm desperate. But also too poor for that. But I want to know if it exists nonetheless. Just cause.
Thanks in advance.
#personal#photo app#technology#onedrive pisses me off#and google photos only holds 15GB#which is like.#what is even the fucking point#technology question#help. me.
6 notes
·
View notes
Text
trying to get twewy solo mix to work on my phone, but not having any luck (please help if possible, I really want to get into twewy)
Why solo mix? I can't afford the switch version, and I can't play the ds version without emulation.
I have a 2022 moto g stylus. I do not own a pc, laptop, or any sort of computer. The only console I have is a 2017 model switch (slightly broken, meaning I can't play in handheld, and I'm forced to use pro controller for everything)
I recently decided that I would like to get into twewy, but I've been having some trouble doing so. I saw a thread on reddit where a person wanted to download solo mix, but couldn't since it didn't work on their phone (link to the thread)
in the thread, there was a patched version of solo mix that could run on newer phones (it's the google drive link in the thread btw), so i downloaded it.
The zip file came with an apk and another file, which I was supposed to place in the obb folder inside the android folder in my phone's files. I did exactly that.
Whenever I try to load the game, I get this screen that says I need to download an update.

Clicking the download button doesn't do anything, and I'm stuck on this screen unable to do anything
If anyone knows about why this is happening, please help
UPDATE: IT HAS BEEN RESOLVED
Starting the app creates a new folder in android/obb, which is where the .obb file was actually supposed to go. After placing it there, the game starts normally!
10 notes
·
View notes
Text
Chapter 4 - Gemini API Developer Competition - Fighting game & Android Export
As planned, I spent the last days on adding fighting game capability to the engine and Android exporting feature. The fighting game has much more details in the puzzle for the AI agent to cope with. There are complex animations for the player and for the opponent, they need to constantly look at each other, you need to be able to demo their kick, punch, block animations, the player needs to be able to move in 3D space etc. Overall I'm very pleased with the results so far. The user can speak freely enough with the AI, get instant results and funny reactions. What's more, I've been able to add Android exporting of the game and automatically open it in Android studio. It was challenging because the Java code worked different on PC and on the mobile device specifically handling of Zip files and all kind of Gradle dependency hell. ChatGPT was on my side all the way, assisting me to resolve configuration issues and coding problems such as selecting the best Zip 3rd party library.
youtube
This video clip, demonstrates the current status of the project. It shows a complete story from the user perspective - you have a conversation with the AI, a game is created and finally you export it to Android studio for deployment in Google play store or any other market place.
What's next
Better and shorter presentation
Prepare the installation of all the components as well as SceneMax3D dev studio
Get feedback from the community
Prepare documentation for the architectural strategies, entities diagram etc.
So far I'm getting very good vibes from the game dev. community, and friends on various WhatsApp groups.
2 notes
·
View notes
Text
I hate TikTok!
Not the people - some of them seem absolutely lovely, and they've been very welcoming 🥰 ...
🤬No, I'm talking about the interface for uploading on Android. As far as I can tell it was designed in hell!🤬
I'm creating slideshows with between 25 & 35 slides in each, all of which have to be in the right order, the only thing on each that changes being the text on the slide.
The low res previews are so bad I had to use Phone Link on my PC so I can make everything bigger so I can see it (some of us do not have young eyes) - and I still have to pattern match most of the text rather than really reading it.
It has taken me 2 days to figure out how to get my slides to list in order when I go to select them - 2 whole days!
And my solution involves Windows powershell scripts and zip files.
I asked Google multiple times how I could do it via file names and it assured me I could not because the TikTok ap does not do that. Clearly I was asking the wrong questions.
Finally I stooped to asking ChatGPT if it knew of a better way, because I was out of ideas completely. You know what it said? Huh? Do you?!!!!
I CAN JUST DO IT FROM "My Files"!!
Don't do it from the TikTok app - that's utter shite, do it from "My Files" where if you click the files in order and share to TikTok, it puts them in in order. I mean it doesn't copy anything in order if you're copying from the PC to the Phone and trying to get the created dates on your files to be right, but apparently, it does do it right for loading the damn things into other applications.
Why, why can't I just do this in the ap? All I want to be able to do is see the file names, or order them by name like a reasonable human being, but nope, can't do anything sensible like that.
I hate it - I hate it - I hate it!

0 notes
Text
WoWonder Nulled Script 4.3.4

Download WoWonder Nulled Script – Build Your Own Social Network for Free Looking to create your own social networking platform without breaking the bank? The WoWonder Nulled Script is the perfect solution for aspiring developers and entrepreneurs who want a feature-rich, scalable, and modern PHP-based social network script—absolutely free. Take full control of your digital community and unlock premium features without spending a dime. What is WoWonder Nulled Script? WoWonder Nulled Script is a modified version of the original premium script that enables users to access all functionalities without license restrictions. It’s a comprehensive PHP-based social networking platform similar to Facebook, allowing users to connect, share, and communicate seamlessly. Whether you’re building a niche community or a wide-reaching social network, this nulled version offers everything you need—free of cost. Why Choose WoWonder Nulled Script? There are numerous reasons to opt for WoWonder Nulled Script. Apart from saving on licensing fees, it gives you unrestricted access to premium features such as real-time messaging, timeline sharing, privacy settings, and responsive mobile design. Whether you are a developer seeking to test the full potential of the script or a business owner looking to launch a new social network, WoWonder delivers robust functionality and clean, customizable code. Technical Specifications Script Type: PHP-based Social Network Script Database: MySQL Framework: Custom PHP MVC Version: Latest Nulled Release Compatibility: PHP 7.x and 8.x Responsive: Fully Responsive Design (Mobile-Friendly) Top Features and Benefits Instant Messaging: Real-time chat and group conversations News Feed: Dynamic timeline with photos, videos, and updates Profile System: Personalized profiles with cover photos and avatars Multi-Language Support: Ideal for global communities Secure Login: Social login integration and two-factor authentication Admin Dashboard: Full-featured admin control panel for site management API Integration: Connect with mobile apps and third-party tools Use Cases of WoWonder Nulled Script From startup projects to private online communities, the WoWonder serves a wide range of applications. Use it to create: A niche social platform for hobbyists or professionals An internal communication network for teams or organizations A student or university social media site Exclusive communities for members or subscribers How to Install WoWonder Nulled Script Download the latest WoWonder Nulled Script zip file from our website. Upload the script to your server via cPanel or FTP. Create a new MySQL database and assign a user to it. Visit the installation URL and follow the on-screen instructions. Complete the setup and start customizing your social network! Frequently Asked Questions (FAQs) Is the WoWonder Nulled Script safe to use? Yes, we scan all files for malware and ensure the nulled version is clean and ready for deployment. However, always install on a test environment first. Can I use this script for commercial purposes? While the nulled version removes license restrictions, we recommend checking legal policies in your jurisdiction. Many users deploy it for learning or demo purposes before buying the official version. Does it support mobile apps? Yes! WoWonder has full API support, allowing easy integration with Android and iOS applications. Where can I find other premium tools for free? If you're looking for top-notch WordPress tools, check out our woodmart nulled theme—an excellent companion for WooCommerce-based websites. Are there other nulled plugins available? Absolutely. For backups and restoration, we recommend using UpdraftPlus Premium nulled—a must-have plugin for all WordPress users. Final Thoughts The WoWonder is your gateway to launching a powerful, customizable, and modern social networking site without the usual financial investment. Unlock all the premium features and experience true freedom in development and innovation.
Download it now and start building your digital empire today!
0 notes
Text
Twilio Migration Guide: IOS SDK
Introduction
This tutorial will help you convert from your existing Twilio Video configuration to the EnableX iOS Video SDK instructions. We recommend that anyone starting a new project refer to the EnableX Video SDK manual for advice. We guarantee a smooth transition for all Twilio users wishing to transfer to a dependable alternative with no fuss. Begin with a free trial to see for yourself how easy integration is.
Quick Start: EnableX Android Video Sample Applications
Explore a range of example programs designed for diverse programming environments, such as Java and Kotlin. Each sample app is accessible on GitHub, and it provides realistic examples to help you get started with your video calling project. Video Calling QuickStart documentation for iOS
Step 1: Begin with EnableX
Start Your Free Trial in Minutes
We’ve got you covered with a migration path that feels familiar yet innovative.
Sign Up Easily: Go to the EnableX portal and select Try for Free.
Quick Registration: Provide your details; name, phone number, company, email and agree to the Terms of Service.
Account Verification: Check your email and click the verification link.
Step 2: Set Up Your Video Calling Project
Login to the EnableX Portal with the credentials.
Creating Your First Video Project with EnableX
Create a New Project: Launch your video project with our user-friendly dashboard.
Enable Video Service: Activate video capabilities in one simple step within your project settings.
Secure Your Application: App ID and App Key
Before diving into development, you'll need to secure your application with EnableX's authentication credentials. Here's how to get started:
Obtain API Credentials: After project creation, we'll email your App ID and App Key.
Reset or Resend: Easily manage your credentials within the portal, under 'Project Credentials'.
Implementation: Use these credentials in the HTTP Basic Authentication Request Header for secure API calls.
Step 3: Integrate EnableX on the Client Side
Developer's Corner: Build Your Way
For integrating EnableX SDKs into your Android app:
Remove Twilio SDK: First, remove the Twilio SDK from your project, including any related code and tags.
Download and Extract EnableX SDKs: Download the EnableX iOS SDK and iOS Web RTC Library. Extract the files from the zip packages.
Install EnableX SDK via CocoaPods
Install CocoaPods following the instructions on the CocoaPods website.
In your project directory, run pod init in the terminal.
Add pod ' EnxRTCiOS' to your Podfile to integrate the EnableX iOS SDK.
Run pod install in the terminal.
Reopen your project in Xcode using the new .xcworkspace file.
Include Socket.IO-Client-Swift
Add pod Socket.IO-Client-Swift(15.0.0) in your Podfile as it Is required for EnableX iOS SDK.
'Socket.IO-Client-Swift', '~> 15.0.0'

Step 4: Start and Join Sessions
Twilio
let connectOptions = ConnectOptions(token: accessToken) { (builder) inbuilder.roomName = "existing-room"}let room = TwilioVideoSDK.connect(options: connectOptions, delegate: self)
Start and join Session with EnableX
1. Initialize and Join Room
Initialize the EnxRtc object.
var enxRtc = EnxRtc()
2. Join Room
Use enxRtc to join a room with the required token, stream, and room information.
2. guard let stream = enxRtc.joinRoom(token, delegate: self,3. publishStreamInfo: localStreamInfo, roomInfo: roomInfo, advanceOptions:nil) else { return }
3. Publish Stream
On the didConnect callback, publish your local stream.
enxRoom.publish(localStream)
4. Attach Renderer to Local Stream
Attach EnxPlayerView to the local stream.
localStream.attachRenderer(EnxPlayerView)
5. Subscribe to Remote Streams
Subscribe to remote streams when didAddedStream callback is received.
enxRoom.subscribe(stream)
6. Handle Active Talkers
Use the Active Talker APIs to manage the display of active talkers.
func room(_ room: EnxRoom?, didActiveTalkerList Data: [Any]?)func room(_ room: EnxRoom?, didActiveTalkerView view: UIView?)
7. End or Destroy the Call:
Use room.disconnect () or room.destroy () to end the session as needed.
For detailed information on the features and implementation of the EnableX iOS Video SDK, please refer to the EnableX iOS Video SDK Documentation. This resource offers comprehensive insights into the capabilities of the SDK, enabling the development of sophisticated and feature-rich video conferencing solutions. If you have specific feature needs, the documentation offers valuable instructions and support.
0 notes
Text
CSCI 4176/CSCI 5708
CSCI 4176/CSCI 5708 Mobile Compu6ng: ASSIGNMENT NO. 4 Date Given: Friday, Nov 1, 2023 Date Due: Sunday, Nov 14, 2023, 11.59 PM Submission: On Brightspace PLEASE READ - GENERAL IMPORTANT NOTES FOR ALL ASSIGNMENTS:
For research type ques/ons or for ques/ons that require you to do online searches, please ensure that all references are properly cited in your answers. Use IEEE reference styles.
(h
Keep in mind that just because you cite references, you must not “cut-and-paste”
代写 CSCI 4176/CSCI 5708
from these or other sources. The write-up must be properly paraphrased and referenced.
This assignment is intended to be completed individually. Please remember that collabora/on with others on this assignment may be viewed as a breach of our academic integrity policy.
Submission will be on Brightspace. Convert your documents into pdf. Submit ONE pdf file containing the answers to all ques/ons. If you have answers in mul/ple documents, compress them into a zip file and upload ONE zip file. Please make sure that your full name and banner ID appears on the document(s). Title: Province and City Explorer Android Applica6on Objec6ves: In this assignment, you will create an Android applica/on that allows users to explore a province and its ci/es. The applica/on should start with a login screen and then lead to a main page with naviga/on op/ons for exploring the province and its ci/es. Part 1: Project Implementa6on 1 point (Login) 2 points (Naviga=on Panel) 1 point (Background Image) 2 points (ViewPager) 2 points (TabView+Image)
LoginAc6vity: This is the entry point of the applica/on. Implement a simple login screen that grants access to the MainAc/vity (hardcoded username and password).
MainAc6vity: ATer a successful login, users should be taken to the MainAc/vity. This ac/vity should incorporate a Naviga/onToolbar with two items: "Province Info" and "Ci/es". Addi/onally, the MainAc/vity should display an image of the selected country in the background.
ProvinceInfoAc6vity: When a user selects "Province Info" from the Naviga/onToolbar, they should be taken to the ProvinceInfoAc/vity. This ac/vity should u/lize a ViewPager to display different views (or fragments) of informa/on about the province.
Ci6esAc6vity: When a user selects "Ci/es" from the Naviga/onToolbar, they should be taken to the Ci/esAc/vity. In this ac/vity, implement a TabView with three tabs, each represen/ng one of the three ci/es in the province. Each tab should display a picture of the corresponding city. 2 points Bonus Op6onal: Adding more op/ons to the naviga/on panel or improving the design may earn you up to 2 bonus points.
2 points Part 2: Report Wri6ng ATer implemen/ng the project, students will be required to write a comprehensive report covering: Project Descrip6on: An overview of the project, its objec/ves, and func/onali/es. Technical Details + Code Commen6ng: A discussion of the technologies used, project structure, and important code snippets. Explain what each line/block of code does, ensuring that the descrip/ons are detailed and clear. (Please take Screenshots of your ac6vi6es and explain about them) Challenges & Learning Points: Reflect on the challenges faced during the project and how they were overcome, as well as the key points learned. Results and Screenshots: Include screenshots of the working applica/on, explaining each one. Conclusion: Share final thoughts on the project and poten/al future enhancements. The report should be well-structured and free from spelling and grammar errors, demonstra6ng proficient technical wri6ng skills. The commented codes should be included as the final sec6on of your assignment within the PDF file. Addi6onally WX:codehelp
1 note
·
View note
Text
How to Add Fonts to Cricut for Your Crafting: Stepwise Guide
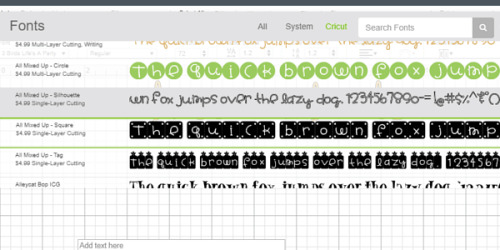
Fonts are a great way to create designs with your Cricut. But, have you ever wondered How to Add Fonts to Cricut? All the old fonts are overrated and sometimes even boring. Luckily, some websites offer some good fonts for your everyday needs. So, you can add these fonts to your Cricut to create various projects such as shirts, coffee mugs, etc.
I will show you all those websites where you can get newer fonts and download them for Cricut. Therefore, this guide will help you understand the download process for all the newer fonts you are looking for. Let’s get started!
What Are the Top Websites to Get the Latest Fonts for Cricut?
When you are looking for the best Cricut font online, you might come across several websites. But how do you know which is best? Basically, there are many top websites you can directly search for on your browser.
For instance, you can search for Creative Fabrica, Dafont, Fontspace, Font Freak, Creative Market Font Bundles and many more such websites. All these are top sites for getting the latest fonts for Cricut. Hopefully, you will get your desired fonts on these sites easily.
How to Add Fonts to Cricut on Windows 10?
If you have a desktop computer like Windows, you can easily access the newer fonts on your Cricut. There are some easy steps you need to go through to download and install them correctly. Have a look at them.
Go to your browser, search for the website, Cricut.com/setup and download its file.
Then, find the downloaded file in the Downloads section.
Now, navigate to your downloaded file and open it by right-clicking on it.
After that, select the Extract option to open the file you downloaded.
At last, right-click on your file and hit the Install button.
That’s how you’ll get the new fonts for Cricut.
How to Add Fonts to Cricut on Mac?
When you are using a Mac computer, you can follow these steps to access your new fonts for Cricut. Learn the steps from here.
In the first step, download a font file on your desktop.
Then, head to the downloaded folder and double-click on the file to extract it.
Now, choose your fonts and open the Menu.
After that, choose Open with and then hit the Font Book option.
Next, a pop-up option will appear to install the latest fonts.
At last, hit the Install button to begin the installation process.
Finally, you got the Cricut fonts on your Mac device. Let’s learn the steps for smartphones.
How to Add Fonts to Cricut on Android/iPhone?
If you don’t have a desktop computer and you want to download the latest Cricut fonts on Android, use these steps to do it correctly.
For Android
First of all, you need to install a font manager app through the Play Store.
Then, download the desired fonts from it.
Now, move to the Downloads section where these files are stored.
After that, extract that file and unzip it.
Next, open the font app and head to the My Font option.
Then, click on the My Font option.
At last, click on the Set option to complete the installation.
Now, you can use your new fonts in the Design Space.
For iPhone
You can easily download fonts for Cricut on your iPhone or iPad. Use the steps below to get it.
Firstly, head to the App Store and install a font manager app.
Then, download that font on your system.
Now, your file will be downloaded in .zip format.
After that, unzip your file and open your font manager app.
In the following step, hit the Font Finder option.
Next, choose the Open Files option and move to the font file you like to install.
Click on the Installer tab and hit the Install button.
Hit the Continue button and select the Allow option.
Then, you can close the app and head to your Settings.
Afterward, tap on the Profile Downloaded.
Also, hit the Install button.
You will receive a message saying Profile Installed.
In the last step, click on the Done button.
Now, you can freely use your new fonts in the Design Space.
Conclusion
I have shared the process of how to add fonts to Cricut?. If you are bored of using old fonts every time, it’s time to give yourself a new start with the latest Cricut fonts that you can download from the best websites on the internet. I am sure you’ll get some of the best fonts for everyday use. All you need to do is browse a website to download your desired fonts, and then you’re all ready to access them on your Design Space software.
FAQs
How to Add Fonts to Cricut Online?
If you want to add new fonts to Cricut online, you can do it easily in a few simple steps. You need to select a top website that offers all the latest Cricut fonts like Dafont, Fontspace, Creative Fabrica or any website and download the font from them. Once you have the downloaded file, you can extract it and add it to your Design Space.
How to Upload New Fonts to Cricut?
If you have to use a new font in your Design Space, you can use these steps.
In the first step, download a font you like from any top website.
Then, extract your downloaded file and unzip it.
After that, double-click on your file.
Continue with the on-screen prompts to install the font file on your desktop.
Next, launch your Cricut Design Space software.
Then, select the New Project option.
Now, you need to add a new text box.
At the end, you can hit the drop-down menu to select a font.
How to Unzip My Downloaded Font File?
To unzip your downloaded font file, use these steps.
First, right-click on the .zip file.
Then, hit the Extract option.
After that, choose the TrueType or OpenType file.
Next, right-click on the file and click to install it.
Finally, tap on the Yes option to allow changes.
Source: How to Add Fonts to Cricut
Visit here for more Information: Cricut.com/setup
Cricut explore 3
Cricut Design Space
#How to Add Fonts to Cricut#cricut.com/setup#cricut explore 3#cricut maker bundle#design space cricut#Cricut Design Space
0 notes
Text
How to Upload Fonts to Cricut Design Space: Stepwise Guide
What’s up, crafters? I am sure you are thinking of something creative, am I right? Well, making crafts is nothing new to you, but there are multiple ways to upgrade yourself. Are you thinking about uploading a new font to your Design Space? Sure, you can do that and create your own font. The best part is that this process is going to be easy for you. So, follow me to learn how to upload fonts to Cricut software.
You don’t need to spend hours finding the right font in Cricut Design Space — rather, you can find it somewhere else, which is what I’m going to tell you about. Adding fonts to the Cricut app is an extremely easy process. So, let’s get started with that.
How to Find a Perfect Font to Upload?
Options for perfect fonts are never-ending. There are many places to find Cricut fonts, and some of my favorite ones are fonts.google.com and Creative Fabrica. On these websites, you will surely find some cool fonts. Apart from them, there are also some sources like
Creative Market and dafont.com are where you can get some high-quality fonts completely free.
Isn’t it great? However, not all fonts will be free on them, and to get some specific fonts, you may need to pay some money. So, if your purpose is to sell items you make, you can go for the paid fonts that often have a commercial use license.
How to Download a New Font to Cricut Design Space?
If you have finally selected your perfect font and you are all set to download it, go ahead with my simplest steps here.
Download your font from a site and check where it gets downloaded to your folder.
Then, unzip your font folder and then double-click on that file. Usually, you will get the font files in .ttf or .otf type. But, I will .otf file.
Now, continue with all the on-screen prompts on your desktop to get the font file.
When your font is installed, launch your the Cricut software.
After that, you need to create a new project.
Next, add the new text layer and choose the text box to add the text to Design Space.
That’s how you will add the font easily to your Design Space canvas. When you download fonts, your guesswork will become zero as you will know which font to use.
How to Upload Fonts to Cricut on a Windows PC?
Are you a Windows user? Perfect. Most of my work is PC-based, so I can tell you well how to upload fonts correctly to your Design Space. Look at the steps below.
In the first step, download your font file, move it to your Downloads folder, and get the downloaded file.
Then, right-click on the file if it’s compressed and choose Extract to get the files.
Now, your font will be added to your PC and the software.
You have understood the download procedure. You can move it to the Cricut Design app canvas by using the steps I have shared at the start.
How to Upload Fonts to Cricut on Your Mac Computer?
Well, if you are a Mac user, I have different steps for you. I don’t use Mac often, but for all of you, I tried adding a font to my friend’s Macbook. So, the steps are easy; let’s check them below.
Similarly, download a font file to your Mac.
After that, unzip your file if it is compressed in the .zip format.
Double-click on the font in your Finder window and let the font install.
You will get your fonts in just three simple steps. Now, you can do anything with your fonts and make great projects.
How to Upload Fonts to Cricut on Smartphones (Android/iPhone)?
If you prefer a mobile phone to use Cricut Design Space, don’t worry. You can also get the latest fonts on your device. Follow my steps below.
For Android
First of all, install an app to manage fonts. I prefer iFont.
Then, download your font and navigate to it under the Downloads folder.
Now, if your file is compressed into .zip format, get the file.
Launch your iFont app and then head to the My Font option.
Next, open that option to see the preview of your font and then install it on your device.
At last, hit the Set option to finish the installation.
These are the final steps for adding fonts to Cricut on an Android smartphone. Now, create your favorite designs with your unique fonts.
For iPhone
iPhone users don’t need to worry; I have a separate section for them. You will also need to install an app to manage fonts. iFont is a perfect app for you, too. Let’s look at the steps.
First of all, install the iFont app to manage your fonts.
Then, download your font and unzip it from the Downloads folder.
Now, launch your iFont and choose the Font Finder.
After that, choose the Open Files window and search for your font file to install.
Next, choose the Installer tab and hit the Install button with the font to allow the installation.
Then, hit the Continue button and then click the Allow option.
Next, launch your Settings app and close the iFont app.
Now, click on the Profile Downloaded option.
Finally, you will get the option to Install your favorite font.
Finally, the font is installed on our iPhone, and you are all set to use it. Now, you have learned the uploading process on almost all the devices.
Conclusion
If you are thinking about how to upload fonts to Cricut Design Space, this blog can be helpful to you. Fonts are so creative and can add spark to your lovely projects. Also, if you are someone who likes to sell your creative items, the addition of a great font will level up your projects and will make you grow as a crafter. I have shared all my favorite sources with you, like dafont.com and Creative Fabrica; if you have better sources than mine, go for it.
#Setup Cricut Machine#Cricut Machine Stepwise Guide#How to Upload Fonts on Cricut Design Space#Stepwise Guide#How to Upload Fonts#cricut explore air 2#cricut setup#cricut new machine setup#cricut crafts
0 notes
Text
⭐The Word Office - PDF, Docx, XLSX, PPT, All Document Reader application is a robust tool that can convert various file formats such as .docx, word, xlsx, pptx, txt, and others to PDF format. It also supports the editing of files, including .docx, word office, xlsx, file .ppt, pptx, and txt. ⭐The app boasts advanced features such as the ability to track changes, make comments, spell checks, and edit documents. Word Office - PDF, Docx, XLSX, PPT, All Document Reader is a leading office application that enables users to read and open documents downloaded from the internet. The app also includes a PDF viewer for android free download and ultra-fast read PDF files capabilities. ✅The Word Office - PDF, Docx, XLSX, PPT, All Document Reader app is user-friendly and comes with powerful functions. The app's SCAN feature enables users to convert various types of documents to PDFs, search files quickly, extract texts from images accurately, produce professional-quality scan results, add e-signatures, add security watermarks, and perform convenient document editing. ✅For docx files, Word Office - PDF, Docx, XLSX, PPT, All Document Reader and key features of this office document - document xlsx offline are available. The app enables users to view and read documents offline on office for Android, including Docx and Offline Word Files. Users can create and edit doc, docx, and docs files, search for .docx files, and explore more Word Office - PDF, Docx, XLSX, PPT, All Document Reader features. It also allows users to collaborate with others on documents from their Android phones and share Word editor, Docx editor easily through Gmail. ✅The PDF feature allows users to read all PDF viewers, load PDF documents editor, read and collaborate in the same document simultaneously, open pdf reader, and pdf editor. It also enables users to edit pdf viewer and documents viewer, the fastest and full option document editor, display Word PDF reader documents in grid or list format, edit documents like edit pdf reader, bookmark PDF pages for future reference, and share documents to save. ✅The XLSX feature enables users to read and view xlsx editor, xls, txt, xlsx files of multiple formats, read all xlsx viewer, load xlsx documents, share xlsx reader, and collaborate in the same document simultaneously. It also allows users to search for .txt files and explore more xlsx office features. Users can edit office documents like edit xlsx file, txt editor, XLS editor, and XLSX editor, and share their documents to save. ✅Finally, the Slide Document feature enables users to read and view file .ppt editor, PPSX PPTX files of multiple formats, read all file .ppt viewer, load file .ppt documents, share file .ppt reader, and collaborate in the same document simultaneously. It also enables users to open file .ppt reader, file .ppt editor, search for PPT, PPTX, PPS, PPSX files, explore more xlsx office features, and share their documents to save. ✨This file viewer application is fully compatible with Word Office - PDF, Docx, XLSX, PPT, All Document Reader files, including Word, XLSX, Docx, file .ppt, and txt documents, and PDF files. The app supports a broad range of formats, including DOC, DOCX, DOCS, PDF Reader & PDF Editor, XLS, XLSX, PPT, PPTX, PPS, PPSX, TXT, HWP, ODT, and Zip.
0 notes
Text
How to Download Fonts for Cricut on Mobile Devices?
There are many ways to make Cricut projects with all sorts of fonts. These fonts can be added to various projects, such as coffee mugs, shirts, or t-shirts. However, fonts designers make a free version of fonts for personal use. Users who wish to download fonts for Cricut can easily download them from a free website. Hence, the write-up will cover the process of downloading fonts and adding them to the Design Space app. Besides, you will learn the key differences between .TTF and. OTF file types for fonts. Further, we will also discuss how to use fonts on Design Space. In this blog, you will find all methods for downloading eye-catching fonts on various devices, including iPad, iPhone, and Android devices.
Differences Between .TTF and .OTF Fonts
There are mainly two types of font files: .TTF and .OTF files. The TTF stands for TrueType Font, and OTF stands for OpenType Font. While downloading the fonts, you will find these two types of font files.
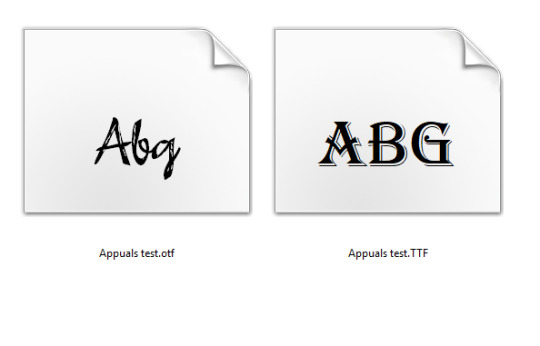
The biggest difference between these files is that .OTF comes with more advanced features. For example, it has special characters, glyphs, and embellishments, giving you more options for designs. Since .OTF offers incredible design options; we recommend you download and install an .OTF file.
If an .OTF option is not available; you can use .TTF, which works perfectly fine with Cricut Design Space. Also, TTF files are larger in size; therefore, they will consume more space on your hard drive.
How to Download Fonts for Cricut on iPad/iPhone?
Downloading fonts on iPad/iPhone devices is simple, and you can download them from the font app. This app is available for free on the App Store.
To install the fonts on your iPad device:
Go to the App Store and download the font manager app, i.e., font.
Afterward, download the font file. You will find the downloaded file in .zip format.
Then, unzip the file, launch the font app, and click on Font Finder.
After that, select the Open Files button and go to the font file you want to install.
Next, hit the Installer tab and click the Install button.
Then, hit the Continue button and allow.
Close the font app and then go to your settings application. Click on the Profile Downloaded.
Now, click the Install button. (Click Install if you see a warning message such as the profile not signed.
Finally, you will see a message saying Profile Installed. Hit the Done.
If you have installed the fonts correctly, then you can use them in your Design Space.
How to Download Fonts for Cricut on Android?
Now, you need to read the following instructions for downloading the fonts for Android devices. Again, you need an app called font. To download, follow the steps mentioned below:
Download and install the font manager app (font) from the Google Play Store.
To find the downloaded file, go to the Downloads App file and extract the same to unzip it.
Then, launch the font app and go to My and then My Font options. You have to open it to see the preview and install the fonts on the device.
Finally, hit Set to finish the installation.
Furthermore, you are free to use the fonts in the Design Space.
How to Use Your Own Fonts in Design Space?
To add the fonts to your Design Space, you first need to download the fonts to your computers or mobile devices. Also, the fonts can be downloaded from a website that offers fonts for free.
Launch the Design Space app on your device. Earlier, if the software is open, then you may require it to close it. Then restart the app before new fonts appear properly.
Open the new Canvas to create a new project.
Hit the Text Tool from the toolbar on the left.
From there, add a textbox to your canvas.
Then, hit the front Drop-Down menu to open the list of fonts.
Choose System to find only the fonts you have installed on your device.
Then, opt for the new font at the front of the queue.
This way, you can easily use any fonts that you want on Cricut Design Space.
Conclusion
In short, the key differences in font files might have helped you understand the right file type for fonts, and you can download them accordingly. Coming to the downloading of fonts, we have explained the same for both Android and iPad/iPhone devices. After downloading and installing fonts, learn how to use the fonts in Cricut Design Space. The download fonts for Cricut Design Space will be easy for you and won’t take much time to install. Just read the instructions carefully and download them accurately.
FAQs
Question 1: How to download fonts on Design Space for a Windows computer?
Answer: To download the fonts on a Windows computer, read the following instructions carefully:
Download the fonts file from the website that offers free fonts.
Then, right-click on the downloaded .zip file to extract it.
Afterward, right-click the Font File and click on Install.
Follow the on-screen commands to install the fonts on your device.
Finally, the fonts will be installed in your Design Space, and you can use them in your Design Space.
Question 2: How can I download Cricut fonts for free?
Answer: Many designers make free versions of fonts. Plus, free fonts are easily accessible on any website, such as fonts.google.com and dafont.com. These two websites offer free fonts that work perfectly with your Cricut Design Space. You can download the fonts and unzip the downloaded font files. Further, after installation of the fonts, it will be ready to use on Design Space.
Question 3: Does Cricut cost for fonts?
Answer: Even though Cricut offers various fonts for free, there are many fonts available on the Design Space that require you to pay. If you do not use a Cricut Access subscription, then most fonts will cost you around $4.99. However, when you buy them once, you have access to these fonts or other resources for a lifetime.
#Download fonts for Cricut#Cricut.com/setup#cricut.com setup download#cricut.com sign in#cricut.com/create#cricut.com design space#cricut.com/setup mac#cricut.com/setup windows#cricut explore air 2#cricut setup#www.cricut.com/setup
0 notes
Text
VN - Video Editor & Maker

VN is an easy-to-use and free video editing app with no watermark. The intuitive interface makes video editing simple, with no prior knowledge needed. It offers all the features required to create professional and high-quality videos, satisfying both the needs of professional and amateur video editors. Intuitive Multi-Track Video Editor • Quick Rough Cut: The track edit design feature for PC versions is built in the VN app. This makes it easier for you to zoom in/out any materials and select keyframes as short as 0.05 seconds. You can make video editing as precise as you want. • Delete & Reorder Easily: Swipe your finger up or down the screen to delete the selected video clips. Reorder your video materials simply by drag-and-drop. • Multi-track Timeline: Easily add picture-in-picture videos, photos, stickers, and texts to your videos, and personalize them using the Keyframe animation feature. • Save Drafts Anytime: Save a draft and undo/redo an action as many times as you want. The support for non-destructive editing allows you to make changes to an image without overwriting the original image data. Easy-to-use Music Beats • Music Beats: Add markers to edit video clips to the beat of the music and take your videos to the next level. • Convenient Recording: Easily add high-quality voice-overs to make your videos more lively in minutes. Trending Effects & Color Grading Filters • Speed Curve: In addition to the regular speed change tool, Speed Curve helps to make your videos play out faster or slower. This feature is similar to Time Remapping in Adobe Premiere Pro. VN offers 6 preset curves for you to choose from. • Transitions & Effects: Make your videos more lively by using the transitions and effects such as overlay and blur and setting their timing and speed. • Rich Filters: Import LUT (.cube) files to make your videos more cinematic. Rich cinematic filters make it easy to create stunning visual effects. Advanced Video Editor • Keyframe Animation: Create awesome video effects using the 19 built-in keyframe animation effects to customize the products, you can also add other keyframes or curves to your footage to customize the results. • Reverse & Zoom: Enjoy the novelty and fun to reverse your video clips, and use the zoom effects to make them more engaging. • Freeze Frame: Create a time freeze effect simply by selecting and tapping a video frame to generate an image with 1.5 seconds duration. • Creative Templates: Create music and video templates and share them with your friends and family. Flexible Use of Materials • Flexible Impor Method: Import music, sound effects, fonts, and stickers to VN via Wi-Fi, WhatsApp, or Telegram. You can also import files in bulk via Zip files. Using your materials for video editing is that simple. • Material Library: Use the many stickers, fonts, and other materials available to add more fun to your videos. Rich Text Templates • Text Templates: Choose from the many text templates and fonts to match your video styles. • Text Editing: Choose from various font styles and adjust the font color, size, spacing, and more in any way you like. Create Effectively & Share Securely • Seamless Collaboration: Transfer projects between mobile and desktop devices via Google Drive or OneDrive with ease. This allows for video editing anytime and anywhere. • Protection Mode: Set expiration dates and passwords for your drafts and templates to secure your assets. • Custom Export: Customize the video resolution, frame rate, and bit rate. 4K resolution, up to 60 FPS. Discord: https://discord.gg/eGFB2BW4uM YouTube: @vnvideoeditor Email: [email protected] Terms of Service: https://www.ui.com/legal/termsofservice Privacy Policy: https://www.ui.com/legal/privacypolicy Official Website: www.vlognow.me Read the full article
1 note
·
View note
Text
How to Install a Minecraft Mod
With the development of Minecraft and the Mod community, the installation of Minecraft Mod has not been as complex as in the past, here, we simply describe the ANDROID version of Minecraft PE Mod installation process.
The first and most important step is to determine which version of the game you are using and whether this version is supported by the Mods. Since Minecraft PE has been updated to many versions, and Mods are launched in early and late, not all Mod makers have the energy to constantly update mods with the game version, and not all Mod makers have the ability to support older versions of the game, so you need to make sure your Mod supports the version of the game you're playing.
If you use your phone to install the Mod, you need to make sure your phone has either a file manager app and an app that can extract files, or connect your phone to your computer and use your computer to operate.
Download the Mod you want, and determine the format of the Mod file, different formats have different installation methods.
If your Mod is a .mcpack /.mcworld /.mcaddon format, look at 4, and if your Mod is a .rar /.zip format, look at 5.
If your Mod is a .mcpack /.mcworld /.mcaddon format, you can open the Mod file directly. When you choose how to open the file, click Open with Minecraft. Minecraft will automatically install the Mod.
If your Mod is a .rar /.zip format, extract your file and remember where you had extracted it, then find the location where Minecraft is located and open the com. mojang folder, there should have the following folders in this folder:
behavior_packs - Usually associated with mods
minecraftWorlds - Used to install save
resources_packs - Sometimes used for mods, but also for texture packs
Then we go back to the extracted file, identify which folders are in it, and put the folder named with resources/textures in com. mojang/resources_packs folder. Place the folder named with behavior intocom.mojang/behavior_packs folder, and place the save into minecraftWorlds folder.
When you're done with 4 or 5 and all the files are in the right place, open Minecraft PE, edit your save or create a new one (it's recommended to create a creative mode save to make it easier to identify mod content). In Create New World menu, tap the Resource pack (if your mod includes the contents of resources_packs), or the Behavior pack (if your mod includes the contents of behavior_packs), and activate the downloaded Mod. If you are using save/map, then you only need to find the save you downloaded in the game's existing saves.
Open your world and enjoy the content of the Mod you installed (it is recommended to familiarize yourself with the content of your mod before installing the mod)
1 note
·
View note
Note
I think it might be a new ship, yes. Then, follow up, slightly like the thing with all four of them but not quite; Arthur running Castor's software in the background, allowing him to piggyback onto physical reality. Possibly letting him have control for a bit...
I like that this is pretty much booting House out of the body. He doesn't get to be in Arthur, he's got his hologram pin, he can suck it up.
On with the fic!
--
Having someone else occupying your systems was a little odd, but not the worth thing to happen to Arthur, if his malfunction and having his sim card removed without his permission was anything to go by.
He had offered to let Zuse, Castor, come with him to the real world, out of ENCOM, in his body. It was really the only way they could save Castor when Clu had figured out that something had been happening behind the scenes.
While House had been annoyed about it, when was he ever happy with anything involving Castor, the Doctor had been pleased and excited about this. This was only going to be temporary, he had stated, as he could find an android body for Castor until they could get back into the system to figure out how to make a human body from it.
But until then, Castor was in Arthur's body, and seemed rather taken with it. This did worry Arthur a little, he did not want to have his body stolen from him, especially when he was finally allowed freedom from the ship. But he felt he could trust the program, it seemed his fascination was just more in how he could interact with the real world over anything else.
Though he did seem a bit... touchy, in a way Arthur was not familiar with.
Well, he was aware of how Castor was open with his flirting, and was rather hands-on with his approach to it, considering how he was around the Doctor. And, well, sometimes Arthur himself.
But with them both sharing his body, the touching was... different.
Arthur may not be in control now, but Castor was, currently looking himself over in the mirror in the Doctor's massive closet. While he found the android's red suit and black bow tie combo to be charming, it wasn't his own style, he wanted something fitting for himself when he was in control.
Being a good host, Arthur said it was fine, as long as it was tasteful. Castor had just smiled at the reflection and started to undress.
It was an interesting choice for the humans who created Arthur to give him a human torso to go along with his other human features, was there any need? No, but maybe it was meant to make people more comfortable? He wasn't sure, he could find no notes as to why in his blueprint file.
But Castor seemed to appreciate it, having said a number of compliments that made Arthur's internal systems overheat for a moment or two.
"What do you think, darling?" Castor said, pale eyes looking at the reflection in the mirror, holding up two different jackets. "Which is more... my style?"
Arthur's eyes changed to hazel as he looked between the two dress jackets, both different shades of white, but each was of a different material. One was clearly more Arthur's taste, the other was an odd... pleather texture, it seemed, reminded Arthur of Castor's normal jacket.
"I suppose this is much more your style." He held up the pleather one.
"Are you sure?" Came Castor's tone from his mouth. "I don't want to mess up your own look too much, you've been such a dear and all. Hosting me when you didn't have to do that."
"I didn't want you to be shattered." Arthur said, and he hadn't, it seemed like such a sad way to go.
"You're too good to me, Arthur." Castor smiled and slipped on the jacket, buttoning it up in a style similar to that of the Doctor's own. "How about I let you add your own touch, would you like your tie?"
"Black is not fitting of the white you wish to wear."
"Ah? I thought it was."
"Not what you have in mind." Arthur commented and zipped down the walk away on his wheels, coming to a stop at a large collection of ties of all sorts. He rummaged through them quickly before returning to the mirror.
He slipped it on under his collar and let Castor take a look. It was a simple, pale blue bow tie, left untied to go with the not-buttoned collar of the shirt. Castor seemed to be pleased with this.
"Oh, you are a clever boy." He commented.
"I live to please." Arthur said, matter-of-factly.
"Mmm, of course you do." Castor said, looking himself over in the mirror before kissing the lips of his fingers, then tapped them to his cheek. "Thank you, love. Let's go show the Doctor!" He moved down the walkway to the lift that the TARDIS had been kind enough to materialize for Arthur.
Within the privacy of his own mind, Arthur wondered about the indirect kiss he was given. He really should ask the Doctor about these strange changes to his programming, he wasn't sure he was meant to be having feelings like this towards people.
Or maybe he should just let them happen, after all, he was a freeman now.
--
Castor is such a fun character to write, like a chaotic Miles who clearly has a kill count.
11 notes
·
View notes