#editing software controller
Explore tagged Tumblr posts
Visit Tumblr Blog
Explore Tumblr blogs with no restrictions, modern design and the best experience.
Last Seen Tumblr Blogs


Fun Fact
70% of Tumblr users say the Dashboard is their favorite place to spend time online.
Text
Buy TourBox NEO Creative Software Controller in UAE

If you’re a creative professional in the UAE looking to streamline your workflow and boost productivity, the TourBox Upgraded NEO Creative Software Controller now available at AWPRO is a game-changer you shouldn’t miss.
What is the TourBox NEO?
The TourBox NEO is a compact, ergonomically designed controller built specifically for creators working in photo editing, video production, animation, audio, and digital art. It’s the upgraded second-generation model, featuring an improved left-side dial and center knob for smoother, more precise adjustments—ideal for intricate creative tasks.
Key Features
Universal Compatibility: Works seamlessly with industry-standard software such as Adobe Photoshop, Lightroom, Premiere Pro, DaVinci Resolve, Illustrator, After Effects, Final Cut Pro X, Capture One, Clip Studio Paint, and many more.
Customizable Controls: Offers up to 42 customizable operations with uniquely shaped buttons, dials, scroll wheels, and knobs for intuitive tactile navigation.
Ergonomic Design: Designed for comfort and efficiency, allowing you to use the controller with one hand while operating a mouse, keyboard, or graphics tablet with the other.
Seamless Integration: Connects via USB Type-C to both Mac and Windows computers, ensuring fast and reliable performance.
Preset Management: The free TourBox software lets you manage and switch between multiple configurations, with official and user-made presets for popular creative apps.
Enhanced Workflow: Features like brush control, all-in-one dial for sliders and frame stepping, seamless navigation (zoom, rotate, timeline adjust), and quick tool switching with HUD support put everything you need at your fingertips.
Why Creatives Love the TourBox NEO
Speed and Efficiency: The tactile controls allow for rapid adjustments, making editing, color grading, and retouching much faster than using keyboard shortcuts alone.
Intuitive Customization: Easily map your most-used shortcuts and functions to the controller, adapting it to your unique workflow.
Build Quality: Premium construction ensures durability and a satisfying user experience, even during long editing sessions.
Beginner-Friendly: Whether you’re a novice or a seasoned pro, the TourBox NEO is easy to set up and master, thanks to its thoughtful design and comprehensive software support.
Why Buy from AWPRO?
AWPRO is the authorized dealer for TourBox in Dubai and across the UAE, offering the best prices and free shipping on orders over AED 300. With a reputation for serving the professional audio, video, and photo community, AWPRO ensures you get genuine products and excellent after-sales support.
Who Should Get the TourBox NEO?
Photographers seeking faster retouching and editing in Lightroom or Photoshop
Video editors wanting precise timeline and frame control in Premiere Pro or DaVinci Resolve
Digital artists and illustrators looking for smooth brush adjustments and tool switching
Audio producers and animators who need quick access to complex software functions
Conclusion
The TourBox Upgraded NEO Creative Software Controller is more than just a gadget. It's an essential tool for modern creators who value efficiency, precision, and comfort. Available now at AWPRO, it’s your ticket to a smoother, more enjoyable creative process in the UAE.
0 notes
Text


⚠️ Danganronpa V3 spoilers ⚠️
"That's right! This is a story that ends with despair... Doesn't that sound exactly like something the big bad mastermind would come up with?" 🧵🎀💙
Tsumugi Shirogane | Danganronpa V3
Photo taken by Visuals by Louis (FB)
Photo manipulation and edit by me 🤓☝️
#danganronpa#danganronpa v3#danganronpa v3 killing harmony#danganronpa killing harmony#drv3#tsumugi shirogane#drv3 tsumugi#drv3 tsumugi shirogane#danganronpa cosplay#danganronpa Tsumugi#cosplay#cosplayer#spike chunsoft#elle cosplay shenanigans#the shot was really nice I lost all control when I opened up the editing software#the background is taken straight from the game btw lol
83 notes
·
View notes
Text
As Things Should Be: Tsuguko Memes because I'm trying to find inspiration


#Me trying to write my demon slayer AU is a lot like trying to tempt a cat into its carrier when it knows it's time to go to the vet#Demon Slayer#meme#shitpost#Demon slayer fanfic#Demon Slayer AU#As Things Should Be#Douma#Inosuke#Tanjiro#Zenitsu#Genya#Kanao#Shinobu#Shinobu is still a tsuguko in the AU hence she's included#Douma is not but the meme came to me in a dream and it was too funny#I have learned the art of transparency control on my shitty editing software#It's over for you all
17 notes
·
View notes
Text

🌊🦦 Summer Beach Time 🦦🌊
soooo i made comments in the tags of another piece i made about how i want to go to the beach (or a lake tbh, he's a lake guy) with him, and watch him get the zoomies in the water and just. walk around and make the 🥺 face at me when i'm sitting at the edge of the water and he wants to be close.
(i'm obsessed with this pair of dino pattern trunks... ren core...)
#i got too perfectionist w this one but i'm Calling it. i need to move on to another piece#and take what i learned here to make something better. yknow how it is. :/ VERY glad i'm starting to FINALLY FOR REAL#nail down his body shape now hehe. still p average build w a paunch and tatas. but also a good amt of muscle in the legs#bc he does SOOOO much walking as both a doc and in retail + in retail he has to lift and carry a lot of things so r!ren's arms#have more tone and he's hiding some muscle strength in his core. doc! and v!ren would have more core muscle strength#but he's a bit of a recluse when he isn't window shopping + finding a place to swim the way he used to when younger is. tough. ;;#(i'm not gonna totally redo the pic but i might post a version fully without the shirt for another blog :3c)#(btw would anyone be interested in timelapse vids? i've wanted to do some but i want to know if it's worth learning editing software lol)#📌 [ my posts. ]#🎨 [ 046 art. ]#046 art#✨ [ oc lore. ]#🍄 [ lying on the blade of an emotion. ]#🧃 [ who is in control. ]#🦦 [ can't escape it. ]#🐸 [ look ahead. ]#selfship#self ship#selfshipping#self shipping#bare chest -
17 notes
·
View notes
Text
every time i open synthv2 to maaaybe start working on one of my ten thousand wips i slap genbu plus on that bad boy and spend 20 minutes getting distracted by 1) how cutie genbu plus sounds and 2) how scared i am that genbu is gonna crash the program again
#he sounds ADORABLE and he wants this software DEAD#i keep saying this but its shocking how much he sounds like his standard. just a biiit warmer#and has a more natural sounding (but kinda hard to control) falsetto. the warmth is sooo sweet tho i keep hearing him say like#a normal word and being like awwww. awwwwwwww. actually i do that with standard beby too. puts a well placed g3soft and im like awwwww#i said this before. synthesizers are cute to me. they are cute to me.#anyway thats all i do in svs2. point at genbu plus and say awwwwwwwwwwwwwwww#and then realize i messed up something in the svp and have to open svs1 again. because i find it hard to do svp edits in svs2 LOL#i think i need like. a light mode. the darker bg of svs2 is way more straining on my eyes than the grayer svs1#im sorry im like this. im the reason light modes exist. its my fault#i would also like that tension parameter dealt with. actually like. okay. i think high tension was actually improved compared to svs1#in 1 it does like. barely anything to me but in 2 its been kinda fantastic. but LOW TENSION my best friend low tension...#it was already sensitive in 1 its WACKY in 2. i think ive figured out kiiiiinda a way around it#whenever i put tension down i also need to put volume etc up. which is a little bit of a pain because. dear kanru moresampler hua#The Reason i LIKE synthvs tension parameter so much is Because i dont have to compensate as much for volume and body loss#with other parameters and also in daw mixing when using softer expressions LOL#but i persevere. i persevere <3
6 notes
·
View notes
Text
How to Use a Blue Yeti Microphone
Using a Blue Yeti microphone can significantly enhance your audio recording quality, whether you're podcasting or streaming.
Using a Blue Yeti microphone can significantly enhance your audio recording quality, whether you’re podcasting, streaming, or creating content. Known for its versatility and superior sound quality, the Blue Yeti microphone stands out as a top choice for creators. In this guide, we’ll delve into the initial setup, optimal placement, and advanced features to ensure you make the most out of your…

View On WordPress
#advanced microphone features#audio clarity#audio editing#audio enhancement#audio recording#audio software#audio troubleshooting#background noise reduction#bidirectional mode#Blue Yeti microphone#cardioid mode#content creation#gain control#home studio setup#live broadcasting#microphone placement#microphone setup#music recording#mute button#omnidirectional mode#podcast equipment#podcasting#pop filter#professional recording#recording environment#recording patterns#recording tips#shock mount#software integration#sound optimization
0 notes
Text
testing around with windows task automation (the goal is to eventually use this to regularly backup files via scp), and i really enjoy that they put so much work into developing and maintaining this feature that it bricks my laptop for a solid 10 seconds every time i take any action in that window.
#tütensuppe#its also working incredibly poorly rn#my og idea was to mount a folder from the backup system to the working computer#so users can save files directly in there#doesnt work bc a) its windows -> linux and windows cant read linux file system#b) linux doesnt seem to natively support this so its not like you can easily create a partition with the right file system#so scp was my next idea. if i could get this bullshit to work.#edit: figured it out 👍#meeting with the users in question is next tuesday so i wanted this solution ready to go#also someone told me they wanted to cool down again this week so i went to check the monitoring panel#server throws errors. panic. check log. timeout error#they did in fact not cool down. the control software isnt even running. hence the timeout errors
0 notes
Text
There's been a HUGE surge in AI fics recently and so....
i would like to put you all onto this ai detector
the amount of ai junk that has started to infiltrate this fandom recently is so fucking insulting to people who are actually spending time writing.
i conducted an investigation the other day, the following photos are from a blog in this fandom that is churning out ai fics (i have blocked out the text so i'm not outright doxing them, but keep in mind these are only a few of the fics that i pasted into the detector, the majority of them were all 100% AI):


this is from my own fic, because i wanted to ensure that the site worked correctly, i pasted several pieces of my own fic into the detector and they all came back at 0%, so my own fics worked as the control in this experiment:

the point of this post is not to be an asshole, but to plead with you all not to read AI generated fics, don't paste people's fics into AI to "finish" them for you, don't use AI chat bots to talk to your favorite characters. art is supposed to come from the soul, it's supposed to be shared and appreciated, AI is literally killing art, and as a writer, this shit pisses me off so unbelievably that it makes me want to stop writing for this fandom, and i know i'm not alone in that sentiment.
if you're a reader in this fandom who wants to support REAL WRITERS, please feel free to use that detector if you suspect a fic is AI. a good telltale sign that a "writer" is posting AI fics is if they're posting at an inhumane rate-- no one can write 10 fics in a day... i'm telling you that with confidence as someone who has been writing for over 15 years.
if you're using AI to write fics for you-- the least you can do is be honest about it. I would urge you to stop, for the sake of the community, for the sake of artists who are constantly getting their work scraped to better these bots, for YOURSELF-- but i know most of you will not listen to me. so please, at the very least, place a disclaimer on your fics if they are AI generated, because you're not tricking real writers.
we can tell the fucking difference.
EDIT: i’ve had a few people reach out to me, concerned that their fics were coming up with some percentage of “ai written” on that ai detector. so here’s a disclaimer and then i will not be answering any more anonymous asks about it: NOT ALL FICS THAT SHOW UP AS “AI WRITTEN” ON AN AI DETECTOR ARE ACTUALLY WRITTEN BY AI! editing software that uses AI models such as grammarly can increase those percentages, as well as a ton of other factors. i need y’all to use critical thinking skills— the ai detector i posted a link to should be a last resort if you suspect an “author” is posting ai fics. look for the signs: posting several completed fics in a day/week, lack of internal conflict or dialogue within the writing, overly action-oriented writing, an abundance of short, abrupt sentences, zero reflection or discussion from the “author” on their own fics, if the “author’s” writing skills are drastically different when comparing their fics to other posts they make, no grammatical errors despite an abnormally fast posting schedule, an abundance of “request anon asks”. i did not post this to preach using ai detectors on everything you read or come across, only as a last resort and even then it might not be accurate. i do know for sure that the fics i plugged into that detector are AI generated, because I know how to spot them, and those specific fic “writers” literally post 10 times a fucking day. i just wanted to shed light on this issue, because it disgusts me, and i know a lot of folks here are unaware this is happening at such an unprecedented rate.
#fanfiction#fanfic#ao3 fanfic#pedro pascal#joel miller fanfiction#ao3#tlou fanfiction#FUCK AI#joel miller x reader
435 notes
·
View notes
Note
Is it ethical to use Chat GPT or Grammarly for line editing purposes? I have a finished book, 100% written by me and line edited by me already--and I do hope to get it traditionally published. But I think it could benefit from a line edit from someone who isn't me, obviously, before querying. But line editing services run $3-4k for a 75k book, which is beyond my budget.
I was chatting with someone recently who self-publishes. They said they use Chat GPT Plus to actually train a model for their projects to line edit using instructions like (do not rewrite or rephrase for content /edit only for rhythm, clarity, tone, and pacing /preserve my voice, sentence structure, and story intent with precision). Those are a few inputs she used and she said it actually worked really well.
So in that case, is AI viewed in the same way you'd collaborate with a human editor? Or does that cross ethical boundaries in traditional publishing? Like say for instance AI rewords your sentence and maybe switches out for a stronger verb or adjective or a stronger metaphor--is using that crossing a line? And if I were to use it for that purpose, would I need to disclose that? I know AI is practically a swear word among authors and publishers right now, so I think even having to say "I used AI tools" might raise eyebrows and make an agent hesitant during the querying process. But obviously, I wouldn't lie if it needs to be disclosed... just not sure I even want to go there and risk having to worry about that. Thoughts? Am I fine? Overthinking it?
Thanks!
I gotta be honest, this question made me flinch so hard I'm surprised my face didn't turn inside out.
Feeding your original work into ChatGPT or a similar generative AI large language model -- which are WELL KNOWN FOR STEALING EVERYTHING THAT GETS PUT INTO THEM AND SPITTING OUT STOLEN MATERIAL-- feels like, idk, just a terrible idea. Letting that AI have ANY kind of control over your words and steal them feels like a terrible idea. Using any words that a literal plagiarism-bot might come up with for you feels like a terrible idea.
And ethical questions aside: AI is simply not good at writing fiction. It doesn't KNOW anything. You want to take its "advice" on your book? Come on. Get it together.
Better idea: Get a good critique group that can tell you if there are major plot holes, characters whose motivations are unclear, anything like that -- those are things that AI can't help you with, anyway. Then read Self-Editing for Fiction Writers -- that info combined with a bit of patience should stand you in good stead.
Finally, I do think that using spell-check/grammarly, either as you work or to check your work, is fine. It's not rewriting your work for you, it's just pointing out typos/mistakes/potential issues, and YOU, PERSONALLY, are going through each and every one to make the decision of how to fix any actual errors that might have snuck in there, and you, personally, are making the decision about when to use a "stronger" word or phrase or recast a sentence that it thinks might be unclear or when to stet for voice, etc. Yes, get rid of typos and real mistakes, by all means!
(And no, I don't think use of that kind of "spell-check/grammar-check" tool is a problem or anything that you need to "disclose" or feel weird about -- spell-check is like, integrated into most word processing software as a rule, it's ubiquitous and helpful, and it's different from feeding your work into some third-party AI thing!)
343 notes
·
View notes
Text
youtube
Rambling: So much of this is just like. It's all the money, you can't get around the money. Engineering is primarily a cost optimisation problem, so is business, where do you buy your parts, how much do you pay your labour. The companies can make equal quality goods cheaper in China because of the industrial base. Western workers don't want to work in manufacturing because it doesn't pay as much or as reliably as other jobs.
I like reading articles and watching videos about factories and a thing you find with a lot of American factories is they're often highly specific niche industries where they don't have much competition or they're really low volume where less intensive manufacturing processes still work or they have big military contracts that give them their base income. Really it's wild how every little engineering shop in the US requires base level security clearance because they make the cable harness for the Hornet or whatever. And crucially, crucially: they employ 100 people. Planning to work for one of these companies is like planning to be a pro baseball player but you make $35/hr.
I studied in South Africa, and I studied electrical engineering, but like. That was my fifth or sixth choice from a personal interest perspective? As a teenager I was really into biochem. I really wanted to work on like. Bioreactor stuff. South Africa has okay industrial chemistry but not that much biochem. So why would I go spend five years getting a biochem Masters and hope I could find a job at one of like six companies. It's a bad move! Once again, baseball player odds! Mostly if you're lucky you'll get to fuck around in a half-related field for a few years and then you'll wind up with some office job that you found because it turns out running tests on paint shearing isn't personally fulfilling enough to make you stay in a lab job.
Hell, even taking the Good Hiring Engineering Job market, it's a goddamn pain in the ass to find any actual engineering work. I applied to dozens of internship positions every semester at engineering firms and workshops and never so much as heard back, whereas I could go to the software job fairs and get two offers and several interviews for a vacation job in a couple weeks. You can swim upstream to get in there but even if you're willing to take the pay cut, engineering jobs are slow moving and slow hiring, and in small departments your professional progression is often gated behind someone retiring or dying.
A while ago someone (was this Reggie? sounds like him EDIT: YEP) was talking about how part of the reason why no one in the US for the past 20 years can do like, epitaxial growth optimisation isn't because there's some philosophical or educational divison, but because anyone committed and driven enough to spend months optimizing that would just put that energy and commitment into going into software or becoming a quant or some other higher yield option. Meanwhile if you're a driven and focussed ladder climber in China there's dozens of factories looking for someone to do exactly this. The people in the West who are so into this that they still do it are often in academia, not industry, and that's an even more competitive and impenetrable sector to get into. Getting a PhD grad job in academic chip manufacturing is miserable, it's basically a six year long interview process that costs you hundreds of thousands of dollars that has a 0.1% chance of panning out.
Actually, I did once do a factory internship, it was my only nepotism internship, at a construction materials factory where my dad was a manager, and it was really interesting work! I had a lot of freedom in a small engineering team and I spent a while understanding a bag filling machine and reading manuals and tuning the control process and talking to floor workers and designing sheet metal parts to improve their jobs. And when I talked to the engineer supervising me I found out he was on a six month contract that wasn't getting renewed and he would be leaving the company basically the same time my internship ended. That company hadn't hired a full-time process engineer in ages, and probably never would if they could avoid it. Not encouraging!
People often say you should get into the trades because they pay well and are material fulfilling work. This is like. It's an elision. Successful tradespeople are in very high demand, but becoming a successful tradesperson is very, very finicky. I worked with a lot of electricians and millwrights and technicians, and for every tech who was successful and running a roaring business there were five guys stuck in eternal apprenticeships or struggling to make a name for themselves in the industry on their own. Some trades are great for this, other trades are 90% training scams where you spend nine months and five thousand dollars on a course that gives you a certificate almost no one cares about.
Every now and then I talk to an installation tech I used to work with who has a bunch of CCTV and security certs he got in the DRC, and he is just absolutely struggling to get by. There's already enough successful companies to serve the demand, why would you take a risk on this fly-by-night? He could find a technical job, and he does, but it's a dead end, everyone wants a base technician forever, they don't want you to upskill and move on. They hire in an external electrician to come in for an hour sign off on your work, and that's all you need.
You can't develop an industrial base unless it's appealing to work in the industrial base. If you're an industrialising nation, the appeal is "It's not farm work and you might get some real money instead of a sack of barley" but in a modern society you need to pay at least as well as the office jobs. If your industrial sector is small it can afford to only hire the most qualified people because it's a labour buyer's market, and that's how you produce a massive knowledge gap.
#Youtube#industrial capacity#engineering#smartereveryday is an interesting example he is a weapons engineer and a weird military guy#which like yeah that's how you do manufacturing in the US. Every little engineering shop needs military clearance#having a weird week re: industry i guess
215 notes
·
View notes
Note
uh. aseprite starter tips? i’m kinda lost
Aseprite Tips for Noobs !!

Get the software: Aseprite (the pixel software of all time) Video tutorial:
Aseprite Crash Course in 30 minutes by AdamCYounis If you already have it you can skip ahead to 'the workspace' timestamp in the video.
If you have ever used another art software, Aseprite will be familiar to you but all the keybinds will be messed up. You can go to edit > keyboard shortcuts, search what you're missing and rebind it to whatever you're used to.
Most important keybinds (to me):
Brush: B
Eraser: E
Undo: control + Z
Redo: control + Y
Quick colour picker: hold alt and click
New layer: shift + N
New frame: alt + N
Lasso select: Q
Quick outline: shift + O
Help! I pressed a button by accident and now I don't know how to fix it
These are a couple keybinds that are actually really useful for pros but a pain in the butt if you hit them while you're learning
Put the animation timeline back: tab
Undo snap to grid: shift + S
The window fills my screen and i cant see the pc bar: F11
The tools are gone: ctrl + F (might have to press it 2 times)
I can give some more advanced tips if anyone wants, but I dont want to overwhelm. If youre stuck there is official aseprite documentation where you can search for what you need. Or just ask me. Everything you have could possibly stuck on I have got stuck on it before 20 times.
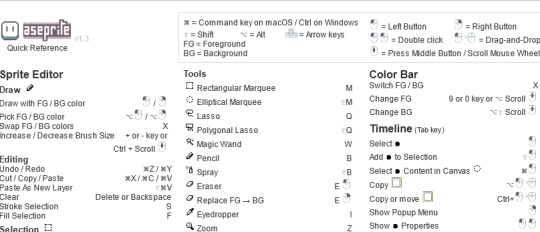
Direct link to keybinds quick reference (keybinds are life
Take it slow and have fun! It will take a while to get used to everything but the software is amazing! Trust the process!
2K notes
·
View notes
Text
How I ditched streaming services and learned to love Linux: A step-by-step guide to building your very own personal media streaming server (V2.0: REVISED AND EXPANDED EDITION)
This is a revised, corrected and expanded version of my tutorial on setting up a personal media server that previously appeared on my old blog (donjuan-auxenfers). I expect that that post is still making the rounds (hopefully with my addendum on modifying group share permissions in Ubuntu to circumvent 0x8007003B "Unexpected Network Error" messages in Windows 10/11 when transferring files) but I have no way of checking. Anyway this new revised version of the tutorial corrects one or two small errors I discovered when rereading what I wrote, adds links to all products mentioned and is just more polished generally. I also expanded it a bit, pointing more adventurous users toward programs such as Sonarr/Radarr/Lidarr and Overseerr which can be used for automating user requests and media collection.
So then, what is this tutorial? This is a tutorial on how to build and set up your own personal media server using Ubuntu as an operating system and Plex (or Jellyfin) to not only manage your media, but to also stream that media to your devices both at home and abroad anywhere in the world where you have an internet connection. Its intent is to show you how building a personal media server and stuffing it full of films, TV, and music that you acquired through indiscriminate and voracious media piracy various legal methods will free you to completely ditch paid streaming services. No more will you have to pay for Disney+, Netflix, HBOMAX, Hulu, Amazon Prime, Peacock, CBS All Access, Paramount+, Crave or any other streaming service that is not named Criterion Channel. Instead whenever you want to watch your favourite films and television shows, you’ll have your own personal service that only features things that you want to see, with files that you have control over. And for music fans out there, both Jellyfin and Plex support music streaming, meaning you can even ditch music streaming services. Goodbye Spotify, Youtube Music, Tidal and Apple Music, welcome back unreasonably large MP3 (or FLAC) collections.
On the hardware front, I’m going to offer a few options catered towards different budgets and media library sizes. The cost of getting a media server up and running using this guide will cost you anywhere from $450 CAD/$325 USD at the low end to $1500 CAD/$1100 USD at the high end (it could go higher). My server was priced closer to the higher figure, but I went and got a lot more storage than most people need. If that seems like a little much, consider for a moment, do you have a roommate, a close friend, or a family member who would be willing to chip in a few bucks towards your little project provided they get access? Well that's how I funded my server. It might also be worth thinking about the cost over time, i.e. how much you spend yearly on subscriptions vs. a one time cost of setting up a server. Additionally there's just the joy of being able to scream "fuck you" at all those show cancelling, library deleting, hedge fund vampire CEOs who run the studios through denying them your money. Drive a stake through David Zaslav's heart.
On the software side I will walk you step-by-step through installing Ubuntu as your server's operating system, configuring your storage as a RAIDz array with ZFS, sharing your zpool to Windows with Samba, running a remote connection between your server and your Windows PC, and then a little about started with Plex/Jellyfin. Every terminal command you will need to input will be provided, and I even share a custom #bash script that will make used vs. available drive space on your server display correctly in Windows.
If you have a different preferred flavour of Linux (Arch, Manjaro, Redhat, Fedora, Mint, OpenSUSE, CentOS, Slackware etc. et. al.) and are aching to tell me off for being basic and using Ubuntu, this tutorial is not for you. The sort of person with a preferred Linux distro is the sort of person who can do this sort of thing in their sleep. Also I don't care. This tutorial is intended for the average home computer user. This is also why we’re not using a more exotic home server solution like running everything through Docker Containers and managing it through a dashboard like Homarr or Heimdall. While such solutions are fantastic and can be very easy to maintain once you have it all set up, wrapping your brain around Docker is a whole thing in and of itself. If you do follow this tutorial and had fun putting everything together, then I would encourage you to return in a year’s time, do your research and set up everything with Docker Containers.
Lastly, this is a tutorial aimed at Windows users. Although I was a daily user of OS X for many years (roughly 2008-2023) and I've dabbled quite a bit with various Linux distributions (mostly Ubuntu and Manjaro), my primary OS these days is Windows 11. Many things in this tutorial will still be applicable to Mac users, but others (e.g. setting up shares) you will have to look up for yourself. I doubt it would be difficult to do so.
Nothing in this tutorial will require feats of computing expertise. All you will need is a basic computer literacy (i.e. an understanding of what a filesystem and directory are, and a degree of comfort in the settings menu) and a willingness to learn a thing or two. While this guide may look overwhelming at first glance, it is only because I want to be as thorough as possible. I want you to understand exactly what it is you're doing, I don't want you to just blindly follow steps. If you half-way know what you’re doing, you will be much better prepared if you ever need to troubleshoot.
Honestly, once you have all the hardware ready it shouldn't take more than an afternoon or two to get everything up and running.
(This tutorial is just shy of seven thousand words long so the rest is under the cut.)
Step One: Choosing Your Hardware
Linux is a light weight operating system, depending on the distribution there's close to no bloat. There are recent distributions available at this very moment that will run perfectly fine on a fourteen year old i3 with 4GB of RAM. Moreover, running Plex or Jellyfin isn’t resource intensive in 90% of use cases. All this is to say, we don’t require an expensive or powerful computer. This means that there are several options available: 1) use an old computer you already have sitting around but aren't using 2) buy a used workstation from eBay, or what I believe to be the best option, 3) order an N100 Mini-PC from AliExpress or Amazon.
Note: If you already have an old PC sitting around that you’ve decided to use, fantastic, move on to the next step.
When weighing your options, keep a few things in mind: the number of people you expect to be streaming simultaneously at any one time, the resolution and bitrate of your media library (4k video takes a lot more processing power than 1080p) and most importantly, how many of those clients are going to be transcoding at any one time. Transcoding is what happens when the playback device does not natively support direct playback of the source file. This can happen for a number of reasons, such as the playback device's native resolution being lower than the file's internal resolution, or because the source file was encoded in a video codec unsupported by the playback device.
Ideally we want any transcoding to be performed by hardware. This means we should be looking for a computer with an Intel processor with Quick Sync. Quick Sync is a dedicated core on the CPU die designed specifically for video encoding and decoding. This specialized hardware makes for highly efficient transcoding both in terms of processing overhead and power draw. Without these Quick Sync cores, transcoding must be brute forced through software. This takes up much more of a CPU’s processing power and requires much more energy. But not all Quick Sync cores are created equal and you need to keep this in mind if you've decided either to use an old computer or to shop for a used workstation on eBay
Any Intel processor from second generation Core (Sandy Bridge circa 2011) onward has Quick Sync cores. It's not until 6th gen (Skylake), however, that the cores support the H.265 HEVC codec. Intel’s 10th gen (Comet Lake) processors introduce support for 10bit HEVC and HDR tone mapping. And the recent 12th gen (Alder Lake) processors brought with them hardware AV1 decoding. As an example, while an 8th gen (Kaby Lake) i5-8500 will be able to hardware transcode a H.265 encoded file, it will fall back to software transcoding if given a 10bit H.265 file. If you’ve decided to use that old PC or to look on eBay for an old Dell Optiplex keep this in mind.
Note 1: The price of old workstations varies wildly and fluctuates frequently. If you get lucky and go shopping shortly after a workplace has liquidated a large number of their workstations you can find deals for as low as $100 on a barebones system, but generally an i5-8500 workstation with 16gb RAM will cost you somewhere in the area of $260 CAD/$200 USD.
Note 2: The AMD equivalent to Quick Sync is called Video Core Next, and while it's fine, it's not as efficient and not as mature a technology. It was only introduced with the first generation Ryzen CPUs and it only got decent with their newest CPUs, we want something cheap.
Alternatively you could forgo having to keep track of what generation of CPU is equipped with Quick Sync cores that feature support for which codecs, and just buy an N100 mini-PC. For around the same price or less of a used workstation you can pick up a mini-PC with an Intel N100 processor. The N100 is a four-core processor based on the 12th gen Alder Lake architecture and comes equipped with the latest revision of the Quick Sync cores. These little processors offer astounding hardware transcoding capabilities for their size and power draw. Otherwise they perform equivalent to an i5-6500, which isn't a terrible CPU. A friend of mine uses an N100 machine as a dedicated retro emulation gaming system and it does everything up to 6th generation consoles just fine. The N100 is also a remarkably efficient chip, it sips power. In fact, the difference between running one of these and an old workstation could work out to hundreds of dollars a year in energy bills depending on where you live.
You can find these Mini-PCs all over Amazon or for a little cheaper on AliExpress. They range in price from $170 CAD/$125 USD for a no name N100 with 8GB RAM to $280 CAD/$200 USD for a Beelink S12 Pro with 16GB RAM. The brand doesn't really matter, they're all coming from the same three factories in Shenzen, go for whichever one fits your budget or has features you want. 8GB RAM should be enough, Linux is lightweight and Plex only calls for 2GB RAM. 16GB RAM might result in a slightly snappier experience, especially with ZFS. A 256GB SSD is more than enough for what we need as a boot drive, but going for a bigger drive might allow you to get away with things like creating preview thumbnails for Plex, but it’s up to you and your budget.
The Mini-PC I wound up buying was a Firebat AK2 Plus with 8GB RAM and a 256GB SSD. It looks like this:

Note: Be forewarned that if you decide to order a Mini-PC from AliExpress, note the type of power adapter it ships with. The mini-PC I bought came with an EU power adapter and I had to supply my own North American power supply. Thankfully this is a minor issue as barrel plug 30W/12V/2.5A power adapters are easy to find and can be had for $10.
Step Two: Choosing Your Storage
Storage is the most important part of our build. It is also the most expensive. Thankfully it’s also the most easily upgrade-able down the line.
For people with a smaller media collection (4TB to 8TB), a more limited budget, or who will only ever have two simultaneous streams running, I would say that the most economical course of action would be to buy a USB 3.0 8TB external HDD. Something like this one from Western Digital or this one from Seagate. One of these external drives will cost you in the area of $200 CAD/$140 USD. Down the line you could add a second external drive or replace it with a multi-drive RAIDz set up such as detailed below.
If a single external drive the path for you, move on to step three.
For people with larger media libraries (12TB+), who prefer media in 4k, or care who about data redundancy, the answer is a RAID array featuring multiple HDDs in an enclosure.
Note: If you are using an old PC or used workstatiom as your server and have the room for at least three 3.5" drives, and as many open SATA ports on your mother board you won't need an enclosure, just install the drives into the case. If your old computer is a laptop or doesn’t have room for more internal drives, then I would suggest an enclosure.
The minimum number of drives needed to run a RAIDz array is three, and seeing as RAIDz is what we will be using, you should be looking for an enclosure with three to five bays. I think that four disks makes for a good compromise for a home server. Regardless of whether you go for a three, four, or five bay enclosure, do be aware that in a RAIDz array the space equivalent of one of the drives will be dedicated to parity at a ratio expressed by the equation 1 − 1/n i.e. in a four bay enclosure equipped with four 12TB drives, if we configured our drives in a RAIDz1 array we would be left with a total of 36TB of usable space (48TB raw size). The reason for why we might sacrifice storage space in such a manner will be explained in the next section.
A four bay enclosure will cost somewhere in the area of $200 CDN/$140 USD. You don't need anything fancy, we don't need anything with hardware RAID controls (RAIDz is done entirely in software) or even USB-C. An enclosure with USB 3.0 will perform perfectly fine. Don’t worry too much about USB speed bottlenecks. A mechanical HDD will be limited by the speed of its mechanism long before before it will be limited by the speed of a USB connection. I've seen decent looking enclosures from TerraMaster, Yottamaster, Mediasonic and Sabrent.
When it comes to selecting the drives, as of this writing, the best value (dollar per gigabyte) are those in the range of 12TB to 20TB. I settled on 12TB drives myself. If 12TB to 20TB drives are out of your budget, go with what you can afford, or look into refurbished drives. I'm not sold on the idea of refurbished drives but many people swear by them.
When shopping for harddrives, search for drives designed specifically for NAS use. Drives designed for NAS use typically have better vibration dampening and are designed to be active 24/7. They will also often make use of CMR (conventional magnetic recording) as opposed to SMR (shingled magnetic recording). This nets them a sizable read/write performance bump over typical desktop drives. Seagate Ironwolf and Toshiba NAS are both well regarded brands when it comes to NAS drives. I would avoid Western Digital Red drives at this time. WD Reds were a go to recommendation up until earlier this year when it was revealed that they feature firmware that will throw up false SMART warnings telling you to replace the drive at the three year mark quite often when there is nothing at all wrong with that drive. It will likely even be good for another six, seven, or more years.

Step Three: Installing Linux
For this step you will need a USB thumbdrive of at least 6GB in capacity, an .ISO of Ubuntu, and a way to make that thumbdrive bootable media.
First download a copy of Ubuntu desktop (for best performance we could download the Server release, but for new Linux users I would recommend against the server release. The server release is strictly command line interface only, and having a GUI is very helpful for most people. Not many people are wholly comfortable doing everything through the command line, I'm certainly not one of them, and I grew up with DOS 6.0. 22.04.3 Jammy Jellyfish is the current Long Term Service release, this is the one to get.
Download the .ISO and then download and install balenaEtcher on your Windows PC. BalenaEtcher is an easy to use program for creating bootable media, you simply insert your thumbdrive, select the .ISO you just downloaded, and it will create a bootable installation media for you.
Once you've made a bootable media and you've got your Mini-PC (or you old PC/used workstation) in front of you, hook it directly into your router with an ethernet cable, and then plug in the HDD enclosure, a monitor, a mouse and a keyboard. Now turn that sucker on and hit whatever key gets you into the BIOS (typically ESC, DEL or F2). If you’re using a Mini-PC check to make sure that the P1 and P2 power limits are set correctly, my N100's P1 limit was set at 10W, a full 20W under the chip's power limit. Also make sure that the RAM is running at the advertised speed. My Mini-PC’s RAM was set at 2333Mhz out of the box when it should have been 3200Mhz. Once you’ve done that, key over to the boot order and place the USB drive first in the boot order. Then save the BIOS settings and restart.
After you restart you’ll be greeted by Ubuntu's installation screen. Installing Ubuntu is really straight forward, select the "minimal" installation option, as we won't need anything on this computer except for a browser (Ubuntu comes preinstalled with Firefox) and Plex Media Server/Jellyfin Media Server. Also remember to delete and reformat that Windows partition! We don't need it.
Step Four: Installing ZFS and Setting Up the RAIDz Array
Note: If you opted for just a single external HDD skip this step and move onto setting up a Samba share.
Once Ubuntu is installed it's time to configure our storage by installing ZFS to build our RAIDz array. ZFS is a "next-gen" file system that is both massively flexible and massively complex. It's capable of snapshot backup, self healing error correction, ZFS pools can be configured with drives operating in a supplemental manner alongside the storage vdev (e.g. fast cache, dedicated secondary intent log, hot swap spares etc.). It's also a file system very amenable to fine tuning. Block and sector size are adjustable to use case and you're afforded the option of different methods of inline compression. If you'd like a very detailed overview and explanation of its various features and tips on tuning a ZFS array check out these articles from Ars Technica. For now we're going to ignore all these features and keep it simple, we're going to pull our drives together into a single vdev running in RAIDz which will be the entirety of our zpool, no fancy cache drive or SLOG.
Open up the terminal and type the following commands:
sudo apt update
then
sudo apt install zfsutils-linux
This will install the ZFS utility. Verify that it's installed with the following command:
zfs --version
Now, it's time to check that the HDDs we have in the enclosure are healthy, running, and recognized. We also want to find out their device IDs and take note of them:
sudo fdisk -1
Note: You might be wondering why some of these commands require "sudo" in front of them while others don't. "Sudo" is short for "super user do”. When and where "sudo" is used has to do with the way permissions are set up in Linux. Only the "root" user has the access level to perform certain tasks in Linux. As a matter of security and safety regular user accounts are kept separate from the "root" user. It's not advised (or even possible) to boot into Linux as "root" with most modern distributions. Instead by using "sudo" our regular user account is temporarily given the power to do otherwise forbidden things. Don't worry about it too much at this stage, but if you want to know more check out this introduction.
If everything is working you should get a list of the various drives detected along with their device IDs which will look like this: /dev/sdc. You can also check the device IDs of the drives by opening the disk utility app. Jot these IDs down as we'll need them for our next step, creating our RAIDz array.
RAIDz is similar to RAID-5 in that instead of striping your data over multiple disks, exchanging redundancy for speed and available space (RAID-0), or mirroring your data writing by two copies of every piece (RAID-1), it instead writes parity blocks across the disks in addition to striping, this provides a balance of speed, redundancy and available space. If a single drive fails, the parity blocks on the working drives can be used to reconstruct the entire array as soon as a replacement drive is added.
Additionally, RAIDz improves over some of the common RAID-5 flaws. It's more resilient and capable of self healing, as it is capable of automatically checking for errors against a checksum. It's more forgiving in this way, and it's likely that you'll be able to detect when a drive is dying well before it fails. A RAIDz array can survive the loss of any one drive.
Note: While RAIDz is indeed resilient, if a second drive fails during the rebuild, you're fucked. Always keep backups of things you can't afford to lose. This tutorial, however, is not about proper data safety.
To create the pool, use the following command:
sudo zpool create "zpoolnamehere" raidz "device IDs of drives we're putting in the pool"
For example, let's creatively name our zpool "mypool". This poil will consist of four drives which have the device IDs: sdb, sdc, sdd, and sde. The resulting command will look like this:
sudo zpool create mypool raidz /dev/sdb /dev/sdc /dev/sdd /dev/sde
If as an example you bought five HDDs and decided you wanted more redundancy dedicating two drive to this purpose, we would modify the command to "raidz2" and the command would look something like the following:
sudo zpool create mypool raidz2 /dev/sdb /dev/sdc /dev/sdd /dev/sde /dev/sdf
An array configured like this is known as RAIDz2 and is able to survive two disk failures.
Once the zpool has been created, we can check its status with the command:
zpool status
Or more concisely with:
zpool list
The nice thing about ZFS as a file system is that a pool is ready to go immediately after creation. If we were to set up a traditional RAID-5 array using mbam, we'd have to sit through a potentially hours long process of reformatting and partitioning the drives. Instead we're ready to go right out the gates.
The zpool should be automatically mounted to the filesystem after creation, check on that with the following:
df -hT | grep zfs
Note: If your computer ever loses power suddenly, say in event of a power outage, you may have to re-import your pool. In most cases, ZFS will automatically import and mount your pool, but if it doesn’t and you can't see your array, simply open the terminal and type sudo zpool import -a.
By default a zpool is mounted at /"zpoolname". The pool should be under our ownership but let's make sure with the following command:
sudo chown -R "yourlinuxusername" /"zpoolname"
Note: Changing file and folder ownership with "chown" and file and folder permissions with "chmod" are essential commands for much of the admin work in Linux, but we won't be dealing with them extensively in this guide. If you'd like a deeper tutorial and explanation you can check out these two guides: chown and chmod.

You can access the zpool file system through the GUI by opening the file manager (the Ubuntu default file manager is called Nautilus) and clicking on "Other Locations" on the sidebar, then entering the Ubuntu file system and looking for a folder with your pool's name. Bookmark the folder on the sidebar for easy access.

Your storage pool is now ready to go. Assuming that we already have some files on our Windows PC we want to copy to over, we're going to need to install and configure Samba to make the pool accessible in Windows.
Step Five: Setting Up Samba/Sharing
Samba is what's going to let us share the zpool with Windows and allow us to write to it from our Windows machine. First let's install Samba with the following commands:
sudo apt-get update
then
sudo apt-get install samba
Next create a password for Samba.
sudo smbpswd -a "yourlinuxusername"
It will then prompt you to create a password. Just reuse your Ubuntu user password for simplicity's sake.
Note: if you're using just a single external drive replace the zpool location in the following commands with wherever it is your external drive is mounted, for more information see this guide on mounting an external drive in Ubuntu.
After you've created a password we're going to create a shareable folder in our pool with this command
mkdir /"zpoolname"/"foldername"
Now we're going to open the smb.conf file and make that folder shareable. Enter the following command.
sudo nano /etc/samba/smb.conf
This will open the .conf file in nano, the terminal text editor program. Now at the end of smb.conf add the following entry:
["foldername"]
path = /"zpoolname"/"foldername"
available = yes
valid users = "yourlinuxusername"
read only = no
writable = yes
browseable = yes
guest ok = no
Ensure that there are no line breaks between the lines and that there's a space on both sides of the equals sign. Our next step is to allow Samba traffic through the firewall:
sudo ufw allow samba
Finally restart the Samba service:
sudo systemctl restart smbd
At this point we'll be able to access to the pool, browse its contents, and read and write to it from Windows. But there's one more thing left to do, Windows doesn't natively support the ZFS file systems and will read the used/available/total space in the pool incorrectly. Windows will read available space as total drive space, and all used space as null. This leads to Windows only displaying a dwindling amount of "available" space as the drives are filled. We can fix this! Functionally this doesn't actually matter, we can still write and read to and from the disk, it just makes it difficult to tell at a glance the proportion of used/available space, so this is an optional step but one I recommend (this step is also unnecessary if you're just using a single external drive). What we're going to do is write a little shell script in #bash. Open nano with the terminal with the command:
nano
Now insert the following code:
#!/bin/bash CUR_PATH=`pwd` ZFS_CHECK_OUTPUT=$(zfs get type $CUR_PATH 2>&1 > /dev/null) > /dev/null if [[ $ZFS_CHECK_OUTPUT == *not\ a\ ZFS* ]] then IS_ZFS=false else IS_ZFS=true fi if [[ $IS_ZFS = false ]] then df $CUR_PATH | tail -1 | awk '{print $2" "$4}' else USED=$((`zfs get -o value -Hp used $CUR_PATH` / 1024)) > /dev/null AVAIL=$((`zfs get -o value -Hp available $CUR_PATH` / 1024)) > /dev/null TOTAL=$(($USED+$AVAIL)) > /dev/null echo $TOTAL $AVAIL fi
Save the script as "dfree.sh" to /home/"yourlinuxusername" then change the ownership of the file to make it executable with this command:
sudo chmod 774 dfree.sh
Now open smb.conf with sudo again:
sudo nano /etc/samba/smb.conf
Now add this entry to the top of the configuration file to direct Samba to use the results of our script when Windows asks for a reading on the pool's used/available/total drive space:
[global]
dfree command = /home/"yourlinuxusername"/dfree.sh
Save the changes to smb.conf and then restart Samba again with the terminal:
sudo systemctl restart smbd
Now there’s one more thing we need to do to fully set up the Samba share, and that’s to modify a hidden group permission. In the terminal window type the following command:
usermod -a -G sambashare “yourlinuxusername”
Then restart samba again:
sudo systemctl restart smbd
If we don’t do this last step, everything will appear to work fine, and you will even be able to see and map the drive from Windows and even begin transferring files, but you'd soon run into a lot of frustration. As every ten minutes or so a file would fail to transfer and you would get a window announcing “0x8007003B Unexpected Network Error”. This window would require your manual input to continue the transfer with the file next in the queue. And at the end it would reattempt to transfer whichever files failed the first time around. 99% of the time they’ll go through that second try, but this is still all a major pain in the ass. Especially if you’ve got a lot of data to transfer or you want to step away from the computer for a while.
It turns out samba can act a little weirdly with the higher read/write speeds of RAIDz arrays and transfers from Windows, and will intermittently crash and restart itself if this group option isn’t changed. Inputting the above command will prevent you from ever seeing that window.
The last thing we're going to do before switching over to our Windows PC is grab the IP address of our Linux machine. Enter the following command:
hostname -I
This will spit out this computer's IP address on the local network (it will look something like 192.168.0.x), write it down. It might be a good idea once you're done here to go into your router settings and reserving that IP for your Linux system in the DHCP settings. Check the manual for your specific model router on how to access its settings, typically it can be accessed by opening a browser and typing http:\\192.168.0.1 in the address bar, but your router may be different.
Okay we’re done with our Linux computer for now. Get on over to your Windows PC, open File Explorer, right click on Network and click "Map network drive". Select Z: as the drive letter (you don't want to map the network drive to a letter you could conceivably be using for other purposes) and enter the IP of your Linux machine and location of the share like so: \\"LINUXCOMPUTERLOCALIPADDRESSGOESHERE"\"zpoolnamegoeshere"\. Windows will then ask you for your username and password, enter the ones you set earlier in Samba and you're good. If you've done everything right it should look something like this:

You can now start moving media over from Windows to the share folder. It's a good idea to have a hard line running to all machines. Moving files over Wi-Fi is going to be tortuously slow, the only thing that’s going to make the transfer time tolerable (hours instead of days) is a solid wired connection between both machines and your router.
Step Six: Setting Up Remote Desktop Access to Your Server
After the server is up and going, you’ll want to be able to access it remotely from Windows. Barring serious maintenance/updates, this is how you'll access it most of the time. On your Linux system open the terminal and enter:
sudo apt install xrdp
Then:
sudo systemctl enable xrdp
Once it's finished installing, open “Settings” on the sidebar and turn off "automatic login" in the User category. Then log out of your account. Attempting to remotely connect to your Linux computer while you’re logged in will result in a black screen!
Now get back on your Windows PC, open search and look for "RDP". A program called "Remote Desktop Connection" should pop up, open this program as an administrator by right-clicking and selecting “run as an administrator”. You’ll be greeted with a window. In the field marked “Computer” type in the IP address of your Linux computer. Press connect and you'll be greeted with a new window and prompt asking for your username and password. Enter your Ubuntu username and password here.

If everything went right, you’ll be logged into your Linux computer. If the performance is sluggish, adjust the display options. Lowering the resolution and colour depth do a lot to make the interface feel snappier.

Remote access is how we're going to be using our Linux system from now, barring edge cases like needing to get into the BIOS or upgrading to a new version of Ubuntu. Everything else from performing maintenance like a monthly zpool scrub to checking zpool status and updating software can all be done remotely.

This is how my server lives its life now, happily humming and chirping away on the floor next to the couch in a corner of the living room.
Step Seven: Plex Media Server/Jellyfin
Okay we’ve got all the ground work finished and our server is almost up and running. We’ve got Ubuntu up and running, our storage array is primed, we’ve set up remote connections and sharing, and maybe we’ve moved over some of favourite movies and TV shows.
Now we need to decide on the media server software to use which will stream our media to us and organize our library. For most people I’d recommend Plex. It just works 99% of the time. That said, Jellyfin has a lot to recommend it by too, even if it is rougher around the edges. Some people run both simultaneously, it’s not that big of an extra strain. I do recommend doing a little bit of your own research into the features each platform offers, but as a quick run down, consider some of the following points:
Plex is closed source and is funded through PlexPass purchases while Jellyfin is open source and entirely user driven. This means a number of things: for one, Plex requires you to purchase a “PlexPass” (purchased as a one time lifetime fee $159.99 CDN/$120 USD or paid for on a monthly or yearly subscription basis) in order to access to certain features, like hardware transcoding (and we want hardware transcoding) or automated intro/credits detection and skipping, Jellyfin offers some of these features for free through plugins. Plex supports a lot more devices than Jellyfin and updates more frequently. That said, Jellyfin's Android and iOS apps are completely free, while the Plex Android and iOS apps must be activated for a one time cost of $6 CDN/$5 USD. But that $6 fee gets you a mobile app that is much more functional and features a unified UI across platforms, the Plex mobile apps are simply a more polished experience. The Jellyfin apps are a bit of a mess and the iOS and Android versions are very different from each other.
Jellyfin’s actual media player is more fully featured than Plex's, but on the other hand Jellyfin's UI, library customization and automatic media tagging really pale in comparison to Plex. Streaming your music library is free through both Jellyfin and Plex, but Plex offers the PlexAmp app for dedicated music streaming which boasts a number of fantastic features, unfortunately some of those fantastic features require a PlexPass. If your internet is down, Jellyfin can still do local streaming, while Plex can fail to play files unless you've got it set up a certain way. Jellyfin has a slew of neat niche features like support for Comic Book libraries with the .cbz/.cbt file types, but then Plex offers some free ad-supported TV and films, they even have a free channel that plays nothing but Classic Doctor Who.
Ultimately it's up to you, I settled on Plex because although some features are pay-walled, it just works. It's more reliable and easier to use, and a one-time fee is much easier to swallow than a subscription. I had a pretty easy time getting my boomer parents and tech illiterate brother introduced to and using Plex and I don't know if I would've had as easy a time doing that with Jellyfin. I do also need to mention that Jellyfin does take a little extra bit of tinkering to get going in Ubuntu, you’ll have to set up process permissions, so if you're more tolerant to tinkering, Jellyfin might be up your alley and I’ll trust that you can follow their installation and configuration guide. For everyone else, I recommend Plex.
So pick your poison: Plex or Jellyfin.
Note: The easiest way to download and install either of these packages in Ubuntu is through Snap Store.
After you've installed one (or both), opening either app will launch a browser window into the browser version of the app allowing you to set all the options server side.
The process of adding creating media libraries is essentially the same in both Plex and Jellyfin. You create a separate libraries for Television, Movies, and Music and add the folders which contain the respective types of media to their respective libraries. The only difficult or time consuming aspect is ensuring that your files and folders follow the appropriate naming conventions:
Plex naming guide for Movies
Plex naming guide for Television
Jellyfin follows the same naming rules but I find their media scanner to be a lot less accurate and forgiving than Plex. Once you've selected the folders to be scanned the service will scan your files, tagging everything and adding metadata. Although I find do find Plex more accurate, it can still erroneously tag some things and you might have to manually clean up some tags in a large library. (When I initially created my library it tagged the 1963-1989 Doctor Who as some Korean soap opera and I needed to manually select the correct match after which everything was tagged normally.) It can also be a bit testy with anime (especially OVAs) be sure to check TVDB to ensure that you have your files and folders structured and named correctly. If something is not showing up at all, double check the name.
Once that's done, organizing and customizing your library is easy. You can set up collections, grouping items together to fit a theme or collect together all the entries in a franchise. You can make playlists, and add custom artwork to entries. It's fun setting up collections with posters to match, there are even several websites dedicated to help you do this like PosterDB. As an example, below are two collections in my library, one collecting all the entries in a franchise, the other follows a theme.

My Star Trek collection, featuring all eleven television series, and thirteen films.

My Best of the Worst collection, featuring sixty-nine films previously showcased on RedLetterMedia’s Best of the Worst. They’re all absolutely terrible and I love them.
As for settings, ensure you've got Remote Access going, it should work automatically and be sure to set your upload speed after running a speed test. In the library settings set the database cache to 2000MB to ensure a snappier and more responsive browsing experience, and then check that playback quality is set to original/maximum. If you’re severely bandwidth limited on your upload and have remote users, you might want to limit the remote stream bitrate to something more reasonable, just as a note of comparison Netflix’s 1080p bitrate is approximately 5Mbps, although almost anyone watching through a chromium based browser is streaming at 720p and 3mbps. Other than that you should be good to go. For actually playing your files, there's a Plex app for just about every platform imaginable. I mostly watch television and films on my laptop using the Windows Plex app, but I also use the Android app which can broadcast to the chromecast connected to the TV in the office and the Android TV app for our smart TV. Both are fully functional and easy to navigate, and I can also attest to the OS X version being equally functional.
Part Eight: Finding Media
Now, this is not really a piracy tutorial, there are plenty of those out there. But if you’re unaware, BitTorrent is free and pretty easy to use, just pick a client (qBittorrent is the best) and go find some public trackers to peruse. Just know now that all the best trackers are private and invite only, and that they can be exceptionally difficult to get into. I’m already on a few, and even then, some of the best ones are wholly out of my reach.
If you decide to take the left hand path and turn to Usenet you’ll have to pay. First you’ll need to sign up with a provider like Newshosting or EasyNews for access to Usenet itself, and then to actually find anything you’re going to need to sign up with an indexer like NZBGeek or NZBFinder. There are dozens of indexers, and many people cross post between them, but for more obscure media it’s worth checking multiple. You’ll also need a binary downloader like SABnzbd. That caveat aside, Usenet is faster, bigger, older, less traceable than BitTorrent, and altogether slicker. I honestly prefer it, and I'm kicking myself for taking this long to start using it because I was scared off by the price. I’ve found so many things on Usenet that I had sought in vain elsewhere for years, like a 2010 Italian film about a massacre perpetrated by the SS that played the festival circuit but never received a home media release; some absolute hero uploaded a rip of a festival screener DVD to Usenet. Anyway, figure out the rest of this shit on your own and remember to use protection, get yourself behind a VPN, use a SOCKS5 proxy with your BitTorrent client, etc.
On the legal side of things, if you’re around my age, you (or your family) probably have a big pile of DVDs and Blu-Rays sitting around unwatched and half forgotten. Why not do a bit of amateur media preservation, rip them and upload them to your server for easier access? (Your tools for this are going to be Handbrake to do the ripping and AnyDVD to break any encryption.) I went to the trouble of ripping all my SCTV DVDs (five box sets worth) because none of it is on streaming nor could it be found on any pirate source I tried. I’m glad I did, forty years on it’s still one of the funniest shows to ever be on TV.
Part Nine/Epilogue: Sonarr/Radarr/Lidarr and Overseerr
There are a lot of ways to automate your server for better functionality or to add features you and other users might find useful. Sonarr, Radarr, and Lidarr are a part of a suite of “Servarr” services (there’s also Readarr for books and Whisparr for adult content) that allow you to automate the collection of new episodes of TV shows (Sonarr), new movie releases (Radarr) and music releases (Lidarr). They hook in to your BitTorrent client or Usenet binary newsgroup downloader and crawl your preferred Torrent trackers and Usenet indexers, alerting you to new releases and automatically grabbing them. You can also use these services to manually search for new media, and even replace/upgrade your existing media with better quality uploads. They’re really a little tricky to set up on a bare metal Ubuntu install (ideally you should be running them in Docker Containers), and I won’t be providing a step by step on installing and running them, I’m simply making you aware of their existence.
The other bit of kit I want to make you aware of is Overseerr which is a program that scans your Plex media library and will serve recommendations based on what you like. It also allows you and your users to request specific media. It can even be integrated with Sonarr/Radarr/Lidarr so that fulfilling those requests is fully automated.
And you're done. It really wasn't all that hard. Enjoy your media. Enjoy the control you have over that media. And be safe in the knowledge that no hedgefund CEO motherfucker who hates the movies but who is somehow in control of a major studio will be able to disappear anything in your library as a tax write-off.
1K notes
·
View notes
Text
also guess which complainer about cevio/voisona's supposed lack of vocal dynamics controls finally Looked Up. and Discovered.
#IN MY DEFENSE on cevio its hidden by default you have to unhide it#but not in my defence it was just out there in voisona. but in my defense again i got scared by the key controls above it#what if the key signature controls kills me. what if i make eyecontact with it and it kills me#but this shit rules ITS NOT as versatile as my beloved sv tension parameter#you cant go from loud to soft within a note for example#BUT this still adds so so SO much. plus i like the usage of forte and piano for it#i like putting a bunch of pp all over my synth covers. normal thing to say#OH ANOTHER THING IN MY DEFENSE for me not looking at the big black bar and seeing the controls is that there are Not many cevio tutorials#in english or otherwise. most are a little basic or too old so they dont mention these parts. i did watch a few japanese tutorials#most were also too old so they have different UI BUT i did watch one where the dude started fucking with dynamics and i was like WHAT#besides most unofficial tutorials and manuals especially in the english speaking world like Only focus on pitch editing. WHICH makes#a BIT of sense in that older software basically just had that + breathiness and maybe formant as things to edit. but we live in the future#i think there is much more to play with than just pitch bends especially with newer software. lot of fun to be had!!#ia has a really nice special type of phoneme in cevio that makes her go suuuuper soft and relaxed which im having fun playing with!
3 notes
·
View notes
Text
Dirty words are politically potent

On OCTOBER 23 at 7PM, I'll be in DECATUR, presenting my novel THE BEZZLE at EAGLE EYE BOOKS.

Making up words is a perfectly cromulent passtime, and while most of the words we coin disappear as soon as they fall from our lips, every now and again, you find a word that fits so nice and kentucky in the public discourse that it acquires a life of its own:
http://meaningofliff.free.fr/definition.php3?word=Kentucky
I've been trying to increase the salience of digital human rights in the public imagination for a quarter of a century, starting with the campaign to get people to appreciate that the internet matters, and that tech policy isn't just the delusion that the governance of spaces where sad nerds argue about Star Trek is somehow relevant to human thriving:
https://www.newyorker.com/magazine/2010/10/04/small-change-malcolm-gladwell
Now, eventually people figured out that a) the internet mattered and, b) it was going dreadfully wrong. So my job changed again, from "how the internet is governed matters" to "you can't fix the internet with wishful thinking," for example, when people said we could solve its problems by banning general purpose computers:
https://memex.craphound.com/2012/01/10/lockdown-the-coming-war-on-general-purpose-computing/
Or by banning working cryptography:
https://memex.craphound.com/2018/09/04/oh-for-fucks-sake-not-this-fucking-bullshit-again-cryptography-edition/
Or by redesigning web browsers to treat their owners as threats:
https://www.eff.org/deeplinks/2017/09/open-letter-w3c-director-ceo-team-and-membership
Or by using bots to filter every public utterance to ensure that they don't infringe copyright:
https://www.eff.org/deeplinks/2018/09/today-europe-lost-internet-now-we-fight-back
Or by forcing platforms to surveil and police their users' speech (aka "getting rid of Section 230"):
https://www.techdirt.com/2020/06/23/hello-youve-been-referred-here-because-youre-wrong-about-section-230-communications-decency-act/
Along the way, many of us have coined words in a bid to encapsulate the abstract, technical ideas at the core of these arguments. This isn't a vanity project! Creating a common vocabulary is a necessary precondition for having the substantive, vital debates we'll need to tackle the real, thorny issues raised by digital systems. So there's "free software," "open source," "filternet," "chat control," "back doors," and my own contributions, like "adversarial interoperability":
https://www.eff.org/deeplinks/2019/10/adversarial-interoperability
Or "Competitive Compatibility" ("comcom"), a less-intimidatingly technical term for the same thing:
https://www.eff.org/deeplinks/2020/12/competitive-compatibility-year-review
These have all found their own niches, but nearly all of them are just that: niche. Some don't even rise to "niche": they're shibboleths, insider terms that confuse and intimidate normies and distract from the real fights with semantic ones, like whether it's "FOSS" or "FLOSS" or something else entirely:
https://opensource.stackexchange.com/questions/262/what-is-the-difference-between-foss-and-floss
But every now and again, you get a word that just kills. That brings me to "enshittification," a word I coined in 2022:
https://pluralistic.net/2022/11/28/enshittification/#relentless-payola
"Enshittification" took root in my hindbrain, rolling around and around, agglomerating lots of different thoughts and critiques I'd been making for years, crystallizing them into a coherent thesis:
https://pluralistic.net/2023/01/21/potemkin-ai/#hey-guys
This kind of spontaneous crystallization is the dividend of doing lots of work in public, trying to take every half-formed thought and pin it down in public writing, something I've been doing for decades:
https://pluralistic.net/2021/05/09/the-memex-method/
After those first couple articles, "enshittification" raced around the internet. There's two reasons for this: first, "enshittification" is a naughty word that's fun to say. Journalists love getting to put "shit" in their copy:
https://www.nytimes.com/2024/01/15/crosswords/linguistics-word-of-the-year.html
Radio journalists love to tweak the FCC with cheekily bleeped syllables in slightly dirty compound words:
https://www.wnycstudios.org/podcasts/otm/projects/enshitification
And nothing enlivens an academic's day like getting to use a word like "enshittification" in a journal article (doubtless this also amuses the editors, peer-reviewers, copyeditors, typesetters, etc):
https://scholar.google.com/scholar?hl=en&as_sdt=0%2C5&q=enshittification&btnG=&oq=ensh
That was where I started, too! The first time I used "enshittification" was in a throwaway bad-tempered rant about the decay of Tripadvisor into utter uselessness, which drew a small chorus of appreciative chuckles about the word:
https://twitter.com/doctorow/status/1550457808222552065
The word rattled around my mind for five months before attaching itself to my detailed theory of platform decay. But it was that detailed critique, coupled with a minor license to swear, that gave "enshittification" a life of its own. How do I know that the theory was as important as the swearing? Because the small wave of amusement that followed my first use of "enshittification" petered out in less than a day. It was only when I added the theory that the word took hold.
Likewise: how do I know that the theory needed to be blended with swearing to break out of the esoteric realm of tech policy debates (which the public had roundly ignored for more than two decades)? Well, because I spent two decades writing about this stuff without making anything like the dents that appeared once I added an Anglo-Saxon monosyllable to that critique.
Adding "enshittification" to the critique got me more column inches, a longer hearing, a more vibrant debate, than anything else I'd tried. First, Wired availed itself of the Creative Commons license on my second long-form article on the subject and reprinted it as a 4,200-word feature. I've been writing for Wired for more than thirty years and this is by far the longest thing I've published with them – a big, roomy, discursive piece that was run verbatim, with every one of my cherished darlings unmurdered.
That gave the word – and the whole critique, with all its spiky corners – a global airing, leading to more pickup and discussion. Eventually, the American Dialect Society named it their "Word of the Year" (and their "Tech Word of the Year"):
https://americandialect.org/2023-word-of-the-year-is-enshittification/
"Enshittification" turns out to be catnip for language nerds:
https://becauselanguage.com/90-enpoopification/#transcript-60
I've been dragged into (good natured) fights over the German, Spanish, French and Italian translations for the term. When I taped an NPR show before a live audience with ASL interpretation, I got to watch a Deaf fan politely inform the interpreter that she didn't need to finger-spell "enshittification," because it had already been given an ASL sign by the US Deaf community:
https://maximumfun.org/episodes/go-fact-yourself/ep-158-aida-rodriguez-cory-doctorow/
I gave a speech about enshittification in Berlin and published the transcript:
https://pluralistic.net/2024/01/30/go-nuts-meine-kerle/#ich-bin-ein-bratapfel
Which prompted the rock-ribbed Financial Times to get in touch with me and publish the speech – again, nearly verbatim – as a whopping 6,400 word feature in their weekend magazine:
https://www.ft.com/content/6fb1602d-a08b-4a8c-bac0-047b7d64aba5
Though they could have had it for free (just as Wired had), they insisted on paying me (very well, as it happens!), as did De Zeit:
https://www.zeit.de/digital/internet/2024-03/plattformen-facebook-google-internet-cory-doctorow
This was the start of the rise of enshittification. The word is spreading farther than ever, in ways that I have nothing to do with, along with the critique I hung on it. In other words, the bit of string that tech policy wonks have been pushing on for a quarter of a century is actually starting to move, and it's actually accelerating.
Despite this (or more likely because of it), there's a growing chorus of "concerned" people who say they like the critique but fret that it is being held back because you can't use it "at church or when talking to K-12 students" (my favorite variant: "I couldn't say this at a NATO conference"). I leave it up to you whether you use the word with your K-12 students, NATO generals, or fellow parishoners (though I assure you that all three groups are conversant with the dirty little word at the root of my coinage). If you don't want to use "enshittification," you can coin your own word – or just use one of the dozens of words that failed to gain public attention over the past 25 years (might I suggest "platform decay?").
What's so funny about all this pearl-clutching is that it comes from people who universally profess to have the intestinal fortitude to hear the word "enshittification" without experiencing psychological trauma, but worry that other people might not be so strong-minded. They continue to say this even as the most conservative officials in the most staid of exalted forums use the word without a hint of embarrassment, much less apology:
https://www.independent.ie/business/technology/chairman-of-irish-social-media-regulator-says-europe-should-not-be-seduced-by-mario-draghis-claims/a526530600.html
I mean, I'm giving a speech on enshittification next month at a conference where I'm opening for the Secretary General of the United Nations:
https://icanewdelhi2024.coop/welcome/pages/Programme
After spending half my life trying to get stuff like this into the discourse, I've developed some hard-won, informed views on how ideas succeed:
First: the minor obscenity is a feature, not a bug. The marriage of something long and serious to something short and funny is a happy one that makes both the word and the ideas better off than they'd be on their own. As Lenny Bruce wrote in his canonical work in the subject, the aptly named How to Talk Dirty and Influence People:
I want to help you if you have a dirty-word problem. There are none, and I'll spell it out logically to you.
Here is a toilet. Specifically-that's all we're concerned with, specifics-if I can tell you a dirty toilet joke, we must have a dirty toilet. That's what we're all talking about, a toilet. If we take this toilet and boil it and it's clean, I can never tell you specifically a dirty toilet joke about this toilet. I can tell you a dirty toilet joke in the Milner Hotel, or something like that, but this toilet is a clean toilet now. Obscenity is a human manifestation. This toilet has no central nervous system, no level of consciousness. It is not aware; it is a dumb toilet; it cannot be obscene; it's impossible. If it could be obscene, it could be cranky, it could be a Communist toilet, a traitorous toilet. It can do none of these things. This is a dirty toilet here.
Nobody can offend you by telling a dirty toilet story. They can offend you because it's trite; you've heard it many, many times.
https://www.dacapopress.com/titles/lenny-bruce/how-to-talk-dirty-and-influence-people/9780306825309/
Second: the fact that a neologism is sometimes decoupled from its theoretical underpinnings and is used colloquially is a feature, not a bug. Many people apply the term "enshittification" very loosely indeed, to mean "something that is bad," without bothering to learn – or apply – the theoretical framework. This is good. This is what it means for a term to enter the lexicon: it takes on a life of its own. If 10,000,000 people use "enshittification" loosely and inspire 10% of their number to look up the longer, more theoretical work I've done on it, that is one million normies who have been sucked into a discourse that used to live exclusively in the world of the most wonkish and obscure practitioners. The only way to maintain a precise, theoretically grounded use of a term is to confine its usage to a small group of largely irrelevant insiders. Policing the use of "enshittification" is worse than a self-limiting move – it would be a self-inflicted wound. As I said in that Berlin speech:
Enshittification names the problem and proposes a solution. It's not just a way to say 'things are getting worse' (though of course, it's fine with me if you want to use it that way. It's an English word. We don't have der Rat für englische Rechtschreibung. English is a free for all. Go nuts, meine Kerle).
Finally: "coinage" is both more – and less – than thinking of the word. After the American Dialect Society gave honors to "enshittification," a few people slid into my mentions with citations to "enshittification" that preceded my usage. I find this completely unsurprising, because English is such a slippery and playful tongue, because English speakers love to swear, and because infixing is such a fun way to swear (e.g. "unfuckingbelievable"). But of course, I hadn't encountered any of those other usages before I came up with the word independently, nor had any of those other usages spread appreciably beyond the speaker (it appears that each of the handful of predecessors to my usage represents an act of independent coinage).
If "coinage" was just a matter of thinking up the word, you could write a small python script that infixed the word "shit" into every syllable of every word in the OED, publish the resulting text file, and declare priority over all subsequent inventive swearers.
On the one hand, coinage takes place when the coiner a) independently invents a word; and b) creates the context for that word that causes it to escape from the coiner's immediate milieu and into the wider world.
But on the other hand – and far more importantly – the fact that a successful coinage requires popular uptake by people unknown to the coiner means that the coiner only ever plays a small role in the coinage. Yes, there would be no popularization without the coinage – but there would also be no coinage without the popularization. Words belong to groups of speakers, not individuals. Language is a cultural phenomenon, not an individual one.
Which is rather the point, isn't it? After a quarter of a century of being part of a community that fought tirelessly to get a serious and widespread consideration of tech policy underway, we're closer than ever, thanks, in part, to "enshittification." If someone else independently used that word before me, if some people use the word loosely, if the word makes some people uncomfortable, that's fine, provided that the word is doing what I want it to do, what I've devoted my life to doing.
The point of coining words isn't the pilkunnussija's obsession with precise usage, nor the petty glory of being known as a coiner, nor ensuring that NATO generals' virgin ears are protected from the word "shit" – a word that, incidentally, is also the root of "science":
https://www.arrantpedantry.com/2019/01/24/science-and-shit/
Isn't language fun?
Tor Books as just published two new, free LITTLE BROTHER stories: VIGILANT, about creepy surveillance in distance education; and SPILL, about oil pipelines and indigenous landback.

If you'd like an essay-formatted version of this post to read or share, here's a link to it on pluralistic.net, my surveillance-free, ad-free, tracker-free blog:
https://pluralistic.net/2024/10/14/pearl-clutching/#this-toilet-has-no-central-nervous-system
306 notes
·
View notes
Text
How to Deal with Windows 10/11 Nonsense
This is more for my own reference to keep all of this on one post. But hopefully others will find this useful too! So yeah, as the title says, this is a to organize links and resources related to handling/removing nonsense from Windows 10 and Windows 11. Especially bloatware and stuff like that Copilot AI thing.
First and foremost, there's O&O Software's ShutUp10++ (an antispy tool that help give you more control over Windows settings) and App Buster (helps remove bloatware and manage applications). I've used these myself for Windows 10 and they work great, and the developers have stated that these should work with Windows 11 too!
10AppsManager is another bloatware/app management tool, though at the moment it seems to only work on Windows 10.
Winaero Tweaker, similar to ShupUp10++ in that it gives you more control over Windows to disable some of the more annoying settings, such as disabling web search from the taskbar/start menu and disabling ads/tips/suggestions in different parts of the OS. I think ShupUp10++ covers the same options as this one, but I'm not entirely sure.
OpenShell, helps simplify the Start Menu and make it look more like the classic start menu from older versions of Windows. Should work with both 10 and 11 according to the readme.
Notes on how to remove that one horrible AI spying snapshots feature that's being rolled out on Windows 11 right now.
Article on how to remove Copilot (an AI assistant) from Windows 11. (Edit 11/20/2024) Plus a post with notes on how to remove it from Windows 10 too, since apparently it's not just limited to 11 now.
Win11Debloat, a simple script that can be used to automatically remove pretty much all of the bullshit from both 10 and 11, though a lot of its features are focused on fixing Windows 11 in particular (hence the name). Also has options you can set to pick and choose what changes you want!
Article on how to set up Windows 11 with a local account on a new computer, instead of having to log in with a Microsoft account. To me, this is especially important because I much prefer having a local account than let Microsoft have access to my stuff via a cloud account. Also note this article and this article for more or less the same process.
I will add to this as I find more resources. I'm hoping to avoid Windows 11 for as long as possible, and I've already been used the O&O apps to keep Windows 10 trimmed down and controlled. But if all else fails and I have to use Windows 11 on a new computer, then I plan to be as prepared as possible.
Edit 11/1/2024: Two extra things I wanted to add onto here.
A recommended Linux distro for people who want to use Linux instead of Windows.
How to run a Windows app on Linux, using Wine. Note that this will not work for every app out there, though a lot of people out there are working on testing different apps and figuring out how to get them to work in Wine.
The main app I use to help with my art (specifically for 3D models to make references when I need it) is Windows only. If I could get it to work on Linux, it would give me no reason to use Windows outside of my work computer tbh (which is a company laptop anyways).
427 notes
·
View notes
Text
Let's talk about vintage lenses.
Here is your cool samurai show with modern lenses.

Here is your cool samurai show with vintage lenses.

Hollywood is no stranger to fads.
We are currently in the middle of a "make everything too dark" fad. But that fad is starting to overlap with "let's use really old lenses on ridiculously high resolution cameras."
This is Zack Snyder with a Red Monstro 8K camera.

He is using a "rehoused" vintage 50mm f/0.95 Canon "Dream Lens" which was first manufactured in 1961.

This old lens is put inside a fancy new body that can fit onto modern cameras.

Which means Zack is getting nowhere near 8K worth of detail. These lenses are not even close to being sharp. Which is fine. I think the obsession with detail can get a bit silly and sometimes things can be "too sharp."
But it is a funny juxtaposition.
The dream lens is a cool lens. It has character. It has certain aberrations and defects that can actually be beneficial to making a cool photograph. It's a bit like vinyl records for photography.

[ Peter Thoeny ]
It has vignetting and distortion and a very strange swirly background blur.

[ Gabriel Binder ]
Optical engineers have been spending the last 60 years trying to eliminate these defects. And I sometimes wonder if they are confused by this fad.
"I WORKED 70 HOURS PER WEEK TO GET PERFECT CORNER SHARPNESS!"
And whether you prefer to work with a perfect optic or a vintage one... it is a valid aesthetic decision either way. I think vintage glass can really suit candid natural light photography. You can almost get abstract with these lenses.

[ Peter Theony ]
Personally I like to start with as close to perfect as possible and then add the character in later. That way I can dial in the effect and tweak how much of it I want. But even with modern image editing tools, some of these aberrations are difficult to recreate authentically.
That said, it can be very easy for the "character" of these lenses to become distracting. And just like when someone first finds the lens flares in Photoshop, it can be easy for people to overdo things.

Zack Snyder decided to be his own cameraman and used only vintage glass in his recent movies and it has led to some complaints about the imagery.
I mean, Zack Snyder overdoing something? I can't even imagine it.
Non camera people felt Army of the Dead was blurry and a bit weird but they couldn't quite explain why it felt that way.
The dream lens has a very wide aperture and it lets in a lot of light. But it also has a very very shallow depth of field. Which means it is very difficult to nail focus.

[ Peter Thoeny ]
Her near eye is in focus and her far eye is soft. You literally can't get an entire face in focus.
There is no reason you have to use the dream lens at f/0.95 at all times. But just like those irresistible lens flares, Zack couldn't help himself.
Here is a blueprint that you can't really see.

Extreme close ups of faces without autofocus at f/0.95 is nearly impossible to pull critical focus on.

Looks like Zack nailed the area just above the eyebrow here.
Let's try to find the point of focus in this one.

Ummmm... she is just... blurry. Missed focus completely.
But Zack isn't the only one going vintage. I've been seeing this a lot recently.
Shogun is a beautiful show. And for the most part, I really enjoyed the cinematography. But they went the vintage lens route and it kept going from gorgeous to "I can't not see it" distracting. And perhaps because I am familiar with these lens defects I am more prone to noticing. But I do think it hurt the imagery in a few spots.
Vingetting is a darkening of the corners of the frame.

Light rays in the corners are much harder to control. A lot of modern lenses still have this problem, but they create software corrections to eliminate the issue. Some cameras do it automatically as you are recording the image.
Vintage lenses were built before lens corrections where a thing—before software was a thing. So you either have to live with them, try to remove them with VFX, or crop into your image and lose some resolution.
It's possible this is the aesthetic they wanted. They felt the vignetting added something to the image. But I just found my eyes darting to the corners and not focusing on the composition.
And then you have distortion.

In this case, barrel distortion.
This is mostly prominent in wide angle lenses. In order to get that wider field of view the lens has to accept light from some very steep angles. And that can be quite difficult to correct. So you kind have to sacrifice any straight lines.

And sometimes this was a positive contribution to the image.

I thought the curved lines matched the way they were sitting here.
But most of the time I just felt like I was looking at feudal Japan through a fish's eye.


It's a bit more tolerable as a still, but when all of these verticals are bowing in motion, I start to feel like I am developing tunnel vision.
I love that this is a tool that is available. Rehousing lenses is a really neat process and I'm glad this old glass is getting new life.
This documentary shows how lens rehousing is done and is quite fascinating if you are in to that sort of thing.
youtube
But I think we are in a "too much of a good thing" phase when it comes to these lenses. I think a balance between old and new can be found.
And I also think maybe Zack should see what f/2.8 looks like. He might like having more than an eyebrow in focus.
446 notes
·
View notes