#free animation software for mac
Explore tagged Tumblr posts
Visit Tumblr Blog
Explore Tumblr blogs with no restrictions, modern design and the best experience.
Last Seen Tumblr Blogs


Fun Fact
After the announcement of the deal with Yahoo!, there were 170K signatures of unhappy Tumblr users petitioning to prevent the sale in 2013.
Text
#free animation software for mac#animation software free#animation software#animation software for kid#free animation software for android
3 notes
·
View notes
Text
#Animation Software for Mac#Free Animation Software for Mac#Free Animation Software for Beginners#Free Animation Software#Animation Software free
0 notes
Text
#free whiteboard animation software#whiteboard animation software free#free animation software#whiteboard animation free#free whiteboard animation software for mac#whiteboard doodles
0 notes
Text

COLORING + SHARPENING TUTORIAL
someone asked for a coloring tutorial and my sharpening settings, so here it is! there are also a few tips to achieve more HQ gifs. :)
tutorial under the cut!
FOR HIGH-QUALITY GIFS
FILE SIZES
it doesn’t matter what your sharpening settings are if the file you’re using to gif is too low quality, so i tend to look for the best that i can get when downloading stuff.
usually, movies (+2h) look better if they’re 5GB or more, while an episode (40 min/1h) can look good with even 1GB. the minimum definition i try to find is 1080p, but i gif with 2160p (4k) when available. unfortunately, not every computer can handle 4k, but don’t worry, you can gif with 1080p files just fine if they are big enough. contrary to popular belief, size does matter! which means sometimes a bigger 1080p file is better than a smaller 2160p one, for example.
SCREENCAPPING METHOD
this can too influence the quality of your gifs. as a gifmaker, i’ve tried it all: video frames to layers, directly opening video clips, loading files into stack, and i’ve finally settled down with opening screencaps as an image sequence. with bigger files, it doesn’t matter much what technique you use, but i’ve noticed with smaller files you can do wonders if you screencap (either by loading files into stack or opening as an image sequence) instead of using video clips. for example, this gif’s original video file was only 4GB (so smaller than i’ve usually go for), if you can believe it!

here’s a tutorial for setting up and screencapping with MPV, the media player i use to screencap. again, you can keep using video clips for bigger files, but you’ll find this useful when dealing with dire causes. i don't file loads into stack, though, like the video does. i open as an image sequence (open > screencap folder > select any image > click the image sequence button). just select OK for the speed. this will open your screencaps as a video clip (blue bar) in timeline mode (i'm a timeline gifmaker, i don't know about you). you will need this action pack to convert the clip into frames if you're a frames gifmaker. i suggest you convert them into frames even if you're a timeline gifmaker, just convert them into a timeline again at the end. that way you can delete the screencaps right away, otherwise you will delete the screencaps and get a static image as a "gif".

ATTENTION if you’re a Mac Sonoma user, MPV won’t be an option for you unless you downgrade your system. that is, if you have an Intel chip. if you have M1 Max chip (or even a better one), here’s a fix for MPV you can try while keeping that MacOS, because nowadays MPV is skipping frames in its latest build. or you can use MPlayer instead for less hassle. here are two tutorials for setting and using MPlayer. Windows users are fine, you can use MPV without trouble.
FOR EVEN MORE QUALITY
ADD NOISE
here’s a tutorial for adding noise as a way to achieve more HQ gifs if your original material is too low quality.
REDUCE NOISE WITH CAMERA RAW
instead of adding noise, you can reduce it, especially if your gif is very noisy as it is.
the path is filter > camera raw > detail > nose reduction. i do this before sharpening, but only my video file isn't great to begin with. because it’s a smart filter, you can reduce or increase its opacity by clicking the bars next to its name in the layers panel.
TOPAZ AI
i use Topaz Photo AI to increase the quality of my screencaps when i need to. it’s paid software, but there are… ways to find it for free, usually on t0rrent websites. if someone’s interested, i can make a tutorial solely about it in the future.
SHARPENING SETTINGS
here are my sharpening settings (filter > sharpen > smart sharpen). i sharpen things twice: 500% 0.4px + 10% 10px. here's an action for it, for more convenience. here's a tutorial on how to use Photoshop actions. for animated stuff, i use this action pack.

COLORING
here’s the gif i'm gonna use as a base. it’s already sharpened like the way i always do it.

LIGHTNING THE SHOTS
half of the secret of a good coloring is good lightning. i always useCurves (layers > new adjustment layer > curves) and Brightness & Contrast (layers > new adjustment layer > brightness & contrast). the settings depend on the scene you’re giffing, but i always try make my gifs bright and with high contrast to make the colors pop.
CURVES
besides lighting your scene, the Curves adjustment layer has four automatic options that will color-correct it for you. it’s not always perfect and it doesn’t mean you won’t need to do further coloring, but it’s a great start. it’s a lifesaver for most ridiculously yellow scenes. look at the difference! this gif uses the 3rd automatic option (the screenshot below isn't mine btw so that's why the fourth option is the chosen one), from top to bottom. what automatic option you need to choose depends on the gif.


sometimes i like to tweak my Curves layer. not everybody does that, it’s not that necessary and if you’re not careful, it can screw your gif up. to modify your layer by hand, you will need to click and drag points of that straight line in the position you desire. this is the concept behind it:

basically, the lower part of the line handles the shadows, while the upper part handles the highlights of the image. if you pull a highlight point up, the image’s highlights will be brighter. if you pull it down, it will make them darker. same thing for the shadow points. you should play with it to get a grasp of it, that’s what i did when i first started giffing.
BRIGHTNESS & CONTRAST
then i added a bit of brightness and contrast.

CHANNEL MIXER
the scene looked a bit too yellow, so i used the Channel Mixer (layer > new adjustment layer > channel mixer) adjustment layer. here’s a tutorial of how it works. not every scene needs the Channel Mixer layer though, i mostly use it to remove heavy overall tints. in this particular case, the Curves layer got rid of most of the yellow, but i wanted the gif to be just a bit more blue so the Channel Mixer tweaks are very minimal.

SELECTIVE COLOR
now, this adjustment layer i always use: Selective Color (layer > new adjustment layer > selective color). this is THE adjustment layer to me, alongside the Curves one. this is how it works:

ie, you can separately edit a color this way, giving it tints. for this gif, i wanted to make the colors more vibrant. to achieve that, i edited the selected colors this way:

for the reds, i added even more red in them by moving the first slider to the right, making the color more vibrant. for his hat to have a more warm tint, i added yellow to the reds (third slider, moving it to the right). finally, to make the reds stronger, i moved the last slider to the right (more black).
for the yellows, i made them brighter by adding white to them, thus making the tile wall and Paddington more bright as well.
for the cyans and the blues, i just added the maximum (+100) of black that i could.
i wanted for Paddington's nose to be brighter, so i added more white to the whites.
lastly, i added depth to the blacks by increasing their own blackness.
you should always play with the Selective Colors sliders for a bit, before deciding what you want or need. with time, you will automatically know what to change to correct the color grading. it all takes practice!
HUE/SATURATION
i don’t know if you noticed, but there are some green spots on the blue wall behind Paddington. to correct that, i added a Hue/Saturation adjustment layer (layer > new adjustment layer > hue/saturation) and made the saturation of the greens 0%, making that unwanted green disappear from the background.

while the green spots on the wall are specific for this gif, i use hue/saturation a lot to tweak, well, hue and saturation. sometimes someone’s skin is too yellow, i made it redder by tweaking the reds and the yellows, or vice-versa. the hue bar follows the rainbow bar, so the maximum settings (+100 and -100) give the selected color to change its hue to something more red or pink (the rainbow extremities). changing hue can give pretty whacky results, like turning someone’s skin tone to green, so you will need to play with it to get the hang of it. you can also tweak the opacity of your hue/saturation layer to further improve your gif’s coloring. i didn’t do it in this case, the opacity is still 100%. the reds and the blues had their saturation increased to make them pop just a bit more, without affecting the other colors.
COLOR BALANCE
the highlights of the gif still had a green tint to it due to the automatic correction of the Curves layer, so i used Color Balance. this is how it works: instead of giving specific colors some tints, you can give them to the shadows, highlights, and mid-tones. if your shadows are too blue, you counterbalance them with the opposite color, yellow. same thing with the cyan-red and magenta-green pairings. in my case, i added a bit of magenta.


B&W GRADIENT MAP
now, if this gif was a dish, it’s time for the salt and pepper. i always add a Gradient Map (layer > new adjustment layer > gradient map) (black to white gradient) with the Soft Light blending mode, thus giving my shadows more depth without messing with the mid-tones and highlights. it also doesn’t “deep fry” (you know those memes?) the gif too much by adding even more contrast. usually, the opacity of the layer is between 30% to 70%, it all depends on the gif. it always does wonders, though!

COLOR FILTER
finally, i like to add Color Filters (layer > new adjustment layer > color filter) to my gifs. it’s very handy when giving different scenes for the same minimalistic set because it makes them kind of match despite having completely different colors. in this gif’s case, i added a “deep blue” filter, opacity 50% density 25. you can change the density and the opacity of the layer for further editing, again, it all depends on the gif.

VIBRANCE
if i feel like it, i add a vibrance layer (layer > new adjustment layer > vibrance) to make the colors pop. this can ruin your coloring sometimes, especially when regarding skin color, so be careful. i didn't do it in this gif because i felt i didn't need it.
TA-DA! 🥳
AN OTHER EXAMPLE
the color grading of the original scene it’s pretty good as it is, to be honest. let’s see a worse scenario, a VERY yellow one:


no channel mixer this time because the automatic curves option dealt with the yellowness, but you can see it made the gif too green. i needed to correct that with the following adjustment layers:
curves (automatic option) (gif 2) >> same curves layer (tweaks) (gif 3) >> brightness & contrast (gif 4) >> hue/saturation (tweaked cyan+blue+green) >> selective color >> color balance (gif 5) >> b&w gradient map >> (sepia) filter >> vibrance (gif 6)
i added a hue/saturation layer to remove the blues & greens before my selective color layer because i thought that was more urgent than tweaking the tint of all colors. color balance (gif 4) was the real hero here, though, by removing the green tint. the selective color layer was meant to make the red pop more than anything else, because the rest looked pretty good, especially her skin tone (despite the green tint). you can notice that tweaking the curves layer (small gif 3) also helped A LOT with the green problem.
tl;dr ���💫😵💫😵💫
here's a list of my go-to's while coloring and lightning gifs. it's not a rule, just a guide. there are gifs in which i don't use all these adjustment layers, or use them in a different order. it all depends!
1. curves (automatic option + tweaks) 2. brightness & contrast 3. channel mixer 4. selective color 5. hue/saturation 6. color balance 7. b&w gradient map 8. color filter 9. vibrance
i'll suggest that you study each adjustment layer listed for more info, either with other Tumblr tutorials or YouTube ones. the YouTube ones focus on images, but you can translate what they teach to gif making very easily. you can ask me to further explain any adjustment layer, too! i was brief to keep this short (which i kinda failed lol).
feel free to ask me for clarification or something else about gifmaking wise, i always like to help. ❤️
#*#*tutorials#gifmaker tag#resources#resource: tutorials#ps help#uservivaldi#tuserjen#userrin#userelio#useralien#userzaynab#userchibi#userbuckleys#usertj#userbess#tuserlucie#useraljoscha#userdavid#usershreyu#usernolan#userhallie#userisaiah#tusergio#tusergeo#userjesslynn
740 notes
·
View notes
Note
Do you have any tips/useful information for people who want to start making audio rps?
(Also love ur content sm!!! Mitch is the most lovable little guy)
Aw thank you so much! Love him too!
This is a great question, had to think about it for a bit;
If you want to dabble with making audios, feel free to start off with public scripts! I think there's subreddits like ASMR script haven (IIRC?) that has public scripts that can be filled by anyone. Just be sure to read the author's conditions carefully i.e. credit, terms of use, what can be changed etc. Right at the start I recorded a public script to try and get started, it's a great way to just jump right into making something to learn the ropes of it without also first having to write an entire script for it too. Filling public scripts is a fantastic way to start off, however I reckon writing your own stories is a major part of the fun!
You don't need an expensive mic, but audio quality is a very important factor. Do some test recordings and listen back to them (with headphones!) and see how it sounds. This is especially important for whispered scenes (DO NOT get too close to the mic or breathe on it!) or loud scenes (DO NOT peak the mic!). If your mic has a gain / input dial, play with that before recording! Just start with mono to begin with, play with stereo if your mic supports it after you become familiar with it. Aim for your recording to be no louder than -6db at the highest, if you can keep your voice roughly between like -20 and -6 that tends to sound reasonably natural.
Do your best to eliminate external sounds! If you have AC or anything like that on, turn it off. I have to shut down my main PC and record with only my editing Mac on because the PC fans are much louder and my mic is very sensitive! There'll pretty much always be background fuzz, some mics will just have some, but try to make your room as quiet as you can. Your software may have some background noise removal tools, I use filters for that (expensive so I can't recommend them), but DO NOT use the noise removal tool in Audacity! It's terrible!
Speaking of, Audacity is decent to get started with. It's good basic recording software, plus multiplatform. For a while I preferred recording on Windows with Audiodope, also very simple, plus I liked that it asks me whether I wanted to record in mono or stereo first in case I forget to switch, I currently record on Mac with ocenaudio which does the same, while Audacity won't ask, you have to go into settings. Anyway Audacity is okay to start with for editing, it's free, but from what I understand it's a "destructive" editing software in that after you make a change like adding a filter, you can't then go back in and change it other than just undoing, which I really don't like, plus changing the timing of things looks fiddly. I don't know what to recommend to move up from, I've heard good stuff about Reaper but it looks very complicated. Avoid Adobe unless you have a free subscription from somewhere else. I edit entirely in Final Cut Pro so I can't recommend that unless you're on Mac, plus it's my old work software and expensive! If you need sound effects, I use freesound.org, there are other great free resources as well, but make sure you check each individual sound effect's license before use.
Once you've edited the audio and want to turn it into a video, I've heard good stuff about Da Vinci Resolve and Kden Live, both are free! Make a video canvas of 1920 x 1080, FPS doesn't especially matter if you only have a still thumbnail, 25 or 30 is fine, and render it out as a h264 mp4 if you're not sure what to select! Good compression for internet video, good for streaming. Try to record and export your audio as wav if you have enough space, wav is uncompressed audio so it maintains full quality but they can get large.
I also make my thumbnails in-edit but you may want to use external software like Gimp to make them. Avoid getting random stuff of google especially anime boys / girls, and definitely don't ever use an artist's stuff without asking for permission + giving proper credit. Using pre-built generators like Picrew is totally fine, just be sure to credit where you got it from, but 100% avoid AI generators, obviously. Be careful with Adobe stock images, apparently there's AI slop in there too. You don't need art for audios though, they're a nice to have bonus, but many of my most viewed videos have no art at all. If you need background images, I like unsplash.com because it has a free license! Read over it yourself but basically you're able to use pretty much any image they have in your videos!
Just jump in and try making something small, never start with your magnum opus! I started with the introverted incubus character because I'm a very shy person myself, it was an easier role to get started with! If you want to start writing your own scripts too there's a lot we could talk about there as well, just try to picture the scene from the perspective of the listener, what they may be thinking or feeling at any given moment, not just the perspective of the character you're going to be playing!
This was a lot and I don't think I covered much, I hope some of it helps though!!
48 notes
·
View notes
Text

i made some cute food themed mouse cursors! read more if you want them for yourself
you guys can use these for anything btww idgaf also feel free to request more and i may get around 2 them eventually
[*NOTE: the pixel art above has been resized and is NOT the same as the .cur files, you have to download and use those. Link below.]
cursor file download (WeTransfer) (dm me if link expires)
Cursor replacement tutorial for a Windows PC (sorry mac users):
Open the Start Menu or press the Windows button
Type "Mouse" and hit enter
Click "Additional Mouse Options"
In the pop-up, go to the tab labeled "Pointers"
Download the .cur files (Cursor files) from the link above ^
Select which pointer you want to replace, and click "Browse..."
Find where you downloaded the .cur files
Select them, and hit "Apply"
and boom, you're done! If you don't like them you can re-select the ones you want to change, and hit "Use Default" To revert back to your computer's original settings.
How to make your own:
If you would like to make your own cursors, you can download any small .png image (has to be .png because .jpg doesn't support transparency). You can also use any image editing websites or software to shrink/tweak larger images - I use Aseprite for my pixel art, and I highly recommend it for no compression or pixel loss when resizing images, but I'm sure there are free alternatives out there.
After you somehow acquire a small transparent image you can convert them using this handy online tool. Convert it to .CUR for image cursors, or .ANI for animated/gif cursors.
Have fun! Thanks for reading <3
27 notes
·
View notes
Note
the wenis video gives me such joy also what do you use to draw/animate you’re literally inspiring me to take up a new hobby lmao
OMG thank you so much, you're too kind!! And HELL YEAH JOIN ME IN THE DRAWING THE SAME THING 1000000 TIMES MINES 😂 (But truly!!)
I use all kinds of software for different things so I'll just make a little list:
RoughAnimator! For ipad, costs like 7 bucks to own forever. Super lightweight, super effective, genuinely where I do like 99% of my animating these days- if you have an ipad I couldn't recommend it enough
Procreate! 99% of my non-animating drawing happens here lmao, also for ipad, also really cost-effective
TVPaint! For PC/Mac- on the more expensive side, but I saved up and got it when I was in college for That Sweet Sweet Student Discount™️... Most of my like, Actual Job Animation has been done with this one!
After Effects! Kind of a bonus here, but it's where I do all my compositing; most camera moves, lots of the lighting and stuff, any layers on multiply/add/[insert blending mode], etc. Every day I wish I could replace it so I could stop paying adobe but here we are
If you're just starting out and you're working on a computer, I think Clip Studio Paint can do animation? And it's way cheaper than trying to grab TVPaint or anything adobe or An Entire Ipad, so it might be a cool place to start experimenting! (There's also Opentoonz, which I think might be free?? But also I will be real with you I opened it once and got overwhelmed and scared so I have no guidance there jksdklfsd) It's also good for drawing, but there's also Paint Tool SAI (my beloved companion thru all my years with a PC) and Krita for regular old drawing as well!
Whatever you end up using, GOOD LUCK!! You're gonna do great!!
20 notes
·
View notes
Note
I've rewatch your Narinder animatic "I don't work here" SO. MANY. TIMES. I love it.
Also, what do you use for animating?
shitty screenshot of some art as an offering
hi!! im so glad you like it!! angry nari is so cute <3
i use a free video editing software called CapCut to put together my animations. it's not actually an animating software; rather, it lets you insert images or videos on a timeline, then move them around and stretch or shorten their length. it's also what i use to edit my let's plays and speedpaints! So, i download the audio from a lyric video, put that in the timeline, line up the lyrics, then make the lyric video invisible and line up all my frames to match the timing that i want. i find this much more intuitive and easy to understand than using actual animation software (of which I have tried many), even though its probably a technically more difficult way to do it.
CapCut is available on Windows and mobile (it puts a watermark at the end of videos made on the mobile app, but you can crop that out on your phone or tablet's photo app). I don't remember if theres a Mac version. as for art, I use Clip Studio Paint, but you could use any art program that lets you export images!
i totally recommend trying to animate yourself!!!!!! it takes a long time but its so much fun and i think capcut makes it really easy
#asks#other art#cult of the lamb#if youd like i could record myself editing one of my wip animations in capcut to give an idea of how it works?#i made the cotl animatic on my PC but my persona 5 animatic was made on my ipad using Procreate and CapCut!
19 notes
·
View notes
Text

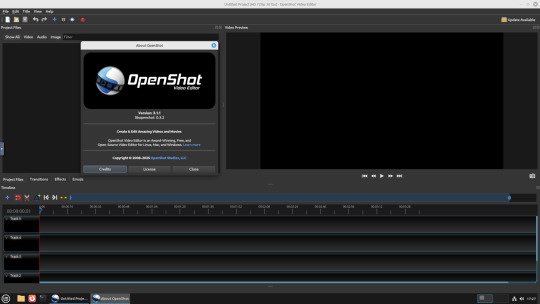
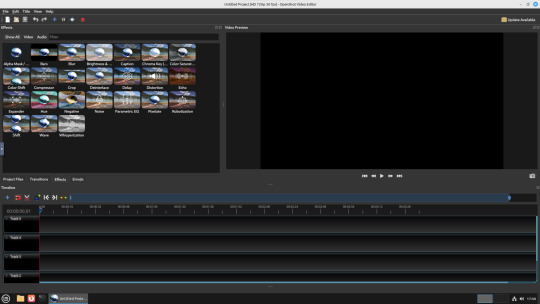

22.02.25
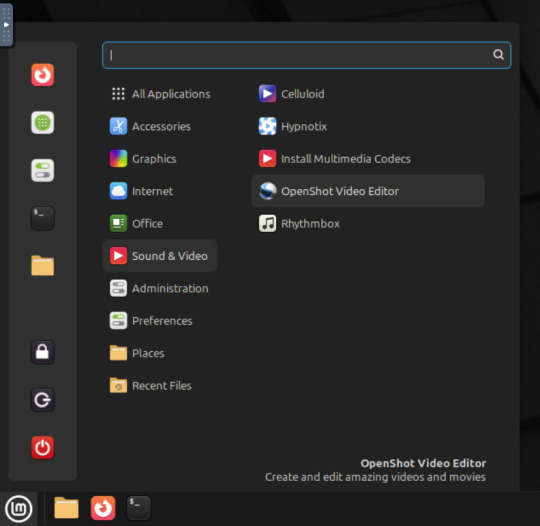
A quick look at the free, open source Openshot Video Editor, running in Linux Mint Cinnamon 22.1 on Distrosea!
On Mint, Openshot is installed via the Software Manager as a .deb file.
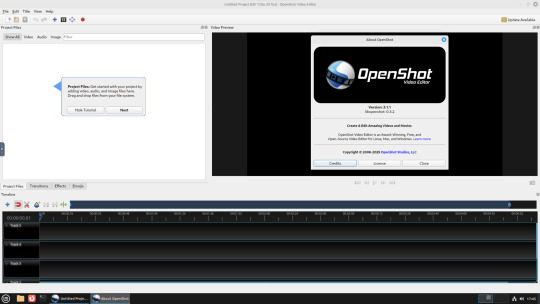
Here are some of the packages (dependencies) that are installed alongside it. The version featured in the manager (Openshot 3.1.1) is a few versions behind the web version (3.3.0) for stability reasons.
OpenShot was released in August 2008. It is built using Python, C++ (libopenshot) and the Qt5 framework. It is available for Linux, Chrome OS, Windows and Mac OS operating systems.
https://www.openshot.org/
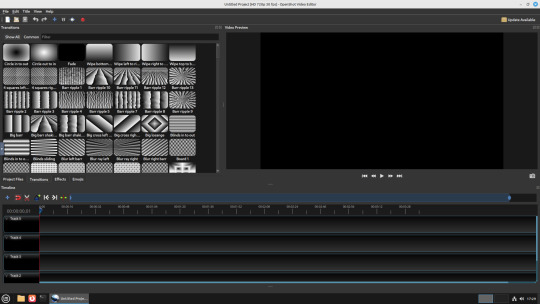
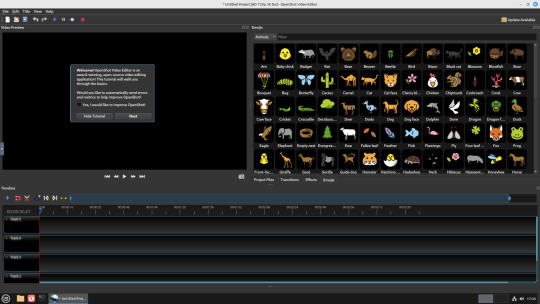
It can handle most modern and classic video formats and can export videos in up to 8K resolution. It comes with a customisable interface, built-in tutorial, various transitions, effects, 3D text and animation effects with Blender Animation support and emoji emblems that can be used in video shots through the time line.
Openshot comes with a default dark theme and a light theme.
https://en.wikipedia.org/wiki/OpenShot
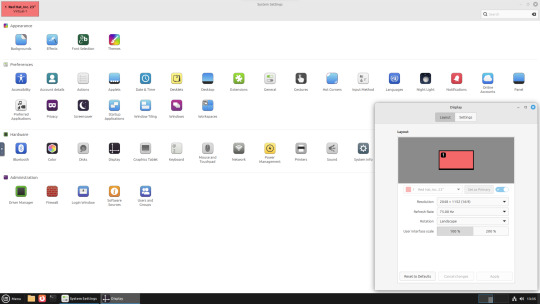
An interesting look at the OpenShot User interface. The window size of the VM is shown in the 'Display Settings' window. The actual display resolution is 2560x1440.
Online video tutorials can be watched here:
https://www.youtube.com/playlist?list=PLymupH2aoNQNezYzv2lhSwvoyZgLp1Q0T
However I still prefer the simplicity of Clipchamp, as it includes ready made templates, a clean UI and is a browser based web-app that can run on any operating system.
https://clipchamp.com/en/
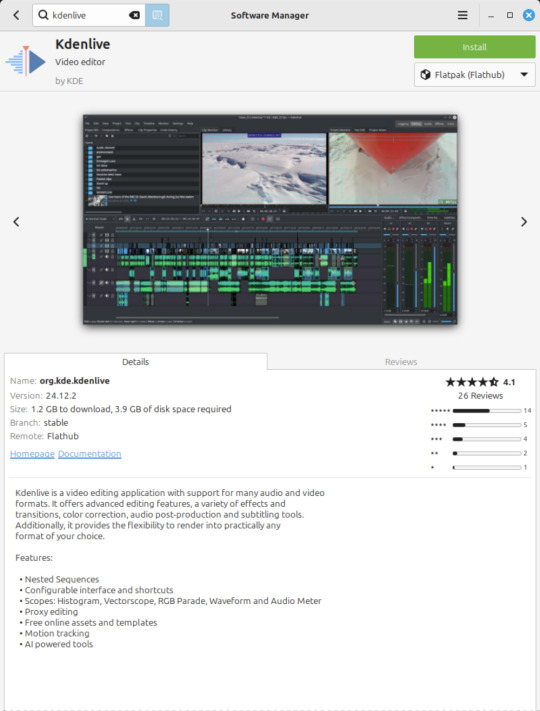
Other popular open-source video editing applications include:
Kdenlive (released 2002)
https://kdenlive.org/en/
Shortcut (released 2011)
https://www.shotcut.org/

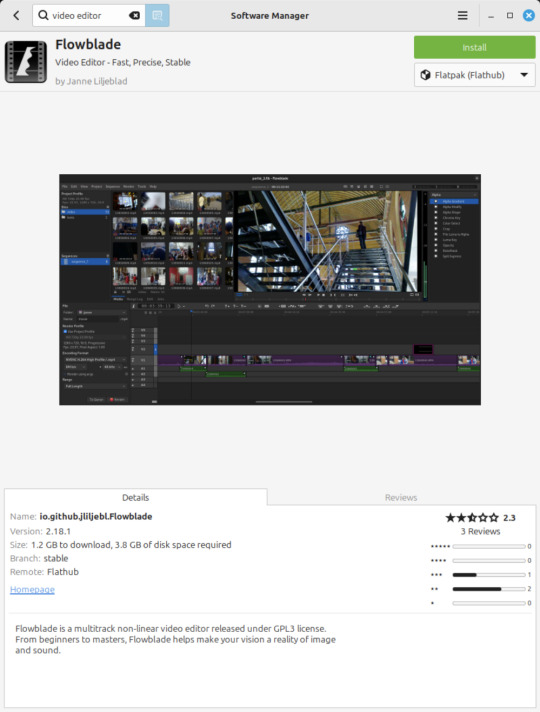
Flowblade Movie Editor (released 2009)
https://jliljebl.github.io/flowblade/
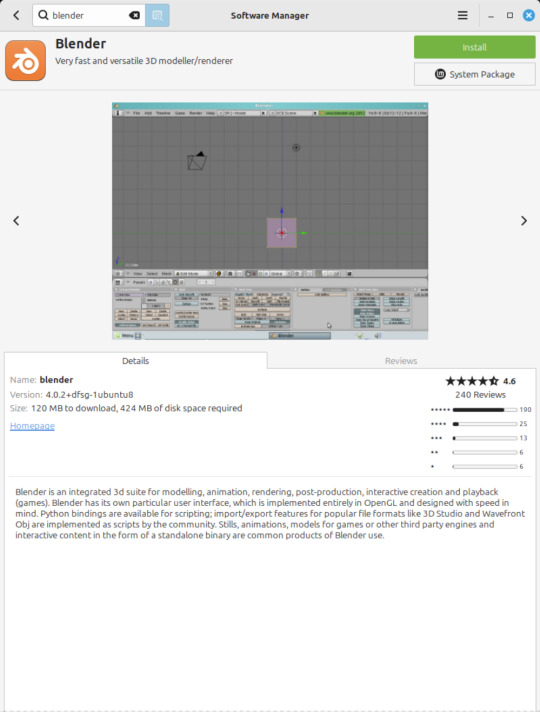
Blender Animation Program (released 1994)
https://www.blender.org/
All of the video editors mentioned here have their pros and cons and many can be installed as a .deb (System Package) or .flatpak (Containerized App) on Linux Mint.
5 notes
·
View notes
Note
Oh it was only 3 actually, counting that one animatic on YouTube (that BTW i had no idea was yours! I was pleasantly surprised <3)
And I found it so funny that you have somewhat an idea of who I might be PFFF you can throw the guess, it would be funny if you get it right (don't have to say my name if you don't remember it, you can just go for something you remember NFKDSJ)
also time for an actual question since i'm already here, what program did you used for the animatic? I've always wanted to get into animating but most softwares cost money or are free but really bad so I could use some recommendations 👀
Good to hear there is no imposter lol. I should probably start using the false pfp so people know it’s me but I’m too lazy to change them all 💀 also my guess was right as to who you were but probably mainly because I put on my Aziraphale detective hat and you were the last notification before the ask inbox notification and your icon had a red beanie. We meet once again.
As for the animatic I used procreate for drawing and capecut for composting. Not the most efficient method but I liked it. I ended up segmenting off each camera angle into a different canvas and making any animation for the shot that way. I love capecut because the free version has every editing function you need for an animatic and the watermark only appears as a black screen at the end so it’s so easy to crop out. It’s probably the best free editing software I’ve found. (I also used a screen recording device to record the audio cause even if you buy a song it sometimes doesn’t allow you to put it in the program.)
I honestly recommend procreate if you have a device that supports it. I think it’s still only a 10 dollar onetime purchase. But if you don’t have a device that supports it, I have used things like flip a clip which is free, and the paid version is pretty cheap. I have also dabbled in an app called rough animate, also free (you don’t have to pay for the onion skins) which was also okay. I got frustrated cause of the lack of brush choice but other than that it’s not bad at all. If you can’t pay anything at all I’d recommend this because, unlike flip a clip, you don’t have to pay to unlock the a lot of the really helpful features. Ibis paint also added an animation feature I think so that’s an option. Idk if you need the paid version for it, but I remember only having to watch ads for a minute to unlock all the brushes so maybe it’s the same for the animation feature lol.
If you have a computer set up, I’ve also heard nice things about Krita for animation. It’s free and from what I remember it had a really good timeline set up. I actually tried to use it, but my computer at the time was old and slow and it lagged to much, and then I had a shitty no screen tablet and my hand eye coordination when it came to drawing and writing is quite bad, so it just wasn’t a good set up for me personally. But I know people make it work. I mean, people make this kinda shit in MS paint, if you’re dedicated enough you can technically do it in almost any program (though you may not be able to make it as polished as you’d like.)
Then there is Clip Studio Paint, which does cost money but is way less expensive than like, harmony or adobe. The EX version which gives you a second of free animation per project is a $5 monthly subscription for once device, PC MaC IOS, and the Pro version (which is more expensive) gives you unlimited animation animation access for I believe around 10 -15 dollars a month (still less than most streaming services lol). There’s also a one time purchase version that is $50 dollars, but it goes on sale A LOT for $25! Although I don’t think it gives you more than a second of animation. CSP also has a very long free trial period, for EX it was legit like 3 months. so if you try it out and like it, I’d definitely suggest finding a way to pay for it. It’s actually used in some professional studios in Japan, so if you have any professional aims for your work it’s a good starting platform to get into industry software. However a lot of the nice things CSP offers for animation are not needed in the story boarding/animatic stage, so if that’s as far as you wanna take your animations it maaaaaaay not be worth it unless you love it.
If anyone else has other cheap or free recommendations feel free to add on. I have attempted to make animatics on procreate, rough animate, and flip a clip; all of which I have uncompleted projects on. It just so happens that procreate is what I was using when I finally made an animatic I liked enough to see until completion. Whatever software you do use, just make sure you learn how to use it before attempting a big project. Do some smaller stuff before you try anything big.
Edit to check the comments! We got other good recommendations for computers!
8 notes
·
View notes
Text
#video editing software#video editing software free#free video editing software#best video editing software#free animation software for mac
3 notes
·
View notes
Text
#Animation Software for Mac#Animation Software for beginners#Animation Software for Kids#Animation Software online#free animation software for pc#free animation software for mac
0 notes
Text
Apple Unveils Mac OS X
Next Generation OS Features New “Aqua” User Interface
MACWORLD EXPO, SAN FRANCISCO
January 5, 2000
Reasserting its leadership in personal computer operating systems, Apple® today unveiled Mac® OS X, the next generation Macintosh® operating system. Steve Jobs demonstrated Mac OS X to an audience of over 4,000 people during his Macworld Expo keynote today, and over 100 developers have pledged their support for the new operating system, including Adobe and Microsoft. Pre-release versions of Mac OS X will be delivered to Macintosh software developers by the end of this month, and will be commercially released this summer.
“Mac OS X will delight consumers with its simplicity and amaze professionals with its power,” said Steve Jobs, Apple’s iCEO. “Apple’s innovation is leading the way in personal computer operating systems once again.”
The new technology Aqua, created by Apple, is a major advancement in personal computer user interfaces. Aqua features the “Dock” — a revolutionary new way to organize everything from applications and documents to web sites and streaming video. Aqua also features a completely new Finder which dramatically simplifies the storing, organizing and retrieving of files—and unifies these functions on the host computer and across local area networks and the Internet. Aqua offers a stunning new visual appearance, with luminous and semi-transparent elements such as buttons, scroll bars and windows, and features fluid animation to enhance the user’s experience. Aqua is a major advancement in personal computer user interfaces, from the same company that started it all in 1984 with the original Macintosh.
Aqua is made possible by Mac OS X’s new graphics system, which features all-new 2D, 3D and multimedia graphics. 2D graphics are performed by Apple’s new “Quartz” graphics system which is based on the PDF Internet standard and features on-the-fly PDF rendering, anti-aliasing and compositing—a first for any operating system. 3D graphics are based on OpenGL, the industry’s most-widely supported 3D graphics technology, and multimedia is based on the QuickTime™ industry standard for digital multimedia.
At the core of Mac OS X is Darwin, Apple’s advanced operating system kernel. Darwin is Linux-like, featuring the same Free BSD Unix support and open-source model. Darwin brings an entirely new foundation to the Mac OS, offering Mac users true memory protection for higher reliability, preemptive multitasking for smoother operation among multiple applications and fully Internet-standard TCP/IP networking. As a result, Mac OS X is the most reliable and robust Apple operating system ever.
Gentle Migration
Apple has designed Mac OS X to enable a gentle migration for its customers and developers from their current installed base of Macintosh operating systems. Mac OS X can run most of the over 13,000 existing Macintosh applications without modification. However, to take full advantage of Mac OS X’s new features, developers must “tune-up” their applications to use “Carbon”, the updated version of APIs (Application Program Interfaces) used to program Macintosh computers. Apple expects most of the popular Macintosh applications to be available in “Carbonized” versions this summer.
Developer Support
Apple today also announced that more than 100 leading developers have pledged their support for the new operating system, including Adobe, Agfa, Connectix, id, Macromedia, Metrowerks, Microsoft, Palm Computing, Quark, SPSS and Wolfram (see related supporting quote sheet).
Availability
Mac OS X will be rolled out over a 12 month period. Macintosh developers have already received two pre-releases of the software, and they will receive another pre-release later this month—the first to incorporate Aqua. Developers will receive the final “beta” pre-release this spring. Mac OS X will go on sale as a shrink-wrapped software product this summer, and will be pre-loaded as the standard operating system on all Macintosh computers beginning in early 2001. Mac OS X is designed to run on all Apple Macintosh computers using PowerPC G3 and G4 processor chips, and requires a minimum of 64 MB of memory.
4 notes
·
View notes
Note
I was watching a bunch of your animatics on YouTube and it's all so good! I've always wanted to make an animatic but I never had the patience so I think it's awesome that you've made so many!
I was just wondering, what software do you draw on and animate everything?
I did put in the description on YouTube for Ruler of Everything, but it’s worth repeating here.
I use krita for all the animating/drawing and da Vinci resolve for all the editing. Both are free so if you want to make an animatic of your own they’re a good place to start.
I’ve been trying out adobe animate and after effects for uni (and I used them a tiny bit for ruler), so I plan to use after effects for lighting in future projects. Adobe animate is terrible though, I do not recommend.
Other than that my old animatics used iMovie for editing, so if you use a Mac it’ll get the job done.
19 notes
·
View notes
Text
@scotchfairy
What software are you using?
I use IbisPaintX mobile on a Samsung Galaxy S8 (poor thing is so old but it still works well). It's available on Android, iOS, Mac, and PC.
I don't have experience with any other digital art software, but iirc I've heard it's similar to PaintTool SAI.
The free version works fine, the ads have gotten a little more aggressive over the years. There is a subscription available for additional features, but it's definitely not necessary lmao. I'm not familiar with it, but it recently received an animation update.
3 notes
·
View notes
Text
How to Find Safe PC Software Free Download
Using the operating system is impossible without installing additional programs that serve specific purposes. Of course, it is important for each user to get high-quality pc app with full functionality without annoying ads.
In the world of PC software, there are many options available. Some of these programs are free, while others require a subscription or license fee to use. However, some people are not willing to pay for software and instead seek out pirated copies of these programs. This practice is known as “cracking” and can pose a serious security risk for computer users. It can result in malware infections and other issues. In addition, it can lead to data theft and illegal activities.
There are several websites that offer cracked software downloads, but not all of them are safe. Some of them contain adware, spyware, and other malicious software. These sites can be difficult to find and often require multiple steps to access. Some of these sites also contain viruses that can damage a user’s computer. Others can steal personal information and sell it to Chinese websites. This is why it is important to choose a website with a good reputation and one that offers a variety of programs.
One of the best websites for downloading crack software is MajorGeeks. This site features a variety of software for Windows and other operating systems. It is an excellent source for finding high-quality software that is free from virus and other dangerous components. It is also easy to navigate and includes an active community. Another option is the Crackzoom site, which has a huge collection of cracked software. This site is not recommended for beginners, but it does have some useful programs that can be downloaded for free.
Other websites for downloading cracked software include Softpedia, Softonic, and Ninite. These websites are useful for managing the programs on a user’s operating system. These sites can be a convenient alternative to searching for individual applications and can save time. These websites also provide a comprehensive list of available programs and updates.
Another popular website for downloading free programs is Sharewareonsale. This website is based in the United States and offers top-rated programs for both Windows and Mac computers. It also has a section for mobile devices that is updated regularly. In addition, the site offers free iOS and Android applications.
If you are looking for a way to create high-quality graphics without spending money, consider using free design software. There are a number of options available to help you create stunning content for social media, business marketing, and much more. Some of these software programs offer templates that are easy for a novice to use, while others provide more sophisticated tools for experienced designers.
The most popular graphic design software is Adobe Photoshop, but it is not the only option. There are a number of alternatives that are free to use and feature flexible controls for creating a wide range of designs. These programs allow you to customize text and images, create layouts, and add animation to your content. They also come with a number of plugins to improve the appearance of your design.
5 notes
·
View notes