#html doctype
Explore tagged Tumblr posts
Visit Tumblr Blog
Explore Tumblr blogs with no restrictions, modern design and the best experience.
Last Seen Tumblr Blogs


Fun Fact
In 2020, 44% of users from Denmark used Tumblr daily.
Text
i love it when federal sites haven't updated their code since like. 2003 or something
#i click on a link and i'm greeted with an early 2000s-esque page layout (read: all the contents of the page are#jammed onto the left side. just for starters) and i'm like '???' and i start inspecting the page source and the first line literally reads#<Script language=“JavaScript”> and i'm just. y'all aren't even gonna update it to read <!DOCTYPE html>???????#OR ANY OF THE OLDER <!DOCTYPE> TAGS IN GENERAL?????#AND THE FIRST LINE STARTS ON LINE 5 FOR SOME FUCKING REASON#THEY HAVE AN ENTIRE DIV CLASS FOR A 'WHAT'S NEW' BOX COMMENTED OUT IN THE CODE INSTEAD OF JUST ERASING IT ENTIRELY#AND THE CODE IS LIKE 'LAST UPDATED/REVIEWED JUNE 5 2007' AND I JUST????????? WHAT. WHATTTTTT#THERE'S A CLEAR LINK TO JQUERY 3.5.0 WHICH WAS RELEASED IN LIKE 2020 IIRC SO WHAT THE FUCK IS THE REST OF THIS ALL ABOUT??????#WHY AM I SEEING SHIT LIKE '<p><b>Your session has expired.</p></b>'??????#THAT'S NOT EVEN GETTING INTO EVERYTHING ELSE!!!! GODDAMN!!!!!!!!
5 notes
·
View notes
Text
La base de tu página web y por qué el DOCTYPE es crucial
Estás creando una página web y quieres asegurarte de que sea sólida y compatible con los últimos estándares? HTML5 es el lenguaje que necesitas. En esta entrada, vamos a sumergirnos en los fundamentos de HTML5, desde el documento HTML5 hasta las etiquetas básicas que dan forma a tu contenido. ¡Descubre por qué el DOCTYPE es tan importante y cómo optimizar tu página web para los motores de…
0 notes
Text
Introduction To HTML
[Note: You need a text editor to do this. You can use Notepad or Text Edit. But it's so much better to download VS Code / Visual Studio Code. Save it with an extension of .html]
HTML stands for Hyper Text Markup Language
It is used to create webpages/websites.
It has a bunch of tags within angular brackets <....>
There are opening and closing tags for every element.
Opening tags look like this <......>
Closing tags look like this
The HTML code is within HTML tags. ( // code)
Here's the basic HTML code:
<!DOCTYPE html> <html> <head> <title> My First Webpage </title> </head> <body> <h1> Hello World </h1> <p> Sometimes even I have no idea <br> what in the world I am doing </p> </body> </html>
Line By Line Explanation :
<!DOCTYPE html> : Tells the browser it's an HTML document.
<html> </html> : All code resides inside these brackets.
<head> </head> : The tags within these don't appear on the webpage. It provides the information about the webpage.
<title> </title> : The title of webpage (It's not seen on the webpage. It will be seen on the address bar)
<body> </body> : Everything that appears on the webpage lies within these tags.
<h1> </h1> : It's basically a heading tag. It's the biggest heading.
Heading Tags are from <h1> to <h6>. H1 are the biggest. H6 are the smallest.
<p> </p> : This is the paragraph tag and everything that you want to write goes between this.
<br> : This is used for line breaks. There is no closing tag for this.
-------
Now, we'll cover some <Meta> tags.
Meta tags = Notes to the browser and search engines.
They don’t appear on the page.
They reside within the head tag
<head> <meta charset="UTF-8"> <meta name="viewport" content="width=device-width, initial-scale=1.0"> <meta name="description" content="Website Description"> <meta name="Author" content="Your Name"> <meta name="keywords" content="Websites Keywords"> </head>
Line By Line Explanation:
<meta charset="UTF-8"> : Makes sure all letters, symbols, and emojis show correctly.
<meta name="viewport" content="width=device-width, initial-scale=1.0"> : Makes your site look good on phones and tablets.
<meta name="description" content="Website Description"> : Describes your page to Google and helps people find it.
<meta name="author" content="Your Name"> : Says who created the page.
<meta name="keywords" content="Website's Keywords"> : Adds a few words to help search engines understand your topic.
_____
This is my first post in this topic. I'll be focusing on the practical side more than the actual theory, really. You will just have some short bullet points for most of these posts. The first 10 posts would be fully HTML. I'll continue with CSS later. And by 20th post, we'll build the first website. So, I hope it will be helpful :)
If I keep a coding post spree for like 2 weeks, would anyone be interested? o-o
#code#codeblr#css#html#javascript#python#studyblr#progblr#programming#comp sci#web design#web developers#web development#website design#webdev#website#tech#html css#learn to code#school#study motivation#study aesthetic#study blog#student#high school#studying#study tips#studyspo#website development#coding
98 notes
·
View notes
Text
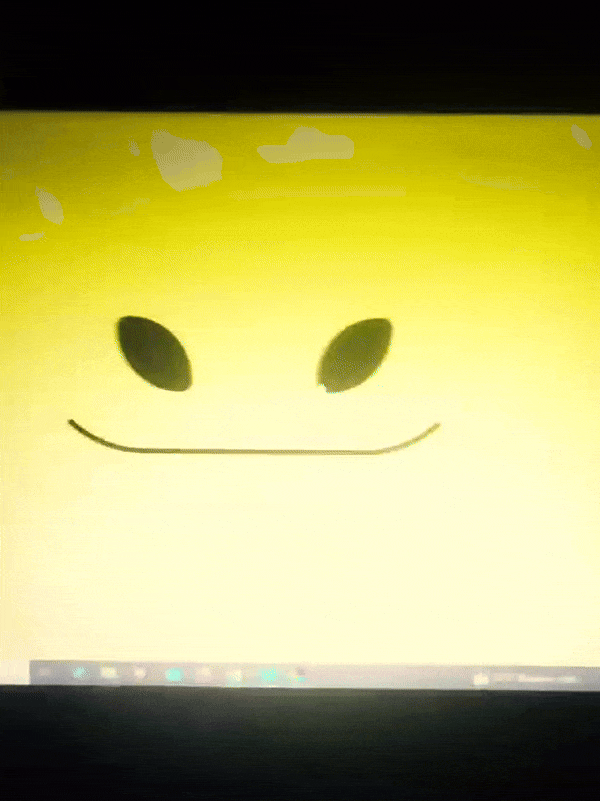
Edgaring time!
Tutorial on how to make your own responsive Edgar :D I will try to explain it in really basic terms, like you’ve never touched a puter (which if you’re making this… I’m sure you’ve touched plenty of computers amirite??? EL APLAUSO SEÑOOOREEES).
If you have some experience I tried to highlight the most important things so you won’t have to read everything, this is literally building a website but easier.
I will only show how to make him move like this:
Disclaimer: I’m a yapper.
Choosing an engine First of all you’ll need something that will allow you to display a responsive background, I used LivelyWallpaper since it’s free and open-source (we love open-source).
Choosing an IDE Next is having any IDE to make some silly code! (Unless you can rawdog code… Which would be honestly impressive and you need to slide in my DMs and we will make out) I use Visual Studio!!!
So now that we have those two things we just need to set up the structure we will use.
Project structure
We will now create our project, which I will call “Edgar”, we will include some things inside as follows:
Edgar
img (folder that will contain images) - thumbnail.png (I literally just have a png of his face :]) - [some svgs…]
face.js (script that will make him interactive)
index.html (script that structures his face!)
LivelyInfo,json (script that LivelyWallpaper uses to display your new wallpaper)
style.css (script we will use to paint him!)
All of those scripts are just literally like a “.txt” file but instead of “.txt” we use “.js”, “.html”, etc… You know? We just write stuff and tell the puter it’s in “.{language}”, nothing fancy.
index.html
Basically the way you build his silly little face! Here’s the code:
<!doctype html> <html> <head> <meta charset="utf-8"> <title>Face!</title> <link rel = "stylesheet" type = "text/css" href = "style.css"> </head> <body> <div class="area"> <div class="face"> <div class="eyes"> <div class="eyeR"></div> <div class="eyeL"></div> </div> <div class="mouth"></div> </div> </div> <script src="face.js"></script> </body> </html>
Ok so now some of you will be thinking “Why would you use eyeR and eyeL? Just use eye!“ and you’d be right but I’m a dummy who couldn’t handle making two different instances of the same object and altering it… It’s scary but if you can do it, please please please teach me ;0;!!!
Area comes in handy to the caress function we will implement in the next module (script)! It encapsulates face.
Face just contains the elements inside, trust me it made sense but i can’t remember why…
Eyes contains each different eye, probably here because I wanted to reuse code and it did not work out and when I kept going I was too scared to restructure it.
EyeR/EyeL are the eyes! We will paint them in the “.css”.
Mouth, like the eyeR/eyeL, will be used in the “.css”.
face.js
Here I will only show how to make it so he feels you mouse on top of him! Too ashamed of how I coded the kisses… Believe me, it’s not pretty at all and so sooo repetitive…
// ######################### // ## CONSTANTS ## // ######################### const area = document.querySelector('.area'); const face = document.querySelector('.face'); const mouth = document.querySelector('.mouth'); const eyeL = document.querySelector('.eyeL'); const eyeR = document.querySelector('.eyeR'); // ######################### // ## CARESS HIM ## // ######################### // When the mouse enters the area the face will follow the mouse area.addEventListener('mousemove', (event) => { const rect = area.getBoundingClientRect(); const x = event.clientX - rect.left; const y = event.clientY - rect.top; face.style.left = `${x}px`; face.style.top = `${y}px`; }); // When the mouse leaves the area the face will return to the original position area.addEventListener('mouseout', () => { face.style.left = '50%'; face.style.top = '50%'; });
God bless my past self for explaining it so well, but tbf it’s really simple,,
style.css
body { padding: 0; margin: 0; background: #c9c368; overflow: hidden; } .area { width: 55vh; height: 55vh; position: absolute; top: 50%; left: 50%; transform: translate(-50%,-50%); background: transparent; display: flex; } .face { width: 55vh; height: 55vh; position: absolute; top: 50%; left: 50%; transform: translate(-50%,-50%); background: transparent; display: flex; justify-content: center; align-items: center; transition: 0.5s ease-out; } .mouth { width: 75vh; height: 70vh; position: absolute; bottom: 5vh; background: transparent; border-radius: 100%; border: 1vh solid #000; border-color: transparent transparent black transparent; pointer-events: none; animation: mouth-sad 3s 420s forwards step-end; } .face:hover .mouth { animation: mouth-happy 0.5s forwards; } .eyes { position: relative; bottom: 27%; display: flex; } .eyes .eyeR { position: relative; width: 13vh; height: 13vh; display: block; background: black; margin-right: 11vh; border-radius: 50%; transition: 1s ease } .face:hover .eyeR { transform: translateY(10vh); border-radius: 20px 100% 20px 100%; } .eyes .eyeL { position: relative; width: 13vh; height: 13vh; display: block; background: black; margin-left: 11vh; border-radius: 50%; transition: 1s ease; } .face:hover .eyeL { transform: translateY(10vh); border-radius: 100% 20px 100% 20px; } @keyframes mouth-happy { 0% { background-color: transparent; height: 70vh; width: 75vh; } 100% { border-radius: 0 0 25% 25%; transform: translateY(-10vh); } } @keyframes mouth-sad { 12.5%{ height: 35vh; width: 67vh; } 25% { height: 10vh; width: 60vh; } 37.5% { width: 53vh; border-radius: 0%; border-bottom-color: black; } 50% { width: 60vh; height: 10vh; transform: translateY(11vh); border-radius: 100%; border-color: black transparent transparent transparent; } 62.5% { width: 64vh; height: 20vh; transform: translateY(21vh); } 75% { width: 69vh; height: 40vh; transform: translateY(41vh); } 87.5% { width: 75vh; height: 70vh; transform: translateY(71vh); } 100% { width: 77vh; height: 90vh; border-color: black transparent transparent transparent; transform: translateY(91vh); } }
I didn’t show it but this also makes it so if you don’t pay attention to him he will get sad (mouth-sad, tried to make it as accurate to the movie as possible, that’s why it’s choppy!)
The .hover is what makes him go like a creature when you hover over him, if you want to change it just… Change it! If you’d rather him always have the same expression, delete it!
Anyway, lots of easy stuff, lots of code that I didn’t reuse and I probably should’ve (the eyes!!! Can someone please tell me a way I can just… Mirror the other or something…? There must be a way!!!) So now this is when we do a thinking exercise in which you think about me as like someone who is kind of dumb and take some pity on me.
LivelyInfo.json
{ "AppVersion": "1.0.0.0", "Title": "Edgar", "Thumbnail": "img/thumbnail.png", "Preview": "thumbnail.png", "Desc": "It's me!.", "Author": "Champagne?", "License": "", "Type": 1, "FileName": "index.html" }
Easy stuff!!!
Conclusion
This could've been a project on git but i'm not ready and we're already finished. I'm curious about how this will be seen on mobile and PC,,, i'm not one to post here.
Sorry if I rambled too much or if i didn't explain something good enough! If you have any doubts please don't hesitate to ask.
And if you add any functionality to my code or see improvements please please please tell me, or make your own post!
98 notes
·
View notes
Text
<!DOCTYPE html> <html> <style> p {color:rgb(005,225,225);} </style> <body>
<p> <p style="font-family:system-ui, -apple-system, BlinkMacSystemFont, 'Segoe UI', Roboto, Oxygen, Ubuntu, Cantarell, 'Open Sans', 'Helvetica Neue', sans-serif;"> <br> <br> Hello!
<br> <br> I’m going to start to draw more. <em> (TRUST ME, IM TRYING BUT ARTBLOCK…) </em>
</p> </body>
</html>
^ Just a little HTML practice. I haven’t learned much, but I’ve memorized most of it! (I think)
This was from memory, so I might have messed it up like once or twice. Also I DON’T memorize RGB numbers. <3
THIS IS VERY MUCH JUST ME YAPPING LMAO (if you understand html you will hopefully understand 😊)
#Html#html code#I practice in Replit lol#or just write it down#(I have 10+ pages of practice on this that I wrote from memory)#I love explaining HTML to my friends who don’t understand it#(They are in the same coding class but they still don’t understand)#HHEHEHEH#i love html and javascript#Code#coding#I still gotta memorize some more#Not much#just around 24 lines of code I don’t understand#I’ll search up the meanings if I don’t understand it lmao
9 notes
·
View notes
Text
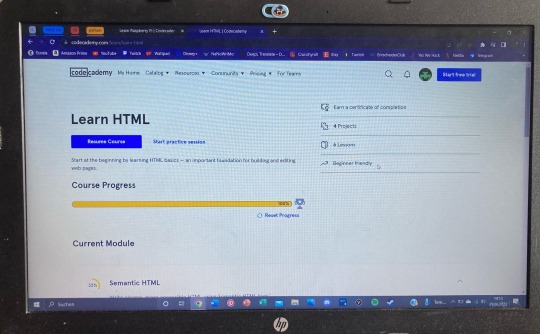
after a week of studying i've completed my first course about HTML!! so far i've learnt the basic facts and syntax about html, like <!DOCTYPE html>, <html> and <body> on top of any html document you build:)
Forms were the most interesting part to me of that course, it makes the website way more interactive and it's so much fun to play around with it.
My next step is to learn more about CSS and designing the website to my liking. I'm excited!
#codeblr#100 days of code#coding#programming#codecademy#htmlcoding#htmllearn#html css#html tags#html#studying#studyblr
113 notes
·
View notes
Text
i like that some things once you learn them you just never forget them. i havent coded in like 3 months but doctype html head body box-sizing border-box are ingrained into my brain now
6 notes
·
View notes
Text
I'm really good at coding but it'll always be a bit funny to me that I can't remember that I'm supposed to start a html file wit <!DOCTYPE html>
I know I'm supposed to start it with SOMETHING. I know it most likely has "html" in it and that it uses the <> those things if I could just remember "doctype" I'd be most of the way there xD
2 notes
·
View notes
Text
So I know how to code websites now, but idk how to upload it to the internet. My plan is to give you all a post that will update with a string of code to sort of visit the website(s?) that I am curating. I will reblog a post that had the original, and include a more patched version as time goes on. I am so sorry in advance.
Because of this.... Lemme show you how html and css works!!
For Project Our Realities, it will all be in html and css since that's what I'm learning so far. JavaScript will be included later.
HTML and CSS basics below!!
HTML, or Hyper-Text Markup Language is the basics of coding a website. It describes how a website will look. It unfortunately doesn't get you too far in terms of digital design, which is why we have languages like Css and javascript.
All HTML files start with <!DOCTYPE html>. This declares to the file that you will be coding in html rather than something like lua.
Each HTML file, after declaring it as an html file, starts with <HTML> and </HTML>. To end a tag, you must close it by adding a forward slash before writing its name (unless it is <br> or <hr>, or similar).
The <head> tag lets you add a title (silly little tab name), a favicon (silly little icon next to the name of the tab) and ways to link your CSS to the HTML.
An HTML file will look like this <!DOCTYPE html>
<html>
<head>
</head>
<body>
</body>
</html>
In the body, you can write the rest of your page, using headers (<h>/<h1-6>), paragraphs (<p>), and even forms (<form>).
--
CSS, also known as Cascading Style Sheets, is a type of coding language that is often used to create websites. No, it is not C++.
Rather than <>, CSS uses brackets {} to code.
CSS is used to style html websites, so it addresses html tags and lets you style their appearance. There is something known as inline CSS, where you can use the <style> tag to style something in your HTML file. HTML was never meant to have colors in its code, but you can change the color of text with inline css. Let's say you would like to style a header.
In your HTML file, it would say:
<!DOCTYPE html>
<html>
<head>
<link rel="stylesheet" href="(name of .css file goes here)">
</head>
<body>
<h1> My first header!!! :> </h1>
</body>
</html>
Now that we have our header, let's turn it red.
In your CSS file, it should say...
h1 {
color: red;
}
The H1 addresses that it will select all h1 elements. The code in the brackets shows that all those addressed will be the color red.
CSS has no starting or finishing lines, all elements will by stylized with {}.
--
To create an HTML file, you must end it with .HTML
To create a CSS file, you must end it with .css
Sometimes, when I create a link for the Css, the required name for the file will be in the HTML code already. Make sure that both files are in the same folder, and not one in a different folder within the same parent folder. This will not work.
--
Wanna test this out? Make a new notepad file on Windows, title it as "firsthtml.html", and create another file called "firstcss.css".
Place this in the .HTML file: <!DOCTYPE html>
<html>
<head>
<title> First HTML </title> <link rel="icon" type="image/x-icon" href="https://i.pinimg.com/736x/1a/8d/9d/1a8d9d26cdca15285d217c817f6953ec.jpg">
<link rel="stylesheet" href="firstcss.css">
</head>
<body> <h1>Welcome, traveler!!</h1>
<h3><I>Thank you for reading the tutorial!! Follow the blog to keep up with our news.</I><h3>
</body>
</html>
Now, for your .css file, write this down:
h1 {
color: dark blue;
}
h3 {
color: orange;
}
--
Thank you so much for following this tutorial. I mainly learned about this from w3schools and in my school course. Happy coding!!! :>
-ava
#.io#ava#ava our realities#io our realities#eps foundation#entertainment productions studio#project our realities#our realities#coding#html#HTML stuff#css#Css stuff#hyper text markup language#cascading style sheets#there will be more coding to come#I hope this helps you guys get into coding
3 notes
·
View notes
Text
I wish coding wasn't so repetitive sometimes like wdym i need to go through the whole doctype whatever whatever basic html structure EVERY SINGLE TIME i make a page. Is this hell
5 notes
·
View notes
Text
here is a basic code for a #deckEditor in an online game using HTML and JavaScript:
HTML code:
```
<!DOCTYPE html>
<html>
<head>
<title>Deck Editor</title>
</head>
<body>
<h1>Deck Editor</h1>
<div id="card-list">
<h2>Card List:</h2>
<ul id="cards">
<!-- populate with cards from database or API -->
<li>Card 1</li>
<li>Card 2</li>
<li>Card 3</li>
<li>Card 4</li>
<li>Card 5</li>
<li>Card 6</li>
<li>Card 7</li>
<li>Card 8</li>
<li>Card 9</li>
<li>Card 10</li>
</ul>
</div>
<div id="deck-list">
<h2>Deck:</h2>
<ul id="deck">
<!-- display selected cards here -->
</ul>
</div>
<button id="save-btn">Save Deck</button>
<button id="clear-btn">Clear Deck</button>
<script src="deck-editor.js"></script>
</body>
</html>
```
JavaScript code:
```
// get references to all necessary elements
const cardsList = document.getElementById('cards');
const deckList = document.getElementById('deck');
const saveBtn = document.getElementById('save-btn');
const clearBtn = document.getElementById('clear-btn');
// create an array to store selected cards
let deck = [];
// function to add a card to the deck
function addCard(event) {
// get the clicked card
const card = event.target;
// check if card is already in deck
if (deck.includes(card.innerText)) {
alert('Card already in deck!');
} else {
// add card to deck array
deck.push(card.innerText);
// create a new li element for the card
const li = document.createElement('li');
li.innerText = card.innerText;
// append li to deck list
deckList.appendChild(li);
}
}
// function to remove a card from the deck
function removeCard(event) {
// get the clicked card
const card = event.target;
// remove card from deck array
deck.splice(deck.indexOf(card.innerText), 1);
// remove card from deck list
card.parentNode.removeChild(card);
}
// add event listeners to cards in card list
cardsList.addEventListener('click', addCard);
// add event listeners to cards in deck list
deckList.addEventListener('click', removeCard);
// function to save deck
function saveDeck() {
// check if deck is empty
if (deck.length === 0) {
alert('Deck is empty!');
} else {
// send deck array to server or save in database
console.log(deck);
alert('Deck saved!');
}
}
// function to clear deck
function clearDeck() {
// remove all cards from deck array
deck = [];
// remove all cards from deck list
while (deckList.firstChild) {
deckList.removeChild(deckList.firstChild);
}
}
// add event listener to save button
saveBtn.addEventListener('click', saveDeck);
// add event listener to clear button
clearBtn.addEventListener('click', clearDeck);
```
Note: This is a basic code and can be improved and customized according to your specific needs and game requirements.
8 notes
·
View notes
Text
So, I did a thing.
Reedsy holds a prompt contest each week and I submitted a story to it. It's a short read, just 1.2k words. The prompt was about senses, other than visual, so I focused on sound and smell.
Maybe you would like to read it?
I hope it's accessible.
22 notes
·
View notes
Text
HTML (HyperText Markup Language), web sayfalarının yapısını ve içeriğini tanımlamak için kullanılan bir işaretleme dilidir. İnternet tarayıcıları tarafından okunarak görsel olarak kullanıcıya sunulan web sayfalarının iskeletini oluşturur. HTML, metin, resim, bağlantılar, tablolar ve diğer multimedya öğelerini düzenlemek için çeşitli etiketler kullanır.
HTML, aşağıdaki gibi ana unsurlardan oluşur:
Etiketler (Tags): İçeriği tanımlayan yapısal bileşenlerdir. Örneğin, <h1> etiketi bir başlığı belirtir, <p> etiketi bir paragrafı tanımlar. Çift taraflı etikette açılış (<etiket>) ve kapanış (</etiket>) bulunur.
Öznitelikler (Attributes): Etiketlere ek bilgi sağlar. Örneğin, <a href="https://example.com"> etiketi, bağlantının gideceği adresi belirtir.
Elementler: Etiketler ve onların arasındaki içerikten oluşur. Örneğin, <p> Bu bir paragraftır. </p> bir elementtir.
HTML Yapısı: HTML dosyası, genellikle bir <!DOCTYPE html> bildirimi, <html>, <head>, ve <body> gibi ana bölümlerden oluşur.
Örneğin, temel bir HTML yapısı şu şekildedir:
———————————————————
<!DOCTYPE html>
<html lang="tr">
<head>
<meta charset="UTF-8">
<meta name="viewport" content="width=device-width, initial-scale=1.0">
<title>Örnek Sayfa</title>
</head>
<body>
<h1>Merhaba Dünya!</h1>
<p>Bu, bir HTML örneğidir.</p>
</body>
</html>
———————————————————
HTML'nin ana amacı, web içeriklerini organize etmek ve yapılandırmaktır. Tarayıcılar, HTML kodlarını okuyarak kullanıcıların görsel olarak etkileşim kurabilecekleri bir web sayfası oluşturur.
———————————————————
Telif Hakkı Uyarısı!
Bu içerik bana aittir ve izinsiz kullanımı, kopyalanması veya paylaşılması yasaktır. Lütfen kaynak belirtmeden veya izin almadan paylaşımda bulunmayınız. Tüm hakları saklıdır.
———————————————————
#batman#captain curly#dan and phil#formula 1#free palestine#jujutsu kaisen#agatha harkness#anya mouthwashing#bucktommy#cats of tumblr
4 notes
·
View notes
Note
woo coolio! ^-^ tank yuew me noms :>
she
!DOCTYPE On my
html until i
lang="en"
5 notes
·
View notes
Text
#Playstation7 #framework #BasicArchitecture #RawCode #RawScript #Opensource #DigitalConsole
To build a new gaming console’s digital framework from the ground up, you would need to integrate several programming languages and technologies to manage different aspects of the system. Below is an outline of the code and language choices required for various parts of the framework, focusing on languages like C++, Python, JavaScript, CSS, MySQL, and Perl for different functionalities.
1. System Architecture Design (Low-level)
• Language: C/C++, Assembly
• Purpose: To program the low-level system components such as CPU, GPU, and memory management.
• Example Code (C++) – Low-Level Hardware Interaction:
#include <iostream>
int main() {
// Initialize hardware (simplified example)
std::cout << "Initializing CPU...\n";
// Set up memory management
std::cout << "Allocating memory for GPU...\n";
// Example: Allocating memory for gaming graphics
int* graphicsMemory = new int[1024]; // Allocate 1KB for demo purposes
std::cout << "Memory allocated for GPU graphics rendering.\n";
// Simulate starting the game engine
std::cout << "Starting game engine...\n";
delete[] graphicsMemory; // Clean up
return 0;
}
2. Operating System Development
• Languages: C, C++, Python (for utilities)
• Purpose: Developing the kernel and OS for hardware abstraction and user-space processes.
• Kernel Code Example (C) – Implementing a simple syscall:
#include <stdio.h>
#include <unistd.h>
int main() {
// Example of invoking a custom system call
syscall(0); // System call 0 - usually reserved for read in UNIX-like systems
printf("System call executed\n");
return 0;
}
3. Software Development Kit (SDK)
• Languages: C++, Python (for tooling), Vulkan or DirectX (for graphics APIs)
• Purpose: Provide libraries and tools for developers to create games.
• Example SDK Code (Vulkan API with C++):
#include <vulkan/vulkan.h>
VkInstance instance;
void initVulkan() {
VkApplicationInfo appInfo = {};
appInfo.sType = VK_STRUCTURE_TYPE_APPLICATION_INFO;
appInfo.pApplicationName = "GameApp";
appInfo.applicationVersion = VK_MAKE_VERSION(1, 0, 0);
appInfo.pEngineName = "GameEngine";
appInfo.engineVersion = VK_MAKE_VERSION(1, 0, 0);
appInfo.apiVersion = VK_API_VERSION_1_0;
VkInstanceCreateInfo createInfo = {};
createInfo.sType = VK_STRUCTURE_TYPE_INSTANCE_CREATE_INFO;
createInfo.pApplicationInfo = &appInfo;
vkCreateInstance(&createInfo, nullptr, &instance);
std::cout << "Vulkan SDK Initialized\n";
}
4. User Interface (UI) Development
• Languages: JavaScript, HTML, CSS (for UI), Python (backend)
• Purpose: Front-end interface design for the user experience and dashboard.
• Example UI Code (HTML/CSS/JavaScript):
<!DOCTYPE html>
<html>
<head>
<title>Console Dashboard</title>
<style>
body { font-family: Arial, sans-serif; background-color: #282c34; color: white; }
.menu { display: flex; justify-content: center; margin-top: 50px; }
.menu button { padding: 15px 30px; margin: 10px; background-color: #61dafb; border: none; cursor: pointer; }
</style>
</head>
<body>
<div class="menu">
<button onclick="startGame()">Start Game</button>
<button onclick="openStore()">Store</button>
</div>
<script>
function startGame() {
alert("Starting Game...");
}
function openStore() {
alert("Opening Store...");
}
</script>
</body>
</html>
5. Digital Store Integration
• Languages: Python (backend), MySQL (database), JavaScript (frontend)
• Purpose: A backend system for purchasing and managing digital game licenses.
• Example Backend Code (Python with MySQL):
import mysql.connector
def connect_db():
db = mysql.connector.connect(
host="localhost",
user="admin",
password="password",
database="game_store"
)
return db
def fetch_games():
db = connect_db()
cursor = db.cursor()
cursor.execute("SELECT * FROM games")
games = cursor.fetchall()
for game in games:
print(f"Game ID: {game[0]}, Name: {game[1]}, Price: {game[2]}")
db.close()
fetch_games()
6. Security Framework Implementation
• Languages: C++, Python, Perl (for system scripts)
• Purpose: Ensure data integrity, authentication, and encryption.
• Example Code (Python – Encrypting User Data):
from cryptography.fernet import Fernet
# Generate a key for encryption
key = Fernet.generate_key()
cipher_suite = Fernet(key)
# Encrypt sensitive user information (e.g., account password)
password = b"SuperSecretPassword"
encrypted_password = cipher_suite.encrypt(password)
print(f"Encrypted Password: {encrypted_password}")
# Decrypting the password
decrypted_password = cipher_suite.decrypt(encrypted_password)
print(f"Decrypted Password: {decrypted_password}")
7. Testing and Quality Assurance
• Languages: Python (for automated tests), Jest (for JavaScript testing)
• Purpose: Unit testing, integration testing, and debugging.
• Example Unit Test (Python using unittest):
import unittest
def add(a, b):
return a + b
class TestGameFramework(unittest.TestCase):
def test_add(self):
self.assertEqual(add(10, 20), 30)
if __name__ == '__main__':
unittest.main()
8. Order of Implementation
• Phase 1: Focus on core system architecture (low-level C/C++) and OS development.
• Phase 2: Develop SDK and start building the basic framework for UI and input management.
• Phase 3: Work on backend systems like the digital store and integrate with front-end UI.
• Phase 4: Begin rigorous testing and debugging using automated test suites.
This comprehensive approach gives you a detailed idea of how each component can be built using a combination of these languages and technologies. Each section is modular, allowing teams to work on different aspects of the console simultaneously.
[Pixel Art/Sprites/Buildinodels/VictoriaSecretPixelArtKit #Playstation7 #DearDearestBrands]

#victoriasecretrunway#runwaybattle#victoria secret fashion#victoria secert model#victoriasecret#victoria secret#VictoriaSecretRunwayBattle#capcom victoriasecret#capcom videogames#playstation7#ps7#deardearestbrands#capcom#digitalconsole#python#script#rawscript#raw code#framework#VictoriaSecretVideoGame#deardearestbrandswordpress
2 notes
·
View notes
Text
Learn HTML and CSS: A Comprehensive Guide for Beginners
Introduction to HTML and CSS
HTML (HyperText Markup Language) and CSS (Cascading Style Sheets) are the core technologies for creating web pages. HTML provides the structure of the page, while CSS defines its style and layout. This guide aims to equip beginners with the essential knowledge to start building and designing web pages.
Why Learn HTML and CSS?
HTML and CSS are fundamental skills for web development. Whether you're looking to create personal websites, start a career in web development, or enhance your current skill set, understanding these technologies is crucial. They form the basis for more advanced languages and frameworks like JavaScript, React, and Angular.
Getting Started with HTML and CSS
To get started, you need a text editor and a web browser. Popular text editors include Visual Studio Code, Sublime Text, and Atom. Browsers like Google Chrome, Firefox, and Safari are excellent for viewing and testing your web pages.
Basic HTML Structure
HTML documents have a basic structure composed of various elements and tags. Here’s a simple example:
html
Copy code
<!DOCTYPE html>
<html>
<head>
<title>My First Web Page</title>
<link rel="stylesheet" type="text/css" href="styles.css">
</head>
<body>
<h1>Welcome to My Web Page</h1>
<p>This is a paragraph of text on my web page.</p>
</body>
</html>
: Declares the document type and HTML version.
: The root element of an HTML page.
: Contains meta-information about the document.
: Connects the HTML to an external CSS file.
: Contains the content of the web page.
Essential HTML Tags
HTML uses various tags to define different parts of a web page:
to : Headings of different levels.
: Paragraph of text.
: Anchor tag for hyperlinks.
: Embeds images.
: Defines divisions or sections.
: Inline container for text.
Creating Your First HTML Page
Follow these steps to create a simple HTML page:
Open your text editor.
Write the basic HTML structure as shown above.
Add a heading with the tag.
Add a paragraph with the tag.
Save the file with a .html extension (e.g., index.html).
Open the file in your web browser to view your web page.
Introduction to CSS
CSS is used to style and layout HTML elements. It can be included within the HTML file using the <style> tag or in a separate .css file linked with the <link> tag.
Basic CSS Syntax
CSS consists of selectors and declarations. Here’s an example:
css
Copy code
h1 {
color: blue;
font-size: 24px;
}
Selector (h1): Specifies the HTML element to be styled.
Declaration Block: Contains one or more declarations, each consisting of a property and a value.
Styling HTML with CSS
To style your HTML elements, you can use different selectors:
Element Selector: Styles all instances of an element.
Class Selector: Styles elements with a specific class.
ID Selector: Styles a single element with a specific ID.
Example:
html
Copy code
<!DOCTYPE html>
<html>
<head>
<title>Styled Page</title>
<link rel="stylesheet" type="text/css" href="styles.css">
</head>
<body>
<h1 class="main-heading">Hello, World!</h1>
<p id="intro">This is an introduction paragraph.</p>
</body>
</html>
In the styles.css file:
css
Copy code
.main-heading {
color: green;
text-align: center;
}
#intro {
font-size: 18px;
color: grey;
}
CSS Layout Techniques
CSS provides several layout techniques to design complex web pages:
Box Model: Defines the structure of an element’s content, padding, border, and margin.
Flexbox: A layout model for arranging items within a container, making it easier to design flexible responsive layouts.
Grid Layout: A two-dimensional layout system for more complex layouts.
Example of Flexbox:
css
Copy code
.container {
display: flex;
justify-content: space-around;
}
.item {
width: 100px;
height: 100px;
background-color: lightblue;
}
Best Practices for Writing HTML and CSS
Semantic HTML: Use HTML tags that describe their meaning clearly (e.g., , , ).
Clean Code: Indent nested elements and use comments for better readability.
Validation: Use tools like the W3C Markup Validation Service to ensure your HTML and CSS are error-free and standards-compliant.
Accessibility: Make sure your website is accessible to all users, including those with disabilities, by using proper HTML tags and attributes.
Free Resources to Learn HTML and CSS
W3Schools: Comprehensive tutorials and references.
MDN Web Docs: Detailed documentation and guides for HTML, CSS, and JavaScript.
Codecademy: Interactive courses on web development.
FreeCodeCamp: Extensive curriculum covering HTML, CSS, and more.
Khan Academy: Lessons on computer programming and web development.
FAQs about Learning HTML and CSS
Q: What is HTML and CSS? A: HTML (HyperText Markup Language) structures web pages, while CSS (Cascading Style Sheets) styles and layouts the web pages.
Q: Why should I learn HTML and CSS? A: Learning HTML and CSS is essential for creating websites, understanding web development frameworks, and progressing to more advanced programming languages.
Q: Do I need prior experience to learn HTML and CSS? A: No prior experience is required. HTML and CSS are beginner-friendly and easy to learn.
Q: How long does it take to learn HTML and CSS? A: The time varies depending on your learning pace. With consistent practice, you can grasp the basics in a few weeks.
Q: Can I create a website using only HTML and CSS? A: Yes, you can create a basic website. For more complex functionality, you'll need to learn JavaScript.
Q: What tools do I need to start learning HTML and CSS? A: You need a text editor (e.g., Visual Studio Code, Sublime Text) and a web browser (e.g., Google Chrome, Firefox).
Q: Are there free resources available to learn HTML and CSS? A: Yes, there are many free resources available online, including W3Schools, MDN Web Docs, Codecademy, FreeCodeCamp, and Khan Academy.
#how to learn html and css#html & css course#html & css tutorial#html and css#html course#html css tutorial#html learn#html learn website#learn html#learn html and css#html and css course#html and css full course#html and css online course#how to learn html and css for beginners
3 notes
·
View notes