#i promise you i try to delete the duplicate ones if i can see that one is more suited for the other PDOFOTOODPTPSO
Text
ok I got sleepy but i managed to fill in a few songs but the songs that really strike in accuracy are those two the hush song tracks... wine red especially because it feels like they're talking about the infection ITSELF its insane i love it SO MUCH and the other song don't wake me up - i imagine it more being focused on these two, not all the lyrics are accurate but it's those cases of "the song had some lyrics that works so well with them i can't just watch it and not add it" anyways uhh x LMAO
p.s pure vessel is their theme please please that makes me so emotional you should at least check that one idk AAAAAA
#i COULD add the other boss theme but it sounds super aggressively initally and i forget that thus is a ship playlist not hollow knight core#ANYWAYS ILL TAKE A NAP JUST FOR A BIT#im actually a little concious because i know a lot of the songs r repetitive (used in other ship playlists) HAIAOAJSHDHS#i promise you i try to delete the duplicate ones if i can see that one is more suited for the other PDOFOTOODPTPSO#MY POINT IS I THINJ HUSH SOUND'S WINE RED AND DON'T WAKE ME UP IS SO GOOD FOR THEM
10 notes
·
View notes
Text
Thief.
Hi @nonvme how are you?
I usually solve such issues in personal messages with the authors to give them the opportunity to simply apologize and not repeat their mistakes, but this situation has upset me a lot, because I wrote to you in the comments a few months ago, but you never answered me (your private messages are closed).
You steal my textures and call it your own, as well as sell it on your patreon without any permission and credits.
Let's start from the beginning.
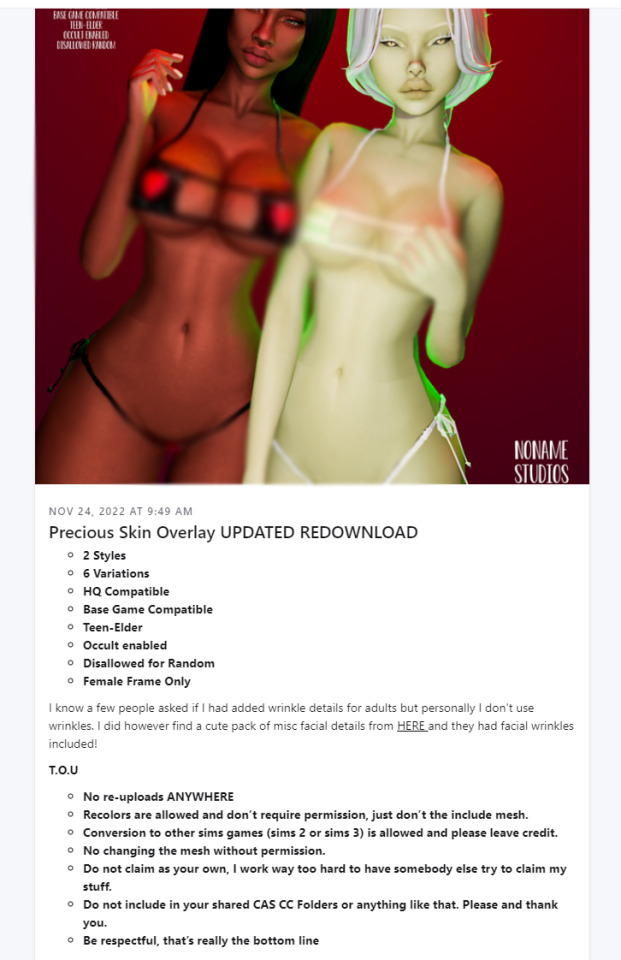
1. https://www.patreon.com/posts/sakira-skin-and-67386343

“credits: obscurus-sims, lamatisse, and google lol” — absolutely no mention of me, it's amazing, because it's almost entirely my texture.
“Do not claim as your own, I work way too hard to have somebody else try to claim my stuff“ — It's so nice to ask to respect your work when you don't respect someone else's.
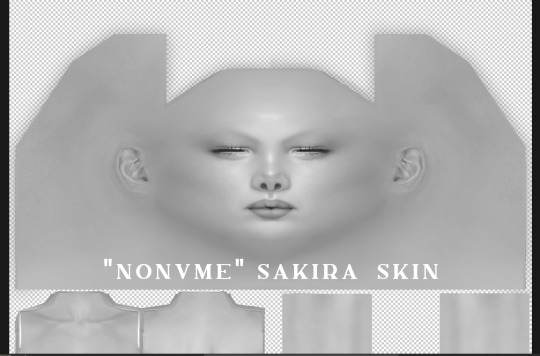
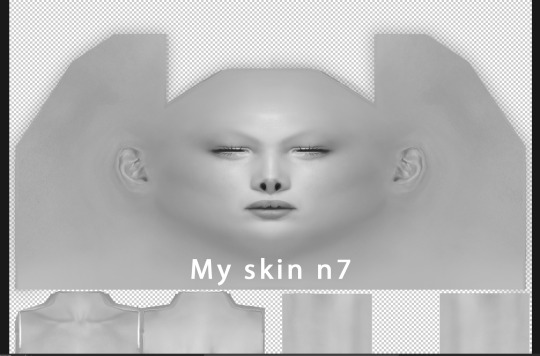


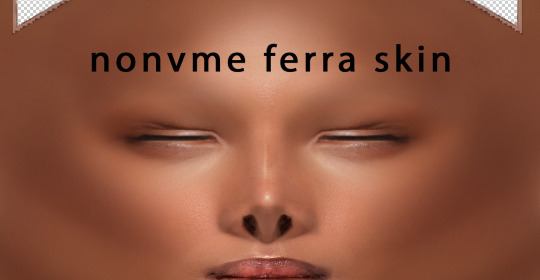
Do I need to comment on something? She just took my skin n7, added a couple of details on face and called it her own. And she put it in early access on her patreon to make money on already free сс. She listed other authors in the credits and didn't mention anything about me.
2. https://www.patreon.com/posts/precious-skin-75050799
“Do not claim as your own, I work way too hard to have somebody else try to claim my stuff“ — and again. The duplicity of this man never ceases to amaze me.
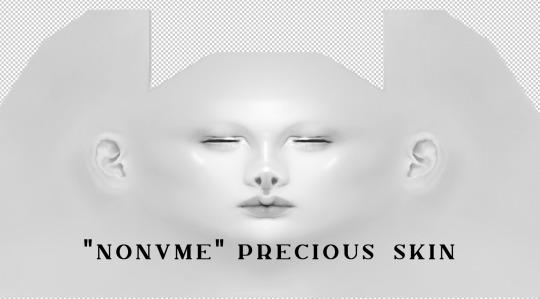

Here she changed a bit more, but she used my skin's face as a base. And again, no mention of me in the credits.This time she didn't mention credits at all, but I see at least @obscurus-sims details.
3.

“Credits to Slephora, Obscurus, and Pinterest for all respective bits and pieces” — okay.
And again, no difference. The textures are identical.
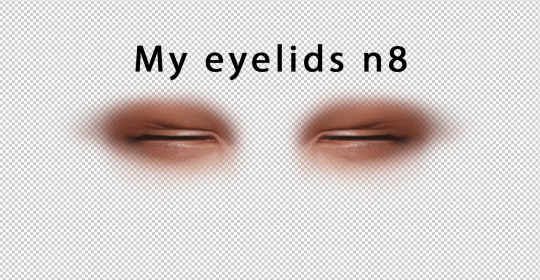
Honey, if a person wants to use my eyelids, he just uses it. There is no need to put my cc in early access again, which has been free for three years.
I want to say that I create my textures completely from scratch, without using EA blanks. Absolutely all the details on my skins are created by me. And as an artist, I can say with confidence that it is impossible to create a texture that will match someone else's pixel by pixel. It's impossible. Moreover, most of my textures are completely drawn by me. What refs from the Internet is she talking about? Did you take refs out of my head? By Bluetooth?
@nonvme you can still apologize and I won't hold a grudge against you. Just apologize and remove my textures from your page. If you had answered me a few months ago and corrected your mistakes, then I would not have written this post and would not have spoiled your reputation. But you didn't answer me.
I'm sorry that you all had to read so much text. I hope your day is going much better than mine.
P.S. I had to re-post to remove some 18+ pieces from the skins.
UPD 15/06/23
Guys! Thank you so much for all your words of support! This is really very important to me. I didn't even expect you all to support me so much. I don't have enough words to express my gratitude to all of you 😢❤️!!!
Nonvme deleted CC that included my textures, and also promised not to use it anymore. It's enough for me to forget about this incident and don't contact patreon support.
I want to add that any author who makes his textures from scratch knows every pixel of his texture. The author of the original content will know if you have used his texture, even if you have somehow modified it. If you steal other people's textures and you haven't been caught yet, it only means that the author hasn't seen your page/cc yet, because he can't monitor the entire Internet. But one day he will find out about you, do not doubt.
1K notes
·
View notes
Text
First and foremost, before you consider following me, I just need to let you know that this is my personal blog, as well as a prompt blog. It started as a personal blog, and somehow became a prompt blog as well. If you don't want my personal stuff clogging your feed, feel free to not follow, or unfollow, or mute/filter the tag #personal as I do tag my personal posts as that. I might create a side blog later, but for now, it remains as a personal and prompt blog.

Now, moving on...
There have been a few people sliding into my ask box, requesting for specific prompts to be written. I’ve had fun doing them thus far, so this is to say:
Prompt requests are open!
Prompts are allowed to be used, but please read below before you send in your requests or decide to use my prompts.
First and foremost: if you do ever end up using my prompts, please do credit me! A mention of my handle and a link to the original post will do.
This is a prompt blog. I do prompt list requests, not writing/stories/fic requests.
I’ll try answering the prompt requests as best as I can, as long as I’m comfortable enough with them.
If I’m uncomfortable with them or if I simply can’t come up with anything for them, I won’t be answering them, so if you don’t hear back from me for a very long time then your ask was probably deleted.
Please do not send in the same request over and over again; there’s quite a long queue of requests I’m going through and I promise I’ll get to yours soon as long as I feel like I can answer them, so please be patient. I’m only one person managing this account. This is to say, duplicate requests will be deleted.
Any time sensitive requests will be prioritised (e.g. Christmas, Valentine's, New Year's).
Anything too specific or too broad, I probably (probably meaning most likely) won't do, UNLESS I vibe with the idea. There are some things I just can't think of anything for, or don't feel like writing for.
Please check my masterlist to see if what you want has already been done before you request.
You can request for subsequent parts to specific lists, but sometimes I won't end up fulfilling them because I can't think of anything else.
I mostly do dialogue prompts, with a dash of scenario prompts. My forte is definitely not in the latter, so make of that what you will.
PROMPTS MASTERLISTS
HERE
DISCORD SERVER

(I made a Ko-fi. If you'd like to support me, you can drop a tip in the tip jar! <3)
#prompt requests#ask box is open#writing prompts#writing scenarios#prompts#those colours are there for a r e a s o n <3#prompts masterlist
315 notes
·
View notes
Text
Yes, it's gone.
Read on if you want to know my reasons for deleting Duplicity and Loser. TL;DR: I felt alienated, lost motivation, and I just don't want part of the community anymore.
I'm not really sure this deserves much of a TL;DR because that was simplistic enough. What it comes down to is I went into this with a lot of motivation and excitement because of members of a yandere community, and since I'm no longer a part of that community, I don't want to be a part of the fandom at all. Interests change.
I'm not going to name names or point fingers, because I just want to wipe my hands clean and start making things that I enjoy, that I like, and that aren't bound by certain rules or restrictions regarding the type of character someone is, if that makes sense. I struggled a lot coming up with Griffin's design and personality, and I started seeing that he was basically a blanket version of other yanderes in the community. He had no substance. And every time I tried to give him some, I'd step out of the boundaries of what I thought a yandere should be. It was frustrating and uncomfortable and hard to work with.
On top of that, the community I was apart of quickly unraveled when I took a break because of my health issues. When I came back, it was different, weird, and foreign almost. I tried my best to re-engage and get back into the swing of things, but I was met with resistance, indifference, and I was severely invalidated in my opinions. It was hurtful, because this community felt like a one-of-a-kind find for me. I could be who I am in it, without judgment. But then I realized, I didn't have any value in it, either. No one really cared as much as I (and some other people) did about trying to make things better for it.
And that's the problem. I cared too much.
I cared too much whether or not I fit in, whether or not my games and characters and art fit in with the community itself, whether I was liked enough. I put too much of myself into it and got nearly nothing back in return. I made some great friends that I will cherish forever outside of that community, but I no longer want any part of it. I don't like the indifferent vibes. I don't like that no one will speak up for themselves. I don't like that when I spoke up for myself, I was basically told to "take a break". Okay, but that doesn't solve the problem.
So I'm leaving, basically. I deleted Duplicity's tumblr, and Lian's tumblr, and any posts having to do with it. I will keep a few of my favorites around to see their progress, but I won't be an active part anymore. I restricted access to Duplicity and Loser on itch.io. Will I make games again? Probably, but they'll be my games, made completely from my imagination, and for myself mostly.
I just want to focus on practicing my writing, practicing my character development, and developing my art into something I can love again. I don't want to fit into any boxes anymore. I just want to make the things I like, when I want to make them, if that makes sense.
I'm sorry to anyone who truly enjoyed my games and characters. I'm sorry that I'm just another one of "those" developers with empty promises. I could pretend and say something like "it will be back again, when I'm feeling it" but I won't feel it. I love Griffin and Tris and Tai, and maybe I'll tell their stories in a different format. Maybe I'll rework them into something else. But for right now, they're packed away in their own little boxes in the back of my mind.
In all seriousness, take care of yourselves. Don't bend and twist yourself into something you're not. Don't break your back trying to fit in places for the sake of missing out or wanting connections. Just love yourself and the things you create without any apologies.
I'll be posting art and writing and whatever I damn well feel like, whenever I feel like it.
See you later, bunnies.
-Cin
2 notes
·
View notes
Note
I'm a huge fan of all your moodboards. May I ask what program you use? I'm trying to learn how to make my own so any tips would be appreciated from my favorite maker
Aw thank you 🥰🩷
I use photoshop! (If you dont have it, just look up "photoshop download" here on tumblr. There are a few links around that work!)
As for tips (which I think are beginner friendly, I've been using photoshop since I was like 12 but I can try and help if there's something you don't fully get!)
Make a base you can use for multiple moodboards. Grab a moodboard (you can use one of mine), paste it into photoshop, create a rectangle the size of one of the tiles and then duplicate it, each rectangle as its own layer. Number them. Make multiple of these with different numbered tiles, size, etc so you don't waste too much time on laying out the board. Save as a .PSD. Then when you go and make the moodboard paste the pictures and make that picture a mask for the rectangle you want it to go on. Save as and then you can save both a png version and psd version of the final product while still having your base and be able to edit your actual moodboard.
Ex.

Pick one or two colors and if you can find pictures that fit that color scheme. If not tweak the ones that don't individually. For me lowering the vibrance and playing slightly with the hues tends to work out. If you aren't sure about this a good bet is new layer > bucket with your main color/gradient with your 2 colors > fill > play with opacity and blending modes
I tend to avoid pictures that have text or faces or repeating elements right next to each other, I find it distracting. Play around with the positions to see where you think it flows better.
Play with the adjustments, layer them, play with opacity and modes. Even if you don't know much of what you're doing, just fake it until it looks good!
Sometimes you're going to really want to use a picture, spent a fuck tone of time trying to fix the background, and the coloring.... only to find a better one. I spend about 30 minutes trying to figure out how to delete Josh from a picture of Alycia in Saint X for my last moodboard, i blurred, deleted the background and went to grab another still where he wasn't showing merging them together... and then just used another still 😅
Start with 2x2. It's simple and just 4 pictures work great for you to get a sense of the composition. The massive 2x8 or 2x10 moodboards look sooo good but oh you will want to pull your hair out by picture 4 😅
Now, I can't say these are ground breaking tips but I do hope they help you get started! I only really started making moodboards in 2016 and I would like to point out my first ones looked like this:


So I promise with time you'll get the hang of it! :D
#letter opened#im just kinda throwing shit at it and hope it sticks xD#also here are my first three moodboards for DES that mever saw the light of day#and my Saige moodboard!
5 notes
·
View notes
Text
FAQs about things+ fanworks use policy & contact info at the end
This is my personal (fannish) tumblr for all my fandoms. I reblog other's posts sometimes but mostly I use this tumblr to post my own art and answer asks/fangirl. I am in my damn 30s, so minors be wary (asks about rated g works from minors are okay)
Why is some of your older fanart not posted here?
Weell here's the thing. My old tumblr josiemus-prime was flagged to death because of the nsfw art I'd posted on it. I'm trying not to let that happen to this one (hence the censoring of some art with links to the uncensored versions on ao3). In other cases… I'm just not very fond of some of my old art and for pure ~aesthetic~ reasons I don't want them here (but it's still viewable there!).
Can you restore the link to [missing fanart] on ao3?
Sadly, some of my old art links are dead and gone forever. But I didn't delete them! I have never purposefully deleted any fanart, the only reason they're gone is that I lost the original files, and hosted the images on sites that were unreliable or now defunct (like imageshack or tinypic). I am going to try to redraw some of them eventually though! I hate seeing the dead links :(
Could you help me find [fic example]?
I have answered this in more detail on the faq page of my recs site but the short of it is; you're welcome to ask me anything! But I can't promise I can help all that much with newer fic/themed recommendations. I've listed some other helpful links on my recs faq if you're interested.
Why is some of your fic under another name?
I made thewordsleep as a way to try out other fandoms, but I'm happy with those fics so I've listed them here. I haven't moved them all over to my main account because I'm told people are subscribed to that profile in case I update there.
Why haven't you answered my ask/message?
I'm so sorry! I definitely try to answer them all, but my inbox gets flooded with bots and tumblr eats old asks sometimes bc I'm bad at getting back to people in a timely manner. If you can be bothered, you can send duplicates of the same message so I can notice it faster ;_; sorry again, I want to be friend.
What programs/hardware do you use for your fanworks?
I use Adobe Photoshop 2020 and I've started using Krita for sketching (which is completely free to use). I draw using a Intous Wacom, and I use Sony Vegas 16.0 for vidding. My art and texture resources can be found right here, under resources.
In regards to using my fanworks as prompts or inspiration for fic, vid cons, or anything else:
Go for it! Whatever it's for, I really appreciate being told about it in a comment or message in advance. Links to whatever it's used for are also nice. You can contact me if there are any issues with downloading videos, or if there's expired links or some such, and I'll try to help out if I can!
Please don't:
Claim my work as your own! Please do not copy my works to another site (i.e wattpad/ffn/ao3/pinterest/goodreads). Also, do not link anything found here to the people they are about - actors, band members, writers, etc - unless I have stated in the post or tags that you can. I realise that these days the fourth wall is about as real as the Tooth Fairy, but I'd still like to keep some of those imaginary boundaries. Thank you!
If there's anything else you'd like to contact me about you can always find me here on tumblr, or you can email me directly here: [email protected] :)
0 notes
Text
Skz reaction to accidentally seeing a sext from one of their members s/o
note: this was inspired by one of @lavenderbexlatte 's posts
includes- sub!Stray Kids, dom!f!reader, strap on, pegging, lingerie, pet names
if you like my works please reblog them with a nice comment or tag
~~~~~~~~~~~~~~~~~~~~~~~~~~~~~~~~~~~~~~~~~~~
Bang Chan
He had only wanted to get back at Felix for the many times he stole his phone when unfortunate timing made a picture of you in a sexy lingerie piece pop up on screen.
Y/N: Don’t forget about me while you’re practicing 😉
He quickly shuts off the phone, handing it back to Felix and apologizing for having taken it. He tries to forget about the photo, watching porn and jerking off in the shower, but your body always comes back on his mind. He cums into his hand, moaning your name, quickly turning the power of the shower hose up to drown out the sounds.
He couldn’t look you in the eye for a month after the incident, worried he would undress you with his eyes.
Felix finally confronts him about his weird behaviour, since he used to be very good friends with you.
“Yeah, she can have that affect on you.”, Felix laughs when Chan admits to what had happened and how the image didn’t want to leave his head, “maybe you should join us sometime so you can see how much more beautiful she is in real life.”
~~~~~~~~~~~~~~~~~~~~~~~~~~~~~~~~~~~~~~~~~~~
Minho
Jisung’s phone kept buzzing while Minho was trying to sleep, he tried to call for Sung to turn off his damn phone but to no effect. Getting up to take matters into his own hands, he picks up the phone to see who was texting him at such an early hour.
Noona: *dick pic*
Noona: How about this one?
Opening the quick answer function, he starts to type “you guys are weird…” when a thought comes to his mind. He deletes what he wrote, shutting the phone off like he was planning to, before taking out his own device. He searches for that secret picture he took last week, pressing send in your chat with a smirk across his face.
Minho: How about this one?
~~~~~~~~~~~~~~~~~~~~~~~~~~~~~~~~~~~~~~~~~~~
Changbin
Hyunjin was practicing a new choreo and had asked Chang to record him with his phone when a message popped up at the top of the screen. He tried to brush the pop-up window away but accidently opened the message instead.
He was greeted by a video clip of you stroking what looked like a silicone dick, strapped to your body. He was so enthralled by the visual, trying to figure out what you were grabbing onto, that he didn’t notice Hyunjin finishing the dance and walking towards him to take back his phone.
As soon as Hyunjin’s eyes fell upon the screen his face turned beat red, slapping the phone out of his hyung’s hand.
“What is that?”, Changbin’s genuine confusion was too cute, making Hyunjin proud that he seemed to be more mature than his hyung.
“Oh, just my dinner”, he winks.
~~~~~~~~~~~~~~~~~~~~~~~~~~~~~~~~~~~~~~~~~~~
Hyunjin
Never in a million years did he expect to see his hyung get fucked.
It was a simple mistake, he had taken the wrong phone home after a concert, but by the time he realised what he had done it was already too late.
He had saved his finger recognition in Minho’s phone before, more as a joke, but now that he had easily opened the phone, looking at the recent messages to see a video of Minho bent over a bed, getting fucked by his girlfriend, the reality hit him like a truck.
There was no way he could explain to Minho what had happened without getting his head chopped off, so he decided to lie.
“I accidentally took your phone instead of mine, but I realised my mistake instantly and came here to give it back to you.”
His arms were shaking as he handed back the phone, making Minho raise an eyebrow but he just quickly ran away, trying to delete the mental image as best as he could. But Minho wasn’t the only one that would remember the ‘Memories of last night’.
~~~~~~~~~~~~~~~~~~~~~~~~~~~~~~~~~~~~~~~~~~~
Jisung
Mommy: How’s my Babyboy doing? If you come home for dinner, I’ll let you eat me for dessert.
The messages flickered on the screen, Jeongin’s phone resting on the table during one of their lives. Jisung quickly takes the phone, putting it in the maknaes Hoodie pocket so the viewers wouldn’t get the shock of their life’s.
He couldn’t say he was surprised; he had once walked in on Jeongin masturbating in the shower, moaning out your title. If anything, he was a little jealous.
“You need to be more careful where you place your phone”, was all he said he to Jeongin after the live, trying to suppress a laugh as the maknae’s eyes shot wide open when he saw his recent messages.
“You- did you-…”
“Did I see your girlfriend sexting you? Nah, but you might want to hurry home 😉”
~~~~~~~~~~~~~~~~~~~~~~~~~~~~~~~~~~~~~~~~~~~
Felix
He had asked Chan for sex advice before, not wanting to mess up his first time, so he knew that his hyung wasn’t an innocent angel. But what he was greeted with on Chan’s screen when he stole his phone was different from anything they had ever talked about.
The older boy was tied to the bed, his legs pushed to his chest as his girlfriend was gliding a toy into him.
Felix could feel himself getting hard at the mere sight, one hand coming down to his ass to duplicate the feeling his hyung must’ve felt. He kept pressing play on the short video, needing to see it again and again.
He felt disgusted with himself that he was doing something so naughty and all behind his hyung’s back, but he couldn’t help the growing desire to be put in Chan’s place.
After handing back the phone, he patiently waited in the living room until Chan’s girlfriend came over later that day. Counting down in his head he made his way over to Chan’s room, bursting in in hopes of catching them in the middle of the act.
And so, a long night had begun.
~~~~~~~~~~~~~~~~~~~~~~~~~~~~~~~~~~~~~~~~~~~
Seungmin
He dropped Changbin’s phone as quickly as he had picked it up, hands shooting up to his face to cover his blushing cheeks.
As Changbin walks back out of the bathroom, drying his hands against his jeans, he notices the curled-up figure that was hiding it’s face in shame.
“Uhm, Is everything okay Seungmin?”
But the younger boy quickly shakes his head, turning so it looked like he was getting swallowed by the couch.
A loud sigh makes Seungmin shiver in fear.
“Did you steal my phone again?”
Changbin had seen the seductive picture you had sent, putting together the puzzle’s pieces on why his usually chipper bandmate suddenly felt shy in front of him.
“At least you learned your lesson…” and with that he turned and left the room.
~~~~~~~~~~~~~~~~~~~~~~~~~~~~~~~~~~~~~~~~~~~
Jeongin
Jealousy was the only thing that tainted his mind as your messages popped up on Seungmin’s screen. He had stolen the older boy’s phone to set a quirky selfie of himself as the background, when curiosity made him the messenger app.
Just a quick look, was what he had promised himself, but your seductive messages glued his eyes to the screen, unable to finish his original task.
Y/N: Is you tail still in place? You must’ve been blushing so hard during practice, having the tiny toy stretch you out in front of your unsuspecting bandmates.
Staring at Seungmin’s ass for the rest of the day his mouth was watering with drool, why couldn’t he be someone’s good puppy?!
Y/N: Be a good puppy and send me a picture of your pretty tail.
-
-
masterlist
-
taglist: @vanillaknj, @mingiibabieee, @sub-hoshi-enthusiast, @soya-zz, @coeurbreak, @mellowriting, @submissive-bangtan
#stray kids#stray kids reaction#stray kids smut#skz#skz reaction#skz smut#sub!stray kids#sub!skz#sub!stray kids reaction#sub!skz reaction#sub!stray kids smut#sub!skz smut#stray kids x reader#skz x reader#sub!skz x reader#sub!idol#sub!idol reaction#sub!idol smut#sub!kpop#dom!reader#dom!reader smut#bang chan#sub!bang chan#lee know#minho#sub!lee know#changbin#sub!changbin#hyunjin#sub!hyunjin
779 notes
·
View notes
Photo

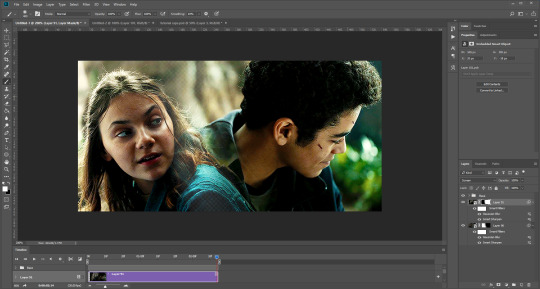
Requested by @tennant!
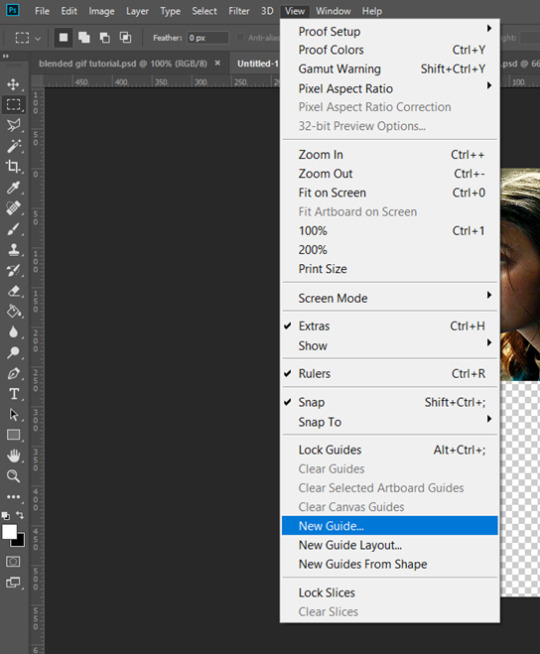
For this tutorial you will need:
Some basic gif-making knowledge (see my last tutorial!)
I’ll be using CC 2017 to do this, but as long as you have the timeline option, this will work for you! 🥰
So, in a sort of part two to my other gif tutorial, (https://luke-patterson.tumblr.com/post/636980573506813952/) this is a slightly more advanced part of gif-making. But I promise it’s easy when you know how!
Assuming you followed the last one, you’ll already know how to make your gifs into a smart object, so we’ll start there!
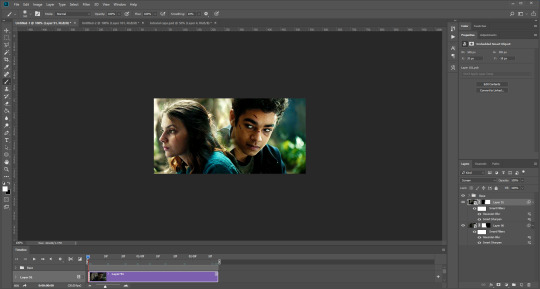
PART ONE: BLENDING
Drag both of your gifs into the same file. For this to work, your gifs have to be the same number of frames, or at least cropped to the same length in the timeline window, otherwise one will loop before the other, and it will mess up the loop of the gif. (For when we get to the multiple gif part, I recommend having between 60-80 frames, so it stays under tumblr’s 10 MB limit.) As this tutorial uses smart layers, they can both be sharpened as well.
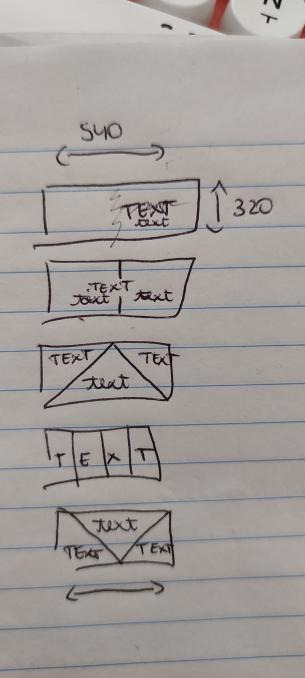
(I made this gif 540 px by 268 px, because I’m going to add more to it later. But we’ll cover that further down in part two!)
Honestly, I find it so much easier to put my colouring on top of both/all the gifs, and then clip individual layers down onto a specific gif, if that one needs more of its own colouring. That way, the extra layers don’t interfere with the other gif(s). It’s so much less confusing visually for me than having lots of groups with their own colourings, and it makes moving the gifs around simpler.

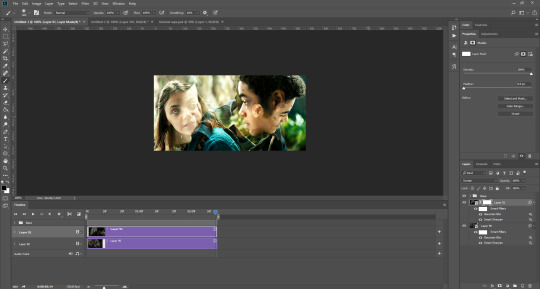
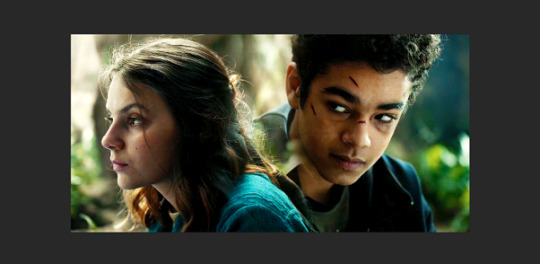
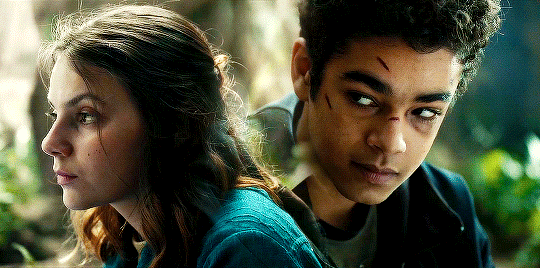
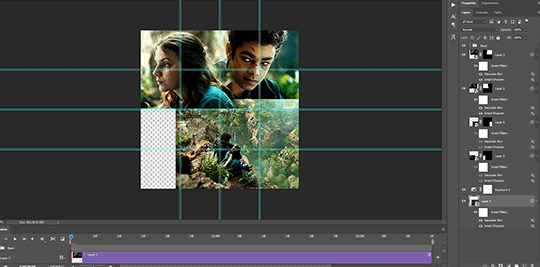
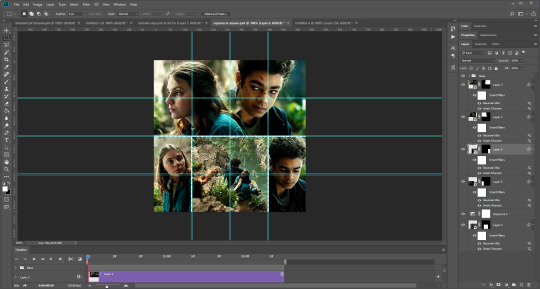
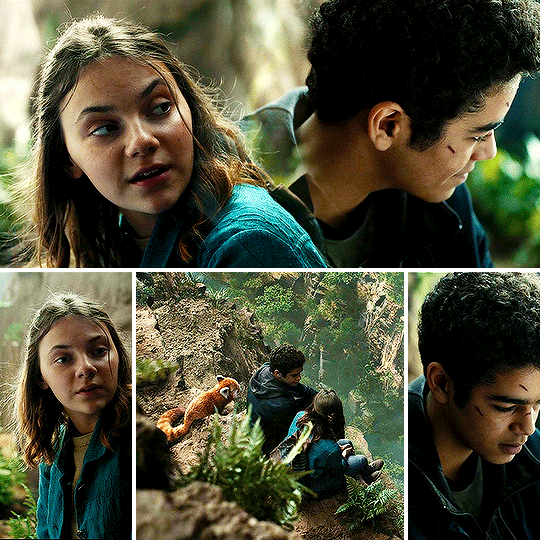
Position them side by side, one on top of the other. Obviously, you can play around with the positioning: this may be easier to do once they are blended, especially as some gifs may be smaller and you need to try them in different places. For example, this is a screenshot of a Lyra/Will set I made in the past, with three blended gifs of different sizes:
Add a layer mask to both of your gifs. You might not need to edit both, but I usually do, as I like to balance how much one gif blends into another! Using the brush tool (set to black, when you’ve clicked on the layer mask), we want the brush to be very big, and very soft.
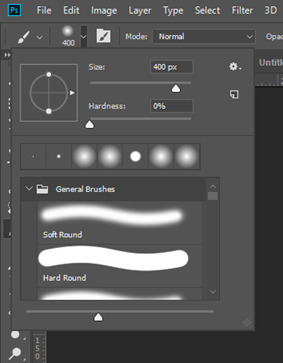
The bigger the brush, the more seamless the blending will be! By painting parts of the top gif away, the other gif will start to appear underneath. It’s not always necessary, but I usually like to set my top gif to ‘screen’ as well. This helps the gifs merge into one another even more, especially if you have one gif which is darker than the other!
As you can see, by setting it to screen, the top gif has already started to look blended. Then, you can start to paint. As the brush is so big, you might end up painting away too much of the gifs, like so:
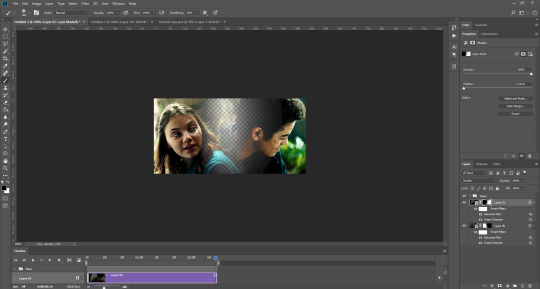
I usually go back and forth, switching between black to remove parts of the gif, and white to add it back (always painting on the layer masks). Sometimes, you might need to make the brush slightly smaller, just to fill in tiny gaps.
Another thing you can do is to add a solid black colour underneath all your gifs, just to fill in any spaces. (Sometimes, I do this on top of gifs too, to create spaces where I want blended gifs to go, like in my current header!):


Anyway, back to the original gif. My blended gif is now pretty much how I want it to be, except Lyra is quite far to the left, and Will is taking up a lot of the screen:
So I’m going to see how they look at the start of the gif, to determine how far right I need to move them both to get them mostly in the middle:

And that’s it! Now you can export them [file > export > save for web (legacy)] and you’ll have to change the timing back to 0.05, or use the action I introduced to do this in my last tutorial.
PART TWO: MULTIPLE GIFS
To put more gifs underneath this one I’ve made, I expanded my canvas. Go to image > canvas size. Make sure you click the little ball to the top in the anchor section, so the canvas expands underneath your gif. If you leave it in the centre, it will simply expand from the middle, or the left, right, etc.
Next, we need to remove the black line at the bottom of the gif.
You want to select the space for cropping using the rectangular marquee tool, so in this case, 540 px by 268 px. The tumblr spacing is 4px between each gif in a set, so however many gifs you want, you have to account for 4px less pixels inside your one gif, to give the illusion there are multiple (unless you want them to touch).
For example, (there’s a little maths here: forgive me!) two gifs of equal size, placed side by side, must be 268px in width or length, because (268 x 2) + 4 = 540. (There is one 4px gap in between). For four gifs, it would be (132 x 4) + 12 = 540. (For the three, 4px gaps). For three gifs of equal size, it’s a bit different. These must be 177px, 178px, and 177px, to ensure there is 8px of space left over (two gaps).

Then, make sure the colour white is the primary colour selected on the paint pad (this is vital) and (in this case), the layer mask from before when we blended, is selected. Press ctrl (command on mac), shift, and i to invert your highlighted area (or select > inverse) and then simply delete the excess line, (either using the delete button on windows, or fn + delete on mac, I think!) Then, do this again for the other gif.
And voilà! It’s gone. You can also paint it out (using the black colour as the primary colour to erase), but I would still recommend highlighting the outline of the area you want to erase, using the marquee tool, so that you can paint it out in a straight line, and don’t paint into your gif and erase parts of that by accident.

Now to add in the other gifs! To do this, I use guides, but you can also use lines at a size of 4px, to map out the spaces in between gifs. If you go with lines, just make sure you delete the shapes after. With guides, they are not actually ‘in’ your gif, so you don’t have to remove them before you save. However, guides only work for straight lines, so gifs with other shapes will need to be made using lines, (but I will touch on that at the end!)
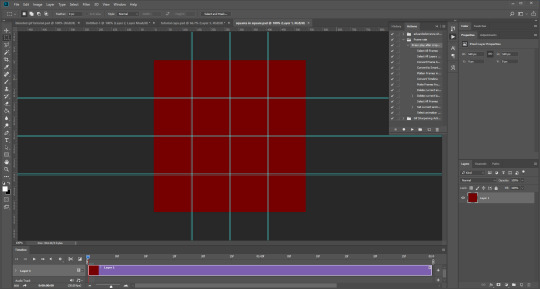
I actually have a few psds saved with guides already on, so that I don’t have to draw them out every time. If I was making a set with three gifs in a row, this would be different, but I usually stick to two or four (or three with one big square/rectangle, and two little squares), so this is my most used psd. The guides are set at: 132 px & 136 px, 268 px & 272 px, and 404 px & 408 px, both horizontally and vertically!
I have a red colour underneath just because I find it easier to see the lines between gifs this way - if you do the same, just remember to turn it off before you save your gif, otherwise it will have the colour red instead of mimicking the transparency between gifs.
Now, make a second gif! I decided to have a square in the middle as you can see in the title, and then two rectangles either side.
Then you want to resize it, in this case to 268 px by 268 px, and drag it across into your main file, or go to layer > duplicate layer, and move it that way. Don’t worry, when you move it, it will show the whole gif as if you haven’t cropped it. The reason I crop and resize it beforehand, is so that I can ensure it will be the correct size when I remove the excess parts of the gifs I don’t want, (rather than making it 268px including the black line for example, which would be wrong.)
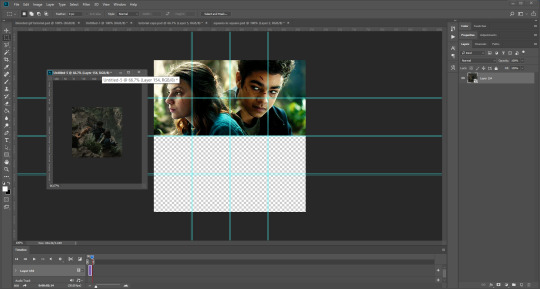
Then, as before, position the gif where you want it to go, and highlight the area you want to be in the gif. Whilst this is selected, (again ensure white is the primary colour on your paint pad), click the layer mask:
Then the excess around the gif should be gone! (Making a gif of a gif tutorial... meta, lmao.) This way, if you decide you want to change the shape of the gif, or move it slightly, you can just paint parts in and out, or delete the layer mask, move the gif, and reapply it!
You can then sharpen and adjust your colouring to the gif as needed! Next, go ahead and repeat this process for your other gifs. Selecting the area, adding a mask, and sharpening. By the end, you should have something that looks like this:
PART THREE: OTHER SHAPES
If you want to use other shapes (which I haven’t tried myself until now, but I can talk you through some thoughts!) You can use the line tool. So, for example you could make a layer with the lines at 4px, merge it, and then at the end delete it from your gif to leave the gaps transparent:
To make a gif any shape you want, choose a shape (either use the shape tool, or get a png of it), and using a clipping mask. Make sure your gif is above the shape layer, then right-click the gif layer, and select create clipping mask to clip it down:
OR you could use a circle, and then delete the circle to make it look transparent:
The best way to select items which are not rectangular, (so you can’t use the marquee tool), is to use the pen tool. Click around your gif so that it’s got a border of what you want selected. Once you have outlined your gif, right-click and choose make selection:
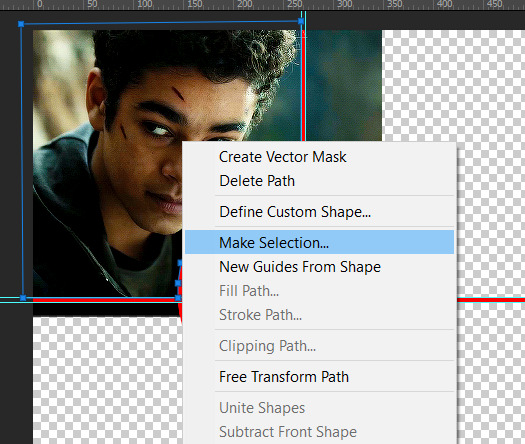
Then set the feather radius to 0, and then the area you want should be highlighted in the same way as with the marquee tool above, so you can add a layer mask, etc. However, as the pen tool is not always that accurate, there is a little white gap here where it’s not a perfect circle.
A way to overcome this could be to make all the gifs you want, and then simply add one on top with a white 4px border, so it gives the illusion of being transparent! (As I have done above, but save it as white rather than red!)
If I find a better way to do this in the future, I will update this tutorial. I hope this is helpful, and thank you for reading 🥰💖
#gif tutorial#tutorial*#completeresources#yeahps#chaoticresources#allresources#mikesmom#usertom#usersmile#heavensentnetwork#if there's any mistakes pls let me know#i am so tired rn fjghfjhgfjgh
697 notes
·
View notes
Note
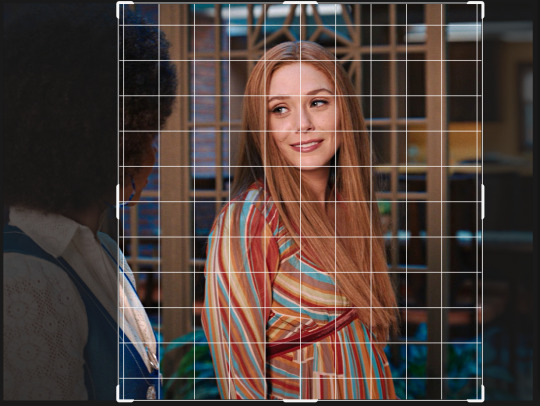
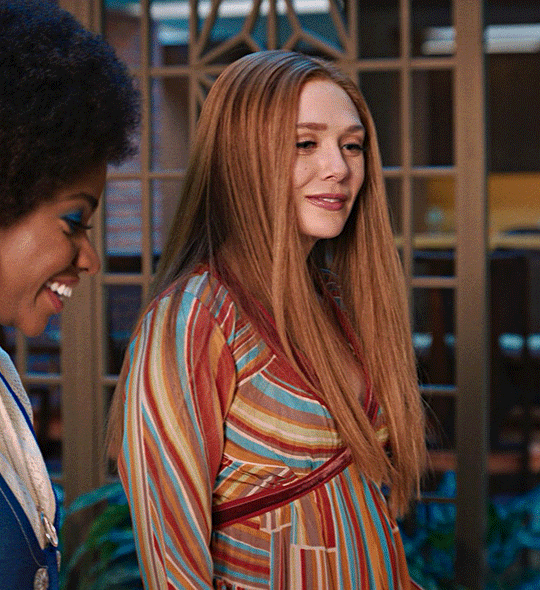
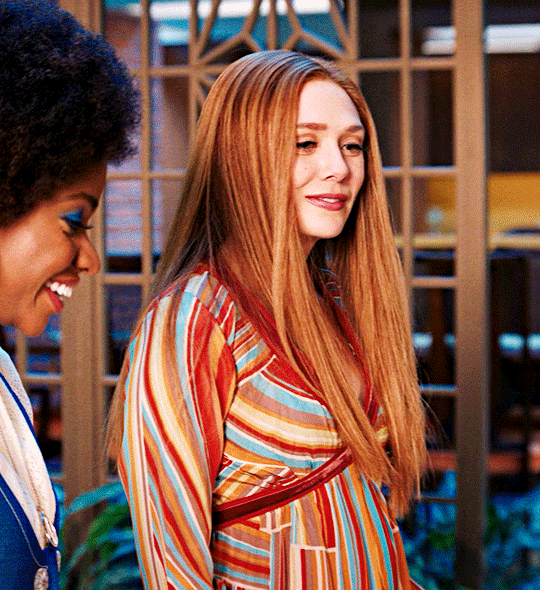
Hi Nia! You're gifs are so pretty! Is it possible for you to show how you get your WandaVision gifs too look so clear and hd? And how do you do your colorings too? (specifically the wanda maximoff in episode 3 gifset ITS GORGEOUS) I'm new to giffing and all the tutorials are kind of old. It's okay if you don't want to though! I understand it may be time consuming.
omg no! never feel intimidated to ask!! i don’t mind at all!
so, i’m going to show you how i made and coloured this gif
mostly bc it’s the only gif in that set w text and i’m going to share my text settings too!
tutorial is below :)
WHAT KIND OF VIDEOS ARE BEST?
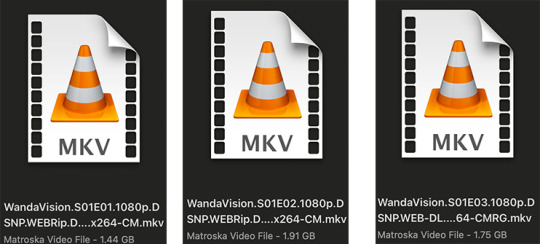
.mkv files (the bigger the better BUT i usually think anything above 5 gb is excessive and unnecessary for an episode of television BUT for a movie worth it)
itunes downloads (logolesspro on twitter, hd-source on tumblr, live-action-raws on tumblr have some DEPENDING on what you’re looking for) (also, there’s a chance that if you search "show/movie hd download tumblr” you’ll find a tumblr with its itunes download available)
THAT IS IT NO OTHER TYPE OF FILES MAKE YOUR GIFS LOOK GOOD
- my suggestion is always if its new (like just came out the past month) t*rrent it! it’ll be downloaded quickly and .mkv files look the best! BUT if not check the sources above see who has the BIGGEST file if they even have what you’re looking for and then if not then you look to t*rrenting!!
here are the wandavision files i use so you can see!!
SCREENCAPPING
-if you have windows use potplayer! i have a mac so i can’t show you how to use it and it’s not available for me :( HOWEVER back when i had a windows potplayer was the best method in screencapping!!
-I HAVE A MAC! so i use mpv!! (go to mpv.io and follow the directions) BUT DON’T DOWNLOAD THE LATEST ONE (it has a bug that skips frames) try each before the latest one bc from what i heard different ones work differently for everyone!! and i don’t know which one i use (yikes!) THERE ISN’T THAT MANY I PROMISE AND IT’S WORTH IT BC MPV IS THE BEST (i used to use adapter but they didn’t take impressive screencaps in my opinion and it was evident in my gifs you can see it too! )
create a folder for your screencaps! and make sure to rmb the directory order! now we want to create a text file on our built in textedit app on mac! type up all this down below (i like jpg but you can replace jpg w png if you want) AND SAVE THE FILE AS mpv.conf THIS IS IMPORTANT SO DON’T FORGET IT! save it somewhere you’ll find easily and NEVER delete it until you don’t use mpv anymore
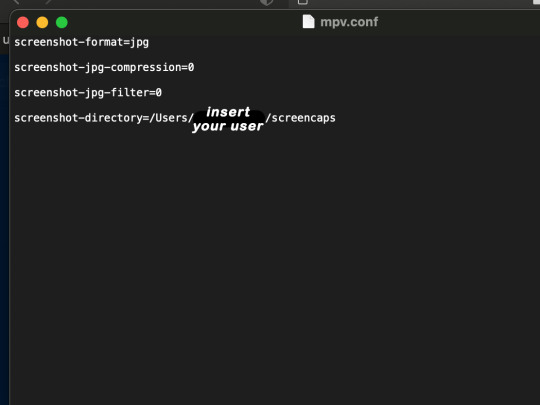
just in case you don’t know what to insert after, go to your screencaps folder
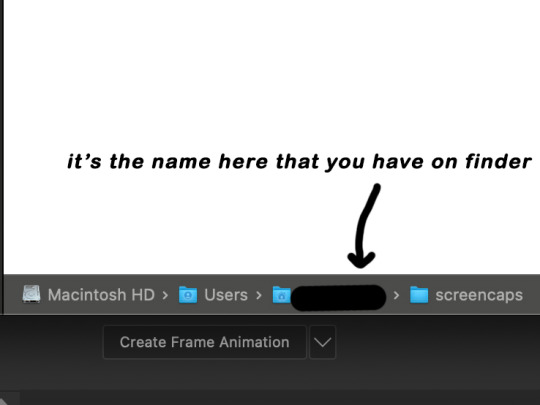
now you want to open mpv and go to the corner towards mpv -> preferences and they’ll tell you that there is no .conf file SO GO LOOK FOR THE TEXT FILE WE JUST MADE AND DRAG IT TO THE FOLDER THEY OPENED FOR US AFTER SAYING THERE IS NO .CONF FILE
(i learned all this from @kylos tutorial!! so if any of what i just said about setting up mpv makes NO SENSE to you check out their tutorial at kylos(.)tumblr(.)com/post/178497909311)
now we can screencap!
so let’s find the scene we want RIGHT BEFORE and MAKE SURE SUBTITLES ARE OFF
i pause and then press (option/alt + s) and then SCREENCAPS ARE BEING TAKEN!! and to end the screencaps being taken you once again press (option/alt + s)!!
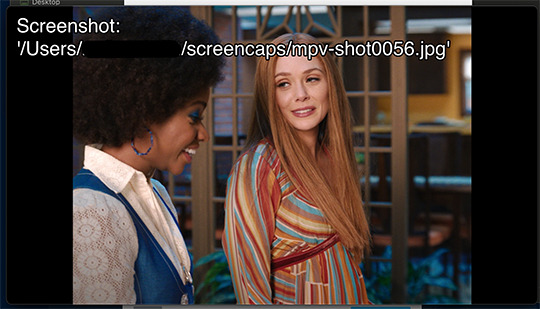
now we want to delete the excess frames! and put it all into one folder!! DO NOT DELETE FRAMES IN THE MIDDLE OF WHAT YOU WANT TO GIF!! WHEN YOU SKIP FRAMES IT WILL BE NOTICEABLE!!

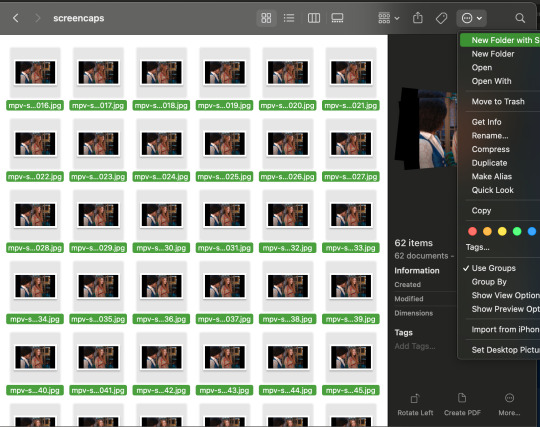
MAKING THE GIF
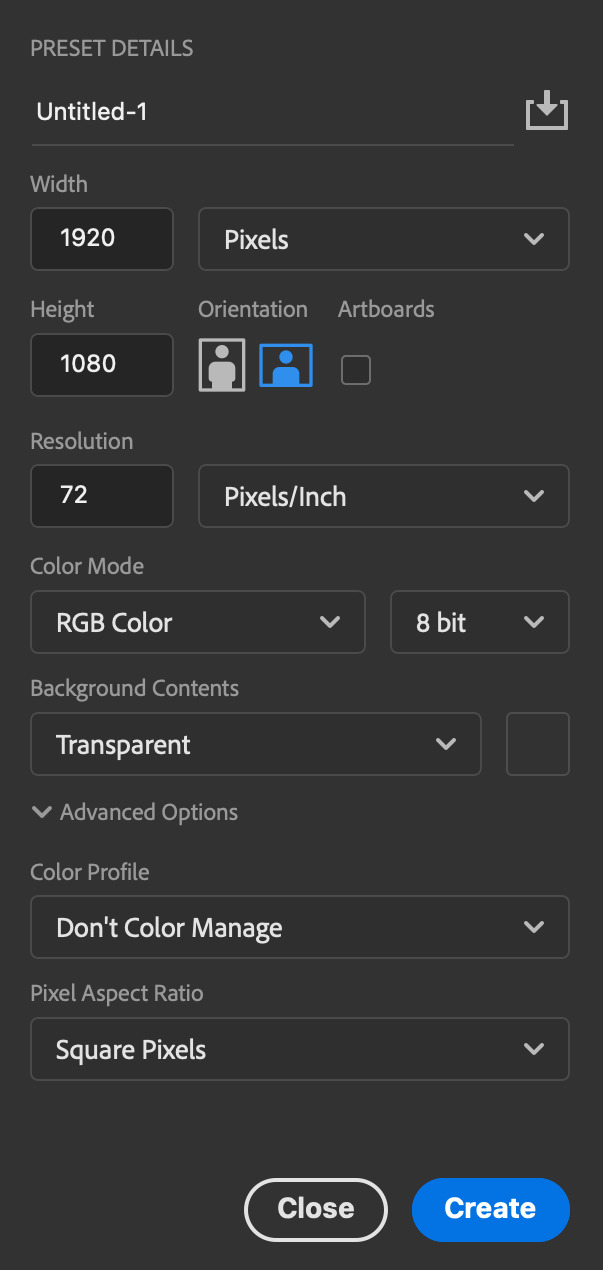
this method isn’t used that much BUT I LOVE IT so this is how i put my frames in! first i check to see the size of my frames: 1920 x 1080

so i create a NEW file on photoshop with those dimensions w these settings
now i set my tool on photoshop to path selection tool bc if you have it set on smth like move tool or crop tool at the end you might end up moving or cropping frames you don’t want to!

ok so now we select ALL our frames and drag it on top of our new file on photoshop and the MOMENT we see our first frame in photoshop JUST KEEP CLICKING ENTER until all the frames are loaded!!

you can do file -> scripts -> load files into stack but it is WAYYY slower in my opinion!
now i crop out the excess BUT i don’t resize the gif yet! the dimensions wandavision is filmed in is 4:3 so i go to crop and set the settings to this:

MAKE SURE IT’S ON RATIO SO WE’RE PRESERVING THE ORIGINAL SIZE JUST CUTTING OFF THE BLACK EDGES!! We are going from 1920 x 1080 to 1440 x 1080 this is the dimensions after i cropped

WE ARE KEEPING THE QUALITY BY NOT CHANGING THE DIMENSIONS OF ANYTHING INSIDE !!
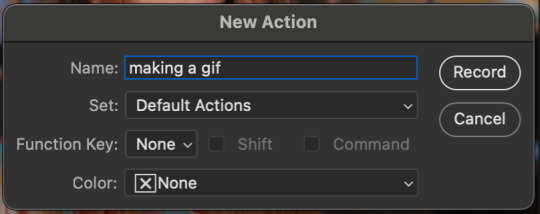
now we want to go to actions and create an action!! open up actions w one of these two depending on what your dash looks like!!


so we create an action with this button on the bottom of actions and we’re gonna title it making a gif and hit record!!

NOW LET’S GOOOOO!!
1. make sure you have timeline on your dash!

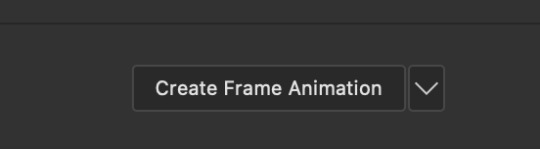
2. create frame animation (if you see create video timeline just click the arrow next to the button to see your other option which is frame animation!!)
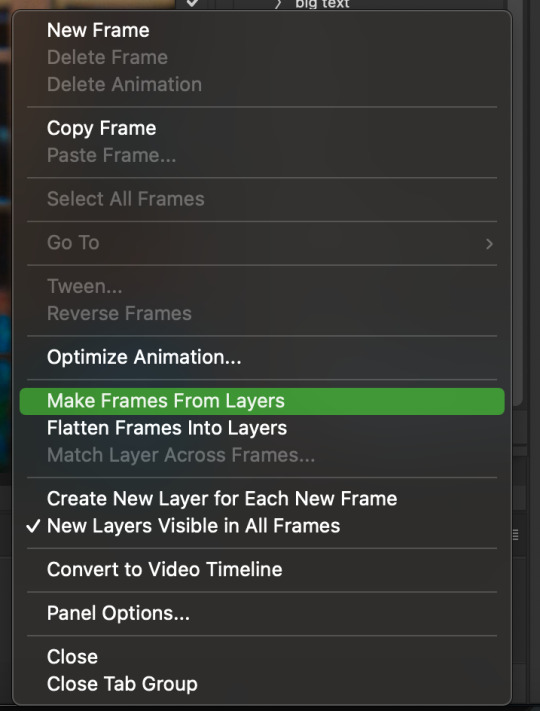
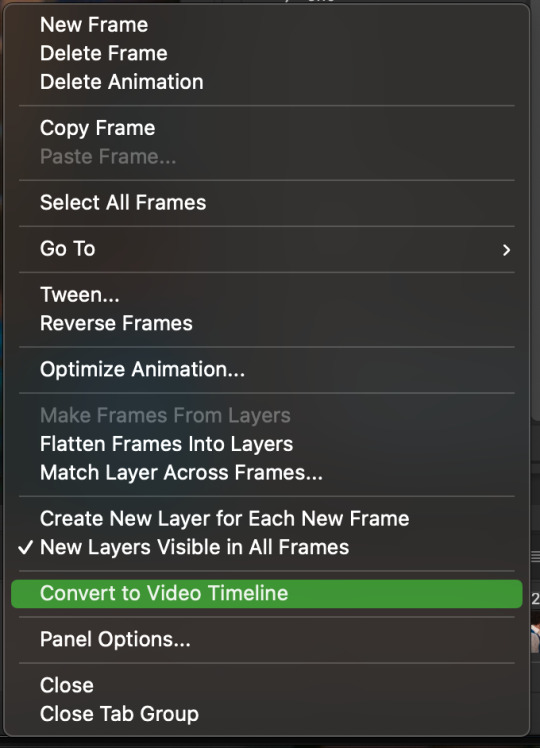
3. now let’s meet our best friend!! the little bar in the top right corner that has all the commands for making our gifs and MAKE FRAMES FROM LAYERS
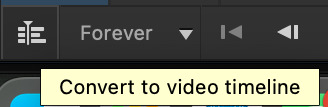
4. WE HAVE TO SHARPEN OUR GIFS NOW BUT TO DO THAT WE NEED TO CONVERT TO A SMART OBJECT SO NOW WE ARE GOING TO CONVERT TO VIDEO TIMELINE there are two ways: the button in the bottom left corner or the button in the top right corner w all the other commands!
5. select -> all layers DON’T MANUALLY SELECT THEM ALL BC THE ACTION WILL ONLY SELECT THAT SAME NUMBER OF FRAMES SO IF THERE ARE MORE FRAMES YOU WON’T GET THEM IN THE SMART OBJECT!!

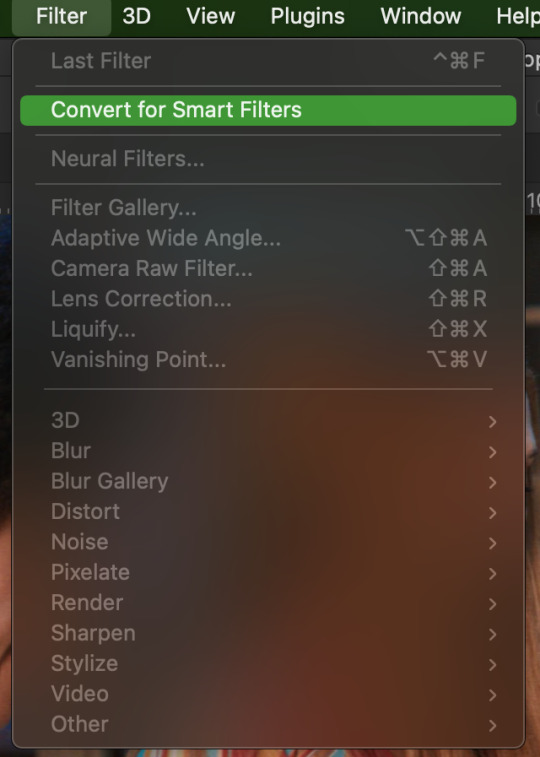
6. filter -> convert for smart filters
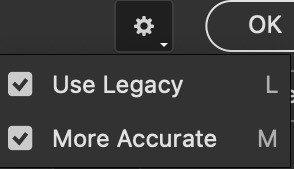
7. NOW WE SHARPEN!! (filter -> sharpen -> smart sharpen) i sharpen twice!! first, make sure we are on legacy w more accurate and remove gaussian blue! the first sharpening will be 500% with 0.4 px radius. NOW SHARPEN AGAIN (filter -> sharpen -> smart sharpen) also w legacy, more accurate and remove gaussian blur BUT this time 10% with a 10.0 px radius!


8. it’s hd now!! so let’s flatten frames into clips!! go to the top right magic button again!! and you should see a pop up saying layers are being made

9. now we convert back to frame animation w either the bottom left button or our magic top right command center!

10. make frames from layers

11. select all frames w our magic command button
12. set the animation delay to 0.05 THAT IS THE BEST ONE ALWAYS ALWAYS ALWAYS only use 0.06 when the character is moving really fast in the video itself and it makes the gif itself look awkward BUT NEVER GO ABOVE 0.06 it’ll look slow and laggy and we don’t want that and don’t go below 0.05 bc then it’ll be tooo fast and we don’t want that either!


13. now delete the very first frame on the timeline bc it is an oversharpened duplicate of the second frame! end the recording w this button!

this is what your action should look like expanded! if you made mistakes on the way and it shows up you can just click the specific step and press the trash can on the action tab to delete in from the order!!
NOW AFTER LOADING YOUR FRAMES AND CROPPING THE EDGES OF YOUR FRAMES IF YOU NEED TO JUST PLAY THE ACTION AND THEN YOUR GIF WILL BE MADE FOR YOU!!!!
now i delete some unnecessary frames in the beginning and end and this is what my gif looks like (the size was 46 mb and the limit is 10 mb so the dimensions of the gif are 540 x 405 to get it to 5 mb BUT I HAVEN’T CROPPED IT YET SO THIS IS ME CROPPING JUST TO SHOW YOU WHAT IT LOOKS LIKE)

CROPPING THE GIF
in my opinion if you want your gif to look hd you shouldn’t crop before you sharpen!! i believe that if you crop before you sharpen you don’t allow photoshop to sharpen all the pixels whereas if you crop beforehand there is less to work with!!
dimensions is all up to you!! just make sure to go by tumblr rules!! 540 is the max width and if you want to make two gifs per row then my suggested width is 268 and for three gifs per row my suggested is 177 px! Just have the right width and the length can be whatever you want!!
now i’m going to crop my gif to 540 by 590!!

NOW THIS IS WHAT MY GIF LOOKS LIKE!
COLOURING BASICS
let me show you the best adjustment tools in my opinion and a brief explanation for what they do!!
brightness/contrast: pretty simple increase/decrease the brightness/contrast BUT one of my techniques for when i first start colouring a gif is i select all my frames and do nothing to the settings of the adjustment but i set the layer to screen LIKE THIS

curves: ik others use curves to change brightness/contrast w the squiggly thing BUT i like it to set a white point and black point, this is also a technique i use when i first start colouring a gif when screen doesn’t look good for me SO you use white point to select a pixel on the gif to set as the lightest color on the gif (setting the white point) and you use black point to select a pixel on the gif to set as the darkest colour on the gif (setting the black point) usually the white point makes it TOO bright and that’s why we use the black point to counter it and same goes for when i use screen with brightness/contrast, it gets too bright so i use black point to counter it below is the button for white point and the button for black point, respectively they are shaped as color picker tools


vibrance: generally, i never use this except for color p*rn sets but they work really well in making colors seem more strong
hue/saturation: like vibrance, i never use this except for color p*rn sets but this adjustment is to help change the colors or hue of a color for example: turn blue into purple or turn a blue into a little lighter shade of blue
color balance: I ALWAYS USE THIS!! except for in black and white gifs BUT THIS IS MY GO TO AND IF I DON’T USE IT MY GIFS ARE JUST BLAND i feel like color balance is what essentially balances the colors on your gif and adds dimension to it, it makes your gif go from looking way too yellow to a more golden neutral look and it is an essential adjustment in my opinion
channel mixer: i rarely use channel mixer BUT it is so so useful when you are working w a dark scene just play w the settings and all of a sudden all the blue in a dark scene will be a little more yellow and red and your scene will kind of just look brighter and more visible
selective color: THIS IS ALSO AN ESSENTIAL this helps SPECIFIC colors pop you’re working on a scene where there is too much red on someones face you use this tool to remove the magentaness from the yellow section OR when you feel someones face is TOO yellow and needs more blush you add more magenta in the yellow section of selective color
gradiant map: gradiant map is perfect when you’re lazy if you feel like your gif looks more neutral and you want some red in it but you don’t want to mess with any other adjustments just set a red to black gradiant on soft overlay with a very low opacity and BOOM slightly red but not too much red added!
NOW TO COLOR THE GIF!
today i have decided to start with a brightness layer set on screen
and this is what we got!

now that’s a little to bright and washed out in my opinion SOOOO to counteract it, i’m going to use my black point tool in curves and i’m going to select this point on the gif (it’s better to choose smth in the background and not smth that’s paid attention to such as monica’s hair or either of their eyelashes)

now my gif looks like this! the base color is complete!

now i think i need to balance all this yellow and red! SOOOO WE GONNA USE COLOR BALANCE!!
i think the best way to use color balance is to keep swinging the balancer until you see what you like and then keep going midtones i think i want more red and i don’t want a cyan midtone and then for shadows i think i want more cyan to counter the redness of the gif but highlights i don’t touch that much NOW HERE ARE MY SETTINGS SO YOU CAN SEE

and this is what my gif looks like

now you can stop here if you want but in my opinion i think the gif looks a lil too dead still SO IMMA USE SELECTIVE COLOR
i think there needs to be a lot lot more RED so i amp up the yellow magenta and black in the red! but i also think the yellows need to be LESS RED so i remove magenta from the yellow! and bc there’s some cyan and blue bc of monica and the flowers in the background im going to make the cyans more cyan and the blues a lil more black! i’m going to remove some yellows from the magenta!! and i add more black to the neutrals and black!! i think it’s always important to add more black to neutral and black bc it adds more depth to the gif by not just making it a bunch of bright colors and having dark colors to contrast to!! my settings are below!

and the result!
now let’s see everything together!

and the before and after!

I HOPE MY COLOURING EXPLANATION MADE SENSE!! if not you can always ask me more questions i don’t mind!!
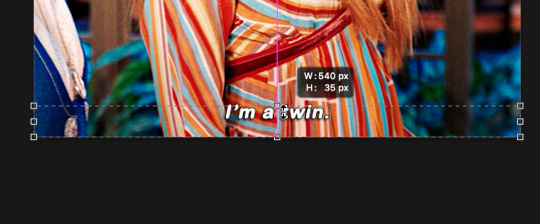
ADDING SUBTITLES
we want to grab the text tool!
make a text box from anywhere in the middle from the left to right edge. this is so we can make sure our text is centered and will be in the same place for when we have sets w more than one gif w text!

type your text out and make sure you highlight the whole text so that all the settings apply to EACH character! you can find the alignments (for center) in the paragraph tab!

now lets right click on the text layer and go to blending options! add stroke and drop shadow!


now drag it to the desired height you would like and make sure to keep it in mind for when you have more than one subtitled gif in a set!
NOW TO MAKE SURE THE TEXT STAYS IN PLACE AND THE BLENDING STAYS YOU HAVE TO CONVERT TO SMART OBJECT!!

if you want to only have the text applied to certain frames instead of all frames, select the frames you don’t want by clicking the first frame in ur don’t want section ON THE TIMELINE and WHILST HOLDING SHIFT click the last frame of ur don’t want section and then toggle the eye switch next to the text layer
now you see the text

now you don’t

tip: use opacity to fade the text in and out!
the text is going to be on all my frames so i don’t need to toggle the eye but i just wanted to show you just in case!!
now here’s my FINAL RESULT

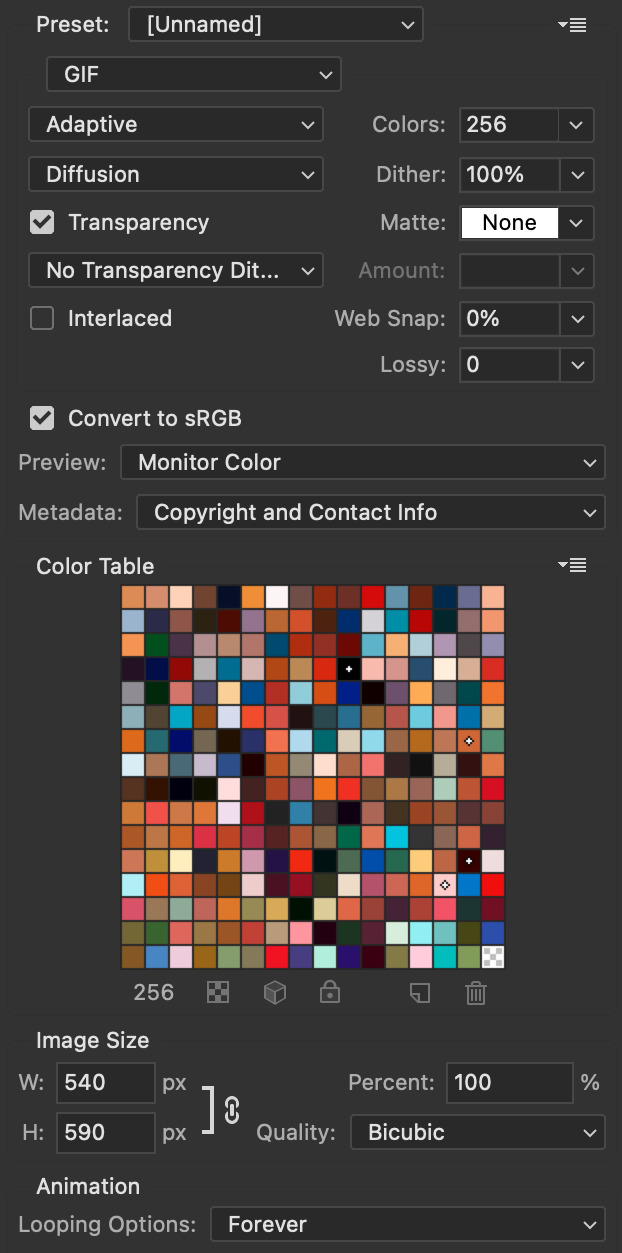
save for web (file -> export -> save for web)
your gifs have to always be under 10 mb! so, if your WAYYY overboard YOU HAVE TO DELETE FRAMES! or you can divide the gif in two and have two gifs instead of one! however, if you plan on going the deleting frames route MAKE SURE YOU DELETE FROM THE BEGINNING OR END OF YOUR SELECTION i promise you that most of us won’t notice that your characters dialogue is being cut off BUT WE WILL NOTICE IF FRAMES ARE BEING SKIPPED so, don’t delete frames in the middle of ur gif!! idc how little you do it IT WILL RUIN YOUR GIF AND I SAY THIS FROM EXPERIENCE i would delete every fifth frame to cut down my gifs and that may seem like not that big of a deal BUT IT IS my gif looked choppy and poor so it is way better to cut from the end/beginning of the gif
ANOTHER LAST PIECE OF ADVICE in the bottom left of when the save for web menu shows up THERE’S A PREVIEW BUTTON click on it! it’ll show you your gif on your default browser and show you what it’ll look like once uploaded! this is perfect to check the speed of ur gif and the colouring and to notice if there’s a problem with your subtitles or maybe there’s an obvious jump in frames you never noticed before!! i always use preview bc the built-in photoshop viewer of ur gif shows the colors differently and the speed is NEVER ACURRATE!
I USED THESE SAVE SETTINGS!! many say to use selective pattern but i DISAGREE and i think these save settings are the ✨ best ✨
OK NOW THAT IS THE END OF THIS VERY LONG GIF TUTORIAL!! I HOPE THIS IS WHAT YOU WANTED!! IF YOU HAVE ANY QUESTIONS DON’T BE AFRAID TO ASK I SINCERELY DON’T MIND!! JUST DON’T BE RUDE OR ANYTHING BC PPL HAVE BEEN RECENTLY :(
I WISH YOU ALL THE LUCK AND FUN IN YOUR GIFFING ADVENTURES !!
#tutorials#asks#sourceblog#allresources#completeresources#itsphotoshop#dailyresources#resourcemarket#chaoticresources#onlyresources#hisources#sibylresources#dailypsd
401 notes
·
View notes
Text
Four for four baby! This is perhaps the last of my daily updates as I’ll be busy the next few days. Here’s another little filler chapter but it’s a good one as it’s the first one where we directly see references to other creators’ Monkie Kid works! There’s three references here, two subtle and one explicit. I’ll make sure to have links to each work in the notes at the end of the chapter. Hope you enjoy!
AO3 Link
<Previous | First | Next>
Scattered Cicadas - Chapter Four: Childish Behavior
Tang often feels like the only adult surrounded by children. Literally sometimes.
----------
If there was one thing Tang had learned about these timelines he kept jumping between was that they were consistently inconsistent.
The minor details that changed randomly but never really affected the outcome of the events from his original time were still abundant and rarely phased him much anymore.
(Although that one time he had platinum blonde hair had been interesting.)
It was when entirely unique situations arose that the scholar was caught off guard.
New events sprung up every now and then and inserted themselves between the original ones. As with the smaller changes, these new scenarios were unpredictable and varied wildly in scope.
A surprisingly durable MK clone that somehow managed to escape being dispelled, gaining independence, and becoming Macaque’s apprentice.
An ocean demon sinking ships just outside the bay and Sandy getting to go on that water adventure he wanted.
MK’s birth parents trying to reinsert themselves back into his life after seeing his achievements on the news.
(Tang was so incredibly proud of his kid for standing up for himself and refusing their empty platitudes. The pranks that he, Mei, and the Monkey King had pulled on them in retaliation were great stress relievers.)
Since Tang could still do his best to help out in each new event without horrible consequences, it seemed the rule of “No Interference” did not apply to them. He supposed that made sense as he had no way to predict when or if they might occur and thus couldn’t change an outcome he didn’t know about.
He was grateful for that small mercy at least.
Still, with how these cycles seemed to be endless so far, a few of these events would happen over multiple timelines.
Getting de-aged by a mischievous trickster demon or spirit was a strangely common occurrence.
MK seemed to be the most popular target for this particular curse. The brightness of his personality seemed to shine even stronger whenever he was reverted into a child, which simply made Tang love the kid even more.
(He wished he could have helped the Monkey King tear Macaque apart for kidnapping their precious little one in that cycle.)
They all had their own turns of having their biological clocks reversed of course. Mei was a little trouble maker, Pigsy was a shy and timid toddler, and Sandy liked to have things he could break apart. Tang couldn’t clearly remember the times he had been de-aged but was pleased when an exhausted Mei and Mk had said he was the easiest of the adults-turned-kids to take care of.
Then there was the Monkey King.
Having to corral a rambunctious young monkey with the strength to crush boulders and the ability to duplicate or shapeshift was not easy.
(He still had no idea how MK had managed to do it alone once.)
With the amount of times they had all been subjected to this specific curse, Tang only really had himself to blame for not seeing it coming.
Tang poured over the scroll in front of him, trying to find the counter for this timeline’s version of the curse. Behind him, Mei distracted a de-aged Red Son, or Red Boy as that’s what the small fire demon was calling himself.
Getting kidnapped by a somewhat feral child with the ability to freely toss around the True Fire of Samadhi hadn’t been the most pleasant start to his day. While being mistaken as the monk Tang Sanzang was a little flattering, the threat of being roasted over the sacred blume flames and eaten had quickly dampened those feelings.
Luckily the young demon had fallen asleep, the fires dissipating as he lost consciousness. If only Tang knew how to cast the Monkey King’s fire ward...
“Ahem.”
Tang glanced up and paled at the sight of a displeased looking Demon Bull King.
“Little thief,” the demon addressed an equally freaked-out MK. “I believe you have something of mine.”
“Father! You’re here,” Red Boy called out as he jumped from Mei’s arms. “I have wonderful news! I’ve found a husband!” He quickly ran over to a petrified MK and leaned against him like he was presenting some great treasure. “Look! Look! Isn’t he pretty?”
Tang had almost forgotten about that particular detail. If they got out of this alive he was never going to let MK live this down for the rest of the cycle. Prerogative of being a dad and all.
“What do you think father,” Red Boy continued, ignoring MK’s desperate plea for him to stop. “I can marry him, right?”
DBK’s expression was frankly unimpressed as he stared down into the hopeful one Red Boy wore. Tang had a bad feeling about what was going to happen and slowly made his way around the room to hide behind MK and Mei who were also backing away.
“No.”
Tang winced a bit at the bluntness of the answer and braced himself for the explosion that was sure to follow.
“What? But… why? WHY NOT?!”
The genuine hurt and confusion in the young demon’s voice would have made Tang feel a bit sympathetic, if Red Boy hadn’t tried to eat him of course.
“Because I said so,” DBK growled as he knelt to be closer to his de-aged son. “Now, enough of this. Time to stop being a child.”
Tang frowned. That was... not how to calmly explain to one’s child about why you were refusing their request. Not if you wanted to avoid a full-on meltdown. He should know, having to take care of a young MK multiple times.
Looking into the Demon Bull King’s scowling visage, he wasn’t sure if the older demon simply didn’t know how, or just didn’t care.
“That’s… NOT FAIR!” Red Boy’s disbelief predictably turned into anger as his hair once again burst into blue flames.
“THAT’S NOT FAIR! I am not a child!” The True Fire of Samadhi burst out around the boy, seeming to startle DBK who took a step back. Tang was just thankful that it wasn’t aimed at him this time.
“I… I’m not-” Red Boy’s anger quickly melted away, as did the fire around him. The young demon sniffed a few times before dropping onto the ground and beginning to cry.
Loudly.
“You’re recording this, right?” MK whispered to Mei.
“Obviously.”
Tang sighed at their antics and looked over at DBK. The demon still looked angry but the scholar could see the uncertainty in his eyes. He seemed completely out of his depth and unsure on what to do.
Tang took a steadying breath before mustering his courage and stepping out from behind MK. If Demon Bull King didn’t know how to act like a good father then perhaps he could show him.
If he survived this he was going to need a vacation to fight back against the grey hairs this was going to give him.
The other adults all looked at him as if he had sprouted another head as he approached the sobbing child and knelt next to him.
“Red Boy?”
“H-huh?” The young demon looked up in confusion at being addressed.
“I know that right now everything seems pretty unfair and that can be upsetting,” Tang soothed, keeping his voice steady and reassuring. “But I promise you that your father has a good reason for not letting you marry MK. Would it help if he were to calmly explain that reason without getting angry at you?” He aimed that last sentence more at DBK than Red Boy, who’s sobs had slowed.
“M-maybe…” the young demon finally admitted.
Tang turned to stare expectantly at the Demon Bull King. The demon glared down at the scholar.
“Why are you treating him like a child?”
The harshness of his tone made Red Boy start to tear up again. Tang glared right back at DBK.
“Because right now, until we can reverse this, he is a child,” the scholar snapped, his fear replaced with righteous anger. “And like every child, he deserves to be treated with kindness and respect. He deserves to be comforted by a parent whom he obviously adores and be told that it’s okay to cry. He deserves to feel safe and loved.”
The room was silent save for the hiccups and sniffles from Red Boy as they all stared at Tang. DBK’s mouth hung open as he gazed incredulously down at the human, seemingly struck speechless.
“F-father?”
The small and unsure voice of Red Boy snapped the Demon Bull King out of his thoughts, and something seemed to loosen within him.
Tang stood and retreated back to MK and Mei to give the demon some privacy as he knelt next to his son and began speaking in a hushed tone with him.
“What the hell Mr. Tang,” MK hissed into his ear as he stared wide eyed at the pair of demons on the ground.
“Language MK,” Tang hissed right back before leaning over to Mei. “I know you aren’t recording two incredibly powerful demons having a moment of vulnerability who would stop at nothing to destroy us if they discovered the existence of such a video, right?”
“Eep!” Mei nearly dropped her phone as she rushed to stop her recording and then delete the last few minutes of the resulting video.
There were a few minutes of tense silence as the three humans did their best to pretend that there weren’t two demons having an emotional moment together just a few feet away. They gave a sigh of relief when Red Boy launched himself at his father, wrapping his arms around his neck. DBK seemed panicked at first before slowly wrapping his own arms around the young demon.
Tang adjusted his glasses and gave a nervous smile to the Demon Bull King who was scrutinizing him like a particularly confusing puzzle.
At least he didn’t seem angry any more.
Perhaps they would escape this fiasco unscathed after all.
----------
I was not expecting this chapter to turn into another Dad Tang story. It just kind of happened that way. So onto the references!
First is Durability by TaintTheUnstoppable which is beginning to shape up into something really interesting.
Second is Little One by @its-kall-the-clown which is just a huge fluff fest capped off with some nice angst. Highly recommended.
Finally we have the Red Boy comic by @purble-turble! Now obviously the Tang in their comic probably won’t do what this one did, by this Tang is too much of a Dad to let a little kid cry for too long.
Next chapter won’t be up until sometime next week! See ya then!
#Ink Writes#Monkie Kid#Scattered Cicadas#Tang#Tang Monkie Kid#MK#Mei#Red Son#Red Boy#Demon Bull King#DBK#Lego Monkie Kid#Durability#TaintTheUnstoppable#Little One#KALL#purble-turble#its-kall-the-clown
54 notes
·
View notes
Text
#showyourprocess
From planning to posting, share your process for making creative content!
To continue supporting content makers, this tag game is meant to show the entire process of making creative content: this can be for any creation.
RULES — When your work is tagged, show the process of its creation from planning to posting, then tag 5 people with a specific link to one of their creative works you’d like to see the process of. Use the tag #showyourprocess so we can find yours!
Thank you so much for tagging me @lan-xichens, I’ll try my best to explain how I made this set from start to finish hehe ♡ and also a big thank you to @suibianjie @highwarlockkareena @nyx4 @aheartfullofjolllly and you as well Kris for putting this all together! Content creators get a lot less recognition than they deserve for all the time they put into their content, so getting everyone to see the (sometimes excessive) process we all go through to put our content in our blog, I hope it creates a positive change!! 💖
1. Planning
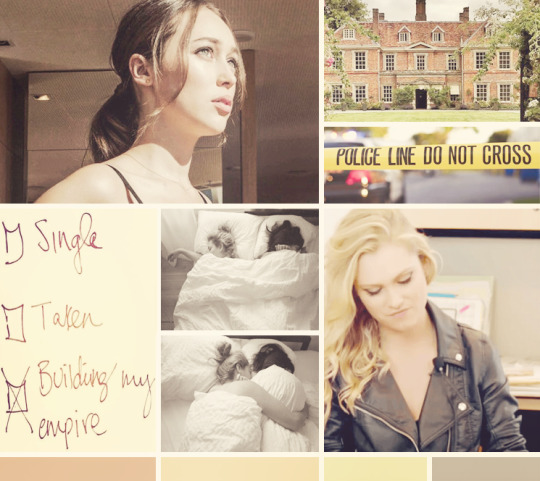
The set in question was actually requested by someone so they could celebrate their friend’s birthday! At first I wasn’t entirely sure if I was going to be able to finish it on time (college is very hectic right now) but I was able to finish it three days before the deadline which was may 1st! ^-^
The first thing I did was decide what characters I wanted to use in the set, I first reached out to the person who requested the set if there were certain characters they wanted me to use but they said they didn’t know enough to really give me any directives outside of the quote. I decided, since the quote is applicable to the entirety of the show, that I would try to put in as many characters as possible.
Thus, of course, came the hunting for scenes. Those of you in the net discord surely know I came into the content help channel a few times to ask for certain scenes here and there, and eventually I had to download an additional 10 episodes to the back then 20 or so episodes I had in my CQL episodes folder.
As you can see I have 30 random episodes of CQL downloaded (slowly but surely getting to the point where I have all 50 episodes downloaded) and I think I ended up using scenes out of at least 20 of those episodes.
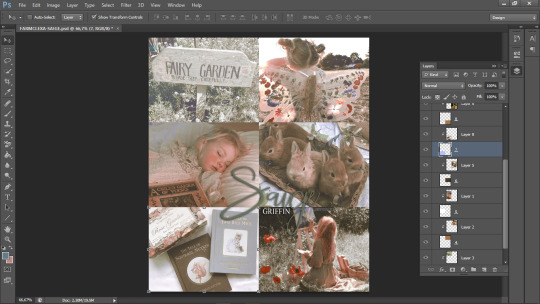
I planned out beforehand what characters I would use per gif. I knew obviously I would start out with Wangxian, them being the main characters of the show, and then would work my way down the list. The second gif consists of Nie Huaisang, Nie Mingjue, Jin Zixuan, Jiang Yanli, Wen Qing, and Wen Ning. They’re all family pairings, two being siblings and one being a married couple. The next gifset consists of the Yi City characters, then the fourth gif consists of the juniors, and the final gif has Jin Guangyao, Mianmian, Jiang Cheng, and Lan Xichen in it.
I have to admit though that when I had made the first four gifs I’d forgotten who I would put in the last gif and the when I thought about it the first time around I could only think of Lan Qiren and the very cursed Yaoyang ship 😭 it was only at dinner time that same day that I remembered I hadn’t put Jiang Cheng in my gifset yet and that’s when I thought of the other characters as well.
I had already made my first two gifs when I went to check Hanyi’s blog for layout inspo and eventually I decided I wanted to try a triangle-ish layout, which I doodled below. I eventually ended up changing the layout of the last gif in the final design. It was also the first time I would work with a triangle-ish layout so I was a bit nervous as I was scared it wasn’t going to work out...
2. Creating
I use Avisynth 2.5 and Adobe Photoshop 2021 (the paid version, unfortunately, I need it for school except I didn’t need it this year but I wanted it so I paid for it with my own money ouch) to make my gifsets! I always start out with trimming down all the scenes I’m going to use into three to five second videos and putting them through Avisynth. This time around I did it separately for each gif I made, simply because I needed so many scenes. I would include a screenshot of my “gif vids” and “temp” folders but I’ve already deleted all the videos, which is what I usually do immediately after a set is posted.
I’ll try my best explaining this gif by gif since each one had a different layout!
2.1 Wangxian

I think I had up to five different designs of this gif 😭 it started out with the gif on the left originally being more centered and the quote right smack in the center but somehow it felt a bit too... empty? I changed up the design and pulled the gif over to the right and put the two closeups on the left, the exact opposite of the gif I eventually ended up with. I switched things around one more time and saved the gif as you can see it right now, except I didn’t include the lines yet. It was only as I finished up my fourth gif that I decided this gif needed lines as well so I added them ^-^
2.2 Nie Huaisang, Nie Mingjue, Jin Zixuan, Jiang Yanli, Wen Qing, and Wen Ning
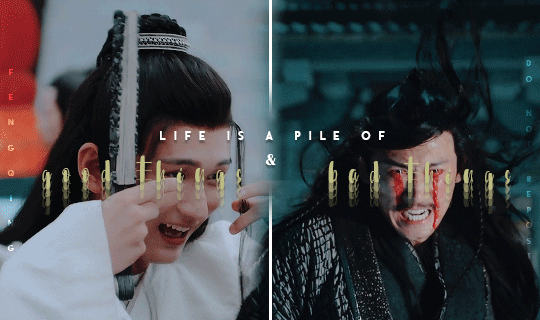
I got the inspiration for the font layout on this gif from this Wenzhou post! I hadn’t tried it before and when I did for this gif I was very happy with the way it turned out :D I wanted to portray that life is a pile of good and bad things, as the quote says, in CQL by mirroring these happy scenes side by side with the sad scenes
2.3 Yi CIty

My first time working with the triangle layout!! Putting in the lines and making sure they would line up with the second gif took me the longest of all actually 😭 I think once I got the line on the left in I just copy pasted it and flipped it horizontally so I didn’t have to fiddle around with angling it anymore :’) my original idea was to get a happy Song Lan scene and a sad A-Qing scene, but when I stumbled upon this A-Qing scene in ep38 I just had to put it in there because her smile is so precious 🥺 Xue Yang and Xiao Xingchen in the center are also supposed to be mirrored, with Xue Yang embodying the “bad things” and Xiao Xingchen the “good things” ! I also think the Yi City characters fit this part of the quote very well!!
2.4 The Juniors
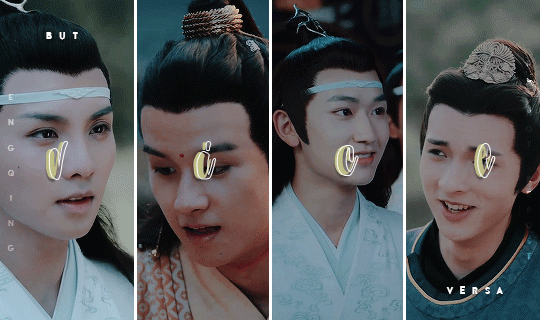
Ah yes, the junior quartet!! :D I had this planned out from the very beginning, that I would include happy versus sad juniors in the “vice versa” part of the quote, and I think it worked out quite well! My first idea was to put the “vice versa” completely in the special font and have it typed out over the gifs like I did with the “vice” but as I typed out the “versa” I realized it had one letter too much to be able to do that 😭😭 it took me a while to come up with how I would position the “but” and “versa” and after some moving around I decided to just place them the way I did in the final gif! For the font, I duplicated the “vice” and added a stroke to the duplicate, then I changed the fill setting to 0% so I could slightly drag the duplicate away from the original layer to create the effect that’s in the gif — also, finding a scene in which Jin Ling smiles is really difficult.... he barely even smiles in the scene I ended up using :(
2.5 Jin Guangyao, Mianmian, Jiang Cheng, and Lan Xichen
The final gif!! I feel like this might come a little across as “I promise I didn’t forget these characters” because they’re a very odd quadruplet to put together, but they were the most important characters left to put in the set! I was thinking of putting Nie Mingjue in here together with Jin Guangyao and Lan Xichen, but I did feel he fit more with his brother up in the second gif. Mei @mylastbraincql cheered me on making this gif for which I was very grateful :D <3 the layout came to be after I googled “how to evenly split a rectangle in four” because I didn’t want a repeat layout in the set (*/∇\*)
2.6 Coloring
For the coloring I pretty much did all of the tweaking on the first gif and then copy pasted all of it onto the second, third, fourth, and fifth gif. This is usually the way I go about my coloring, I will always edit certain gifs if necessary but I don’t think I had to change the coloring much on any of these gifs? Maybe I added in a curve layer here and there, but nothing major! This is really one of my preferred coloring styles, even though I try to step outside of my comfort zones with other sets ^-^
3. Posting
I will always upload sets into my drafts and edit the caption in there as well, clicking on “preview post” a couple times to check everything looks good on my blog as well, before I post a set. However, this time, since there was a deadline and I finished before the deadline, I put this set in the queue so it would automatically post on the 1st of may! Knowing myself, I would’ve forgotten to do so </3
Whew that was... a lot 😭 did it make any sense? Probably not, but it was fun to ramble ( ´∀`)
I’ll tag
@blinkplnk with this set !
@wuxien with this set !
@wendashanren with this set !
@wanyinxichen with this set !
@yibobibo with this set !
@mylastbraincql with this set !
@sugarbabywenkexing with this set !
@yiling-recesses with this set !
@jiancheng with this set !
Please feel totally free to ignore this if you’ve already been tagged and don’t want to do it again!! <3
#showyourprocess#tag game#this got so long i'm sorry ;-;#very curious to see everyone else's processes!!#thank you for the tag kris <3
62 notes
·
View notes
Note
My quandary is rooted in a separate fandom. I and a few of my friends have character blogs in this separate fandom. Well we aren't popular or that well known, but we have fun and we don't harm anybody. You see there is another group of character blogs as well [in this same fandom] who are very popular. They instantly get likes and fanfare from stans. Our blogs are nothing like theirs. We don't try to duplicate or mimic them in any way. However they (the popular character blogs) have on occasion ripped off our posts and posted our words to their blogs, have used our rp situations, have tried to do things that we do, that we noticed. We ended up blocking them. That's not my quandary though, my problem is one of my friends, let's call her Marsha, who rps her character perfectly and is funny and amazing, decided to start rping with them. Normally I wouldn't have a problem with this, but they are who they are, and Marsha is rping the stuff we do with her.. now with them. Isn't that odd? Marsha pities them because she (and we) suspects that in actuality, the popular blogs are run by 1 or 2 people (there's quite a lot of those blogs). I suspect Marsha is right. But? Is this even fair? I don't trust her, because why is she emulating our rp style, with these blogs that hate us for nothing?
This is part 1 of the quandary but I'll break it off here, due to length, and tell me what you think?
Addendum: I'm not trying to flex, but we put a lot of thought into our blogs, a lot of care goes into building our characters. We take it seriously. The other character blogs are based on crack threads. Which is always welcome, but it feels so frustrating. Even when we do crack threads I'm sorry but we're just funnier. 🤷🏼♀️ Not tootin my own horn but when Marsha posts with the haters (lack of a better term), she's giving them more likes and we sort of feel, hey, look at us here, we're just rping alone.
(If I could show you what the other blogs post about, 50 reblogs about utensils and.. You would see what I mean!! And again, anyone has the right to post whatever they desire as long as it's not harmful, but their actions against us is what riles me up.)
It's so stupid how what should be a fun time has this added layer of stress. I haven't been sleeping or eating. I'm sorry for dumping this on you. But I need a voice unrelated to my fandom to just.. Tell me what I'm not seeing.
(If you want me to shut up I will!)

Hi ♥ First, I’m sorry you have to go through this. Fandom, especially RP parts, can be traumatizing. And it’s hard to really leave, because there are people you care about. And sometimes it’s almost impossible. I will put it under the cut, bcs it’s long.
Second, I would advise you to be careful about what the group is saying about the second group. Masha (for some reason I imagine Marcia from Succession) maybe chose the strategy - if you can’t defeat them, you must join them. Which sometimes can be good, but it can get weird. Sometimes people just want to join the popularest plastics because the promise of popularity seems great (I shrug because this is literally tumblr, why are people still playing plastics lmao). That’s really on them, but there’s a chance she might tell them everything you’re saying, so I really think you should be careful. People like to take things out of context to show how abusive other people are. Just be safe and in case there’s anything sensitive, delete it, because these things can get pretty messy very fast. I’m not saying she will do it, I sincerely hope she won't, I hope she feels only sorry for them, but it’s better to be safe than sorry.
Third – do not tell them you think they are copying your content. I know this sounds like terrible advice, but many people were accused on this website of stealing stuff and used it as evidence that the other person is shitty. For some reason, RP attracts people who don’t have a very strong sense of identity (which is fine by the way, sometimes I struggle with that too, so I know how it feels) and sometimes these things happen, and they don’t even realize. It sucks, but it is what it is. And your complaining will be used as ammunition.
You can get into a fight, but honestly, it’s not worth the mental turmoil, because this is basically what thirteen years old children do, mimicking Ar*ana Grande or other famous celebs. It is hurtful to see other people being rewarded for your content, but it’s not like you can do anything, there are no judges. Unless the person is level-headed (if someone told me I would probably apologize bcs it’s my big fear, copying someone! I’d rather know that continue that behavior), there’s a little chance they will admit that they’re basically stealing it from you and most likely they don’t even realize (which is not an excuse, but it lowers the chance of them admitting to it). You probably won’t win and if you will, you will pay for it with your mental health. Most likely, you both will lose in the end or it will be a pyrrhic victory, take that from me. Also I have one thought about it being one or two people – they might be unconsciously mimicking one another, so they might appear as the same, just thought.
So I would advise you to just block them and not watch them. In the end, it’s embarrassing for them to steal something. And as someone who had their content stolen (ironically, by people who would probably prefer if I died and who lied about me and last time I was told they’re still at it but I can’t let that get to me), there’s one thing that always calmed me down. That they can take some things from me, but it doesn’t matter, because it came out of my head, my head is mine, they can’t replace it by taking the things it created. That’s the thing they want, but will never have, your mind. People say imitation is the sincerest form of flattery and it is true, it just sucks that people will take the credit.
But what you can do is evolve your ideas. They will be better since they came from you. You aren’t replacable. Try to focus that stress into something creative, even if it’s just out of spite and pettiness. If you don’t want to leave, there’s only that option left. And it’s much better than obsessing about what they took away, because it will only stress you out. You already have the most important thing – your mind and that’s already a higher ground. Not people liking it. It’s much better than fighting them and being petty on main. Believe me, you don’t need that kind of negativity in your life. Some people will notice, some won’t, but you don’t want them around anyway.
Oh and the last thing – take care of yourself. Sometimes I wish people on the internet could see the other person, because I doubt it would be as scary. This is like a high school and nothing more. I hope you will find peace in your ideas, and you won’t feel the need to check them. It can really get uglier than it is now, because some people feel they are entitled to make your life hell, don’t be one of them. Just say no to that negativity, be careful and don’t check them out, because it will ruin your fun. Try not to spiral down and not let the bad thoughts in, this is how you protect your safe space.
I’m sorry for telling you to kind of surrender, but safety and mental health comes first. And this is the only way it worked for me.
#anonymous#ask#✿life is full of little interruptions✿#konohanians talk#✿wouldn't you like to know✿#ooc probably?#fandom shit#also keep on asking#hashiramathetheTherapist
6 notes
·
View notes
Note
hey if it isn;t too much trouble would you mind doing a tutorial on belnding gifs? i can't really find any tutorials and i can't figure it out and your blending is amazing
hi love! it’s not trouble at all, you’re right all my tips are scattered throughout my other tutorials but i never made a proper one so here we go. THESE STATEMENTS STILL STAND because i think they’re crucial to get a good result.
So to reiterate: pay attention to the scenes you choose, ideally the characters move very little or at least they never leave a “side” of the gif so you know you can erase the other half without too much trouble. Depending on the type of blending you want to achieve (side to side, one gif framing the other etc.) you’ll have to mind the colors, not too much because coloring will do wonders and help you a lot in this regard but if you want to blend the backgrounds then they would both have to be on the lighter/darker side, if you want to blend a face on another’s character’ clothes those clothes will have to be dark (black, blue, purple etc.) or it’s gonna be difficult to manage a seamless blending.
This said, the technique per se is pretty easy, i’m gonna try to walk you through at the best of my abilities (and i finally have a ps set in english, so no more stressful translations)!
Make you gifs, as many as you want but of course we usually go with two. You can either already color them or wait until you have them both on the same canvas that’s what i do because i like to start coloring them together and then tweak with cropping masks where needed. What I do is right-click on the second gif, hit DUPLICATE LAYER and select the first gif canvas.

now i have the two gifs on the same window but obviously the one on the top completely covers the other, this is where blending mode gets in action. i usually use LIGHTEN for my gifs but occasionally DARKEN can be useful too if the background is too light.

Don’t worry if the gif doesn’t overlay perfectly, we can fix that, for now we just need to see what we’re working with, which at this point is something like this:

First thing I notice is that obviously i don’t want the edge of the first gif to show on five’s face so these are the steps that i take to fix that:
activate the VECTOR MASK on the layer i want to erase from
selecting the BLACK from my wheel of colors
selecting a SOFT BRUSH of a medium/large size to get a nice blended effect, i can always come in for the details with a smaller brush later

I never really set my brush opacity to 100%, try to build up to the result you want erasing bit by bit and checking the overall vibe. Now my gif looks like this, I also deleted the subtle see through of the other gif over his jacket because i want “big” five to be on the foreground to get a sense of perspective.

Usually at this point I’ll do an initial coloring and get to fix the transparency problem later so here we go (this sucks ass sorry gsodgsd- i promise i’m usually better at coloring, i’m just going quick for the sake of this tutorial)

now all that’s left is to bring out the other gif, create a NEW LAYER in between the two gifs, set your brush to soft light or better yet, down the opacity to something between 20% and 40% and with black selected start to paint under the gif set on lighten until you’re satisfied with the result.


and that’s it basically, i then proceed to fix the coloring, add the text etc. this takes a bit to get used to but you’ll learn to recognize usable scenes with no problem! it actually take me very little to do the blending, it’s the coloring and lettering i spend ages on! hope i could be useful somehow ♥
#Anonymous#replies#text#tutorial#honestly discard the coloring#i just put too much blacks on it to avoid having to color correct too much
34 notes
·
View notes
Text
VI a. UV_0
(Previous: V. Adding missing body parts / Frankenmeshing / Finishing touches)
As promised, I'll finally talk about uv maps today. About time! Sorry it took so long; I hope at least you'll feel that it was worth the wait.
Generally speaking, uv maps are 2D representations of a 3D mesh. A mesh cut into pieces and made flat. TS4 meshes use two of them, called – very originally – uv_0 and uv_1. You can see them listed if you click the little triangular symbol in the panel on the very right (if you hover over the triangle, it says 'Data').

Why are there two? Because they serve very different purposes. To put it simply, uv_0 is responsible for the texture of your mesh, while uv_1 makes the mesh move with body sliders. Therefore we'll need to discuss them separately. Let's start with uv_0.
As you can see, uv_0 is the one selected by default. If you switch the mesh shading to 'Material' or 'Texture', you're going to immediately see any changes you make to it. The map itself is located in the window on the left – the one which we haven't used so far at all. Let's go into edit mode and then make that window bigger, so that we could see all the icons at the bottom.
Right now nothing is happening there. But let's just try selecting a random part of the mesh...
Important: when you use shortkeys, pay attention to your cursor's position! E.g. if you press b with your cursor in the uv map area, it'll activate the selection tool for the map, not for the 3D mesh.

You can see that a bunch of little dots appeared on the map! Those are your selected vertices.
Now, I don't know why this is the default option for Blender – your vertices being invisible on the uv map unless selected – but you can easily change it, so that you could always see them. You just have to click one of those tiny icons at the bottom. If you hover over it, it says 'Keep UV and edit mode mesh selection in sync'.
I find it way easier to work with this way: you can see all the vertices, and the ones which you selected are highlighted now, just like in case of the 3D model.
Then there's another important tiny button, right between 'UVs' and 'New'. If you click it, you'll see a list of all texture files associated with your mesh. In my case it's only two basic files: the body texture and the texture of the top I used as a base, but if you're frankenmeshing, that list can get much longer. Let's choose the original diffuse map.

You can see that the map reflects perfectly whatever is going on with the 3D mesh. The parts not covered by any texture use the skin texture instead. Not the whole texture of the top is used, because at the very beginning I cut off the bottom part of the mesh. There's also an abundance of vertices in the waist area, because I extruded the lowest row of vertices to make a skirt; and, as I didn't make any changes to the uv map yet, the new vertices appeared right on top of the original ones. In fact, if you select that lowest line on the uv map, you'll see that the whole skirt gets selected.
UV maps can also be useful for detecting weird stuff happening to your mesh. I can see that there's some line going across the top. I switched to edge select, selected it and found out it really is some completely useless edge going through my 3D mesh. No idea how it got there, but thanks to the uv map I could spot and delete it.
Just a couple of other tiny icons before we proceed to fixing our uv_0 map. Firstly, there's the little pin, which let's you – unsurprisingly – pin the currently used texture, so that Blender wouldn't switch to any other ones (yep, it likes doing it). Just click it and you're safe.
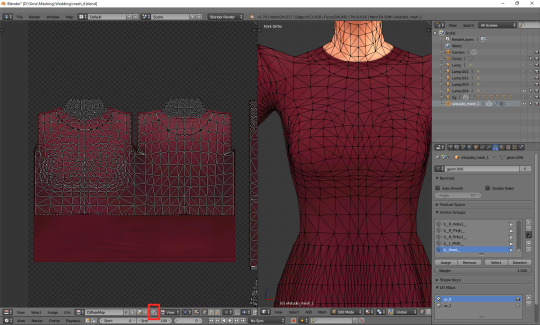
And then, right next to it, there's a little cross. Remember what I said about the list of used textures getting super long if you're frankenmeshing? It can get annoying if you don't need 80% of them, but have to scroll through them all whenever you want to switch from texture A to texture B. If you're sure you don't need a certain texture, select it and then shift-click that little cross. That'll tell Blender that this texture is not used, so it doesn't have to load it. You'll need to save your mesh, close Blender and reopen it for the changes to be applied!
OK. Now that you have an idea what's what, we can finally talk about editing the uv_0.
In case of TS4 diffuse maps, it's very important where you put your texture. Each category has its designated part on the map. It looks like this:
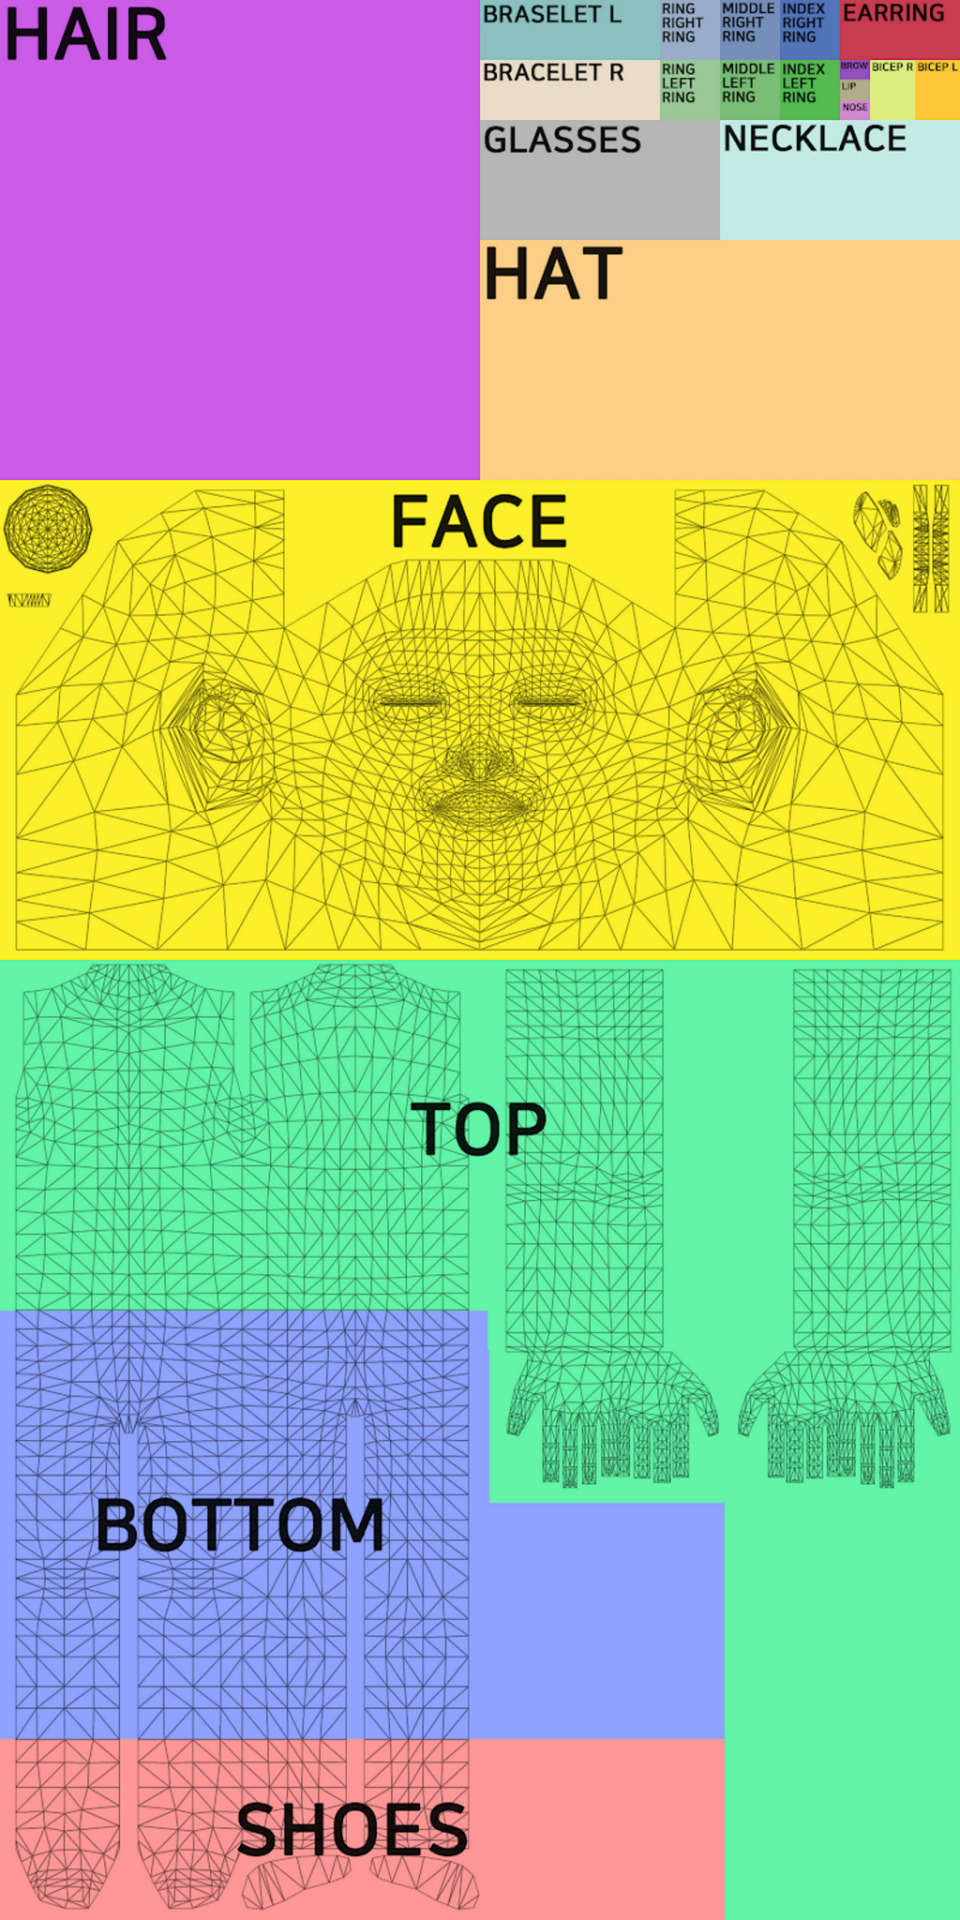
You can download the template in default, EA size (1024x2048) HERE, and a twice bigger one (2048x4096) HERE. In my own creations I always use the 2048x4096 format – it lets me fit in way more details without stuff getting badly pixelated – but that's obviously not a must. Now, at the bottom of the uv window, click 'Image' and then 'Open image'. Find the template you just downloaded and double-click it (or choose 'Open image').
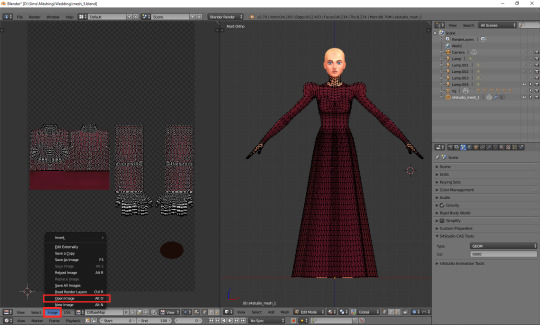
Whatever you do with your uv map, there are two basic rules you have to follow. One, fit the vertices only in the place meant for the category you're working on. If you're making a dress, you can ignore the top/bottom division (although be aware that if you do ignore it, you won't be able to split your dress into separates), but that's the only exception. Don't let your vertices go into the shoes or face area. If you're making a skirt, stick to the area marked as bottom. If you're making a top, fit them all in the area marked as top. It seems obvious, but I've seen sooo many CC pieces which are incompatible with each other, because their textures overlap. Some of them are beautiful and even made by really well-known, established creators. So I think it doesn't hurt to overstress this point a bit. Please pay attention to it!
And two: don't move anything which is supposed to be bare skin. Or half-transparent texture printed on top of the skin (not 3D). It's an absolute no-no. Terrible stuff will happen if you do it. If you accidentally did it, then... Oh boy. You may try to move it back into the right position, but maybe it'd be easier to just delete those parts altogether and just append them anew (as explained in the previous part).
As for the parts which you intend to texture – so, in this case, your dress – you can theoretically put them anywhere you want (that is, as long as you stay in the top/bottom area and don't overlap the bare skin parts). Your map doesn't necessarily have to look like the ones made by EA. However, I think not following the EA style (top on the left, bottom underneath, sleeves on the right, any extra deco in the free slots) may result in your clothing being sunbathing-incompatible. I can't say for sure, as I don't have Island Living, so my sims don't tan, but I suspect the tan lines depend exactly on your uv_0 map. I don't think it makes any difference in case of Victorian dresses, but if you're making something more modern, which could leave some visible tan lines, you probably shouldn't go too wild while making your uv_0 map.
Let's go back to our dress. Because we used the top as a base, half of the work is already done. We only need to 'unwrap' the skirt (and any decorations, if you added them). There are 4 ways in which I usually approach it:
1) Selecting the rows in 3D view and moving them manually (g, y) on the uv map
It's not very practical now, when the skirt is already full of those horizontal lines, but at an earlier stage it would have been very quick and easy. The important thing is, you should do it before adding 'fillers' (i.e. those lines which you don't move, scale or whatever, but just add them and leave them as is). Depending on the size of your dress, you probably achieved the desired shape with 3-5 lines. Move them on the uv map, make sure the proportions look correct (you can always try to open some patterned image for a second, to see if everything looks ok – see part VI b) and only then add the fillers. They'll automatically appear in the right places on the map.
2) Cylinder projection
You can also decide to unwrap the skirt. Select it, either in the 3D mesh or uv map window. Now, with your cursor in the 3D mesh window, press t to unhide the panel on the left and go to the 3rd category: 'Shading/UVs'. In the UVs section you'll see a button called 'Unwrap'. If you click it, a drop-down menu will appear, with different unwrapping styles/options. Choose 'Cylinder projection'. Watch out: your viewpoint matters! Before you unwrap, go to the right side view (num 3).
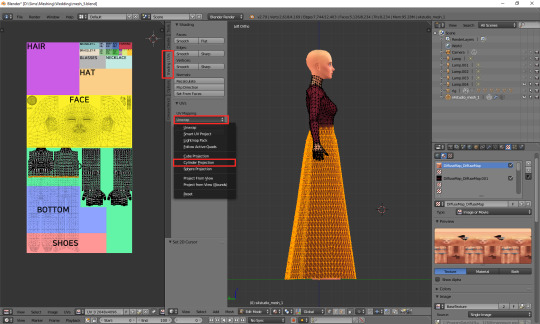
I took the screenshot from the wrong side, please pretend you didn't notice (-.-)
A whole bunch of new vertices should appear on your uv map – in a completely wrong place. We'll have to move them under the top. You'll notice, however, that if you try to move, scale or do whatever else with your skirt, it affects the lowest line of your top as well. That's because the top line of the skirt and the bottom line of the top are actually the same vertices, just duplicated on the uv map. You could select only that one line and edge split it (ctrl + e, in the 3D view), but an easier way around it is simply switching from vertex select to face select. Face select has some special powers when it comes to uv maps: it lets you not only move stuff separately, but also select parts of the mesh with L (multiple select with shift + L). Neither of those things works when in vertex or edge select mode.
Now you can simply scale the selection down and put it under the top. Adjust it in any way necessary, so that it'd align with the top nicely. Make sure that the faces are in the right places! Select the bottom-left face of the top and then, in the 3D view window (left side view, ctrl + num 3), click the face right underneath it. Is it the top-left one of the skirt on the uv map? If so, perfect! If not, you've got some manual moving to do. Just select any faces which are in the wrong place and move them along the x axis (g, x) till they are placed properly.
It should look fine by default though. That's exactly why we went to the right-side view before unwrapping.
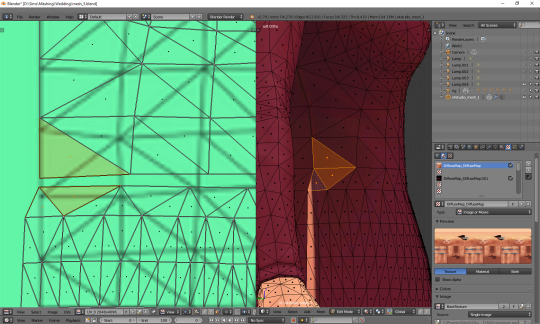
If your skirt goes into the shoes area, scale it down along the y axis! (g, y)
Now the only thing left to do is to weld the vertices and get rid of the gap between the skirt and the top. Go back to vertex select and select the second vertex from the left. You'll see that – just as before – a vertex of the top gets highlighted too. Press W and, from the drop-down menu, choose 'Weld'.
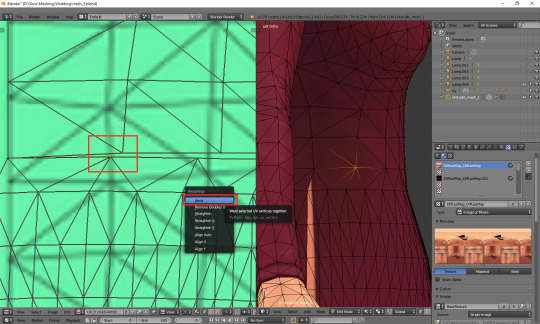
Do the same for all the vertices in that line, except for the first and last one.
What about the first and last one? The problem is, they are all actually the same vertex. If you select any of them, you'll see that the other one gets highlighted as well. Welding them would make them meet in the middle, and that's not something you want to happen. So what can you do? This time there's no other way around it than splitting. Select the whole vertical line (either the left or right one), move the cursor to the 3D view area, press ctrl + e and choose 'edge split'.
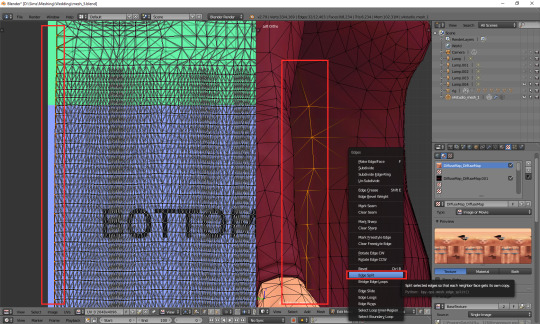
Now you should be able to weld each of those vertices separately. When you're done, select all (a) and (in 3D view) remove doubles (w).
And that's basically it. Of course, if you want to, you can dedicate some more time to your uv map, making sure everything looks absolutely perfect. You can, for example, edit certain lines – or all – and make them perfectly straight. Just select a line, press w and choose 'Align x/y'. It's especially useful for deco parts – you'll see what I mean once you get to texturing.
3) Professional tailoring (marking seams)
This method is quite crazy, but can be very useful in some cases – e.g. if you're making a patterned dress with a huuuuge skirt and want the pattern to look even. To use it, you have to imagine for a second that you're a tailor/seamstress and that your mesh is a real dress, made from real pieces of material. Where would this material be cut and sewn together?
Once you know where the seams would be, go to edge select mode and, well, select those edges. Then press ctrl + e and choose 'Mark seam'. Make sure you really mark all the seams which would be there in case of a real dress!
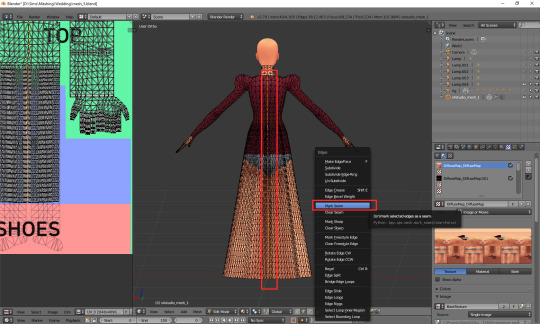
Once you're done, select your whole dress (or whatever it is that you're making). Do not select body parts! Once again go the panel on the left (if it's not there, unhide it with t) and this time simply select 'Unwrap'.
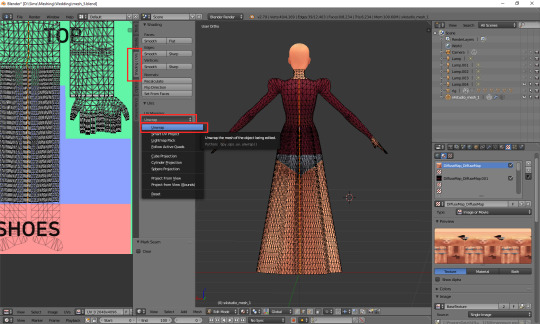
And now just go to face select, scale down the results of your unwrapping and put them anywhere (but in the right category :P). If something looks wrong, that most probably means you forgot to mark some seam. You'll have to go on a search for it. I'll be honest: I have zero idea of sewing, so using this method is quite tricky for me and I'm struggling myself with marking all the right edges as seams. I used it only twice so far, in my last 2 projects. Here's how my 1843 dress looks like after unwrapping:
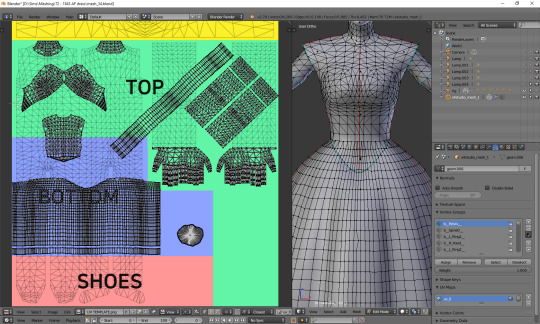
As you can see, the uv map is plain crazy and, as mentioned before, definitely not tanning-compatible, but thanks to it later I didn't have to adjust the pattern to each part of the mesh individually – I could just fill the whole texture with pattern and only had to erase it from the parts which were supposed to be uncovered. It does make your life easier if you make 66 swatches :P.
4) Projecting from view
Yet another unwrapping option, useful mostly for smaller, decorative elements. Or in general: for stuff which you can see properly. I use it mostly for bottoms (I mean... That thing 'closing' the dress at the bottom). Go to the bottom view (ctrl + 7), select the whole bottom part (might be easier to do on the uv map, now that you've unwrapped the skirt!) and, from the unwrap drop-down menu, select 'Project from view'.
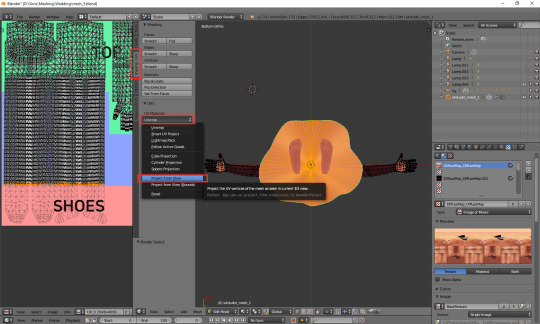
Go to face select, scale the thing down and put it somewhere in the area for decorative elements. For example here:
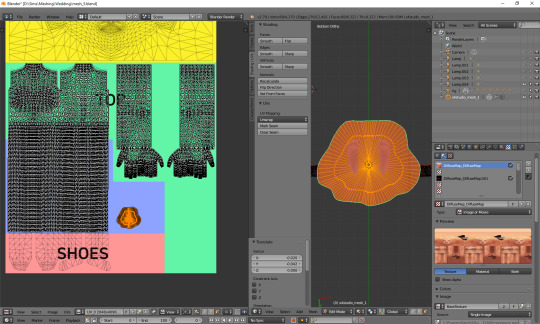
Done!
***
Here's also a small general tip: it's always better to separate clothing parts from body parts on the uv_0 map. I'm thinking especially of the neckline. It's the only way to get a sharp, clear line; if you just paint the neckline in your graphic editor, it'll become blurry in game. It seems that the devs realised it at some point too, as at least some pieces from later DLCs have a gap in the uv_0 between the neck and the collar. Just select the whole top-bottom area, deselect the neck and move the part which should be textured a bit down.
***
Whichever method you chose, your dress has a ready uv_0 map. Now there's only one thing left to do: you should export the uv layout, so that you'll know where to put your texture. At the bottom of the uv map area, click 'UVs' and then choose 'Export UV Layout'.
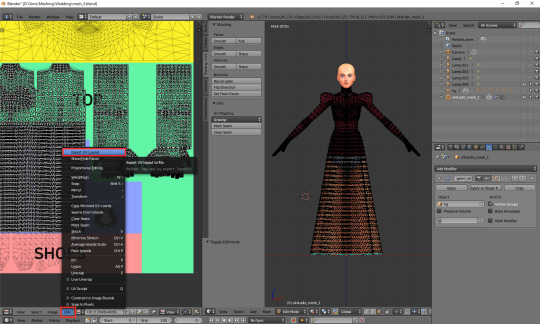
A new window will appear. Save it wherever you want, under whichever name. The only important thing is, you must tick that little box on the left saying 'All UVs'. Then just click the 'Export UV Layout' button.
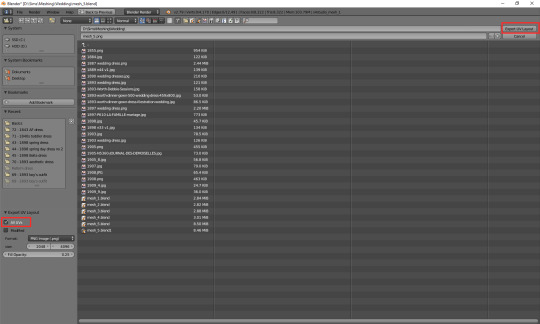
And that's all. Congratulations! You're fully done with your uv_0 map.
(Next: VI b. Changing the texture displayed in Blender)
71 notes
·
View notes
Text
Buddie prompt #1 cast out for any nibbles. Please claim the prompt in the comments to hopefully avoid any duplication. If it is claimed, I will delete the prompt from further viewing once it has been copied elsewhere.
Eddie knows he trapped himself into the relationship with Ana. He had thoughts of breaking it off with her several times for various reasons the author can decide. Eddie's following the motions of how things are supposed to go. People are starting to joke about when he's going to pop the question.
- He went with Ana as her plus one to a fellow teacher's wedding and she caught the bouquet, or he accidentally catches the garter.
Or, it's the Madney wedding and Maddie has a look of horror on her face when she catches it. She's seen later apologizing profusely to Buck because of course she knows how Buck feels about Eddie.
- Caught under mistletoe at a faculty Christmas party.
- Misunderstanding after someone sees him standing outside of a jewelry store.
- His parents dropping not so subtle hints. Possibly asking if this is really what Eddie wants (hinting at another option Eddie isn't seeing).
Buck is still around, but not as often as he was, or he invites Christopher to his apartment instead of going to Eddie's. He's not going to break his promise to Chris. Chris tells Eddie all about his time/fun with Buck. Eddie misses his best friend but Ana is taking most of his personal time.
Buck is hiding his true pain after realizing he had feelings for Eddie. He's not really dating Taylor, he's just looking for companionship and human touch (she knows and keeps trying to get him to talk to Eddie).
Until he abruptly transfers to another fire house after Eddie does propose stunning everyone except Hen who has it all figured out in her head. She gently tries to talk to Eddie to try to get him to see the real picture, but it goes over his head.
Eddie overhears people making bets on how long the marriage will last and he gets defensive, but then wonders why they’re making bets in the first place. Are they seeing something he isn't?
Eddie snaps after a few days and confronts Buck, but they end up in an argument that makes Eddie flee Buck's apartment. “Do you even really love her, Eddie?!” “Your parents are pulling your strings like a marionette.” “Yes, I’m jealous, but not of you. It's her…because…she has…you.” “I don't mean as my friend, Eddie! You… Don't you get it?! I’m in love with you!”
Eddie is stunned and spiraling. He sees Buck collapsing to his knees in tears over and over in his mind. He's so confused. He's realizing that what he wanted/needed was slipping through his fingers. I can see him going to Hen and Karen (he now sees what she was trying to tell him), but Michael is an option, too.
Ana can either gracefully accept the breaking of the relationship or go crazy. His parents are either shockingly supportive (they knew since they stopped in El Paso from the wildfire and were waiting for it to dawn on him, but if he had really chosen Ana they were supportive of that, too) or turn terrible, but his firefam has his back always. And of course Chris is thrilled.
Eddie asks Maddie for help, so she sets Buck up on a blind date at a park. Buck tries to run, but Eddie gets him to stop and listen. Eddie asks for time (maybe Dr. Copeland has a coworker who Eddie starts talking to to figure out his issues where he struggles to open up at first, but when he/she gets him to break it all flows out without stopping until he's drained emotionally and physically) and to go slow.
He asks if Buck is going to come back, but he's already made friends at his new firehouse. It's safer of they're not at the same one if they're in a relationship anyway, but he will try to get his new captain to sync their schedules as best he/she can since LAFD is pretty consistent on that across the city.
It takes over a year for them to even kiss (Eddie initiating it), but other physical contact (holding hands, hugs, etc.) has happened. Maybe here is the Madney wedding where they slow dance together. Buck has just waited patiently and let Eddie lead everything or asks for consent first every time. Eddie is kind of emotional about this.
(Optional closing chapter(s) - Added slow step at a time sex scenes [after the kiss!] to avoid overwhelming Eddie [always with consent] or none. Running into Ana at a school pulled fire alarm or no and they have a small talk about how their lives are now. Eddie (and Hen who is present) has his first run in with homophobia from a new probie, but Bobby swiftly shuts him down and has him transferred within minutes. Eddie is reeling, but Hen (or his therapist) keeps him from crashing. Chris proposing to Buck for Eddie with a speech that has Buck in tears. "Be my dad? Not just my Bucky? Because when dad asked I said yes. Turn around." in front of everyone as both firehouses teams are over at Eddie's for a barbecue. A successful cooking lesson from Buck that has them both laughing. Or Eddie making his first successful meal after learning from Buck - which were/are some of their best "dates.")
9 notes
·
View notes
Note
I really wouldn't mind you aiding me with some tutorials love
giffing tutorial/resources
hi anon! sorry it took me so long to answer. i figured this might be helpful for others out there who have asked me similar questions, so i’ve compiled a pretty comprehensive list of tutorials/resources. idk about others but when i was new to giffing, it took me a lot of painful effort to go around and look for resources, so i’m putting it all here to make it a little easier!
i download videos using 4k video downloader. it will download very good quality 1080p videos in .mp4 format. if you’re downloading a 4k video, make sure to change the setting option to .mkv so that you get 4k and not 1080p—for obvious reasons since you want the highest quality.
i rely on kpopexciting to get .ts files — which are basically raw, very high quality video files for live performances. they are much less grainy than .mp4 versions of live performances—which are the ones you’ll see uploaded to youtube. i’ve found that 4k videos (in .mkv) are just as good quality as .ts, but obviously you will rarely see live performances in 4k, so get .ts when you can!! you can also try to find .ts files on twitter, but you may have to do a lot of digging. i wish i could recommend you twitter accounts, but the ones i used to go to have been very inactive/taken down all their drives :( but this website is really nice and updated frequently so i would recommend it!
vapoursynth links + download. the reason you would use vapoursynth is to resize your gif, while maintaining the optimal quality of the gif. if you gif without vapoursynth (.ie only using photoshop), it will still be fine, but the image quality may be grainier. also, you will definitely need vapoursynth to gif .ts files —more will be explained in the tutorial i’ve linked below. i would recommend that you have a high processing/lots of ram/newer desktop or laptop to use vapoursynth so that 1, your computer isn’t fried and 2, your vapoursynth process will go a lot faster. i am using a 2017 macbook pro for all my work, and it runs pretty well, but my laptop still gets pretty hot so just make sure you’re not running a million things in the background while using adobe products and vapoursynth lol. i used a pretty old and beat up 2011 model macbook air back then, and i will say that yes vapoursynth worked and ran on it, but it took much longer, and basically fried the laptop’s battery (aka i had to get the battery changed twice and the laptop would die randomly) but issok it was a school borrowed laptop so i didn’t feel too bad lol. im just saying this as a precaution, to preserve the health of your electronic devices!! but don’t be afraid to use vapoursynth! you should still try it at least once.
thank you to @realstraykids for this super detailed, really nice tutorial! it includes how and where to download videos, how to gif using vapoursynth, using photoshop, comparisons, coloring, and pretty much all you need to know. 10/10 would recommend
thank you to @dreamcolouring for this lifesaver!!! the best and easiest way to blur out unwanted captions/objects in your gifs. i recommend doing this step after converting your frames to video timeline and before you do sharpening and coloring. another tip i’ll add is to feather the selection you’ve made right before you click on “add vector mask” —this will make sense once you’ve read through the tutorial. feathering it will make the blurred spot less noticeable and more subtle.
i use this generator to create gradient colored captions! copy and paste your text, then select the colors you want. generate the code, and copy it. change the settings of the text editor on your post to HTML. paste the code, preview, and voila! add elements <blockquote>,<b>,<i>, etc as needed. see more on colored captions in this tutorial by @kylos --i believe op mentioned a different and better color generator but for some reason it won’t work for me :( hopefully it works for u! basically same idea as the previous generator i mentioned.
my own mini tutorial/workflow process of making gifs. this includes working with a .ts file, vapoursynth, photoshop, coloring, watermarking, etc. and a few of my own tips below:
if you are working with an .mp4, you do not have to make any changes to the preprocessor/denoise filters/sharpening in the resizing part of vapoursynth—it doesn’t make that big of a difference if you do. but if you are working with a .ts file, definitely do make those changes,, that’s the whole reason you have vapoursynth. with an .mp4, i like to use vapoursynth to just resize, but i don’t add any additional settings. i use smart sharpen in photoshop to sharpen it, which is pretty good on it’s own (at least in photoshop 2020!).
my rule of thumb is to do add .02 seconds when i am setting frame delay. so if when you first import the frames, they are at 0.04 seconds, i usually change them to 0.06. of course, this is my personal taste—you can make all your gifs faster or slower depending on how you want em to look.
if you are on a mac, you can screen record by pressing Command+Shift+5 (it’s a shortcut to quicktime screen recording). I only screen record for things like the beyond live concert or other live streamed events. the image quality of the screen recording, in my experience, is actually pretty good. when you gif the screen recording however, you may notice that it adds extra frames that you don’t need. by that i mean duplicate frames. you could keep the duplicate frames but that just means the size of your gif is going to be much bigger (keep in mind the limit is 8mb). in order to remove those duplicates, my only solution has been to remove them manually (by holding Command while selecting), or when you are importing the video to frames, select the option to “limit to every 2 frames”—but this method will be less precise and still not as good as manually removing frames. if you remove the duplicate frames, this means you will need to set the frame delay even slower, to make up for lost frames. in my experience, fps(frames per second) and frame delay work in conjunction. so for example, if i delete every other frame because they are duplicates, but the starting frame delay is 0.02, i am now going to change it to something like 0.05 (so i added 0.03 seconds rather than my usual 0.02). if the duration length and the image dimensions of the gif are short/small, feel free to keep the duplicate frames in—i only delete duplicate frames in order to keep my gif under the 8mb limit. then, if you keep the duplicate frames in, continue with your standard frame delay preferences. now that i’m writing this im realizing this might not make a lot of sense lol.. but don’t worry about it for now and if you run into trouble w screen recorded gifs then you can come back to this for reference. again, this is only my experience recording on a mac—it may be a lot different if you use a screen recording program or are on a pc.
i don’t really use .psd templates because i like to give every gif/gifset it’s own unique coloring—so i remake the coloring every time, but if you get into a rhythm it’s pretty easy. there are a lot of nice coloring tutorials out there, too! my personal coloring adjustments in order: levels, exposure, color balance, selective color (if needed), vibrance, photo filter (if needed), color lookup (i use 2strip most often and i put it on ‘color’ blending mode). don’t forget to adjust the opacities and fills of the ‘color lookup’ adjustment layer in case it’s too strong. go back to correct each adjustment layer as needed. then, when you’re done and satisfied, group all those layers, copy the group (you can do an easy command+c), and paste it onto the next gif you’re working on for easy workflow.
if for some reason you can’t see the frames when you import your layers/video, it’s likely because your ‘timeline’ window isn’t showing up. just go to the window menu on photoshop, go to the bottom and you’ll see ‘timeline.’ make sure it has a check next to it.
i recommend watermarking your gifs because a lot of people like to repost tings these days 😠 - so make sure u got your brand on it! i keep my watermark saved to my ‘libraries’ in photoshop so it’s ready when i need it. i use the blending mode ‘overlay’ and adjust the opacity, but if you don’t want to do that you can also add a stroke/shadow to your watermark/do all sorts.
tag #nctinc for your nct creations and #jenonet for your jeno creations!!
here’s my own mini tutorial (well not much of a tutorial ig more like a work process vid?): took about ten minutes including the time to search and download the video (but i didn’t record that part i trust yall know how to do that), vapoursynth, and exporting. i hope this helps somewhat! feel free to ask more questions whenever :)
youtube
keep in mind that giffing takes a lot of patience, energy, and experience—so don’t worry if it takes you a bit to figure things out or if your gifs don’t turn out the way you want them to the first time around. we all start at the same place and all run into problems. i know giffing can sound intimidating and seem like a lot of work, but i promise, once you get into a routine, giffing is going to happen in minutes—and you’ll get beautiful gifs. have fun! 😊
#anon#answered#tut#tuts#giffing tutorial#should i make a tut/resources post on gfx? not rly sure if gfx can be taught.. it's like a lottt about personal style imo lol#hope this helps!#not just for anon but for anyone
117 notes
·
View notes
Last Seen Blogs

thesoupofthetruck
Homos Holding Hands

moves-like-changster-blog
Asian Persuasian.

user154117
合集

rsyq
still here

im-just-a-bug
hey, im bug