#microcontroller raspberry pi
Explore tagged Tumblr posts
Visit Tumblr Blog
Explore Tumblr blogs with no restrictions, modern design and the best experience.
Last Seen Tumblr Blogs


Fun Fact
Mobile US users spent an average of 115.8 minutes on Tumblr app monthly.
Text
https://www.futureelectronics.com/p/semiconductors--microcontrollers--8-bit/ez80f91az050ek-zilog-8131964
Embedded microcontroller, microcontroller board, lcd microcontrollers
eZ80F91 Series 256 kB Flash 8 kB RAM 50 MHz 8-Bit Microcontroller - LQFP-144
#Microcontrollers#8 bit#EZ80F91AZ050EK#Zilog#embedded microcontroller#microcontroller board#lcd#8 bit microcontrollers software#programmable pic#Wireless microcontroller#usb microcontroller#microcontroller raspberry pi
1 note
·
View note
Text
Today I made a case for my raspberry pi with lego:

(Ignore the ugly chunky hdmi cable and micro-hdmi adapter. these are some rigid chonkers.)
It even has a lid for the display:


The air can circulate thru the literal "windows". i might add some more cooling bodies inside.
#raspberry pi 4B#raspberry pi#raspberry pi build#raspi#lego#bricks#brick#building bricks#raspi case#raspberry pi case#custom build#microcontroller#tinkering#technology#tech
32 notes
·
View notes
Text
#Built-in Wi-Fi for Raspberry Pi Pico#IoT development board#Raspberry Pi for IoT projects#Wi-Fi-enabled microcontroller#DIY electronics with Raspberry Pi#Robotics with Raspberry Pi Pico#Home automation with Raspberry Pi
3 notes
·
View notes
Note
Hi, I just got into tech (actually 1 year in but I still feel like I don't know anything).
I learnt python, R, SQL, Tableau and concepts in Data Structures, Algorithms.
[Just the Basic level of the listed.]
But I can't write my own programs on python or create anything.
I was hella impressed by your microprocessor project, and when I took up tech (ai and data science) I assumed I would do something like that or at least code.
Now, I am just venting but where do I start, how do I make projects what are some interesting projects, what should I learn? A lot of my seniors tell me to have a wide range of knowledge like focus on one thing by depth but add other things. For example: you can study data analytics in depth but have some knowledge in ethical hacking and web development etc. Like an all rounder.
Wow ok a lot to unpack here, I'll get started
Lots of places recommend that you start with Arduino, as there are a lot of good tutorials out there. I somewhat disagree
I think that raspberry pi is better because it's usually a lot cheaper to buy the stuff you want to play around with
But an even cooler way to do it, go to wokwi.com and start a project on a Raspberry Pi Pico (make sure it's the micropython version) and then you can get started there
Google something like "Blink led with Pi Pico micropython" and there will be a tutorial or two
Then, once you've played around for a while you can buy a Pi Pico for very little money and see your stuff work irl!
If you need any more help or have any questions, feel free to DM me and I'll see what I can do
#micropython#coding#python#raspberry pi#raspberry pi pico#programming#microprocessors#microcontroller#microcontrollers
6 notes
·
View notes
Text
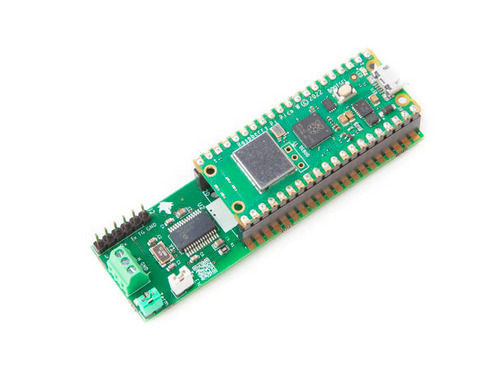
Combining CAN Bus and Microcontroller Power: The CANPico V2 by Copperhill Technologies
Discover the CANPico V2 from Copperhill Technologies – a powerful Raspberry Pi Pico WH board with built-in CAN Bus support for automotive, industrial, and IoT applications. Compact, reliable, and easy to use.
0 notes
Text
USB to LoRa Dongle: A Solution for Wireless Communications Device

In the remote sensor networks or any other IoT projects which are used to communicate over large distances with minimal power consumption, USB to LoRa Dongle can be a game changer device. The dongle offers an affordable, efficient and powerful solution for establishing seamless communication. This is a powerful and versatile device that acts as a bridge between your computer or microcontroller and LoRa based wireless.
The dongle comes with SX1268 next generation LoRa technology and is able to communicate up to 5km distance with license free frequency bands(433MHz/868MHz/915MHz). The dongle can connect Raspberry Pi, LoRa and any other microcontroller. The features and specifications of the dongle is given below:
Features and Specifications:
Communication: This module is enabled to communicate over long distances up to 5km range.
Frequency Support: Supports license free ISM frequency bands 433MHz, 868MHz and 915MHz with these features you can use it in different regions across the world.
Transmission Power: Comes with maximum transmission power of 160mW that ensures your data can be transmitted over long distances and it has a multi-level adjustable setting that helps you to optimize the device for your specific needs.
Next Generation LoRa technology: Comes with new generation LoRa technology based on SX1268 chip. Makes it highly reliable for applications. The air data rates for this module range from 0.3Kbps~ 62.5kbps. This range provides a good balance between communication range and data rate, allowing you to choose the best configuration for your specific needs.
Power Supply: can operate with a wide range of power inputs, supports 2.1V - 5.5V or 3.3V~5.5V power supply for the best performance.
Low Power Consumption: This device is energy efficient. It reduced 40% power consumption and 35% power consumption for hardware and software respectively.
Industrial Grade Durability: The industrial grade standard of the dongle ensures it operates in different temperatures from -40°C to 85°C for a long time.
Development Friendly Features: Dongle supports IPEX and stamp holes. This feature provides flexibility for developers and engineers looking to customize the dongle for specialized projects.
Easy Integration With Existing System: Can connect to any computer, Raspberry Pi, Rock, Beagle Bone or other microcontroller to integrate easily with your existing system.
Applications: USB to LoRa dongle can be used in various applications that require long range wireless connectivity, low power consumption and many IoT applications.
IoT Applications
Smart Home Automation
Asset Tracking
Emergency Services
Remote Monitoring
The USB to LoRa by SB Components is a combination of long-range communication, low power consumption, software adjustable transmission power and flexible power supply options. With these great features it provides a reliable and adjustable solution for various applications.
Whether you are building IoT networks, remote sensing systems, or smart agriculture solutions, the USB to LoRa device ensures you can communicate over long distances, reduce energy costs, and deploy solutions that are both reliable and efficient. With its industrial-grade durability, low power consumption, and development-friendly features, the USB to LoRa device is truly a game-changer in the world of wireless communication.
#usb dongle#lora#lora products#wireless#wireless connectivity#raspberry pi#rock#innovation#technology#electronics#iot#iot applications#projects#microcontrollers
0 notes
Text
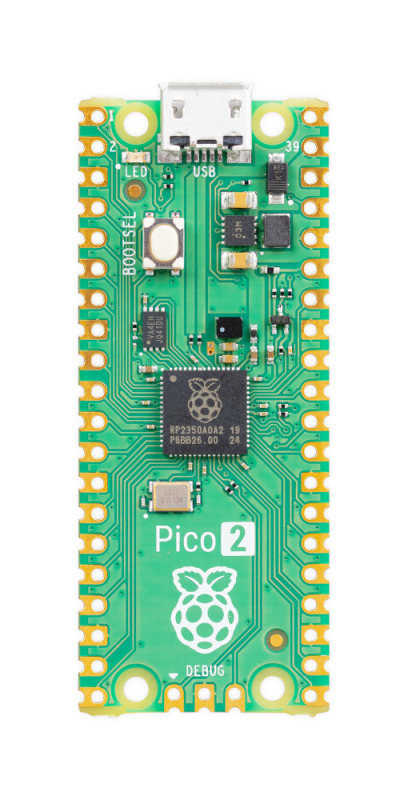
Pi Pico 2
A quick post about the #RaspberryPiPico2 (I was offline for most of the day when it was launched!) #Blaugust2024 #100DaysToOffload
I was busy and offline for most of today, and by the time I checked “the feeds” I’d missed the excitement about the Raspberry Pi Pico 2 / RP2350. I’m somewhat excited – the RP2040 and the Pico have been staples of my electronics tinkering over the past few years – I used one in a plotter project, for example; I used one to add remote-controlled lighting to my Bambu X1C 3D printer; I’ve hacked…
View On WordPress
#Blaugust2024#100DaysToOffload#hacking#hardware#microcontroller#micropython#Raspberry Pi#raspberry pi pico 2#Technology
0 notes
Text
10 Exciting RP2040 Project Ideas
The Raspberry Pi Pico, powered by the RP2040 microcontroller, has taken the maker community by storm with its affordability and versatility. If you're looking for some exciting project ideas to try with your RP2040, you're in the right place! In this article, we'll explore 10 innovative projects that showcase the capabilities of the RP2040 and inspire your next creation.
Introduction
The RP2040 is a powerful microcontroller that can be used in a wide range of projects, from simple LED blinkers to complex IoT devices. Its dual-core ARM Cortex-M0+ processor and generous amount of RAM make it ideal for multitasking and handling various tasks simultaneously. Let's dive into some exciting project ideas to unleash the full potential of the RP2040.
1. Blinking LED
A classic project for beginners, the blinking LED demonstrates the basic functionality of the RP2040. By controlling the GPIO pins, you can make an LED blink at different rates, creating various patterns and effects.
2. Temperature Monitoring System
Use the RP2040's ADC to read temperature values from a sensor and display them on an LCD screen. You can also set up alerts to notify you when the temperature exceeds a certain threshold.
3. Motion-Activated Camera
Create a motion-activated camera using the RP2040 and a camera module. The RP2040 can detect motion using a PIR sensor and trigger the camera to capture images or videos.
4. Smart Weather Station
Build a weather station that collects data such as temperature, humidity, and air pressure using sensors. Display the data on an OLED screen and upload it to a cloud service for remote monitoring.
5. Home Automation System
Control lights, appliances, and other devices in your home using the RP2040 and relays. You can create a mobile app or a web interface to control the system remotely.
6. Game Console Emulator
Turn your RP2040 into a retro game console emulator by installing emulators for classic gaming consoles. Use the GPIO pins to connect controllers and play your favorite games.
7. MIDI Controller
Build a MIDI controller using the RP2040 and potentiometers, buttons, and sliders. Use it to control music software or hardware synthesizers.
8. Internet Radio
Create an internet radio player using the RP2040 and a Wi-Fi module. Stream music from online radio stations and control playback using buttons or a web interface.
9. AI Voice Assistant
Build an AI voice assistant using the RP2040 and a microphone. Use services like Google Assistant or Alexa to control smart devices, play music, and answer questions.
10. Conclusion
The RP2040 opens up a world of possibilities for makers and hobbyists. With its powerful features and affordable price, it's the perfect platform for experimenting with electronics and programming. Whether you're a beginner or an experienced maker, these project ideas will help you get started with the RP2040 and unleash your creativity.
0 notes
Text
RN42 Bluetooth Module: A Comprehensive Guide
The RN42 Bluetooth module was developed by Microchip Technology. It’s designed to provide Bluetooth connectivity to devices and is commonly used in various applications, including wireless communication between devices.
Features Of RN42 Bluetooth Module
The RN42 Bluetooth module comes with several key features that make it suitable for various wireless communication applications. Here are the key features of the RN42 module:
Bluetooth Version:
The RN42 module is based on Bluetooth version 2.1 + EDR (Enhanced Data Rate).
Profiles:
Supports a range of Bluetooth profiles including Serial Port Profile (SPP), Human Interface Device (HID), Audio Gateway (AG), and others. The availability of profiles makes it versatile for different types of applications.
Frequency Range:
Operates in the 2.4 GHz ISM (Industrial, Scientific, and Medical) band, the standard frequency range for Bluetooth communication.
Data Rates:
Offers data rates of up to 3 Mbps, providing a balance between speed and power consumption.
Power Supply Voltage:
Operates with a power supply voltage in the range of 3.3V to 6V, making it compatible with a variety of power sources.
Low Power Consumption:
Designed for low power consumption, making it suitable for battery-powered applications and energy-efficient designs.
Antenna Options:
Provides options for both internal and external antennas, offering flexibility in design based on the specific requirements of the application.
Interface:
Utilizes a UART (Universal Asynchronous Receiver-Transmitter) interface for serial communication, facilitating easy integration with microcontrollers and other embedded systems.
Security Features:
Implements authentication and encryption mechanisms to ensure secure wireless communication.
Read More: RN42 Bluetooth Module
#rn42-bluetooth-module#bluetooth-module#rn42#bluetooth-low-energy#ble#microcontroller#arduino#raspberry-pi#embedded-systems#IoT#internet-of-things#wireless-communication#data-transmission#sensor-networking#wearable-technology#mobile-devices#smart-homes#industrial-automation#healthcare#automotive#aerospace#telecommunications#networking#security#software-development#hardware-engineering#electronics#electrical-engineering#computer-science#engineering
0 notes
Text
Wiring and programming microcontrollers is so dumb sometimes because you’ll do literally EVERYTHING, EXACTLY as instructed and it won’t fucking work and then your professor will come over and say some bullshit like, “Well you forgot to connect the cum circuit to ground and reference the balls and penis libraries” and then zoom off before helping at all.
#programming#wiring#microcontrollers#mech#automation#raspberry pi#and then later they’ll chuckle and tell some story about when they worked at intel and someone almost got fucking obliterated by electricity
1 note
·
View note
Text
Using circuitpython instead of C because I’m still a noob. This was me testing out drawing on the screen and registering buttons
0 notes
Text
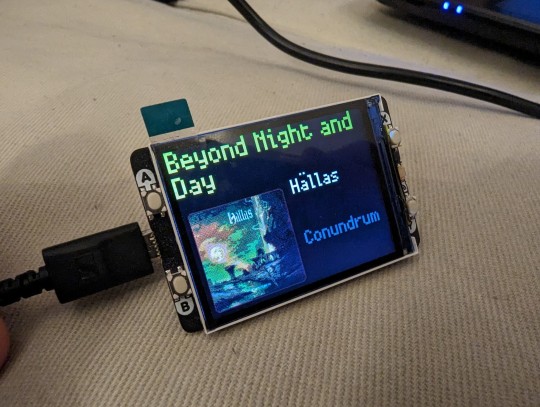
Working on a Raspberry Pico W display to showcase what is currently playing on Plex. Fun project with both Python and Micropython in the stack.
Now all that remains is getting buttons to work and hardening against network failures.
0 notes
Text
#raspberry pi#Raspberry Pi Pico 2#Raspberry Pi Pico 2 Wi-Fi#Pico 2 Wi-Fi board#RP2040 microcontroller#IoT development board#DIY electronics
0 notes
Note
My entire life I've seen year over year performance increases from computers at about the same power draw, and it makes me wonder - would these developments also enable something with roughly the same computation power of a windows 98 or 2000 machine but with a lower overall power draw, such that you might be able to cram the computing power of a turn of the century workstation into the form factor and power draw of a pocket calculator, perhaps even solar powered?
Idk, maybe.
If you've seen the very small embedded hardware grade x86 processors, similar to what LGR demonstrated on this past week's episode on the Pixel x86, you'll see that these machines still take up a bit of power, certainly small enough to be at cellphone scale. The machines he demonstrated are attempting to replicate the power and functionality of 30 year old hardware, and aren't hyper-optimized for low power consumption. So you could probably make something relatively portable, you just wouldn't be at "pocket calculator" scale.
If you're willing to go outside of ~2000-era x86 computing, the answer is probably "pretty close" with a Raspberry Pi or one of the other modern ARM microcontroller. You could totally make some tiny little machines based on that, but it ain't gonna run Windows without an emulation layer.
I can't claim expertise on the subject of miniaturization, so take what I say with a grain of salt.
35 notes
·
View notes
Text
Driving HUB75 RGB Matrices on Raspi 5 with PIO 💡😎
Since the latest release of 'piolib' we can do things like drive NeoPixels on any pin on the Raspberry Pi 5
which rocks, and means we can tackle the next, more complex, project: driving HUB75 RGB Matrix displays
these require even MORE timing freakiness: using 10 pins, and 'manual' PWM means we have to constantly blit out the color dithering. Historically this was done with mmap'd memory to the GPIO controller bitbanging, which required a full core and could jitter depending on load. But now we can use the PIO peripheral! We can drive massive display arrays at high speeds and color depths using just about any pins. The future is looking bright 😎
22 notes
·
View notes
