#oauth2 authentication postman
Explore tagged Tumblr posts
Visit Tumblr Blog
Explore Tumblr blogs with no restrictions, modern design and the best experience.
Last Seen Tumblr Blogs


Fun Fact
There were a total of 171.5 billion posts on Tumblr in 2019.
Text
You can learn NodeJS easily, Here's all you need:
1.Introduction to Node.js
• JavaScript Runtime for Server-Side Development
• Non-Blocking I/0
2.Setting Up Node.js
• Installing Node.js and NPM
• Package.json Configuration
• Node Version Manager (NVM)
3.Node.js Modules
• CommonJS Modules (require, module.exports)
• ES6 Modules (import, export)
• Built-in Modules (e.g., fs, http, events)
4.Core Concepts
• Event Loop
• Callbacks and Asynchronous Programming
• Streams and Buffers
5.Core Modules
• fs (File Svstem)
• http and https (HTTP Modules)
• events (Event Emitter)
• util (Utilities)
• os (Operating System)
• path (Path Module)
6.NPM (Node Package Manager)
• Installing Packages
• Creating and Managing package.json
• Semantic Versioning
• NPM Scripts
7.Asynchronous Programming in Node.js
• Callbacks
• Promises
• Async/Await
• Error-First Callbacks
8.Express.js Framework
• Routing
• Middleware
• Templating Engines (Pug, EJS)
• RESTful APIs
• Error Handling Middleware
9.Working with Databases
• Connecting to Databases (MongoDB, MySQL)
• Mongoose (for MongoDB)
• Sequelize (for MySQL)
• Database Migrations and Seeders
10.Authentication and Authorization
• JSON Web Tokens (JWT)
• Passport.js Middleware
• OAuth and OAuth2
11.Security
• Helmet.js (Security Middleware)
• Input Validation and Sanitization
• Secure Headers
• Cross-Origin Resource Sharing (CORS)
12.Testing and Debugging
• Unit Testing (Mocha, Chai)
• Debugging Tools (Node Inspector)
• Load Testing (Artillery, Apache Bench)
13.API Documentation
• Swagger
• API Blueprint
• Postman Documentation
14.Real-Time Applications
• WebSockets (Socket.io)
• Server-Sent Events (SSE)
• WebRTC for Video Calls
15.Performance Optimization
• Caching Strategies (in-memory, Redis)
• Load Balancing (Nginx, HAProxy)
• Profiling and Optimization Tools (Node Clinic, New Relic)
16.Deployment and Hosting
• Deploying Node.js Apps (PM2, Forever)
• Hosting Platforms (AWS, Heroku, DigitalOcean)
• Continuous Integration and Deployment-(Jenkins, Travis CI)
17.RESTful API Design
• Best Practices
• API Versioning
• HATEOAS (Hypermedia as the Engine-of Application State)
18.Middleware and Custom Modules
• Creating Custom Middleware
• Organizing Code into Modules
• Publish and Use Private NPM Packages
19.Logging
• Winston Logger
• Morgan Middleware
• Log Rotation Strategies
20.Streaming and Buffers
• Readable and Writable Streams
• Buffers
• Transform Streams
21.Error Handling and Monitoring
• Sentry and Error Tracking
• Health Checks and Monitoring Endpoints
22.Microservices Architecture
• Principles of Microservices
• Communication Patterns (REST, gRPC)
• Service Discovery and Load Balancing in Microservices
1 note
·
View note
Text
A Beginner’s Guide to RESTful API Design

RESTful APIs are the backbone of modern web and mobile applications. Whether you're building the backend for a web service, a mobile app, or a microservice architecture, understanding how to design a RESTful API is essential. In this guide, we’ll walk you through what REST is and how to structure APIs that are scalable, maintainable, and easy to use.
What is a RESTful API?
REST stands for Representational State Transfer. It's an architectural style that uses standard HTTP methods (GET, POST, PUT, DELETE) for communication between clients and servers. A RESTful API exposes data and services over the web using URLs, returning responses typically in JSON format.
Core Principles of RESTful API Design
Statelessness: Each request should contain all the information needed to process it. The server does not store client session data.
Resource-Based: Data is represented as resources (e.g., /users, /products).
Use of HTTP Methods: Use standard HTTP verbs for actions: GET (read), POST (create), PUT/PATCH (update), DELETE (remove).
Uniform Interface: Consistent structure and naming conventions help developers understand and use your API easily.
Representation: Resources are typically represented using JSON or XML.
Best Practices for RESTful API Design
1. Use Nouns in URIs
URIs should represent resources, not actions. Example:✅ /users❌ /getUsers
2. Use HTTP Methods Correctly
GET /users → Get list of users
GET /users/1 → Get user with ID 1
POST /users → Create a new user
PUT /users/1 → Update user with ID 1
DELETE /users/1 → Delete user with ID 1
3. Return Proper HTTP Status Codes
200 OK → Successful request
201 Created → Resource created successfully
400 Bad Request → Client error
401 Unauthorized → Authentication failed
404 Not Found → Resource doesn’t exist
500 Internal Server Error → Server-side error
4. Use JSON as the Response Format
JSON is the most widely used and supported format. It’s readable by both humans and machines.
5. Version Your API
Always version your APIs to avoid breaking changes for clients when you update your codebase./api/v1/users
6. Use Pagination for Large Collections
For endpoints that return many items, use query parameters for pagination:/users?page=2&limit=20
7. Include Error Messages
Return helpful error messages to guide developers on how to fix their request: { "error": "Invalid input", "details": "Email address is required" }
8. Secure Your API
Use HTTPS to encrypt data in transit.
Implement authentication (e.g., OAuth2, JWT).
Validate inputs to prevent injection attacks.
Tools for API Development and Testing
Postman: Test and document your APIs.
Swagger/OpenAPI: Generate interactive API documentation.
Insomnia: Alternative to Postman for API testing.
Conclusion
Designing a RESTful API isn't just about making something that works — it's about making it intuitive, reliable, and secure. By following the principles and best practices outlined here, you'll create APIs that developers love to use and that can scale with your application.
0 notes
Text
How to Set Up Postman to Call Dynamics 365 Services

Overview
A wide range of setup postman to call d365 services to allow developers and administrators to work programmatically with their data and business logic. For calling these D365 services, Postman is an excellent tool for testing and developing APIs. Your development process can be streamlined by properly configuring Postman to call D365 services, whether you're integrating third-party apps or running regular tests. You may ensure seamless and effective API interactions by following this guide, which will help you through the process of configuring Postman to interface with D365 services.
How to Set Up Postman Step-by-Step to Call D365 Services
Set up and start Postman:
Install Postman by downloading it from the official website.
For your D365 API interactions, open Postman, create a new workspace, or use an existing one.
Obtain Specifics of Authentication:
It is necessary to use OAuth 2.0 authentication in order to access D365 services. If you haven't previously, start by registering an application in Azure Active Directory (Azure AD).
Go to "Azure Active Directory" > "App registrations" on the Azure portal to register a new application.
Make a note of the Application (Client) ID and the Directory (Tenant) ID. From the "Certificates & Secrets" area, establish a client secret. For authentication, these credentials are essential.
Set up Postman's authentication:
Make a new request in Postman and choose the "Authorization" tab.
After selecting "OAuth 2.0" as the type, press "Get New Access Token."
Complete the necessary fields:
Name of Token: Assign a moniker to your token.
Type of Grant: Choose "Client Credentials."
URL for Access Token: For your tenant ID, use this URL: https://login.microsoftonline.com/oauth2/v2.0/token Client ID: From Azure AD, enter the Application (Client) ID.
Client Secret: Type in the secret you made for the client.
Format: https://.crm.dynamics.com/.default is the recommended one.
To apply the token to your request, select "Request Token" and then "Use Token."
Construct API Requests:
GET Requests: Use the GET technique to retrieve data from D365 services. To query client records, for instance:
.crm.dynamics.com/api/data/v9.0/accounts is the URL.
POST Requests: POST is used to create new records. Provide the information in the request body in JSON format. Creating a new account, for instance:
.crm.dynamics.com/api/data/v9.0/accounts is the URL.
JSON body: json
Copy the following code: {"telephone1": "123-456-7890", "name": "New Account"}
PATCH Requests: Use PATCH together with the record's ID to update already-existing records:
.crm.dynamics.com/api/data/v9.0/accounts() is the URL.
JSON body: json
Code {"telephone1": "987-654-3210"} should be copied.
DELETE Requests: Utilize DELETE together with the record's ID: .crm.dynamics.com/api/data/v9.0/accounts()
Add the parameters and headers:
In the "Headers" tab, make sure to include:
Bearer is authorized.
Application/json is the content type for POST and PATCH requests.
For filtering, sorting, or pagination in GET requests, use query parameters as necessary. As an illustration, consider this URL: https://.crm.dynamics.com/api/data/v9.0/accounts?$filter=name eq 'Contoso'
Submit Requests and Evaluate Answers:
In order to send your API queries, click "Send."
Check if the response in Postman is what you expected by looking at it. The answer will comprise status codes, headers, and body content, often in JSON format.
Deal with Errors and Issues:
For further information, look at the error message and status code if you run into problems. Authentication failures, misconfigured endpoints, or badly formatted request data are typical problems.
For information on specific error codes and troubleshooting techniques, consult the D365 API documentation.
Summary
Getting Postman to make a call A useful method for testing and maintaining your D365 integrations and API interactions is to use Dynamics 365 services. Through the configuration of Postman with required authentication credentials and D365 API endpoints, you may effectively search, create, update, and remove records. This configuration allows for smooth integration with other systems and apps in addition to supporting thorough API testing. Developing, testing, and maintaining efficient integrations will become easier with the help of Postman for D365 services, which will improve data management and operational effectiveness in your Dynamics 365 environment.
0 notes
Text
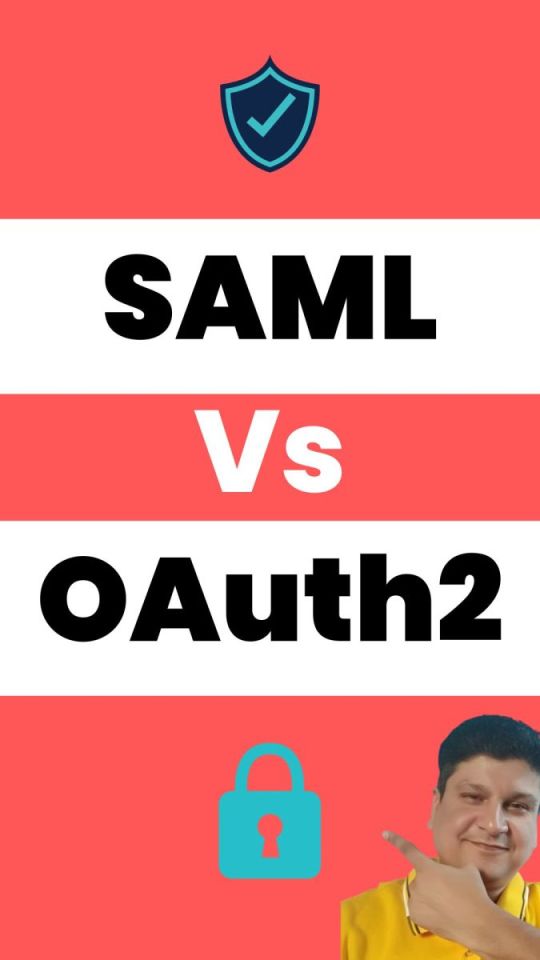
YouTube Short | What is Difference Between OAuth2 and SAML | Quick Guide to SAML Vs OAuth2
Hi, a short #video on #oauth2 Vs #SAML #authentication & #authorization is published on #codeonedigest #youtube channel. Learn OAuth2 and SAML in 1 minute. #saml #oauth #oauth2 #samlvsoauth2 #samlvsoauth
What is SAML? SAML is an acronym used to describe the Security Assertion Markup Language (SAML). Its primary role in online security is that it enables you to access multiple web applications using single sign-on (SSO). What is OAuth2? OAuth2 is an open-standard authorization protocol or framework that provides applications the ability for “secure designated access.” OAuth2 doesn’t share…
View On WordPress
#Oauth#oauth2#oauth2 authentication#oauth2 authentication flow#oauth2 authentication postman#oauth2 authentication server#oauth2 authentication spring boot#oauth2 authorization#oauth2 authorization code#oauth2 authorization code flow#oauth2 authorization code flow spring boot#oauth2 authorization server#oauth2 authorization sever spring boot#oauth2 explained#oauth2 spring boot#oauth2 spring boot microservices#oauth2 spring boot rest api#oauth2 tutorial#oauth2 vs saml#oauth2 vs saml 2.0#oauth2 vs saml2#saml#saml 2.0#saml 2.0 registration#saml authentication#saml tutorial#saml vs oauth#saml vs oauth 2.0#saml vs oauth vs sso#saml vs oauth2
0 notes
Text
Getting started with Laravel Passport and OAuth2
Getting started with Laravel Passport and OAuth2
In this 29 minute video, I’ll show you how to install and use the powerful Passport authentication package in an example Laravel application. Postman helps a … laravel
View On WordPress
0 notes
Text
IFS Authentication flow with OAuth and OpenID Connect
IFS Authentication flow with OAuth and OpenID Connect
In my previous article I wrote about Capturing IFS Aurena requests using Postman which is a shortcut method for calling IFS main cluster resources which requires OAuth2 and OpenID Connect authentication. I thought of getting little deep dive this time and try out how we can create a successful request to IFS with OAuth authentication. What this post is about… What is OAuth and how it’s used in…

View On WordPress
0 notes
Text
Restful Web API with Oauth2 Token Bearer (.NET)
I have just created REST API to allow administrator can manage data user from ASP.NET Web API, this is simple to use and have a authentication use OAUTH2 bearer token OWIN.
You can manage data user if he has got token bearer while token is not expired. I set token expired for 15 minutes, you can change it as you as want. Not only text, but also you can upload image file to server and save filename into database via REST API.
Make sure you have install :
Visual Studio 2015(or higher)
SQL Server 2012
Net framework 4.5.2
Postman (Last version)
from CodeCanyon new items https://ift.tt/2QfFnia via IFTTT https://goo.gl/zxKHwc
0 notes
Photo

How to Master Your API Workflow with Postman
Building good APIs is hard, and anyone who had the chance to do so can relate to this. A project can easily grow to become a mess. One can keep trying to adopt an approach to make it more enjoyable, like trying a documentation-first workflow, but something always feels clumsy.
I was trying out Postman lately, a tool we've briefly covered before, and I discovered that they're doing a great job by providing an integrated environment for different components of an API, like authorization, testing, documentation, versioning, etc.

In this article, we're going to walk through the different features that Postman provides and how we can organize them to make our API workflow less painful.
Making Requests
The first step to discovering Postman is making a simple API request and seeing the response.

From the screenshot above we can see that the view incorporates different elements. The top bar contains the request method (in this case GET), and right next to it we specify the endpoint to make the request to. If the request has some params we can specify them by clicking the Params button, which will open a table for entering them. When ready, we can click the send button to initiate the request.
The next section contains five tabs:
Authorization: Specifies how to authorize the request. Like Basic Auth, OAuth2, etc.
Headers: Any header that should be sent with the request. Like content-type, Authorization, etc.
Body: Request body for request types like Post, PUT, etc.
Pre-request Script: JS code to be executed before performing the request. (More about this later)
Tests: JS code to validate the response payload.
The bottom section contains all the details about the response (status, time and size). The four tabs are self explanatory, except for Tests which contains the tests result if we have any (more about this later).
Authorization
Postman supports all types of authorization, as we saw above. We're going to focus on token authorization set via header. You can read more about authorization here.
The header format that Postman will use is:
Authorization: Bearer <TOKEN>

Now, we'll go ahead and get a token we can use for our future requests. I'm testing on an in-development application of mine, but you can use any application you have lying around, or set one up quickly with Laravel as described here.
Not familiar with Laravel? Try our premium course - it's a comprehensive introduction, and you'll get the upcoming newer version of it automatically if you grab it in its current iteration!

At this point, we have a token to be used for querying data from the API as an authenticated user. However, copying and pasting the token for every request is tedious!
Environment Variables
This nice feature alleviates the pain of copy/paste and groups our variables in one place. An environment is an execution context: we may have a local environment, testing, staging, etc.
Postman has different scopes for variables:
Global
Environment
Local
Data
The global variables are available everywhere, separately from the selected environment. You can read more in the documentation.
We need at least three variables for now:
domain: current active subdomain company1, company2, etc.
url: our app URL.
token: Token for future authentication.

Now we can update our login endpoint to use our new environment, but first we need to select our environment from the top right selection box.

We can use our variables inside the URL, parameters, tests, etc. But how are we going to use our token now?
Well, we have two choices. The first is to copy the token and paste it as a value for the token variable (this is what we're trying to avoid).
The second method is to set this via code executed after the request is done. This is where tests come into play, let's find out what they are!
Continue reading %How to Master Your API Workflow with Postman%
by Younes Rafie via SitePoint http://ift.tt/2wTRcl9
0 notes
Text
Taking the First Step with OAuth
If you’re a PM for an identity product, someone who sells a product which includes SSO or even starting to create an side project, you might need to know about OAuth. There are tons of resources out there but I wanted to share my journey to enlightenment... about OAuth. I centered on DocuSign Developer Center for obvious reasons and while it’s a great resource, you could also use a product that works for your specific needs.
Getting Started with OAuth
https://developer.okta.com/
https://www.youtube.com/channel/UC5AMiWqFVFxF1q9Ya1FuZ_Q/featured
Great blog for getting started: https://www.docusign.com/blog/dsdev-please-mr-postman/
Here are the docs for the three code types we use at DS: https://developers.docusign.com/esign-rest-api/guides/authentication
https://support.docusign.com/en/guides/org-admin-guide-identity-providers
General guides:
https://itnext.io/an-oauth-2-0-introduction-for-beginners-6e386b19f7a9
https://blog.oauth.io/choose-oauth2-flow-grant-types-for-app/
https://auth0.com/docs/api-auth/which-oauth-flow-to-use
https://community.apigee.com/questions/44446/oauth-which-grant-type-to-choose.html
https://www.quora.com/Which-companies-have-the-best-developers-website-and-API-documentation
Product Documentation:
https://developers.google.com/identity/protocols/OAuth2
https://developer.spotify.com/documentation/general/guides/authorization-guide/
https://developer.okta.com/docs/concepts/auth-overview/
https://support.google.com/googleapi/answer/6158849?hl=en
https://www.etsy.com/developers/documentation/getting_started/oauth
https://help.shopify.com/en/api/getting-started/authentication
https://stripe.com/docs/connect/oauth-reference
https://docs.microsoft.com/en-us/azure/active-directory/develop/authentication-flows-app-scenarios
https://app.hellosign.com/api/oauthWalkthrough
0 notes
Text
Sr. JAVA Automation Developer
Job Description: We are looking for a Strong Sr. Software Automation Developer with following skills --- Required: Excellent communication skills (written and verbal). Demonstrate ability to work in a team environment and multi-task to meet critical deliverable dates. Working knowledge of Linux. Working knowledge of various AWS technologies (Lambda, RDS, API Gateway, etc.). Working knowledge of web standards relating to authentication and APIs (OAuth2, SAML2, SSL, CORS, JWT, REST/SOAP, etc.). Working knowledge of API and UI Test Automation tools such as PostMan (Newman), SoapUI, and Cypress. Working knowledge of unit testing code written in Java (such as JUnit) and Python (s...
Source: https://www.jobisite.com/sj/id/9042346-Sr.-JAVA-Automation-Developer
0 notes
Text
How to fetch office365 unread emails using postman
I am trying to fetch unread emails from inbox of my office365 account using postman.With the help of Microsoft Graph API reference i am able to generate access token as in below format: POST https://login.microsoftonline.com//oauth2/token { "token_type": "Bearer&qu...
"How to fetch office365 unread emails using postman" by Samiron Mallick originally published October 10th 2018 in Office 365 topics
I am trying to fetch unread emails from inbox of my office365 account using postman.
With the help of Microsoft Graph API reference i am able to generate access token as in below format:
POST https://login.microsoftonline.com//oauth2/token { "token_type": "Bearer", "expires_in": "3600", "ext_expires_in": "0", "expires_on": "1539180610", "not_before": "1539176710", "resource": "https://graph.microsoft.com", "access_token": <ENCRYPTED_TOKEN> }
However my requirement is to fetch unread mails from Inbox.
Using the following link seems that can be possible, however while using in postman, getting "Invalid authentication, access token is empty" error.
https://graph.microsoft.com/v1.0/me/mailFolders('Inbox')/messages?$select=sender,subject
Can anyone please tell me how to append access token with the above code, if this is the right one.
Or if you know any simple and better procedure to fetch unread emails from office365 account, please advice.
Read Full Post
0 notes
Text
Setting Up Postman to Call Dynamics 365 Data Entities

Overview
A strong API structure offered by Dynamics 365 (D365) enables programmatic interaction between developers and administrators and its data entities. You can set up and run queries to these data entities with ease using Postman, a robust tool for API development and testing. This makes operations like querying, updating, and managing your D365 data easier. In order to ensure that you can efficiently utilize the API for your integration and development needs, this article will lead you through the setup postman to call d365 data entities.
How to Set Up Postman Step-by-Step for D365 Data Entities
Set up Postman:
Install Postman by downloading it from the official website.
Create a new workspace in Postman after opening it to arrange your API testing.
Acquire API Passwords:
Enter your D365 credentials and go to If you haven't already, go to the Azure Active Directory portal to register an application.
Go to "Azure Active Directory" > "App registrations" in the Azure portal to register a new application. Make a client secret and write down the Application (Client) ID and Directory (Tenant) ID.
Your Postman requests will be authenticated using these credentials.
Activation Setup in Postman:
Click the "New" button in Postman and choose "Request" to start a new request.
Navigate to the “Authorization” tab in the request setup.
Select "OAuth 2.0" as the format. After selecting "Get New Access Token," fill out the following information:
Token Name: Any name you want.
Grant Category: Client References.
https://login.microsoftonline.com//oauth2/v2.0/token is the URL for the access token.
Application (Client) ID: This is the Client ID from Azure. Client Secret: The secret you made for the client.
Scope: /.default/.crm.dynamics.com
For your request, click "Request Token" and then "Use Token."
Set Up an API Request:
Configure the D365 data entities API endpoint. For example, the URL would be https://.crm.dynamics.com/api/data/v9.0/accounts to retrieve data from the accounts object.
Based on your action, choose the proper HTTP method (GET, POST, PUT, or DELETE):
GET: To obtain information. For instance, GET /accounts
POST: To generate fresh data. POST /accounts with a JSON payload in the body is an example.
PUT/PATCH: To bring current records up to date. PATCH /accounts() with the modified data in the body, for instance.
DELETE: To delete information. DELETE /accounts(), for instance
Include Query Parameters and Headers:
Add the subsequent headers to the "Headers" tab:
Permission: as bearer
Application/json is the content type for POST and PUT/PATCH queries
Use the query parameters in the request URL to filter or sort the results. To filter accounts by name, for instance, go to this link: https://.crm.dynamics.com/api/data/v9.0/accounts?$filter=name eq 'Contoso'. Requests can be executed and reviewed.
In order to submit your API request, click "Send."
Postman will show the answer, together with any returned data and status codes. Make sure the response satisfies your expectations by reviewing it.
Deal with Errors and Issues:
Summary
A useful and effective technique to work with your D365 data programmatically is to set up Postman to call Dynamics 365 data entities. By setting up Postman You may easily execute a variety of API queries, from adding and removing records to retrieving and updating data, if you have the necessary login information and API endpoints. This configuration offers a simple and manageable interface for working with D365 data, which assists integration efforts in addition to facilitating thorough API testing. Gaining proficiency with this configuration will improve your capacity to create and manage integrations, automate workflows, and take full advantage of Dynamics 365's API features.
0 notes
Text
New Course: Android Networking
It’s day 8 of the Android Avalanche: an event where we’ll be releasing new Android and Kotlin books, courses, and screencasts every day!
Today, we are releasing a brand new course: Android Networking.
In this 27-video course, Joe Howard will show you how to make calls to REST APIs and how to send and receive structured data. Through a series of hands-on exercises and challenges, you’ll learn some fundamental concepts of networking, how to use the Retrofit networking library, how to handle tasks like authentication, and more!
Take a look at what’s inside:
Part 1: Networking Basics
In part one, learn how fundamental concepts of networking like HTTP, requests, and responses work.
Introduction: Find out what’s covered in our Android Networking video tutorial series: HTTP basics, HttpUrlConnection, and using the Retrofit library from Square.
The Starter App: Download the starter app, build it in Android Studio, and review the existing app code. Review the use of ViewModel, LiveData, and the Repository pattern.
HTTP Basics: Learn about basic concepts of HTTP requests, JSON, using REST APIs and consuming responses, and use the Postman REST client to investigate the GitHub API.
Check Connectivity: See how to check for network connectivity from the starter app, and setup network state access permissions.
HttpUrlConnection: Use the HttpUrlConnection class, along with an AsyncTask, to query the GitHub repos API for any GitHub user.
Challenge: HttpUrlConnection: Practice what you’ve learned so far to query the GitHub API and retrieve a list of code gists for any GitHub user.
Parsing JSON: Learn how to parse the structured HTTP data responses from a REST API using JSONObject and JSONArray.
Challenge: Parsing JSON: Practice what you’ve learned about parsing JSON responses to parse the code gists JSON data for any GitHub user.
Challenge: Profile: Practice all that you’ve learned about making HTTP connections and parsing JSON data to retrieve and display a GitHub user’s profile information.
Conclusion: Let’s review what you’ve covered on networking basics in this first part of Android Networking, and then discuss what’s next.
Part 2: Getting Started with Retrofit
In the second part, learn to setup the Retrofit networking library.
Introduction: We’ll review the various issues with making HTTP connections from Android, then see a preview of how the Retrofit library from Square can help.
Setting up Retrofit: Learn about how to setup the Retrofit library and Gson parsing library as dependencies for your Android project.
GET Requests: See how to make a basic GET request using Retrofit, and also see how to use the Android Profiler to monitor network requests.
Challenge: GET Requests: Practice what you’ve learned about making GET requests with Retrofit to retrieve a GitHub user’s gists and profile.
Parsing with Converters: Use the Gson parsing library from Google to automatically parse the response data from Retrofit requests into Kotlin instances.
Challenge: Parsing with Converters: Practice what you’ve learned about Gson and Retrofit to show the user profile data obtained from GitHub.
Logging Interceptor: Setup an HttpLoggingInterceptor for an OkHttp client and use the client with your Retrofit instance.
Error Handling: See how to handle errors that occur when making API requests with Retrofit by creating an Either class that can represent both success and error.
Challenge: Error Handling: Practice what you’ve learned about error handling to handle errors that occur when making requests for GitHub repos and gists.
Conclusion: Let’s review what you’ve covered about getting started with Retrofit in this second part of Android Networking, and then discuss what’s next.
Part 3: More with Retrofit
In the last part, learn how to handle networking tasks like authentication and posts.
Introduction: Survey other capabilities of the Retrofit library, and preview the network requests that will be seen in this part of the course.
Authentication: Learn how to authenticate into a GitHub user’s account by retrieving an OAuth2 token from the GitHub API.
POST Requests: Use an interceptor to add the OAuth2 token into requests made by Retrofit, and then make POST requests to add a new gist into the user’s GitHub account.
Challenge: POST Requests: Practice what you’ve learned about making POST requests to send more data back when creating a new gist for the authenticated GitHub user.
DELETE Requests: Learn how to make a DELETE request with Retrofit and then add the ability to delete gists for the authenticated GitHub user.
Challenge: Retrofit: Practice all that you’ve learned about Retrofit to send an update request for profile data for the authenticated GitHub user.
Conclusion: In this final episode, we’ll summarize both this last part and the whole course, and then see an overview of Android networking topics that were not covered.
The Android Avalanche Bundle
If you like this course, from now until March 30th you can get it along with the rest of our new Android and Kotlin books, courses, and screencasts — at a big discount!
Our new Android Avalanche Bundle includes:
Android Apprentice ($54.99 value): Gives you access to our new Android Apprentice book, which teaches you how to build four complete Android apps from scratch. PDF/ePub format.
Kotlin Apprentice ($54.99 value): Gives you access to our new Kotlin Apprentice book, which gives you a deep dive into the Kotlin programming language itself. PDF/ePub format.
A raywenderlich.com subscription ($19.99 value): Gives you access to all 8 of our new Android video courses, our 2 new Android screencasts, and access to any new courses and screencasts we release in the future.
The bundle price of $99.99 includes the first month of your subscription, which will continue at $19.99/month thereafter. You can cancel at any time and keep the books. This bundle gives you more than 20% off everything in the Android Avalanche!
The Android Avalanche bundle is only available for the next two weeks, so be sure to order your copy while you can.
Already a subscriber? As a subscriber, you already have access to this new course as part of your subscription. You can also enjoy a $20 discount on the bundle that will get you both books added to your collection. It’s our way of thanking you for supporting what we do here at raywenderlich.com.
Where To Go From Here?
If you want to learn Android and Kotlin development — or level up your existing skills – there’s no better way to learn than these new books, courses, and screencasts.
And this is only the beginning! We’re committed to creating more new books, courses, and screencasts on Android development, with the goal of covering Android and Kotlin in the same way that we’ve covered iOS and Swift over the years.
We truly appreciate your support in making this possible. We’re excited about this new chapter at raywenderlich.com. So order your copy of the Android Avalanche Bundle today before the deal is over!
The post New Course: Android Networking appeared first on Ray Wenderlich.
New Course: Android Networking published first on https://medium.com/@koresol
0 notes
Text
How to Master Your API Workflow with Postman
Building good APIs is hard, and anyone who had the chance to do so can relate to this. A project can easily grow to become a mess. One can keep trying to adopt an approach to make it more enjoyable, like trying a documentation-first workflow, but something always feels clumsy.
I was trying out Postman lately, a tool we've briefly covered before, and I discovered that they're doing a great job by providing an integrated environment for different components of an API, like authorization, testing, documentation, versioning, etc.
In this article, we're going to walk through the different features that Postman provides and how we can organize them to make our API workflow less painful.
Making Requests
The first step to discovering Postman is making a simple API request and seeing the response.
From the screenshot above we can see that the view incorporates different elements. The top bar contains the request method (in this case GET), and right next to it we specify the endpoint to make the request to. If the request has some params we can specify them by clicking the Params button, which will open a table for entering them. When ready, we can click the send button to initiate the request.
The next section contains five tabs:
Authorization: Specifies how to authorize the request. Like Basic Auth, OAuth2, etc.
Headers: Any header that should be sent with the request. Like content-type, Authorization, etc.
Body: Request body for request types like Post, PUT, etc.
Pre-request Script: JS code to be executed before performing the request. (More about this later)
Tests: JS code to validate the response payload.
The bottom section contains all the details about the response (status, time and size). The four tabs are self explanatory, except for Tests which contains the tests result if we have any (more about this later).
Authorization
Postman supports all types of authorization, as we saw above. We're going to focus on token authorization set via header. You can read more about authorization here.
The header format that Postman will use is:
Authorization: Bearer <TOKEN>
Now, we'll go ahead and get a token we can use for our future requests. I'm testing on an in-development application of mine, but you can use any application you have lying around, or set one up quickly with Laravel as described here.
Not familiar with Laravel? Try our premium course - it's a comprehensive introduction, and you'll get the upcoming newer version of it automatically if you grab it in its current iteration!
At this point, we have a token to be used for querying data from the API as an authenticated user. However, copying and pasting the token for every request is tedious!
Environment Variables
This nice feature alleviates the pain of copy/paste and groups our variables in one place. An environment is an execution context: we may have a local environment, testing, staging, etc.
Postman has different scopes for variables:
Global
Environment
Local
Data
The global variables are available everywhere, separately from the selected environment. You can read more in the documentation.
We need at least three variables for now:
domain: current active subdomain company1, company2, etc.
url: our app URL.
token: Token for future authentication.
Now we can update our login endpoint to use our new environment, but first we need to select our environment from the top right selection box.
We can use our variables inside the URL, parameters, tests, etc. But how are we going to use our token now?
Well, we have two choices. The first is to copy the token and paste it as a value for the token variable (this is what we're trying to avoid).
The second method is to set this via code executed after the request is done. This is where tests come into play, let's find out what they are!
Continue reading %How to Master Your API Workflow with Postman%
via SitePoint http://ift.tt/2x7WcS9
0 notes