#saml 2.0
Text
The Evolution of Identity and Access Management: SCIM, SAML vs. OpenID Connect, and Integration Challenges
In the ever-evolving digital landscape, Identity and Access Management (IAM) has become crucial for organizations to ensure security, compliance, and efficiency. The increasing reliance on technology has necessitated the development of sophisticated IAM protocols and standards. This blog will explore a SCIM example, compare SAML vs. OpenID Connect, and discuss the challenges and solutions associated with IAM integration.

Understanding SCIM: An Example
System for Cross-domain Identity Management (SCIM) is a standard protocol designed to simplify the management of user identities in cloud-based applications and services. SCIM automates the exchange of user identity information between identity providers and service providers, ensuring seamless integration and synchronization.
SCIM Example
Consider an organization using multiple cloud services, such as Office 365, Google Workspace, and Salesforce. Managing user identities manually across these platforms can be cumbersome and error-prone. By implementing SCIM, the organization can automate the provisioning and deprovisioning of user accounts.
For instance, when a new employee joins the company, the IAM system can automatically create their user account in all relevant cloud services using SCIM. Similarly, when an employee leaves, their access can be revoked across all platforms in a streamlined manner. This automation enhances security, reduces administrative workload, and ensures consistent identity data across all systems.

Comparing SAML vs. OpenID Connect
When it comes to authentication protocols, SAML (Security Assertion Markup Language) and OpenID Connect are two of the most widely used standards. Both serve the purpose of providing secure authentication, but they do so in different ways and are suited to different use cases.
SAML
SAML is an XML-based framework primarily used for Single Sign-On (SSO) in enterprise environments. It allows users to authenticate once and gain access to multiple applications without re-entering credentials. SAML is commonly used in scenarios where secure, federated access to web applications is required, such as accessing corporate intranets or SaaS applications.
OpenID Connect
OpenID Connect is a modern identity layer built on top of the OAuth 2.0 protocol. It uses JSON-based tokens and is designed for mobile and web applications. OpenID Connect provides a more flexible and user-friendly approach to authentication, making it ideal for consumer-facing applications where user experience is paramount.
SAML vs. OpenID Connect: Key Differences
Protocol Structure: SAML uses XML, whereas OpenID Connect uses JSON.
Use Cases: SAML is suited for enterprise SSO, while OpenID Connect is better for modern web and mobile applications.
Token Types: SAML uses assertions, whereas OpenID Connect uses ID tokens.
User Experience: OpenID Connect generally offers a more seamless and user-friendly experience compared to SAML.
The Challenges of IAM Integration
With the growing reliance on technology, integrating various IAM components and protocols has become increasingly complex. Effective IAM integration is essential for ensuring that different systems work together harmoniously, providing a seamless and secure user experience. However, several challenges can arise during the integration process.
Compatibility Issues
Organizations often use a mix of legacy systems and modern applications, leading to compatibility issues. Ensuring that different IAM solutions can communicate and share identity data effectively is a significant challenge.
Data Consistency
Maintaining consistent identity data across multiple platforms is crucial for security and compliance. Any discrepancies in user data can lead to unauthorized access or account lockouts.
Scalability
As organizations grow, their IAM systems must be able to scale accordingly. Integrating IAM solutions that can handle an increasing number of users and applications without compromising performance is vital.
Security Concerns
Integrating multiple IAM solutions can introduce security vulnerabilities if not done correctly. Ensuring that data is securely transmitted and that all systems adhere to robust security protocols is paramount.
Solutions for Effective IAM Integration
To overcome these challenges, organizations should adopt a strategic approach to IAM integration:
Standardization
Adopting standard protocols such as SCIM, SAML, and OpenID Connect can simplify integration by ensuring compatibility and consistency across different systems.
Centralized Identity Management
Implementing a centralized IAM platform can help streamline identity management processes and ensure consistent data across all applications and services.
Regular Audits
Conducting regular audits of IAM systems and processes can help identify and address potential vulnerabilities and inconsistencies, ensuring that the integration remains secure and effective.
Vendor Support
Working with reputable IAM vendors who offer comprehensive support and integration services can significantly ease the integration process and ensure a successful deployment.
Conclusion
As organizations continue to increase their reliance on technology, the need for robust and effective IAM integration becomes more critical. By understanding the differences between SAML vs. OpenID Connect, leveraging standards like SCIM, and adopting strategic integration practices, organizations can enhance security, streamline operations, and provide a seamless user experience. The right IAM solutions not only protect against cyber threats but also empower businesses to thrive in the digital age.
0 notes
Text
Authorization vs Authentication: Key Differences Explained
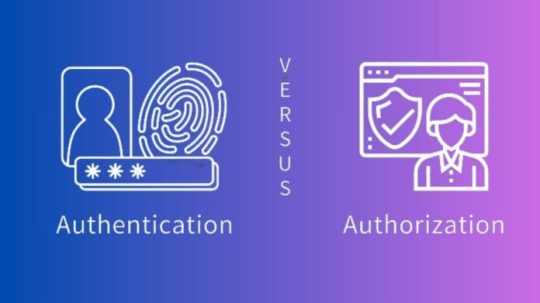
What’s Authorization vs Authentication?
An organisation’s identity and access management (IAM) solution separates authentication and authorization. Users are authenticated. Users are authorised to access system resources.
Authentication requires users to give credentials like passwords or fingerprint scans.Access to a resource or network is determined by user permissions. For instance, file system permissions determine whether a user can create, read, update, or delete files.
In addition to humans, gadgets, automated workloads, and web apps require authentication and authorization. IAM systems can handle authentication and authorization separately or together.
Verification is frequently required for authorization. Users must be identified before a system may provide them access.
Hacked user accounts and access rights are rising due to identity-based assaults. These attacks make up 30% of cyberattacks, according to the IBM X-Force Threat Intelligence Index.
Identity and permission restrict access and prevent data breaches. Strong authentication prevents hackers from taking over user accounts. These accounts are less vulnerable to hackers with strong authorization.
Realising authentication
Authentication method
User credentials authentication factors are exchanged during authentication, abbreviated “authn.” A user’s identity is verified by authentication factors.
New system users create authentication factors. When logging in, these factors appear. Present factors are compared to file factors. A match means the system trusts the user.
Regular authentication factors include:
A password, PIN, or security question that only the user knows.
Possession factors: A SMS-sent one-time PIN (OTP) or a physical security token that only the user holds.
Factors: Facial and fingerprint recognition.
Individual apps and resources can authenticate themselves. Users can authenticate once to access numerous resources in a secure domain in many organisations’ integrated systems, such as SSO.
SAML and OIDC are prevalent authentication protocols. SAMl employs XML messages to communicate authentication information, while OIDC uses “ID tokens” JSON Web Tokens (JWTs).
Verification methods
SFA verifies a user’s identification with one factor. Logging into social media with a username and password is SFA.
Multifactor authentication (MFA) uses a password and fingerprint scan.
2FA is a sort of MFA that requires two elements. Most internet users have used 2FA, such as a banking app requiring a password and a phone-sent PIN.
A passwordless authentication mechanism uses no passwords or knowledge factors. Passwordless systems are popular at preventing credential thieves from stealing knowledge factors, which are easy to steal.
User riskiness determines authentication requirements in adaptive authentication systems using artificial intelligence and machine learning. User wanting to access secret data may need to provide numerous authentication factors before system verification.
Exemplary authentication
Mobile phone unlocking with a fingerprint and PIN.
New bank account opening requires ID.
Browsers scan digital certificates to verify website legitimacy.
Each API call includes an app’s private API key to verify itself.
Know permission
Authorisation workings
Permissions determine authorization, or “authz.” System permissions govern user access and behaviour.
The authorization system enforces user permissions set by administrators and security leaders. Accessing a resource or taking an action requires the authorization system to validate a user’s permissions.
Examine a sensitive client database. This database is only visible to authorised users. Database access depends on authorization if they can. Reading, creating, deleting, and updating entries?
Authorization protocols like OAuth 2.0 employ access tokens to grant user permissions. Data is shared between apps using OAuth. If a user consents, OAuth lets a social networking site examine their email contacts for friends.
Authority types
Role-based access control (RBAC) determines user access permissions. Firewall configurations can be viewed but not changed by a junior security analyst, while the head of network security can.
Attribute-based access control (ABAC) uses user, object, and action attributes including name, resource type, and time of day to allocate access. ABAC analyses all relevant attributes and only gives access if a user meets established requirements. User access to sensitive data may be restricted to work hours and seniority in an ABAC system.
ALL users must follow centrally specified access control (MAC) policies. RBAC and ABAC are more granular than MAC systems, which use clearance or trust ratings to establish access. Programme access to sensitive system resources is controlled by MAC in several operating systems.
DAC systems let resource owners specify their own access policies. DAC is more flexible than MAC’s blankets.
Authorization instances
Email logins only display emails. Non-authorized users cannot view messages.
Healthcare records systems only allow doctors with specific approval to examine patient data.
A user creates a shared file document. Other users can view but not edit the document since they set access settings to “read only”.
An unknown programme can’t change laptop settings.
Authentication and authorization secure networks.
Authentication and authorization protect sensitive data and network resources from insiders and outsiders. Authentication protects user accounts, whereas authorization protects access systems.
Basis for identification and access management
IDAM systems detect user activity, prohibit unauthorised access to network assets, and enforce granular permissions so only authorised users can access resources.
To establish meaningful access controls, organisations must answer two key questions: authentication and authorization.
You who? What can you accomplish with this system? (Authentication) Organisations must identify users to grant appropriate access levels (Authorization). The correct authentication factors are needed for a network administrator to log in. When that happens, the IAM system will let the user add and remove users.
Resisting advanced cyberattacks
Thieves are hijacking user accounts and misusing their privileges to cause havoc as organisational security procedures improve. IBM X-Force Threat Intelligence Index: Identity-based assaults rose 71% between 2022 and 2023.
Cybercriminals can easily launch these efforts. Breach-force attacks, infostealer software, and buying credentials from other hackers can crack passwords. X-Force Threat Intelligence Index discovered that 90% of dark web cloud assets are cloud account credentials.
Using generative AI techniques, hackers can create more powerful phishing attacks in less time.
Verification and permission, however rudimentary, protect against identity theft and account misuse, including AI-powered attacks.
Biometrics can replace passwords, making account theft tougher.
Limiting user privileges to necessary resources and actions in granular authorization systems reduces lateral mobility. This reduces malware and insider threat harm from access privileges abuse.
IBM Security Verify adds more than authentication and authorization. Verify lets you safeguard accounts with passwordless and multifactor authentication and regulate apps with contextual access controls.
Read more on govindhtech.com
#authorization#authentication#key#differences#explained#cyberattacks#ibm#xforce#Intelligence#index#verificationmethods#exemplary#authoritytypes#access#management#generativeai#ai#technology#technews#news#govindhtech
0 notes
Text
SAML and OAuth2
SAML and OAuth 2.0 - Same same but different! Explore the key differences and learn how to implement these authentication and authorization protocols in Drupal for enhanced security and user experience.

0 notes
Text
Boomi Single Sign On

Title: Streamline User Access and Security with Boomi Single Sign-On (SSO)
Introduction
Managing multiple logins across different applications can be a hassle for users and a security headache for IT teams. Boomi Single Sign-On (SSO) provides a powerful solution, allowing users to authenticate once and access their Boomi account seamlessly without the need for separate credentials. In this blog, we’ll explore the benefits of Boomi SSO and a step-by-step guide for setting it up.
What is Single Sign-On (SSO)?
Single sign-on (SSO) is an authentication system that enables users to use one set of credentials (username and password) to access multiple connected applications securely. With SSO implemented, users don’t have to remember different login details for each system they need to use.
Benefits of Boomi SSO
Enhanced User Experience: SSO eliminates the need to manage multiple passwords, making access more accessible and convenient. This leads to higher user satisfaction and productivity.
Improved Security: With fewer passwords, the risk of password-related security breaches (like weak passwords and reuse) significantly decreases. SSO also often couples with centralized user management, enabling better user lifecycle control and auditing for compliance.
Simplified Administration: IT administrators can centrally manage user accounts and access rights from a single location. This streamlines user provisioning and de-provisioning processes, saving time and effort.
Setting Up Boomi SSO
Boomi supports SAML 2.0, an industry-standard protocol for SSO, allowing integration with various Identity Providers (IdPs), including:
Popular cloud IDps like Azure Active Directory, Okta, OneLogin
On-premises solutions such as Active Directory Federation Services (ADFS)
Here’s a general outline of the setup process:
Choose an Identity Provider (IdP): Select an IdP that aligns with your organization’s existing infrastructure and security requirements.
Configure the Identity Provider: Set up your IDP to connect with Boomi. This includes generating a metadata file or certificate and defining user attributes that will be exchanged during the SSO process.
Configure Boomi:
Go to the Settings section in your Boomi account.
Navigate to SSO Options under the Security tab.
Enable SAML SSO.
Import the IDP metadata or certificate.
Define any necessary attribute mappings for Boomi to receive user information.
Test and Roll Out: Test the SSO implementation thoroughly with a few users before rolling it out to your entire organization.
Important Considerations
Federation ID: Ensure the federation ID attribute is correctly configured in your IdP and Boomi settings. The federation ID is a unique identifier that links users between the systems.
Attribute Mapping: Verify that the user attributes Boomi requires (like email) are appropriately mapped to the attributes provided by your IDP.
Conclusion
Boomi SSO delivers a seamless and secure user experience while reducing IT teams’ management overhead. With careful planning and the steps outlined above, you can successfully implement SSO and enhance the usability and security of your Boomi environment.
youtube
You can find more information about Dell Boomi in this Dell Boomi Link
Conclusion:
Unogeeks is the No.1 IT Training Institute for Dell Boomi Training. Anyone Disagree? Please drop in a comment
You can check out our other latest blogs on Dell Boomi here – Dell Boomi Blogs
You can check out our Best In Class Dell Boomi Details here – Dell Boomi Training
Follow & Connect with us:
———————————-
For Training inquiries:
Call/Whatsapp: +91 73960 33555
Mail us at: [email protected]
Our Website ➜ https://unogeeks.com
Follow us:
Instagram: https://www.instagram.com/unogeeks
Facebook: https://www.facebook.com/UnogeeksSoftwareTrainingInstitute
Twitter: https://twitter.com/unogeek
0 notes
Text
ORACLE APEX AZURE AD

Why Integrate Oracle APEX with Azure AD?
If your organization uses both Oracle APEX for application development and Microsoft Azure Active Directory (Azure AD) for user identity and access management, integrating the two can streamline your authentication process and improve security. Here are some of the benefits of integrating Oracle APEX with Azure AD:
Centralized user management: You can leverage Azure AD as your central source of truth for user identities, eliminating the need to manage user accounts in multiple systems. This can save time and reduce the risk of errors.
Improved security: Azure AD offers a variety of security features, such as multi-factor authentication (MFA) and conditional access. By integrating with Azure AD, you can extend these security features to your Oracle APEX applications.
Simplified user experience: Users can sign in to your Oracle APEX applications using their existing Azure AD credentials. This eliminates the need for them to remember multiple usernames and passwords.
How to Integrate Oracle APEX with Azure AD
There are two main approaches to integrating Oracle APEX with Azure AD:
SAML integration: This is the traditional approach, which involves configuring Oracle APEX as a SAML service provider (SP) and Azure AD as a SAML identity provider (IdP).
OAuth 2.0 integration: This is a more modern approach that is based on the OAuth 2.0 protocol. It is simpler to configure than SAML integration.
The best approach for you will depend on your specific requirements.
youtube
You can find more information about Oracle Apex in this Oracle Apex Link
Conclusion:
Unogeeks is the No.1 IT Training Institute for Oracle Apex Training. Anyone Disagree? Please drop in a comment
You can check out our other latest blogs on Oracle Apex here – Oarcle Apex Blogs
You can check out our Best In Class Oracle Apex Details here – Oracle Apex Training
Follow & Connect with us:
———————————-
For Training inquiries:
Call/Whatsapp: +91 73960 33555
Mail us at: [email protected]
Our Website ➜ https://unogeeks.com
Follow us:
Instagram: https://www.instagram.com/unogeeks
Facebook: https://www.facebook.com/UnogeeksSoftwareTrainingInstitute
Twitter: https://twitter.com/unogeeks
0 notes
Text
Fünf Cyberabwehrstrategien

In den vergangenen zwei Jahren ist es Angreifern gelungen, in die Systeme von 78 Prozent der deutschen Unternehmen einzudringen. Das zeigt die „Data Risk Management“ Studie von Veritas Technologies. Besonders beunruhigend daran ist, dass KI-Tools wie WormGPT es Angreifern erleichtern, ihre Social-Engineering-Angriffe durch KI-generierte Phishing-E-Mails zu verfeinern.
Doch damit nicht genug: KI-gesteuerte, autonome Ransomware-Angriffe werden auch im Jahr 2024 vermehrt vorkommen. Im Nachfolgenden erläutert Veritas die wirksamen Methoden und bewährte Tipps zur Abwehr von Cyberattacken, insbesondere im Hinblick auf Ransomware.
Passwort-Hacking
Cyberkriminelle nutzen Sicherheitslücken aus und bemächtigen sich fremder Passwörter. Brute-Force-Angriffe, Passwortlisten aus dem Dark Web und gängige Passwörter wie „Password123“ ermöglichen einen schnellen Zugang zu gesicherten Systemen. Um Passwörter basierend auf persönlichen Informationen aus sozialen Medien zu erraten, nutzen viele Hacker Social-Engineering-Methoden. Nach einem erfolgreichen Login umgehen sie Sicherheitskontrollen und führen laterale Angriffe durch, um an kritische Daten zu gelangen.
Daher müssen Passwörter regelmäßig aktualisiert werden, mindestens zwölf bis 14 Zeichen lang sein und eine Kombination aus Groß- und Kleinbuchstaben, Zahlen sowie Symbolen enthalten.
Phishing-Angriffe
Oftmals verleiten Cyberkriminelle abgelenkte Mitarbeiter dazu, schädliche Links zu klicken. Diese Links werden gezielt eingesetzt, um Malware zu verbreiten, Systeme zu sabotieren oder geistiges Eigentum zu stehlen. Dafür werden verschiedene Kommunikationskanäle wie E-Mails, Textnachrichten, soziale Medien und Telefonanrufe genutzt. Eine häufig angewandte Methode ist Spear Phishing. Dabei nutzen die Angreifer Informationen über ein Unternehmen oder einen Mitarbeiter, um sich als vertrauenswürdige Quelle auszugeben.
Die aktive Schulung und Ermutigung der Mitarbeiter, Sicherheitspraktiken proaktiv zu übernehmen, sind von entscheidender Bedeutung. Ein Fokus liegt dabei auf dem Training zur Erkennung von Phishing-Methoden und Social-Engineering-Taktiken.
Gestohlene Passwörter
Benutzerdaten, insbesondere Passwörter, werden häufig im DarkWeb angeboten. Der Verkauf ist lukrativ. Um an die sensiblen Informationen zu kommen, wenden Cyberkriminelle gern die Taktik des „Shoulder Surfing“ (oder auch Schulterblick) an. Dabei beobachten sie, wie ihr Opfer Benutzer- und Passwörter eingibt. Nach dem erfolgreichen Eindringen in die Systeme bewegen sich Cyberkriminelle aktiv zwischen verschiedenen Umgebungen, um geschäftskritische Daten, vertrauliche Informationen und Backup-Systeme aufzuspüren. Die Implementierung eines firmenweiten Zero-Trust-Ansatzes bietet Unternehmen hohen Schutz und minimiert die Angriffsfläche.
Zu den bewährten Praktiken gehören starke Identity- and Access Management (IAM) mit Multi-Faktor-Authentifizierung (MFA). Es ist wichtig, Role Based Access Control (RBAC) zu verwenden, Biometrie zur verbesserten Identifizierung zu integrieren und Hardware-Sicherheitsschlüssel zu nutzen. Der Zugriff auf Daten sollte ausschließlich autorisierten Benutzern erlaubt sein. Um die Sicherheit zu erhöhen, sollte eine klare Richtlinie zur regelmäßigen Änderung von Benutzer- und Anwendungspasswörtern eingeführt werden. Eine entscheidende Rolle spielt hierbei die Integration mit privilegiertem Zugriffsmanagement, wie zum Beispiel CyberArk. Bei Datenschutzoperationen sollten kritische Systeme Passwörter nur aktiv abrufen. Eine Integration mit einem Identitätsanbieter, dessen Lösung auf SAML 2.0 basiert, eröffnet zusätzliche Authentifizierungsmöglichkeiten.
Man-in-the-Middle-Angriff
Sensible Daten können auch durch einen Man-in-the-Middle-Angriff (MitM) gestohlen werden. Benutzernamen und Passwörter werden während der Übertragung über die Netzwerkverbindung abgefangen. Um diese Art von Angriff zu verhindern, ist es wichtig, dass die Daten sowohl während der Übertragung („in transit“) als auch im Ruhezustand („at rest“) verschlüsselt sind. Zusätzliche Strategien umfassen die Nutzung eines Key Management Service mit einem manipulationssicheren Hardware-Sicherheitsmodul (HSM) und die Einhaltung kryptografischer Standards wie FIPS 140. Modelle zur Nutzung eigener Verschlüsselungsschlüssel (Bring Your Own Encryption Key, BYOK) erleichtern die Kontrolle und Verwaltung der Verschlüsselungsschlüssel.
Böswilliger Insider
Insider-Bedrohungen können von aktuellen oder ehemaligen Mitarbeitern ausgehen. Das muss nicht immer böswillig sein, sondern kann auch durch Nachlässigkeit geschehen – eine Sicherheitslücke, die immer häufiger Störungen verursacht. Effektive Gegenmaßnahmen sind unter anderem Zugriffskontrollen und die Implementierung der minimalen Rechtevergabe. Demnach sollten Mitarbeiter nur die Zugriffsrechte haben, die sie für ihre jeweiligen Aufgaben benötigen. Wird ein Arbeitsverhältnis beendet, müssen die Zugriffsrechte geändert werden.
Zudem sollten Unternehmen auch Systeme zur Überwachung von Netzwerkaktivitäten, Dateizugriffen und anderen relevanten Ereignissen einsetzen. Mithilfe regelmäßiger Audits können verdächtige Aktivitäten identifiziert werden.„Durch umfassende Sicherheitslösungen unterstützen Unternehmen nicht nur ihre IT-Profis, sondern stärken auch die Cyberresilienz ihres Unternehmens. Ein mehrstufiger Ansatz mit bewährten Praktiken wie MFA, rollenbasierten Zugriffskontrollen, Datenverschlüsselung und KI-gesteuerten Sicherheitsfeatures ist dabei essenziell“, erklärt Ralf Baumann, Country Manager bei Veritas Technologies. „Um Ausfallzeiten im Fall von Störungen zu minimieren, sollten Wiederherstellungsumgebungen optimiert werden. Daher ist es von großer Bedeutung, Geräte zu verwenden, die zusätzliche Sicherheitsschichten aufweisen, einschließlich unveränderlichem Speicher und integrierter Containerisolierung.“
Über Veritas
Veritas Technologies ist ein führender Anbieter für die sichere Multi-Cloud-Datenverwaltung. Mehr als 80.000 Kunden – darunter 91 Prozent der Fortune-100-Unternehmen – verlassen sich beim Schutz, der Wiederherstellung und der Compliance ihrer Daten auf Veritas.
Passende Artikel zum Thema
Lesen Sie den ganzen Artikel
0 notes
Text
Demystifying JWT, OAuth, OIDC, and SAML: A Technical Guide
Applications and APIs today need to handle user authentication, authorized access controls, and identity management, leading to the common question – which standard is right for a given use case? Core standards include JSON Web Tokens (JWT), OAuth 2.0, OpenID Connect (OIDC), and SAML, each with distinct approaches. This comprehensive technical guide explores the key characteristics, appropriate…

View On WordPress
#assistant professor#computer science#computer scientist#engineering#experimental roboticist#research scientist#university of denver
0 notes
Text
Demystifying JWT, OAuth, OIDC, and SAML: A Technical Guide
Applications and APIs today need to handle user authentication, authorized access controls, and identity management, leading to the common question – which standard is right for a given use case? Core standards include JSON Web Tokens (JWT), OAuth 2.0, OpenID Connect (OIDC), and SAML, each with distinct approaches. This comprehensive technical guide explores the key characteristics, appropriate…

View On WordPress
#artificialintelligence#cloudsoftware#cloudtechnology#customerfirst#cybersecurity#cyberthreats#devops#devopsteams#digitalidentity#digitalsolutions#ITexpert#leadership#LoginRadius#password#postcovid#productinnovation#softwaredevelopers#techexpert#technologynews#tip
0 notes
Text
Sama Launches Multi-Cloud Integration; Increases Speed Of New Project Onboarding By 7x

Sama, a pioneer in data annotation solutions, has increased compliance with security regulations and reduced costs for its customers by integrating many clouds into its platform. Now, users may securely provide Sama access to key global cloud providers (AWS, Google Cloud, and Microsoft Azure) for data storage, cutting down on client onboarding time by up to 7 times. By doing away with the requirement for unique code solutions, this integration streamlines and saves resources. Sama has a wide range of integrations, including support for Databricks, SAML, Okta, Python SDKs, and more. The platform's enterprise-grade SSO, GDPR and CCPA compliance, ISO and TISAX certifications, and other measures all support its enhanced data security. Sama can minimize project costs by up to $400,000 by using the multi-cloud method for large-scale data transfers. By performing safe file updates directly on clients' servers and not keeping a copy of sensitive data, the platform guarantees data protection. Sama is still committed to cutting model ownership costs and time to launch while utilizing its Platform 2.0 and knowledgeable staff. With SamaAssureTM, the firm has achieved a 99% client approval rate for AI training data, and it delivers over 300 million frames, 850 million shapes, and 10 billion annotation points monthly for annotation delivery.
Read More - bit.ly/3Sf2EBY
0 notes
Text
0 notes
Text
YouTube Short | What is Difference Between OAuth2 and SAML | Quick Guide to SAML Vs OAuth2
Hi, a short #video on #oauth2 Vs #SAML #authentication & #authorization is published on #codeonedigest #youtube channel. Learn OAuth2 and SAML in 1 minute.
#saml #oauth #oauth2 #samlvsoauth2 #samlvsoauth
What is SAML?
SAML is an acronym used to describe the Security Assertion Markup Language (SAML). Its primary role in online security is that it enables you to access multiple web applications using single sign-on (SSO).
What is OAuth2?
OAuth2 is an open-standard authorization protocol or framework that provides applications the ability for “secure designated access.”
OAuth2 doesn’t share…
View On WordPress
#Oauth#oauth2#oauth2 authentication#oauth2 authentication flow#oauth2 authentication postman#oauth2 authentication server#oauth2 authentication spring boot#oauth2 authorization#oauth2 authorization code#oauth2 authorization code flow#oauth2 authorization code flow spring boot#oauth2 authorization server#oauth2 authorization sever spring boot#oauth2 explained#oauth2 spring boot#oauth2 spring boot microservices#oauth2 spring boot rest api#oauth2 tutorial#oauth2 vs saml#oauth2 vs saml 2.0#oauth2 vs saml2#saml#saml 2.0#saml 2.0 registration#saml authentication#saml tutorial#saml vs oauth#saml vs oauth 2.0#saml vs oauth vs sso#saml vs oauth2
0 notes
Text
Install new apps in bitnami owncloud
DOWNLOAD NOW Install new apps in bitnami owncloud

#Install new apps in bitnami owncloud how to#
#Install new apps in bitnami owncloud install#
#Install new apps in bitnami owncloud update#
#Install new apps in bitnami owncloud code#
Once you are done creating the repository for PHP, update your system packages & repositories for the new PHP repository to take effect. $ sudo echo "deb $(lsb_release -sc) main" > /etc/apt//php.list At the time of penning down this guide, PHP 7.3 is not yet supported, so our best shot is using PHP 7.2.
#Install new apps in bitnami owncloud install#
In the Market app you can add it by clicking on “Edit API key”, pasting the key into the field, clicking on “Save”, and “Close”.After the installation is complete, proceed and install PHP 7.2. You can find it in your profile in the Marketplace or in the Enterprise Trial overview. Now you have to add the API key to your ownCloud server. As we already installed ownCloud, we can skip step 1. On the Marketplace, they are explained for the ownCloud Appliance, but they are the same for any other ownCloud server. You will then see a few steps – they are also explained here for the sake of redundancy. On the Marketplace website, you can start the Enterprise Trial.

Login to the Marketplace – or register, if you have not already. It allows for many configuration options.įor the next steps, it does not matter which you choose – but to continue, you need an admin account at a running ownCloud server. For experienced system administrators, it takes about 30 minutes. Install ownCloud on a Linux server with a tarball. The installation is way faster and only takes about 3 minutes. To setup ownCloud with Docker you need a few more skills and a Linux machine, but this guide explains it quite well. The installation will take around 30 minutes, so grab a coffee and take some time. You don’t have to be a system administrator to set it up, it’s easy. The ownCloud Univention appliance runs on Windows, MacOS, and Linux. There are several ways to install ownCloud: To install the ownCloud Enterprise apps, you need an ownCloud server first.
External Storage – Windows Network Drives: Integrate Windows and Samba/CIFS shared network drives as external storages.
External Storage – Sharepoint: Integrate Sharepoint as external storage.
In some cases this is needed for compliance with corporate guidelines
Auditing: Keep track of user and admin actions.
File Firewall: Rule-based access control engine to enforce fine-grained compliance policies.
LDAP Home Connector: Integration of Windows User Directories via LDAP/AD attributes.
ownCloud X Enterprise Theme: Equip your ownCloud instance with the official ownCloud X Enterprise Theme.
Object Storage Support: Backend to integrate object storages via S3 as primary storage.
Collaborative Tags Management: Admin interface for managing Collaborative Tags of an ownCloud instance.
Workflows: Automated File Operations based on Collaborative Tags.
SAML/SSO Integration: Single Sign-on integration for SAML 2.0 compatible Identity Providers.
Ransomware Protection: Protect data from ransomware threats.
When you activate the Enterprise Trial, you will get following apps, which enhance your ownCloud:

#Install new apps in bitnami owncloud how to#
This tutorial shows you the options to deploy ownCloud and how to activate the 30-day Enterprise Trial.
This also applies to our Enterprise features, which are also available on the Marketplace.
#Install new apps in bitnami owncloud code#
You can trust our software, because you can read every line of source code which runs on your server. OwnCloud is free software, and is completely open source. If you are in an offline environment, you can also download them from there and install them manually with the command line. The ownCloud Marketplace hosts all ownCloud apps. You can do so in the Market app, which is shipped with the ownCloud Server. When you have an ownCloud Server, you can extend it by installing more apps. Some of these apps are commercial Enterprise apps. It consists out of the core, and several apps which contain additional functionality. The ownCloud Server has a modular architecture.
DOWNLOAD NOW Install new apps in bitnami owncloud
0 notes
Text
An SSO(Single Sign-On) is a system that allows access to multiple independent, software systems using the same credentials. This simply means that with a single authentication, you can log into several services without providing a password. SSO systems are popular nowadays with Google, Facebook e.t.c using it. Today, there are many SSO servers, they include OneLogin, okta e.t.c
Keycloak is an open-source SSO provider that supports multiple protocols such as OpenID Connect and SAML 2.0. This Identity and Access Management System allows one to easily add authentication to an application and secure it. You can easily enable social login or use an existing Active Directory/LDAP.
Keycloak is a very extensible and highly configurable tool that offers the following features:
User Federation – It allows one to sync users from Active Directory and LDAP servers.
Kerberos bridge – It can be used to automatically authenticate the users logged in to the Kerberos server.
Theme support – Customize its interface to integrate with your applications as desired.
Two-factor Authentication Support – It offers support for HOTP/TOTP via Google Authenticator or FreeOTP.
Social Login – You can enable login with GitHub, Google, Facebook, Twitter and other social networks.
It offers Single-Sign-On and Single-Sign-Out for browser applications.
Identity Brokering – it allows one to authenticate with external SAML or Open ID identity providers.
Session management – the admins can view and manage the user sessions.
Client adapters for JavaScript applications, JBoss EAP, WildFly, Fuse, Jetty, Tomcat, Spring, etc.
Below is an illustration of the Keycloak Architecture.
This guide offers the required knowledge on how to run Keycloak Server in Docker Containers with Let’s Encrypt SSL.
Getting Started.
We will begin by installing the required packages for this setup.
## On Debian/Ubuntu
sudo apt update && sudo apt upgrade
sudo apt install curl vim git
## On RHEL/CentOS/RockyLinux 8
sudo yum -y update
sudo yum -y install curl vim git
## On Fedora
sudo dnf update
sudo dnf -y install curl vim git
Step 1 – Install Docker and Docker-Compose on Linux
This guide requires one to have docker and docker-compose installed. Below is a dedicated guide to help you install Docker on Linux.
How To Install Docker CE on Linux Systems
Verify the installation as below:
$ docker -v
Docker version 20.10.14, build a224086
Add your system user to the docker group.
sudo usermod -aG docker $USER
newgrp docker
Start and enable the docker service on your system.
sudo systemctl start docker && sudo systemctl enable docker
Step 2 – Create the Database Container.
It is important to have a database when deploying the Keycloak Server Container. In this guide, we will run the PostgreSQL database container.
Create a network for Keycloak.
docker network create keycloak-network
Run PostgreSQL in the pod.
docker run --name db \
--net keycloak-network \
-e POSTGRES_USER=admin \
-e POSTGRES_PASSWORD=Passw0rd \
-e POSTGRES_DB=keycloakdb \
-d docker.io/library/postgres:latest
View the container.
$ docker ps
CONTAINER ID IMAGE COMMAND CREATED STATUS PORTS NAMES
479b1599d5a0 postgres:latest "docker-entrypoint.s…" 12 seconds ago Up 10 seconds 5432/tcp db
Step 3 – Provisioning the Keycloak Server Container.
This guide provides two methods on how you can provision the Keycloak Server Container. These are:
Building your optimized Keycloak docker image
Using ready Keycloak docker image
1. Building your optimized Keycloak docker image
You can build your own Keycloak image with token exchange feature, health and metrics endpoints enabled, and uses the PostgreSQL database from the below Dockerfile.
vim Dockerfile
Add the below lines to the file
FROM quay.io/keycloak/keycloak:latest as builder
ENV KC_HEALTH_ENABLED=true
ENV KC_METRICS_ENABLED=true
ENV KC_FEATURES=token-exchange
ENV KC_DB=postgres
# Install custom providers
RUN curl -sL https://github.com/aerogear/keycloak-metrics-spi/releases/download/2.5.3/keycloak-metrics-spi-2.5.3.jar -o /opt/keycloak/providers/keycloak-metrics-spi-2.5.3.jar
RUN /opt/keycloak/bin/kc.sh build
FROM quay.io/keycloak/keycloak:latest
COPY --from=builder /opt/keycloak/ /opt/keycloak/
WORKDIR /opt/keycloak
# For demonstration purposes only, please make sure to use proper certificates in production instead
RUN keytool -genkeypair -storepass password -storetype PKCS12 -keyalg RSA -keysize 2048 -dname "CN=server" -alias server -ext "SAN:c=DNS:localhost,IP:127.0.0.1" -keystore conf/server.keystore
# Change these values to point to a running postgres instance
ENV KC_DB_URL=jdbc:postgresql://db/keycloakdb
ENV KC_DB_USERNAME=admin
ENV KC_DB_PASSWORD=Passw0rd
ENV KC_HOSTNAME=localhost
ENTRYPOINT ["/opt/keycloak/bin/kc.sh", "start"]
Remember to replace the database credentials and the IP address in the DB_URL appropriately before we proceed to build the image.
docker build . -t keycloak_image
Once the image has been built, view it:
$ docker images
REPOSITORY TAG IMAGE ID CREATED SIZE
keycloak_image latest c7e3a15f28de 5 seconds ago 754MB
faf55943f0f2 13 seconds ago 734MB
quay.io/keycloak/keycloak latest a669b057e631 36 hours ago 562MB
postgres latest 74b0c105737a 44 hours ago 376MB
Now run Keycloak in the created pod using the optimized image.
In production mode (with secure defaults)
docker run --name keycloak --net keycloak-network -p 8443:8443 -e KEYCLOAK_ADMIN=myadmin -e KEYCLOAK_ADMIN_PASSWORD=StrongPassw0rd -d keycloak_image
The container will be created as below:
$ docker ps
CONTAINER ID IMAGE COMMAND CREATED STATUS PORTS NAMES
78eb8a3e6ecc keycloak_image "/opt/keycloak/bin/k…" 4 seconds ago Up 3 seconds 8080/tcp, 0.0.0.0:8443->8443/tcp, :::8443->8443/tcp keycloak
f6f538e7c097 postgres:latest "docker-entrypoint.s…" 2 minutes ago Up 2 minutes 0.0.0.0:5432->5432/tcp, :::5432->5432/tcp db
Once complete, the container should be accessible on port 8443 can be accessed using the URL https://IP_address:8443
The health checkpoints are:
https://localhost:8443/health
https://localhost:8443/health/ready
https://localhost:8443/health/live
Metrics are available at:
https://localhost:8443/metrics
2. Using ready Keycloak docker image
You can also use the ready Keycloak docker image. The command below shows how you can run a standard Keycloak image.
docker run -d \
--net keycloak-network \
--name keycloak \
-e KEYCLOAK_USER=myadmin \
-e KEYCLOAK_PASSWORD=StrongPassw0rd \
-p 8080:8080 \
-p 8443:8443 \
-e KEYCLOAK_DB=postgres \
-e KEYCLOAK_FEATURES=token-exchange \
-e KEYCLOAK_DB_URL=jdbc:postgresql://db/keycloakdb \
-e KEYCLOAK_DB_USERNAME=admin \
-e KEYCLOAK_DB_PASSWORD=Passw0rd \
jboss/keycloak
Remember to replace the database and Keycloak admin user credentials.
Check the status of the container.
$ docker ps
CONTAINER ID IMAGE COMMAND CREATED STATUS PORTS NAMES
a910a9eaa5e1 jboss/keycloak "/opt/jboss/tools/do…" 5 seconds ago Up 4 seconds 0.0.0.0:8080->8080/tcp, :::8080->8080/tcp, 0.0.0.0:8443->8443/tcp, :::8443->8443/tcp keycloak
8f5e593eb517 postgres:latest "docker-entrypoint.s…" About an hour ago Up About an hour 5432/tcp db
Step 4 – Access and Use Keycloak Server
Access Keycloak using the URL https://IP_address:8443
Proceed to the admin console and log in using the created user.
With the correct user credentials provided, you will be authenticated to the dashboard below.
We already have a Realm created, we will proceed and add a new client in the Clients tab.
Provide the details for the client.
Provide the URL path of your application under “Valid redirect URL“.
You can also create a new user in the user tab.
Proceed to the Credentials tab and set the password for the user.
Assign roles to the created user in the roles tab
That was a brief demonstration on how to get started with Keycloak.
Step 5 – Secure Keycloak with Let’s Encrypt SSL
It is necessary to secure your Keycloak server with SSL certificates to prevent the credentials from traveling along the unprotected wire. In this guide, we will use Let’s Encrypt to issue free trusted SSL certificates for our domain name.
First, install and configure a reverse proxy with Nginx.
##On RHEL 8/CentOS/Rocky Linux 8/Fedora
sudo dnf install https://dl.fedoraproject.org/pub/epel/epel-release-latest-8.noarch.rpm
sudo yum install nginx certbot python3-certbot-nginx
##On Debian/Ubuntu
sudo apt install nginx certbot python3-certbot-nginx
Proceed and create a Virtual Host file.
sudo vim /etc/nginx/conf.d/keycloak.conf
The file will contain the below lines.
server
listen 80;
server_name keycloak.example.com;
client_max_body_size 25m;
location /
proxy_pass https://localhost:8443/;
proxy_set_header Host $http_host;
proxy_set_header X-Real-IP $remote_addr;
proxy_set_header X-Forwarded-Proto $scheme;
error_page 404 /404.html;
location = /40x.html
error_page 500 502 503 504 /50x.html;
location = /50x.html
Save the file restart and enable Nginx
sudo systemctl restart nginx
sudo systemctl enable nginx
Proceed and generate SSL certificates for the domain name with the command:
sudo certbot --nginx
Proceed as below.
Saving debug log to /var/log/letsencrypt/letsencrypt.log
Enter email address (used for urgent renewal and security notices)
(Enter 'c' to cancel): Enter a valid Email address here
- - - - - - - - - - - - - - - - - - - - - - - - - - - - - - - - - - - - - - - -
Please read the Terms of Service at
https://letsencrypt.org/documents/LE-SA-v1.2-November-15-2017.pdf. You must
agree in order to register with the ACME server. Do you agree?
- - - - - - - - - - - - - - - - - - - - - - - - - - - - - - - - - - - - - - - -
(Y)es/(N)o: y
- - - - - - - - - - - - - - - - - - - - - - - - - - - - - - - - - - - - - - - -
Would you be willing, once your first certificate is successfully issued, to
share your email address with the Electronic Frontier Foundation, a founding
partner of the Let's Encrypt project and the non-profit organization that
develops Certbot? We'd like to send you email about our work encrypting the web,
EFF news, campaigns, and ways to support digital freedom.
- - - - - - - - - - - - - - - - - - - - - - - - - - - - - - - - - - - - - - - -
(Y)es/(N)o: y
Account registered.
Which names would you like to activate HTTPS for?
- - - - - - - - - - - - - - - - - - - - - - - - - - - - - - - - - - - - - - - -
1: keycloak.example.com
- - - - - - - - - - - - - - - - - - - - - - - - - - - - - - - - - - - - - - - -
Select the appropriate numbers separated by commas and/or spaces, or leave input
blank to select all options shown (Enter 'c' to cancel): 1
Requesting a certificate for keycloak.example.com
Performing the following challenges:
http-01 challenge for keycloak.example.com
Waiting for verification...
Cleaning up challenges
Deploying Certificate to VirtualHost /etc/nginx/conf.d/keycloak.conf
Please choose whether or not to redirect HTTP traffic to HTTPS, removing HTTP access.
- - - - - - - - - - - - - - - - - - - - - - - - - - - - - - - - - - - - - - - -
1: No redirect - Make no further changes to the webserver configuration.
2: Redirect - Make all requests redirect to secure HTTPS access. Choose this for
new sites, or if you're confident your site works on HTTPS. You can undo this
change by editing your web server's configuration.
- - - - - - - - - - - - - - - - - - - - - - - - - - - - - - - - - - - - - - - -
Select the appropriate number [1-2] then [enter] (press 'c' to cancel): 2
Redirecting all traffic on port 80 to ssl in /etc/nginx/conf.d/keycloak.conf
- - - - - - - - - - - - - - - - - - - - - - - - - - - - - - - - - - - - - - - -
Congratulations! You have successfully enabled https://keycloak.example.com
...
Now proceed and access your Keycloak server with HTTPS using the URL https://domain_name
Closing Thoughts.
This guide not only provides the required knowledge on how to run the Keycloak Server in Docker Containers with Let’s Encrypt SSL but also knowledge on how to get started with the Keycloak SSO system.
0 notes
Text
Keeper password manager hacked

#Keeper password manager hacked password
Set it up with Google SSO, did a ton of work to get everything sorted and was absolutely sold on it. I found Keeper and loved the software, interface, and compatibility. So at the end of July I wanted to move away from LastPass.
#Keeper password manager hacked password
The Max Bundle and the Plus Bundle includes all of the features of the Keeper Unlimited Password Manager plus BreachWatch Dark Web Monitoring, secure file storage and KeeperChat Private Messenger.Įnterprise Experience. The Keeper Unlimited Password Manager is available for individual, business and family plans. This helps keep documents, photos, videos, website accounts, bank info, social media accounts, security system codes and personal identification numbers safe. Keeper for families Keeper can help families’ data and accounts secure by making it easy to share passwords while keeping them private. Keeper Enterprise includes everything in the Keeper Business option plus single sign-on (SAML 2.0) authentication, email auto-provisioning, command-line provisioning, developer APIs for password rotation and back-end integration.Keeper Business includes a digital vault for every user, a security audit, folders and subfolders, activity reporting, shared team folders, access from unlimited devices, policy engine and enforcement and basic two-factor authentication (SMS, TOTP, smartwatch and FIDO U2F).There are two Keeper options for business: Keeper Business and Keeper Enterprise. It also encrypts and stores private keys, digital certificates, notes, lists, codes, confidential documents and media files. Keeper enables teams to create, share and manage records or encrypted folders safely. Keeper seamlessly integrates with many of the platforms you are already using, such as Active Directory, SSO, SCIM and developer APIs, to streamline the onboarding process. Keeper for businesses Keeper assigns each employee of your business a private, encrypted vault to store and manage their passwords, credentials, files and client data. Key features of Keeper for individuals include: The 256-bit AES encryption makes it safe and easy to use. Keeper for individuals Keeper can store, save and create passwords for things you use every day, including email, social media accounts and subscriptions. Keeper plans are available for individuals, businesses and families. Keeper uses innovative security architecture that supports on-premise, cloud and hybrid-cloud environments for client-side encryption key management. Keeper is a cybersecurity platform that offers password management solutions for individuals, families and businesses.
0 notes
Text
Vmware horizon client loading failed

#Vmware horizon client loading failed manual#
Got it working last week! Just want to post this to help anyone else that may be having issues with the iApp or the configuration in general for smart card, SAML, etc. The part I don't understand is why the same connection from a web browser goes on to the SAML part of the connection (which I can see in APM but not sure where to find it on the Horizon side. I understand that all the failures are reactionary to the Connection server not being able to find a machine that it wants to send me to. All I see in the APM log at that point is "notice apmd: 01490005:5: /Common/horizon.app/horizon:Common:5f616461: Following rule 'fallback' from item 'View Client Cert Inspection' to ending 'Deny.'" The client's explanation is even more vague with "Authentication Failure." If I'm going there from the client, the next thing I see in the log is "Unverified CHANGEKEY message discarded, machine 'cn=ca70f223-b584-4cc4-a489-230b73bf92b6,ou=servers,dc=vdi,dc=vmware,dc=int' does not exist. I actually can see the cert getting there from the client and the browser (it is the same cert - and the correct one at that). The iApp will set this value on your client ssl profile to 60 seconds but I mention it in case you selected a pre-configured ssl client profile or for some reason are taking longer than 60 seconds to send certificate.īoneyard, I was able to access the logs on the connection server today. This means you have to enter smartcard pin and sent client certificate within 10 seconds of making your initial connection. You could also be hitting a time out issue regarding client side ssl handshake timeout, as the default is set to 10 seconds. Of course you will need to select a valid certificate (one that has been issued by a CA selected in question "Which CA certificate bundle do you want to use for your trusted certificate authorities?", and is valid). Doing so will make it so the client is able to view all client certificates rather then just certificates issued by the CA root certificate selected. Modify the question "Which CA certificate bundle do you want to use for your advertised certificate authorities?" to none. This could mean you are not sending a certificate at all, or perhaps are not sending one that matches your allowed CA issued certs. With that said, do you see the Access policy completing successfully for both clients or only HTML? There is an option in the iApp that might help a little during certificate selection, I point this out as I noted you are not passing certificate authentication when using the horizon client. I would open a support case, as they will be able to review log files to determine at which point authentication is failing and more quickly get your environment working. I could really use some guidance on this. SAML authentication is seen for the browser connection the cert inspection from the same smartcard passes where it fails on connections from the Horizon client. The main thing is the APM log looks great.
#Vmware horizon client loading failed manual#
If I attempt the same exact connection through a regular web browser via HTML 5, I can authenticate to the webtop where the authentication fails to the back end (the documentation says that's what should happen and that manual login has to occur from the webtop). The horizon client will prompt for a pin and then after a second or two display "Authentication Failure." APM logs consistently show the access policy failing at the cert inspection step. Both the View server and F5 have been configured according to the companion guide for the iapp. The feature we really want to implement is using smartcard authentication with SAML 2.0 through the horizon client. Currently attempting setup with the f5.vmware_view.v1.5.1 iapp template. I am running Big IP version 12.1.0 with APM and Horizon View 7.0.1.
0 notes
Last Seen Blogs

carlesbaiges
Urban Sociology

lemonadia18-blog
what brings you here?

kevlarninja
KevlarNinja

tongkolnyasar
Tanpa judul

souta-world
Souta world