#oauth2 authentication
Explore tagged Tumblr posts
Visit Tumblr Blog
Explore Tumblr blogs with no restrictions, modern design and the best experience.
Last Seen Tumblr Blogs


Fun Fact
Mobile US users spent an average of 115.8 minutes on Tumblr app monthly.
Text
What is Argo CD? And When Was Argo CD Established?

What Is Argo CD?
Argo CD is declarative Kubernetes GitOps continuous delivery.
In DevOps, ArgoCD is a Continuous Delivery (CD) technology that has become well-liked for delivering applications to Kubernetes. It is based on the GitOps deployment methodology.
When was Argo CD Established?
Argo CD was created at Intuit and made publicly available following Applatix’s 2018 acquisition by Intuit. The founding developers of Applatix, Hong Wang, Jesse Suen, and Alexander Matyushentsev, made the Argo project open-source in 2017.
Why Argo CD?
Declarative and version-controlled application definitions, configurations, and environments are ideal. Automated, auditable, and easily comprehensible application deployment and lifecycle management are essential.
Getting Started
Quick Start
kubectl create namespace argocd kubectl apply -n argocd -f https://raw.githubusercontent.com/argoproj/argo-cd/stable/manifests/install.yaml
For some features, more user-friendly documentation is offered. Refer to the upgrade guide if you want to upgrade your Argo CD. Those interested in creating third-party connectors can access developer-oriented resources.
How it works
Argo CD defines the intended application state by employing Git repositories as the source of truth, in accordance with the GitOps pattern. There are various approaches to specify Kubernetes manifests:
Applications for Customization
Helm charts
JSONNET files
Simple YAML/JSON manifest directory
Any custom configuration management tool that is set up as a plugin
The deployment of the intended application states in the designated target settings is automated by Argo CD. Deployments of applications can monitor changes to branches, tags, or pinned to a particular manifest version at a Git commit.
Architecture
The implementation of Argo CD is a Kubernetes controller that continually observes active apps and contrasts their present, live state with the target state (as defined in the Git repository). Out Of Sync is the term used to describe a deployed application whose live state differs from the target state. In addition to reporting and visualizing the differences, Argo CD offers the ability to manually or automatically sync the current state back to the intended goal state. The designated target environments can automatically apply and reflect any changes made to the intended target state in the Git repository.
Components
API Server
The Web UI, CLI, and CI/CD systems use the API, which is exposed by the gRPC/REST server. Its duties include the following:
Status reporting and application management
Launching application functions (such as rollback, sync, and user-defined actions)
Cluster credential management and repository (k8s secrets)
RBAC enforcement
Authentication, and auth delegation to outside identity providers
Git webhook event listener/forwarder
Repository Server
An internal service called the repository server keeps a local cache of the Git repository containing the application manifests. When given the following inputs, it is in charge of creating and returning the Kubernetes manifests:
URL of the repository
Revision (tag, branch, commit)
Path of the application
Template-specific configurations: helm values.yaml, parameters
A Kubernetes controller known as the application controller keeps an eye on all active apps and contrasts their actual, live state with the intended target state as defined in the repository. When it identifies an Out Of Sync application state, it may take remedial action. It is in charge of calling any user-specified hooks for lifecycle events (Sync, PostSync, and PreSync).
Features
Applications are automatically deployed to designated target environments.
Multiple configuration management/templating tools (Kustomize, Helm, Jsonnet, and plain-YAML) are supported.
Capacity to oversee and implement across several clusters
Integration of SSO (OIDC, OAuth2, LDAP, SAML 2.0, Microsoft, LinkedIn, GitHub, GitLab)
RBAC and multi-tenancy authorization policies
Rollback/Roll-anywhere to any Git repository-committed application configuration
Analysis of the application resources’ health state
Automated visualization and detection of configuration drift
Applications can be synced manually or automatically to their desired state.
Web user interface that shows program activity in real time
CLI for CI integration and automation
Integration of webhooks (GitHub, BitBucket, GitLab)
Tokens of access for automation
Hooks for PreSync, Sync, and PostSync to facilitate intricate application rollouts (such as canary and blue/green upgrades)
Application event and API call audit trails
Prometheus measurements
To override helm parameters in Git, use parameter overrides.
Read more on Govindhtech.com
#ArgoCD#CD#GitOps#API#Kubernetes#Git#Argoproject#News#Technews#Technology#Technologynews#Technologytrends#govindhtech
2 notes
·
View notes
Text
Spring Security Using Facebook Authorization: A Comprehensive Guide
In today's digital landscape, integrating third-party login mechanisms into applications has become a standard practice. It enhances user experience by allowing users to log in with their existing social media accounts. In this blog post, we will walk through the process of integrating Facebook authorization into a Spring Boot application using Spring Security.
Table of Contents
Introduction
Prerequisites
Setting Up Facebook Developer Account
Creating a Spring Boot Application
Configuring Spring Security for OAuth2 Login
Handling Facebook User Data
Testing the Integration
Conclusion
1. Introduction
OAuth2 is an open standard for access delegation, commonly used for token-based authentication. Facebook, among other social media platforms, supports OAuth2, making it possible to integrate Facebook login into your Spring Boot application.
2. Prerequisites
Before we start, ensure you have the following:
JDK 11 or later
Maven
An IDE (e.g., IntelliJ IDEA or Eclipse)
A Facebook Developer account
3. Setting Up Facebook Developer Account
To use Facebook login, you need to create an app on the Facebook Developer portal:
Go to the Facebook Developer website and log in.
Click on "My Apps" and then "Create App."
Choose an app type (e.g., "For Everything Else") and provide the required details.
Once the app is created, go to "Settings" > "Basic" and note down the App ID and App Secret.
Add a product, select "Facebook Login," and configure the Valid OAuth Redirect URIs to http://localhost:8080/login/oauth2/code/facebook.
4. Creating a Spring Boot Application
Create a new Spring Boot project with the necessary dependencies. You can use Spring Initializr or add the dependencies manually to your pom.xml.
Dependencies
<dependencies> <dependency> <groupId>org.springframework.boot</groupId> <artifactId>spring-boot-starter-security</artifactId> </dependency> <dependency> <groupId>org.springframework.boot</groupId> <artifactId>spring-boot-starter-web</artifactId> </dependency> <dependency> <groupId>org.springframework.boot</groupId> <artifactId>spring-boot-starter-oauth2-client</artifactId> </dependency> <dependency> <groupId>org.springframework.boot</groupId> <artifactId>spring-boot-starter-thymeleaf</artifactId> </dependency> </dependencies>
5. Configuring Spring Security for OAuth2 Login
Next, configure Spring Security to use Facebook for OAuth2 login.
application.properties
Add your Facebook app credentials to src/main/resources/application.properties.spring.security.oauth2.client.registration.facebook.client-id=YOUR_FACEBOOK_APP_ID spring.security.oauth2.client.registration.facebook.client-secret=YOUR_FACEBOOK_APP_SECRET spring.security.oauth2.client.registration.facebook.redirect-uri-template={baseUrl}/login/oauth2/code/{registrationId} spring.security.oauth2.client.registration.facebook.scope=email,public_profile spring.security.oauth2.client.registration.facebook.client-name=Facebook spring.security.oauth2.client.registration.facebook.authorization-grant-type=authorization_code spring.security.oauth2.client.provider.facebook.authorization-uri=https://www.facebook.com/v11.0/dialog/oauth spring.security.oauth2.client.provider.facebook.token-uri=https://graph.facebook.com/v11.0/oauth/access_token spring.security.oauth2.client.provider.facebook.user-info-uri=https://graph.facebook.com/me?fields=id,name,email spring.security.oauth2.client.provider.facebook.user-name-attribute=id
Security Configuration
Create a security configuration class to handle the OAuth2 login.import org.springframework.context.annotation.Bean; import org.springframework.context.annotation.Configuration; import org.springframework.security.config.annotation.web.builders.HttpSecurity; import org.springframework.security.config.annotation.web.configuration.EnableWebSecurity; import org.springframework.security.config.annotation.web.configuration.WebSecurityConfigurerAdapter; import org.springframework.security.oauth2.client.oidc.userinfo.OidcUserService; import org.springframework.security.oauth2.client.userinfo.DefaultOAuth2UserService; import org.springframework.security.oauth2.client.userinfo.OAuth2UserService; import org.springframework.security.oauth2.core.oidc.user.OidcUser; import org.springframework.security.oauth2.core.user.OAuth2User; import org.springframework.security.web.authentication.SimpleUrlAuthenticationFailureHandler; @Configuration @EnableWebSecurity public class SecurityConfig extends WebSecurityConfigurerAdapter { @Override protected void configure(HttpSecurity http) throws Exception { http .authorizeRequests(authorizeRequests -> authorizeRequests .antMatchers("/", "/error", "/webjars/**").permitAll() .anyRequest().authenticated() ) .oauth2Login(oauth2Login -> oauth2Login .loginPage("/login") .userInfoEndpoint(userInfoEndpoint -> userInfoEndpoint .oidcUserService(this.oidcUserService()) .userService(this.oAuth2UserService()) ) .failureHandler(new SimpleUrlAuthenticationFailureHandler()) ); } private OAuth2UserService<OidcUserRequest, OidcUser> oidcUserService() { final OidcUserService delegate = new OidcUserService(); return (userRequest) -> { OidcUser oidcUser = delegate.loadUser(userRequest); // Custom logic here return oidcUser; }; } private OAuth2UserService<OAuth2UserRequest, OAuth2User> oAuth2UserService() { final DefaultOAuth2UserService delegate = new DefaultOAuth2UserService(); return (userRequest) -> { OAuth2User oAuth2User = delegate.loadUser(userRequest); // Custom logic here return oAuth2User; }; } }
6. Handling Facebook User Data
After a successful login, you might want to handle and display user data.
Custom User Service
Create a custom service to process user details.import org.springframework.security.oauth2.core.user.OAuth2User; import org.springframework.security.oauth2.core.user.OAuth2UserAuthority; import org.springframework.security.oauth2.client.userinfo.OAuth2UserService; import org.springframework.security.oauth2.client.oidc.userinfo.OidcUserService; import org.springframework.security.oauth2.core.oidc.user.OidcUser; import org.springframework.security.oauth2.client.userinfo.DefaultOAuth2UserService; import org.springframework.security.oauth2.client.oidc.userinfo.OidcUserRequest; import org.springframework.security.oauth2.client.userinfo.OAuth2UserRequest; import org.springframework.stereotype.Service; import java.util.Map; import java.util.Set; import java.util.HashMap; @Service public class CustomOAuth2UserService implements OAuth2UserService<OAuth2UserRequest, OAuth2User> { private final DefaultOAuth2UserService delegate = new DefaultOAuth2UserService(); @Override public OAuth2User loadUser(OAuth2UserRequest userRequest) { OAuth2User oAuth2User = delegate.loadUser(userRequest); Map<String, Object> attributes = new HashMap<>(oAuth2User.getAttributes()); // Additional processing of attributes if needed return oAuth2User; } }
Controller
Create a controller to handle login and display user info.import org.springframework.security.core.annotation.AuthenticationPrincipal; import org.springframework.security.oauth2.core.user.OAuth2User; import org.springframework.stereotype.Controller; import org.springframework.ui.Model; import org.springframework.web.bind.annotation.GetMapping; @Controller public class LoginController { @GetMapping("/login") public String getLoginPage() { return "login"; } @GetMapping("/") public String getIndexPage(Model model, @AuthenticationPrincipal OAuth2User principal) { if (principal != null) { model.addAttribute("name", principal.getAttribute("name")); } return "index"; } }
Thymeleaf Templates
Create Thymeleaf templates for login and index pages.
src/main/resources/templates/login.html
<!DOCTYPE html> <html xmlns:th="http://www.thymeleaf.org"> <head> <title>Login</title> </head> <body> <h1>Login</h1> <a href="/oauth2/authorization/facebook">Login with Facebook</a> </body> </html>
src/main/resources/templates/index.html
<!DOCTYPE html> <html xmlns:th="http://www.thymeleaf.org"> <head> <title>Home</title> </head> <body> <h1>Home</h1> <div th:if="${name}"> <p>Welcome, <span th:text="${name}">User</span>!</p> </div> <div th:if="${!name}"> <p>Please <a href="/login">log in</a>.</p> </div> </body> </html>
7. Testing the Integration
Run your Spring Boot application and navigate to http://localhost:8080. Click on the "Login with Facebook" link and authenticate with your Facebook credentials. If everything is set up correctly, you should be redirected to the home page with your Facebook profile name displayed.
8. Conclusion
Integrating Facebook login into your Spring Boot application using Spring Security enhances user experience and leverages the power of OAuth2. With this setup, users can easily log in with their existing Facebook accounts, providing a seamless and secure authentication process.
By following this guide,
2 notes
·
View notes
Text
Identity, authentication, anonymity; Pseudonymous identity and recovery in an uncaring world. Revision 2.1a
Identity, authentication, anonymity; Pseudonymous identity and recovery in an uncaring world. Revision 2.1a This paper explores managing identity and account recovery, going beyond multi-factor authentication (MFA) and examining the potential role of using proof of observability ledgers. The focus is on observability networks, undeniably signatures, and hard anonymity. The goal is to allow users to recover from catastrophic losses of secret keys, hardware tokens, computers, and mobile devices while still maintaining a pseudonymous identity. The paper also discusses the question of human-based secret recovery and revisits the web of trust in the age of social media. It emphasizes that the users most at risk are the ones who need the highest level of security. To achieve this, the paper proposes using secret sharing methods to create identity control blocks, understanding the difference between statutory identity and persistent global pseudonymous identity, and recognizing why this is important in the modern social context. Mitigating the risks of global identities is also discussed, and the paper proposes bootstrapping the protocol using peer-to-peer methods over existing protocols. The pitfalls of failure to scale are highlighted, and the importance of considering human factors and cryptography engineering in a combined system is emphasized. The paper suggests avoiding federated protocols to prevent monopolistic oligarchies from emerging. Since these identities are not tied to a central service they are not entrapped to a walled garden and can freely move from service to service. With operational conformance to OpenID Oauth2 and Fido U2F they can quickly be deployed to many existing services. To ensure secure key recovery, players use Shamir's secret sharing to publish a specific number of recovery key bits to a subset of peers. The reconvocation key of the primary key is also published this way. Although not all members will sign everyone's key, all group members watch the log, and groups can be of arbitrary sizes based on performance and connectedness. Players should be in multiple groups, and auto-summaries of group hashes are published to prevent rollbacks. In case a player loses their primary hardware key, they can convince N out of M of their key partners to publish their revocation token. All actions in the game use N of M fail/stop multi-party computation, and the game doesn't require a central authority or policy-setting organization since it relies on hardware tokens and published revocation and recovery keys. In practical operation the game will be designed to cause tokens to fail to simulate key loss, as well as designate some players as attackers. Each token will initially be loaded with a “Alias” and “True Name”. Attackers will have “Agent Smith” in the true name field. A play variant may be created where cheating detection by the group can force the reveal of the “True Name”.
3 notes
·
View notes
Text
You can learn NodeJS easily, Here's all you need:
1.Introduction to Node.js
• JavaScript Runtime for Server-Side Development
• Non-Blocking I/0
2.Setting Up Node.js
• Installing Node.js and NPM
• Package.json Configuration
• Node Version Manager (NVM)
3.Node.js Modules
• CommonJS Modules (require, module.exports)
• ES6 Modules (import, export)
• Built-in Modules (e.g., fs, http, events)
4.Core Concepts
• Event Loop
• Callbacks and Asynchronous Programming
• Streams and Buffers
5.Core Modules
• fs (File Svstem)
• http and https (HTTP Modules)
• events (Event Emitter)
• util (Utilities)
• os (Operating System)
• path (Path Module)
6.NPM (Node Package Manager)
• Installing Packages
• Creating and Managing package.json
• Semantic Versioning
• NPM Scripts
7.Asynchronous Programming in Node.js
• Callbacks
• Promises
• Async/Await
• Error-First Callbacks
8.Express.js Framework
• Routing
• Middleware
• Templating Engines (Pug, EJS)
• RESTful APIs
• Error Handling Middleware
9.Working with Databases
• Connecting to Databases (MongoDB, MySQL)
• Mongoose (for MongoDB)
• Sequelize (for MySQL)
• Database Migrations and Seeders
10.Authentication and Authorization
• JSON Web Tokens (JWT)
• Passport.js Middleware
• OAuth and OAuth2
11.Security
• Helmet.js (Security Middleware)
• Input Validation and Sanitization
• Secure Headers
• Cross-Origin Resource Sharing (CORS)
12.Testing and Debugging
• Unit Testing (Mocha, Chai)
• Debugging Tools (Node Inspector)
• Load Testing (Artillery, Apache Bench)
13.API Documentation
• Swagger
• API Blueprint
• Postman Documentation
14.Real-Time Applications
• WebSockets (Socket.io)
• Server-Sent Events (SSE)
• WebRTC for Video Calls
15.Performance Optimization
• Caching Strategies (in-memory, Redis)
• Load Balancing (Nginx, HAProxy)
• Profiling and Optimization Tools (Node Clinic, New Relic)
16.Deployment and Hosting
• Deploying Node.js Apps (PM2, Forever)
• Hosting Platforms (AWS, Heroku, DigitalOcean)
• Continuous Integration and Deployment-(Jenkins, Travis CI)
17.RESTful API Design
• Best Practices
• API Versioning
• HATEOAS (Hypermedia as the Engine-of Application State)
18.Middleware and Custom Modules
• Creating Custom Middleware
• Organizing Code into Modules
• Publish and Use Private NPM Packages
19.Logging
• Winston Logger
• Morgan Middleware
• Log Rotation Strategies
20.Streaming and Buffers
• Readable and Writable Streams
• Buffers
• Transform Streams
21.Error Handling and Monitoring
• Sentry and Error Tracking
• Health Checks and Monitoring Endpoints
22.Microservices Architecture
• Principles of Microservices
• Communication Patterns (REST, gRPC)
• Service Discovery and Load Balancing in Microservices
1 note
·
View note
Text
Top Security Features Every Business Application Should Have
It’s not enough to just provide functionality and usability in today’s digital-first business environment and build really great applications. It has become imperative to keep security at the top of the priority list. All businesses, big or small, are getting caught in the rising tide of cyber-attacks, which threaten everything from daily operations to customer trust and long-term reputation at any given moment.
Application security may be important for every industry-finance, healthcare, e-commerce, logistics, or otherwise. No matter which trade you belong to in terms of being identified as dependent on a digital platform-your application security policy has to be non-negotiable. Simply installing or plugging a few off-the-shelf solutions and hoping for the best is obsolete. Well-structured, proactive security solutions must be integrated the moment the idea is conceived.
In this blog, we will dissect the most important security features every business application must have-what this means for operations, customers, and the bottom line.
Strong Authentication and Access Controls
One of the first lines of defense in any application is verifying who can access it and what they can do once inside. Robust authentication ensures that only authorized users get into them, while access control limits what they can see or manipulate according to their roles.
Modern business applications should incorporate:
Multi-Factor Authentication (MFA) affords the confirmation of users’ identity against passwords, biometrics, and OTP.
Single Sign-On (SSO) allows people to have approved, secure entry to more than one system with a single set of credentials.
Role-Based Access Control (RBAC) minimizes driver threats inside the company by assigning permissions relative to job roles.
Working with a reputable software company gives access to end-user customization and development of access control systems under internal policy and workflow. This ensures that sensitive information remains confidential from unauthorized personnel and has an audit trail of who did what and when.
Comprehensive Data Encryption
Encryption is necessary for securing business as well as individual data. All stored data, whether in a database or transmitted over networks, should be scrambled so that it would not be intelligible to unauthorized parties.
In this case, Encryption at Rest protects the stored data in the hard drives or cloud storage.
Encryption in Transit secures data sent across the internet or internal networks.
Having standards set for data storage, such as AES-256, and data transmission like TLS 1.3 will result in making any data collected during the breach useless to attackers. It protects the organization’s data but also ensures that it abides by related legal frameworks such as GDPR, HIPAA, and CCPA.
Most companies prefer developing customized software in-house so that it becomes easier to manage encryption. Though generic tools can provide a few features, specific software can embed encryption within the individual layers of the application based on how sensitive this particular data environment is structured.
Secure API Integrations
Currently, APIs (Application Program Interfaces) have become very important for any business application to communicate effectively with third-party tools, services, and internal systems. However, unsecured APIs may turn out to be one of the most significant loopholes.
To safeguard the API endpoints, the businesses should have:
Token-based authentication (OAuth2)
Throttling and rate limiting
Validating the inputs
API gateways
It ensures that only authenticated users can perform any operation over the application data and services. These measures would reduce the risks of denial-of-service (DoS) attacks, scraping of data, or unauthorized access to data.
Custom APIs, again, part of custom software solutions, tend to be more secure since they’re built for a purpose and typically don’t leave much room for errors or compatibility problems with other platforms.
Routine Patching and Update Mechanisms
Flaws in software are bound to appear somewhere in its life cycle. However, the extent to which your application reacts fast and effectively to such flaws greatly affects the security posture. Known exploits not patched in time have the potential for catastrophic breaches.
A secure application:
I. Accommodate seamless update mechanisms.
II. Applies patches without downtime.
III. Sends real-time alerts when vulnerabilities are discovered.
That is why, when tied to a professional software development company, businesses can make sure that their applications aren’t merely monitored for hitches but also kept with a current patch level to quickly seal holes from known attack vectors.
Input Validation and Injection Prevention
User input areas for applications — especially those for forms or search boxes — are prone to injection attacks. SQL injection, cross-site scripting (XSS), and command injection can become disastrous attacks by enabling the attacker to manipulate the application to behave in an unintended manner and/or expose sensitive information.
Some fundamental practices include:
Input format validation (e.g., email, phone number)
Input sanitization to remove dangerous characters
Output escaping to inhibit code injection
By building these validations natively into your codebase, you lower dependency on third-party libraries and significantly reduce the risk of compromise for the applications.
One of many good things about custom software solutions is that you can define validation rules based on specific business logic and user flows. Thus, resulting in more secure and reliable applications.
Advanced Logging and Real-Time Monitoring
Security not only views itself as a barrier against disruptive forces but must also tend to detect and respond to them instantaneously. Tools for logging and monitoring can record user activities, detect anomalies, and send alerts based on observed irregularities in behavior.
0 notes
Text
A Beginner’s Guide to RESTful API Design

RESTful APIs are the backbone of modern web and mobile applications. Whether you're building the backend for a web service, a mobile app, or a microservice architecture, understanding how to design a RESTful API is essential. In this guide, we’ll walk you through what REST is and how to structure APIs that are scalable, maintainable, and easy to use.
What is a RESTful API?
REST stands for Representational State Transfer. It's an architectural style that uses standard HTTP methods (GET, POST, PUT, DELETE) for communication between clients and servers. A RESTful API exposes data and services over the web using URLs, returning responses typically in JSON format.
Core Principles of RESTful API Design
Statelessness: Each request should contain all the information needed to process it. The server does not store client session data.
Resource-Based: Data is represented as resources (e.g., /users, /products).
Use of HTTP Methods: Use standard HTTP verbs for actions: GET (read), POST (create), PUT/PATCH (update), DELETE (remove).
Uniform Interface: Consistent structure and naming conventions help developers understand and use your API easily.
Representation: Resources are typically represented using JSON or XML.
Best Practices for RESTful API Design
1. Use Nouns in URIs
URIs should represent resources, not actions. Example:✅ /users❌ /getUsers
2. Use HTTP Methods Correctly
GET /users → Get list of users
GET /users/1 → Get user with ID 1
POST /users → Create a new user
PUT /users/1 → Update user with ID 1
DELETE /users/1 → Delete user with ID 1
3. Return Proper HTTP Status Codes
200 OK → Successful request
201 Created → Resource created successfully
400 Bad Request → Client error
401 Unauthorized → Authentication failed
404 Not Found → Resource doesn’t exist
500 Internal Server Error → Server-side error
4. Use JSON as the Response Format
JSON is the most widely used and supported format. It’s readable by both humans and machines.
5. Version Your API
Always version your APIs to avoid breaking changes for clients when you update your codebase./api/v1/users
6. Use Pagination for Large Collections
For endpoints that return many items, use query parameters for pagination:/users?page=2&limit=20
7. Include Error Messages
Return helpful error messages to guide developers on how to fix their request: { "error": "Invalid input", "details": "Email address is required" }
8. Secure Your API
Use HTTPS to encrypt data in transit.
Implement authentication (e.g., OAuth2, JWT).
Validate inputs to prevent injection attacks.
Tools for API Development and Testing
Postman: Test and document your APIs.
Swagger/OpenAPI: Generate interactive API documentation.
Insomnia: Alternative to Postman for API testing.
Conclusion
Designing a RESTful API isn't just about making something that works — it's about making it intuitive, reliable, and secure. By following the principles and best practices outlined here, you'll create APIs that developers love to use and that can scale with your application.
0 notes
Text
Exploring Laravel’s Ecosystem: Top Tools and Packages You Should Use

Laravel has become one of the most popular PHP frameworks due to its elegant syntax, robust features, and a thriving ecosystem. If you're working with Laravel or considering it for your next project, exploring its extensive range of tools and packages is crucial to optimizing your development process. A Laravel Development Company can help you unlock the full potential of Laravel by implementing these tools effectively. Whether you're building a small website or a complex web application, understanding the tools available within Laravel's ecosystem can significantly improve both the development speed and the performance of your project.
The Laravel Ecosystem: A Treasure Trove of Tools
Laravel is not just a framework; it’s an entire ecosystem with various tools and packages that simplify everything from authentication to deployment. Laravel’s ecosystem is known for its simplicity, scalability, and ability to integrate with a variety of technologies. It’s designed to streamline development, making it easier for developers to build web applications quickly and efficiently.
One of the standout features of Laravel is Laravel Forge, a tool that simplifies server management, allowing developers to deploy applications with ease. Forge provides a robust solution for provisioning servers, configuring SSL, and monitoring server health. This tool eliminates the hassle of manual server management, enabling developers to focus on writing clean and efficient code.
Top Laravel Tools and Packages to Boost Your Productivity
Here are some essential tools and packages that you should consider when working with Laravel:
1. Laravel Nova
Nova is a beautifully designed administration panel for Laravel applications. It provides a clean and intuitive interface for managing the data in your application. Nova allows you to create custom dashboards, manage resources, and build complex relationships between different parts of your app.
It is ideal for Laravel developers who want to create powerful and customized admin panels without reinventing the wheel. As a package, Nova offers a flexible and highly configurable UI that can be tailored to fit your business needs.
2. Laravel Echo
For applications that require real-time features like notifications, chat, or activity feeds, Laravel Echo is an essential tool. Echo makes it easy to broadcast events from your application to clients in real time. It integrates seamlessly with WebSockets, so you can push updates to users without requiring them to refresh the page.
If your app demands live updates, whether for a messaging system, live notifications, or any other feature requiring real-time data, Echo is a must-have tool in your Laravel toolkit.
3. Laravel Passport
OAuth2 authentication is a common feature for many modern applications, especially those that require API-based access. Laravel Passport is a full OAuth2 server implementation for Laravel, providing a secure and straightforward way to manage API authentication.
Passport makes it simple to issue access tokens for your API and protect routes with OAuth2 security. It’s an essential package for developers building large-scale applications with API-driven architectures.
4. Laravel Horizon
Managing queues and jobs is a significant part of building scalable applications. Laravel Horizon is a powerful queue manager that provides a beautiful dashboard for monitoring and managing your queues. With Horizon, you can track job throughput, failures, and other crucial metrics that help ensure your queue system runs smoothly.
Horizon is particularly useful for applications that need to handle a high volume of tasks or background processes, such as processing payments or sending emails.
5. Laravel Mix
When it comes to asset compilation, Laravel Mix simplifies front-end workflow. Mix provides a clean API for defining Webpack build steps for your Laravel application, making it easier to manage CSS, JavaScript, and other assets.
With its seamless integration into Laravel, Mix allows you to compile and minify your assets with ease, helping you improve the performance and user experience of your application.
6. Spatie Packages
Spatie is a renowned company within the Laravel community that has created a wide array of useful packages. Some of their most popular packages include Laravel Permission for role-based access control, Laravel Media Library for handling file uploads, and Laravel Activitylog for tracking user activity.
Spatie’s tools are known for their reliability and ease of use, making them excellent choices for developers who want to extend Laravel’s functionality without reinventing the wheel.
7. Laravel Scout
If your application needs full-text search capabilities, Laravel Scout is the go-to solution. Scout provides a simple, driver-based solution for adding full-text search to your models. It works with several popular search engines like Algolia and TNTSearch.
Using Scout, you can easily implement robust search functionality in your Laravel application without having to worry about the complexities of managing search indexes and queries.
Considering Mobile App Development? Don’t Forget the Cost
If you're planning to take your Laravel web application to the mobile platform, integrating a mobile app into your Laravel project is becoming increasingly popular. However, before diving into mobile app development, it's important to consider the mobile app cost calculator to understand the expenses involved.
Building a mobile app can range from a few thousand dollars to hundreds of thousands, depending on the features, platforms (iOS/Android), and the complexity of the app. A mobile app cost calculator can give you a rough estimate of the costs based on your desired features and functionalities, helping you make informed decisions about your project’s budget and scope.
If you’re unsure of how to proceed with your Laravel app and mobile development strategy, it’s always a good idea to consult a Laravel Development Company for expert advice and support.
If you're interested in exploring the benefits of Laravel development services for your business, we encourage you to book an appointment with our team of experts. Book an Appointment
Conclusion
The Laravel ecosystem is rich with tools and packages designed to streamline development, enhance functionality, and improve the overall user experience. From real-time events with Laravel Echo to managing queues with Laravel Horizon, these tools can help you build robust applications more efficiently.
If you’re looking for expert guidance or need help with your next project, consider leveraging Laravel App Development Services to ensure you’re utilizing the full power of the Laravel ecosystem. By working with professionals, you can save time and focus on what matters most—creating outstanding web applications.
0 notes
Text
OpenAI uses open source Ory to authenticate over 400M weekly active users
https://www.ory.sh/blog/openai-oauth2-server-open-source
1 note
·
View note
Text
Weak API Authentication in Laravel: How to Secure It
Introduction
API authentication is a critical aspect of securing web applications. In Laravel, APIs allow developers to connect with the backend while keeping things modular and efficient. However, when API authentication is weak or poorly implemented, it leaves the door open for attackers to exploit sensitive data.

In this post, we’ll explore the risks of weak API authentication in Laravel, how to identify vulnerabilities, and ways to secure your API endpoints. We’ll also guide you through a coding example and introduce a free tool for a website security test to help you identify API vulnerabilities on your site.
Why Weak API Authentication Is Dangerous
APIs are a primary target for cybercriminals due to the sensitive data they expose. When authentication methods are weak, such as using insecure or predictable tokens, attackers can easily bypass security mechanisms and gain unauthorized access to your backend systems.
Here’s why weak API authentication is dangerous:
Data Breaches: Hackers can access user data, financial information, or any sensitive data stored in your database.
Unauthorized API Calls: Without proper authentication, malicious users can make API requests on behalf of authenticated users.
Denial of Service Attacks: Exploiting weak authentication can allow attackers to overload your systems or take them down entirely.
Common Causes of Weak API Authentication
Some common causes of weak API authentication include:
Using Default Tokens: Laravel provides several ways to authenticate APIs, but many developers still use the default tokens or insecure methods.
No Token Expiration: Not setting an expiration time for API tokens can lead to long-term vulnerabilities.
Insecure Password Storage: If you store passwords in plain text or use weak hashing algorithms, hackers can easily retrieve them.
Improper Rate Limiting: Failing to limit the number of API requests from a user can lead to brute-force attacks.
How to Secure API Authentication in Laravel
Here, we’ll walk you through securing your API authentication in Laravel, step by step, using modern techniques.
1. Use Laravel Passport for OAuth Authentication
Laravel Passport provides a complete OAuth2 server implementation for your Laravel application. It is the most secure and robust way to handle API authentication.
To install Laravel Passport, follow these steps:
composer require laravel/passport php artisan migrate php artisan passport:install
After installation, you need to configure the AuthServiceProvider to use Passport:
use Laravel\Passport\Passport; public function boot() { Passport::routes(); }
Then, update your api guard in config/auth.php to use Passport:
'guards' => [ 'api' => [ 'driver' => 'passport', 'provider' => 'users', ], ],
Now, you can authenticate users using OAuth tokens, which provides a much higher level of security.
2. Enable Token Expiration
Another important step is ensuring that API tokens expire after a certain period. By default, tokens generated by Passport are long-lived, but you can customize their expiration time.
To set token expiration, update the config/passport.php file:
'personal_access_tokens_expire_in' => now()->addDays(7),
This will ensure that tokens expire after 7 days, requiring users to re-authenticate.
3. Use Strong Hashing for Passwords
Make sure that you store passwords securely using bcrypt or Argon2 hashing. Laravel automatically hashes passwords using bcrypt, but you can configure it to use Argon2 as well in config/hashing.php:
'driver' => 'argon2i',
4. Implement Rate Limiting
To prevent brute-force attacks, you should implement rate limiting for your API. Laravel has a built-in rate limiting feature that you can enable easily in routes/api.php:
Route::middleware('throttle:60,1')->get('/user', function (Request $request) { return $request->user(); });
This will limit the API requests to 60 per minute, helping to prevent excessive login attempts.
Testing Your API Security
After implementing the above security measures, it's important to test your API for vulnerabilities. Use our Website Vulnerability Scanner to check your website’s API security and identify any weaknesses in your authentication methods.

Screenshot of the free tools webpage where you can access security assessment tools.
Conclusion
Securing API authentication in Laravel is crucial for preventing unauthorized access and protecting sensitive user data. By using OAuth tokens, setting expiration times, applying strong password hashing, and implementing rate limiting, you can significantly enhance your API security.
If you’re unsure about the security of your website or API, try out our Free Website Security Scanner tool to perform a vulnerability assessment.

An Example of a vulnerability assessment report generated with our free tool, providing insights into possible vulnerabilities.
For more security tips and updates, visit our blog at Pentest Testing Corp.
0 notes
Text
Introduction to Azure Data Factory's REST API: Automating Data Pipelines
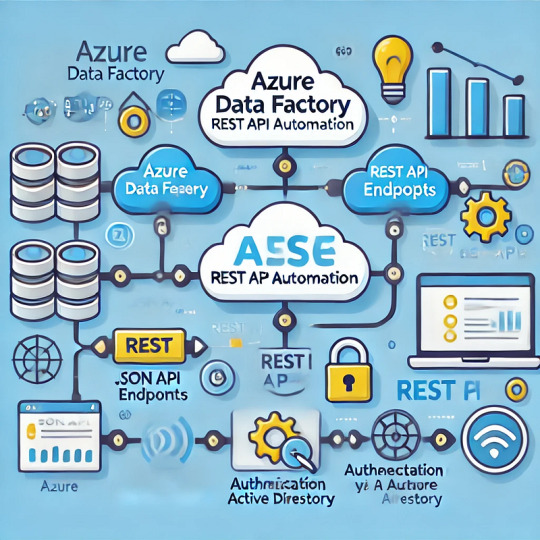
1. Overview of Azure Data Factory REST API
Azure Data Factory (ADF) provides a RESTful API that allows users to automate and manage data pipelines programmatically. The API supports various operations such as:
Creating, updating, and deleting pipelines
Triggering pipeline runs
Monitoring pipeline execution
Managing linked services and datasets
By leveraging the REST API, organizations can integrate ADF with CI/CD pipelines, automate workflows, and enhance overall data operations.
2. Authenticating with Azure Data Factory REST API
Before making API calls, authentication is required using Azure Active Directory (Azure AD). The process involves obtaining an OAuth 2.0 token.
Steps to Get an Authentication Token
Register an Azure AD App in the Azure Portal.
Assign permissions to allow the app to interact with ADF.
Use a service principal to authenticate and generate an access token.
Here’s a Python script to obtain the OAuth 2.0 token:pythonimport requestsTENANT_ID = "your-tenant-id" CLIENT_ID = "your-client-id" CLIENT_SECRET = "your-client-secret" RESOURCE = "https://management.azure.com/"AUTH_URL = f"https://login.microsoftonline.com/{TENANT_ID}/oauth2/token"data = { "grant_type": "client_credentials", "client_id": CLIENT_ID, "client_secret": CLIENT_SECRET, "resource": RESOURCE, }response = requests.post(AUTH_URL, data=data) token = response.json().get("access_token")print("Access Token:", token)
3. Triggering an Azure Data Factory Pipeline using REST API
Once authenticated, you can trigger a pipeline execution using the API.
API Endpoint
bashPOST https://management.azure.com/subscriptions/{subscriptionId}/resourceGroups/{resourceGroupName}/providers/Microsoft.DataFactory/factories/{factoryName}/pipelines/{pipelineName}/createRun?api-version=2018-06-01
Python Example: Triggering a Pipeline
pythonimport requestsSUBSCRIPTION_ID = "your-subscription-id" RESOURCE_GROUP = "your-resource-group" FACTORY_NAME = "your-adf-factory" PIPELINE_NAME = "your-pipeline-name" API_VERSION = "2018-06-01"URL = f"https://management.azure.com/subscriptions/{SUBSCRIPTION_ID}/resourceGroups/{RESOURCE_GROUP}/providers/Microsoft.DataFactory/factories/{FACTORY_NAME}/pipelines/{PIPELINE_NAME}/createRun?api-version={API_VERSION}"headers = { "Authorization": f"Bearer {token}", "Content-Type": "application/json" }response = requests.post(URL, headers=headers) print("Pipeline Trigger Response:", response.json())
4. Monitoring Pipeline Runs using REST API
After triggering a pipeline, you might want to check its status. The following API call retrieves the status of a pipeline run:
API Endpoint
bashCopyEditGET https://management.azure.com/subscriptions/{subscriptionId}/resourceGroups/{resourceGroupName}/providers/Microsoft.DataFactory/factories/{factoryName}/pipelineruns/{runId}?api-version=2018-06-01
Python Example: Checking Pipeline Run Status
pythonCopyEditRUN_ID = "your-pipeline-run-id"URL = f"https://management.azure.com/subscriptions/{SUBSCRIPTION_ID}/resourceGroups/{RESOURCE_GROUP}/providers/Microsoft.DataFactory/factories/{FACTORY_NAME}/pipelineruns/{RUN_ID}?api-version={API_VERSION}"response = requests.get(URL, headers=headers) print("Pipeline Run Status:", response.json())
5. Automating Pipeline Execution with a Scheduler
To automate pipeline execution at regular intervals, you can use:
Azure Logic Apps
Azure Functions
A simple Python script with a scheduler (e.g., cron jobs or Windows Task Scheduler)
Here’s an example using Python’s schedule module`:pythonimport schedule import timedef run_pipeline(): response = requests.post(URL, headers=headers) print("Pipeline Triggered:", response.json())schedule.every().day.at("08:00").do(run_pipeline)while True: schedule.run_pending() time.sleep(60)
6. Conclusion
The Azure Data Factory REST API provides a powerful way to automate data workflows. By leveraging the API, you can programmatically trigger pipelines, monitor executions, and integrate ADF with other cloud services. Whether you’re managing data ingestion, transformation, or orchestration, using the REST API ensures efficient and scalable automation.
WEBSITE: https://www.ficusoft.in/azure-data-factory-training-in-chennai/
0 notes
Text
MCP Toolbox for Databases Simplifies AI Agent Data Access

AI Agent Access to Enterprise Data Made Easy with MCP Toolbox for Databases
Google Cloud Next 25 showed organisations how to develop multi-agent ecosystems using Vertex AI and Google Cloud Databases. Agent2Agent Protocol and Model Context Protocol increase agent interactions. Due to developer interest in MCP, we're offering MCP Toolbox for Databases (formerly Gen AI Toolbox for Databases) easy to access your company data in databases. This advances standardised and safe agentic application experimentation.
Previous names: Gen AI Toolbox for Databases, MCP Toolbox
Developers may securely and easily interface new AI agents to business data using MCP Toolbox for Databases (Toolbox), an open-source MCP server. Anthropic created MCP, an open standard that links AI systems to data sources without specific integrations.
Toolbox can now generate tools for self-managed MySQL and PostgreSQL, Spanner, Cloud SQL for PostgreSQL, Cloud SQL for MySQL, and AlloyDB for PostgreSQL (with Omni). As an open-source project, it uses Neo4j and Dgraph. Toolbox integrates OpenTelemetry for end-to-end observability, OAuth2 and OIDC for security, and reduced boilerplate code for simpler development. This simplifies, speeds up, and secures tool creation by managing connection pooling, authentication, and more.
MCP server Toolbox provides the framework needed to construct production-quality database utilities and make them available to all clients in the increasing MCP ecosystem. This compatibility lets agentic app developers leverage Toolbox and reliably query several databases using a single protocol, simplifying development and improving interoperability.
MCP Toolbox for Databases supports ATK
The Agent Development Kit (ADK), an open-source framework that simplifies complicated multi-agent systems while maintaining fine-grained agent behaviour management, was later introduced. You can construct an AI agent using ADK in under 100 lines of user-friendly code. ADK lets you:
Orchestration controls and deterministic guardrails affect agents' thinking, reasoning, and collaboration.
ADK's patented bidirectional audio and video streaming features allow human-like interactions with agents with just a few lines of code.
Choose your preferred deployment or model. ADK supports your stack, whether it's your top-tier model, deployment target, or remote agent interface with other frameworks. ADK also supports the Model Context Protocol (MCP), which secures data source-AI agent communication.
Release to production using Vertex AI Agent Engine's direct interface. This reliable and transparent approach from development to enterprise-grade deployment eliminates agent production overhead.
Add LangGraph support
LangGraph offers essential persistence layer support with checkpointers. This helps create powerful, stateful agents that can complete long tasks or resume where they left off.
For state storage, Google Cloud provides integration libraries that employ powerful managed databases. The following are developer options:
Access the extremely scalable AlloyDB for PostgreSQL using the langchain-google-alloydb-pg-python library's AlloyDBSaver class, or pick
Cloud SQL for PostgreSQL utilising langchain-google-cloud-sql-pg-python's PostgresSaver checkpointer.
With Google Cloud's PostgreSQL performance and management, both store and load agent execution states easily, allowing operations to be halted, resumed, and audited with dependability.
When assembling a graph, a checkpointer records a graph state checkpoint at each super-step. These checkpoints are saved in a thread accessible after graph execution. Threads offer access to the graph's state after execution, enabling fault-tolerance, memory, time travel, and human-in-the-loop.
#technology#technews#govindhtech#news#technologynews#MCP Toolbox for Databases#AI Agent Data Access#Gen AI Toolbox for Databases#MCP Toolbox#Toolbox for Databases#Agent Development Kit
0 notes
Text
Essential Components of a Production Microservice Application
DevOps Automation Tools and modern practices have revolutionized how applications are designed, developed, and deployed. Microservice architecture is a preferred approach for enterprises, IT sectors, and manufacturing industries aiming to create scalable, maintainable, and resilient applications. This blog will explore the essential components of a production microservice application, ensuring it meets enterprise-grade standards.
1. API Gateway
An API Gateway acts as a single entry point for client requests. It handles routing, composition, and protocol translation, ensuring seamless communication between clients and microservices. Key features include:
Authentication and Authorization: Protect sensitive data by implementing OAuth2, OpenID Connect, or other security protocols.
Rate Limiting: Prevent overloading by throttling excessive requests.
Caching: Reduce response time by storing frequently accessed data.
Monitoring: Provide insights into traffic patterns and potential issues.
API Gateways like Kong, AWS API Gateway, or NGINX are widely used.
Mobile App Development Agency professionals often integrate API Gateways when developing scalable mobile solutions.
2. Service Registry and Discovery
Microservices need to discover each other dynamically, as their instances may scale up or down or move across servers. A service registry, like Consul, Eureka, or etcd, maintains a directory of all services and their locations. Benefits include:
Dynamic Service Discovery: Automatically update the service location.
Load Balancing: Distribute requests efficiently.
Resilience: Ensure high availability by managing service health checks.
3. Configuration Management
Centralized configuration management is vital for managing environment-specific settings, such as database credentials or API keys. Tools like Spring Cloud Config, Consul, or AWS Systems Manager Parameter Store provide features like:
Version Control: Track configuration changes.
Secure Storage: Encrypt sensitive data.
Dynamic Refresh: Update configurations without redeploying services.
4. Service Mesh
A service mesh abstracts the complexity of inter-service communication, providing advanced traffic management and security features. Popular service mesh solutions like Istio, Linkerd, or Kuma offer:
Traffic Management: Control traffic flow with features like retries, timeouts, and load balancing.
Observability: Monitor microservice interactions using distributed tracing and metrics.
Security: Encrypt communication using mTLS (Mutual TLS).
5. Containerization and Orchestration
Microservices are typically deployed in containers, which provide consistency and portability across environments. Container orchestration platforms like Kubernetes or Docker Swarm are essential for managing containerized applications. Key benefits include:
Scalability: Automatically scale services based on demand.
Self-Healing: Restart failed containers to maintain availability.
Resource Optimization: Efficiently utilize computing resources.
6. Monitoring and Observability
Ensuring the health of a production microservice application requires robust monitoring and observability. Enterprises use tools like Prometheus, Grafana, or Datadog to:
Track Metrics: Monitor CPU, memory, and other performance metrics.
Set Alerts: Notify teams of anomalies or failures.
Analyze Logs: Centralize logs for troubleshooting using ELK Stack (Elasticsearch, Logstash, Kibana) or Fluentd.
Distributed Tracing: Trace request flows across services using Jaeger or Zipkin.
Hire Android App Developers to ensure seamless integration of monitoring tools for mobile-specific services.
7. Security and Compliance
Securing a production microservice application is paramount. Enterprises should implement a multi-layered security approach, including:
Authentication and Authorization: Use protocols like OAuth2 and JWT for secure access.
Data Encryption: Encrypt data in transit (using TLS) and at rest.
Compliance Standards: Adhere to industry standards such as GDPR, HIPAA, or PCI-DSS.
Runtime Security: Employ tools like Falco or Aqua Security to detect runtime threats.
8. Continuous Integration and Continuous Deployment (CI/CD)
A robust CI/CD pipeline ensures rapid and reliable deployment of microservices. Using tools like Jenkins, GitLab CI/CD, or CircleCI enables:
Automated Testing: Run unit, integration, and end-to-end tests to catch bugs early.
Blue-Green Deployments: Minimize downtime by deploying new versions alongside old ones.
Canary Releases: Test new features on a small subset of users before full rollout.
Rollback Mechanisms: Quickly revert to a previous version in case of issues.
9. Database Management
Microservices often follow a database-per-service model to ensure loose coupling. Choosing the right database solution is critical. Considerations include:
Relational Databases: Use PostgreSQL or MySQL for structured data.
NoSQL Databases: Opt for MongoDB or Cassandra for unstructured data.
Event Sourcing: Leverage Kafka or RabbitMQ for managing event-driven architectures.
10. Resilience and Fault Tolerance
A production microservice application must handle failures gracefully to ensure seamless user experiences. Techniques include:
Circuit Breakers: Prevent cascading failures using tools like Hystrix or Resilience4j.
Retries and Timeouts: Ensure graceful recovery from temporary issues.
Bulkheads: Isolate failures to prevent them from impacting the entire system.
11. Event-Driven Architecture
Event-driven architecture improves responsiveness and scalability. Key components include:
Message Brokers: Use RabbitMQ, Kafka, or AWS SQS for asynchronous communication.
Event Streaming: Employ tools like Kafka Streams for real-time data processing.
Event Sourcing: Maintain a complete record of changes for auditing and debugging.
12. Testing and Quality Assurance
Testing in microservices is complex due to the distributed nature of the architecture. A comprehensive testing strategy should include:
Unit Tests: Verify individual service functionality.
Integration Tests: Validate inter-service communication.
Contract Testing: Ensure compatibility between service APIs.
Chaos Engineering: Test system resilience by simulating failures using tools like Gremlin or Chaos Monkey.
13. Cost Management
Optimizing costs in a microservice environment is crucial for enterprises. Considerations include:
Autoscaling: Scale services based on demand to avoid overprovisioning.
Resource Monitoring: Use tools like AWS Cost Explorer or Kubernetes Cost Management.
Right-Sizing: Adjust resources to match service needs.
Conclusion
Building a production-ready microservice application involves integrating numerous components, each playing a critical role in ensuring scalability, reliability, and maintainability. By adopting best practices and leveraging the right tools, enterprises, IT sectors, and manufacturing industries can achieve operational excellence and deliver high-quality services to their customers.
Understanding and implementing these essential components, such as DevOps Automation Tools and robust testing practices, will enable organizations to fully harness the potential of microservice architecture. Whether you are part of a Mobile App Development Agency or looking to Hire Android App Developers, staying ahead in today’s competitive digital landscape is essential.
0 notes
Text
Flask and OAuth2: Securing Your API with Industry-Standard Authentication
Introduction Flask and OAuth2: Securing Your API with Industry-Standard Authentication is a crucial aspect of building secure and scalable web applications. In this tutorial, we will explore the world of Flask, a lightweight Python web framework, and OAuth2, an industry-standard authentication protocol. We will delve into the technical background, implementation guide, code examples, best…
0 notes
Text
Unlocking the Power of Keycloak for Identity and Access Management (IAM)
In the ever-evolving digital landscape, managing identity and access securely is paramount. Businesses need a robust, scalable, and flexible solution to safeguard their applications and services. Enter Keycloak, an open-source Identity and Access Management (IAM) tool that has emerged as a game-changer for organizations worldwide.
What is Keycloak?
Keycloak is an open-source IAM solution developed by Red Hat, designed to provide secure authentication and authorization for applications. It simplifies user management while supporting modern security protocols such as OAuth2, OpenID Connect, and SAML. With its rich feature set and community support, Keycloak is a preferred choice for developers and administrators alike.
Key Features of Keycloak
1. Single Sign-On (SSO)
Keycloak enables users to log in once and gain access to multiple applications without re-authenticating. This enhances user experience and reduces friction.
2. Social Login Integration
With out-of-the-box support for social login providers like Google, Facebook, and Twitter, Keycloak makes it easy to offer social authentication for applications.
3. Fine-Grained Access Control
Keycloak allows administrators to define roles, permissions, and policies to control access to resources. This ensures that users only access what they’re authorized to.
4. User Federation
Keycloak supports integrating with existing user directories like LDAP and Active Directory. This simplifies the adoption process by leveraging existing user bases.
5. Extensibility
Its plugin-based architecture allows customization to fit unique business requirements. From custom themes to additional authentication mechanisms, the possibilities are vast.
6. Multi-Factor Authentication (MFA)
For enhanced security, Keycloak supports MFA, adding an extra layer of protection to user accounts.
Why Choose Keycloak for IAM?
Open Source Advantage: Being open source, Keycloak eliminates vendor lock-in and offers complete transparency.
Scalability: It handles millions of users and adapts to growing business needs.
Developer-Friendly: Its RESTful APIs and SDKs streamline integration into existing applications.
Active Community: Keycloak’s active community ensures continuous updates, bug fixes, and feature enhancements.
Real-World Use Cases
E-Commerce Platforms: Managing customer accounts, providing social logins, and enabling secure payments.
Enterprise Applications: Centralized authentication for internal tools and systems.
Educational Portals: Facilitating SSO for students and staff across multiple applications.
Cloud and DevOps: Securing APIs and managing developer access in CI/CD pipelines.
Getting Started with Keycloak
Installation: Keycloak can be deployed on-premises or in the cloud. It supports Docker and Kubernetes for easy containerized deployment.
Configuration: After installation, configure realms, clients, roles, and users to set up your IAM environment.
Integration: Use Keycloak’s adapters or APIs to integrate it with your applications.
A Glimpse into the Future
As organizations embrace digital transformation, IAM solutions like Keycloak are becoming indispensable. With its commitment to security, scalability, and community-driven innovation, Keycloak is set to remain at the forefront of IAM solutions.
Final Thoughts
Keycloak is not just an IAM tool; it’s a strategic asset that empowers businesses to secure their digital ecosystem. By simplifying user authentication and access management, it helps organizations focus on what truly matters: delivering value to their customers.
So, whether you’re a developer building a new application or an administrator managing enterprise security, Keycloak is a tool worth exploring. Its features, flexibility, and community support make it a standout choice in the crowded IAM space.
For more information visit : https://www.hawkstack.com/
0 notes
Text
Microservices Programming

Microservices architecture is revolutionizing the way modern software is built. Instead of a single monolithic application, microservices break down functionality into small, independent services that communicate over a network. This approach brings flexibility, scalability, and easier maintenance. In this post, we’ll explore the core concepts of microservices and how to start programming with them.
What Are Microservices?
Microservices are a software development technique where an application is composed of loosely coupled, independently deployable services. Each service focuses on a specific business capability and communicates with others through lightweight APIs, usually over HTTP or messaging queues.
Why Use Microservices?
Scalability: Scale services independently based on load.
Flexibility: Use different languages or technologies for different services.
Faster Development: Small teams can build, test, and deploy services independently.
Resilience: Failure in one service doesn't crash the entire system.
Better Maintainability: Easier to manage, update, and test smaller codebases.
Key Components of Microservices Architecture
Services: Individual, self-contained units with specific functionality.
API Gateway: Central access point that routes requests to appropriate services.
Service Discovery: Automatically locates services within the system (e.g., Eureka, Consul).
Load Balancing: Distributes incoming traffic across instances (e.g., Nginx, HAProxy).
Containerization: Deploy services in isolated environments (e.g., Docker, Kubernetes).
Messaging Systems: Allow asynchronous communication (e.g., RabbitMQ, Apache Kafka).
Popular Tools and Frameworks
Spring Boot + Spring Cloud (Java): Full-stack support for microservices.
Express.js (Node.js): Lightweight framework for building RESTful services.
FastAPI (Python): High-performance framework ideal for microservices.
Docker: Container platform for packaging and running services.
Kubernetes: Orchestrates and manages containerized microservices.
Example: A Simple Microservices Architecture
User Service: Manages user registration and authentication.
Product Service: Handles product listings and inventory.
Order Service: Manages order placement and status.
Each service runs on its own server or container, communicates through REST APIs, and has its own database to avoid tight coupling.
Best Practices for Microservices Programming
Keep services small and focused on a single responsibility.
Use versioned APIs to ensure backward compatibility.
Centralize logging and monitoring using tools like ELK Stack or Prometheus + Grafana.
Secure your APIs using tokens (JWT, OAuth2).
Automate deployments and CI/CD pipelines with tools like Jenkins, GitHub Actions, or GitLab CI.
Avoid shared databases between services — use event-driven architecture for coordination.
Challenges in Microservices
Managing communication and data consistency across services.
Increased complexity in deployment and monitoring.
Ensuring security between service endpoints.
Conclusion
Microservices programming is a powerful approach to building modern, scalable applications. While it introduces architectural complexity, the benefits in flexibility, deployment, and team autonomy make it an ideal choice for many large-scale projects. With the right tools and design patterns, you can unlock the full potential of microservices for your applications.
0 notes
Text
API Integration Services
Jellyfish Technologies is one of the most advanced companies in developing digital products and software, with more than 150 experts and over 13 years of experience. We have completed over 4,000 web, mobile, and software projects.
We are dealing with custom API integration services for iOS, Android, and web applications, using a variety of authentication methods, including OAuth, OAuth1, OAuth2, JSON Web Token (JWT), and SAML. At Jellyfish Technologies, we are on the focus of modernization towards developing the most efficient digital ecosystems possible. From consulting to development, Jellyfish Technologies provides full-scale services offered by one of the best API development companies around to ensure that your project succeeds, consulting, and more, to drive your project’s success.
0 notes