#textformatting
Explore tagged Tumblr posts
Visit Tumblr Blog
Explore Tumblr blogs with no restrictions, modern design and the best experience.
Last Seen Tumblr Blogs


Fun Fact
Women make up for the other 50% of Tumblr’s audience.
Text
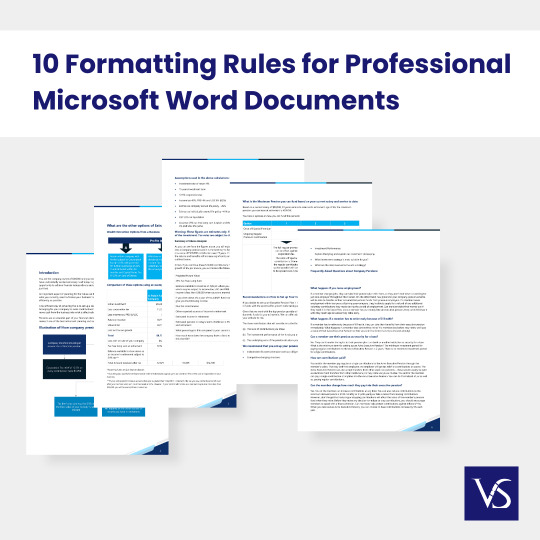
Key Differences for Enhanced Document Clarity
Document Formatting Services: Q & A Tutorial
1. What are the document format rules?
Document format rules typically include using clear headings and subheadings, consistent font styles and sizes, proper margins, and appropriate line spacing. Ensure correct grammar and punctuation, use bullet points or numbered lists for clarity, and include a title page if necessary. Always follow any specific guidelines provided for the document, such as citation styles or required sections.
2. What are the 4 types of file formatting?
The four common types of file formatting include: 1. **Text Files** (e.g., .txt, .csv): Plain text without special formatting. 2. **Document Files** (e.g., .docx, .pdf): Rich text with formatting options. 3. **Image Files** (e.g., .jpg, .png): Visual data with various compression methods. 4. **Audio/Video Files** (e.g., .mp3, .mp4): Multimedia formats for sound and video content.
3. What is font formatting?
Font formatting refers to the visual appearance and style of text in a document. This includes attributes like font type (e.g., Arial, Times New Roman), size, color, boldness, italics, underline, and alignment. It enhances readability and helps convey tone or emphasis in written content. Proper font formatting is essential in both print and digital media.
4. How many types of text formatting are in MS Word?
In MS Word, there are several types of text formatting options, including bold, italic, underline, strikethrough, font size, font color, highlighting, text alignment (left, center, right, justified), bullet points, numbering, and indentation. Additionally, you can apply styles, change cases, and add text effects. Overall, there are numerous formatting options to customize text appearance.
5. What is the difference between formatting and editing toolbar?
The formatting toolbar primarily includes options for changing the appearance of text, such as font style, size, color, and alignment. In contrast, the editing toolbar typically contains tools for actions like cut, copy, paste, undo, and redo, focusing on modifying the content itself rather than its presentation. Both toolbars enhance document creation but serve different purposes.
Visit: VS Website See: VS Portfolio
0 notes
Text
🔠 Easily Convert Text Case with the Case Converter.
Need a simple tool to switch text between upper case, lower case, or title case? Use our Case Converter to quickly reformat your text for any purpose. Perfect for writers, developers, and anyone working with text. Try the Case Converter now https://seotools.report/tools/case-converter
0 notes
Text
Perfect Your Content with the 'Remove Line Breaks' Tool
Clean up your text and achieve flawless formatting with our 'Remove Line Breaks' tool. It's perfect for anyone looking to improve the readability and appearance of their content. Visit OnlineToolsArena and try it out today
0 notes
Text
✨ Want to add a touch of style to your text on iPhone? Let's italicize! ✨
Here’s how you can do it:
Messages App: Highlight the text you want to italicize, tap "B/I/U" in the pop-up menu, and select "Italic."
Notes App: Similar to Messages, highlight the text, tap "B/I/U," and choose "Italic."
Mail App: Highlight the text, tap the "Aa" icon, then select "Italic."
📱 Tip: This works for most Apple apps that support text formatting!
Have you used this feature? Share your favorite tips below! 👇
#iPhoneTips#TextStyling#AppleHacks#MobileTech#iOSFeatures#SmartphoneTips#TextFormatting#TechTricks#ProductivityHacks#TechSavvy
0 notes
Text
🌟🗣️ Text in business presentations: CRUCIAL for success! 🌟💼

1️⃣ Keep it concise: 20-40 words per slide! 📝 Avoid duplicating oral comments while presenting. Exception: self-familiarization presentations with more text for clients. 🗣️💬
2️⃣ Organize hierarchy: Create a clear structure (header, sub-header, text) throughout your entire presentation. 📑👌
3️⃣ Font finesse: Avoid unjustified font experiments. Stick to what works! 🚫🎨
4️⃣ Mix & Match fonts: Achieve visual harmony! Use various typefaces for different purposes and attention management. 🎭👀
Ready to become a presentation guru? 😎 Puzzlax is your go-to! Check out our website, download the app, and onboard with us now! 🌐💼🚀
#presentation#businesspartner#textformatting#hierarchy#fonts#slides#puzzlax#app#businesssuccess#communication#visualharmony#presentationguru#businessskills#communicationtips#professional#businessetiquette#powerpoint#success#businessgrowth#onboarding#downloadapp
0 notes
Text
Text Format In Online Notepad
Generally, Notepad is pre-installed for every user who can use a Laptop or PC. In the old times, users could prepare notes or save content in Notepad. Every user mainly uses it to keep documents easily; whenever they need it, they can easily open it. But in Notepad, it is not saving in PDF format, and you can't change the font style of any text or even can't highlight any text. So, if any word or line is essential, it slips from their mind, and they can't remember it again. A tool is launched with advanced features to solve this problem, which has elements of changing text format according to you. Have you heard about Online Notepad? Do you ever use Online Notepad? Online Notepad is just like a Notepad, where you can write notes or publish content. It is an advanced approach to previous Notepad to up the use of Notepad again.
WHAT IS ONLINE NOTEPAD?
Online Notepad is an indispensable tool for individuals and professionals; it is an easily accessible platform for making notes and showing your ideas to every audience. This tool is known for its simplicity and ease of use for everyone to publish their content online. It has basic text format options like Bold, Italic, and underline. We will discuss the importance of online Notepad, its features, and how they enhance the usability of these tools and their applications. Meanwhile, it is the best application tool where simple text format options like bold, italic, and underlined bridge the gap between digital and traditional note-making ability. Here, we can discuss its text format options, allowing users to make notes effectively and efficiently.
BOLD TEXT: - The ability of text format as bold is a fundamental feature to highlight your important details or any headings in your notes. Through this, it can help users who read your messages. It enables the users to understand the letters and quickly scan your content. Generally, your content is always attracting your users through the headlines, and if the headlines are in bold text, it impacts visual communication.
ITALIC: - The primary purpose of using italics in your content is to make the plain text more expressive. It is mainly used for conveying nuances of your content and indicating some message through your single words. Usually, no one can read the plain text because they can assume that no vital message is conveyed through your content published. If some text is in the form of italics and bold, then they can read it.
UNDERLINE: - For creating a hyperlink in your text or any main keyword you want to link with the website, that word is underlined so users can understand it as a clickable link. To highlight your text, you can accentuate it so users can read it with more focus.
ENHANCEMENT OF USING TEXT FORMAT OPTIONS:-
Including these text format options in your plain text makes it more versatile and good-looking notes. Here some significant points which are as:-
Improved Reading Ability: - Bold, Italic and Underline text help the users to differentiate the headings, titles, sub-headings, paragraphs, and body text, which make a massive impact on the readability of notes by the users.
Clarity: - Using italics and underlining in your text, you can easily describe which lines are more important and which are less critical. You can clarify your content and draw attention in notes to attract users towards your published content.
Emphasis: - These text format options allow the users to emphasize critical information and are less likely to be overlooked. It can draw users' attention towards your content to tell about the important message which is helpful for them.
Organization: By applying formatting to crucial points or categories, users can better organize their notes, making it easier to revisit and reference them later.
Website
0 notes
Text
Podcast-Produktion und Prozessoptimierung durch KI
Die Podcast-Branche hat einen dramatischen Popularitätsanstieg erlebt und damit geht auch der Bedarf an effizienteren Produktionsprozessen einher. Die Integration künstlicher Intelligenz (KI) in die Podcast-Produktion revolutioniert die Arbeitsweise von Inhaltserstellern. Von der Verbesserung der Audioqualit��t bis zur Automatisierung mühsamer Aufgaben optimieren KI-gesteuerte Tools die Produktionsabläufe und sparen Zeit und Ressourcen. Digital Media 360 GmbH, ein führendes Unternehmen in der digitalen Medienlandschaft, nutzt KI, um die Podcast-Produktion zu optimieren und sicherzustellen, dass qualitativ hochwertige Inhalte effizient und präzise bereitgestellt werden.
Verbesserung der Audioqualität
Eine der wichtigsten Möglichkeiten, mit denen KI die Podcast Produktion verändert, ist die Audioverbesserung. Fortschrittliche KI-Algorithmen können Hintergrundgeräusche entfernen, Audiopegel ausgleichen und die allgemeine Klangqualität verbessern, ohne dass ein manuelles Eingreifen erforderlich ist. Traditionell erforderte diese Aufgabe stundenlange Bearbeitung durch erfahrene Fachleute. Jetzt kann KI-gesteuerte Software Unvollkommenheiten automatisch erkennen und korrigieren, sodass sich Podcast-Produzenten auf den Inhalt statt auf technische Probleme konzentrieren können.
Automatisierte Transkriptionen
Podcast-Transkripte sind für SEO, Zugänglichkeit und Publikumsbindung unerlässlich. Das manuelle Transkribieren von Episoden kann jedoch zeitaufwändig sein. KI-gestützte Transkriptionstools haben für Podcast-Produzenten eine bahnbrechende Entwicklung durchlaufen. Diese Tools können ganze Episoden innerhalb von Minuten transkribieren und bieten ein genaues und durchsuchbares Textformat, das problemlos geteilt oder in andere Inhaltsformen wie Blogs oder Social-Media-Beiträge umgewandelt werden kann. Diese Automatisierung gibt den Erstellern wertvolle Zeit, sich auf die Inhaltsstrategie zu konzentrieren.
KI-gestützte Bearbeitung
Die Fähigkeit der KI, die Inhaltsstruktur zu analysieren, hat die Entwicklung von Tools ermöglicht, die bei der Bearbeitung von Podcasts helfen. KI kann jetzt irrelevante Segmente, sich wiederholende Phrasen oder Momente erkennen, in denen die Audioqualität nachlässt, und Bearbeitungen vorschlagen, um das Hörerlebnis zu verbessern. Darüber hinaus kann KI bei der Inhaltskuratierung helfen, indem sie automatisch Soundbites für Werbeclips auswählt und so den Prozess weiter rationalisiert.
Optimierung der Inhaltsstrategie mit KI-Analyse
KI-gestützte Analysetools können Podcast-Produzenten tiefere Einblicke in das Hörerverhalten bieten. Durch die Analyse von Daten wie Publikumsengagement, Bindungsraten und bevorzugten Themen kann KI den Produzenten helfen, Inhalte anzupassen, die bei ihrem Publikum Anklang finden. Die Digital Media 360 GmbH hat KI-basierte Analysen in ihre prozessoptimierung durch ki integriert, um sicherzustellen, dass Podcasts ihre Zielgruppe effektiv erreichen und sich auf der Grundlage von Echtzeit-Feedback kontinuierlich verbessern.
Fazit
Die Rolle der KI in der Podcast-Produktion verändert die Branche, indem sie Prozesse automatisiert, die Audioqualität verbessert und umsetzbare Erkenntnisse liefert. Die Digital Media 360 GmbH steht an der Spitze dieser Transformation und nutzt KI, um die Effizienz der Podcast-Produktion zu steigern und gleichzeitig die Erstellung erstklassiger Inhalte zu gewährleisten. Da sich die KI weiterentwickelt, sieht die Zukunft des Podcasting rosiger und erfolgsorientierter aus.
0 notes
Text
Topp Professionell Korrekturläsning I Sverige: Aardvark Translations
Vi erbjuder professionell korrekturläsning i sverige för att säkerställa att ditt innehåll är utmärkt. Vårt team av erfarna korrekturläsare arbetar med att ta bort skiljetecken, grammatik och stavfel för att se till att din text är tydlig och fri från fel. Vi tillhandahåller pålitliga och noggranna korrekturtjänster för olika textformat, inklusive företag och utbildning. Lita på Aardvark Translations för att förbättra kvaliteten på ditt skrivande och det läsbara innehållet. För ytterligare information om våra expertkorrekturtjänster, besök vår webbplats.
0 notes
Text
Pros:
viel Inspiration
Tag-System (zum Suchen/Sortieren)
Ideen sortieren
mehr Sichtbarkeit für kleinere Künstler
Feedback/Austausch mit anderen kreativen Menschen
Möglichkeit, Blog privat zu machen
Vielfalt verschiedener Medien (Audio/Video/Bilder/Links/Text)
meistens Quellen vorhanden
kreative Visualisierungsmöglichkeiten (Textformat/Bildanordnung)
0 notes
Text
🌟 Introducing Our Case Converter Tool! 🌟
Tired of manually adjusting the letter case of your text? Say goodbye to tedious formatting tasks with our Case Converter tool! 🚀
🔹 Convert text to UPPERCASE, lowercase, Title Case, Sentence case, and more! 🔹 Effortlessly transform the letter case of your text with just a few clicks. 🔹 Enjoy a user-friendly interface for seamless text processing.
Experience the convenience and efficiency of our Case Converter now: Case Converter
Simplify your text formatting journey today! ✨ #CaseConverter #TextFormatting #OnlineToolkits
1 note
·
View note
Text
How to Display a Circular Timer in Flutter?
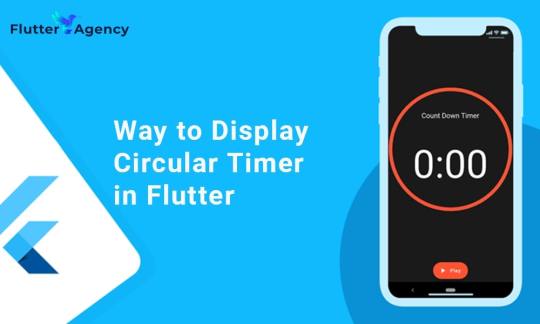
You can make stunning, native-looking apps for Android and iOS using the popular cross-platform Flutter mobile app programming framework. Circular timer creation is just one of the numerous things you can accomplish with Flutter. A countdown clock or a stopwatch are two examples of circular timers that are excellent for displaying the amount of time left on a job.
In Flutter, there are some different methods to build a circular timer. This article will teach you how to design a circular clock in Flutter. In addition, you will know how to change the timer’s look. You can learn more about displaying a circular timer in Flutter by reading the tutorial below. Also you can read this blog from our official website Circular Timer in Flutter.
Developing a Custom Circular Timer in Flutter
There are several methods in Flutter for displaying a circular timer outside the circular_countdown_timer package. As an illustration, you might make a circular progress bar using the RadialGauge widget. The circular_countdown_timer box, on the other hand, is a more specialized widget made just for showing countdown timers. You may make a customized circular timer by following the instructions in this article after installing Flutter:
import 'package:flutter/material.dart';
import 'package:circular_countdown_timer/circular_countdown_timer.dart';
void main() {
runApp(const MyApp());
}
class MyApp extends StatelessWidget {
const MyApp({super.key});
@override
Widget build(BuildContext context) {
return MaterialApp(
title: 'Flutter Demo',
theme: ThemeData(
primarySwatch: Colors.blue,
),
home: const HomePage(),
debugShowCheckedModeBanner: false,
);
}
}
class HomePage extends StatefulWidget {
const HomePage({super.key});
@override
State<homepage> createState() => _HomePageState();
}
class _HomePageState extends State<homepage> {
final int _duration = 10;
final CountDownController _controller = CountDownController();
@override
Widget build(BuildContext context) {
return Scaffold(
appBar: AppBar(
title: const Text("Circular Counter with countdown timer"),
),
body: Center(
child: CircularCountDownTimer(
// Countdown duration in Seconds.
duration: _duration,
// Countdown initial elapsed Duration in Seconds.
initialDuration: 0,
// Controls (i.e., Start, Pause, Resume, Restart) the Countdown Timer.
controller: _controller,
// Width of the Countdown Widget.
width: MediaQuery.of(context).size.width / 2,
// Height of the Countdown Widget.
height: MediaQuery.of(context).size.height / 2,
// Ring Color for Countdown Widget.
ringColor: Colors.blue,
// Ring Gradient for Countdown Widget.
ringGradient: null,
// Filling Color for Countdown Widget.
fillColor: Colors.red,
// Filling Gradient for Countdown Widget.
fillGradient: null,
// Background Color for Countdown Widget.
backgroundColor: Colors.amber,
// Background Gradient for Countdown Widget.
backgroundGradient: null,
// Border Thickness of the Countdown Ring.
strokeWidth: 20.0,
// Begin and end contours with a flat edge and no extension.
strokeCap: StrokeCap.round,
// Text Style for Countdown Text.
textStyle: const TextStyle(
fontSize: 33.0,
color: Colors.black,
fontWeight: FontWeight.bold,
),
// Format for the Countdown Text.
textFormat: CountdownTextFormat.S,
// Handles Countdown Timer (true for Reverse Countdown (max to 0), false for Forward Countdown (0 to max)).
isReverse: true,
// Handles Animation Direction (true for Reverse Animation, false for Forward Animation).
isReverseAnimation: true,
// Handles visibility of the Countdown Text.
isTimerTextShown: true,
// Handles the timer start.
autoStart: true,
// This Callback will execute when the Countdown Starts.
onStart: () {
// Here, do whatever you want
debugPrint('Started Countdown');
},
// This Callback will execute when the Countdown Ends.
onComplete: () {
// Here, do whatever you want
debugPrint('Ended Countdown');
},
// This Callback will execute when the Countdown Changes.
onChange: (String timeStamp) {
// Here, do whatever you want
debugPrint('Changed Countdown $timeStamp');
},
),
),
);
}
}
</homepage></homepage>
Function to format the text.
Allows you to format the current duration to any String.
It also provides the default function in case you want to format specific moments as in reverse when reaching ‘0’ show ‘GO,’ and for the rest of the instances, follow the default behavior.
Inside the CircularCountDownTimer we have to add these below lines:
timeFormatterFunction: (defaultFormatterFunction, duration) {
if (duration.inSeconds == 0) {
// only format for '0'
return "Start";
} else {
// other durations by it's default format
return Function.apply(defaultFormatterFunction, [duration]);
}
},
Add inside the scaffold widget to control the counter
floatingActionButton: Row(
mainAxisAlignment: MainAxisAlignment.center,
children: [
const SizedBox(
width: 30,
),
_button(
title: "Start",
onPressed: () => _controller.start(),
),
const SizedBox(
width: 10,
),
_button(
title: "Pause",
onPressed: () => _controller.pause(),
),
const SizedBox(
width: 10,
),
_button(
title: "Resume",
onPressed: () => _controller.resume(),
),
const SizedBox(
width: 10,
),
_button(
title: "Restart",
onPressed: () => _controller.restart(duration: _duration),
),
],
),
Function return button
Widget _button({required String title, VoidCallback? onPressed}) {
return Expanded(
child: ElevatedButton(
style: ButtonStyle(
backgroundColor: MaterialStateProperty.all(Colors.purple),
),
onPressed: onPressed,
child: Text(
title,
style: const TextStyle(color: Colors.white),
),
),
);
}
Example
import 'package:flutter/material.dart';
import 'package:circular_countdown_timer/circular_countdown_timer.dart';
void main() {
runApp(const MyApp());
}
class MyApp extends StatelessWidget {
const MyApp({super.key});
@override
Widget build(BuildContext context) {
return MaterialApp(
title: 'Flutter Demo',
theme: ThemeData(
primarySwatch: Colors.blue,
),
home: const HomePage(),
debugShowCheckedModeBanner: false,
);
}
}
class HomePage extends StatefulWidget {
const HomePage({super.key});
@override
State<homepage> createState() => _HomePageState();
}
class _HomePageState extends State<homepage> {
final int _duration = 10;
final CountDownController _controller = CountDownController();
@override
Widget build(BuildContext context) {
return Scaffold(
appBar: AppBar(
title: const Text("Circular Counter with countdown timer"),
),
body: Center(
child: CircularCountDownTimer(
timeFormatterFunction: (defaultFormatterFunction, duration) {
if (duration.inSeconds == 0) {
// only format for '0'
return "Start";
} else {
// other durations by it's default format
return Function.apply(defaultFormatterFunction, [duration]);
}
},
// Countdown duration in Seconds.
duration: _duration,
// Countdown initial elapsed Duration in Seconds.
initialDuration: 0,
// Controls (i.e., Start, Pause, Resume, Restart) the Countdown Timer.
controller: _controller,
// Width of the Countdown Widget.
width: MediaQuery.of(context).size.width / 2,
// Height of the Countdown Widget.
height: MediaQuery.of(context).size.height / 2,
// Ring Color for Countdown Widget.
ringColor: Colors.blue,
// Ring Gradient for Countdown Widget.
ringGradient: null,
// Filling Color for Countdown Widget.
fillColor: Colors.red,
// Filling Gradient for Countdown Widget.
fillGradient: null,
// Background Color for Countdown Widget.
backgroundColor: Colors.amber,
// Background Gradient for Countdown Widget.
backgroundGradient: null,
// Border Thickness of the Countdown Ring.
strokeWidth: 20.0,
// Begin and end contours with a flat edge and no extension.
strokeCap: StrokeCap.round,
// Text Style for Countdown Text.
textStyle: const TextStyle(
fontSize: 33.0,
color: Colors.black,
fontWeight: FontWeight.bold,
),
// Format for the Countdown Text.
textFormat: CountdownTextFormat.S,
// Handles Countdown Timer (true for Reverse Countdown (max to 0), false for Forward Countdown (0 to max)).
isReverse: true,
// Handles Animation Direction (true for Reverse Animation, false for Forward Animation).
isReverseAnimation: true,
// Handles visibility of the Countdown Text.
isTimerTextShown: true,
// Handles the timer start.
autoStart: true,
// This Callback will execute when the Countdown Starts.
onStart: () {
// Here, do whatever you want
debugPrint('Started Countdown');
},
// This Callback will execute when the Countdown Ends.
onComplete: () {
// Here, do whatever you want
debugPrint('Ended Countdown');
},
// This Callback will execute when the Countdown Changes.
onChange: (String timeStamp) {
// Here, do whatever you want
debugPrint('Changed Countdown $timeStamp');
},
),
),
floatingActionButton: Row(
mainAxisAlignment: MainAxisAlignment.center,
children: [
const SizedBox(
width: 30,
),
_button(
title: "Start",
onPressed: () => _controller.start(),
),
const SizedBox(
width: 10,
),
_button(
title: "Pause",
onPressed: () => _controller.pause(),
),
const SizedBox(
width: 10,
),
_button(
title: "Resume",
onPressed: () => _controller.resume(),
),
const SizedBox(
width: 10,
),
_button(
title: "Restart",
onPressed: () => _controller.restart(duration: _duration),
),
],
),
);
}
Widget _button({required String title, VoidCallback? onPressed}) {
return Expanded(
child: ElevatedButton(
style: ButtonStyle(
backgroundColor: MaterialStateProperty.all(Colors.purple),
),
onPressed: onPressed,
child: Text(
title,
style: const TextStyle(color: Colors.white),
),
),
);
}
}
</homepage></homepage>
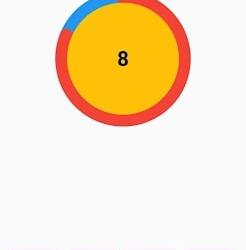
Output
Why Should You Display a Circular Timer in Flutter?
You can choose to show a circular timer in Flutter for various reasons. Here are some of the most typical causes:
1. To start the countdown to an upcoming event. The most typical application for circular timers is this. They help count down to the beginning of a presentation, the end of a timer, or any other event you wish to keep track of.
2. To provide user feedback. The user can receive feedback about the passing of time through circular timers. This is advantageous when performing duties like preparing meals or watching for a bus.
2. For a visual component for your app. Circular timers may provide an optical element to your app that will increase its aesthetic appeal and make it more engaging.
Hire Flutter developer to create a circular timer. It is an excellent alternative if you are searching for a way to show the passing of time in your Flutter project. They are versatile, easy to use, and serve several functions.
Conclusion
The article has shown how to display a circular timer in Flutter. First, you will set up the widget to show a circular countdown timer from the circular_countdown_timer package. It can also utilize the widget to exhibit a ten-second countdown timer by creating a simple example. By defining the colors, border width, and text style, the article also provided information on how to alter the timer’s visual look.
Connect with the top Flutter app development company for your project if you want to create mobile apps with the circular timer for your business. But if you’re still unclear and want more information about the Flutter framework, browse our blogs!
Frequently Asked Questions (FAQs)
1. How is a dart timer used?
The timer starts at the given duration and counts down to 0. The given callback function is called when the timer approaches zero. To repeatedly count down the same interval, use a periodic timer. The same rules apply to negative durations as to durations of 0.
2. How can I create a widget with a countdown timer?
Press the addition (+) sign in the top left corner to add a widget. A Countdown widget can be selected. Click Add Widget. Please tap on the widget once it shows on your Home Screen.
3. What does Flutter’s circle indicator mean?
The CircularProgressIndicator widget uses a circle to represent progress. It can be used as a progress indicator for determined and indeterminate work. The value attribute must be left empty or unspecified to create an indeterminate progress indicator in Flutter.
#flutter app development#flutter#hire flutter developers#flutter agency#hire flutter developer#flutter developers#flutter app developers#FlutterTips#FlutterTimer#CircularTimer
0 notes
Text
Converting Google Slides: Simplifying Format Changes for Effective Sharing
High-quality professional Google Slides design: Expert Q&A Insights
1.How do I duplicate a Google slide?
To duplicate a Google Slide, open your presentation, right-click on the slide you want to duplicate in the left sidebar, and select "Duplicate slide." Alternatively, you can select the slide and press Ctrl + D (Cmd + D on Mac) to create a copy. The duplicated slide will appear right after the original.
2. How do I center text in Google Slides?
To center text in Google Slides, select the text box or highlight the text you want to center. Then, click on the "Align" button in the toolbar (it looks like horizontal lines), and choose "Center." Alternatively, you can use the keyboard shortcut Ctrl+E (Cmd+E on Mac) for quick alignment. Your text will now be centered in the text box.
3. How do I import slides in Google Slides?
To import slides in Google Slides, open your presentation, click on "File," then select "Import slides." Choose the presentation you want to import from, select the slides you wish to add, and click "Import slides." The selected slides will be added to your current presentation.
4. How do I convert a Google slide?
To convert a Google Slide, open your presentation, click on "File," then choose "Download." You can select your preferred format, such as Microsoft PowerPoint (.pptx), PDF Document (.pdf), or others. The file will download to your device in the selected format.
5. How do I layer shapes in Google Slides?
To layer shapes in Google Slides, select the shape you want to move. Right-click and choose "Order" from the menu. You can then select "Bring to front," "Send to back," "Bring forward," or "Send backward" to adjust the shape's position relative to others. You can also use the keyboard shortcuts Ctrl + Up/Down Arrow for quicker adjustments.

Visit: VS Website See: VS Portfolio
0 notes
Video
tumblr
Use Quick Format Painter for Effortless Formatting with PhotoADKing.
•You must have applied a lot of custom effects on any given text box, shape or image •To do the same for another element on the same template, use the shortcut – “Format Painter” •All the effects will be applied to any given element without repeating them all •This eases your editing job like anything & you’re saved from a lot of rework. Kudos!
0 notes
Text
I 👏🏻 HAVE 👏🏻 BEEN 👏🏻 TAKING 👏🏻 MEDS 👏🏻 FOR 👏🏻 AN 👏🏻 ILLNESS 👏🏻 I 👏🏻 DON’T 👏🏻 HAVE 👏🏻 FOR 👏🏻 THREE 👏🏻 YEARS 👏🏻
#it’s confirmed#i don’t have#hypothyroidism#after all#yes i’m salty#i know this textformat is annoying but it had to be done
7 notes
·
View notes
Text
Improved Text Styling with Rich Text Format.
The “Improved Text Styling with Rich Text Format” article delves into the advancements and benefits of utilizing Rich Text Format (RTF) in modern digital communication. RTF is a versatile file format that allows users to apply various text formatting options such as bold, italics, underline, font size,paste online and color to enhance the appearance of text in documents.
The article starts by highlighting the limitations of plain text and early text formatting methods, which lacked the ability to convey visual richness in documents. RTF emerged as a solution, bridging the gap between plain text and complex document formats like HTML. Its simplicity and cross-platform compatibility have made it a popular choice in various applications.

The article explores the advantages of RTF, emphasizing how it enables precise text formatting while remaining accessible to a wide range of software and devices. It discusses how RTF maintains document integrity across different platforms, making it an ideal choice for collaborative work and sharing documents across heterogeneous environments.
Furthermore, the article outlines the various software applications and word processors that support RTF, emphasizing its universal adoption in the digital ecosystem. From word processing software to email clients and web-based text editor, RTF’s prevalence has made it a ubiquitous format for text manipulation.
website
#richtextformat#onlinenotepad#pastenow#textformat#textshareonline#onlinenotepadshare#notepadonlinefree
0 notes
Text
can i get your most favorite ship in form of either a gif, pic or textformat?
#litterally any fandom#spn#superwholock#it can be a crossover#marvel#dcu#mcu#lgbt#maze runner#fictional#realistic#edits are welcome
2 notes
·
View notes