#typesetting guide
Explore tagged Tumblr posts
Visit Tumblr Blog
Explore Tumblr blogs with no restrictions, modern design and the best experience.
Last Seen Tumblr Blogs


Fun Fact
Tumblr has been providing a Korean-language service since 2013.
Text
here’s my guide to making typesets! I use Word to make my typesets, Canva for designs, and Adobe to insert the majority of my designs.
this is a ton of info and I tried to make it as readable as possible, but plz let me know if u need any clarification!
Word: always use the app, the online program doesn't have all of the options needed
paper size: US Letter Borderless
then i flip it landscape, do custom borders, and select book fold. I do 1 inch on top and bottom, .75 in inside, and .5 in outside. i leave the gutter option alone and leave it set to 0. You can choose how large you want your signatures to be (sheets in booklet option on the margins page): I normally do 40 page signatures, but if it's a smaller text you'll want to go smaller for stability. after that, you should have a half page to start your typeset!
Inserting your fic:
the next thing you’ll do is insert your fic; on ao3 click entire story, CTRL A to select all, CTRL C to copy it all. Paste it into your document. word automatically detects the headings, and you should be able to see all your chapters on the left side bar (if you can’t see it, click the page numbers on the bottom left to open the tab).
Formatting:
you can do the next few steps in any order, but we’re going to fix the formatting now. you’ll want to CTRL A everything, pick a font and a font size. I normally use georgia and size 10, going smaller or larger depending on the file size.
To have an indent on every line: CTRL A your work to select all, right click the “normal” style, on the home tab. go to the bottom left, open the drop-down menu, and select “paragraph”. next to special, hit first line. i like to do .3, you can do whatever you want. i then like to make sure the space after is set to 0, the line spacing to single, and then hit save. it should automatically adjust your lines to start at whatever indent you picked.
To fix the spacing: go into the layout tab, and go to spacing. There'll be a before and after option: write in 0, then click enter for both of them. Word is a little bit bitchy so you have to force it do things sometimes. after this you can choose if you want single spacing, or 1.5, or whatever you want.
*sometimes, the way the fic was formatted when posted to ao3 means that even after setting the line spacing to zero, there will still be a space in between each line. this is where you have to troubleshoot. you can either go line by line to delete the excess space (yes, for real. and yes, it's just as awful as it sounds) or, sometimes, not every-time but sometimes, you can highlight the chapter text, go into the home tab on top, click the A with the purple eraser to erase all formatting, and then do all the beginning steps again, and it will get rid of the extra space.*
Now that your format is mostly fixed, delete the archive of our own beta, and anything else you don't want. I normally delete everything up to the title of the work, and leave that for creating my copyright page. Remember to do the same for the end of the work!
Page Breaks and Section Breaks:
the next part is the most crucial. it's how we format both the chapters, but also how we format the headings and footer. this was the part that took me the longest to figure out: it's the page breaks and section breaks. page breaks mark the place where one page ends, and another begins. section breaks will create a new section in your document, so you can break the beginning few pages from the rest of your textblock. This will allow you to insert page numbers that start on page one, instead of at the first page of the document.
I like to go the end of the description, and then click on the first chapter. then I'll add a section break. you can find this in the layout tab, click breaks, and then click section break. so now our section 2 starts with chapter one. After this, add a blank page after the description and before your new section, and then click on the first chapter. (adding a blank page allows for smoother formatting later with headers and footers)
I then go to each chapter, delete the authors notes at the start and end of each chapter, and add a page break at the start of each chapter. i like to use the heading tab on the left to click each chapter, so I know I'm actually starting the new page right where I need to, and other formatting won't delete the page break.
when I create a compilation fic, where I have muitlple fics in one typeset, I use section breaks at the starts of each new fic. this will allow the page numbers to continue, but I can then edit each sectio to change the fic title and the authors name. if you're really fancy, you can do this for each chapter title as well, you would just hve to use a section break for each chapter instead of page break. *Remember to click link to previous to turn it off, so you are only editing that section, and not all the other sections. this can be found in the heading and footer tab on the top, which will automatically open when you click on the heading or footer.*
Adding page numbers, authors name, text name:
To add a page number, I click the footer, which automatically opens the header/footer tab on top. Then, I click page numbers, add page numbers. I turn on different odd and even pages, which is also found in the header/footer tab. you'll have to insert page numbers on both an even and odd age to get them to show up once you click that option. Page one should be an odd page, page two should be an even page. I like to put the page numbers on the outside of the page. Then you'll click format page numbers, click "start at" instead of "continue from previous section", and write in 1. now your typeset starts at 1 on chapter one instead of the start of your document! you'll need to go back and delete the numbers that showed up on the first section, but remember to deselect link to previous before you do that! or you'll end up deleting your page numbers again.
to add text on page numbers:
click into the header/footer again. double click directly on the page number, then start typing. You ca highlight the whole thing to change the font, font seize, etc. I normally do the same size as my text, and I'll either do georgia font or garamond font. I google "copy paste line for text" to get that line dividing the page number from whatever text I have next to it.
to add graphics on an entire work:
you can go into the header or footer, go to the insert tab, and insert a picture. Doing it in the header or footer will ensure it's on every single page that shares that header or footer. I have done this in the past, and find it's cute, but it's also tricky because it needs to be small enough to fit inside the header or footer, and won't really be able to interact with the text because it's different on each page, while the graphic will stay in the same position regardless.
Blank Pages:
you want blank pages at the start and end of your textblock: this is what you'll be glueing your end papers to. even more, you'll want to ensure your total page number is both divisible by 4 (each page of paper will have four pages of your text on it, two to each side) and fits into your signature count. If you're working with a 40 page signature, and you have 420 pages, that's fine. You'll end up having the last signature only be 5 regular pages instead of 10, which is plenty enough to sew. you really just want to try and avoid only having one of two pages in that last signature, as that won't be very strong in holding up your end page, or be very stable in sewing on to your book block.
to make sure they're blank, with no page numbers, you'll want to insert a section break on the last page of text. Deselect link to previous, delete the page numbers and you should be all good!
Printing/Saving:
I'm on a mac. I don't know how you would do this on anything but a mac. let that be a warning lmao. but I will CTRL A everything, ensure it's US Letter Borderless, and then hit print. if you don't tell the document it's the right size, it'll be funky when you go to print because of the margins. to insert images, i click save as pdf. it'll save it in the correct order to print for your signatures, and then I upload it into adobe to edit further. that'll have to be a different post bc this is entirely too long already.
If you want to print directly from here, ensure it's printing the right size, flip on short edge, double sided. and you're all done!
#tips and tricks#typesetting guide#i woke up at 630 am with a purpose and shat this out#it might not even be legible#apologies in advance#how to typeset#bookbinding#fanfiction#ao3 fanfic#typesetting#microsoft word#adobe#canva#signature#resource
122 notes
·
View notes
Text


This finally arrived (curse you international post!) so I can post photos!
I typeset and bound this for leo7066 for the the 2023 Renegade Bindery Bound Book Exchange.
It was tons of fun, especially doing the rips on the cover!
27 notes
·
View notes
Note
Hi! I wanted to know, how do you do typesetting for manga? What sort of tools do you use? I recently discovered a series that has text only translations, and wanted to learn how to typeset so I could combine them with the raw scans.
Hello! It's great to hear that someone else is getting into typesetting! I'm entirely self-taught (didn't even look at guides or anything, I just felt it out and it shows in my earlier work lol) but the nice thing about typesetting is that it's pretty easy to get a feel for. Honestly, Photoshop does most of the technical work; I would say a lot of typesetting has to do with art and visual aesthetics. It's your job to make things look right, and you can get really fancy with it (especially with sound effects).
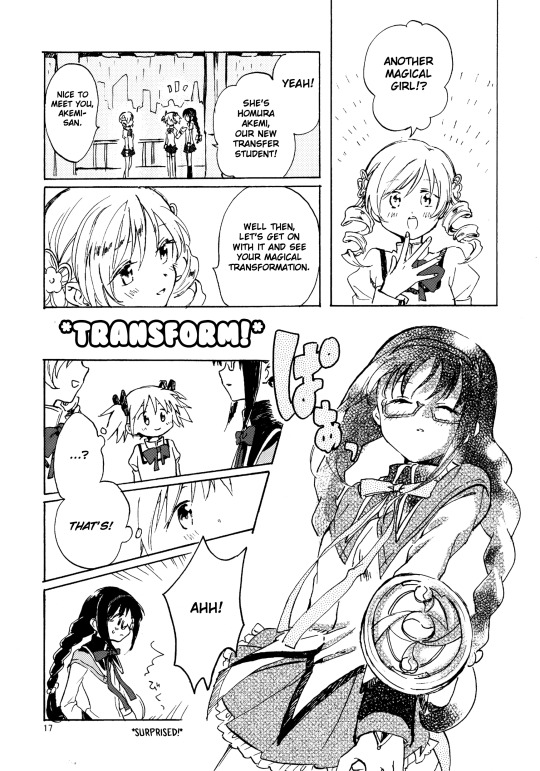
I'm very slowly working on a very long PMMM doujinshi, here's a sample page of my work and what I mean about making things look "right" (in regards to text placement, cleaning bubbles, etc). My personal preference is to break up words as seldom as possible, which is a philosophy even a lot of official typesetters don't share lol (probably because a lot of typesetters value speed over little touches like that).
Anyway, Photoshop will be your best friend! I'll be honest, it's been a hot minute since I pirated my copy and I don't even think the method is valid anymore. From what I understand GenP (Windows) and AdobeZii (Mac) are the new methods of cracking Photoshop. Here are the GenP and AdobeZii subreddits for guidance. Also, if you have a Mac apparently downloading directly from Cmacked is the way to get Photoshop.
Anyway, I really can't get into all the tricks and intricacies I've learned over the years about typesetting. However, I found this AMAZING, comprehensive guide that I would strongly suggest using as a reference. They cover all of the fundamentals as well as a lot of the extras. There's even a few things in here that I wasn't aware of and will definitely be brushing up on!
I've also uploaded my font reference file to Google Docs. All the fonts show up as arial, but I've included screencaps of what they look like. These are all free fonts and can be found/downloaded if you just Google the name. Generally, Wild Words is considered the standard font in manga/doujinshi scanlations (although of course there are variants). It's what I use in all my standard text. All the rest are for sound effects, aside text, emotional text that is meant to be elevated, etc.
I would also suggest at least downloading custom heart and star shapes (or brushes) for Photoshop; there are a bunch of free ones available and those shapes tend to come up in manga speech bubbles a lot.
Oh, and make sure you make a credits page for your releases. Mine are super bare-bones (just white text on a black background for the most part) but you deserve to be credited for your labor! So does whoever translated the manga. Once you get the series up and rolling I would suggest starting to upload to Mangadex (the hub of scanlation where tens of thousands of people can see what you've made). If you need help figuring out how to do that, hit me up again when you get to that point. You'll have to create a group but it's super easy.
Am I forgetting anything else? This is such a near and dear hobby of mine and I feel like there's just so much to cover, lol. Please let me know if you have any other questions!
43 notes
·
View notes
Text


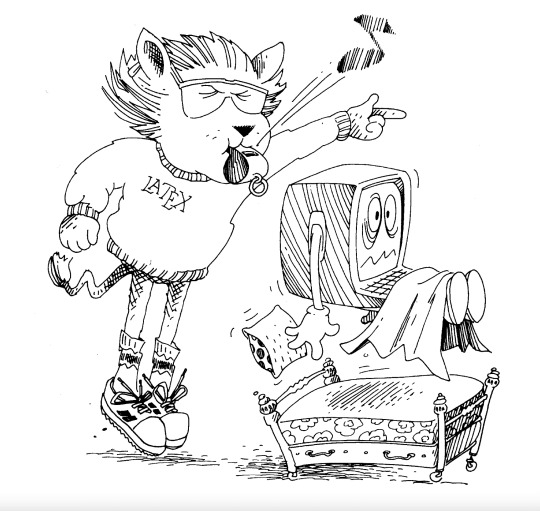
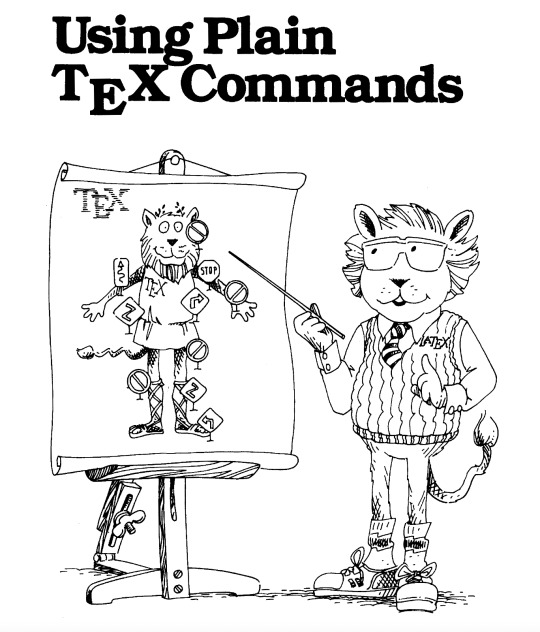


The mascot of LaTeX, the document preparation program, created by Duane Bibby as a companion to the mascot for underlying TeX typesetting system (from LaTeX - User's Guide and Reference Manual)
7K notes
·
View notes
Text
Alright gentlefolks, you know I had to do it, so I present to you @gallusrostromegalus's Family Lore Story About The 1969 Easter Mass Incident aka the Bread Jesus Story because my brain generated an idea weeks ago and I was compelled to bring it to life with a hardcover 2-section pamphlet/booklet (also this was a challenge to try a new book binding style that's not a Bradel yet again:


Scoured the Internet Archive for something pretty I could use in the typesetting and found these gorgeous Mucha illustrated frames (see 4th image for name of the book), and yes I picked the one that depicted the crucifixion scene, haha.
And then the printer bugged out on me while I was reprinting a fixed version that was supposed to be black and white (the fucking Magenta ink tank is clogged clogged) so I decided to lean into the green and got out the jewel toned cardstock and the fancy American scrapbook prints (ouch import prices but worth it). The spine is just black bookcloth I made.
A couple of process and practice photos:


So it turns out when the conservation style 2-section pamphlet guide says you need to sew onto a strip of bookcloth hinge, it wasn't a suggestion because aw fuck, it was structurally important to not have a loose connection despite how much pulling and tightening you do (as seen in final photo between the practice typoed sections and the actual set). Lesson learned. Also, I definitely sewed on the bookcloth hinge backasswards but with enough PVA glue, everything will hold lol.
Typesetting this was fun though. Lots of evil cackling.
#salty teeth bookbinding#bookbinding#fanbinding#gallusrostromegalus#bread jesus story#the 1969 easter mass incident
1K notes
·
View notes
Text

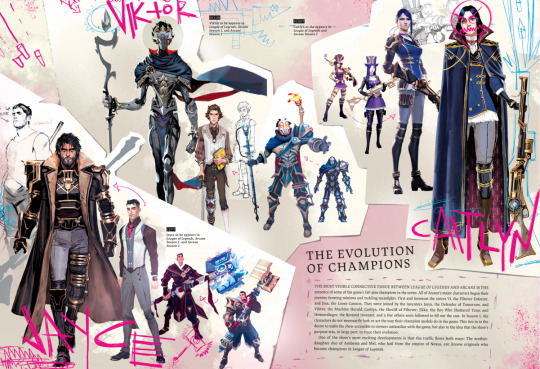
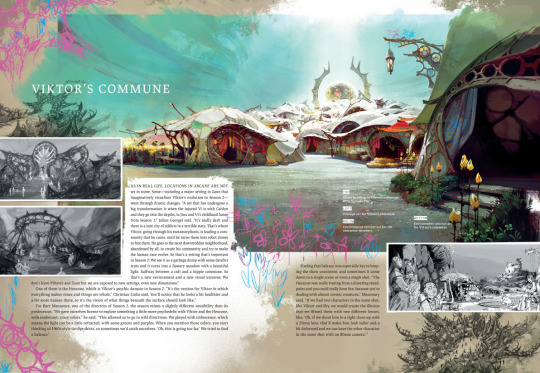

“The Art and Making of Arcane: League of Legends” 🎨🎨🎨🎨 Book Review Under the Cut
⋆。°✩*ੈ✶⋆.˚✩‧₊˚⋆˚☆˖°⋆。° ✮˖ ࣪ ⊹⋆.˚⋆˙⟡⋆✴︎˚。⋆⊹.˚⟡ ݁₊˚⊹⋆☆˖°
If you enjoy my work, please consider supporting me on Ko-fi 👛🫙✨🖤 Thank you! 🥰
Hi All! 😊 As I have amassed loads of Art Books throughout my degree and in my work as an illustrator, I thought I could do some reviews so those of you who are just now embarking on your art journeys and wondering whether something is worth spending money on, can make an informed decision about what part of your creative development you want to put your money towards. I’m thinking of structuring the reviews in five key areas, with books earning a palette for each area they score against, with a total of five palettes being the max, and a brush being awarded in areas where a book can only score half a point. As someone from a working-class background who is also neurodivergent, I’m especially mindful how these things can impact the way in which we access information and new knowledge. Of course, if you have any suggestions on what else should be included, please let me know and I’ll be happy to consider this in future too. 😊
Now! Off to the main bit...
Is the book Useful? 🎨
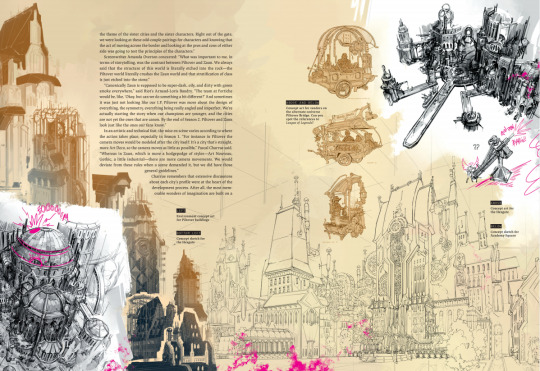
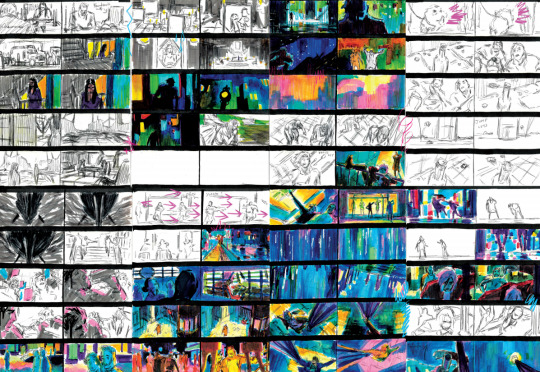
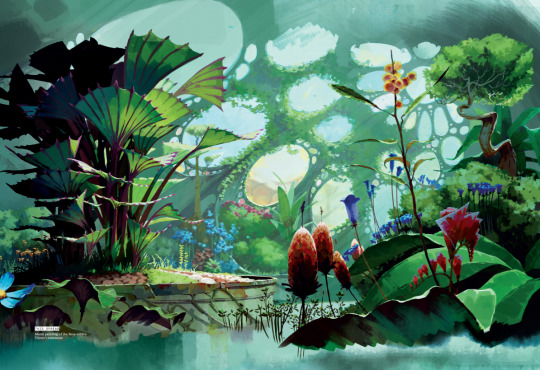
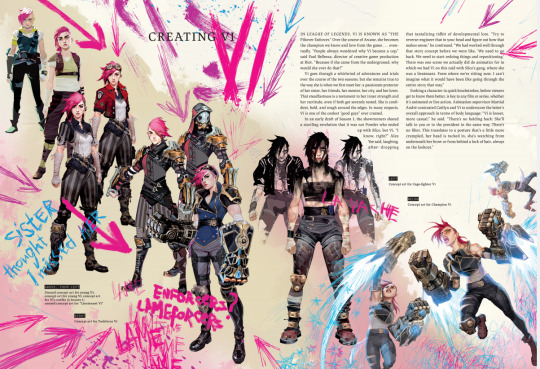
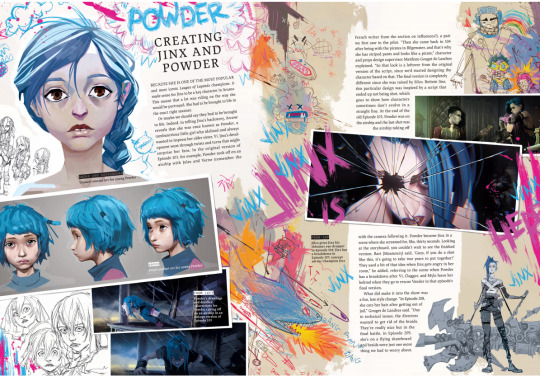
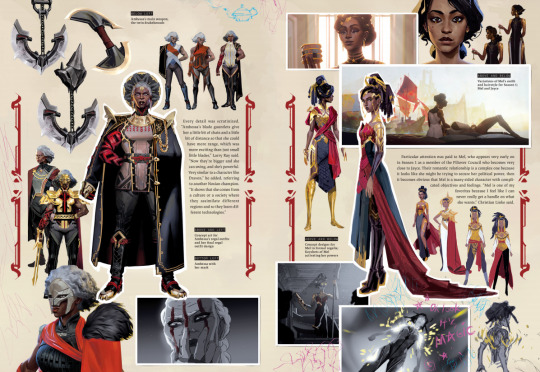
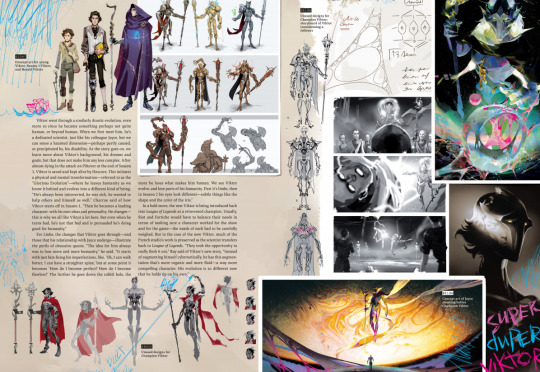
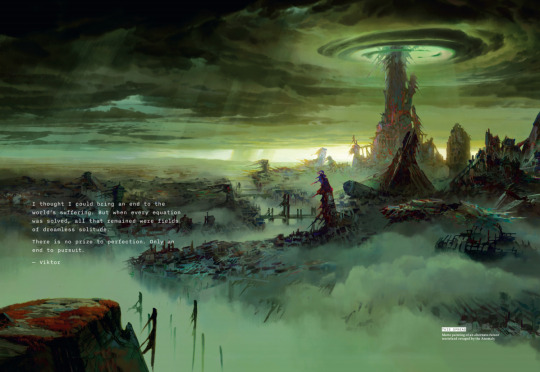
I think this would of interest not only to fans of the game and series alike, but also less experienced artists who want to learn about the motivation, inspirations, ideas, and thought processes behind the storytelling, characters and plotlines. Alex and Chris (the Creators) talk about the history and background of how it came to be, how the right group and studio of people were found to bring it together, and how the story and visuals were built from the smallest details to the major production hurdles. There are the back scenes of the storyboarding and character designs, with frameworks and the timeline between the layouts of the game vs the show. The book also goes down into details on the music, lyrics, color schemes, speeds of animation, backgrounds and the in-depth world building of Arcane. It pays attention to the visual and personal development of the central characters, their set bases and their props. Given all of this, I would say – Yes. It is a very useful source and guide on master adaptation, for those already interested in the game as well as those who have just come into its world now, brought in by the art of the show before they got caught in the story.
Is the book Engaging? 🎨
The book design has been planned thoroughly, and the content is very well paced. There is good overlay between photographs, illustrations, game graphics and show scenes alongside the text and other visuals. The design of the book is beautifully done, with phenomenal coloring, and good spacing between the texts and images. As someone who struggles with big chunks of text, and a very temperamental attention span, the way that the chapters and sub-sections of the book are broken up, helped me quite a lot in managing to keep my focus and my mind engaged at one page at a time, without feeling the need to put it down indefinitely or jump ahead and move on to the next bit before I was done. Therefore, I would say – Yes. It is manageable, digestible, and entertaining, which makes it a joy to engage with, and even more so because it can be done so easily.
Is the book Accessible? 🖌️
There might be some pages where people who are easily visually overstimulated might struggle to keep with the text, as the graphics fill the sheet and overlay each other quite strongly. However, if you are someone who prefers the strong visuals of a comic book or a graphic novel, then this might not be an issue for you at all. Overall, the blocks of text come in small chunks and are set in narrow columns with a max of 15 words to a line at its longest (on average up to 10), which makes the text easier to follow. Though the typesetting of the book is primarily in serif fonts, and on some pages the text blocks are slanted to fit the visuals’ layout better. I have an advantage that I have a digital copy and can easily zoom into the text, though if you had the physical copy of the book (judging by the format size of 23.5 x 3 x 32.4cm) there might be some pages where you struggle with the smaller lines. From what I have been able to find out, the standard hardcover edition weighs approx. 800gr, which isn’t very light to carry or hold up with one hand, especially considering a thick rectangle is less manageable than a single bag of sugar or bottle of water for example. In terms of language, it is written in plain English (in EN speaking countries) and even though I am not a native English speaker, there were no overcomplicated structures or words I was unfamiliar with at any time. So overall, I would say Yes and No. It is up to you to decide whether any of the above is a deal breaker regarding accessibility, but if it is in the physical aspects, I would advise in looking for a digital copy alike myself as well.
Is the book Affordable? 🖌️
Well. When I was looking for a copy, unfortunately there were no paperbacks available, and the only hardbacks were second hand varying in price point from £40 - £80 GBP. Which is about $50 – 110 USD, or €45 - 95 EUR. I also could not find any free digital copies, so my only option was to buy the book on Kindle for £14, or approx. $18 / €16. Given that when I was a student, I used to live on £1 a day (my family is poor), I think that up to £80 for a single art book is a high price to pay, especially for a young person who isn’t in full time employment. But even though I am a working adult now, I still wouldn’t pay this for the book given that the actual cost was £40 before it went out of stock, and the price has been inflated solely because the book isn’t physically available anymore. Due to this, and because it is the right thing to do, before making a purchase, I would adamantly encourage you to check with the library(ies) near you first. If they have it, you can borrow it for free and make copies, scans or take pics of it if you’d like to make your own digital copy. If this is not an option, look for it online and check if there are any torrents on the sites you have access to where you live. Only if you exhaust all other options, or if you are dead set in buying a physical copy for a memento / getting it signed by the artist type of keepsake, should you consider purchasing it at the inflated price. So even though the book might be affordable to those who have the money, that simply isn’t applicable to most people, meaning that – No. It isn’t affordable as it would not fall into most people’s budgets easily or without being looked at as a luxury.
Is the book Worth it? 🎨
Even though due to points 3 & 4 above, I cannot give the book a full 5 palettes, and must settle only on 4, I would say – Yes. It has been great to learn more about the backstory and history of Arcane and the people who made it possible. The work they’ve put in for years, each single step in their journey and the care and dedication that has been poured into the creation of this new world. It has been lovely to gain an insight into the visual development of the series, as well as the character building, and the considerations awarded to all the small things that make them the characters that they are and the characters that we love. I may have never played LoL but I absolutely loved the show. Though even if I hadn’t seen it, from the perspective of a graphic designer, I can certainly appreciate the beauty of Arcane and this book still. And if like me, you are new to this world, then I suspect the book will make you love it even more. It’s worth it.
#arcane#jayvik#kz reviews#league of legends#arcane art#jayce talis#viktor arcane#video games#art of arcane#book review#visual development#character design#character art#jinx#jinx arcane#vi arcane#caitlyn arcane#mel arcane#game design#graphic design#digital art#art#art community#artists on tumblr#art school#book recommendations#book reccs#arcane season 2#silco#vander
173 notes
·
View notes
Text
Coming Home (But Not to You) + Someplace New Physical Bind


i've done a few rebinds of paperbacks to hardcovers but this is my first ever full bind :')
i really love this universe written by @lesbianherald and i'm so delighted to have a forever copy! i keep coming back to it, so having it on paper will make it much easier to tab out my favourite parts when i need them.
there's definitely mistakes, especially with the cover (pls don't ask about the back cover it's none of my business). i hit a point where i chose done over good because otherwise this would have taken me 6 months. there is no prize to perfection etc.
Coming Home clocks in at around 360 pages and Someplace New is about 60. i included the playlists for both since i'm a sucker for 'bonus content'. in paper, that means 107 sheets of a4 split into 14 signatures of 7-8 pages.
some retrospectives and the guides i followed below:
what went well:
the actual process of folding signatures and sewing the binding was my favourite part. basically all the work that didn't involve fighting technology lmao
i struggled sourcing a4 short grain but i'm really happy i used it! it's such a floppy, soft book and it sits open on it's own
i hated the cover design in canva but on the book it looks sick as hell. very trust the process kind of deal
what didn't go well:
i'll never learn my lesson about text and heat transfer vinyl. this is where i almost lost my mind
speaking of htv, i really screwed up every step of the case creation. my boards are a little short, i wasted a load of book cloth, and i used to much glue for the endpapers that it seeped through a little. not enough to do major damage to the textblock, but the first and last 20 pages are a little wavy
Resources:
How To Typeset in Google Docs - i followed about 3 different tutorials for doing it in word before finding this video. very easy to follow and she shows how to impose to signatures afterwards
How To Bind on a Budget (Beginner Friendly)
French Link Stitch Bookbinding tutorial
268 notes
·
View notes
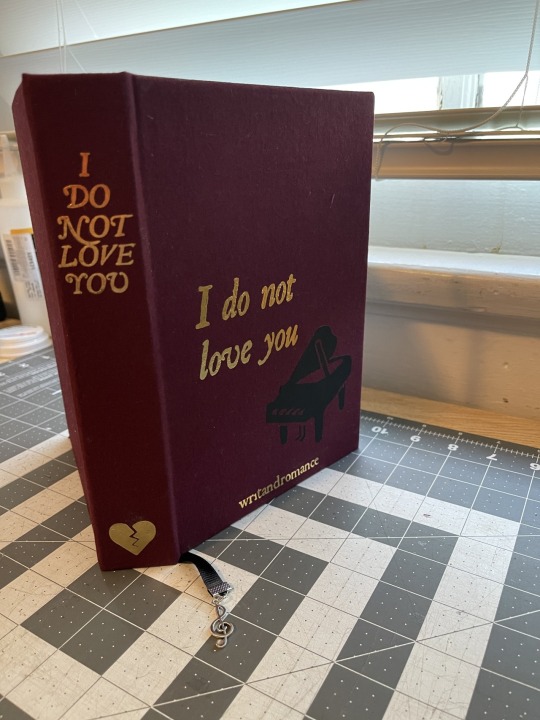
Text


This is a cover for the guiding of death by RayShippouUchiha on A03. They are an amazing writer who has done some of my fave characterisation for various characters and their relationships. They have done quite a lot of avengers (Tony-centric) and a truly amazing unginged series following a more unhinged sterek that I adore and will one day typeset because dang.
This fic brings together some of my fave things including Persephone! A truly unique take on the gods reborn. I used one of the Canva avaliable images as the background because it just fit so well with the vibe I wanted. I included a quote I liked and a border. For the back I did a bunch of the fic data but am unsure if I would insyead prefer to use that solely as an inner I fo page and do a different type of background.
Keep fanfiction free.
132 notes
·
View notes
Text
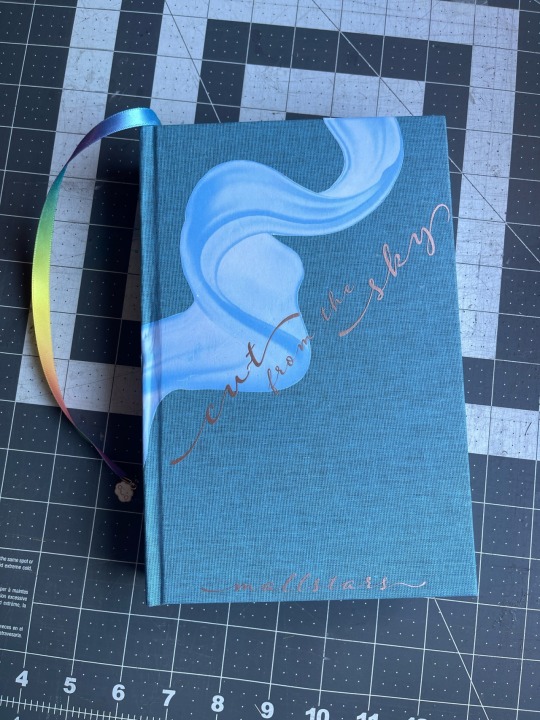
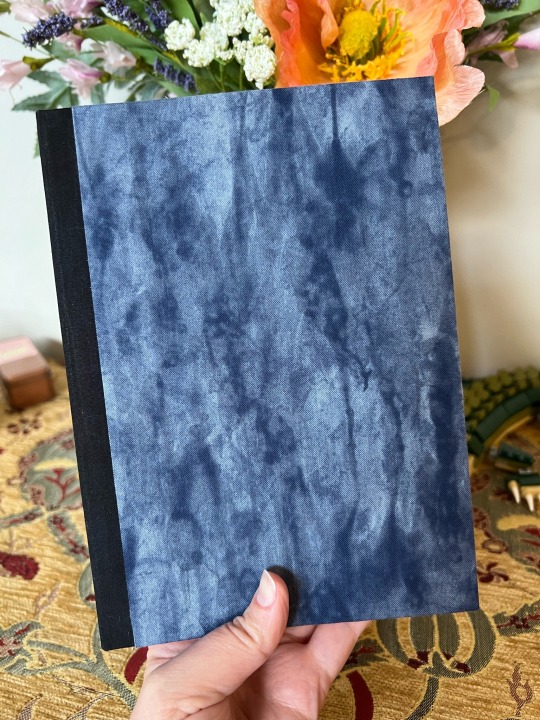
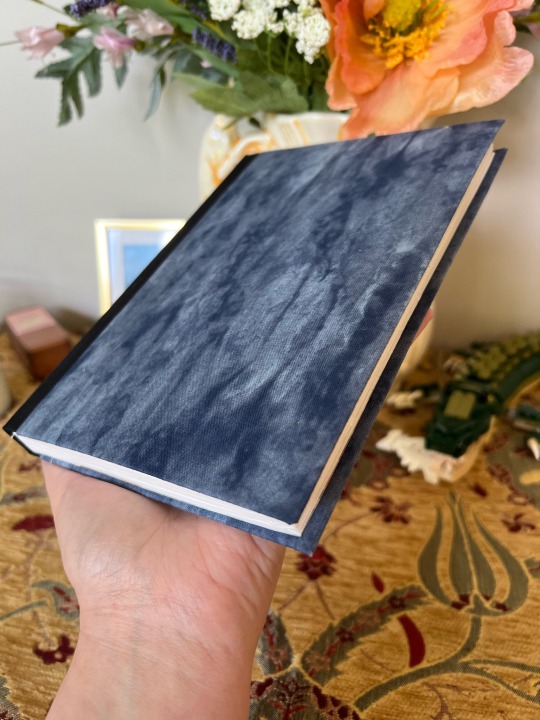
(Re)Bound: Polar Night/Midnight Sun by me (@toomuchplor)


It’s been nearly a year since I started bookbinding, so I decided it was time to revisit the first fic I ever set.
I'll do a post with side-by-side photos another time but suffice it to say, it's not so clear to me that it's like 'first book bad, this book good'.
And if you're like, wow, Plor is posting a lot of binds this week -- you are correct. I'm on vacation this week, but also I'm wrapping up a few things that were WIPs for weeks. Lots of victory laps, but this is the last one!


I did my first typeset in Word before quickly switching to InDesign (which I have for work reasons anyway) so I wound up designing from scratch. (By the way, I’m very happy to share typesets if anyone is ever interested — for personal use only, of course!)
I used Canva to create the cover page and chapter headers in this cute watercolour style. And the end papers are pretty chiyogami from a paper store in Toronto.


I rounded the spine, but it didn’t need backing as the swell wasn’t much. I am still figuring out rounding for sure — the hardest part is getting the text block and spine stable enough to trim the head and tail straight afterwards, at least for me!

Sewn faux double core silk endbands on a 2 mm leather cord core.
I dithered about the case cover art for weeks while I did a million other projects. I knew I wanted to try something new but couldn’t find the right approach or technique to inspire me. Then I randomly tried a paper onlay for a blank book I was making and had my eureka moment.
The cover design is drawn by me in Illustrator, then cut from chiyogami by my cricut. I used a PVA/corn starch paste 50-50 mix to glue on the paper directly to the cover before the gold HTV outline was applied. The gold is partly decorative and partly to protect the edge of the onlay from friction/wear.
I am obsessed with how this looks. It’s quilting and paper art and mosaic all together? I can see myself doing this style more for sure.
One challenge is that once it’s glued up, you have exactly one chance to place the paper onlay on the cover — you can’t pick it up and try again because even with mix, the glue marks the fabric. So you need steady hands and good planning. I’m wondering about transfer tape or maybe even post it flags to help guide me in future projects? I'm pleased with the result but it could be better.
After all that sweating and work, I was paranoid about wear and tear on the paper, so I made a dust jacket. (Shout out to @citrusses for advice and emotional support during lamination time, and to lately for chatting with me and advising me as I did the paper onlay design and work!)
#bookbinding#fanbinding#case binding#drarry fanbinding#sewn endbands#hp fanbinding#drarry#toomuchplor#polar night midnight sun#legal quarto binding#rounded spine#dust jacket
105 notes
·
View notes
Text
This past summer, I participated in the @renegadeguild Tiny Book Bang! This tiny book was created from a typeset (digital formatted file) made by another guild member, @fantailpress. It's fanbinding but not ficbinding in this case, since it's an excerpt of a podcast script.

The Mistholme Museum of Mystery, Morbidity and Mortality is a series of stories told in the format of a museum audio guide, so I staged my photos in a rough approximation of a museum exhibit. (Canadian quarter for scale.)


This particular episode segment is a Pied Piper story, told in overlapping, layered voices, and the typesetting reflects that in a very cool way. I've tried to echo the inside text with the static-style paint on the cover.


One of the nice things about tiny books is that you can use all sorts of scraps of material. Commercial book cloth, title and images stencilled with acrylic paint (I used a site to generate colouring book pages to turn the pied piper image into an outline to stencil), and endpapers are from a scrap pack a friend sent me, picked because they remind me of something you'd see in a kids' fairy tale collection.


Also, I got the sneaky glee of making something for a friend who didn't know I'd picked her typeset. (She was only the one who recommended the podcast to me, after all!)

156 notes
·
View notes
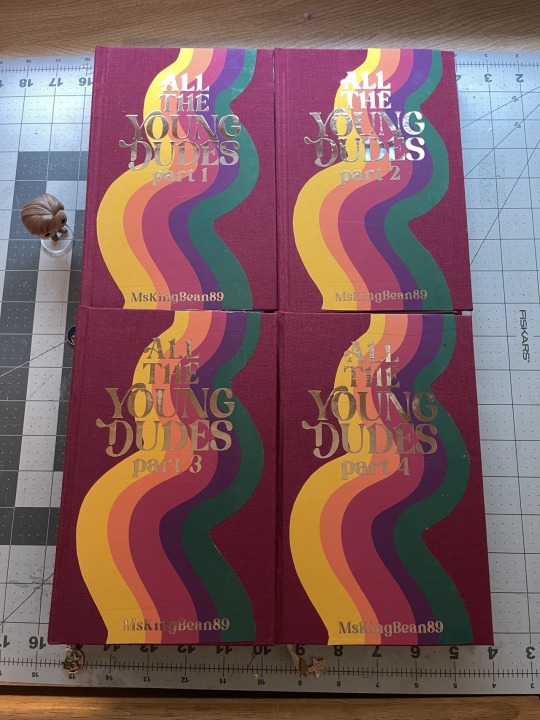
Note
hi there! I was checking out your google drive for your incredible looking typesets for ATYD (My bestfriend's birthday is coming up and I want to gift her a personal ATYD collection, even though I'm not really into typesetting, hence looking for one) and I was wondering about some specifics you used, like what page size and whether or not you trimmed the textblocks? I tried printing out some test pages set to A4 but the negative space at the bottom was massive, but normal looking at the sides and top, so I'm a bit confused. Thank you so much! :D
(Also, I love your typeset for dripping fingers, it fits the feeling of the story so incredibly well and I love it)
hey! thank you so much, and i’m so glad you’re looking to use my typesets!! those are good questions, and i should probably make a fact sheet to drop in the drive. But i print on regular 8.5x11 letter sized paper, flipped on the short edge. For ATYD specifically, because they’re quarto’s, you’ll get 8 “pages” on one sheet on paper. I used bookbinder.js to create the signatures, so I can’t remember the specifics of how many sheets of paper are in one signature, but it should be in the 4-6 range.
and yes, i do trim my bookblocks! for a quarto in particular, you need to trim them as the top seam is attached. idk if going to be able to explain it well, so plz let me know if this is confusing, but when you print a quarto you first fold your page in half from top to bottom (all the typesets have dotted lines that indicate where to fold!). this is now the “top” of your page. after you fold in half the first time, you then fold in half from left to right, giving you 8 pages. so to be able to open the pages, you need to cut off the top seam at the least.
If trimming is something you aren’t able to do, I think there are some free typesets of standard sized atyd floating around out there that you would be able to bind and leave with the deckled edge.
but that’s such a cool present for your friend, and I hope you enjoy binding it!! atyd is a monster hahaha and such a good fic. Thank you for your compliments too (i think dripping fingers is my favorite i’ve ever done) and plz let me know if there’s anything else I can help you with:)
3 notes
·
View notes
Text
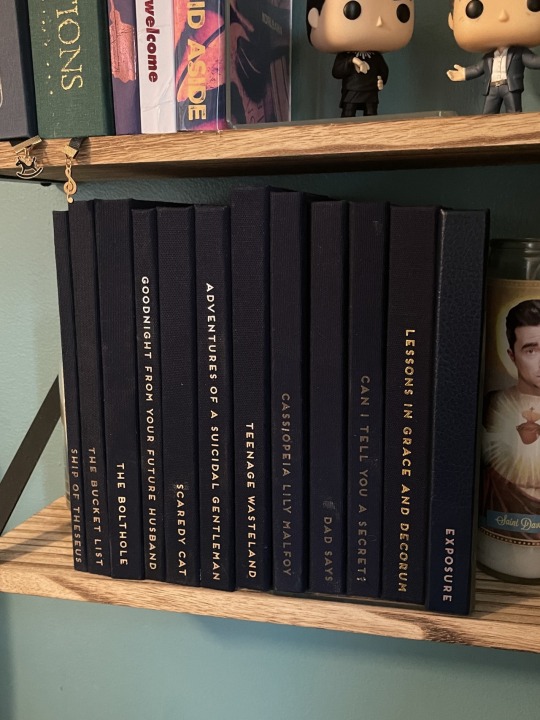
One year of fanbinding!
I keep thinking "I'm really new at this still" but I guess after a year, it's like, you don't have a puppy anymore, you have a dog. So now I'm in the dog phase of this hobby.
(I didn't make all of these, some were acquired in exchanges.)
In the past year, I have made around 54 books. (For the purposes of my sanity, I am not counting journals or sketchbooks, nor am I counting author/artist copies if the design was the same.)
54 books! In 52 weeks! That's basically a book a week!
Which binds are my favorites?
Ooh, that's hard. I tried to limit myself here, but these all are very special to me.


And I can't choose just one of these:
Honorable mention goes to this one, but I didn't design the typeset, so I can't take all the credit. But I do love the cover.
What's my favorite part of making books?
It's not surprising to me that typesetting is my favorite part. I designed a book for a local museum in 2007, and loved the process. Before that, I wanted to work in editorial design (I had a few jobs doing that in and after college, but that was in the olden days.)
I enjoy the part of physically creating the book too, but I find it a bit more frustrating. I'm not detail-oriented enough to make sure everything is perfect, and then I get frustrated when an endpaper is glued on slightly crookedly, or my text block isn't perfectly square. (Not that I have anyone to blame but myself!) That said, holding a completed book in my hands is the most satisfying feeling, after actually reading said book. I feel so smug when I'm reading a book I created.
I have a lot of imposter syndrome when it comes to the actual designing of covers. I know my strengths lie in manipulating existing content instead of creating it from scratch. So I need to stop comparing myself to other creators, and just do my best. We all have different styles, I tell myself.
What's next?
I'd like to learn how to sew endbands for once and for all. I have tried and given up in disgust so many times. I have watched so many videos and read many tutorials, and I just need someone to come to my house and show me in person.
I also would like to try to learn how to draw, a bit. I know I'll never be great at it, but I've also never tried to learn. I will be off work for a few months later this summer/fall, and I'd like to use that time taking some classes. Even if I could just draw designs to use on my covers, I'd be happy. I don't expect to be able to draw things or people.
I wanted to take up this hobby for a long time before I actually did it. I read through @armoredsuperheavy's guide like eighteen times before I worked up the courage to actually use it. So my advice to all of the people who tag my posts with "i wish i could do this" and "i want to do this"…do it!
297 notes
·
View notes
Text
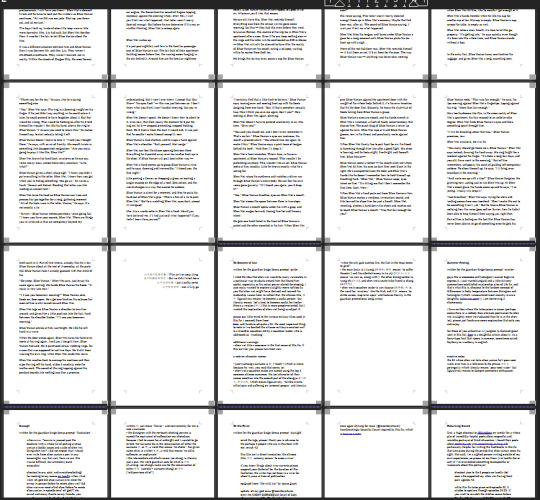
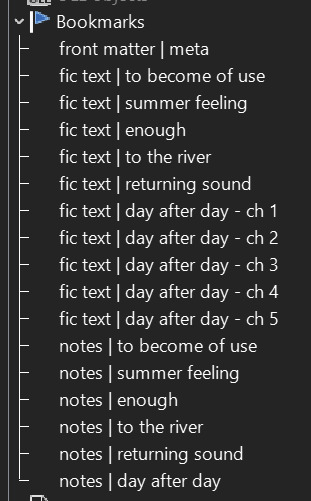
all my unformatted pages ... libreoffice bookmarks navigation feature i am in love with you
embarking on my first typesetting journey ... extremely fun !! but somehow three hours have passed omg
#copy-pasting the text into libreoffice somehow took one and a half hours ... shoutout to armoredsuperheavy's guide i would suffer without it#also interestingly this process is causing me to feel a level of almost unprecedented insecurity about the quality of my writing haha oh go#quietly chanting to myself: how you feel about it has no relationship to how it reads#hidey typesets#<- in case u wish to avoid me blogging about this#back when i was involved in the studyblr side of tumblr i was soooooo wowed by all the people writing essays and color-coding them and then#using this like. shrink pages view to look at all of them ... mmmmmmmmmmm ... now i too have this power :333333#but also oh my god saving the text file is so scary hahah i want to be able to write commit messages so bad lmao .... save me git .........
11 notes
·
View notes
Text
My (second) bookbinding of Daemon’s Handbook ✅


I made my first ever bookbinding last summer, also of Daemon’s Handbook. Then I got Matt Smith’s autograph at NYCC on a dust jacket that I made for the first bind, and I realized I needed to do justice to that amazing autograph.
I knew I wanted:
A cover that looks like dragon scales
Sprayed edges
High Valyrian galore
Medieval marginalia-inspired illustrations
It took me a while to figure out all these techniques! I was lucky to find an embossed alligator skin that looked dragonish (and came in red for Caraxes). That was the easy part.
The most-time consuming part was my 634 day Duolingo streak for High Valyrian, so I would have enough knowledge of HV to attempt a translation. I used a lot of resources by @dedalvs to a) translate the fic title and b) write it in HV glyphs. The sprayed edges were done with my newfangled airbrush and some stencils. Red and black for House Targ, of course. The dragon on the bookmark charm has four legs instead of GRRM’s preferred two, but not everything can be perfect. 🥲
I previously talked about the endpapers in this post.
The good artwork inside the book is by @lucife56 (title page full spread) and @mariascorzelliart (fold-out with the Targbros and Velargirls in the back). The funky little Daemon doodles are by me. 🤡 The idea is that Daemon, being the author of this book, is scribbling and doodling on various pages with his commentary. So if the doodles are low quality, blame it on Daemon. (Joff also manages some vandalism on one of the pages).
Tumblr only lets me share 10 photos at a time so I can’t show the sections of the book that include Weekend Activity Guide for Witchy Children and my commentary about the Handbook. Because I was designing the book to fit the dust jacket (rather than the other way around), I had to get creative with the page count in my new typeset. Thus, the book ended up getting some fun bonus content beyond the Handbook.
#my writing#daemon’s handbook#fanbinding#bookbinding#hotd#house of the dragon#daemon Targaryen#house targaryen#Targaryen#dragons#high valyrian#high valyrian glyphs
71 notes
·
View notes
Text
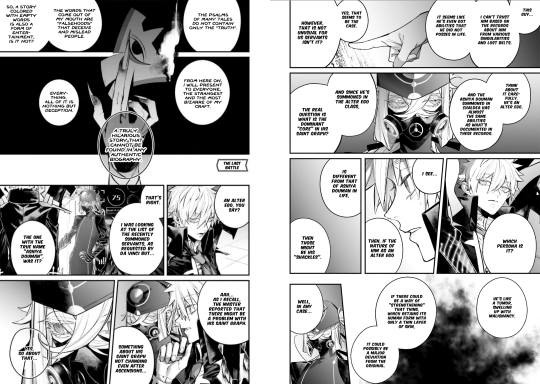
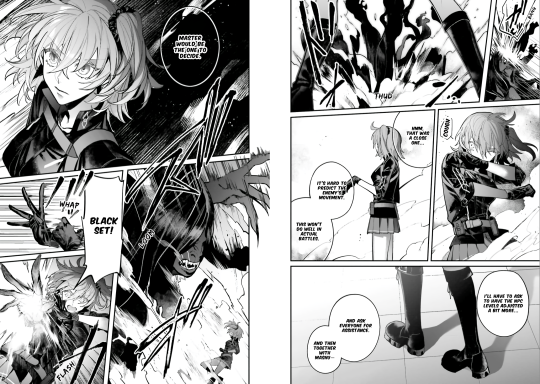
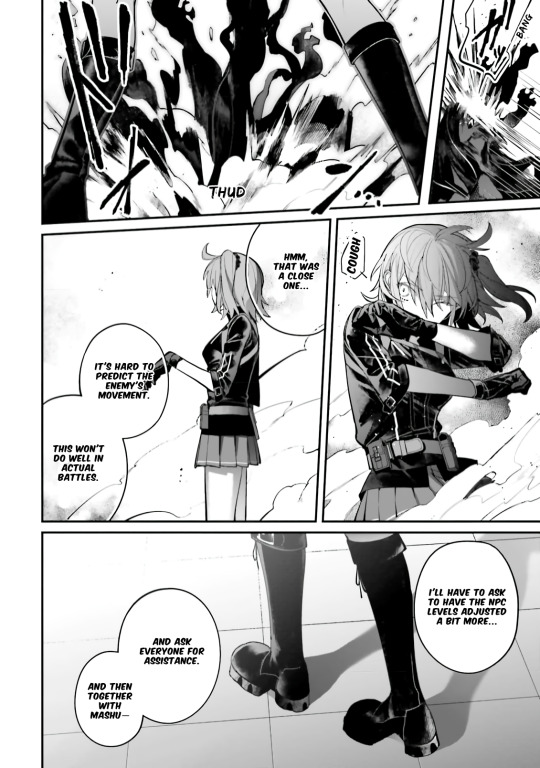
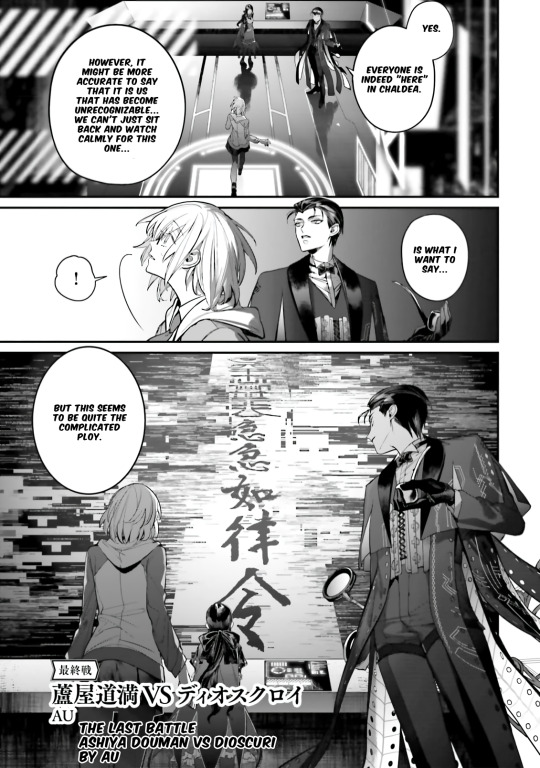
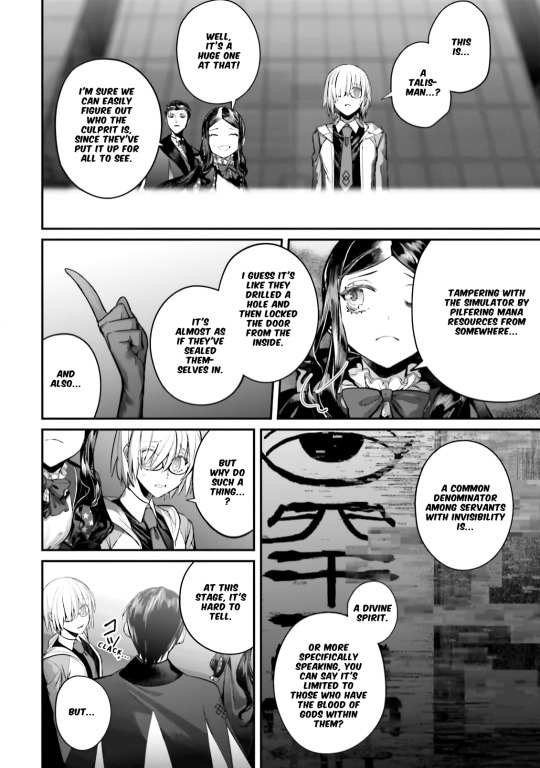
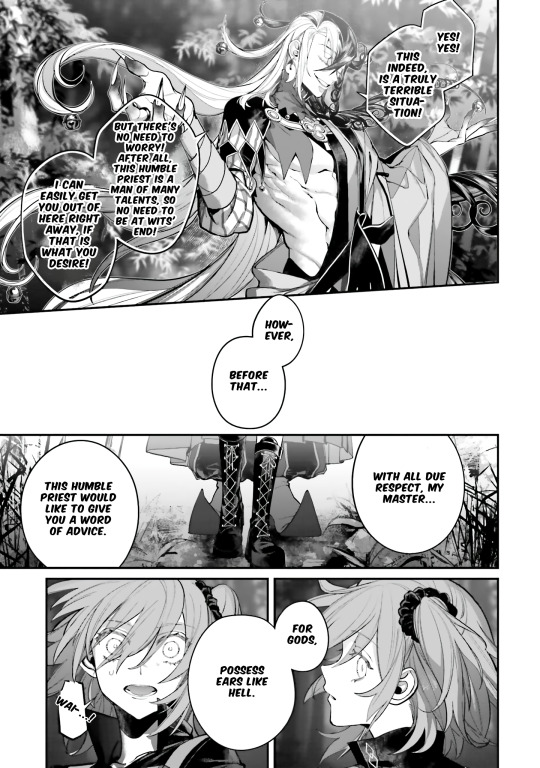
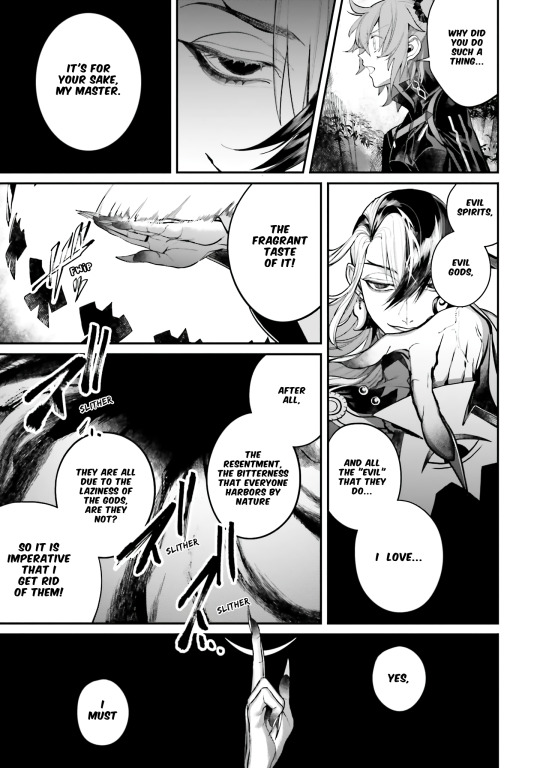

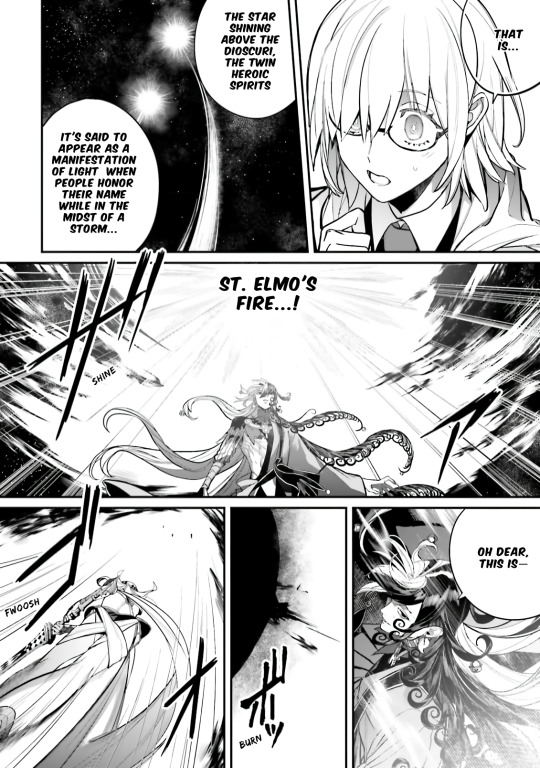
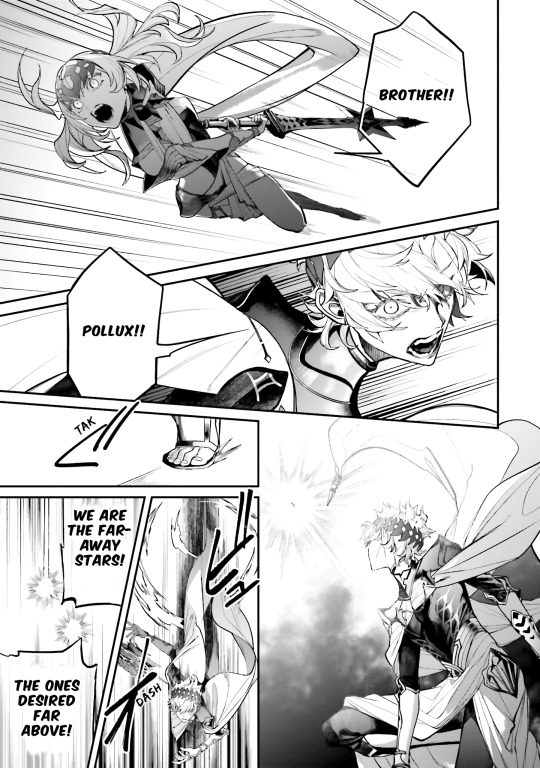
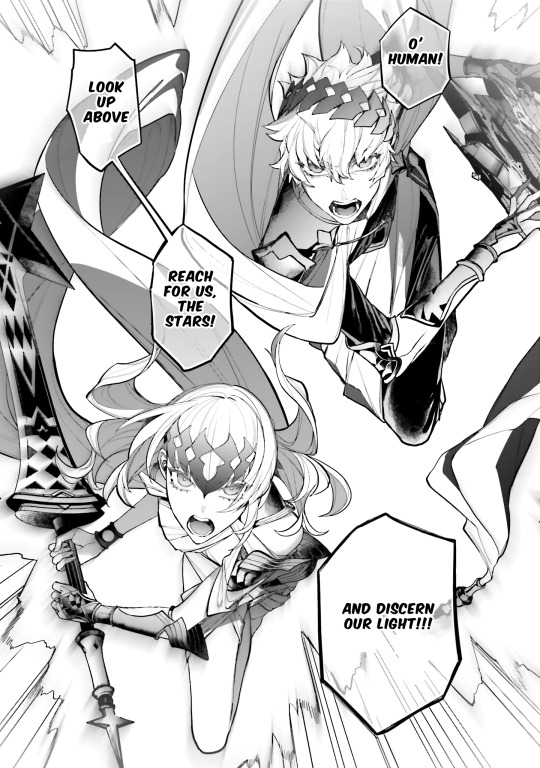
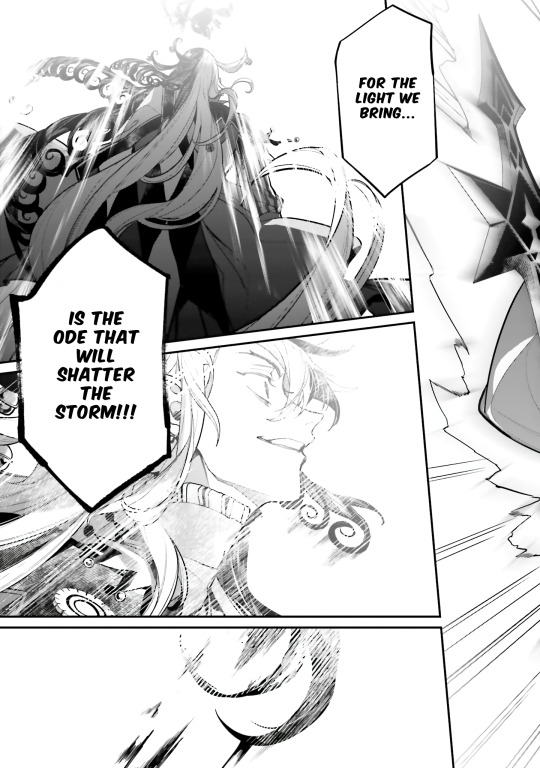
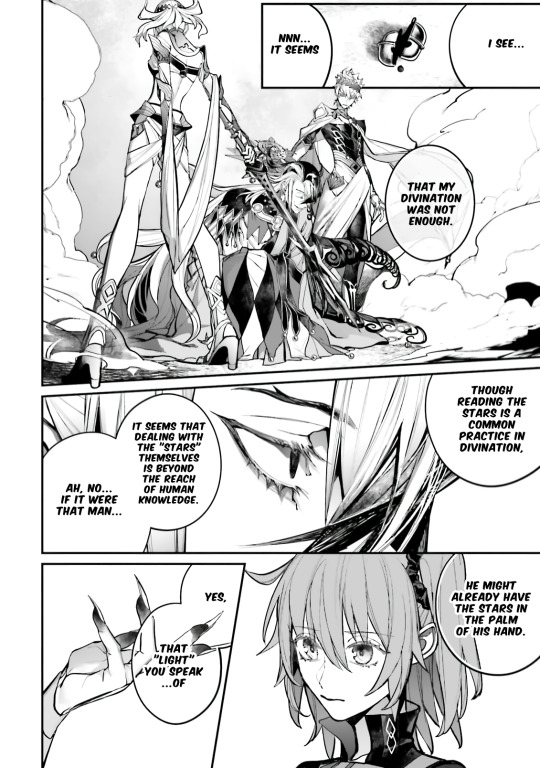
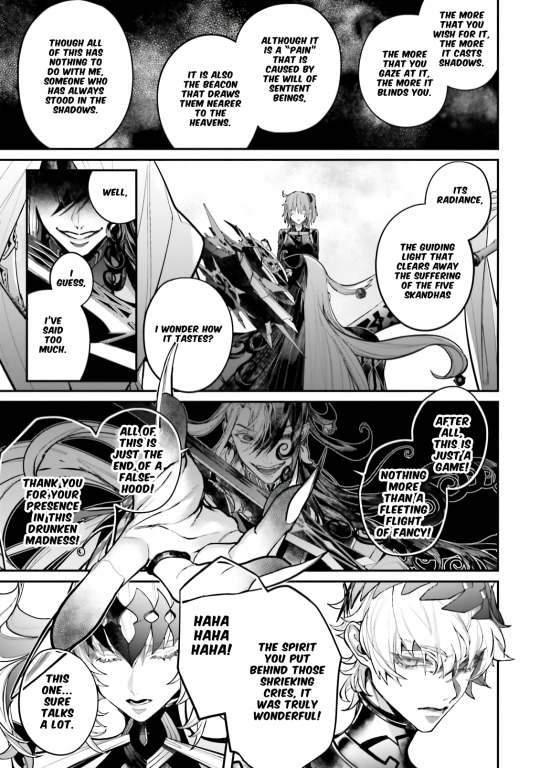

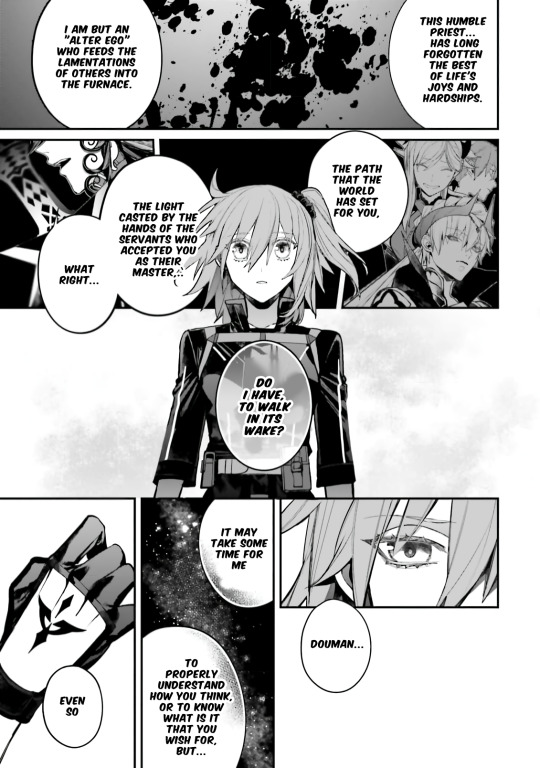
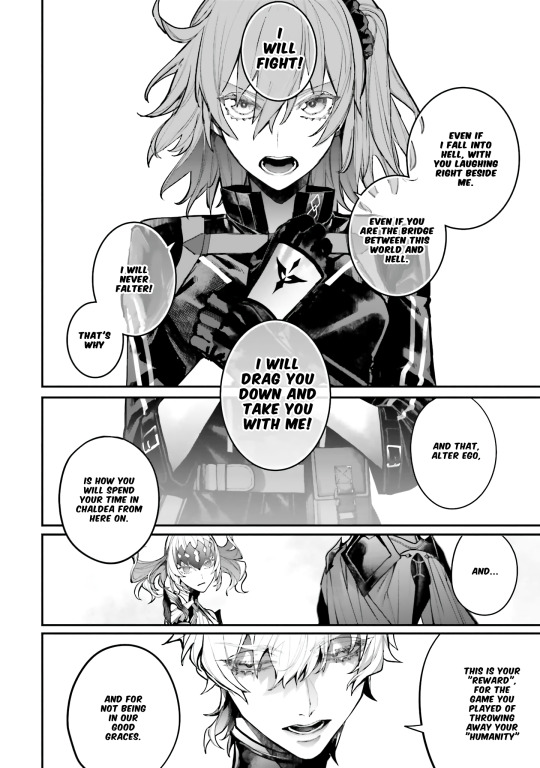
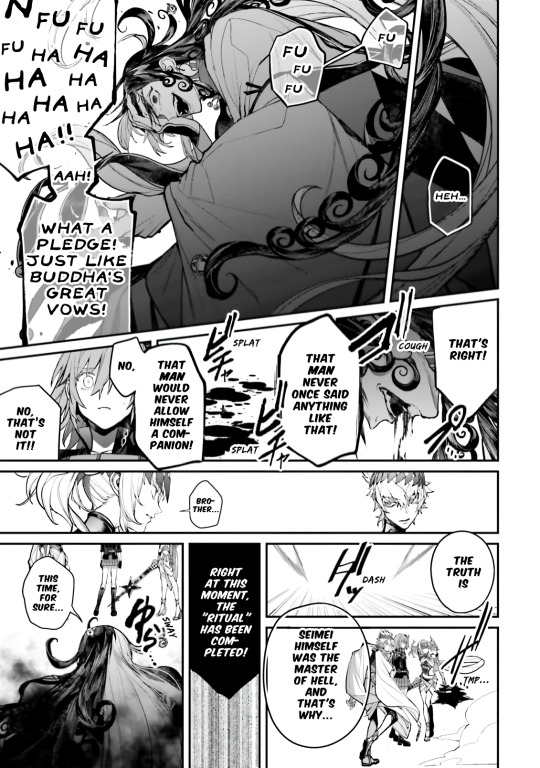
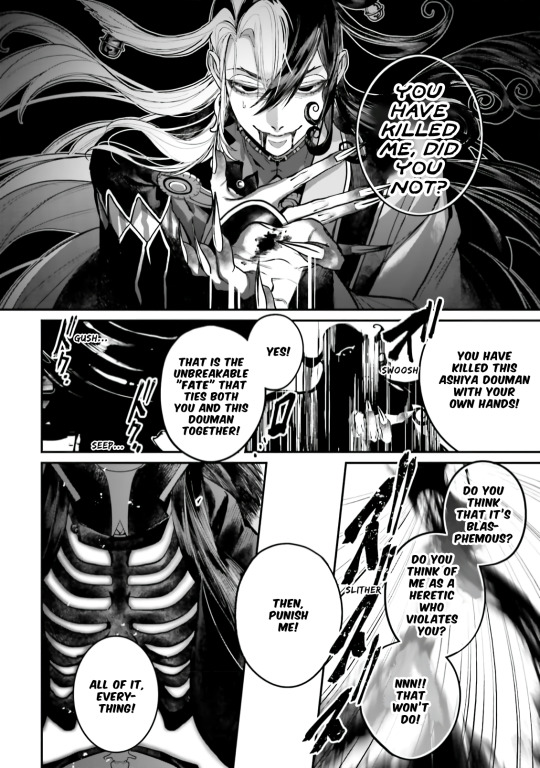

Fate/Grand Order COMIC à la carte PLUS! SP Showdown!
Ashiya Douman VS Dioscuri
TL & Typeset by yours truly.
Right, so, edited to add AU's commentary below.
Au's commentary
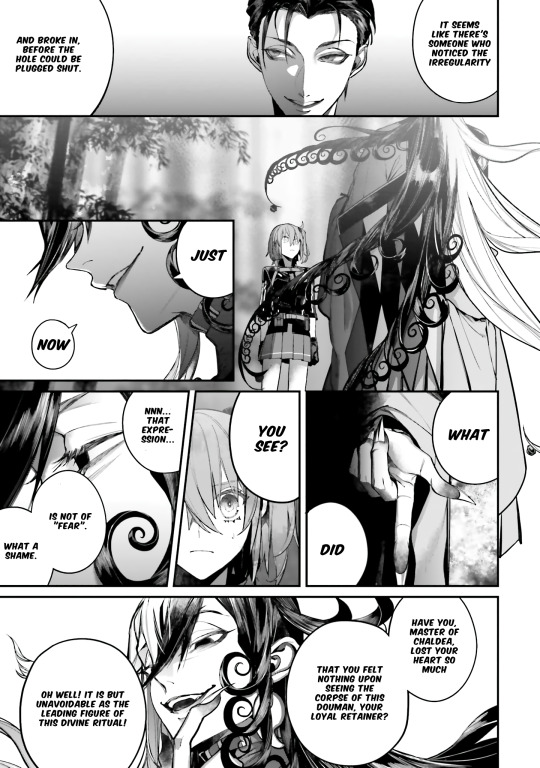
【Douman】
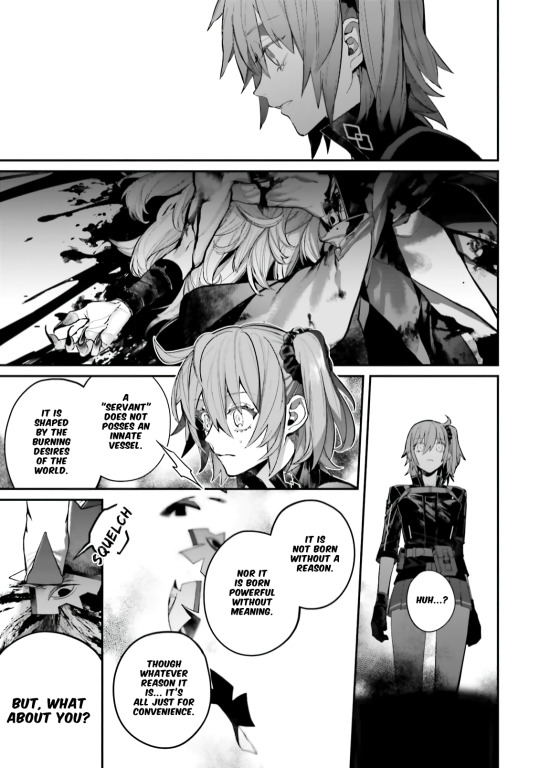
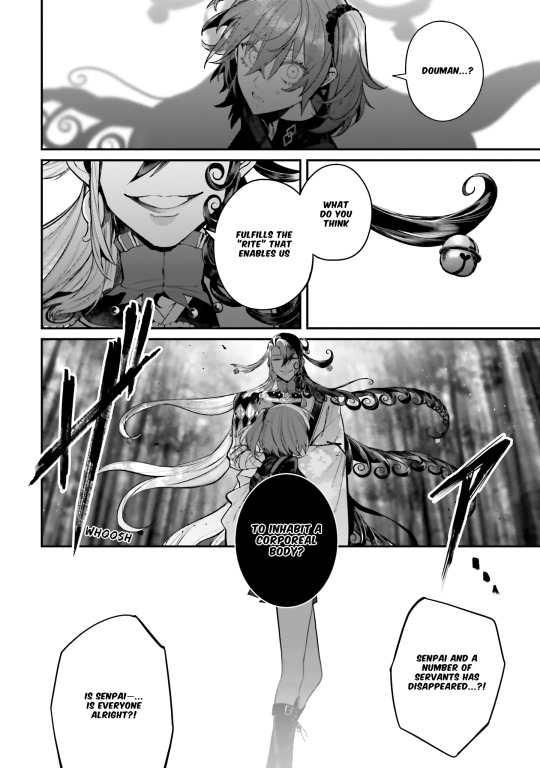
I think that due to his position as an onmyouji and as a bonze, he places an emphasis on formality and rituals. Whatever his motivation may be, he can't help but go through these motions (though there are times that he stops abrubptly), it's like "if he has to do it anyway, it's more interesting to do it this way." In addition, it was a confrontation against the Dioscuri.
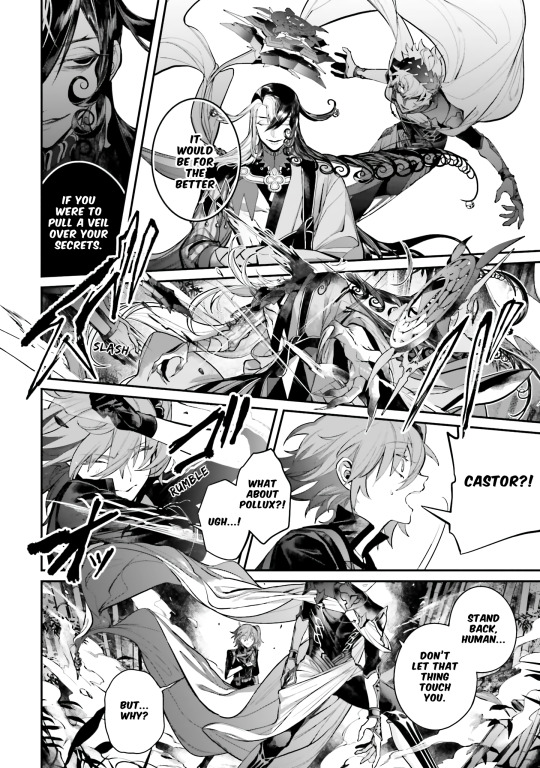
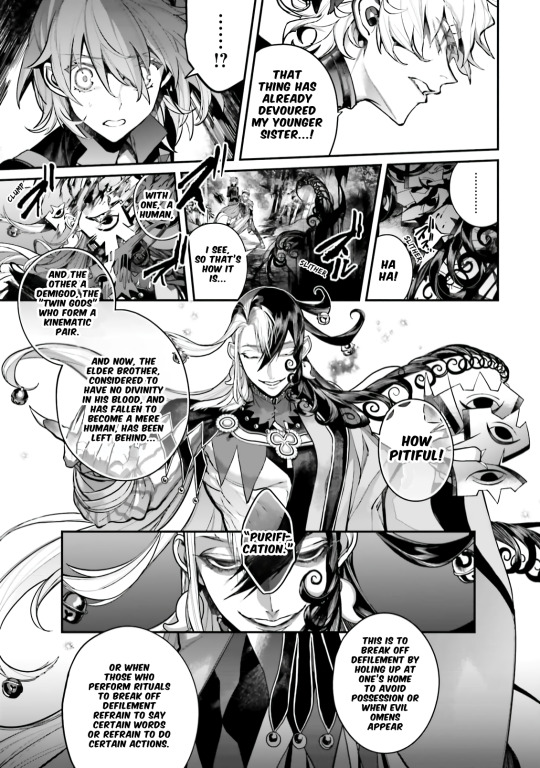
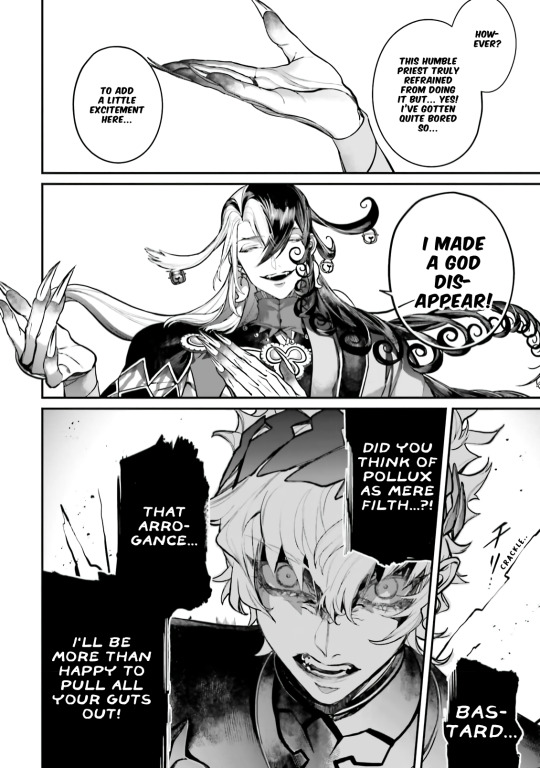
The Dioscuri, gods who connect with humans through "rituals" that play an important role in religion and faith, and whose way of being can be influenced and altered by man, in contrast with Ashiya Douman, one who blasphemes even gods themselves, one who guides humans by "looking up to the heavens and divining the stars." The ritual was brought about when Douman thought that he wanted to perform the steps to carry out the purifying ritual (monomi^), but he did not want to be the one to be shut in, so he made someone else disappear instead.
(^物忌み - monomi; an onmyou practice of shutting oneself inside the house on inauspicious days to avoid misfortune.)
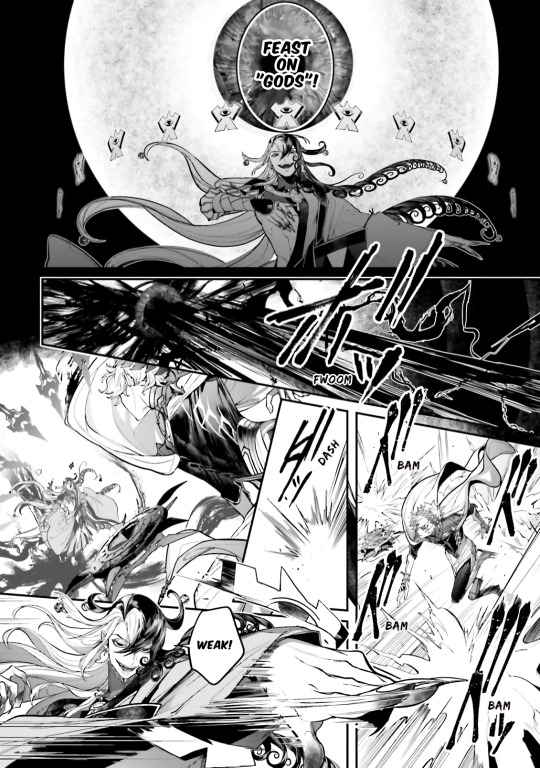
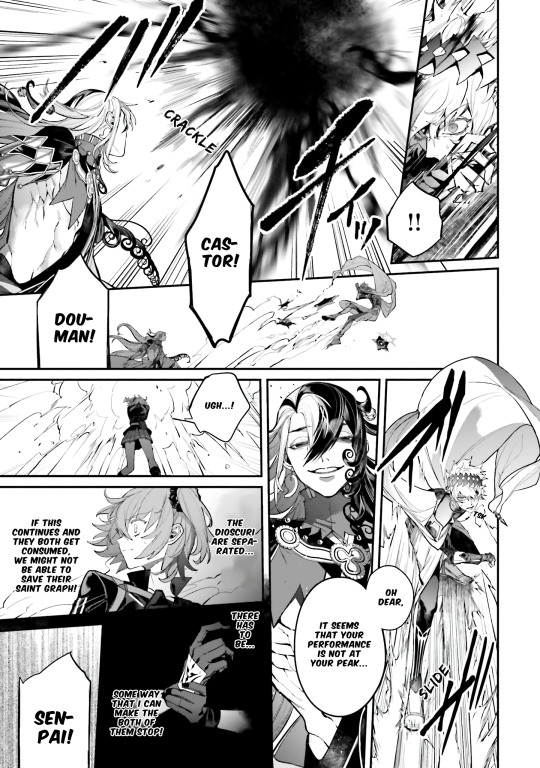
In simpler terms, it's an act to purify one's body and soul by cutting off impurities, as such, Castor was furious at not only being suddenly separated from his sister, but also for being judged as "defective." (Although Castor's anger was at the forefront, his bond level is assumed to be high, because he rushed into the scene, out of concern regarding the abnormal situation, and for his Master's safety.)
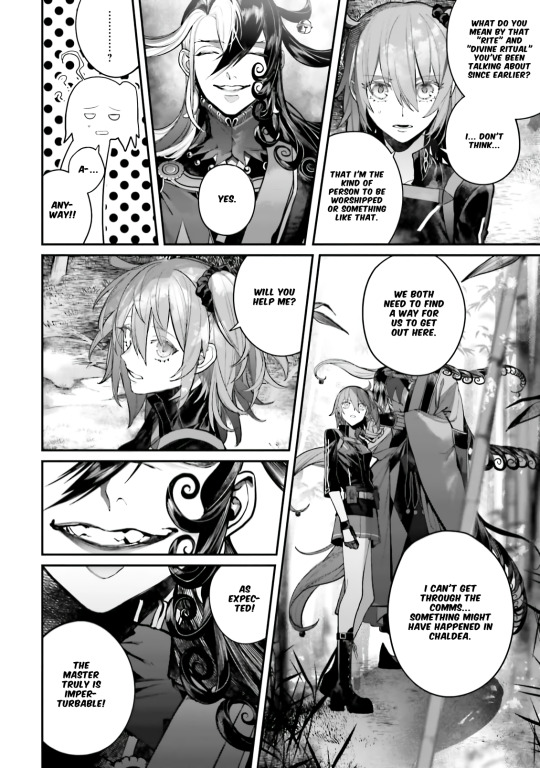
【Dioscuri】
・Castor's Saint Graph is deficient, due to his separation from Pollux (derived from the Dioscuri interlude). ・In addition, it was difficult to stop Douman with a god's power, as due to Douman's spell, it was a situation where no divinity other than Douman's was functioning.
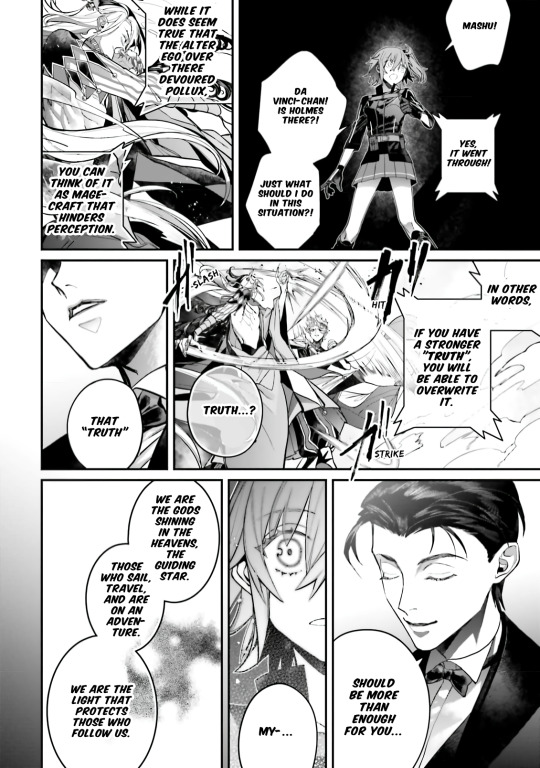
As for the "stronger truth (for the Master)" that Holmes mentioned, at this part, the Master was reminded of Dioscuri Castor's return gift from Valentine's, St. Elmo's Fire. One aspect of the Dioscuri is being the guardians of navigation, the guiding light, the "star" shining in the heavens.
Castor's return gift, based on the circumstances of the event scenario, is interpreted here as a blessing given by the Dioscuri only to the Master. A "truth" that was clear to the Master, that even if no one else knew about it, without any doubt, they have received this blessing. At that moment, the Master, who is the key figure in this divine ritual, overrode the "Dioscuri" by strongly recognizing them as "stars" rather than the "twin gods". Thus, this is the process that allowed Pollux to be revived.
【The Master of Hell】
Though it has various meanings, it revolves mainly about Seimei's episode with the "Taizanfukugun", and the "Taizanfukugun Festival^".
(^An onmyou festival, revering "Taizanfugun", a god from ancient China that was syncretized with the Buddhist king Enma, and was believed to rule over human lifespan and fortune. It was a popular festival among court nobles during the Heian period, and it was the festival that the onmyou family, the Abe clan, excelled at.)
Taizanfukugun is a major deity in onmyoudo, in Buddhism, considered as one of the ten kings of hell (sometimes equated with King Enma). The main implication of this image is that he is able to interfere with even the forces of hell and use them as if they were his own.
In this sense, Seimei should be the one who's more suited for hell, so what point would there be if the Master falls into hell? Would there be any meaning after that? In the first place, the Master would certainly not fall without a fight. And if they decided to, they would jump in without hestation, which is for Douman, also infuriating.
How does Douman see the greatest onmyouji? Did he collectively likened that person to the emotions swirling around him? Was it through the story of that person's resurrection, their travels through the world of that time, that equated to them easily conquering even Hell? Or is it something else entirely?
Whether he gives it his all or not, I feel that for Douman, there seems to be a fundamental ambiguity in self-affirmation, making him think "If I'm like this, then that person must be even better", regardless of Douman's own level of ability.
【Companion/Attendant】
When the Master pledged that they were determined to take Douman with them, even if it meant dragging him along with them, I wanted to show a "contrast" that showed their difference from Seimei, expressed through the rather exaggerated "Master allowed themselves to be accompanied / Seimei will never allow himself to be accompanied."
It's like "I said I liked apples, but he didn't say he liked apples. So he must hate apples.", something to that extreme. From Douman's point of view, that's how it must have been.
Furthermore, most of the passages in which Douman refers to Seimei are all from his perspective.
-The following is a digression -
・Sanson and Asclepius These two were the ones originally from Showdown Part 1. Originally, there was no scene in which these two talked to each other, but I hope those who read the previous comic will notice it.
This too, is a story about "humans" and "demigods (children of Apollo)".
(By the way, I was able to draw Asclepius in his second ascension for this FGO comicalized series.)
・At the beginning, I wanted to make the Master upset by making (Douman) say, "I killed her,'' but the response got boring so I changed it up.
・Buddha's great vows - this is the Bodhisattva's vast desire to save all sentient beings. In short, this was a hugely sarcastic remark towards the Master, as if to say "Your determination and your theatrical declaration are both truly admirable!" However, it also suggests that even if they would have to get various people to help their cause, the Master might just be able to pull it off.
・I was able to finish Holmes' panels in just one day.
・The last panel I drew was Douman's left side.
398 notes
·
View notes
Text
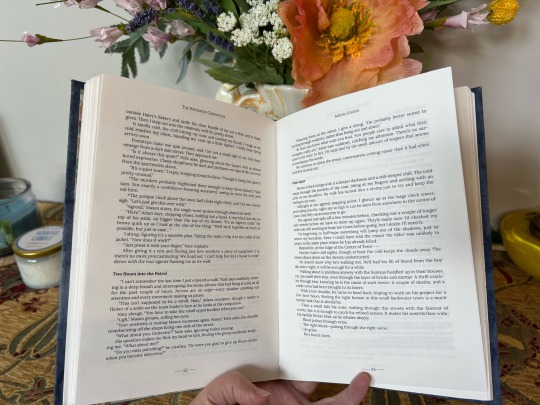

IT'S DONE! I made a book! I never thought I'd ever be able to make a book. Sure mistakes were made but it was still a fun process and I learned so much from making this first one.
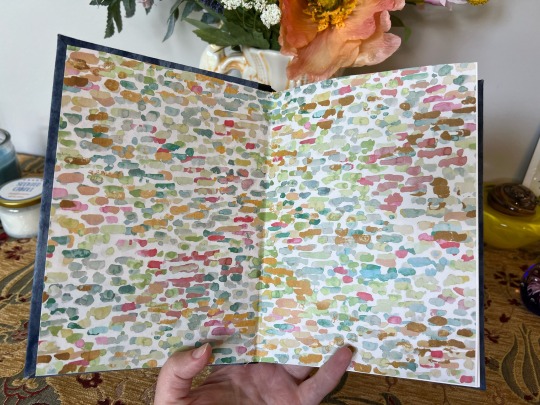
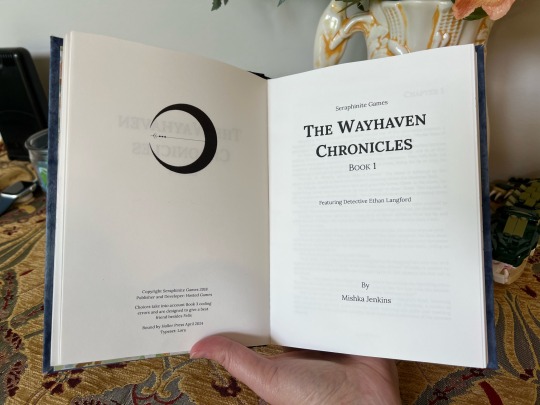
This a binding of The Wayhaven Chronicles IF but with my personal Detective's choices included and the resulting text smoothed out to read more like a novel.
Honestly, I thought something like this would be way beyond my skill set but it wasn't as scary as I thought once I got started. Definitely check out @renegadeguild for some book making and typesetting guides and their discord is super friendly and helpful as well.
If you want to learn from my mistakes I'll go into some trials and tribulations under the cut.
I'm not sure how well this book will hold up long term but that's ok! It was more about learning and I'll make some adjustments and try again with the same text probably.
Typsetting
Margins - need to make them bigger. I mostly read paperbacks so I was going for that format with narrower margins but then when I ran into paper problems, I didn't have a ton of room for trimming.
There was an option on the imposer to add dotted lines to the center fold and I clicked that but they're visible still even after binding. Could be that I needed to sew my signatures tighter and that would help but regardless I don't think I need them in the future so I'll be skipping that feature.
The font was intentionally small, along with the margins, because I was trying to minimize the number of signatures I was dealing with for a first project. I'll bump it up in the future.
Paper (so much wrong)
So the grain should run parallel to the spine but I couldn't find short grain paper. I read at some point that someone recommended using sketch books instead because that should be the right grain. It was not, at least not what I bought, so it still ended up going the wrong way.
The sketch note book I bought had perforated pages. It made them easy to get out but I didn't realize that the page widths were inconsistent until everything was printed out. The paper width varied by at least 1/8 of an inch. I wasn't planning on trimming my pages but my top was super uneven because of this so an attempt at trimming was made. It could have gone worse (there was no blood) but the trimming could have been a lot better too.
Should have just used printer paper. The results would have been the same.
Making Book Cloth
Used the Heat and Bond method with some spare fabric and it worked pretty well. The problem was when it came to adding backing. I'd read tissue paper or even plain paper so I grabbed some piecing paper that was close at hand. That was a mistake. It was good quality fabric so it was thicker already and the paper backing made it too thick. I could barely fold it over and it kept wanting to flip up. It's the spine fabric and I'm still concern it's going to do this in the future.
Used tissue paper for the marbled looking fabric and it was much easier to work with.
Book Board
Not measuring right was all on me. The rice box worked in a pinch but I think it will be prone to bending. Got me the experience I needed be wouldn't be my go-to material for a project of this size.
Glue
I used Elmer's All Purpose and it got the job done but, again, probably not going to hold up the best long term. However, I'm glad I didn't buy PVA and basically waste it on this project. Elmer's was good and cheap enough for practice. I'll be getting some PVA for future projects.
#the wayhaven chronicles#twc#bookbinding#life at nerdy holler#nerdy makes a book#Already poking the typeset for a second attempt#I really and truly am pleased with this though#even if it isn't super fancy or didn't come out exactly like I wanted#so jealous of the fancy htv titles and cover designs people make#but sadly I don't know anyone with a cricut or similar to make it
246 notes
·
View notes