#video editing software for windows
Explore tagged Tumblr posts
Visit Tumblr Blog
Explore Tumblr blogs with no restrictions, modern design and the best experience.
Last Seen Tumblr Blogs


Fun Fact
The Tumblr office adopted Tommy, an 11-year-old Pomeranian.
Text
#Video editing software#free video editing software#Video editing software for mac#Video editing software for windows#Video editing software for beginners#Video Animation Software
0 notes
Text
I PRESENT TO YOU: THIS MESS
this uhh took way longer than i thought it would to make but. i was determined. i haven't animated much before so, i hope it turned out well hehe 😅
based on this thing courtesy of @beatcroc (..... forgive me for this bro)
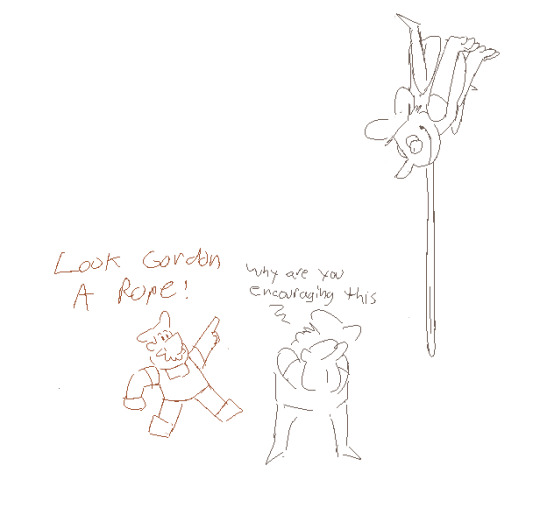
#LISTEN I GOT THAT DAMN QUOTE STUCK IN MY HEAD FOR DAYS AFTER THAT POST SO. I KNEW WHAT I HAD TO DO.#TAKE THE MOST OF WHAT MY SHODDY PIXEL ART ANIMATION SKILLS CAN OFFER 👍👍👍#the quality is kinda garbage because. the only video editing software i have is Windows Movie Maker. forgive me.#my art#pizza tower#pizza tower gustavo#pizza tower fake peppino#* IMPLIED fake peppino but. he's there. even if the only part of him that's showing is. Tongue.#gus will be fine though. don't worry about it ;)#now then. to work on like 5 other things i should've been doing instead of this. buhbye for now!!!
258 notes
·
View notes
Text
[description: the opening credits to PBS Mystery, which are animated in the style of Edward Gorey, set to the Candela Obscura theme.]
#posts with an audience of me#anyway i figured out how to do the most basic of video editing. follow for more usage of windows free software to do memes#candela tag
57 notes
·
View notes
Text
i also remembered to start the timelapse record right when i started inking so there could be a vid on it
4 notes
·
View notes
Text
Viewing milliseconds in VLC media player
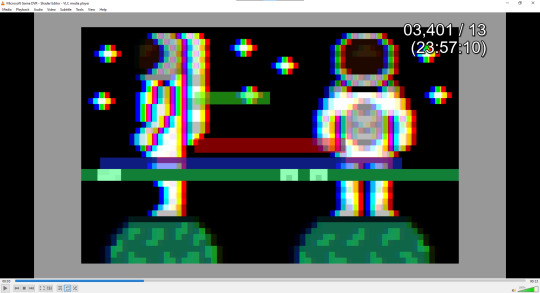
Learn how to view milliseconds or frames in VLC media player using a simple time extension
Viewing milliseconds in VLC media player – Agate DRAGON Games
2 notes
·
View notes
Text
Important update:
#new pronouns#it's very hard to recreate windows movie maker in professional video editing software#anyway here's my fumcken gembter
4 notes
·
View notes
Text
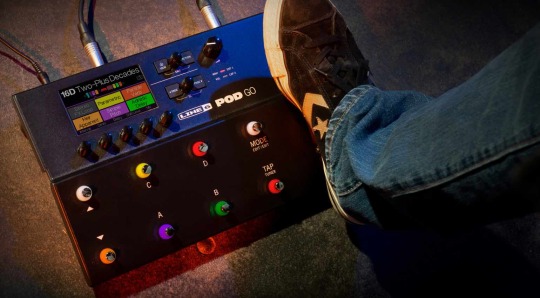
Line 6 POD Go 2.0 firmware update released
Line 6 POD Go 2.0 has just dropped and is an update for the POD Go and POD Go Wireless. It is the fourth significant upgrade since the product’s launch. Line 6 POD Go 2.0 Both the POD Go and POD Go Wireless boast Line 6’s state-of-the-art HX Modeling technology. This technology guarantees top-notch sound and rapid response, setting a new standard in the industry. Expanded Amps, Speakers, and…
View On WordPress
#amps#audio#cabinets#DAW#effects#firmware#Helix#HX Modeling#Impulse Response#Instagram#IRs#Line 6#MAc#OSX#PC#POD Edit 2.0#Pod Go#POD Go 2.0 firmware#Pod Go Wireless#software#Update#video#Windows#YouTube
1 note
·
View note
Text
FFmpeg: The Ultimate Tool for Multimedia Processing
FFmpeg is a powerful open-source tool for handling multimedia files. Whether you’re encoding, decoding, converting, or streaming, FFmpeg is widely used for manipulating video and audio. Getting Started FFmpeg can be installed on various operating systems: Windows: Download from the official site. Here Mac: Use Homebrew: Brew install ffmpeg Linux: Install via package managers like APT or YUM: sudo…
#Audio Editing#Command Line Tools#Encoding & Decoding#FFmpeg#Linux#macOS#Media Conversion#Multimedia Processing#Open Source Software#Streaming#Tech Tools#Video Compression#Video Editing#windows
0 notes
Text
#free animation software for mac#free animation software for windows#best video editing software#free animation software for android#animation software free#animation software
0 notes
Text
AnyMP4 Screen Recorder
AnyMP4 Screen Recorder is the top HD screen recording software for Windows PCs, allowing you to capture various screen activities. It enables high-quality video recording with multiple audio sources, including system sounds, microphone input, or both, along with the ability to record webcam footage and take screenshots. Enjoy! This convenient desktop screen recording application offers an…
#AnyMP4#audio recording#gameplay capture#HD recording#instructional videos#online tutorials#screen capture#screen recorder#video editing#video meetings#webcam recording#Windows software
0 notes
Text
Does anybody have any recommendations for a free video editing software for windows? Preferably one without AI.
0 notes
Text
im gonna fucking... download this alwake video and cut the part where this youtuber talks about the zane - alan paradox bc this shit is so funny and SOOOOOO so true
#tani's personal shit#actually i dont know if i have any video editing softwares 🤔🤔🤔#hmm...#i Have windows movie maker though which is practically the same thing dfgdfg
1 note
·
View note
Text
what is happeninggg i exported my gifs like usual and in my file explorer theyre normal and in my video preview theyre normal and then i upload them to tumblr and suddenly theyre twice the speed?? im so confused how this happened, i just wanna post gifs
#i talk#i use a new video editing software but it shouldnt matter? when i open them in windows media player theyre fine?#and then on tumblr - both while post editing and also when posting in drafts - theyre twice the speed#idk what the problem is it must be on tumblrs side?? but idk?? i hope thisll fix itself
1 note
·
View note
Note
uh. aseprite starter tips? i’m kinda lost
Aseprite Tips for Noobs !!
Get the software: Aseprite (the pixel software of all time) Video tutorial:
Aseprite Crash Course in 30 minutes by AdamCYounis If you already have it you can skip ahead to 'the workspace' timestamp in the video.
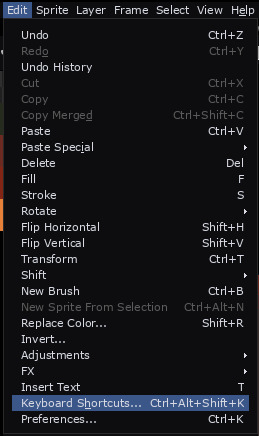
If you have ever used another art software, Aseprite will be familiar to you but all the keybinds will be messed up. You can go to edit > keyboard shortcuts, search what you're missing and rebind it to whatever you're used to.
Most important keybinds (to me):
Brush: B
Eraser: E
Undo: control + Z
Redo: control + Y
Quick colour picker: hold alt and click
New layer: shift + N
New frame: alt + N
Lasso select: Q
Quick outline: shift + O
Help! I pressed a button by accident and now I don't know how to fix it
These are a couple keybinds that are actually really useful for pros but a pain in the butt if you hit them while you're learning
Put the animation timeline back: tab
Undo snap to grid: shift + S
The window fills my screen and i cant see the pc bar: F11
The tools are gone: ctrl + F (might have to press it 2 times)
I can give some more advanced tips if anyone wants, but I dont want to overwhelm. If youre stuck there is official aseprite documentation where you can search for what you need. Or just ask me. Everything you have could possibly stuck on I have got stuck on it before 20 times.
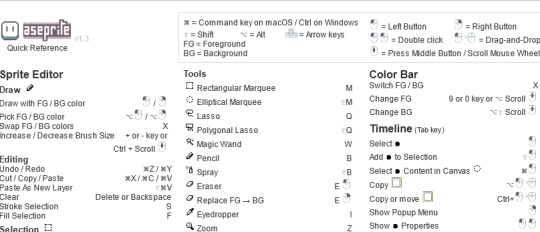
Direct link to keybinds quick reference (keybinds are life
Take it slow and have fun! It will take a while to get used to everything but the software is amazing! Trust the process!
2K notes
·
View notes
Text

hello and welcome to my tutorial on how to create gifs like this one! full explanation under the cut, but if you wanted to take a little peek at the gifset attached to this tutorial, here ya go!
for the purposes of this tutorial i am assuming you know
how to make a gif
what vhs footage looks like
STEP ONE: MAKING YOUR GIF
choose your footage and plug it into your desired software of choice! i use photoshop for this so i can only attest to the efficacy of these methods in that context
as for shot selection, you could feasibly choose anything. however, i prefer shots without too much movement in them - makes it look more like a home video.
because of the heavy amount of colors and filters, i'd recommend a gif somewhere around the 40-50 frames! but of course you can play around.
oh i also set the frame delay to 0.08 seconds. this is slower than most gifmakers tend to set theirs, but it makes it run buttery smooth imo.
STEP TWO: MAKING THE COLORING
here's where we get vhs specific. if you're unfamiliar with vhs footage, i recommend clicking through this youtube playlist! if you're not interested in the coloring, skip to step three (smart object fuckery + filters)
now while making a set i tend to choose some primary colors for my gifs. in the gifset i linked above, i chose to work with blue and orange-y yellow. in some of the other gifs i'll be using as examples (from an unfinished set) i chose green and yellow.


to create the above coloring i generally use these steps:
1) curves
i'm a maniac so i use the same curves layer to initially edit the luminosity AND colors of my gifs. the purpose of this layer is to edit brightness/contrast like i normally would and already start the process of changing the colors a little bit. this is my curves layer for the blue house gif:

to make the gif go from the left image to the right image:


as you can see i used the brightening curves to make the footage a whole lot lighter. i also increased the reds to get rid of the cyan tint a lot of blue footage has, slightly increased the blues, and once again decreased the greens to get rid of any cyan. this does make the blue hue a bit more purple, which is a nice bonus!
as for the gif of the boy, that one's a little harder to show a before and after for, but i'lls how the curves for good measure:

the original shot was already quite bright so i only edited the brightness a litttle bit. because i knew i wanted the gif to be green and yellow, i increased the greens, decreased the reds (except in the shadows), and decreased the blues (to get yellow)
2) channel mixer
now the channel mixer layer takes a little getting used to so i recommend experimenting. ALWAYS USE THIS LAYER ON THE COLOR BLENDING MODE for a more even result.
i use channel mixers to sort of... unify the colors a bit more. for the house gif, for example, i increased the blue channel to +110% blue, but decreased the blue in the red (-12%) to retain the yellow in the window.
if you want me to explain this more in depth, send an ask! it'll be kinda longwinded though


before / after of the boy gif with curves/channel mixer.
3) levels
this is where it starts looking more vhs-y! vhs footage has light shadows and dark highlights.
first, set your levels layer to luminosity blending mode to retain your beautiful colors.
then, crunch the hell out of your gif to make it very... mid.


this may feel a little wrong at first but i prommy it'll look okay at the end. a before/after for the boy:


now that's starting to look familiar right?
4) color fill/gradient map
because i want to unify my colors/make sure my gif is saturated, i usually add either a color fill or gradient map layer. in the case of the house, i chose to go with a dark blue color fill:


because the coloring of the boy gif was a little more complex, i decided to go with a brown to green gradient map.

this will make the shadows yellow, and the highlights green.


BOTH THESE LAYERS ARE SET TO OVERLAY. i usually fiddle with the opacity of them until i like it, but it's anywhere from 7% - 17% depending on what i feel like that day
5) curves (again)
this layer is probably useless but i do it anyway to make myself feel better. this is just a regular curse layer to up the brightness a tiiiiny bit and amke sure everything's clear. also it helps counteract the darkness your overlay color will add in.
6) color balance
this is my most subtle layer so i won't be able to show before and after but i fiddle with the color distribution a little until i'm satisfied. set this layer to color blending 'cause that's what you wanna affect!
i decided i wanted the house gif shadows to be a little more purple, for example, so i added in red (+3), magenta (-1) and blue (+1). etc etc. do what feels good!
STEP THREE: SMART OBJECT FUCKERY AND FILTERS
OKAY that was a lot. sorry or you're welcome. but good news: now's the fun part. convert your animation to a timeline, then select both your coloring and gif layers, right click, and select convert to smart object.
now that your gif's a smart object, i usually crop it. i tend make vhs aes gifs a 4:3 ratio (so 540 x 405 px) because that's what vhs footage was usually recorded as! crop your gif, resize, and then we can continue.
1) color bleeding
vhs footage usually bleeds its colors - this manifests as a short of... weird subtle halo around any object. the way to recreate this in photoshop is to duplicate your smart object.
set your copied smart object to color blending. now move it to the side a couple of pixels (i usually do around 5px, but you do you!)


as you can see, the tree and chimney (and everything else but less prominently) have a yellow shadow to them. this is exactly what we want!
2) filters
now's the time to add your filters and make it look like shit (but on purpose!) first, select both smart objects and convert to smart object again. this will ensure the filters apply to all layers evenly.
i use the following filters:
unsharp mask (amt 35%, radius 4px) - this will subtly add some sharpening but only on the edges of objects
add noise (amt 7.5%, distr. uniform, not monochromatic) - this will add the signature vhs grain.
box blur (2px) - i edit this to be 75% opacity with the little arrows to the right, just to make sure you can still make SOMETHING out when you're looking at the gif. MAKE SURE THIS FILTER IS ON TOP OF YOUR NOISE FILTER. tumblr will kill your gif otherwise
4) ONE LAST THING
usually at this point i'm not happy with either the saturation or levels. (usually the levels). so on top of your smart object, add another saturation or levels layer and fuck around!
in the case of the house gif, i thought it was too bright still so i set my output levels to 13 and 216. for the boy, i thought the shadows were too dark, so i set my shadow output to 11.
BEFORE & AFTER:


aaaand that's it! thanks for reading! if you have any questions, feel free to come to my askbox, i'm always happy to explain my process. happy giffing 🥰
#gif tutorial#ps tutorial#photoshop#completeresources#allresources#giffing tutorial#vhs gif tutorial#idfk. what do you even tag for tutorials lmao
320 notes
·
View notes
Note
Will there be a voice claims video with the WAC characters?
perhaps in the future! I started one, but I've since moved laptops and apparently the editing software I've used for years just like. breaks Windows 11 on my new computer. So either I figure out how to make the software work without fucking up my computer or I have to redo all of the editing and audio cutting work I'd already done on it on a new software. Either prospect isn't very motivating at the moment.
Here's some of the cards I made for the video so far though!


149 notes
·
View notes