#visual studio code html
Explore tagged Tumblr posts
Visit Tumblr Blog
Explore Tumblr blogs with no restrictions, modern design and the best experience.
Last Seen Tumblr Blogs


Fun Fact
In 2020, 44% of users from Denmark used Tumblr daily.
Text
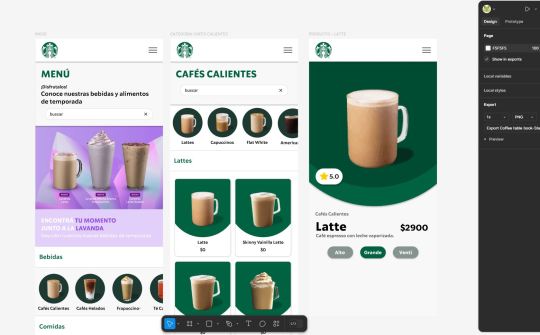

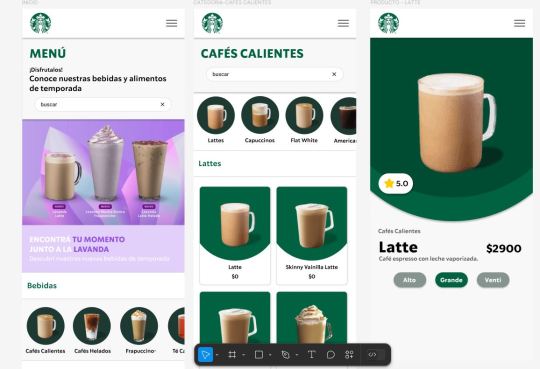
Working on a new project about redesigning how I would create a virtual menu/book table for Starbucks. Starting the prototype in Figma! 🥐☕✨
#web development#web design#web developers#htmlcoding#html css#html#html5#coding#programming#uxdesign#figma#figma to html#freelance#uidesign#figmadesign#visual studio code
1 note
·
View note
Text
Create a web page to visualize the output of BitLocker Script
In this article, we will create Create a web page to visualize the output of BitLocker Script. This sample web page creation assumes you already have your scripts saved. We will be utilizing the Virtual Studio Code which is a a powerful and versatile code editor. Please see how to Install HTML Web Client for Microsoft RDS, How to Migrate Azure Web Apps, and “RDS client access licenses: How…
#CSS#CSS3#html#HTML in Visual Studio Code#HyperText Markup Language#javascript#Python#Text Automation#visual studio#Visual Studio Code#Visual Studio Extensions
0 notes
Text
Hojas de Estilo CSS: La Magia Detrás del Diseño Web
¿Qué son las hojas de estilo en cascada (CSS)? CSS es un lenguaje de diseño que se utiliza para dar estilo y formato a las páginas web. Separa la presentación del contenido, lo que facilita la creación de sitios web más consistentes y fáciles de mantener. Historia Breve CSS surgió a mediados de los 90 como una solución para separar el contenido (HTML) de la presentación (CSS). Desde entonces,…
#Atom#Bootstrap#compatibilidad con navegadores#CSS#Diseño web#Foundation#frameworks CSS#hojas de estilo#HTML#Less#preprocesadores CSS#propiedades#responsive design#Sass#selectores#Sublime Text#valores#Visual Studio Code
0 notes
Text

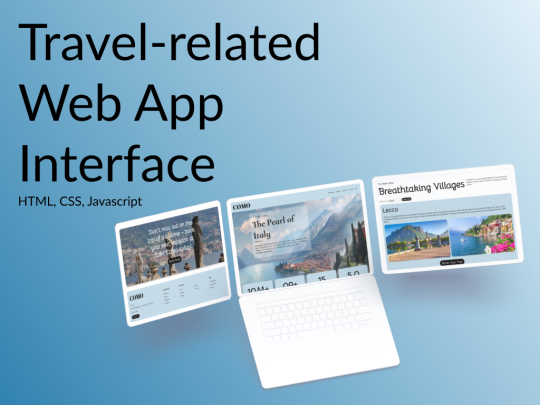
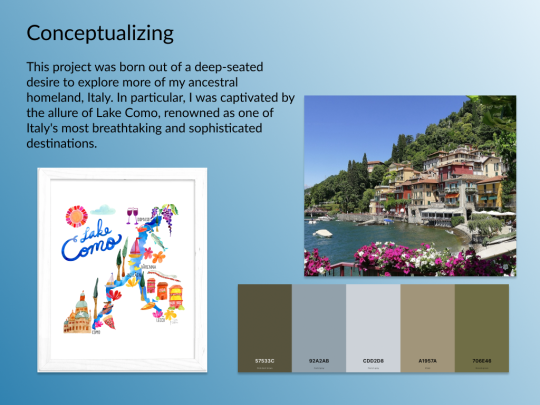
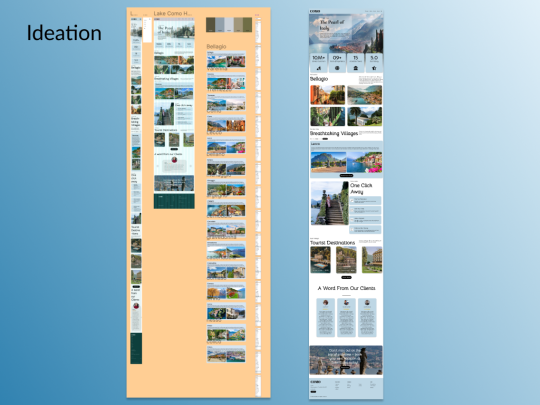
Lake Como Travel HTML, CSS, JS
View File in Browser


1 note
·
View note
Text
does anyone else use vscode for normal writing too? 😭 like I have a little folder of txt documents and I use vscode to write in them :') mine uses a dark mode theme and opendyslexic, so it's generally easier for me to look at for long periods of time, and I have a little bongocat in the bottom, so it's just more fun 😭😭 sometimes I'll also make it an html document PURELY bc it turns the text pink for me 💀
1 note
·
View note
Text
!!! my tag system is below all of this,,, I moved it under a cut because people reblog this post for the links :P
edit: thx for the love on this post. im going to try and continually update this!

⇩ ⠀sites FULL of web graphics ⇩
blinkie maker : make your own blinkies!
DOLLZ REVIVAL : a revival of pixel dolls where you can create and share your own. very cute!
GlowTxt : create glowing transparent text gifs that say whatever u want
HOARDER'S PILE : contains blinkies, buttons, stamps, and teddies
plasticdino.neocities.org : blinkies
Glitter Graphics : contains gifs, blinkies, dividers, and just sooo many web graphics
Cute Kawaii Resources : contains gifs, blinkies, stamps, favicons, dividers, buttons, fonts, literally everything you need. its an insane resource
Adrian's blinkie collection : collection of blinkies, stamps, and buttons
☆ (supplies.ju.mp) : blinkies, stamps, buttons, & favicons
twigbranch.carrd.co : blinkies
lallys.carrd.co : blinkies, stamps, dividers, and other resources
Bugleeblinkie.carrd.co : blinkies, and 3 very special gifs at the end ;)
unshinesblinkies.carrd.co : blinkies
The 88x31 GIF Collection : buttons. there are 5 parts! huge collection!
Bonnibel's Graphic Collection : blinkies
WELCOME TO GIFCITY : blinkies, dividers, favicons, stamps
cass-tastrophe.carrd.co : blinkies, stamps
kotatsuOS : blinkies
Cute web graphics : blinkies, stamps, dividers, and a LOT of other graphics, all very cute
⇩ some html tools! + tags below cut ⇩
MDN (mozilla.org) : if you're just starting out like me this is super helpful HTML Tutorial (w3schools.com): same here! (offers other programming languages as well!) Accessibility Checker(Free Scan) : a site you can use to check accessibility/ADA compliance when making your website! it will point out what needs to be changed. it is free, but they also offer paid services if you need more help imagecolorpicker.com : hex code picker. i use this one because you can upload an image, paste clipboard, OR type in the website and it'll grab a screenshot for you! something simple that was made really well. cssgradient.io : helps you make css gradients for backgrounds or whatever else you need them for smartgb.com : a free guestbook service FC2 Counter! : free "site visits" and "online now" counters. fully customizable Unclosed Tag Checker by Alicia Ramirez : does as it says, checks for unclosed tags (although I recommend using a program that does this as you write anyways. I use Visual Studio Code. Status Cafe : an updateable and embeddable status that you can stick anywhere on your site! it is mostly customizable with CSS but I have noticed a few small quirks with it
my tagging system :))
#graphics
#blinkies
#stamps
#buttons
#dividers
#html/css
#resources
#code
e10's web (neocities.org) <- shameless site plug. show it some love :P
#blinkies#stamps#favicons#gifs#old web graphics#old web aesthetic#old web stamps#old internet#old web#old webcore#2000s web#90s web#html#html css#html5#css#htmlcoding#web design#web resources#early web#early internet#neocities graphics#neocities#geocities#gifcities#web graphics#webcore
549 notes
·
View notes
Text
Essentials You Need to Become a Web Developer
HTML, CSS, and JavaScript Mastery
Text Editor/Integrated Development Environment (IDE): Popular choices include Visual Studio Code, Sublime Text.
Version Control/Git: Platforms like GitHub, GitLab, and Bitbucket allow you to track changes, collaborate with others, and contribute to open-source projects.
Responsive Web Design Skills: Learn CSS frameworks like Bootstrap or Flexbox and master media queries
Understanding of Web Browsers: Familiarize yourself with browser developer tools for debugging and testing your code.
Front-End Frameworks: for example : React, Angular, or Vue.js are powerful tools for building dynamic and interactive web applications.
Back-End Development Skills: Understanding server-side programming languages (e.g., Node.js, Python, Ruby , php) and databases (e.g., MySQL, MongoDB)
Web Hosting and Deployment Knowledge: Platforms like Heroku, Vercel , Netlify, or AWS can help simplify this process.
Basic DevOps and CI/CD Understanding
Soft Skills and Problem-Solving: Effective communication, teamwork, and problem-solving skills
Confidence in Yourself: Confidence is a powerful asset. Believe in your abilities, and don't be afraid to take on challenging projects. The more you trust yourself, the more you'll be able to tackle complex coding tasks and overcome obstacles with determination.
#code#codeblr#css#html#javascript#java development company#python#studyblr#progblr#programming#comp sci#web design#web developers#web development#website design#webdev#website#tech#html css#learn to code
2K notes
·
View notes
Text
Introduction To HTML
[Note: You need a text editor to do this. You can use Notepad or Text Edit. But it's so much better to download VS Code / Visual Studio Code. Save it with an extension of .html]
HTML stands for Hyper Text Markup Language
It is used to create webpages/websites.
It has a bunch of tags within angular brackets <....>
There are opening and closing tags for every element.
Opening tags look like this <......>
Closing tags look like this
The HTML code is within HTML tags. ( // code)
Here's the basic HTML code:
<!DOCTYPE html> <html> <head> <title> My First Webpage </title> </head> <body> <h1> Hello World </h1> <p> Sometimes even I have no idea <br> what in the world I am doing </p> </body> </html>
Line By Line Explanation :
<!DOCTYPE html> : Tells the browser it's an HTML document.
<html> </html> : All code resides inside these brackets.
<head> </head> : The tags within these don't appear on the webpage. It provides the information about the webpage.
<title> </title> : The title of webpage (It's not seen on the webpage. It will be seen on the address bar)
<body> </body> : Everything that appears on the webpage lies within these tags.
<h1> </h1> : It's basically a heading tag. It's the biggest heading.
Heading Tags are from <h1> to <h6>. H1 are the biggest. H6 are the smallest.
<p> </p> : This is the paragraph tag and everything that you want to write goes between this.
<br> : This is used for line breaks. There is no closing tag for this.
-------
Now, we'll cover some <Meta> tags.
Meta tags = Notes to the browser and search engines.
They don’t appear on the page.
They reside within the head tag
<head> <meta charset="UTF-8"> <meta name="viewport" content="width=device-width, initial-scale=1.0"> <meta name="description" content="Website Description"> <meta name="Author" content="Your Name"> <meta name="keywords" content="Websites Keywords"> </head>
Line By Line Explanation:
<meta charset="UTF-8"> : Makes sure all letters, symbols, and emojis show correctly.
<meta name="viewport" content="width=device-width, initial-scale=1.0"> : Makes your site look good on phones and tablets.
<meta name="description" content="Website Description"> : Describes your page to Google and helps people find it.
<meta name="author" content="Your Name"> : Says who created the page.
<meta name="keywords" content="Website's Keywords"> : Adds a few words to help search engines understand your topic.
_____
This is my first post in this topic. I'll be focusing on the practical side more than the actual theory, really. You will just have some short bullet points for most of these posts. The first 10 posts would be fully HTML. I'll continue with CSS later. And by 20th post, we'll build the first website. So, I hope it will be helpful :)
If I keep a coding post spree for like 2 weeks, would anyone be interested? o-o
#code#codeblr#css#html#javascript#python#studyblr#progblr#programming#comp sci#web design#web developers#web development#website design#webdev#website#tech#html css#learn to code#school#study motivation#study aesthetic#study blog#student#high school#studying#study tips#studyspo#website development#coding
100 notes
·
View notes
Text
Edgaring time!
Tutorial on how to make your own responsive Edgar :D I will try to explain it in really basic terms, like you’ve never touched a puter (which if you’re making this… I’m sure you’ve touched plenty of computers amirite??? EL APLAUSO SEÑOOOREEES).
If you have some experience I tried to highlight the most important things so you won’t have to read everything, this is literally building a website but easier.
I will only show how to make him move like this:
Disclaimer: I’m a yapper.
Choosing an engine First of all you’ll need something that will allow you to display a responsive background, I used LivelyWallpaper since it’s free and open-source (we love open-source).
Choosing an IDE Next is having any IDE to make some silly code! (Unless you can rawdog code… Which would be honestly impressive and you need to slide in my DMs and we will make out) I use Visual Studio!!!
So now that we have those two things we just need to set up the structure we will use.
Project structure
We will now create our project, which I will call “Edgar”, we will include some things inside as follows:
Edgar
img (folder that will contain images) - thumbnail.png (I literally just have a png of his face :]) - [some svgs…]
face.js (script that will make him interactive)
index.html (script that structures his face!)
LivelyInfo,json (script that LivelyWallpaper uses to display your new wallpaper)
style.css (script we will use to paint him!)
All of those scripts are just literally like a “.txt” file but instead of “.txt” we use “.js”, “.html”, etc… You know? We just write stuff and tell the puter it’s in “.{language}”, nothing fancy.
index.html
Basically the way you build his silly little face! Here’s the code:
<!doctype html> <html> <head> <meta charset="utf-8"> <title>Face!</title> <link rel = "stylesheet" type = "text/css" href = "style.css"> </head> <body> <div class="area"> <div class="face"> <div class="eyes"> <div class="eyeR"></div> <div class="eyeL"></div> </div> <div class="mouth"></div> </div> </div> <script src="face.js"></script> </body> </html>
Ok so now some of you will be thinking “Why would you use eyeR and eyeL? Just use eye!“ and you’d be right but I’m a dummy who couldn’t handle making two different instances of the same object and altering it… It’s scary but if you can do it, please please please teach me ;0;!!!
Area comes in handy to the caress function we will implement in the next module (script)! It encapsulates face.
Face just contains the elements inside, trust me it made sense but i can’t remember why…
Eyes contains each different eye, probably here because I wanted to reuse code and it did not work out and when I kept going I was too scared to restructure it.
EyeR/EyeL are the eyes! We will paint them in the “.css”.
Mouth, like the eyeR/eyeL, will be used in the “.css”.
face.js
Here I will only show how to make it so he feels you mouse on top of him! Too ashamed of how I coded the kisses… Believe me, it’s not pretty at all and so sooo repetitive…
// ######################### // ## CONSTANTS ## // ######################### const area = document.querySelector('.area'); const face = document.querySelector('.face'); const mouth = document.querySelector('.mouth'); const eyeL = document.querySelector('.eyeL'); const eyeR = document.querySelector('.eyeR'); // ######################### // ## CARESS HIM ## // ######################### // When the mouse enters the area the face will follow the mouse area.addEventListener('mousemove', (event) => { const rect = area.getBoundingClientRect(); const x = event.clientX - rect.left; const y = event.clientY - rect.top; face.style.left = `${x}px`; face.style.top = `${y}px`; }); // When the mouse leaves the area the face will return to the original position area.addEventListener('mouseout', () => { face.style.left = '50%'; face.style.top = '50%'; });
God bless my past self for explaining it so well, but tbf it’s really simple,,
style.css
body { padding: 0; margin: 0; background: #c9c368; overflow: hidden; } .area { width: 55vh; height: 55vh; position: absolute; top: 50%; left: 50%; transform: translate(-50%,-50%); background: transparent; display: flex; } .face { width: 55vh; height: 55vh; position: absolute; top: 50%; left: 50%; transform: translate(-50%,-50%); background: transparent; display: flex; justify-content: center; align-items: center; transition: 0.5s ease-out; } .mouth { width: 75vh; height: 70vh; position: absolute; bottom: 5vh; background: transparent; border-radius: 100%; border: 1vh solid #000; border-color: transparent transparent black transparent; pointer-events: none; animation: mouth-sad 3s 420s forwards step-end; } .face:hover .mouth { animation: mouth-happy 0.5s forwards; } .eyes { position: relative; bottom: 27%; display: flex; } .eyes .eyeR { position: relative; width: 13vh; height: 13vh; display: block; background: black; margin-right: 11vh; border-radius: 50%; transition: 1s ease } .face:hover .eyeR { transform: translateY(10vh); border-radius: 20px 100% 20px 100%; } .eyes .eyeL { position: relative; width: 13vh; height: 13vh; display: block; background: black; margin-left: 11vh; border-radius: 50%; transition: 1s ease; } .face:hover .eyeL { transform: translateY(10vh); border-radius: 100% 20px 100% 20px; } @keyframes mouth-happy { 0% { background-color: transparent; height: 70vh; width: 75vh; } 100% { border-radius: 0 0 25% 25%; transform: translateY(-10vh); } } @keyframes mouth-sad { 12.5%{ height: 35vh; width: 67vh; } 25% { height: 10vh; width: 60vh; } 37.5% { width: 53vh; border-radius: 0%; border-bottom-color: black; } 50% { width: 60vh; height: 10vh; transform: translateY(11vh); border-radius: 100%; border-color: black transparent transparent transparent; } 62.5% { width: 64vh; height: 20vh; transform: translateY(21vh); } 75% { width: 69vh; height: 40vh; transform: translateY(41vh); } 87.5% { width: 75vh; height: 70vh; transform: translateY(71vh); } 100% { width: 77vh; height: 90vh; border-color: black transparent transparent transparent; transform: translateY(91vh); } }
I didn’t show it but this also makes it so if you don’t pay attention to him he will get sad (mouth-sad, tried to make it as accurate to the movie as possible, that’s why it’s choppy!)
The .hover is what makes him go like a creature when you hover over him, if you want to change it just… Change it! If you’d rather him always have the same expression, delete it!
Anyway, lots of easy stuff, lots of code that I didn’t reuse and I probably should’ve (the eyes!!! Can someone please tell me a way I can just… Mirror the other or something…? There must be a way!!!) So now this is when we do a thinking exercise in which you think about me as like someone who is kind of dumb and take some pity on me.
LivelyInfo.json
{ "AppVersion": "1.0.0.0", "Title": "Edgar", "Thumbnail": "img/thumbnail.png", "Preview": "thumbnail.png", "Desc": "It's me!.", "Author": "Champagne?", "License": "", "Type": 1, "FileName": "index.html" }
Easy stuff!!!
Conclusion
This could've been a project on git but i'm not ready and we're already finished. I'm curious about how this will be seen on mobile and PC,,, i'm not one to post here.
Sorry if I rambled too much or if i didn't explain something good enough! If you have any doubts please don't hesitate to ask.
And if you add any functionality to my code or see improvements please please please tell me, or make your own post!
98 notes
·
View notes
Text
I've been itching to dive into something totally new and outside of my usual web dev comfort zone! After brainstorming for a while, I finally landed on a brilliant new project idea: building my very own desktop widget~!
Now, full disclosure—I have zero idea where to even start when it comes to programming a widget, but that’s where the fun comes in, right? I’m all about learning new things (I have an addiction to studying so…)~!
In this post however, I’ll be sharing my initial ideas for the widget and brainstorming what tech stack might bring this amazing idea to life~!
Prior knowledge on desktop widgets?
All I know is that they stick to the desktop area and some even always in front of the other windows. That’s all I know!
Widget Idea
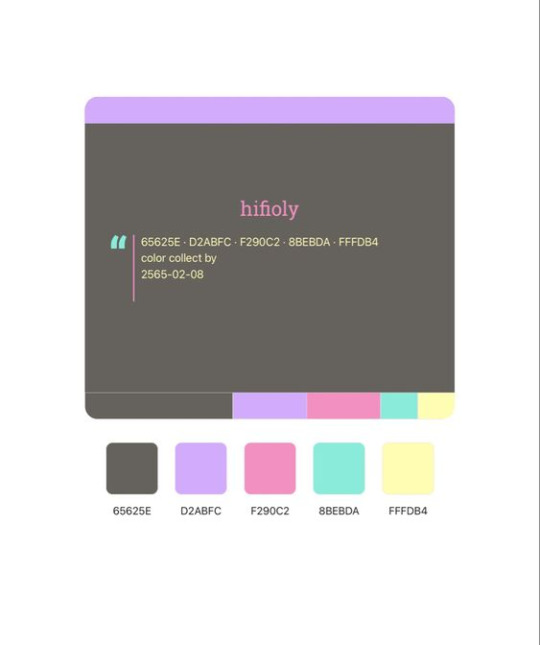
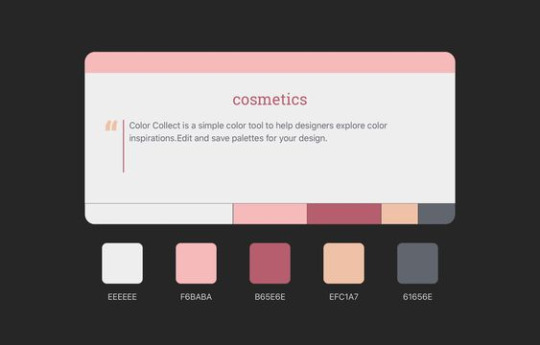
So, the project idea I’ve chosen is something simple, just so I can get used to making widgets: a notepad. But, it’s not just any plain notepad widget—it’s going to have an aesthetic color scheme! (I know, pretty cool, right?) I really wanted to keep things basic for this first project.
The inspiration actually came from a Pinterest pin that I saved. I think the design is originally from a color palette generator website, but I want to take that concept and turn it into an actual desktop widget. Thus this project was born!

Tech Stack
Alright, I lied—I'm not entirely stepping out of my comfort zone for this one! I'll be using ReactJS, a technology I’m super comfortable with and absolutely love. But to keep things fresh and challenging, I’m diving into something new as well!
After researching (thank you, ChatGPT, Google, and YouTube), I found out there are plenty of ways to build a desktop application, or in this case, a widget. You can go with WinForms, WPF, Tauri (Rust), Qt, and others. But I wanted to stick closer to JavaScript—specifically something I could pair with ReactJS. So, ElectronJS seemed like the best fit.
For this project, my tech stack will be:
ReactJS (JavaScript)
ElectronJS (JavaScript)
SCSS (for those extra styling powers)
HTML (obviously)
Visual Studio Code (with a lovely brown theme 🧸)
Toward the end of the project, I’ll also explore how to package the widget so people can download and install it on their own computers, and how to store the notes locally!
Finally
As I post this I am going to start the project so I will soon post updates! (This is where I fail…!)
#xc: project logs#coding#codeblr#programming#progblr#studyblr#studying#tech#comp sci#computer science
95 notes
·
View notes
Note
I’m a complete beginner when it comes to any coding and I’m not sure if you are or not, but was it easy to begin making the site using rarebit?
I'm a complete beginner as well! I've only coded a navigation bar back in middle school for an assignment and then never again, so Rarebit was overwhelming when I started.
However, you'll realize that it's pretty straightforward the more you read the code over and over again. I suggest opening up the Rarebit folder in an external terminal that isn't Neocities like Visual Studio Code and download the Live Preview plug-in from Microsoft. This let's you see your website in live time and not have to code blindly like in Neocities.
HTML is extremely straightforward and easy to grasp. It's CSS you have to learn and worry about since it's what makes your website look like your website.
I haven't touched Javascript yet, that's a bit more complex, but nothing a YouTube video or a forum can't help with.
It just takes time and patience like any other skill to learn!
I recently learnt how to use flexbox!

#asks#anon#idk it's just fun!#and more rewarding to create an experience for the readers to explore than to upload it on webtoon or tapas#like it reminds people that comics are a craft and aren't just content to consume#there's an experience to it
97 notes
·
View notes
Note
hi! sorry if this is a question you get a lot but i looked at your tags and i didn’t quite see the answer - i was wondering what software you use to code link rot? i’ve been trying to figure out what to use for my own project that i want to be multimedia/be able to click links and such and hosted probably on neocities and i just can’t figure out what program - if any - these sorts of projects use. (i would assume it’s html and css at the least, but is js needed too?) like can you still use twine for this kind of thing or rarebit or? if it’s a personal program/code i completely get if you don’t want to share it!! thank you either way :)
i use html, CSS, and javascript/jquery! you can absolutely use twine if you so choose, that's just a different language to learn to accomplish the same thing. most people code in visual studio code (its free!) and upload to their website, but if you're sick in the head (me) you can just code on the website directly
16 notes
·
View notes
Text
heyyyyyy guys. remember light on tainted glass? thats still a thing right lol? chapter 12 probably coming out soon with another website overhaul as I move from neocities/notepad++ to visual studio code for my html stuff
12 notes
·
View notes
Text
just realized that i never mentioned that i know how to code websites and vaguely know how to code in C because i took a class from Harvard, as well as classes at my university
in case you're interested in learning HTML and CSS, my web design class literally gave us these websites to use because it has almost everything:
CSS Tricks - An entire website just for CSS
HTML Tutorial - A webpage about HTML
CSS Tutorial - A webpage about CSS
Markup Validator - Makes sure your code is right
also, i recommend using Visual Studio (if you have Windows) or Visual Studio Code (if you have anything other than Windows, or if you want to do more than just HTML)
#random#random thoughts#thought this was cool to know about me#fun fact about me#ig#and honestly#coding in html and css is literally so easy#i first learned in a computer class in middle school and i made a whole ass website#i highly recommend html for anyone that wants to start learning more about computer languages#although i always found css to be a bit more difficult to figure out#but i think that is just a me problem#html#html css#htmlcoding#html5#css#html5 css3#frontend#code
6 notes
·
View notes
Text
How to Build Software Projects for Beginners

Building software projects is one of the best ways to learn programming and gain practical experience. Whether you want to enhance your resume or simply enjoy coding, starting your own project can be incredibly rewarding. Here’s a step-by-step guide to help you get started.
1. Choose Your Project Idea
Select a project that interests you and is appropriate for your skill level. Here are some ideas:
To-do list application
Personal blog or portfolio website
Weather app using a public API
Simple game (like Tic-Tac-Toe)
2. Define the Scope
Outline what features you want in your project. Start small and focus on the minimum viable product (MVP) — the simplest version of your idea that is still functional. You can always add more features later!
3. Choose the Right Tools and Technologies
Based on your project, choose the appropriate programming languages, frameworks, and tools:
Web Development: HTML, CSS, JavaScript, React, or Django
Mobile Development: Flutter, React Native, or native languages (Java/Kotlin for Android, Swift for iOS)
Game Development: Unity (C#), Godot (GDScript), or Pygame (Python)
4. Set Up Your Development Environment
Install the necessary software and tools:
Code editor (e.g., Visual Studio Code, Atom, or Sublime Text)
Version control (e.g., Git and GitHub for collaboration and backup)
Frameworks and libraries (install via package managers like npm, pip, or gems)
5. Break Down the Project into Tasks
Divide your project into smaller, manageable tasks. Create a to-do list or use project management tools like Trello or Asana to keep track of your progress.
6. Start Coding!
Begin with the core functionality of your project. Don’t worry about perfection at this stage. Focus on getting your code to work, and remember to:
Write clean, readable code
Test your code frequently
Commit your changes regularly using Git
7. Test and Debug
Once you have a working version, thoroughly test it. Look for bugs and fix any issues you encounter. Testing ensures your software functions correctly and provides a better user experience.
8. Seek Feedback
Share your project with friends, family, or online communities. Feedback can provide valuable insights and suggestions for improvement. Consider platforms like GitHub to showcase your work and get input from other developers.
9. Iterate and Improve
Based on feedback, make improvements and add new features. Software development is an iterative process, so don’t hesitate to refine your project continuously.
10. Document Your Work
Write documentation for your project. Include instructions on how to set it up, use it, and contribute. Good documentation helps others understand your project and can attract potential collaborators.
Conclusion
Building software projects is a fantastic way to learn and grow as a developer. Follow these steps, stay persistent, and enjoy the process. Remember, every project is a learning experience that will enhance your skills and confidence!
3 notes
·
View notes
Text
What Is The Difference Between Web Development & Web Design?
In today’s world, we experience the growing popularity of eCommerce businesses. Web designing and web development are two major sectors for making a difference in eCommerce businesses. But they work together for publishing a website successfully. But what’s the difference between a web designers in Dubai and a web developer?
Directly speaking, web designers design and developers code. But this is a simplified answer. Knowing these two things superficially will not clear your doubt but increase them. Let us delve deep into the concepts, roles and differentiation between web development and website design Abu Dhabi.

What Is Meant By Web Design?
A web design encompasses everything within the oeuvre of a website’s visual aesthetics and utility. This might include colour, theme, layout, scheme, the flow of information and anything related to the visual features that can impact the website user experience.
With the word web design, you can expect all the exterior decorations, including images and layout that one can view on their mobile or laptop screen. This doesn’t concern anything with the hidden mechanism beneath the attractive surface of a website. Some web design tools used by web designers in Dubai which differentiate themselves from web development are as follows:
● Graphic design
● UI designs
● Logo design
● Layout
● Topography
● UX design
● Wireframes and storyboards
● Colour palettes
And anything that can potentially escalate the website’s visual aesthetics. Creating an unparalleled yet straightforward website design Abu Dhabi can fetch you more conversion rates. It can also gift you brand loyalty which is the key to a successful eCommerce business.
What Is Meant By Web Development?
While web design concerns itself with all a website’s visual and exterior factors, web development focuses on the interior and the code. Web developers’ task is to govern all the codes that make a website work. The entire web development programme can be divided into two categories: front and back.
The front end deals with the code determining how the website will show the designs mocked by a designer. While the back end deals entirely with managing the data within the database. Along with it forwarding the data to the front end for display. Some web development tools used by a website design company in Dubai are:
● Javascript/HTML/CSS Preprocessors
● Template design for web
● GitHub and Git
● On-site search engine optimisation
● Frameworks as in Ember, ReactJS or Angular JS
● Programming languages on the server side, including PHP, Python, Java, C#
● Web development frameworks on the server side, including Ruby on Rails, Symfony, .NET
● Database management systems including MySQL, MongoDB, PostgreSQL
Web Designers vs. Web Developers- Differences
You must have become acquainted with the idea of how id web design is different from web development. Some significant points will highlight the job differentiation between web developers and designers.
Generally, Coding Is Not A Cup Of Tea For Web Designers:
Don’t ever ask any web designers in Dubai about their coding knowledge. They merely know anything about coding. All they are concerned about is escalating a website’s visual aspects, making them more eyes catchy.
For this, they might use a visual editor like photoshop to develop images or animation tools and an app prototyping tool such as InVision Studio for designing layouts for the website. And all of these don’t require any coding knowledge.
Web Developers Do Not Work On Visual Assets:
Web developers add functionality to a website with their coding skills. This includes the translation of the designer’s mockups and wireframes into code using Javascript, HTML or CSS. While visual assets are entirely created by designers, developer use codes to implement those colour schemes, fonts and layouts into the web page.
Hiring A Web Developer Is Expensive:
Web developers are more expensive to hire simply because of the demand and supply ratio. Web designers are readily available as their job is much simpler. Their job doesn’t require the learning of coding. Coding is undoubtedly a highly sought-after skill that everyone can’t entertain.
Final Thoughts:
So if you look forward to creating a website, you might become confused. This is because you don’t know whether to opt for a web designer or a developer. Well, to create a website, technically, both are required. So you need to search for a website design company that will offer both services and ensure healthy growth for your business.
2 notes
·
View notes