#CAD Tutorials
Explore tagged Tumblr posts
Visit Tumblr Blog
Explore Tumblr blogs with no restrictions, modern design and the best experience.
Last Seen Tumblr Blogs


Fun Fact
Celebrities use Tumblr as well.
Photo

#CADSkills #CareerGrowth #DesignEngineering #CADTutorials #YouTubeChannel CAD Foundations is more than a channel—it’s a community of learners, innovators, and professionals. Subscribe today to enhance your skills and take a step closer to your career goals.
0 notes
Note
I’m learnin’ to draw the lanky blue weirdo, got any tips?
Tons and tons and tons of references from every angle possible. I often use screenshots from the clone wars episodes that Cad Bane is featured in. I've made a google drive where I store all my reference materials.
The sideshow sixth scale Cad Bane figure (Kinda pricey but worth it) is articulate and absolutely amazing for posing and referencing.
However, as an artist, my brain is trained to identify shapes and how to utilize that as a tool. (Years of practice helps too) I'll do my best to simplify my explanation.. bear with me, I've never made a guide before 😅
I hope this helps!

Tips
52 notes
·
View notes
Text
I LOVE WOMEN!!!!!

#If u saw this before I fixed the typo then no u didn’t#cad comic#ctrl alt del#ctrl+alt+del#Player 4#i watched a shading tutorial for this
28 notes
·
View notes
Text
I should abuse the fact my college gives me access to 3D Studio Max more... I should learn it more...
#i learned a little bit in class but not much#we mostly used it for rendering objects we made other CAD programs#i wanna learn how to model and animate on that thing if i can#i was following an animation tutorial for a simple bouncing ball recently... thats a start#fetti talks
4 notes
·
View notes
Text
19. November 2023
Weil es geht
Im Rahmen einer Curriculumsreform sollen „Praxis“ und „Theorie“ besser verknüpft werden. Zudem werden „Skills“ neu in so genannten selfpaced-learning-Formaten vermittelt und trainiert. Zu den „Skills“ gehört insbesondere das computergestützte Konstruieren.
Der Fachbereich nutzt dafür seit zwei oder drei Jahren nicht mehr Solid Works, sondern OnShape, eine Software, die sich auch kollaborativ nutzen lässt. Auf der Plattform von OnShape lassen sich Klassen, Kurse, Tutorials, Aufgaben und Abgabeordner einrichten, nicht nur zu OnShape selbst, sondern zu eigentlich allem.
Die Mittelbauleute haben für das Selfpaced-Learning nebst Unterlagen zum Kernthema CAD auch Tutorials zur Produktfotografie, zum Informationsdesign, zum Freihandzeichnen und zu Adobe Basics aufgearbeitet und mich um ein Tutorial zur Konzeption von Dokubroschüren gebeten.
Das Tutorial besteht im Wesentlichen aus ein paar Folien mit kurzen Angaben, ein paar Links, vielen Bildern und den Arbeitsanleitungen. Ein Youtube-Video wäre auch schön, sagt der Mittelbau, sei aber nicht zwingend. Die Studierenden sollen die Folien durcharbeiten und anschliessend die Skizze zu einem Seitenspiegel und zu den geplanten Textbausteinen hochladen. Im Stundenplan sind 90 Minuten dafür vorgesehen.
Heute, knapp drei Wochen später, sehe ich auf OnShape, dass 3 von 14 die Aufgabe erledigt haben, 8 sind „in progress“ und 3 haben das Tutorial noch nicht geöffnet. Vielleicht hätte ich doch ein Video machen sollen.
(Franziska Nyffenegger)
3 notes
·
View notes
Video
youtube
¡Aprende a usar las poderosas Cotas Anotativas en AutoCAD y ahorra tiemp...
0 notes
Text
youtube
#tutorial#howto#tutorials#education#solidworks#cad#youtube#learn solidworks#video#solidworks 2012#Youtube
0 notes
Video
youtube
Part Design: Screw Modeling in CATIA V5 Practice
0 notes
Video
Complex 3d Drawing in Autodesk Inventor || Inventor Tutorials || Autodes...
#youtube#Autodesk Inventor guide 3D modeling tutorial CAD design tips Beginner Inventor tutorial Inventor software walkthrough Step-by-step design in
0 notes
Text
youtube
How To Make Pear Diamond Shape Jewelry Prong Head For Earing In Rhino 3D Tutorial.
How To Make Pear Diamond Shape Jewelry Prong Head For Earing In Rhino 3D Tutorial. Join Live Chat For Any Questions Want To Know About Techniques Or Tutorials. https://jewelry3dartist.locals.com/post/5009046/how-to-make-pear-diamond-shape-jewelry-prong-head-for-earing-in-rhino-3d-tutorial Be a Member of my Community For Exclusive Jewelry 3D CAD Modeling tutorial techniques To Learn And Get experience from My Jewelry Field Journey From 1991 until now. Benefits From My Locals Community Video Tutorials With Private Or Public Live Chat With Me For Ask Any Question Or Techniques, Same Time Share Your Works, Your Ideas, Your Experiences In Our Community. https://jewelry3dartist.locals.com Join Patreon for exclusive new jewelry designs per month, You can be a member and receive each month new creative designs in all file formats, for 3d print industrial use you will get STL file format, and for editing or for media use you will get 3DM Main Default file format. https://www.patreon.com/jewelry3dstudio Join Discord Community Jewelry 3D Tutorials https://discord.gg/VWf7uvfsPb Join Discord Community Jewelry 3D Models https://discord.gg/mKqU8mVQQH Join the Telegram Channel For New Topics https://t.me/jewelry3dstudio Website https://jewelry3dstudio.com https://jewelry3dshop.com
#jewelry tutorials#jewelry 3d tutorials#jewelry modeling#jewelry 3d modeling#jewelry cad tutorial#jewelry course#jewelry 3d course#jewelry training#jewelry 3d online course#online course#online tutorials#jewelry design making#jewelry students#jewelryteachers#rhino 3d#rhino 3d modeling#rhino 3d tutorials#rhino 3d software for modeling#jewelry maker#goldsmith#jewelry diamond settings#jewelry handmade#diamonds#3d print tutorials#3d print course#3d cad#3d#Youtube
0 notes
Text
How I ditched streaming services and learned to love Linux: A step-by-step guide to building your very own personal media streaming server (V2.0: REVISED AND EXPANDED EDITION)
This is a revised, corrected and expanded version of my tutorial on setting up a personal media server that previously appeared on my old blog (donjuan-auxenfers). I expect that that post is still making the rounds (hopefully with my addendum on modifying group share permissions in Ubuntu to circumvent 0x8007003B "Unexpected Network Error" messages in Windows 10/11 when transferring files) but I have no way of checking. Anyway this new revised version of the tutorial corrects one or two small errors I discovered when rereading what I wrote, adds links to all products mentioned and is just more polished generally. I also expanded it a bit, pointing more adventurous users toward programs such as Sonarr/Radarr/Lidarr and Overseerr which can be used for automating user requests and media collection.
So then, what is this tutorial? This is a tutorial on how to build and set up your own personal media server using Ubuntu as an operating system and Plex (or Jellyfin) to not only manage your media, but to also stream that media to your devices both at home and abroad anywhere in the world where you have an internet connection. Its intent is to show you how building a personal media server and stuffing it full of films, TV, and music that you acquired through indiscriminate and voracious media piracy various legal methods will free you to completely ditch paid streaming services. No more will you have to pay for Disney+, Netflix, HBOMAX, Hulu, Amazon Prime, Peacock, CBS All Access, Paramount+, Crave or any other streaming service that is not named Criterion Channel. Instead whenever you want to watch your favourite films and television shows, you’ll have your own personal service that only features things that you want to see, with files that you have control over. And for music fans out there, both Jellyfin and Plex support music streaming, meaning you can even ditch music streaming services. Goodbye Spotify, Youtube Music, Tidal and Apple Music, welcome back unreasonably large MP3 (or FLAC) collections.
On the hardware front, I’m going to offer a few options catered towards different budgets and media library sizes. The cost of getting a media server up and running using this guide will cost you anywhere from $450 CAD/$325 USD at the low end to $1500 CAD/$1100 USD at the high end (it could go higher). My server was priced closer to the higher figure, but I went and got a lot more storage than most people need. If that seems like a little much, consider for a moment, do you have a roommate, a close friend, or a family member who would be willing to chip in a few bucks towards your little project provided they get access? Well that's how I funded my server. It might also be worth thinking about the cost over time, i.e. how much you spend yearly on subscriptions vs. a one time cost of setting up a server. Additionally there's just the joy of being able to scream "fuck you" at all those show cancelling, library deleting, hedge fund vampire CEOs who run the studios through denying them your money. Drive a stake through David Zaslav's heart.
On the software side I will walk you step-by-step through installing Ubuntu as your server's operating system, configuring your storage as a RAIDz array with ZFS, sharing your zpool to Windows with Samba, running a remote connection between your server and your Windows PC, and then a little about started with Plex/Jellyfin. Every terminal command you will need to input will be provided, and I even share a custom #bash script that will make used vs. available drive space on your server display correctly in Windows.
If you have a different preferred flavour of Linux (Arch, Manjaro, Redhat, Fedora, Mint, OpenSUSE, CentOS, Slackware etc. et. al.) and are aching to tell me off for being basic and using Ubuntu, this tutorial is not for you. The sort of person with a preferred Linux distro is the sort of person who can do this sort of thing in their sleep. Also I don't care. This tutorial is intended for the average home computer user. This is also why we’re not using a more exotic home server solution like running everything through Docker Containers and managing it through a dashboard like Homarr or Heimdall. While such solutions are fantastic and can be very easy to maintain once you have it all set up, wrapping your brain around Docker is a whole thing in and of itself. If you do follow this tutorial and had fun putting everything together, then I would encourage you to return in a year’s time, do your research and set up everything with Docker Containers.
Lastly, this is a tutorial aimed at Windows users. Although I was a daily user of OS X for many years (roughly 2008-2023) and I've dabbled quite a bit with various Linux distributions (mostly Ubuntu and Manjaro), my primary OS these days is Windows 11. Many things in this tutorial will still be applicable to Mac users, but others (e.g. setting up shares) you will have to look up for yourself. I doubt it would be difficult to do so.
Nothing in this tutorial will require feats of computing expertise. All you will need is a basic computer literacy (i.e. an understanding of what a filesystem and directory are, and a degree of comfort in the settings menu) and a willingness to learn a thing or two. While this guide may look overwhelming at first glance, it is only because I want to be as thorough as possible. I want you to understand exactly what it is you're doing, I don't want you to just blindly follow steps. If you half-way know what you’re doing, you will be much better prepared if you ever need to troubleshoot.
Honestly, once you have all the hardware ready it shouldn't take more than an afternoon or two to get everything up and running.
(This tutorial is just shy of seven thousand words long so the rest is under the cut.)
Step One: Choosing Your Hardware
Linux is a light weight operating system, depending on the distribution there's close to no bloat. There are recent distributions available at this very moment that will run perfectly fine on a fourteen year old i3 with 4GB of RAM. Moreover, running Plex or Jellyfin isn’t resource intensive in 90% of use cases. All this is to say, we don’t require an expensive or powerful computer. This means that there are several options available: 1) use an old computer you already have sitting around but aren't using 2) buy a used workstation from eBay, or what I believe to be the best option, 3) order an N100 Mini-PC from AliExpress or Amazon.
Note: If you already have an old PC sitting around that you’ve decided to use, fantastic, move on to the next step.
When weighing your options, keep a few things in mind: the number of people you expect to be streaming simultaneously at any one time, the resolution and bitrate of your media library (4k video takes a lot more processing power than 1080p) and most importantly, how many of those clients are going to be transcoding at any one time. Transcoding is what happens when the playback device does not natively support direct playback of the source file. This can happen for a number of reasons, such as the playback device's native resolution being lower than the file's internal resolution, or because the source file was encoded in a video codec unsupported by the playback device.
Ideally we want any transcoding to be performed by hardware. This means we should be looking for a computer with an Intel processor with Quick Sync. Quick Sync is a dedicated core on the CPU die designed specifically for video encoding and decoding. This specialized hardware makes for highly efficient transcoding both in terms of processing overhead and power draw. Without these Quick Sync cores, transcoding must be brute forced through software. This takes up much more of a CPU’s processing power and requires much more energy. But not all Quick Sync cores are created equal and you need to keep this in mind if you've decided either to use an old computer or to shop for a used workstation on eBay
Any Intel processor from second generation Core (Sandy Bridge circa 2011) onward has Quick Sync cores. It's not until 6th gen (Skylake), however, that the cores support the H.265 HEVC codec. Intel’s 10th gen (Comet Lake) processors introduce support for 10bit HEVC and HDR tone mapping. And the recent 12th gen (Alder Lake) processors brought with them hardware AV1 decoding. As an example, while an 8th gen (Kaby Lake) i5-8500 will be able to hardware transcode a H.265 encoded file, it will fall back to software transcoding if given a 10bit H.265 file. If you’ve decided to use that old PC or to look on eBay for an old Dell Optiplex keep this in mind.
Note 1: The price of old workstations varies wildly and fluctuates frequently. If you get lucky and go shopping shortly after a workplace has liquidated a large number of their workstations you can find deals for as low as $100 on a barebones system, but generally an i5-8500 workstation with 16gb RAM will cost you somewhere in the area of $260 CAD/$200 USD.
Note 2: The AMD equivalent to Quick Sync is called Video Core Next, and while it's fine, it's not as efficient and not as mature a technology. It was only introduced with the first generation Ryzen CPUs and it only got decent with their newest CPUs, we want something cheap.
Alternatively you could forgo having to keep track of what generation of CPU is equipped with Quick Sync cores that feature support for which codecs, and just buy an N100 mini-PC. For around the same price or less of a used workstation you can pick up a mini-PC with an Intel N100 processor. The N100 is a four-core processor based on the 12th gen Alder Lake architecture and comes equipped with the latest revision of the Quick Sync cores. These little processors offer astounding hardware transcoding capabilities for their size and power draw. Otherwise they perform equivalent to an i5-6500, which isn't a terrible CPU. A friend of mine uses an N100 machine as a dedicated retro emulation gaming system and it does everything up to 6th generation consoles just fine. The N100 is also a remarkably efficient chip, it sips power. In fact, the difference between running one of these and an old workstation could work out to hundreds of dollars a year in energy bills depending on where you live.
You can find these Mini-PCs all over Amazon or for a little cheaper on AliExpress. They range in price from $170 CAD/$125 USD for a no name N100 with 8GB RAM to $280 CAD/$200 USD for a Beelink S12 Pro with 16GB RAM. The brand doesn't really matter, they're all coming from the same three factories in Shenzen, go for whichever one fits your budget or has features you want. 8GB RAM should be enough, Linux is lightweight and Plex only calls for 2GB RAM. 16GB RAM might result in a slightly snappier experience, especially with ZFS. A 256GB SSD is more than enough for what we need as a boot drive, but going for a bigger drive might allow you to get away with things like creating preview thumbnails for Plex, but it’s up to you and your budget.
The Mini-PC I wound up buying was a Firebat AK2 Plus with 8GB RAM and a 256GB SSD. It looks like this:

Note: Be forewarned that if you decide to order a Mini-PC from AliExpress, note the type of power adapter it ships with. The mini-PC I bought came with an EU power adapter and I had to supply my own North American power supply. Thankfully this is a minor issue as barrel plug 30W/12V/2.5A power adapters are easy to find and can be had for $10.
Step Two: Choosing Your Storage
Storage is the most important part of our build. It is also the most expensive. Thankfully it’s also the most easily upgrade-able down the line.
For people with a smaller media collection (4TB to 8TB), a more limited budget, or who will only ever have two simultaneous streams running, I would say that the most economical course of action would be to buy a USB 3.0 8TB external HDD. Something like this one from Western Digital or this one from Seagate. One of these external drives will cost you in the area of $200 CAD/$140 USD. Down the line you could add a second external drive or replace it with a multi-drive RAIDz set up such as detailed below.
If a single external drive the path for you, move on to step three.
For people with larger media libraries (12TB+), who prefer media in 4k, or care who about data redundancy, the answer is a RAID array featuring multiple HDDs in an enclosure.
Note: If you are using an old PC or used workstatiom as your server and have the room for at least three 3.5" drives, and as many open SATA ports on your mother board you won't need an enclosure, just install the drives into the case. If your old computer is a laptop or doesn’t have room for more internal drives, then I would suggest an enclosure.
The minimum number of drives needed to run a RAIDz array is three, and seeing as RAIDz is what we will be using, you should be looking for an enclosure with three to five bays. I think that four disks makes for a good compromise for a home server. Regardless of whether you go for a three, four, or five bay enclosure, do be aware that in a RAIDz array the space equivalent of one of the drives will be dedicated to parity at a ratio expressed by the equation 1 − 1/n i.e. in a four bay enclosure equipped with four 12TB drives, if we configured our drives in a RAIDz1 array we would be left with a total of 36TB of usable space (48TB raw size). The reason for why we might sacrifice storage space in such a manner will be explained in the next section.
A four bay enclosure will cost somewhere in the area of $200 CDN/$140 USD. You don't need anything fancy, we don't need anything with hardware RAID controls (RAIDz is done entirely in software) or even USB-C. An enclosure with USB 3.0 will perform perfectly fine. Don’t worry too much about USB speed bottlenecks. A mechanical HDD will be limited by the speed of its mechanism long before before it will be limited by the speed of a USB connection. I've seen decent looking enclosures from TerraMaster, Yottamaster, Mediasonic and Sabrent.
When it comes to selecting the drives, as of this writing, the best value (dollar per gigabyte) are those in the range of 12TB to 20TB. I settled on 12TB drives myself. If 12TB to 20TB drives are out of your budget, go with what you can afford, or look into refurbished drives. I'm not sold on the idea of refurbished drives but many people swear by them.
When shopping for harddrives, search for drives designed specifically for NAS use. Drives designed for NAS use typically have better vibration dampening and are designed to be active 24/7. They will also often make use of CMR (conventional magnetic recording) as opposed to SMR (shingled magnetic recording). This nets them a sizable read/write performance bump over typical desktop drives. Seagate Ironwolf and Toshiba NAS are both well regarded brands when it comes to NAS drives. I would avoid Western Digital Red drives at this time. WD Reds were a go to recommendation up until earlier this year when it was revealed that they feature firmware that will throw up false SMART warnings telling you to replace the drive at the three year mark quite often when there is nothing at all wrong with that drive. It will likely even be good for another six, seven, or more years.

Step Three: Installing Linux
For this step you will need a USB thumbdrive of at least 6GB in capacity, an .ISO of Ubuntu, and a way to make that thumbdrive bootable media.
First download a copy of Ubuntu desktop (for best performance we could download the Server release, but for new Linux users I would recommend against the server release. The server release is strictly command line interface only, and having a GUI is very helpful for most people. Not many people are wholly comfortable doing everything through the command line, I'm certainly not one of them, and I grew up with DOS 6.0. 22.04.3 Jammy Jellyfish is the current Long Term Service release, this is the one to get.
Download the .ISO and then download and install balenaEtcher on your Windows PC. BalenaEtcher is an easy to use program for creating bootable media, you simply insert your thumbdrive, select the .ISO you just downloaded, and it will create a bootable installation media for you.
Once you've made a bootable media and you've got your Mini-PC (or you old PC/used workstation) in front of you, hook it directly into your router with an ethernet cable, and then plug in the HDD enclosure, a monitor, a mouse and a keyboard. Now turn that sucker on and hit whatever key gets you into the BIOS (typically ESC, DEL or F2). If you’re using a Mini-PC check to make sure that the P1 and P2 power limits are set correctly, my N100's P1 limit was set at 10W, a full 20W under the chip's power limit. Also make sure that the RAM is running at the advertised speed. My Mini-PC’s RAM was set at 2333Mhz out of the box when it should have been 3200Mhz. Once you’ve done that, key over to the boot order and place the USB drive first in the boot order. Then save the BIOS settings and restart.
After you restart you’ll be greeted by Ubuntu's installation screen. Installing Ubuntu is really straight forward, select the "minimal" installation option, as we won't need anything on this computer except for a browser (Ubuntu comes preinstalled with Firefox) and Plex Media Server/Jellyfin Media Server. Also remember to delete and reformat that Windows partition! We don't need it.
Step Four: Installing ZFS and Setting Up the RAIDz Array
Note: If you opted for just a single external HDD skip this step and move onto setting up a Samba share.
Once Ubuntu is installed it's time to configure our storage by installing ZFS to build our RAIDz array. ZFS is a "next-gen" file system that is both massively flexible and massively complex. It's capable of snapshot backup, self healing error correction, ZFS pools can be configured with drives operating in a supplemental manner alongside the storage vdev (e.g. fast cache, dedicated secondary intent log, hot swap spares etc.). It's also a file system very amenable to fine tuning. Block and sector size are adjustable to use case and you're afforded the option of different methods of inline compression. If you'd like a very detailed overview and explanation of its various features and tips on tuning a ZFS array check out these articles from Ars Technica. For now we're going to ignore all these features and keep it simple, we're going to pull our drives together into a single vdev running in RAIDz which will be the entirety of our zpool, no fancy cache drive or SLOG.
Open up the terminal and type the following commands:
sudo apt update
then
sudo apt install zfsutils-linux
This will install the ZFS utility. Verify that it's installed with the following command:
zfs --version
Now, it's time to check that the HDDs we have in the enclosure are healthy, running, and recognized. We also want to find out their device IDs and take note of them:
sudo fdisk -1
Note: You might be wondering why some of these commands require "sudo" in front of them while others don't. "Sudo" is short for "super user do”. When and where "sudo" is used has to do with the way permissions are set up in Linux. Only the "root" user has the access level to perform certain tasks in Linux. As a matter of security and safety regular user accounts are kept separate from the "root" user. It's not advised (or even possible) to boot into Linux as "root" with most modern distributions. Instead by using "sudo" our regular user account is temporarily given the power to do otherwise forbidden things. Don't worry about it too much at this stage, but if you want to know more check out this introduction.
If everything is working you should get a list of the various drives detected along with their device IDs which will look like this: /dev/sdc. You can also check the device IDs of the drives by opening the disk utility app. Jot these IDs down as we'll need them for our next step, creating our RAIDz array.
RAIDz is similar to RAID-5 in that instead of striping your data over multiple disks, exchanging redundancy for speed and available space (RAID-0), or mirroring your data writing by two copies of every piece (RAID-1), it instead writes parity blocks across the disks in addition to striping, this provides a balance of speed, redundancy and available space. If a single drive fails, the parity blocks on the working drives can be used to reconstruct the entire array as soon as a replacement drive is added.
Additionally, RAIDz improves over some of the common RAID-5 flaws. It's more resilient and capable of self healing, as it is capable of automatically checking for errors against a checksum. It's more forgiving in this way, and it's likely that you'll be able to detect when a drive is dying well before it fails. A RAIDz array can survive the loss of any one drive.
Note: While RAIDz is indeed resilient, if a second drive fails during the rebuild, you're fucked. Always keep backups of things you can't afford to lose. This tutorial, however, is not about proper data safety.
To create the pool, use the following command:
sudo zpool create "zpoolnamehere" raidz "device IDs of drives we're putting in the pool"
For example, let's creatively name our zpool "mypool". This poil will consist of four drives which have the device IDs: sdb, sdc, sdd, and sde. The resulting command will look like this:
sudo zpool create mypool raidz /dev/sdb /dev/sdc /dev/sdd /dev/sde
If as an example you bought five HDDs and decided you wanted more redundancy dedicating two drive to this purpose, we would modify the command to "raidz2" and the command would look something like the following:
sudo zpool create mypool raidz2 /dev/sdb /dev/sdc /dev/sdd /dev/sde /dev/sdf
An array configured like this is known as RAIDz2 and is able to survive two disk failures.
Once the zpool has been created, we can check its status with the command:
zpool status
Or more concisely with:
zpool list
The nice thing about ZFS as a file system is that a pool is ready to go immediately after creation. If we were to set up a traditional RAID-5 array using mbam, we'd have to sit through a potentially hours long process of reformatting and partitioning the drives. Instead we're ready to go right out the gates.
The zpool should be automatically mounted to the filesystem after creation, check on that with the following:
df -hT | grep zfs
Note: If your computer ever loses power suddenly, say in event of a power outage, you may have to re-import your pool. In most cases, ZFS will automatically import and mount your pool, but if it doesn’t and you can't see your array, simply open the terminal and type sudo zpool import -a.
By default a zpool is mounted at /"zpoolname". The pool should be under our ownership but let's make sure with the following command:
sudo chown -R "yourlinuxusername" /"zpoolname"
Note: Changing file and folder ownership with "chown" and file and folder permissions with "chmod" are essential commands for much of the admin work in Linux, but we won't be dealing with them extensively in this guide. If you'd like a deeper tutorial and explanation you can check out these two guides: chown and chmod.

You can access the zpool file system through the GUI by opening the file manager (the Ubuntu default file manager is called Nautilus) and clicking on "Other Locations" on the sidebar, then entering the Ubuntu file system and looking for a folder with your pool's name. Bookmark the folder on the sidebar for easy access.

Your storage pool is now ready to go. Assuming that we already have some files on our Windows PC we want to copy to over, we're going to need to install and configure Samba to make the pool accessible in Windows.
Step Five: Setting Up Samba/Sharing
Samba is what's going to let us share the zpool with Windows and allow us to write to it from our Windows machine. First let's install Samba with the following commands:
sudo apt-get update
then
sudo apt-get install samba
Next create a password for Samba.
sudo smbpswd -a "yourlinuxusername"
It will then prompt you to create a password. Just reuse your Ubuntu user password for simplicity's sake.
Note: if you're using just a single external drive replace the zpool location in the following commands with wherever it is your external drive is mounted, for more information see this guide on mounting an external drive in Ubuntu.
After you've created a password we're going to create a shareable folder in our pool with this command
mkdir /"zpoolname"/"foldername"
Now we're going to open the smb.conf file and make that folder shareable. Enter the following command.
sudo nano /etc/samba/smb.conf
This will open the .conf file in nano, the terminal text editor program. Now at the end of smb.conf add the following entry:
["foldername"]
path = /"zpoolname"/"foldername"
available = yes
valid users = "yourlinuxusername"
read only = no
writable = yes
browseable = yes
guest ok = no
Ensure that there are no line breaks between the lines and that there's a space on both sides of the equals sign. Our next step is to allow Samba traffic through the firewall:
sudo ufw allow samba
Finally restart the Samba service:
sudo systemctl restart smbd
At this point we'll be able to access to the pool, browse its contents, and read and write to it from Windows. But there's one more thing left to do, Windows doesn't natively support the ZFS file systems and will read the used/available/total space in the pool incorrectly. Windows will read available space as total drive space, and all used space as null. This leads to Windows only displaying a dwindling amount of "available" space as the drives are filled. We can fix this! Functionally this doesn't actually matter, we can still write and read to and from the disk, it just makes it difficult to tell at a glance the proportion of used/available space, so this is an optional step but one I recommend (this step is also unnecessary if you're just using a single external drive). What we're going to do is write a little shell script in #bash. Open nano with the terminal with the command:
nano
Now insert the following code:
#!/bin/bash CUR_PATH=`pwd` ZFS_CHECK_OUTPUT=$(zfs get type $CUR_PATH 2>&1 > /dev/null) > /dev/null if [[ $ZFS_CHECK_OUTPUT == *not\ a\ ZFS* ]] then IS_ZFS=false else IS_ZFS=true fi if [[ $IS_ZFS = false ]] then df $CUR_PATH | tail -1 | awk '{print $2" "$4}' else USED=$((`zfs get -o value -Hp used $CUR_PATH` / 1024)) > /dev/null AVAIL=$((`zfs get -o value -Hp available $CUR_PATH` / 1024)) > /dev/null TOTAL=$(($USED+$AVAIL)) > /dev/null echo $TOTAL $AVAIL fi
Save the script as "dfree.sh" to /home/"yourlinuxusername" then change the ownership of the file to make it executable with this command:
sudo chmod 774 dfree.sh
Now open smb.conf with sudo again:
sudo nano /etc/samba/smb.conf
Now add this entry to the top of the configuration file to direct Samba to use the results of our script when Windows asks for a reading on the pool's used/available/total drive space:
[global]
dfree command = /home/"yourlinuxusername"/dfree.sh
Save the changes to smb.conf and then restart Samba again with the terminal:
sudo systemctl restart smbd
Now there’s one more thing we need to do to fully set up the Samba share, and that’s to modify a hidden group permission. In the terminal window type the following command:
usermod -a -G sambashare “yourlinuxusername”
Then restart samba again:
sudo systemctl restart smbd
If we don’t do this last step, everything will appear to work fine, and you will even be able to see and map the drive from Windows and even begin transferring files, but you'd soon run into a lot of frustration. As every ten minutes or so a file would fail to transfer and you would get a window announcing “0x8007003B Unexpected Network Error”. This window would require your manual input to continue the transfer with the file next in the queue. And at the end it would reattempt to transfer whichever files failed the first time around. 99% of the time they’ll go through that second try, but this is still all a major pain in the ass. Especially if you’ve got a lot of data to transfer or you want to step away from the computer for a while.
It turns out samba can act a little weirdly with the higher read/write speeds of RAIDz arrays and transfers from Windows, and will intermittently crash and restart itself if this group option isn’t changed. Inputting the above command will prevent you from ever seeing that window.
The last thing we're going to do before switching over to our Windows PC is grab the IP address of our Linux machine. Enter the following command:
hostname -I
This will spit out this computer's IP address on the local network (it will look something like 192.168.0.x), write it down. It might be a good idea once you're done here to go into your router settings and reserving that IP for your Linux system in the DHCP settings. Check the manual for your specific model router on how to access its settings, typically it can be accessed by opening a browser and typing http:\\192.168.0.1 in the address bar, but your router may be different.
Okay we’re done with our Linux computer for now. Get on over to your Windows PC, open File Explorer, right click on Network and click "Map network drive". Select Z: as the drive letter (you don't want to map the network drive to a letter you could conceivably be using for other purposes) and enter the IP of your Linux machine and location of the share like so: \\"LINUXCOMPUTERLOCALIPADDRESSGOESHERE"\"zpoolnamegoeshere"\. Windows will then ask you for your username and password, enter the ones you set earlier in Samba and you're good. If you've done everything right it should look something like this:

You can now start moving media over from Windows to the share folder. It's a good idea to have a hard line running to all machines. Moving files over Wi-Fi is going to be tortuously slow, the only thing that’s going to make the transfer time tolerable (hours instead of days) is a solid wired connection between both machines and your router.
Step Six: Setting Up Remote Desktop Access to Your Server
After the server is up and going, you’ll want to be able to access it remotely from Windows. Barring serious maintenance/updates, this is how you'll access it most of the time. On your Linux system open the terminal and enter:
sudo apt install xrdp
Then:
sudo systemctl enable xrdp
Once it's finished installing, open “Settings” on the sidebar and turn off "automatic login" in the User category. Then log out of your account. Attempting to remotely connect to your Linux computer while you’re logged in will result in a black screen!
Now get back on your Windows PC, open search and look for "RDP". A program called "Remote Desktop Connection" should pop up, open this program as an administrator by right-clicking and selecting “run as an administrator”. You’ll be greeted with a window. In the field marked “Computer” type in the IP address of your Linux computer. Press connect and you'll be greeted with a new window and prompt asking for your username and password. Enter your Ubuntu username and password here.

If everything went right, you’ll be logged into your Linux computer. If the performance is sluggish, adjust the display options. Lowering the resolution and colour depth do a lot to make the interface feel snappier.

Remote access is how we're going to be using our Linux system from now, barring edge cases like needing to get into the BIOS or upgrading to a new version of Ubuntu. Everything else from performing maintenance like a monthly zpool scrub to checking zpool status and updating software can all be done remotely.

This is how my server lives its life now, happily humming and chirping away on the floor next to the couch in a corner of the living room.
Step Seven: Plex Media Server/Jellyfin
Okay we’ve got all the ground work finished and our server is almost up and running. We’ve got Ubuntu up and running, our storage array is primed, we’ve set up remote connections and sharing, and maybe we’ve moved over some of favourite movies and TV shows.
Now we need to decide on the media server software to use which will stream our media to us and organize our library. For most people I’d recommend Plex. It just works 99% of the time. That said, Jellyfin has a lot to recommend it by too, even if it is rougher around the edges. Some people run both simultaneously, it’s not that big of an extra strain. I do recommend doing a little bit of your own research into the features each platform offers, but as a quick run down, consider some of the following points:
Plex is closed source and is funded through PlexPass purchases while Jellyfin is open source and entirely user driven. This means a number of things: for one, Plex requires you to purchase a “PlexPass” (purchased as a one time lifetime fee $159.99 CDN/$120 USD or paid for on a monthly or yearly subscription basis) in order to access to certain features, like hardware transcoding (and we want hardware transcoding) or automated intro/credits detection and skipping, Jellyfin offers some of these features for free through plugins. Plex supports a lot more devices than Jellyfin and updates more frequently. That said, Jellyfin's Android and iOS apps are completely free, while the Plex Android and iOS apps must be activated for a one time cost of $6 CDN/$5 USD. But that $6 fee gets you a mobile app that is much more functional and features a unified UI across platforms, the Plex mobile apps are simply a more polished experience. The Jellyfin apps are a bit of a mess and the iOS and Android versions are very different from each other.
Jellyfin’s actual media player is more fully featured than Plex's, but on the other hand Jellyfin's UI, library customization and automatic media tagging really pale in comparison to Plex. Streaming your music library is free through both Jellyfin and Plex, but Plex offers the PlexAmp app for dedicated music streaming which boasts a number of fantastic features, unfortunately some of those fantastic features require a PlexPass. If your internet is down, Jellyfin can still do local streaming, while Plex can fail to play files unless you've got it set up a certain way. Jellyfin has a slew of neat niche features like support for Comic Book libraries with the .cbz/.cbt file types, but then Plex offers some free ad-supported TV and films, they even have a free channel that plays nothing but Classic Doctor Who.
Ultimately it's up to you, I settled on Plex because although some features are pay-walled, it just works. It's more reliable and easier to use, and a one-time fee is much easier to swallow than a subscription. I had a pretty easy time getting my boomer parents and tech illiterate brother introduced to and using Plex and I don't know if I would've had as easy a time doing that with Jellyfin. I do also need to mention that Jellyfin does take a little extra bit of tinkering to get going in Ubuntu, you’ll have to set up process permissions, so if you're more tolerant to tinkering, Jellyfin might be up your alley and I’ll trust that you can follow their installation and configuration guide. For everyone else, I recommend Plex.
So pick your poison: Plex or Jellyfin.
Note: The easiest way to download and install either of these packages in Ubuntu is through Snap Store.
After you've installed one (or both), opening either app will launch a browser window into the browser version of the app allowing you to set all the options server side.
The process of adding creating media libraries is essentially the same in both Plex and Jellyfin. You create a separate libraries for Television, Movies, and Music and add the folders which contain the respective types of media to their respective libraries. The only difficult or time consuming aspect is ensuring that your files and folders follow the appropriate naming conventions:
Plex naming guide for Movies
Plex naming guide for Television
Jellyfin follows the same naming rules but I find their media scanner to be a lot less accurate and forgiving than Plex. Once you've selected the folders to be scanned the service will scan your files, tagging everything and adding metadata. Although I find do find Plex more accurate, it can still erroneously tag some things and you might have to manually clean up some tags in a large library. (When I initially created my library it tagged the 1963-1989 Doctor Who as some Korean soap opera and I needed to manually select the correct match after which everything was tagged normally.) It can also be a bit testy with anime (especially OVAs) be sure to check TVDB to ensure that you have your files and folders structured and named correctly. If something is not showing up at all, double check the name.
Once that's done, organizing and customizing your library is easy. You can set up collections, grouping items together to fit a theme or collect together all the entries in a franchise. You can make playlists, and add custom artwork to entries. It's fun setting up collections with posters to match, there are even several websites dedicated to help you do this like PosterDB. As an example, below are two collections in my library, one collecting all the entries in a franchise, the other follows a theme.

My Star Trek collection, featuring all eleven television series, and thirteen films.

My Best of the Worst collection, featuring sixty-nine films previously showcased on RedLetterMedia’s Best of the Worst. They’re all absolutely terrible and I love them.
As for settings, ensure you've got Remote Access going, it should work automatically and be sure to set your upload speed after running a speed test. In the library settings set the database cache to 2000MB to ensure a snappier and more responsive browsing experience, and then check that playback quality is set to original/maximum. If you’re severely bandwidth limited on your upload and have remote users, you might want to limit the remote stream bitrate to something more reasonable, just as a note of comparison Netflix’s 1080p bitrate is approximately 5Mbps, although almost anyone watching through a chromium based browser is streaming at 720p and 3mbps. Other than that you should be good to go. For actually playing your files, there's a Plex app for just about every platform imaginable. I mostly watch television and films on my laptop using the Windows Plex app, but I also use the Android app which can broadcast to the chromecast connected to the TV in the office and the Android TV app for our smart TV. Both are fully functional and easy to navigate, and I can also attest to the OS X version being equally functional.
Part Eight: Finding Media
Now, this is not really a piracy tutorial, there are plenty of those out there. But if you’re unaware, BitTorrent is free and pretty easy to use, just pick a client (qBittorrent is the best) and go find some public trackers to peruse. Just know now that all the best trackers are private and invite only, and that they can be exceptionally difficult to get into. I’m already on a few, and even then, some of the best ones are wholly out of my reach.
If you decide to take the left hand path and turn to Usenet you’ll have to pay. First you’ll need to sign up with a provider like Newshosting or EasyNews for access to Usenet itself, and then to actually find anything you’re going to need to sign up with an indexer like NZBGeek or NZBFinder. There are dozens of indexers, and many people cross post between them, but for more obscure media it’s worth checking multiple. You’ll also need a binary downloader like SABnzbd. That caveat aside, Usenet is faster, bigger, older, less traceable than BitTorrent, and altogether slicker. I honestly prefer it, and I'm kicking myself for taking this long to start using it because I was scared off by the price. I’ve found so many things on Usenet that I had sought in vain elsewhere for years, like a 2010 Italian film about a massacre perpetrated by the SS that played the festival circuit but never received a home media release; some absolute hero uploaded a rip of a festival screener DVD to Usenet. Anyway, figure out the rest of this shit on your own and remember to use protection, get yourself behind a VPN, use a SOCKS5 proxy with your BitTorrent client, etc.
On the legal side of things, if you’re around my age, you (or your family) probably have a big pile of DVDs and Blu-Rays sitting around unwatched and half forgotten. Why not do a bit of amateur media preservation, rip them and upload them to your server for easier access? (Your tools for this are going to be Handbrake to do the ripping and AnyDVD to break any encryption.) I went to the trouble of ripping all my SCTV DVDs (five box sets worth) because none of it is on streaming nor could it be found on any pirate source I tried. I’m glad I did, forty years on it’s still one of the funniest shows to ever be on TV.
Part Nine/Epilogue: Sonarr/Radarr/Lidarr and Overseerr
There are a lot of ways to automate your server for better functionality or to add features you and other users might find useful. Sonarr, Radarr, and Lidarr are a part of a suite of “Servarr” services (there’s also Readarr for books and Whisparr for adult content) that allow you to automate the collection of new episodes of TV shows (Sonarr), new movie releases (Radarr) and music releases (Lidarr). They hook in to your BitTorrent client or Usenet binary newsgroup downloader and crawl your preferred Torrent trackers and Usenet indexers, alerting you to new releases and automatically grabbing them. You can also use these services to manually search for new media, and even replace/upgrade your existing media with better quality uploads. They’re really a little tricky to set up on a bare metal Ubuntu install (ideally you should be running them in Docker Containers), and I won’t be providing a step by step on installing and running them, I’m simply making you aware of their existence.
The other bit of kit I want to make you aware of is Overseerr which is a program that scans your Plex media library and will serve recommendations based on what you like. It also allows you and your users to request specific media. It can even be integrated with Sonarr/Radarr/Lidarr so that fulfilling those requests is fully automated.
And you're done. It really wasn't all that hard. Enjoy your media. Enjoy the control you have over that media. And be safe in the knowledge that no hedgefund CEO motherfucker who hates the movies but who is somehow in control of a major studio will be able to disappear anything in your library as a tax write-off.
1K notes
·
View notes
Text
Small shoutout/promo to the app i now use for writing✨️ ✒️Lite Writer


Monthly: $3 (CAD)
One-time purchase: $15 (CAD)
*most of these features are premium, but you can still use the free version*
((Ignoring the fact you get a rare glimpse of one of my drafts before the x3 editing rounds, there's quite a few features I'm loving here- mainly in premium, but I appreciated the allowance of a time-senstive trial so I could get a sense of what the app offers. This is the only app I've found that is similar to one I used to rely on in my early days of digital writing.)
👏🏼My favourite features so far (in order of photos):
•The ability for a background/theme- what makes it better is every book can have a different one (a godsend)
•The ability to add book covers
•In "side panel" there's a web shortcut which allows you to browse the web without leaving the app- which I find handy & am loving it for using my main thesaurus!! I was surprised at the fact they offered this lol, really going the extra mile it seems
•Web server- havent tweaked it yet, but to my understanding it's for transferring.
•Continuing the point above, I find it cool that it allows for transfer in txt or PDF if you dont wanna use the web server
•It allows backups- I'm not fully versed in how it works and it seems a little finicky, but its there along with the web server. It offers it by Google drive and a couple other accounts.
•Fonts✨️✨️- a BLESSING. Just upload whatever ones you want.
•Quite a basic feature, but the book allows chapter separation.
•It has TTS and is very basic, definitely not ElevenLabs quality, but they offer it + allow you to export the audio file, which is really cool.
There are so many other features I'm yet to learn & this app is definitely a work in progress, but I personally am getting my $15 worth. Their development team seems very involved from what I've seen, which is good. The last update was March of this year, and they offer tutorials in certain aspects. The only thing I can't figure out is fucking markdown lol- i literally can't find it. But that's my only issue, everything else is great & im so glad I found this!!!!
#thewhumptextsupdates#writing#writing life#writing prompt#writing process#creative writing#whump writing#fic writing woes#writing woes#writer#writblr#ficblr#hp fic#hp au#wolfstar#marauders#marauders era#wolfstar au#whump#hp whump#fic prompt#y/n#harry potter#wolfstar fic#drarry#harry james potter#hp#fic writing things#writing resources#writing reference
12 notes
·
View notes
Note
If you are going to make a game here’s some things that might be helpful!
Game engines:
Godot: very new dev friendly and it’s free. Has its own programming language (GDscript) but also supports C#. It’s best for 2D games but it can do 3D also.
Unity: I don’t even know if I should be recommending Unity. It has caused me much pain and the suffering. But Unity has an incredible amount of guides and tutorials. And once you get the hang of something it’s hard to get caught on the same thing again. It also has a great Visual Studio integration and uses C#. I will warn you the unity animator is where all dreams go to die. It’s a tedious process but you can probably get some plugins to help with that.
Unreal: Don’t use it unless you’re building a very large or very detailed 3D game. It also uses C++ which is hell.
Renpy: Made for visual novels but has support for small mini games. It only supports Python iirc. Basically if you’re making a VN it’s renpy all the way otherwise you should look elsewhere.
What to learn: Game design and how to act as your own game designer. As a designer you need to know if a part of your game isn’t meshing with the rest of it and be willing to give up that part if needed. Also sound design is very important as well. If you want to make your own sounds audacity is perfect for recording and cutting up your clips. If you want to find sound effects I recommend freesound.org and the YouTube royalty free music database.
Sadly I can’t recommend a lot of places to learn this stuff because I’m taking Game Development in Uni. So most of my info comes from my lectures and stuff. One of my game design textbooks is pretty good but it’s around $40 CAD. It’s called the game designers playbook by Samantha Stahlke and Pejman Mirza-Babaei if you’re interested (fun fact there’s a photo of Toriel in there)
Anyway sorry for dumping this large ask on you I’m just really passionate about game design and I like to see other people get into it.
please do not apologize I'd never heard half of this stuff so this is super useful!! I've seen some godot tutorials on YouTube although so far I've played around with RPG maker MV (it was on sale. very very fiddly interface, i had trouble getting around it) and gamemaker, which recently became free for non-commercial use (a lot more approachable on first impact but like i said, haven't really done anything substantial in either yet).
mostly, I'm still in the super vague stage. I've got an idea for the main story conflict, the protagonist and their foil, the general aesthetic i want to go for (likely 2D graphics, but it would be cool to make like. small cutscenes in low-poly 3D) but not much else. haven't exactly decided on the gameplay either! it's gonna necessarily be rpg-esque, but I'm not much of a fan of classic turn-based combat so. I'm gonna check out other games and see if i can frankenstein anything cooler :P
#like for example. if i were ever to make a daemo game (knock on wood) i was thinking that it would work out quite well#if i made it a PUZZLE rpg kind if game. since the player character is no longer frisk/chara/connected to the player#and daemo doesn't really have any reason to 1) be possessed or 2) go on murderous rampages#so with a base game like undertale where those ARE crucial parts of player-world interaction I'd have to redirect it elsewhere#it being player input in the story#but I'm not sure puzzles are quite the solutions for this other story....... we'll see#answered asks#SAVE point#thank you so much!
83 notes
·
View notes
Note
Hello there!
I'd like to know your advice on drawing tablets?
As in, what do you use for your digital art? Is there any you suggest?
I'm planning on getting one, but there are so many options, and I'd like to know your opinion and preference.
Thank you ^^
hi anon! thanks for the question!
i draw with a samsung galaxy tab s7!
BUT if this is your first time drawing digitally, then it's a good idea to test out if you like it with cheaper options first (so you don't drop a whole lot of money on a hobby/medium of art you don't enjoy)
some suggestions:
if you have a smart phone, try drawing with your finger using free to use drawing apps like ibispaint X or HiPaint (i recommend HiPaint cuz the UI is a lot simpler and less overwhelming, but both have a good selection of tools. i wanna say ibispaint has better text tools tho and there's A LOT more tutorials and resources online) drawing digitally with your finger is different from drawing digitally with a pen AND drawing traditionally, but this is a good way to familiarize yourself with digital art tools. a very simple entry point if you already have a smart phone.
if you don't want to draw with your finger (understandable, i personally couldn't stand it) you can try simple drawing tablets, which are the tablets that you plug into your computer/laptop, come with a pen, but they don't have a screen you draw directly on. they're actually a lot more affordable nowadays (i saw some for under $50 CAD, which is WILD), so that’s a good starting option if you want to draw with a pen. with a pen, you have more control with line weights than you do with your finger, but it takes practice to get used to. it also takes some getting use to drawing on a tablet and looking at your monitor, but this is where i started haha. i still have my old bamboo wacom create drawing tablet. but nowadays, other brands like xp-pen and huion are very comparable to wacom, so definitely consider getting a cheaper one to try out first. of course, if you go with a drawing tablet, you'll need an art program on your computer. i've used photoshop and clip studio paint and they're very good, but probably overwhelming for people who are new to digital art (they are loaded with tools and you have to really familiarize yourself with the menus and everything). there are probably simpler options available... but i'm not as familiar with them. oh wait, i think there are some drawing tablets that can also connect with your smart phone too nowadays. man, that's so cool. that's probably a better option instead of purchasing photoshop or clip studio paint right off the bat.
if you REALLY want a screen display experience, try a cheaper general tablet. iPads are a popular option if you're comfortable with the Apple ecosystem (i'm not 😅) but they can be pricey PLUS you have to buy the Apple pen separately. for Android, I'm pretty sure even the Samsung Galaxy Tab S6 is a solid choice and it comes with a pen unlike an iPad. the SPen is built with Wacom tech, so you know it's quality. and while iPad has Procreate, HiPaint is available for Android and it's basically a Procreate clone (i explain more about HiPaint here) otherwise, ibisPaint X is also good and infinite painter is probably the most sophisticated free to use drawing app i've encountered (sophisticated as in it does a pretty good job at imitating traditional media in their brushes. it's cool, but the free version is very limited).
also if you like watching videos, Brad Colbow and Teoh on Tech on YouTube are great resources. they specifically review tech from an artist's perspective.
why i suggest testing it out is because if you're used to drawing traditionally, then switching to digital is a different experience. some artists can't get used to drawing digitally, and that's fine. that's why it's a good idea to test it out with a cheaper option first to see if you like it and to give yourself time to familiarize yourself with drawing apps/programs. i actually kinda hated drawing digitally at first. i didn't have the same level of control that i was used to with drawing traditionally. and overtime i made a lot of bad habits with my digital art that i had to unlearn by switching back to traditional art for a couple years (some bad habits like: relying on the Undo button to make "perfect" lines; trying to draw really fast because the pen glides over the screen unlike a pencil has friction against paper) so... give it a try and just let yourself have fun. don't worry about making anything perfect, just have fun!
#ask the crab#i hope you have fun!#i first got my bamboo wacom tablet in 2011#and it's still very good#i use my samsung tablet now because i really like the screen display experience#and the fact i can bring it with me on the go without my laptop#i like digital art#but i'll still occasionally switch to traditional art#that's how i deal with art block#i switch something up and just experiment with a different medium for a little while#that gets me out of the perfectionist mindset too#i can't spam the undo button if there's no undo button with pen and paper#the reason why i switched to digital art recently was because i was struggling with sketching with traditional art a little while back#i was designing a new DCA OC with a body type i am not familiar with drawing#and it was just getting frustrating trying to get the body shape right#so i took a break and switched to drawing chibis in digital art so i could give myself a refresh#i eventually was able to design that character#but i did it digitally#i'll share him soon#i haven't really decided on an outfit for him yet
23 notes
·
View notes
Text


had kind of a crazy brain blast today...
wanted to create my own cardboard vase templates for paper mache. Just sat around and thought about how I would manipulate the shapes in onshape (free CAD software). I'm sure there is a tutorial for this but I wanted to see if I could figure it out on my own... once I figured out that I had to circular array the silhouette in 3D space it was smooth sailing. Next steps will be taking the shapes I drew that make up each facet and copying them into a new sketch so I can play around with placement for the most efficient laser cutting.
#first image is from corriebethmakes on etsy#3d modeling#onshape#paper mache#my first thought is to basically make a long strip that becomes the middle piece#and then the top two facets are connected#and the bottom two are connected#hopefully that will make it a bit more stable when taping up#if not just split everything into it's own piece and tape them up
5 notes
·
View notes
Text
So you wanna sell your art on Redbubble but you don't know how?
(Or, I meant to write this months ago but better late than never lol)
OKAY okay. I have a bunch of friends as well as mutuals who have lovely lovely art and have considered selling it online (specifically on Redbubble lol that's what's being covered today anyways) but don't really have any clue how RB works, if it's right for them, or what to expect. SO I'M HERE TO GUIDE Y'ALL THROUGH ALL THE BASICS and hopefully, if I've done my job right, this tutorial will help you set up your RB shop and start selling your art online (or help you decide that RB isn't for you lol).
Table of Contents:
What the heck is RedBubble and should I use it?
How to make your account and set up payment
How to add a new work
Pricing? Markup?
Extra: Checking sales and payment history
Extra: Taxes and copyright, in case that scares you.
Extra: The Partner Program (or how to make "officially licensed" fanart)
What the heck is RedBubble and should I use it?
>> RedBubble is a site that allows you to upload your artwork and sell it on quite a variety of different products.
>> The main benefit of using RedBubble, aside from reach and visibility, is that RB handles *everything* when it comes to the manufacturing and shipment of your product. You are literally not responsible for anything other than making the art, uploading it, and deciding how you want it to look on different products. If there is any kind of problem with material quality or delivery (though in my experience they're pretty good with both of those things), it's not your responsibility to correct!
>> RedBubble does not charge you to sell on their site, but they do set a base price for all products to cover manufacturing and to ensure that they make some level of profit for each sale. We'll look into the specifics of this in a later section when discussing pricing and markup, but it would be considered pretty standard, for example, for an item to cost $20 and you to make $4-$5 upon making a sale.
>> At the end of the day, whether or not RB is right for you largely depends on whether or not you feel their pricing and payment is fair, and whether their available products correspond to what you wish to sell.
Okay, so how do I get started?
Well first you're gonna need an account!
>> Head over to the RedBubble main page and click "Sign Up"

>> Select "Artist Signup"
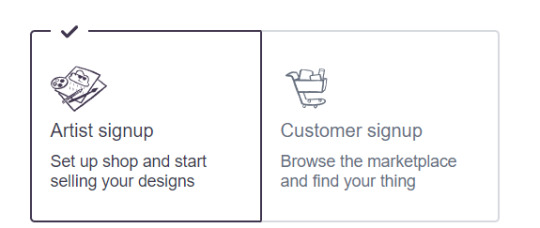
>> Fill in your email, shop name (this is your username also), and password
>> Click "Sign Up"
>> You will be brought to this dashboard page:
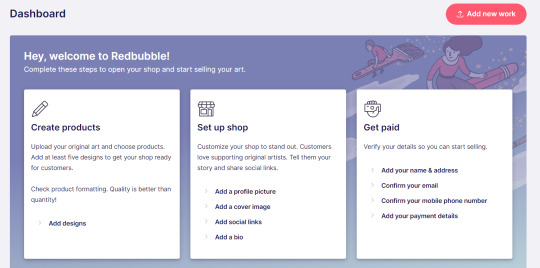
>> We will discuss creating products in the next section. Everything under "Set Up Shop" is optional and I'll let you explore that on your own so we can focus on the essentials. That just leaves... Getting paid!
>> First, check the email you used to confirm your email address. If you didn't receive an email to confirm your email address, don't worry, we can resend the form- keep going with the steps for now.
>> Then, under "Get Paid", click "Add your name & address". Note that all of the options in the "Get Paid" section actually lead to the same form, but selecting this option starts us near the top.
>> Fill out all the fields on this page. If you didn't receive the email to confirm your email address, click on this button:
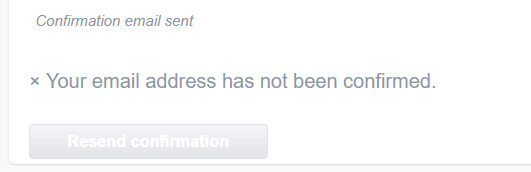
Then check your email again.
>> Note when choosing your payment method: if you are from Canada, like me, then paypal is your only option. Same for parts of Europe that aren't in the UK. Otherwise, you also have bank transfer options:
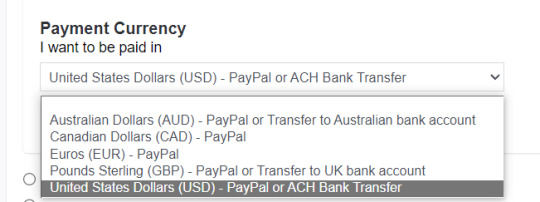
>> Once you've finished filling in everything on this page, click "Save Changes" at the bottom and... That's it! Now you can get paid :)
**Note: I believe RB still requires you to make a minimum amount of money before they do a transfer (for me in Canada I believe it's $20 CAD?), so do keep that in mind!
>> Payments are made to your account monthly, generally on the same day every month (assuming you've made profits!).
How to add a new work
So you've made your account, fantastic. Now you're ready to actually add your works to RB and make them available for purchase to the wider public! To demonstrate the process, we're gonna use our pal Nicky here (who was a gift from my lovely friend @llumimoon) and pretend that we want to upload him:

Ain't he a doll? Anyways, let's begin.
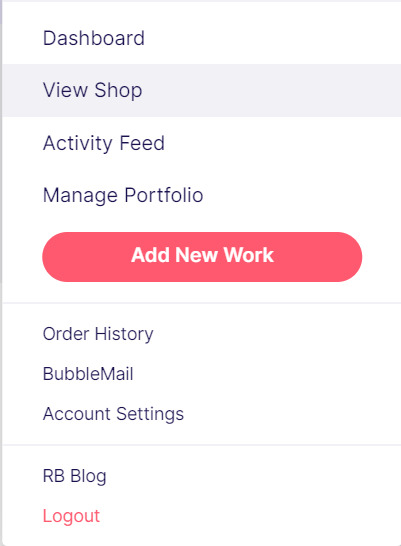
>> Hover your mouse over your pfp in the top right corner to make this drop down menu appear:
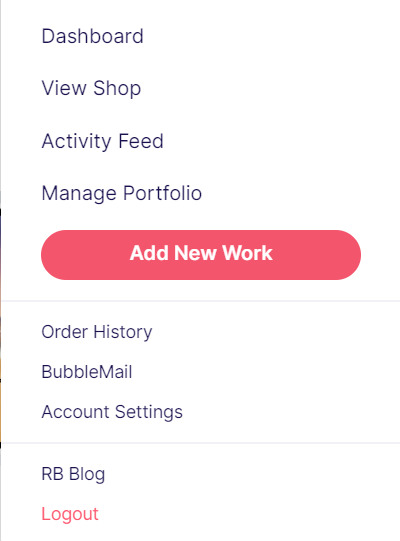
>> Click on "Add New Work"
**On a new account with nothing uploaded, this will look a bit different. instead choose "Sell Your Art" from this dropdown menu, then "Add New Work" from the top right corner of the same dashboard page from earlier.
>> Click on "Upload New Work" (and note the file type and resolution requirements at the bottom. I always stick with PNGs, but in theory JPEG or GIF works as well.)
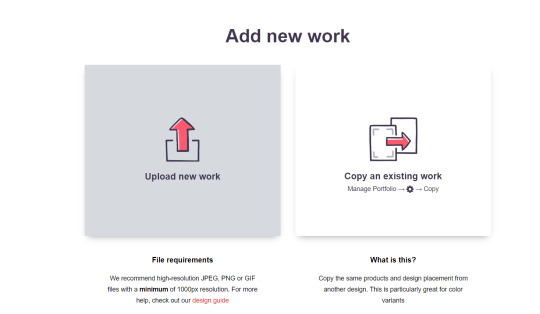
>> Select the file of the image you want to upload. In our case, that's Nicky.
>> Now write a title for your work, tags, and a description if you want. The tagging system is how people will actually find your work, it works a lot like Tumblr's! Try to choose things that are relevant to whatever your piece is. If you're uploading fandom-related art and aren't sure what tags are used for your fandom on RB, try looking some up and seeing what generates the most relevant results!

>> You may have noticed the "background color" section right below Nicky. This sets the default background color for your piece on different products. We're gonna keep this as the default white here, and I'll show you how to adjust this for individual products very soon.
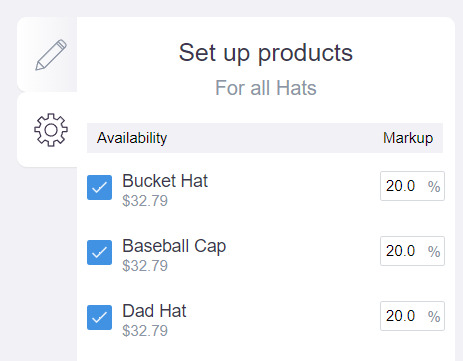
>> Scroll down. This is where we decide what products we want this design to be available on and how we want Nicky to look on each thing we've enabled.
For example, if I were actually selling Nicky here (if that wasn't clear obviously I'm not actually selling my friend's art lol don't do that ofc) I would definitely want people to be able to buy him as a little sticker :]
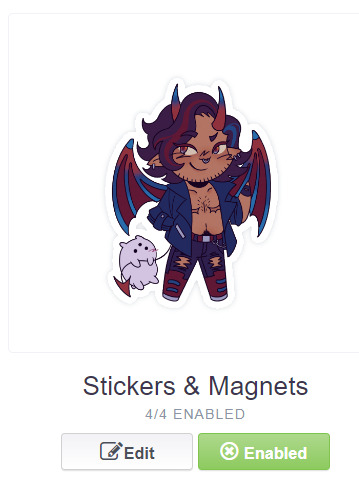
>> In this case, "Stickers & Magnets" have been enabled by default. If you wanted to disable them, you would simply click that little "Enabled" button. Similarly, if we want to enable a product type that is disabled, just click that same button (which will be grey rather than green and say "disabled").
>> If a product is disabled and you are being prevented from enabling it, that's because the dimensions of your image are too small for the product in question! You'll wanna resize your image (preferably in a manner that retains its resolution of course) and come back.
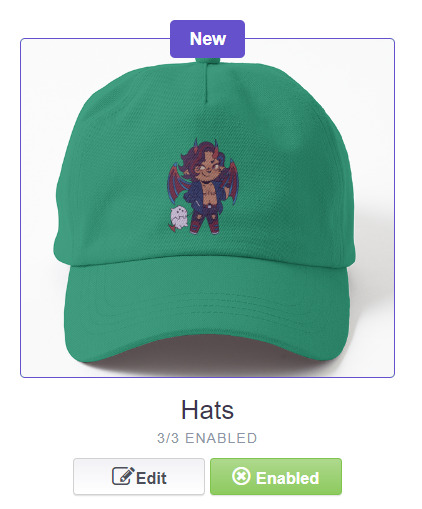
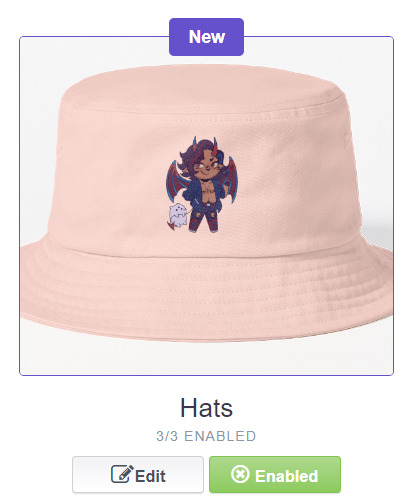
>> Hm. Let's use the hats here as an example of how we might make edits to the layout of a specific product.
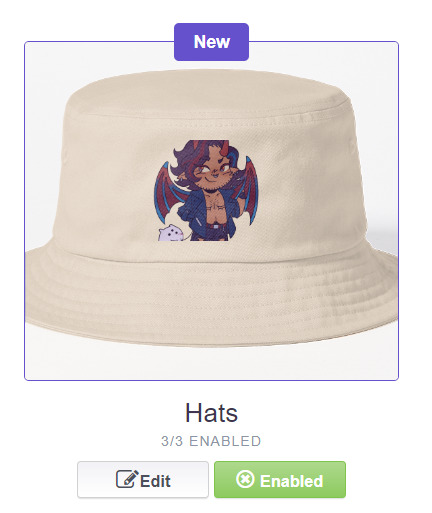
He's kind of cut off, as you can see actually that's pretty in-character, and I think I want this hat to be pink rather than this default beige-looking color.
>> Click on "Edit"
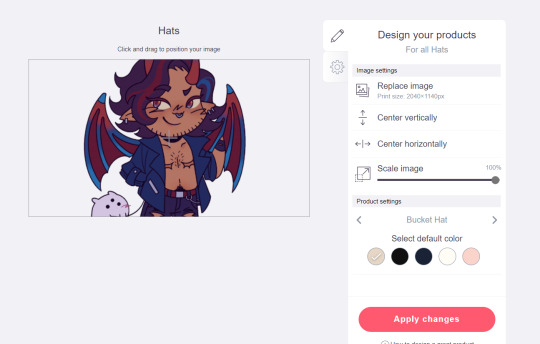
So, the first thing I'm gonna do here is use that "Scale Image" slider to scale him down a bit. I'm also gonna click the image and drag him up a bit to re-center him.
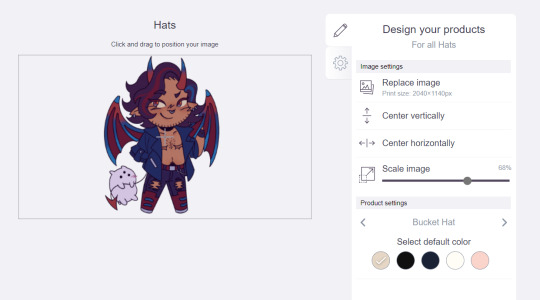
Next, I'm gonna pick from one of the default colors and choose the pink one.
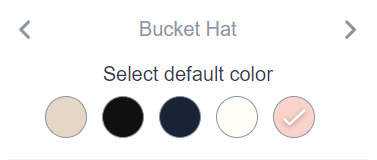
>> Notice the two arrows beside the words "Bucket Hat"? This lets me go through the different types of hats available and change the background/base color for each of those, like the dad hat:

>> Before we apply our changes, click that little gear icon right under the pencil icon
>> This lets us adjust the markup price for each individual hat. It is 20% by default. Changing the markup percentage affects how much you will make off of a sale, as well as how much your product will cost. More on that in the next section!
>> Click "Apply Changes"
The "dad hat" was the last hat I had selected (when setting its color), so the display has changed to show that one in the preview. Here's our bucket hat from before:
Nice!
>> The specifics of how you can adjust your design will vary depending on the product. With pillows & totes, for example, the editing menu looks like this:
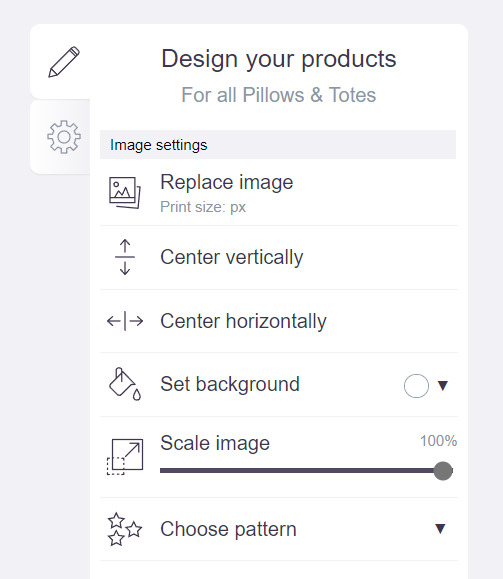
Using the "Choose pattern" option, I can make the Nicky image repeat as a pattern like so:
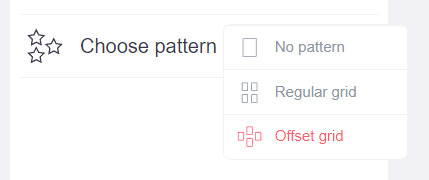

(note that I also scaled the image down a bit here too).
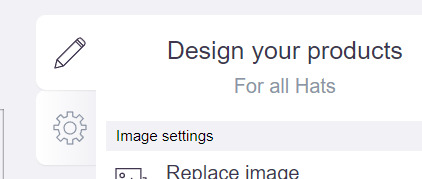
>> One last thing. See that "Replace Image" button near the top?
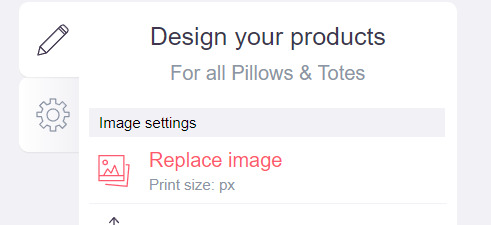
You can use this when you want to use a different version of your image altogether for a specific product.
>> That's the gist! Play around with the settings for each item as you see fit. You can always edit them again later.
>> Scroll down. Select up to 2 relevant media types.
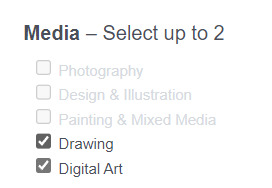
I'm pretty sure this affects search results when users choose specific filters, but tbh otherwise I don't think it's all too important.
>> Let's look at what remains.

>> I have the "Who can view this work?" section set to "Only You"- THIS IS SO I CAN FINISH THE STEPS HERE AND SAVE THE WORK WITHOUT ACTUALLY MAKING IT AVAILABLE TO THE PUBLIC. In practice, you'd only use this option if you wanted to buy your own work on something but didn't want other people to be able to see or buy it. Otherwise, you're always gonna choose "Anybody (public)".
>> Collections can be created to organize the pieces in your shop (for example, by fandom), but we won't cover the specifics of how to do that here.
>> Set whether or not your work contains "mature content".
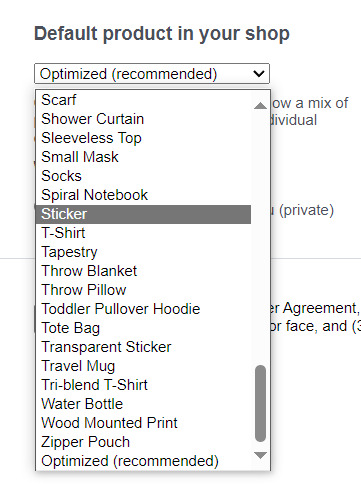
>> If you want, you can set which product shows up in the preview for your work when people view your shop. If you think your piece looks especially nice on a mug, for example, you can make sure that's what people see first.
>> Finally, agree to RedBubble's User Agreement (read that little blurble, since that's basically all you generally need to care about when it comes to what you can and can't sell on RB, but more on that later).

>> Click "Save Work" and voila! Your piece is now available in your shop, and can be found in the search results of whatever tags you left on it (this may take a few minutes to take effect).
>> If you want to check out your design in your shop, navigate to your pfp and click "View shop"
>> Don't fret if the design doesn't appear in your shop right away! Again, this can take several minutes.
>> To edit your design again (and to view/purchase privately uploaded designs like Nicky here), click the "Manage Portfolio" option instead:
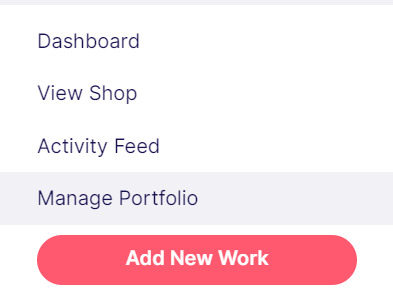
>> Here is Nicky as he appears in my portfolio (again, your portfolio and your shop are different things- Nicky will not appear in my shop at all because he is set to "private")

>> You can click that little gear icon to do a variety of things, like return to the editing menu from earlier. The three icons below Nicky refer to the amount of comments, sales, and likes your design has received in total.
>> Click on your design either from your shop page or your portfolio page. Wow! Your cool art is now available on all the products you enabled. Be sure to look through them and make sure that everything is to your liking!
Pricing? Markup? What's that about?
Well good tumblr user, RB handles everything regarding the production (and shipping) of your product, which means that they set a base (minimum) price for every kind of product to account for materials and production, and of course make some amount of profit themselves. The *markup* is a percentage that you the artist set (see the previous section on how to do so), and will determine how much you actually make off of a sale. Note that increasing the markup price means that your product will increase in price as well!
>> An Example (using hypothetical but more or less realistic numbers):
Let's say that the base price (0% markup, i.e. no profit for you) of a phone case on RB is $15. You set the markup to 30%. 30% of 15 is 4.5, so the public price is increased to $19.5, and if anyone purchases this phone case with your design on it, you will make $4.5.
And that's really the gist! Ultimately the markup price is up to you and what you feel is reasonable, though RB sets it to 20% by default.
Extra: Checking sales and payment history
Eheh, unfortunately I've reached the image limit for this post but:
To check your sales:
>> Click on your pfp
>> Click "Account Settings"
>> Under "Artist Tools" (on the left side), click "Sales History"
To check your payment history:
>> From the same "Artist Tools" menu (see above), click "Payment History"
Extra: Taxes and copyright, in case that scares you.
>> Do I need to report the income I make on RB when I do my taxes?
Yup! But dw, it isn't anything special. I mean, I'm not here to do your taxes for you, but money you make on Redbubble counts as "Self-Employment Income", same as if you sold your art just about anywhere else really!
>> So what am I actually allowed to sell on Redbubble? Is fanart okay?
Generally speaking... Yes! Obviously work should be your own, and it should not contain any company logos or names that you don't have the right to, nor photos of actual people unless you have their explicit permission.
>> Hm, okay, but what if I *do* accidentally sell something that isn't allowed?
In most cases, it'll just get taken down 👍. And no, you won't be asked to pay back any profits you made off the work in the meantime.
**A more extreme case: Story time. So, years ago a friend of mine uploaded some official Rick and Morty art that he forgot to set to "private". Overnight he made... Let's just say he made quite a bit of money. RB responded by taking down the work and banning his IP address, effectively preventing him from ever selling on the site again. But they still let him keep the money he made, and he didn't get into any actual trouble outside of that. What I'm saying is, even if you really fuck up, it'll be alright. And again, this was a pretty extreme scenario.
***Note: if your work falls under one of the brands in Redbubble's "Partner Program" (see the next section), it will be temporarily removed from the search results and your shop while it undergoes review. So don't panic if you see your fanart suddenly disappear from your shop!
Extra: The Partner Program (or how to make "officially licensed" fanart)
Very briefly, Redbubble has their partner program, which I won't explain in full detail here, but basically it means that if you upload a work and tag it as one of these brands, it will be inspected for review and, upon passing that brand's guidelines, will be considered "officially licensed" merch for that brand. Just felt worth mentioning!
So that's really the gist folks! There's certainly much more to play around with when it comes to RB, but that's all you need to know to get started! Hopefully this was useful? Hopefully lol. In any case, good luck out there!
#*breathes* OKAY#gee I sure do hope this is actually useful lol#artists on tumblr#redbubble#selling art#idk what to tag this as lmao#baba's tutorials#<- new tag ig lmao#if y'all have other questions (especially friends and mutuals and followers) feel free to reach out and I'll answer what I can!#so if you're wondering. yes I've sold on the site before. no you don't get to know what haha.#bought a lot from RB too- their shit's good quality!#but to be completely clear ofc I don't speak on their behalf haha this tutorial exists so that I can buy more of my friends' cool art lmao
33 notes
·
View notes