#How to use Cricut machine
Explore tagged Tumblr posts
Visit Tumblr Blog
Explore Tumblr blogs with no restrictions, modern design and the best experience.
Last Seen Tumblr Blogs


Fun Fact
The Tumblr app for Google Glass was released on May 16, 2013.
Text
How to Make Keychains With Cricut (Complete Guide)
This year, I am getting a golden chance to change my status from beginner to expert by learning how to make keychains with Cricut. Next week my sister is going to blow out the candles by celebrating her 18th birthday. Not only that, but we are also excited about her birthday as she is about to enter adulthood and explore the real world. And nothing can beat the idea of making a DIY keychain for her special day.
Being her elder sister, I am planning to give her a present that she will cherish all her life. For the past few days, I’ve been doing a lot of research by reading references. It helped me as I got to know everything, which made my work much easier. In today’s tutorial, I am going to empower you by providing information on designing this craft.
Step 1: Create a Keychain Design in the Cricut App
Being an enthusiastic learner, start the process by opening Cricut Design Space on your system. After that, choose the Images icon present under the Menu section of your designing software canvas. Next, choose your favorite image from the library visible on your system screen.

Following this, modify the design of your keychain by changing its dimensions depending on the measurement of your keychain blank. Now, tick the Monogram box, as they are an ideal choice for making the keychains look great. Besides, you will also have the chance to change the color of your keychain design. You can change by choosing the color by opening the Color panel. Following this, you can also add different colors to any design and then attach them by selecting the Attach option. Then, tap on Make It, and you will land on the mat preview page.

Since you are going to use vinyl material, click the Without Mat and press the Continue option. Afterward, review your artwork on each of the mats and choose the Continue to Cut box visible at the bottom right side of the page.

Step 2: Cut and Weed Out Vinyl

In addition to the process, take your Cricut weeding tool and remove the extra material from the Cricut cutting mat. Following this, delete the protective sheet from both sides of the keychain blank.

Step 3: Apply Vinyl on Your Keychain Blank
While performing this step, remove the brush stroke design from the mat and place the sticky part of the vinyl on the back side of the blank. Now, take the scraper tool and gently move it on the design. After that, cover the monogram design on the front side of the blank with the Cricut supplies.

Follow the same by applying the vinyl on both sides of the blank with the help of a scraper tool along with Cricut transfer tape as well. Ensure that you are applying both materials accurately.
Step 4: Assemble All the Materials

Step 5: Seal Vinyl on the Blank
In addition to this method, cover your hands to secure your hands with gloves and pour UV resin in the center of your vinyl. Then, take a popsicle stick and cover the whole area of the blank. Ensure that you cover the whole area of the blank, not just the vinyl. Afterward, save the stick covered in the resin at the end.

After setting up the vinyl with UV resin, unbox your heat gun and apply heat on the whole design equally. Give your best by covering up the whole blank during the heating process, and after it’s done, instantly turn it off. Afterward, move on to the next process of how to make keychains with Cricut.

Now, it is time to cure the remaining bubbles by putting them under UV light and setting the time to 60 seconds. Next, place the light on top of both the blank as well as a stick, and once the process is complete, remove the UV light. You need to follow the same process of using the heat gun and placing UV light on the back of the keychain.

Step 6: Reveal Your Final Cricut Keychain
In the final step of how to make keychains with Cricut, keep your final do-it-yourself craft on a flat surface or nearby table. After that, you can utilize this craft by hanging it on your bag chain and showing it off to your friends. Other than that, you can also give them as a part of a present or return them to your friends, family members or close ones while celebrating any event.

Won’t you agree that it was one of the amazing activities to learn something new that can help you work by brushing up your crafting skills?
Final Words
I personally enjoy creating this personal craft by using compatible Cricut products during the cutting & applying process. However, I must carry the supplies that will assist me in forming this craft as per my choice. Apart from preparing by using vinyl & UV resin, you can make DIY keychains out of wood, plastic, acrylic, and many more. By taking the help of all these steps, you can surely make this specific craft within a few minutes without making any serious mistakes.
Frequently Asked Questions
Questions: Can I Become a Business Person by Selling DIY Keychains?
Answer: Yes, you can surely start your own business by designing handmade keychains with Cricut products. However, you must ensure that you carry all the compatible supplies with you and must know the DIYer’s expectations. Other than that, you should also assemble all the materials in their correct place and finish the crafting process by taking the correct steps.
Question: How to Clean Cricut Keychains?
Answer: It’s pretty obvious that your keychain will get dirty after some time, but there are a few methods that can keep it clean. The methods are:
Clean your keychain with baby wipes on a regular basis, at least once a week.
You can also try to clean it by placing it under the lukewarm water and cleaning the water with a smooth cloth.
Question: How Long Do Cricut DIY Keychains Last?
Answer: The customized Cricut keychains are scratch-resistant, water-resistant, and heat-resistant. It surely means that the design placed on the blank will remain for a longer period of time and won’t wear out easily. Other than that, it entirely depends upon the user how they are taking care of the keychain.
Source: Make Keychains With Cricut
#Make Keychains With Cricut#CRICUT DESIGN AND SPACES#CRICUT DESIGN SPACE LOGIN#HOW TO USE CRICUT MACHINE
0 notes
Text
How to Use Cricut Machine to Make Your First DIY Project?
My lovely readers welcome back to my other blog on how to use Cricut machine. I am Amy William, a homemaker, and an experienced crafter. Managing both home and business at the same time is not an easy task. However, with the support of my family members, I was able to pursue my passion and become financially independent.
I have been using the Cricut machine for the past four years and have created many DIY projects. The projects not only helped me brush up on my skills but also helped me expand my business. My son recently bought a Cricut cutting machine, and now he is asking me a lot of questions about the machine. So, in this post, I will teach my son how to use a Cricut machine and guide you by sharing the basic information related to Cricut.
How to Setup Cricut Machine on Your Computer?
As a writer of this blog, I must ensure that you are aware of the setup process before knowing about how to use Cricut machine. With an aim to create different kinds of customized crafts, all the users must know about the setup process. In order to learn about the setup process, you need to read the details given below:
First, I will plug in the machine with the compatible socket and then switch it on.
Second, I will connect my Cricut product with a USB cord or pair it up with Bluetooth.
Third, I am going to download and install Design Space on my PC (Windows/ Mac).

Alt Text: Download the Cricut software for your system
After the installation, I will follow the on-screen instructions and set up the machine.
Lastly, I will get to know about the completion of setup when called for a test cut.
Following the successful setup of the craft machine, I will be capable enough to create my first do-it-yourself project out of this Cricut product.
How to Use Cricut Machine for Creating Custom Cards?
Are you keen to learn about how to use a Cricut machine and want to try your first personalized project? If yes! Then you should surely give this section a shot. In this part, I’ve shared one of the simplest and easiest crafts that I am going to make you aware of with this craft machine.
Step 1: Set up the Cricut App & Create Your Design
First, I will open the Cricut app and sign in by filling in your login credentials.

Alt Text: Enter your Cricut ID & password to sign in
Second, I am going to press the New Project and choose a shape from the Shapes panel.
Now, I am going to choose a Heart shape and then resize it as per my choice.

Alt Text: Select the Heart shape from the Shapes panel
Next, I will right-click and tick the Duplicate option and move the identical ones to each other.

Alt Text: Duplicate the shapes
After doing that, change the shape sizes by changing the size from the drop-box given under the Size panel.

Alt Text: Change your shape size from the Size panel
Following this, tap the Make It button and adjust your design on the mat as per your choice.
After doing that, I will proceed to the next step, which is to choose the compatible material.
Step 2: Choose the Material and Cut It
After doing that, I will press the Continue box and choose the material by clicking Browse all materials.
Now, I will select the material of your choice from the list appearing on your screen.

Alt Text: Select material of your choice for your project
In addition, I am now going to stick your material on the cutting mat and load it onto your craft material.

Alt Text: Insert your Cricut mat into your craft machine
After the cutting process of how to Cricut machine comes to an end, I will instantly unload the material from the cutting mat.
Step 3: Complete Your Paper Card
Further unloading the mat from my Cricut product, I will start removing my design using the weeding tool.

Alt Text: Use the weeding tool and remove your design
Following this, remove the leftover material from the mat.
Next, I will cover my cutting mat with a plastic protective sheet and reuse it while creating new projects.

Alt Text: Cover your Cricut mat with a plastic protective sheet
Now, I will place a double-sided tape at the back of my heart-shaped design and then turn it over.
Furthermore, I will take another cardstock, cover it with adhesive, and then place the card above it.
After doing that, leave it for a few minutes and let both the materials stick with each other properly without any bubbles.
At last, my aim to make you and my son learn about how to use Cricut machine to create a custom card has come to an end.

Alt Text: Finally, your Cricut customized card Now, you tell me, wasn’t it simple and fun to learn about how to use a Cricut machine? It’s crystal clear that sharing with you all the significant details about this Cricut product will encourage you to be more creative. However, there are many projects that I have made out of my craft machine for my buyers and home. But don’t worry, as I will keep you updated by sharing them on my blog.
0 notes
Text
History PSA for writing: prior to at minimum the mid to VERY LATE 1800's most things were made, or at least finished, by hand! If you have a character inspecting furniture in... for example fantasy ancient china... or the english regency... or fucking pseudomedieval times... marveling that they wouldn't have guessed something was made by hand, you have fucked up as an author on the research front.
#quill reads fanfic#look the education goes here because the nitpick is not useful to the author#as they have published and are unlikely to be fixing this error#HOWEVER#my immersion broke enough to send me to tumblr#and it is not a specialist thing!#it's merely thinking how the hell else you would make a bed in this era except by hand!#Magically powered cricut machine or something? I don't know!
29 notes
·
View notes
Text
I would be so unstoppable with a sticker printer. my local library has a cricut machine but I don't get the time to visit very often
12 notes
·
View notes
Text
How to Use a Cricut Maker to Create a DIY Project? (Easy Guide)
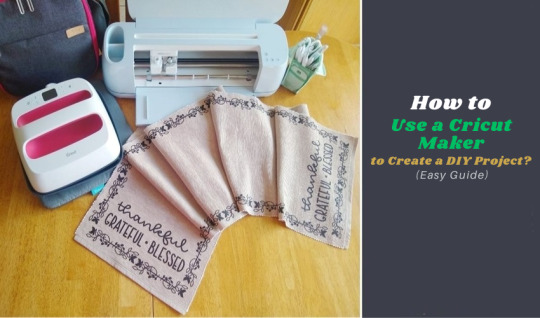
Are you thinking of buying a Cricut Maker? Or you have just got one and are not sure where to start? This guide will walk you through all the different ways to learn how to use a Cricut Maker without any previous experience.
This cutting machine is advanced and unique from other models, like Explore Air 2 and Joy machine. It delivers a wide range of features, tools, and accessories for crafting projects. With this machine, you can cut fabric, vinyl, cardstock, chipboard, and more precisely.
So, if you are a beginner and don’t know how to use this machine—don’t worry; we are here to help! Read this blog, and you will learn how to use it easily.
How to Use a Cricut Maker: Unboxing and Initial Setup
Once you have got your machine in your hands, it is time to check if you have all the necessary supplies and tools that come with the machine or not. So, in order to do that, you must follow these steps:
Step 1: Unbox Your Machine
Carefully remove the machine from the box, ensuring that all packaging materials are removed. Inside the box, you will find the machine, a power cable, a USB cable, a cutting mat, a fine-point blade, and a welcome guide.
Step 2: Positioning Your Machine
Place the machine on a flat surface, ensuring at least 10 inches of space in front and behind the machine. This space allows the cutting machine to move freely during operation.
Step 3: Connecting to Power
Now that you have unboxed your machine, it’s time to take the most important step: giving it life support. To do that, you must insert the power cable into the back of the machine and plug it into an electrical outlet. Once you finish the connection part, let us look into how to activate your machine.
How to Activate a Cricut Maker: Quick and Easy Steps
The first thing to do is activate the machine. To do so, from your Windows/Mac, you must head over to cricut.com/setup��from any browser of your choice. Activating the machine is even easier if you have already used the Design Space app. To set up the machine from the app, go to the Menu icon and then select ‘Cricut New Product Setup.’ After that, follow the prompts that let you choose your machine.
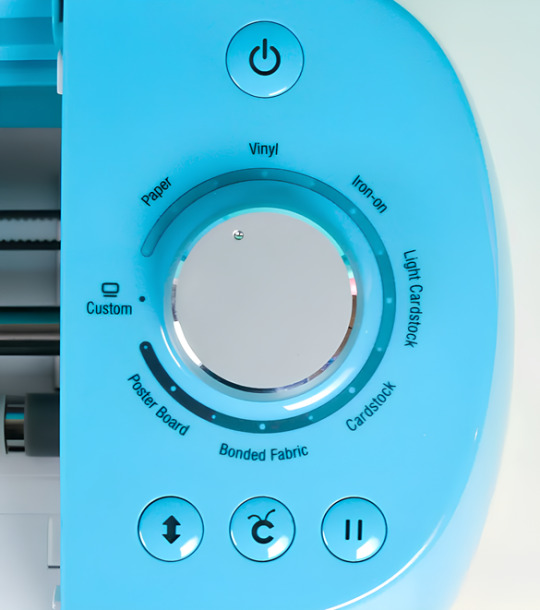
To open the machine, you must lift its lid. This will open the cover of the machine automatically.
Power button: With this button, you can turn the machine on and off.

Feeding switch: This button lets you feed your mat into the machine.
Cricut switch: This is the button with the initial C. Press it when you want to start cutting (it is also called the confirm button).

Pause button: This button gives you the flexibility to pause your machine in between. It’s extremely handy if you’re in the middle of a cut and want to change something or for any other reason.

That’s all in terms of design. In the next section, we’ll look at the steps to create a project.
How to Use a Cricut Maker: 5 Easy-To-Follow Steps
To use a machine, follow these detailed steps from setup to your first project. As the Cricut Maker Setup is a versatile cutting machine, it can handle various materials, making it ideal for crafting projects.
Step 1: Connecting to Your Device
In order to get a hold of the machine, you must connect it to your desktop or computer. This is crucial because, without the connection, the machine cannot communicate with your device. Even though the Design Space app can work offline, you still need a connection at least once to save it on the app.
You can connect your machine to your device via a USB cable or Bluetooth. Connect the square end to the machine and the USB end to your PC via USB. To pair your device with the machine using Bluetooth, turn on the machine and then go to the Bluetooth settings.
Visit the official website or surf design.cricut.com and download the Design Space application. It is essential for project creation and supports various platforms, like Mac, iPad, and iPhone.
Step 2: Setting Up Design Space
This is the most important step after connecting the machine and your device (Mac/Windows). Once you have downloaded the app, you must do these things for a smooth experience:
Open the software and fill out the required fields to create an account. The account allows one to save their projects and access various design features.
In the software, select “New Machine Setup” from your profile. Finish the on-screen steps to choose your machine model and perform the setup process. The app will guide you in connecting your device to the machine.
Step 3: Designing Your DIY Project
Now that you have done all this, let’s start creating your first project. To do so, let’s look at these steps:
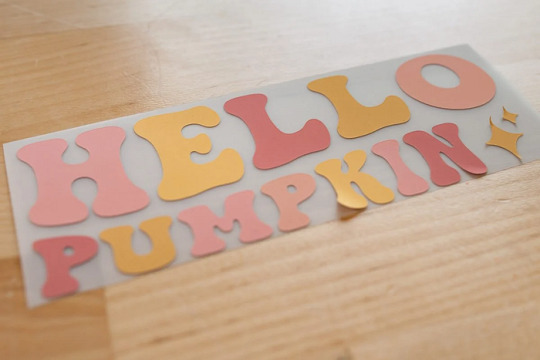
Start a New Project: Once your machine is connected, you can start a new project using the software. Select the type of project you want to create, such as a card, decal, or label.
Choose Your Materials: Design Space allows you to select the material. If you use cardstock, set the material type accordingly.
Prepare Your Cutting Mat: Place your chosen material onto the mat. Ensure it is aligned correctly and adheres well to avoid shifting during cutting.
Step 4: Start the Cutting Process
Now that you are familiar with downloading the app and activating the machine, let us look at its main purpose: the cutting process. It happens as described below; follow the steps carefully for a seamless cutting.
Load the Mat: Insert the mat into your crafting machine until it clicks into place. This will automatically feed the mat in for cutting.
Start Cutting: Press the “C” button on the machine to begin cutting. Your device will display a percentage of the cut completion and allow you to monitor the progress.
Completion: Once the cutting is finished, the machine will signal it is done. Carefully remove the mat and peel off your cut material.
Step 5: Post-Cutting Steps
It is equally important to know what to do after you are done with your cutting process.
Removing Your Cut Material: Gently lift the material from the machine mat. If you use delicate materials, such as intricate designs, use a spatula tool to help lift them without curling.
Assemble Your Project: Depending on your project, you may also need to assemble various pieces. Follow any additional steps to add embellishments or complete your design.
Conclusion
Don’t be discouraged if your first project isn’t perfect. The more you use your cutting machine, the more comfortable you will become with the process. Take time to explore the features of Design Space, like templates, images, and fonts. This exploration can inspire new project ideas. Using a crafting machine opens up a world of creative possibilities. Following these steps, you can confidently set up your machine, design your projects, and bring your creative ideas to life. Happy crafting!
FAQs
How do you use a Cricut for beginners?
To use a crafting machine as a beginner, unbox your machine and follow the setup steps. Download the Design Space software on your computer or mobile device for project creation. Familiarize yourself with basic operations like uploading images, selecting materials, and changing settings. Start with modest projects, such as stickers or paper cards, to build confidence. Use online resources and community forums to get more support and inspiration.
What do you use a Cricut Maker for?
A Cricut Maker is a versatile creative gadget that can cut materials like vinyl, paper, and fabric. It’s excellent for making unique designs for home decor, apparel, and more. The machine is capable of cutting a variety of materials, making it appropriate for both simple and intricate crafts. Beginners begin with projects such as greeting cards or decals, gradually discovering their full potential as they gain skills.
Do I need a computer to use a Cricut?
While a computer is not required to use a Cricut, it is suggested for maximum performance. The Design Space software can be accessible from a computer, tablet, or smartphone, making design management easier. Using a computer allows for a wider screen and more accurate control when making complex designs. However, several users have operated their machines using mobile apps, allowing them to create while on the road.
Source: How to Use a Cricut Maker
#how to use a cricut maker#cricut design space download#cricut design space app#cricut design space software#Cricut Maker Setup#cricut new product setup#how to setup cricut maker#cricut new machine setup
1 note
·
View note
Photo

Cricut for Beginners - Do you have a new Cricut Machine? Learn how to use your new Cricut TODAY! Fast and easy tutorials that will get you started now.
#Cricut#for#Beginners#-#Do#you#have#a#new#Machine?#Learn#how#to#use#your#TODAY!#Fast#and#easy#tutorials#that#will#get#started#now.
0 notes
Text
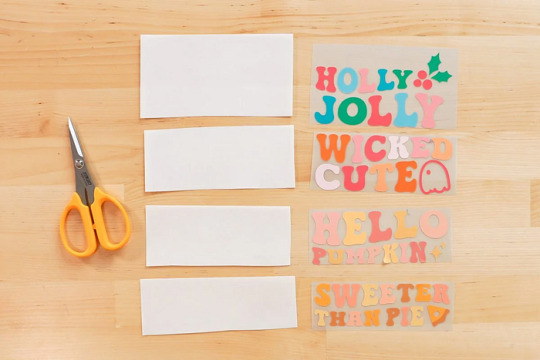
How to Use Cricut Maker: Create a Siser Easy Color DTV Project!
Have you just bought a new Cricut Maker and are wondering how to use Cricut Maker? This brilliant Cricut machine may be overwhelming for beginners, but it is simpler than you think. You get many amazing features with this crafting machine. Let’s get ready to use it and make creative DIY projects with it. I will tell you how to prepare a desired project using this Cricut cutting machine.
Cricut Maker offers various adaptive features that help you create unique and beautiful projects effortlessly. Plus, you get a slot for inserting pens and a number of Cricut tools and supplies. It will be all fun to create something with this ultimate machine. Here, I’ll tell you the best methods to prepare personalized apparel using Siser EasyColor DTV. You’ll learn more about it later in this blog. So, let’s get started.
Supplies and Tools You Will Need for Your Cricut Project
Before we get started to learn how to use Cricut Maker, you must gather some important accessories. I’m listing all of the best accessories here. Use them and follow my step-by-step instructions to create your own project. Check the steps below.
● Brand new Cricut Maker or Explore
● Siser EasyColor DTV
● Siser Easy Mask
● An inkjet printer
● Cricut StandardGrip mat
● A weeding tool
● A Cricut EasyPress
● A Cricut scraper tool
Let me tell you what a Siser EasyColor DTV is. It is an iron-on vinyl type that is typically used on lighter blanks such as garments, T-shirts, etc. This unique vinyl is very convenient and useful for creating better designs and sublimation projects. Let’s check the complete method to create the best project.
How to Use Cricut Maker to Make Personalized Apparel?
Finally, we are here to learn the process of creating personalized T-shirts. So, before we move on to the final steps, measure your blank so that you can create an appropriate design. So, let’s check how to use Cricut Maker for beginners.
Step 1: Upload an SVG File to Cricut Design Space
In the first and foremost step, you’ll need to upload your SVG design file to the Cricut software. If you want, you can create a design manually as well. Once you’re ready, just resize your design and make it fit to your blank.
As you’ll have to print this image, ensure that your Cricut machine will recognize it as a printable file and not a file to be cut. To ensure this, choose your image and hit the Flatten option beneath the Layers Panel.
After that, your Cricut machine will show a preview of the image. When you’re ready, just click the Make It button. And now, this design will go through a Print Then Cut feature. To access it, hit the Continue button.
In the next step, you’re allowed to send that image to your inkjet printer and select the paper type you want to print on. I prefer specialty matte. You can select one based on your printer. Get ready with your printer and insert the Siser EasyColor DTV into it.
Step 2: Start Cutting the Siser EasyColor DTV
In the following step, you’ll need to cut your material. On your Cricut machine, select your material as Premium Vinyl Permanent Glossy and set the pressure to More using the drop-down menu.
Next, load your vinyl material on the Cricut mat at the left-side corner and make it stick to the mat using a brayer tool. Now, load the mat with vinyl into the Cricut machine and hit the Play button to allow your Cricut to cut the image. Continue with the steps to learn how to use Cricut Maker.
Once the cut is done, take off the paper sheet from your mat, turn the mat over, and take the mat away from your DTV. Please note that you don’t have to peel off the DTV from the mat. You can also use a pair of scissors to cut the design if necessary.
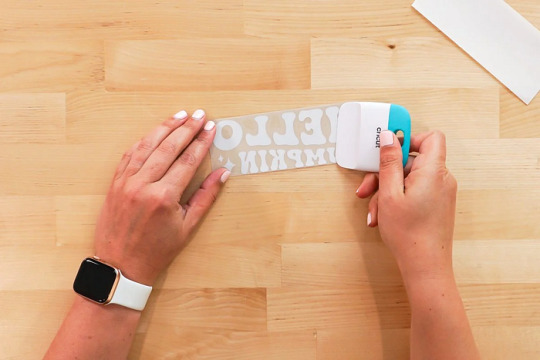
Step 3: Weed Out the Excess Vinyl
Once you cut your design, you should weed out the excess vinyl from your design. Do this carefully, so that your design doesn’t ruin. This step will add more detail to your project.
Step 4: Cover Your Image With a Mask
Moving forward, cut your mask to the size of your design. Now, take off the transparent film from the mask and then apply the mask alone to your DTV image. Moreover, ensure that the final design is flat and that there are no air gaps between the mask and the design.
Step 5: Transfer Your Design to Apparel
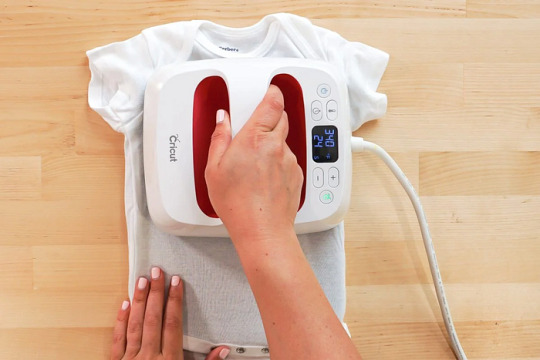

This design is so amazing; I love making it. This is how to use Cricut Maker to reap good results. All the best to all of you who are keen to make something unique and precise.
FAQs
How to Use a Cricut Maker to Make Shirts?
To create a shirt with your Cricut cutting machine, you’ll need to use the Cricut Design Space and a heating press to create a desired design. Get started with the Cricut software, make a design, resize it, and then print and cut it with your Cricut machine. Now, weed away the excess vinyl, and then preheat it with your Cricut heat press, and give a final heat to it.
Which Heat Press Is Suitable for Making an Iron-on Cricut Project?
As there are many options to create an iron-on Cricut project, you can use any of them depending on your requirements. So, the common machines are Cricut EasyPress, Cricut EasyPress 2 & 3, Cricut EasyPress Mini, etc. You can utilize a heat press to transfer the design to your apparel effortlessly.
Can You Use Regular Iron With a Cricut Machine?
Yes, you can. A regular iron is also effective for your minimalist iron-on projects. However, a regular iron may not deliver the results you want and not give a permanent design. Overall, we can say you can use a household iron for normal, sensitive projects but not for complex projects.
Read more: install cricut design space app
cricut.com/setup
cricut.com/setup mac
Source: How to Use Cricut Maker
#How to Use Cricut Maker#How to use cricut maker for beginners#how to use a cricut maker to make shirts#cricut.com/setup mac#cricut explore 3#www.cricut.com setup login#cricut design space#cricut explore air 2#cricut.com/setup#cricut new machine setup#cricut.com setup mac#cricut setup on computer
0 notes
Text
How to Use a Cricut Joy: Quick and Easy Guide
A few days ago, I went to my cousin’s house and saw a new Cricut Joy collecting dust in the corner. Being a crafter myself, I couldn’t resist asking her why. She replied that she was confused about how to use it. With a smile, I offered to help. From unboxing the machine to setting it up, I guided her through each step, even teaching her how to create her first project.
Then, I realized that some beginners may not have even opened the box and could use my assistance. That’s why I have prepared this guide for you all. Just like I helped my cousin, I will tell you how to use a Cricut Joy from scratch. However, it is necessary to follow this guide till the end because every piece of information is important for using your Cricut Joy.
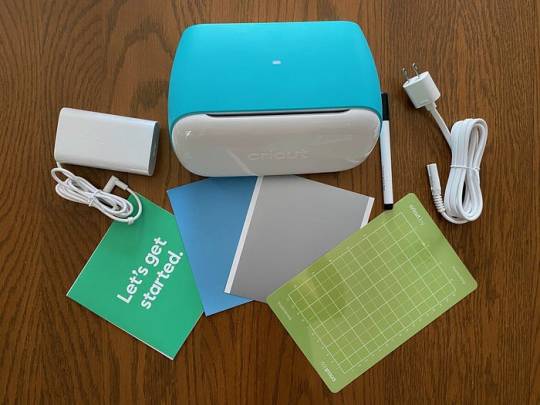
Step 1: Unboxing the Cricut Joy
If you have already unboxed your Cricut Joy machine, you can continue to the second step below. If not, let’s take a look at what you’ll find inside the box:
Welcome card
Cricut Joy machine
Power adapter
Fine Point pen (0.4 mm)
StandardGrip mat
Sample of smart vinyl
Around 50 pre-made projects
Free Cricut Access for 30 days
Step 2: Setting up Your Cricut Joy Machine
Setting up a Cricut Joy is a crucial step in learning how to use a Cricut Joy machine effectively. Let’s start by setting up the machine first.
Prepare Your Cricut Cutting Machine
Place the Cricut Joy machine on a flat and clean surface near the electric outlet.
Assemble the machine’s power cord and insert one end into the machine and the other end into the electrical outlet.
After that, turn the power button on, and a light will illuminate the machine.
Connecting a Cricut Joy to Your Computer
The Cricut Joy does not have a USB cord, so you have to connect the cutting machine to a computer via Bluetooth.
Turn on the Cricut Joy machine 10–15 feet away from your desktop computer.
Next, locate the Bluetooth option, turn it on, and wait for the computer to detect your machine.
Now, select Cricut Joy from the list, and if asked for a PIN, enter 0000 and hit Connect.

Downloading and Installing Cricut Design Space
Downloading and installing Design Space on your desktop computer is necessary to complete the process of how to use a Cricut Joy machine.
Go to cricut.com/setup, agree to Cricut’sterms and conditions, and download the file.

After downloading Design Space, locate the file you see on the screen and install it.
Once the software is installed, launch it, create a Cricut ID and password, and sign in.
Note: If you want to access Cricut Joy from mobile (Android or iOS), download the Cricut app from the Play Store or App Store.
Adding Your Cricut Joy Machine in Design Space
Once you have installed and signed into the Cricut software, it’s time to set up the Cricut Joy. To do this, launch the Cricut software, click on the drop-down menu, and select New Machine Setup > Cricut Cutting Machine > Cricut Joy. Also, make sure the connection is established.
Step 3: Using a Cricut Joy to Make a Project
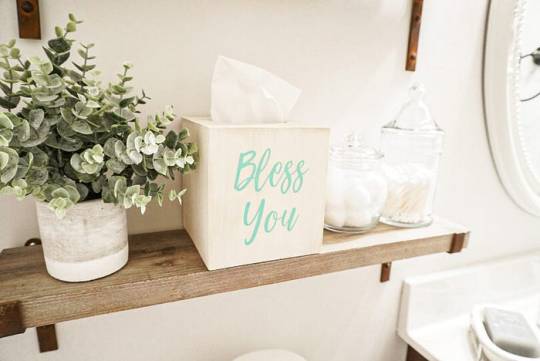
You will need to cut vinyl with Cricut Joy to personalize a wooden tissue holder. Here’s what you need for this project:
Cricut smart vinyl
Unfinished wooden tissue box
Cricut Joy machine
Computer or transfer tape
Design
Create a Design in Design Space
Open the Cricut Design app and select the New Project tab.
After that, use the Text function and a text and change its font.
Once you have the design ready to cut, click the Make It option to move on to the next page.
Then, select the mat page. There is no need to mirror this project. Click Continue.
From the All Browse Material option, search for vinyl and select it as a material.
Now, load the green vinyl into Cricut Joy without using a mat.
Cut & Weed Out the Vinyl Design
Once everything is ready, go back to Design Space and hit Continue to begin cutting.
Once the machine completes cutting, it automatically stops. Now, unload the smart vinyl and weed out unwanted designs.
Next, cut the transfer tape to the size of the vinyl and apply it to the design.
Apply Your Design
Frequently Asked Questions
What can you make using a Cricut Joy?
Cricut Joy is a smart, compact, and portable machine that can be used to create different projects. Below, I have listed some of the Cricut Joy projects.
Vinyl mug
Greeting cards
DIY pillow
Leather earrings
Wall art
Tumblers
Cake toppers
Stickers
Labels
Banners
T-shirts
Jewelry
How does Cricut Joy work?
The Cricut machine works with the user-friendly Cricut Design Space or Cricut Joy app. Users need to install one of these and start a project. Also, the Cricut Joy connects to devices via Bluetooth. Once everything is set up, the user designs it and sends it to the machine. Finally, the Cricut Joy will cut or write according to the selected settings.
Do I need a computer to use a Cricut Joy?
That’s not necessarily true; you can also use your mobile device to use Cricut Joy. All you need is a device where you can download and install Cricut Design Space to command the Cricut machine. However, all of this can also be done from a mobile phone or tablet. So, it depends on the user’s preference and their comfort level.
Conclusion
The Cricut Joy is a beginner-friendly crafting tool that is compact yet versatile. Setting up the Cricut Joy and learning how to use it may not be too difficult for beginners. I have discussed everything in detail in the blog post above. If you followed the instructions exactly, you can now use your Cricut Joy without any hassle.
Read more: install cricut design space app
cricut.com/setup
cricut.com/setup mac
Cricut New Machine Setup
Source: how to use a Cricut Joy
#how to use a Cricut Joy#Cricut New Machine Setup#cricut software app#cricut design space download#cricut explore air 2#cricut.com/setup#cricut project ideas#design.cricut.com/setup#cricut.com/register#cricut.com#cricut.com/create
1 note
·
View note
Note
Hello! I was wondering what company you use for your sticker sheets? I bough one from your Ko-Fi shop and really like the quality, and the pricing you were able to sell at is waaaaaay more reasonable compared to any of the companies I've seen and used myself. Is it a POD company, or a mass purchase of them to sell on your own?
Thank you for your time if you're able to respond!
I'm really glad you like the quality, because I actually make them by hand at home! (Please forgive the lighting, my bedroom is my office lmao.)
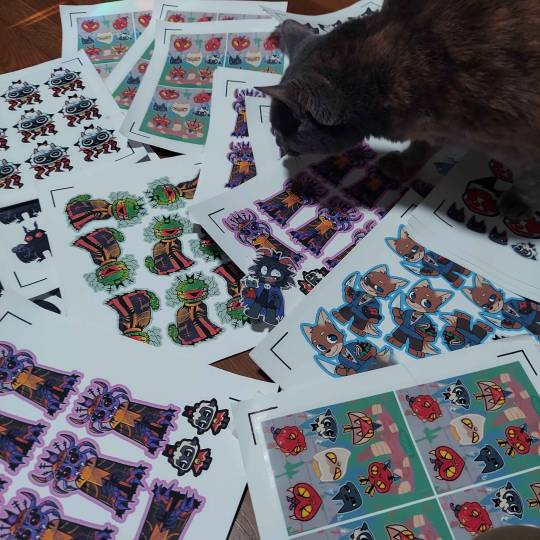
I don't use a company (and Idk what a POD company is sorry!) but making them at home gives a lot more freedom of stock, just be wary it can be very time consuming depending on how many you need to make.
I've had other people ask before, so here's a rundown of how I make my stickers at home: At most you'll need:
Printer
Sticker paper (this is the type that I use)
Laminator and lamination paper (the lamination paper that I use.) You can also use adhesive non-heat lamination paper if you don't have a laminator, gives you the same result, just be careful of bubbles. You will get double your worth out of a pack because we are splitting the pouches to cover two sticker sheets.
Your choice of a sticker cutting machine or just using scissors.
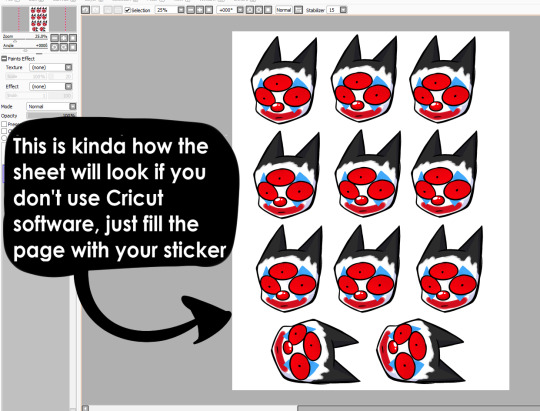
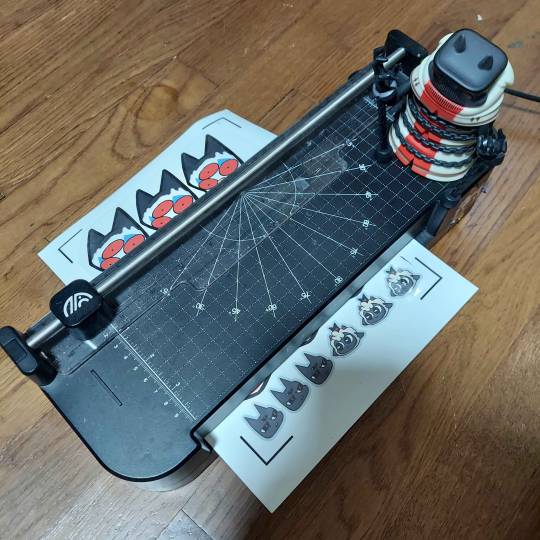
First, I use Cricut's software to print out the sticker sheet with the guidelines around the corners so the machine can read it. If you do NOT have a Cricut machine, open up your art program, make a canvas of 2550x3300 and fill it up with your sticker design with some cutting space between them. This the 8.5x11 size for the sticker page.
I usually have bleed selected so the cut comes out cleaner. Tip for non-Cricut users below: Increase the border around your sticker design to fake the 'bleed' effect for a cleaner cut.
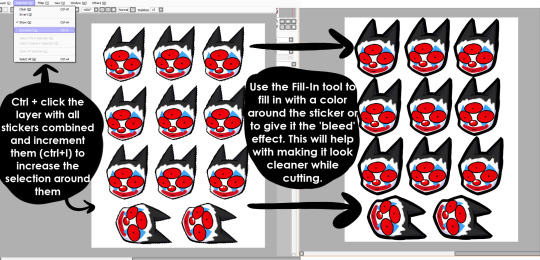
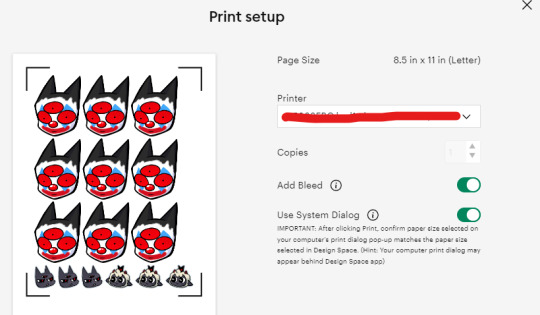
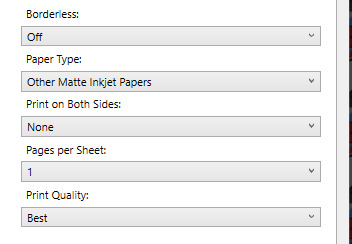
These are the print settings I use for my printer. I use the 'use system dialogue' to make sure I can adjust the settings otherwise it prints out low quality by default. Make sure if you're using the above paper that you have 'matte' selected, and 'best quality' selected, these aren't usually selected by default.
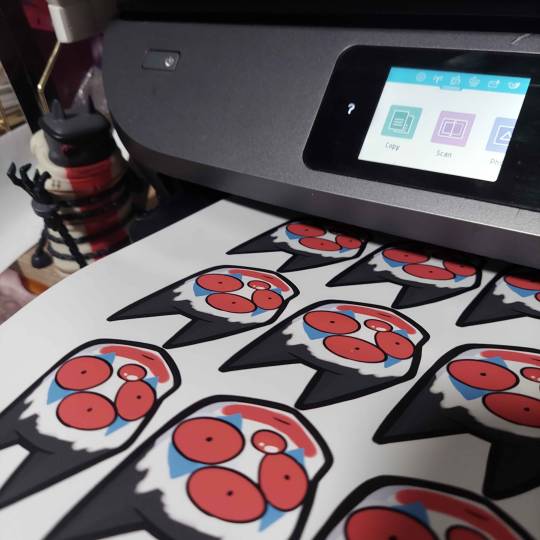
So you have your sticker sheet printed! Next is the lamination part. I use a hot laminator that was gifted to me, but there is no-heat types of lamination you can peel and stick on yourself if that's not an option.
(This is for protection and makes the colors pop, but if you prefer your stickers matte, you can skip to the cutting process.)
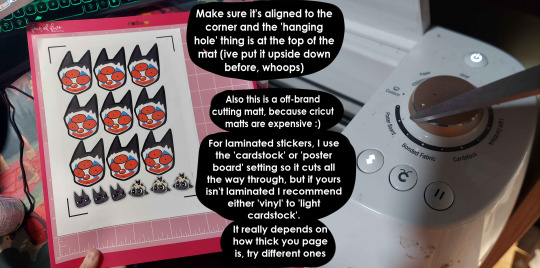
Important for Cricut users or those planning to get a Cricut: You're going to cut the lamination page to cover the stickers while also not covering the guidelines in the corners. First, take your lamination page and lay it over the sheet, take marker/pen and mark were the edges of your stickers are, and cut off the excess:
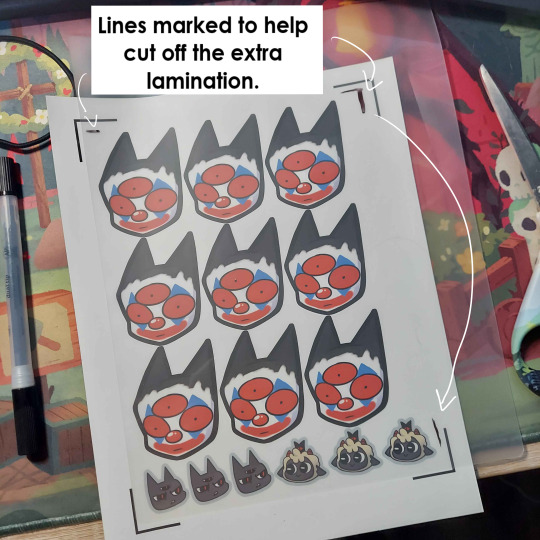
(I save the scrap to use for smaller stickers or bonuses later on)
After you've cut out your lamination rectangle, separate the two layers and lay one down on your sticker sheet over your stickers with matte side down, shiny side up. (Save the other sheet for another sticker page)
The gloss of the lamination will prevent the machine from reading the guidelines, so be careful not to lay it over them. It also helps to cut the corners afterwards to prevent accidentally interfering with the guidelines.

Now put that bad boy in the laminator! (Or self seal if you are using non-heat adhesive lamination)
Congrats! You now have a laminated page full of stickers.
For non-cricut/folks cutting them out by hand: this is the part where you start going ham on the page with scisscors. Have fun~
Cutting machine: I put the page on a cutting mat and keep it aligned in the corner, and feed it into the machine. For laminated pages I go between 'cardstock' and 'poster board' so that it cuts all the way through without any issues, but for non-laminated pages or thinner pages, I stick for 'vinyl' and 'light card stock'. Kinda test around.
Now I smash that go button:

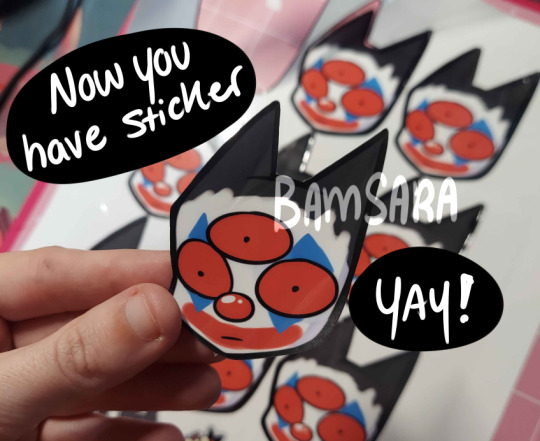
You have a sticker now!
The pros of making stickers at home is that you save some cost, and you have more control of your stock and how soon you can make new designs. (I can't really afford to factory produce my stickers anyway)
However, this can be a very time consuming, tedious process especially if you have to make a lot of them. There is also a LOT chance for some errors (misprints, miscuts, lamination bubbles, ect) that will leave you with B-grade or otherwise not-so-perfect or damaged stickers. (Little note, if you have page mess up in printing and can't be fed into the cricut machine, you can still laminate it and cut it out by hand too.)
I have to do a lot of sticker cutting by hand, so if you don't have a cricut don't stress too much about it. I have an entire drawer filled to the top of miscuts/misprints. I keep them because I don't want to be wasteful, so maybe one day they'll find another home. Sucks for my hand though.
But yeah! This is how I make my stickers at home! Hope this is helpful to anyone curious
1K notes
·
View notes
Text
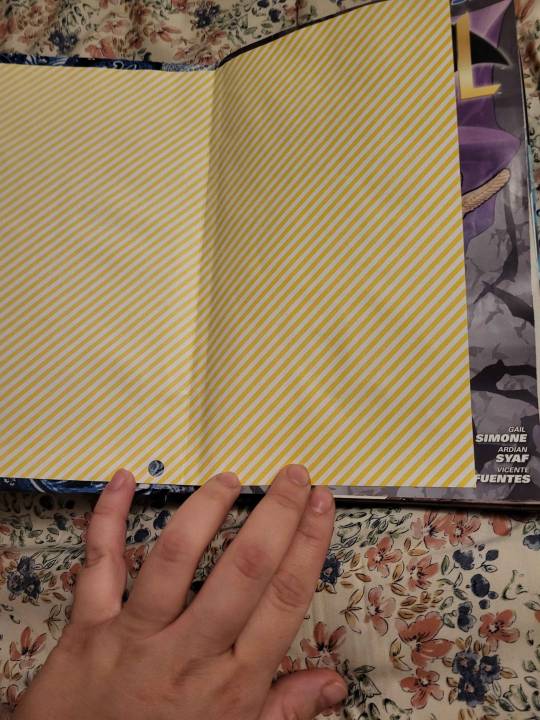
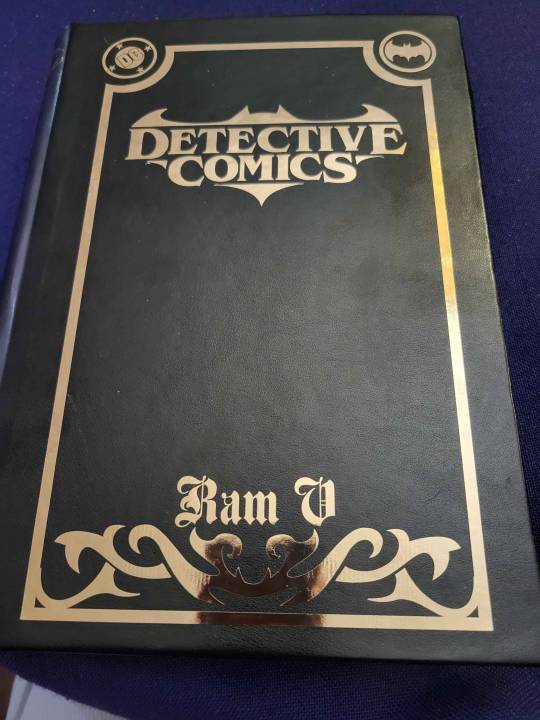
Massive comic bookbinding progress post.
Making a massive bookbinding post with my progress and what resources and steps I use. I do not claim to be an expert and recommend if you want to get into bookbinding yourself you look into any linked tutorials (or find some yourself), because they are made by people with much more experience.
So. When I just got into bookbinding, I was following an instructables tutorial for (link) most of the book. the sewing part, I was following this (link) tutorial. The cover tutorial (instructables) wasn't great for what I currently do, and I changed a lot looking back on it, but it had the bonus of suggesting cheap materials (Cardboard for covers, elmer's glue for spine, any spare fabric for bookcloth) that helped lower the barrier to entry and let me decide if I wanted to buy nicer stuff.
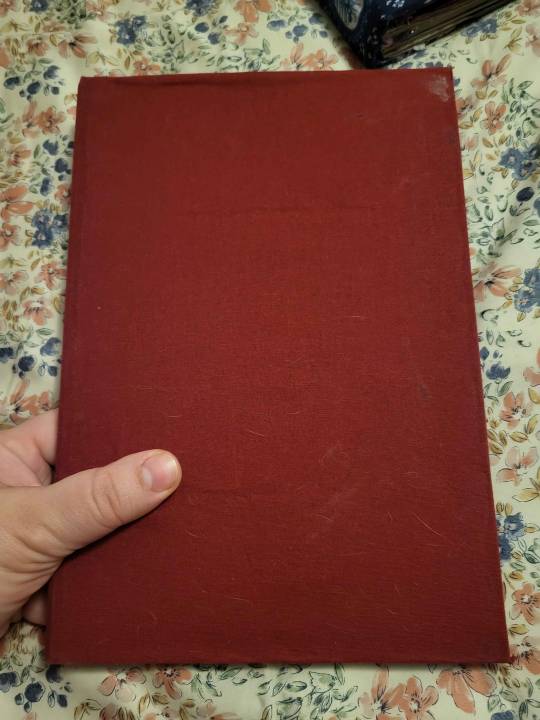
This is the first book I ever bound, using the instructables tutorial.
It's not the prettiest construction wise, but I can still hold it and read it which is at least successful for a first book (tho I did test on comics I didn't care as much about, in case I messed up).
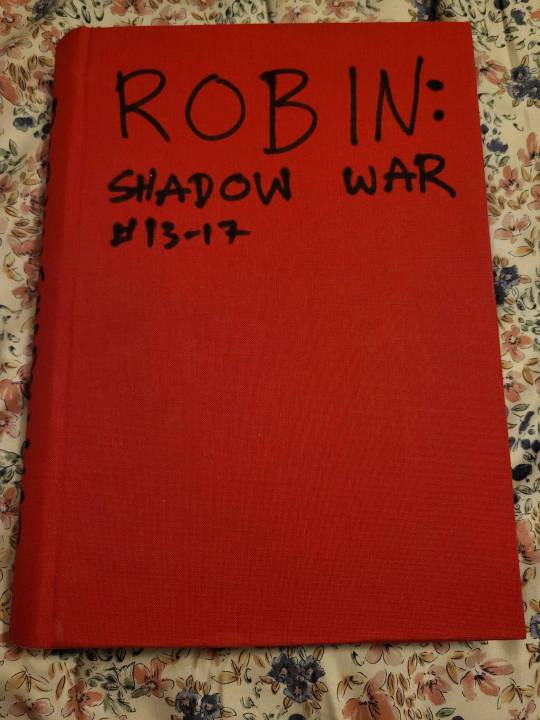
I did a couple more books like this, one being Blue Beetle: Graduation Day (in Spanish) and the other being Artemis: Requiem, and another being Knight Terrors.
Artemis Requiem I think was the last
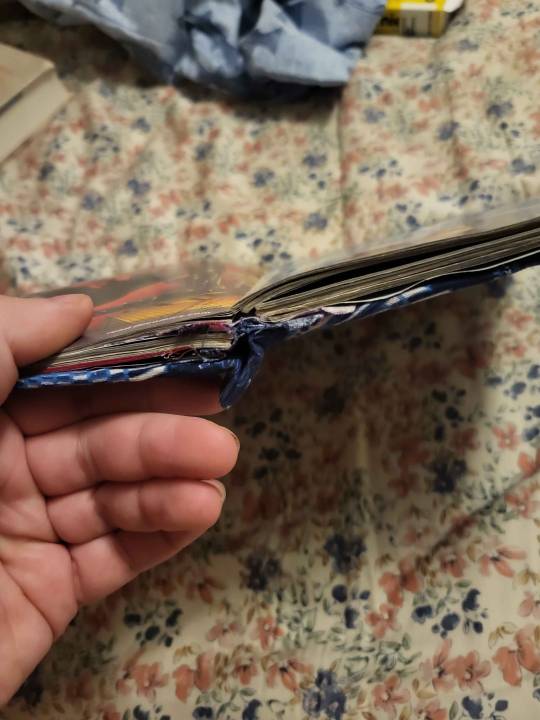
Next, I found and started using Dave the Designer's tutorial (link) and also got some materials actually targeted at bookbinding. I got bookbinding needles and thread (much thicker and stronger, it's easier to pull the threat through and it feels stronger) and davey board -- though since then I have tried chipboard which is muuuuuuuuuuuuch cheaper and works just as well unless you have a giant comic. Sometimes you have to lay weights on chipboard after gluing it to make sure it doesn't bend though, it likes bending when it is wet a lot.
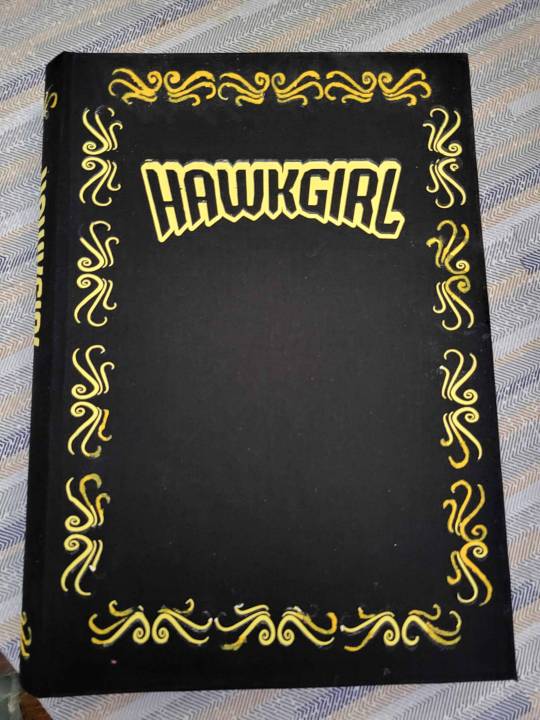
I did a ton of books in this period. I was mostly interested in making books that had good construction and were good for protecting the comics I sewed together and felt structurally sound. I did not care at all about what the covers looked like, and just wrote titles on them with sharpie. I used mostly linen cloth, buckram cloth, or occasionally spent money on book cloth
After this, my friend linked me this (link) youtube tutorial. It does not get into sewing, because the goal of that person's tutorial is not how to sew but how to rebind paperbacks as hardbacks with fancy covers. The main focus for what I watched is on covers. They use a cricut, I got the cheapest I could find (Joy xtra, not maker or any of the big kinds). It still is expensive (like 150 dollars), and in the linked playlist the youtuber includes how you can decorate without a cricut, though that does leave less freedom for what you can choose... UNLESS you are an artist already!
Shortly before I got the cricut, I did Eric Luke's WW Run
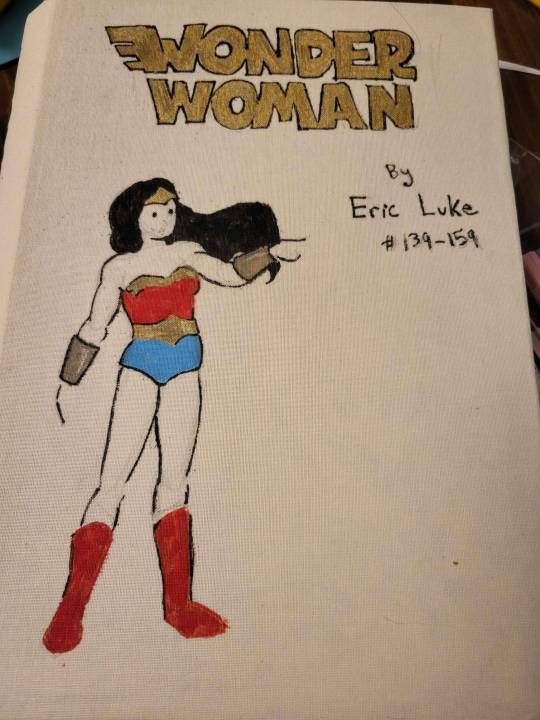
This was when I was getting frustrated I couldn't make the books look pretty on the outside, so I drew a sketch in pencil and colored in with paint pens i had bought for action figure modding (tho im sure any type of sharpies would work).
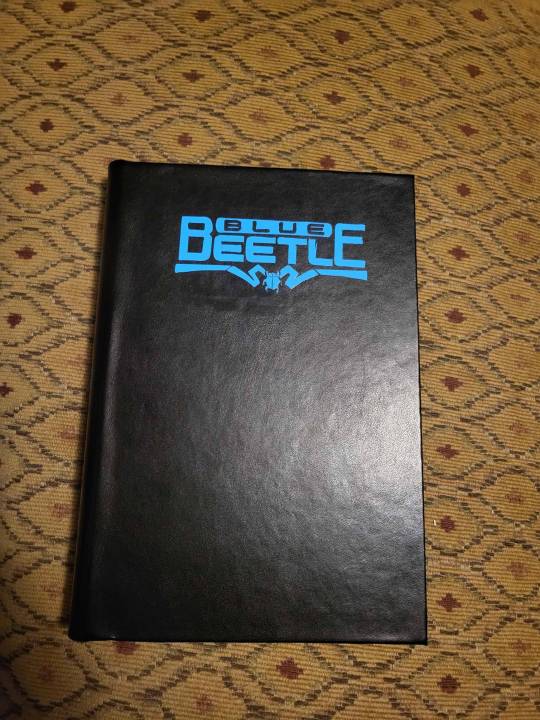
Anyway, after that I started using the Cricuts for covers. This is the first one:
i messed up on the heat transfer vinyl stuff, so I had to repaint some parts with yellow paint. I haven't had these issues since I started using the bookcloth materials recommended by the cricut youtuber I linked earlier, which are also generally cheaper per unit than where I was getting bookcloth earlier (but shipping is expensive)
Now I do almost all my bookcovers with cricut because once you have the machine it's reasonably priced, the vinyl is pretty cheap, and it's easier on my spoons than hand drawing everything and lets you customize a lot
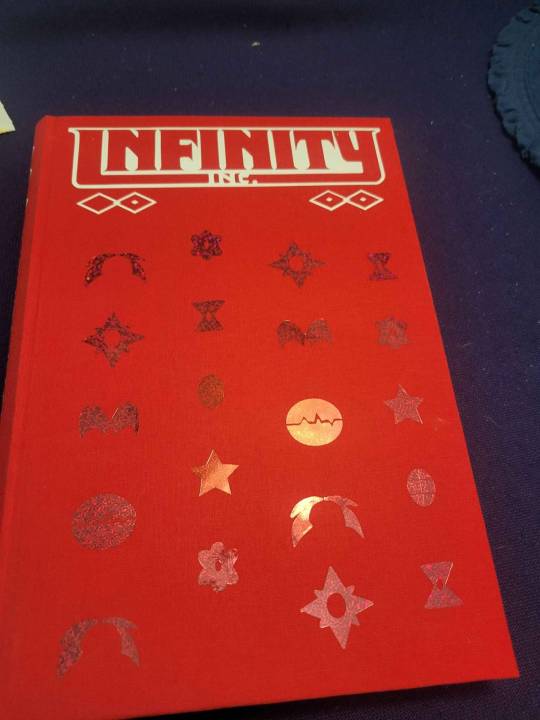
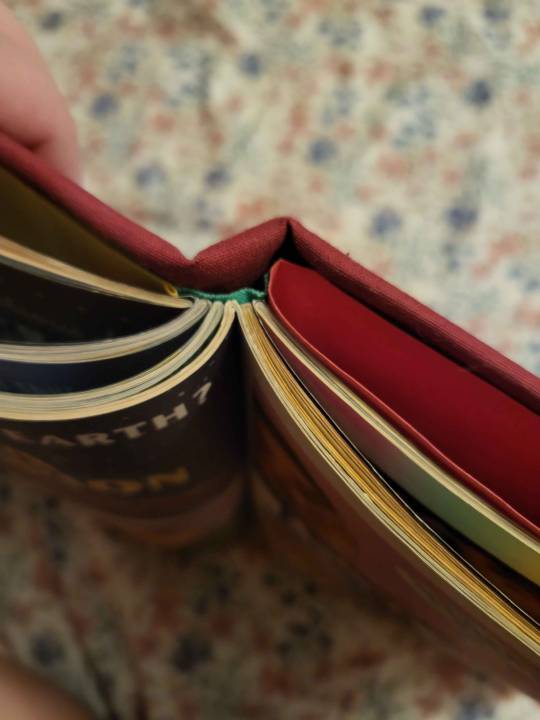
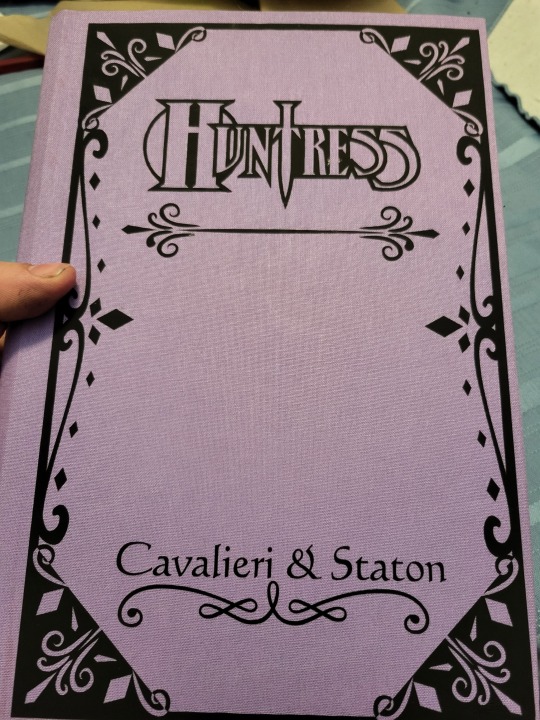
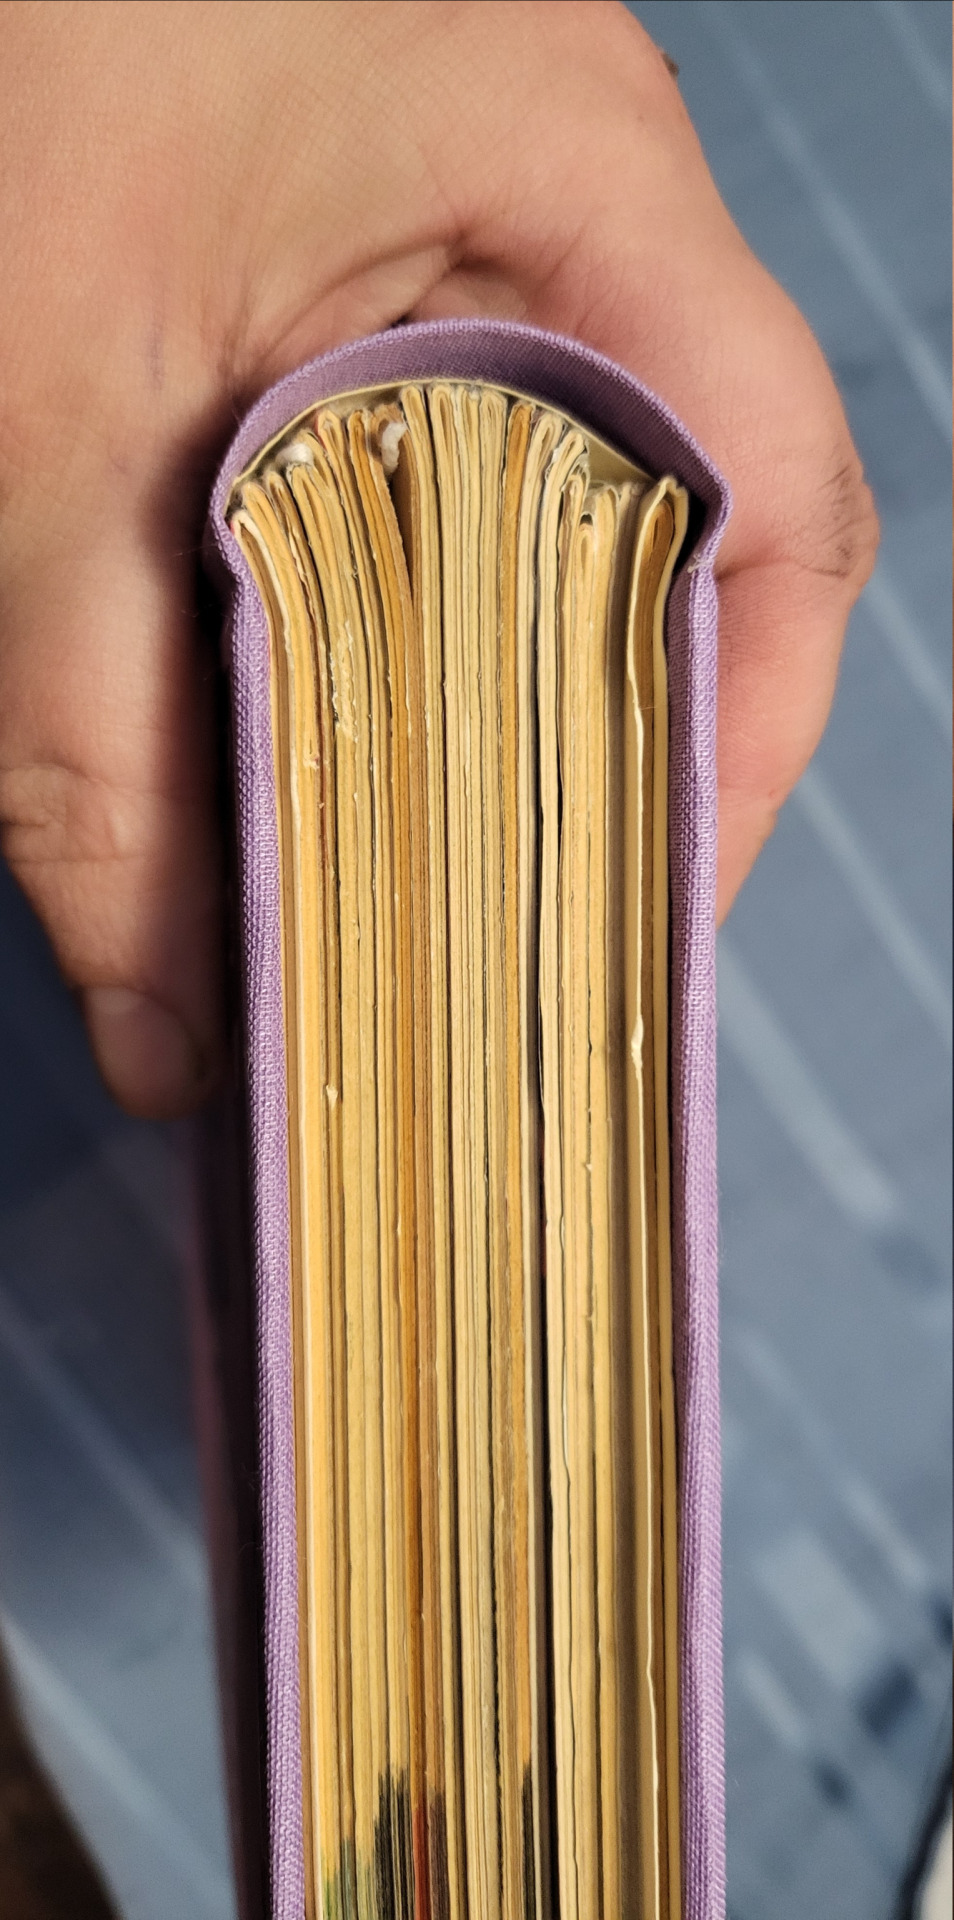
Lately, I've been trying to make my sewing/construction technique better, and I've been watching videos from DAS bookbinding (link). I tried to do my most recent Huntress comic with the rounded + backed spine with shoulders, not sure that I succeeded, but that's definitely on me because in the tutorial where he explains how to do it without the official material he's like "You should try this with proper equipment first, this is just for binders who took a course and could do the shouldering in a bookbinding course and want to try it on their own without having to buy the proper equipment" and. I have never done a real bookbinding course or used the proper equipment.
Hope this was informative/fun if you made it through!
69 notes
·
View notes
Text
GUYS GUESS WHAT
I took my friend (who doesn't get out much and needs to have a quiet retreat space) to the library today.
I FORGOT HOW RAD THE LIBRARY IS.
-My library has private rooms with locking doors that you check out with your library card and then have keycard access to.
-These rooms are made of plexiglass for Obvious Reasons, but still. Rooms.
-I checked out a Lounge space and, guys, it's a balcony.
-It's over the main entrance to the library so you can see everyone coming in and out. The door locks so it's private, but it's also open air to the tall ceilings and has SO MUCH natural light.
-literally so much natural light the one exterior wall is floor-to-ceiling windows with a view over a fountain and a courtyard and the local shopping district. the sunset was rad.
-My laptop connected directly to the WiFi.
-There were so many people there! There are chairs spread throughout and a bunch of computers and people just chilled and hung out!
-My friend was thrilled to be able to navigate a quiet space with strangers who didn't speak to her, and then to have a retreat space.
-My library also has a Makerspace (!!!) and a Cricut machine (!!!) and I can email someone and get trained in how to use it!
-Someone was in the recording booth and I couldn't tell what she was reading but it sounded cool.
-There's a whole room along the side of the upstairs that's just for teens. Like literally just. The sign says that if you're not a teenager you should see the staff for other rooms. There wasn't anyone there when I stuck my head in but there's a giant whiteboard and orb-style chairs and
-sorry I forgot to mention that my balcony has not only a couch but also several big comfy chairs (like, I can sit on my chair and put my feet on it too and balance my book on my knees and it's STILL not too small of a chair) and a couple coffee tables and a corner where the sunlight isn't direct y'all it's so nice
-I'm so glad my tax dollars went to this, guys. We're stuck on campus for Thanksgiving break and we desperately needed to go somewhere that didn't cost money.
-for as much as I get on about the necessity of Third Spaces, you think I'd remember this.
-I also found out my friend likes Agatha Christie novels. She read me a section while I washed dishes tonight, and I think I'm gonna like them too.
#moss's musings#library#public library#go to the library#third space#solarpunk#kinda literally lol the amount of Vitamin D I got almost made up for the fact that it was dark at 5 pm#also they have a Craft and Chat on Monday nights and I've never been sadder to work on Monday nights.#the connections I could make!
347 notes
·
View notes
Text
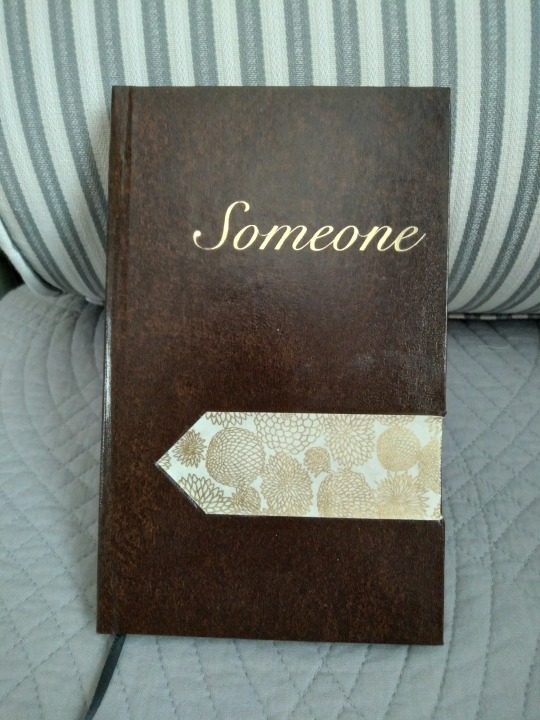
Binderary Book #3 is at last photographed and ready to share. This is Someone, a Good Omens human!au by Diminua, in which our favorite angel and demon are lonely and both turn to a matchmaking service to solve this problem. It sounds like a comedy but it isn't particularly, it starts off very lonely and a bit melancholy before they get a very quiet and beautiful happily-ever-after. As I told the author when I asked to bind it, it lives in my brain and radiates comfort.
I wanted to give it a binding that reflected the sort of classic romance that I feel is present in the story. I used a brown faux leather from Neenah Papers that's much darker and nicer than the faux leather I'd been using previously, though once it's on the book it looks a bit strongly like a bible cover. That's not so bad for a Good Omens fic though.
Have a look under the cut for detail shots; I feel like this one rewards a closer look.
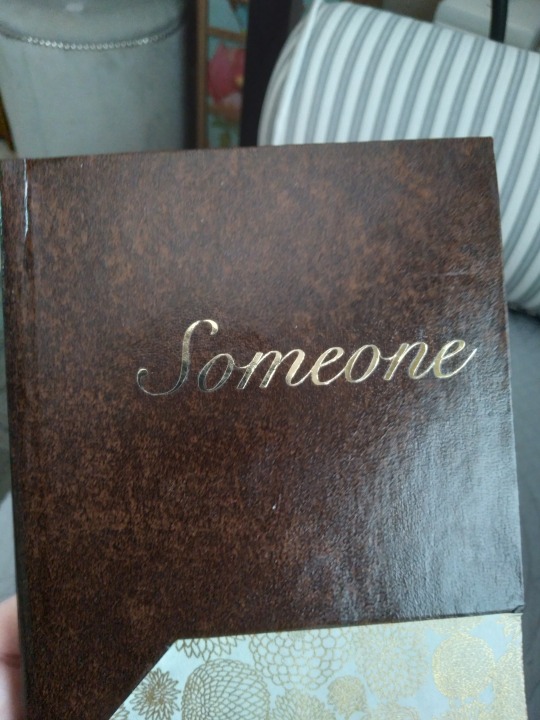
For the title we have gold foil htv. The author's name was supposed to go under it, in slightly smaller text, but it proved too great a challenge for my Cricut with this swirly font and the machine ate it.
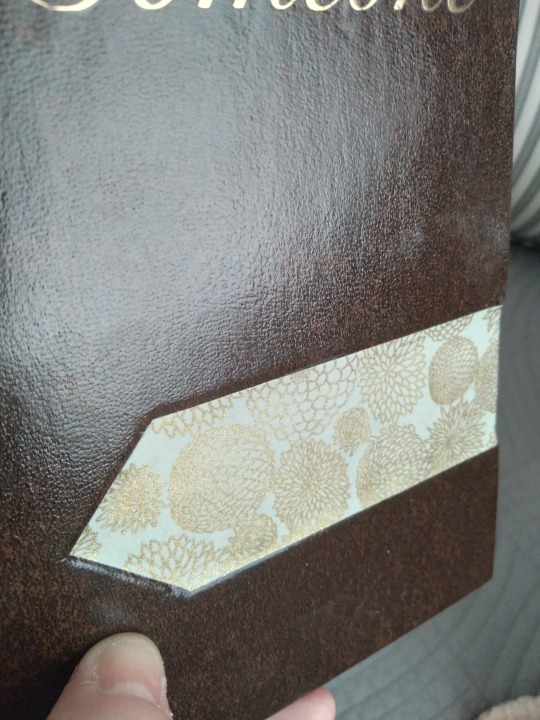
The floral strip is a piece of chiyogami that I got in one of Chibijay's scrap packs. It's cream with gold flowers printed on it, which just screams "wedding" to me. There's a vivid moment in the story where they go to a flower market to pick out what they want for their ceremony, and I thought this was a nice echo of that. I was torn on this bind by wanting to do an accent strip (the way I usually do them, with the end hidden under a different material that covers the spine) and wanting to do a full leather bind since it's been ages. I've done some full cloth recently but the last full leather was a year ago. The compromise I reached was to cut that little point in it and embed it into a cutout to protect it. It went well, though there's a bit where it wraps around the edge and the leather tore so I had to patch it. It's not noticeable unless you're looking for it, so I'm calling it a win. And I love it, it looks like no other book I've made and it's perfect.
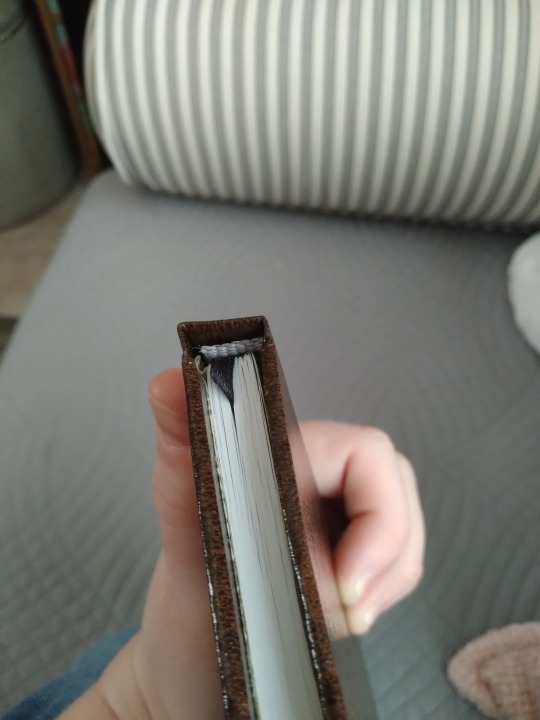
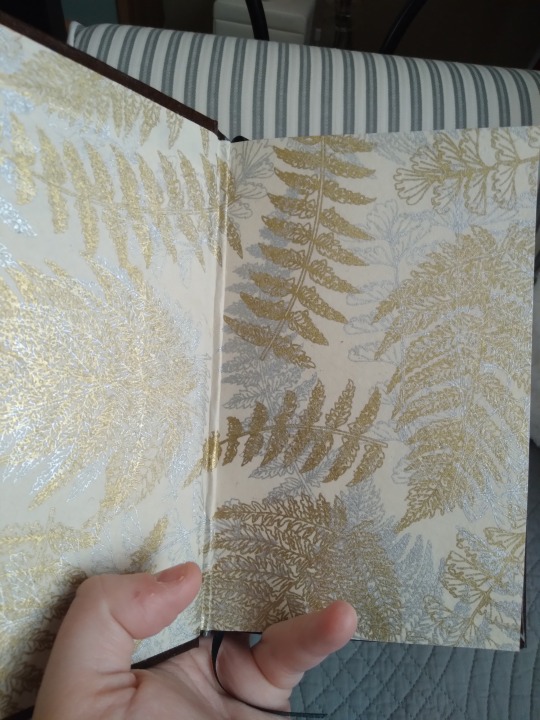
Top view, with premade end band. I would have loved to make custom ones but the book's too skinny. The gray ties in well with the endpapers though. The endpapers are a printed lokta that I got at Blick a while back without knowing what I was going to do with them, They're printed in gold and silver ferns and while they don't match the strip on the front I think they coordinate with it nicely. The first time I cut them I made them too small because the paper wasn't square and they had to be redone. There's a wrinkle from the casing in but we are none of us perfect.
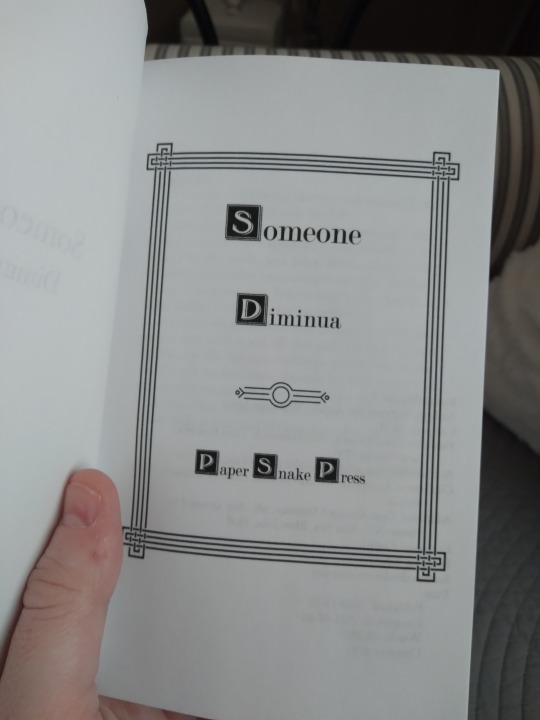
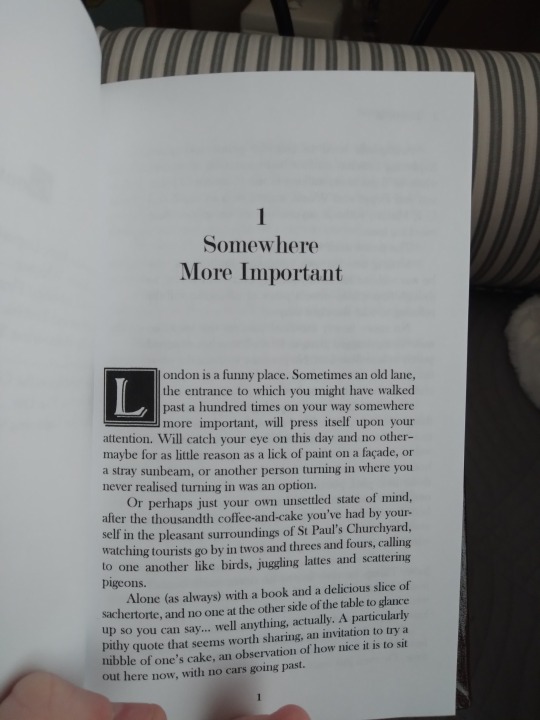
Title page and first page. The frame came from rawpixel, the little art deco widget came from vecteezy and I also used it as a scene break divider throughout the fic. The drop capital is from a dafont custom called Bolton Drop Caps and I love how they all coordinate with each other despite coming from such different sources. Something about legal quartos just begs me for drop caps. They're just the right thing to make the pages pop, and Bolton's a really nice font. Bold, but not frilly. The florals on the cover are very frilly and I like how the interior graphics balance them.
And that's it! This was a start-to-finish Binderary book; I had fully typeset it before the month began, but it hadn't been printed and all the physical work was done during February. I tend to pause between stages so this was practically a speed run for me and I couldn't be happier with it.
#good omens#bookbinding#fanbinding#snek makes books#i'm very pleased with this one#it's just. so cute#it fits the story#i think i nailed it
21 notes
·
View notes
Text
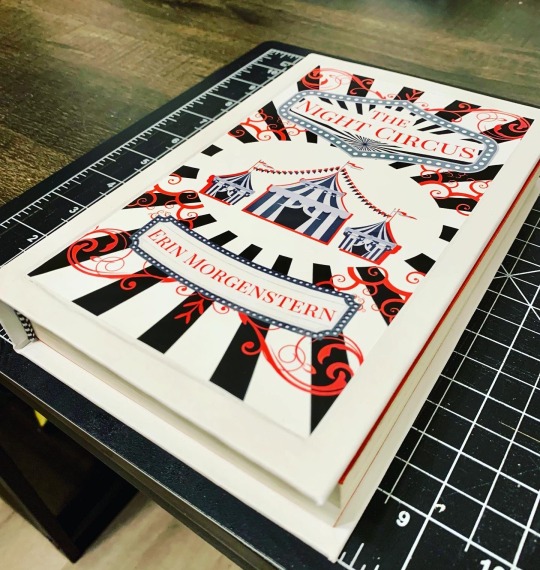
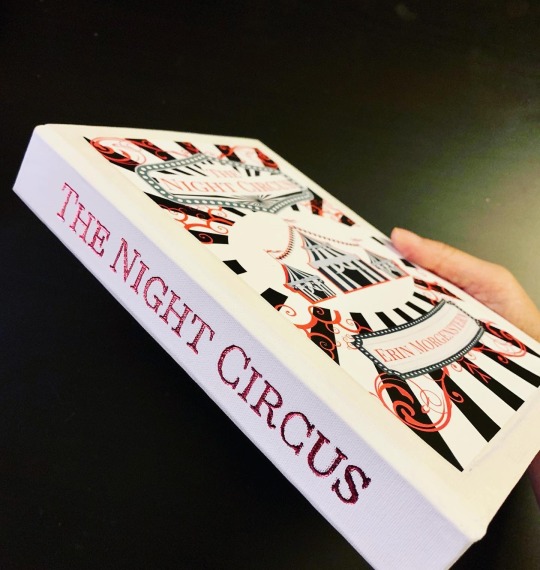
The Night Circus
By Erin Morgenstern
🎪
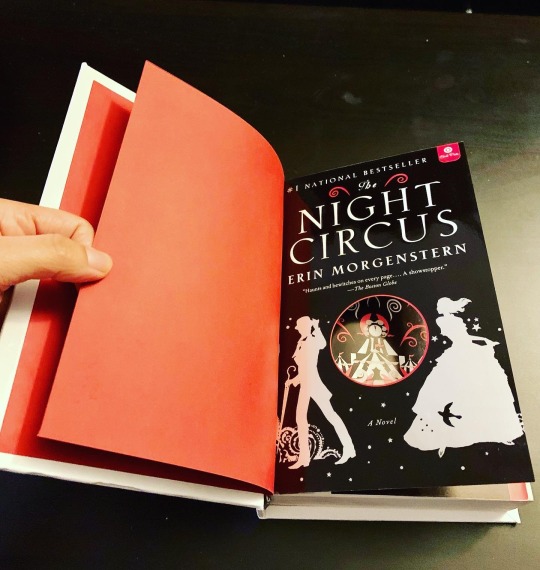
A rebind that I will be gifting to a friend as a Christmas present.
I read this book when I first started college, I think. The thing that stuck with me since reading it has always been the beauty and magic of the circus itself. Normally, I’d get lost or bored of extensive detail or descriptions about the setting, but the Circus of Dreams was an ✨aesthetic✨ that stirred my imagination. I was surprised at how much I loved it.
🎡
Regarding process:
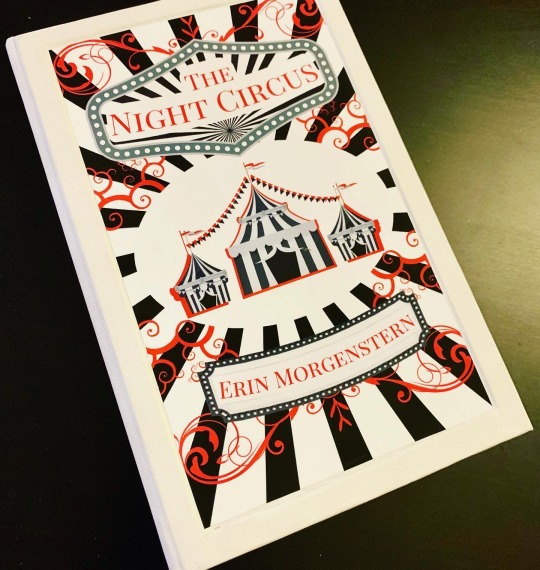
So I recently rewatched the DAS video about paper labels, and creating a “well” for the label to sit in. And I thought to myself, what if I made the entire cover design the “label” and centered it on the cover?
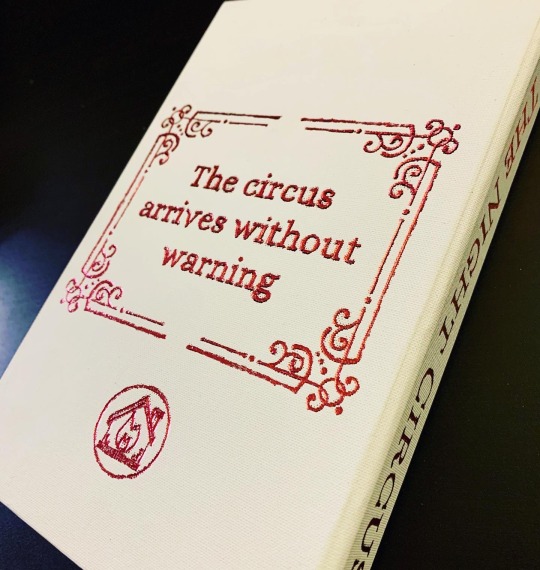
The design was printed on vinyl adhesive paper, and it’s pasted right in the center of a large recess on the cover. Spine and back was hand foiled.
🎠
Well, it’s seems I’m on a roll. There will be many more rebinds to come before the end of the year, if I don’t lose momentum. I’m excited to see my projects take flight, but it’s also honestly quite daunting as well. 😮💨
As a side note…
When I first started this hobby, I was ambitious to achieve a level of quality comparable to many IG and tiktok bookbinders I’d been seeing out there. Many of them were binding fanfiction or doing rebinds of popular fiction, fantasies and romance.
And a LOT of them (or at least the popular accounts) were using special cutting machines like cricut, and heat transfer vinyl to create clean, professional looking designs. Shiny and metallic seems to be a highly sought after look, and admittedly it is attention grabbing for many casual viewers who stumble upon these videos. The same can also be said of the more traditional binders who make leather books and use special techniques for embossing and foiling.
While those beautiful machines and materials and tools like htv or leather-working aren’t NECESSARY for the hobby, it’s clear that any simple amateur bookbinders trying to build their accounts and show people their work really won’t be getting as much reach without making books that are as shiny and attention grabbing in the same ways.
And trying to achieve those looks of metallic vinyl, or beautifully embossed leather, felt pretty inaccessible to me. I’m sure many other amateur binders feel same the way.
That’s why I’m glad I can demonstrate how to achieve beautiful, high quality looking books in alternative ways. Feel free to reach out and ask me about my techniques! I’m no expert, but I’d be happy to help you find solutions and new methods.
12/15/2023
#bookbinding#handmade#erin morgenstern#the night circus#handbound book#book binding#arts and crafts#bookbinder#hand bound book#ficbinding#renegade bookbinding#renegade publishing
130 notes
·
View notes
Text
How to Use a Cricut Mug Press? [A Comprehensive Guide]
Are you curious to learn how to use a Cricut Mug Press? Well, this guide explores everything you need to know about the use of this machine. With this ultimate guide, you will be ready to use the Cricut Mug Press easily without anyone’s help. However, the Cricut Mug Press is a perfect choice for people who want to create a customized mug with pro quality.
This fantastic tool is compatible with markers, pens, and Infusible Ink transfer sheets. You also need a Cricut Design Space to create a design that can be further cut on the Cricut cutting machine. Moreover, you will need different materials, such as HTV and Infusible ink, to get desirable designs on mugs. After that, we will learn the process of using the Mug Press with step-by-step instructions. Let’s dive into it.
Step 1: Supplies You Need to Use Cricut Mug Press
Before learning how to use a Cricut Mug Press, you first need to know the requirements of supplies. These supplies are essential for using the Cricut Mug Press.
A desktop or laptop for setting up your Mug Press.
You can use any Cricut machine (Maker series, Explore series, and Joy).
Cricut Blank Ceramic Mug
Lint Roller
Butcher Paper
EasyPress mat or heat-resistant surface.
Infusible Ink Transfer Sheets and Infusible Ink Markers/Pens.
Oven Glove
Heat Resistant Tape
Laser copy paper
Step 2: Set Up Your Cricut Mug Press
In order to learn how to use a Cricut Mug Press, you must know about the Cricut Mug Press setup.
Follow the steps carefully to set up the Cricut Mug Press:
Insert the power cable into the back of your Cricut Mug Press, followed by a USB cable. Insert one end into your machine and another end into the computer.
Open the Cricut Design Space on your computer or laptop.
Then, select New Product Setup from the right-side menu.
Afterward, select Heat Press, followed by Mug Press.
You can follow the displayed instructions on the screen to download any updates you need.
While following the instructions, you will need to continue the Activate button to activate your Mug Press.
After this, the update will be completed.
Then, you can unplug the USB cable.
Now, your Mug Press is ready to use. Let’s learn how to use a Cricut Mug Press.
Step 3: Use the Cricut Mug Press
The Mug Press is relatively easy to use. After setting up, you can easily create a pro-customized mug. You can choose the design from Cricut Design Space. Always ensure that you choose the design with the exact size that fits your mug.
Once you have selected the designs, start cutting them using your cutting machine. Make sure your design is mirrored before the cut. You can follow the design given below.
After cutting the material, weed the unwanted materials.
Ensure your mug is clean and there is no dust present on it.
Then, place the design around the mug.
Afterward, you have to place the Cricut Mug Press on an easy press mat or any other heat-resistant surface you have.
Press the power button in your Mug Press, and the button will light the green color.
After that, you will hear the beep sound, meaning it is ready to use. However, you don’t need to set any temperature as it is already smart enough to set the temperature automatically.
Then, put the mug into the press.
It will take 6 minutes to sublimate the design onto the mug.
Finally, it will beep when it is done.
Turn off the device and take out the mug using gloves.
Final Words
In short, you should understand that a Mug Press alone can’t help you customize your mug. For this, you need various types of supplies that we have already mentioned in this post. Once you have all these items, you can proceed with the setup process. For this setup, you need a laptop or computer with a Cricut Design Space. When you are done with your setup, your Mug Press will be ready to use. Finally, you can design your mug like a pro!
FAQs
Question 1: How much time does a Cricut Mug Press take to heat up?
Answer: The only time your Mug Press will take to heat up is 5 minutes. After placing your mug into the press, it will take approx 6 minutes to finish it. However, the Mug Press produces a beep sound when it has finished its task. When you finally take out the mug from the press, it takes 15 to 30 minutes to cool down. Therefore, you must be cautious while taking it outside.
Question 2: Do I need a computer to use the Cricut Mug Press?
Answer: Well, you don’t have to rely entirely on a computer to use the Mug Press. Still, a computer is needed when you want to set up or activate your Cricut Mug Press. Also, you can update your firmware using your computer or laptop. All this is done when you connect your computer to your Mug Press via a USB cable.
Question 3: Is a regular mug compatible with the Cricut Mug Press?
Answer: There is no issue using your regular mug until it is made up of ceramic. Other than this, no materials should be used, such as stainless steel, plastic, etc.). Plus, the mug must be coated with sublimation material, which is suitable for your printer’s sublimation ink and Infusible ink. In short, the regular you buy from a local store is not going to work with the Cricut Mug Press.
Visit - Cricut.com/setup
Cricut Design Space Login
Cricut maker setup
Cricut Mug Press
Cricut Maker Machine
#Cricut Maker Machine#Set Up Cricut Machine#Cricut Mug Press#How to Use a Cricut Mug Press?#How to Use a Cricut#How to Set Up Cricut Maker Machine
0 notes
Text


So happy I was able to finish Imogen lvl 9, at least to a wearable point, for SDCC! I do have more to add and fix for next time, but overall I am delighted with how it turned out.
Some credits and info:
👗Based off the art by @agarthanguide
🌟Skirt designs are by @mommasammu who is a cosplay angel 😭
(My brother also helped cut, weed, and apply the designs, as well, which was a massive help)
💜Wig from @wigisfashion
Chest lightning designs were made using Silhouette's clear temporary tattoo paper - highly recommend as an alternative to makeup on your chest! Can just print out the design on an inkjet printer, and so easy to apply. Lasted all day and was fairly easy to remove, as well. (I'll just have to position them better next time so they're more visible.)
Skirt designs are metallic heat transfer vinyl, our first foray into that kind of thing! Unfortunately getting the proper amount of heat and pressure was much more difficult with the large pieces... didn't get as many others on as I wanted to this time 😅
The effect is fantastic, though! It worked surprisingly well on the sheer fabric.
We did end up buying a Silhouette machine (similar to Cricut) as we'd been eyeing one anyways, but if that's not something you have access to, see if your local library has a makerspace!
269 notes
·
View notes
Text
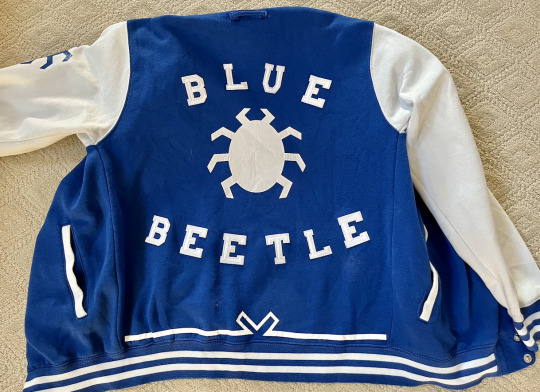

okay so finished product. here's the blue beetle jacket (blue beetacket) inspired by the design by @drempen in their fanart. ill ramble a bit about making it under the cut but overall this was super fun and im excited to wear it to theaters!
basically i wanted a blue beetle varsity style jacket more then life and when it became clear this movie was getting very little promo and probably merch i realized i’d have to do it myself.
the design itself is heavily inspired by these pieces of fanart which i rotated around in my brain for So Long before deciding to make this.
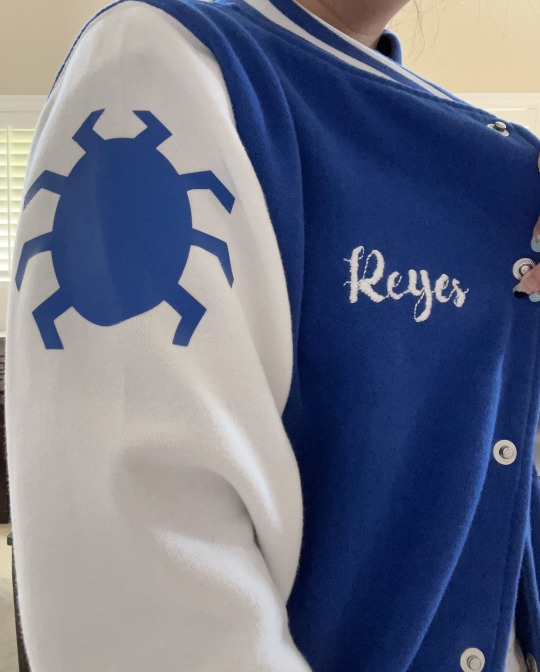
it was actually easier to make than i thought it'd be. but honestly that's just cuz im lucky and know someone with a cricut machine who is much craftier than i am. the scarabs on the back and sleeves i used the cricut machine for. i just got some htv online and then cut and pressed those on.
the letters and numbers are iron on patches. i honestly kinda wanted a "class of 06" patch as a nod to the varsity style and jaimes 06 debut, but unfortunately thought of it too late to get one in time for sdcc (which is where it obtained the slight wear you might see in the first picture)
the "reyes" i embroidered by hand. its super messy cuz i'd only embroidered like two things previously, but i'm pretty proud of how it turned out.
#blu talks#blue beetle#dc comics#also the jacket base itself i got off depop from some dude for like $12#i did kinda mess up the logo line on the back because i forgot an extra line so it kinda looks like a heart#but its kinda cute and honestly nobody did or will notice
155 notes
·
View notes