#Theme on localhost
Explore tagged Tumblr posts
Visit Tumblr Blog
Explore Tumblr blogs with no restrictions, modern design and the best experience.
Last Seen Tumblr Blogs


Fun Fact
Mobile US users spent an average of 115.8 minutes on Tumblr app monthly.
Text
Obsidian And RTX AI PCs For Advanced Large Language Model
How to Utilize Obsidian‘s Generative AI Tools. Two plug-ins created by the community demonstrate how RTX AI PCs can support large language models for the next generation of app developers.
Obsidian Meaning
Obsidian is a note-taking and personal knowledge base program that works with Markdown files. Users may create internal linkages for notes using it, and they can see the relationships as a graph. It is intended to assist users in flexible, non-linearly structuring and organizing their ideas and information. Commercial licenses are available for purchase, however personal usage of the program is free.
Obsidian Features
Electron is the foundation of Obsidian. It is a cross-platform program that works on mobile operating systems like iOS and Android in addition to Windows, Linux, and macOS. The program does not have a web-based version. By installing plugins and themes, users may expand the functionality of Obsidian across all platforms by integrating it with other tools or adding new capabilities.
Obsidian distinguishes between community plugins, which are submitted by users and made available as open-source software via GitHub, and core plugins, which are made available and maintained by the Obsidian team. A calendar widget and a task board in the Kanban style are two examples of community plugins. The software comes with more than 200 community-made themes.
Every new note in Obsidian creates a new text document, and all of the documents are searchable inside the app. Obsidian works with a folder of text documents. Obsidian generates an interactive graph that illustrates the connections between notes and permits internal connectivity between notes. While Markdown is used to accomplish text formatting in Obsidian, Obsidian offers quick previewing of produced content.
Generative AI Tools In Obsidian
A group of AI aficionados is exploring with methods to incorporate the potent technology into standard productivity practices as generative AI develops and speeds up industry.
Community plug-in-supporting applications empower users to investigate the ways in which large language models (LLMs) might improve a range of activities. Users using RTX AI PCs may easily incorporate local LLMs by employing local inference servers that are powered by the NVIDIA RTX-accelerated llama.cpp software library.
It previously examined how consumers might maximize their online surfing experience by using Leo AI in the Brave web browser. Today, it examine Obsidian, a well-known writing and note-taking tool that uses the Markdown markup language and is helpful for managing intricate and connected records for many projects. Several of the community-developed plug-ins that add functionality to the app allow users to connect Obsidian to a local inferencing server, such as LM Studio or Ollama.
To connect Obsidian to LM Studio, just select the “Developer” button on the left panel, load any downloaded model, enable the CORS toggle, and click “Start.” This will enable LM Studio’s local server capabilities. Because the plug-ins will need this information to connect, make a note of the chat completion URL from the “Developer” log console (“http://localhost:1234/v1/chat/completions” by default).
Next, visit the “Settings” tab after launching Obsidian. After selecting “Community plug-ins,” choose “Browse.” Although there are a number of LLM-related community plug-ins, Text Generator and Smart Connections are two well-liked choices.
For creating notes and summaries on a study subject, for example, Text Generator is useful in an Obsidian vault.
Asking queries about the contents of an Obsidian vault, such the solution to a trivia question that was stored years ago, is made easier using Smart Connections.
Open the Text Generator settings, choose “Custom” under “Provider profile,” and then enter the whole URL in the “Endpoint” section. After turning on the plug-in, adjust the settings for Smart Connections. For the model platform, choose “Custom Local (OpenAI Format)” from the options panel on the right side of the screen. Next, as they appear in LM Studio, type the model name (for example, “gemma-2-27b-instruct”) and the URL into the corresponding fields.
The plug-ins will work when the fields are completed. If users are interested in what’s going on on the local server side, the LM Studio user interface will also display recorded activities.
Transforming Workflows With Obsidian AI Plug-Ins
Consider a scenario where a user want to organize a trip to the made-up city of Lunar City and come up with suggestions for things to do there. “What to Do in Lunar City” would be the title of the new note that the user would begin. A few more instructions must be included in the query submitted to the LLM in order to direct the results, since Lunar City is not an actual location. The model will create a list of things to do while traveling if you click the Text Generator plug-in button.
Obsidian will ask LM Studio to provide a response using the Text Generator plug-in, and LM Studio will then execute the Gemma 2 27B model. The model can rapidly provide a list of tasks if the user’s machine has RTX GPU acceleration.
Or let’s say that years later, the user’s buddy is visiting Lunar City and is looking for a place to dine. Although the user may not be able to recall the names of the restaurants they visited, they can review the notes in their vault Obsidian‘s word for a collection of notes to see whether they have any written notes.
A user may ask inquiries about their vault of notes and other material using the Smart Connections plug-in instead of going through all of the notes by hand. In order to help with the process, the plug-in retrieves pertinent information from the user’s notes and responds to the request using the same LM Studio server. The plug-in uses a method known as retrieval-augmented generation to do this.
Although these are entertaining examples, users may see the true advantages and enhancements in daily productivity after experimenting with these features for a while. Two examples of how community developers and AI fans are using AI to enhance their PC experiences are Obsidian plug-ins.
Thousands of open-source models are available for developers to include into their Windows programs using NVIDIA GeForce RTX technology.
Read more on Govindhtech.com
#Obsidian#RTXAIPCs#LLM#LargeLanguageModel#AI#GenerativeAI#NVIDIARTX#LMStudio#RTXGPU#News#Technews#Technology#Technologynews#Technologytrends#govindhtech
3 notes
·
View notes
Text
What is Tailwind CSS React
Tailwind CSS React
Tailwind CSS is a modern way to style your website or app using utility classes. It helps developers design faster by writing classes directly in the HTML or JSX (in React).
In this guide, we will learn what Tailwind CSS is and how you can use it step-by-step in a React project.
🌟 What is Tailwind CSS?
Tailwind CSS is a utility-first CSS framework. This means it gives you ready-made CSS classes that you can use directly in your code.
For example:
htmlCopy
Edit
<button class="bg-blue-500 text-white px-4 py-2 rounded">Click Me</button>
In React, you can write these classes inside your className attribute.
⚛️ Why Use Tailwind CSS with React?
Speeds up the development process
Easy to make responsive designs
No need to write custom CSS for every component
Clean and consistent layout
✅ Step-by-Step: How to Add Tailwind CSS to a React Project
Step 1: Create a React App
If you don’t have a React app yet, create one using the command below:
bashCopy
Edit
npx create-react-app my-app cd my-app
Step 2: Install Tailwind CSS
Run the following command to install Tailwind CSS and its dependencies:
bashCopy
Edit
npm install -D tailwindcss postcss autoprefixer npx tailwindcss init -p
This will create two files:
tailwind.config.js
postcss.config.js
Step 3: Configure Tailwind
Open tailwind.config.js and add this under content:
jsCopy
Edit
module.exports = { content: ["./src/**/*.{js,jsx,ts,tsx}"], theme: { extend: {}, }, plugins: [], }
This tells Tailwind to look for classes in your React files.
Step 4: Add Tailwind to Your CSS
Open src/index.css and replace everything with the following:
cssCopy
Edit
@tailwind base; @tailwind components; @tailwind utilities;
This will load Tailwind’s default styles into your project.
Step 5: Start Using Tailwind Classes
Now, you can use Tailwind classes directly inside your React components.
Example (App.js):
jsxCopy
Edit
function App() { return ( <div className="text-center p-10"> <h1 className="text-4xl font-bold text-blue-600">Hello Tailwind!</h1> <p className="mt-4 text-gray-700">This is a React app using Tailwind CSS.</p> </div> ); }
Step 6: Run Your App
Now start the app:
bashCopy
Edit
npm start
Open your browser and go to http://localhost:3000. You should see the styles applied.
🎯 Summary
Tailwind CSS is a utility-first CSS framework.
It works well with React.
You don’t need to write separate CSS files.
You just write utility classes in your JSX.
It makes your design process faster and easier.
Using Tailwind CSS in React is a great way to build modern web apps with clean and responsive designs quickly.
0 notes
Text
What are the steps to install OpenEMR for a clinic?
Introduction
Healthcare practitioners use OpenEMR as a strong open-source application that functions as an Electronic Medical Records (EMR) system together with practice management capabilities. The clinic needs to follow several vital steps to install OpenEMR, which we will describe in the following section. As a step-by-step guide, it will provide you with a straightforward path to set up OpenEMR while maximizing its available features.
Step 1: Download and Extract OpenEMR
1.Download OpenEMR
Users should retrieve the most up-to-date version of OpenEMR (openemr-7.0.2.zip) through Source Forge from the OpenEMR website.
You should enable your browser to allow downloading files without interruption.
2.Extract the OpenEMR Archive
Right-click and open the downloaded zip file through the Properties dialogue box available on your operating system.
The file extraction process depends on selecting "Unblock" in the Windows Properties box in order to prevent file blocking.
Extract the zip file to a folder on your computer (e.g., C:\OpenEMR).
3.Rename the Directory (Optional)
You should rename the directory to openemr if you wish to simplify its name.
Step 2: Download and Install XAMPP
1.Download XAMPP
Users should navigate to the Apache Friends official website and retrieve the newest version of Windows XAMPP from this page.
2.Install XAMPP
Launch the XAMPP installer through the download and execute the built-in instructions to perform the setup.
The default installation settings should remain selected unless you require custom modifications.
Step 3: Move OpenEMR to the XAMPP Directory
You need to place OpenEMR files at the XAMPP home directory.
1.Navigate to the XAMPP Directory
The XAMPP is typically located at C:\xampp\htdocs.
2.Move OpenEMR Files
After extracting the OpenEMR folder, you should cut it before placing it inside XAMPP's htdocs directory.
The openemr directory should be located at C:\xampp\htdocs\openemr.
Step 4: Configure XAMPP
1.Start XAMPP Services
Users should start the XAMPP Control Panel to begin the Apache and MySQL services.
2.Verify Services
The services must operate without producing any errors.
Step 5: OpenEMR Setup via Web GUI
Users can establish OpenEMR through the web.
1.Access OpenEMR Setup
You should access OpenEMR through the web browser by going to http://localhost/openemr.
2.Follow Setup Instructions
Multiple steps of the setup process installation include the creation of a new database and configuration tasks.
Check all file system permissions for correctness before continuing forward.
3.Create Database
When prompted, you will decide to either establish a new database or pick one from the existing collection.
Perform the necessary actions using the instructions provided by the interface.
4.Finalize Configuration
You must finish the setup operations by creating your first login details, including username and password.
Step 6: Clinic Setup
1.Enter Global Settings
Users should configure the application settings of OpenEMR through these steps to establish the interface theme and date/time presentation.
2.Enter Facility-Specific Settings
During setup, users must provide practice and business identifiers together with tax information and insurance numbers.
3.Create User Accounts
All users accessing OpenEMR need to receive accounts during the setup process.
4.Enter Contact Information
The user can add their contact information and business account contact details.
5.Practice Settings
Configure pharmacy and insurance company information, along with accepted document formats.
Step 7: External Data Loads
1.Load Codesets
The implementation of ICD10, RXNORM, and SNOMED and CQM_VALUSET codesets through import processes will enhance the clinical documentation system.
2.Calendar Configuration
The system requires configuration to define appointment types together with the providers' planned availability times.
Step 8: Useful Configurations
1.Customize Templates
Tailor notes templates to your practice’s needs.
2.Integrate with Other Systems
OpenEMR should be connected to lab systems, billing software, and telehealth platforms.
Troubleshooting Tips
The Apache server must possess correct permissions that allow file reading and writing operations in the OpenEMR directory.
Check MySQL settings to resolve any database connection issues by verifying proper database configuration.
Service disruptions of XAMPP require users to reset both Apache and MySQL components.
Real-World Examples and Case Studies
The clinic based in Vermont utilized OpenEMR Cloud on AWS, which resulted in a 70% reduction in server maintenance expenses while also enabling better scalability during busy patient periods.
A Texas-based large hospital decided to run OpenEMR on-premises for customized data security which delivered smooth integration with their hospital infrastructure.
Conclusion
To implement OpenEMR at a clinic, administrators need to follow multiple steps that start with software download and then proceed through configuration and clinic-specific setup. OpenEMR users can achieve operational streamlining and patient care improvement while maintaining regulatory standards through their robust features and by following the specified guidelines.
FAQs
Q1: What are the system requirements for installing OpenEMR on Windows?
Your system requirements for OpenEMR installation are Windows Server 2012 and later versions or Windows 10/11 together with XAMPP or WampServer and Apache HTTP Server running PHP 7.4 or higher with essential extensions alongside MySQL version 5.6 or above.
Q2: How do I troubleshoot common issues during OpenEMR installation?
Verify the system permissions while also checking for database configuration accuracy before restarting XAMPP service operations.
Q3: Can I use OpenEMR on other platforms besides Windows?
The OpenEMR system functions on Linux and macOS operating systems with server setups that include XAMPP and LAMP.
0 notes
Text
bearer of the curse in a way i forget all coding syntax despite having it done more than the average person by the following:
baby's first code is delving into tumblr themes and tweaking it to your liking the more you switch themes. also the ancient old custom boxes from deviantart. i miss you so babygirl
whatever the fuck tweaking c++ values is with the dumpster fire of (bethesda) games
idk how tf i made a relatively good first ever attempt at a game with fucking unreal engine blueprint in uni but somehow i did
tweaked to fully modified a toyhouse premium template (css/html/bootstrap) to my tastes, to the point i might as well have written it myself
converted/merged above code into other languages multiple times to make it a) work without premium (no css), b) work on a walmart wiki (tumblr blog), c) work on neocities by splitting & writing new css/html/jscript files albeit briefly because d) building it with templates and an SSG like astro fits my needs better
i Get why layout builders like weebly and carrd exist but fuck me neocities is so fucking good i'm going to pass away. i love customisation and i'm going to jork it violently
crash course into several pyramid schemes of frameworks and proceed to lose my mind and die
also die because x program is better for y language and z framework. then you proceed to install 3920282 programs you use for about 2 weeks and then forget again. but hey i guess i can start up localhost now instead of horribly failing at editing neocities pages
i just really like layouts. i love importing a template and then tweaking individual fucking values the way i need em to so i can make my oc world in the microwave radiate its signals outside the kitchen
wrote several own profile/folder/mockup codes inspired by toyhouse codes <- what can i say. i am fascinated by the humble button and the carousel
yayyy i love responsive ui i looove mobile friendly webbed sites i looove beating the shit out of bootstrap code by giving recurring elements their own fucking style.css and thus shortening justify-content-xl-between and rounded-circle border-0 background-faded to a single word class yayyy yippee ^_^
slightly delved into java for hypothetical entertaining thought of minecraft modding & i guess i can read it better now alongside python. but object programming stinks ass in the way to tell everything you're x and you have sexual relations with files y, z & the rest of the alphabet. webdev import is so sexy actually
#something something adhd without saying adhd. yeah. anyway#sy.txt#anyway the entire neocities shebang might add another incentive to actually write more oc bios than like 3 5k essays every 6 months
1 note
·
View note
Text
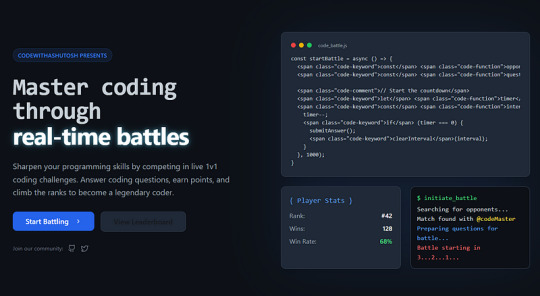
CodeBattle: The Ultimate 1v1 Real-Time Coding Battle Platform
Introduction
Hello coder! How are you , In the world of competitive programming and coding challenges, real-time battles are becoming increasingly popular. CodeBattle is a cutting-edge 1v1 real-time coding battle platform designed to test programmers’ skills in a fast-paced MCQ-based format. Whether you’re a beginner or an experienced coder, CodeBattle offers an exciting and challenging way to improve your coding knowledge.
In this article, we will dive deep into the development of CodeBattle, covering project structure, technology stack, real-time matchmaking, styling tips, and live demo setup. Additionally, we will provide code snippets to help you understand the implementation better.
Features of CodeBattle
Real-time 1v1 Coding Battles
MCQ-based Questions with a 20-second timer
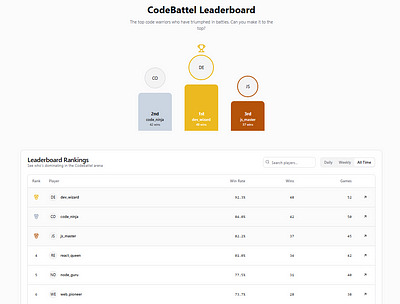
Live Scoreboard
Leaderboard System (Daily, Weekly, and All-time Rankings)
Secure Authentication (Google/Firebase Login)
Admin Panel to manage questions & users
Fully Responsive UI
Tech Stack: React (Next.js), Node.js, Express.js, MongoDB, and Socket.io
Project Structure
CodeBattel/ ├── frontend/ # React (Next.js) UI │ ├── components/ # Reusable Components │ ├── pages/ # Next.js Pages (Home, Play, Leaderboard, etc.) │ ├── styles/ # CSS Modules / Tailwind CSS │ └── utils/ # Helper Functions │ ├── backend/ # Node.js Backend │ ├── models/ # MongoDB Models │ ├── routes/ # Express Routes (API Endpoints) │ ├── controllers/ # Business Logic │ ├── config/ # Configuration Files │ ├── socket/ # Real-time Matchmaking with Socket.io │ └── index.js # Main Server Entry Point │ └── README.md # Project Documentation
Building the Frontend with React (Next.js)
1. Installing Dependencies
npx create-next-app@latest codebattel cd codebattel npm install socket.io-client axios tailwindcss npm install --save firebase
2. Setting up Tailwind CSS
npx tailwindcss init -p
Edit tailwind.config.js:module.exports = { content: ["./pages/**/*.{js,ts,jsx,tsx}", "./components/**/*.{js,ts,jsx,tsx}"], theme: { extend: {}, }, plugins: [], };
Developing the 1v1 Battle System
1. Setting Up Real-Time Matchmaking
import { io } from "socket.io-client"; import { useEffect, useState } from "react";const socket = io("http://localhost:5000");export default function BattleRoom() { const [question, setQuestion] = useState(null); const [timer, setTimer] = useState(20); useEffect(() => { socket.emit("joinBattle"); socket.on("newQuestion", (data) => { setQuestion(data); setTimer(20); }); }, []); return ( <div> <h1>CodeBattel</h1> {question && ( <div> <h2>{question.text}</h2> <ul> {question.options.map((opt, index) => ( <li key={index}>{opt}</li> ))} </ul> <p>Time Left: {timer} sec</p> </div> )} </div> ); }
Building the Backend with Node.js & Socket.io
1. Installing Dependencies
npm init -y npm install express socket.io mongoose cors dotenv
2. Creating the Server
const express = require("express"); const http = require("http"); const { Server } = require("socket.io"); const app = express(); const server = http.createServer(app); const io = new Server(server, { cors: { origin: "*" } });let rooms = []; io.on("connection", (socket) => { socket.on("joinBattle", () => { if (rooms.length > 0) { let room = rooms.pop(); socket.join(room); io.to(room).emit("newQuestion", { text: "What is React?", options: ["Library", "Framework", "Language", "None"] }); } else { let newRoom = "room-" + socket.id; rooms.push(newRoom); socket.join(newRoom); } }); });server.listen(5000, () => console.log("Server running on port 5000"));
Live Demo Setup
Clone the repo:
git clone https://github.com/ashutoshmishra52/codebattel.git cd codebattel
Install dependencies:
npm install && cd backend && npm install
Run the project:
npm run dev
Open http://localhost:3000 in your browser.
FAQ
Q1: What is CodeBattle?
CodeBattle is a 1v1 real-time coding battle platform where players answer multiple-choice questions under a 20-second timer.
Q2: How does matchmaking work?
Players are randomly paired in real time using Socket.io.
Q3: Can I add my own questions?
Yes! The Admin Panel allows you to add/edit/delete MCQs.
Q4: How do I contribute?
Check out the GitHub repository and submit a pull request.
About the Author
Ashutosh Mishra is a full-stack developer, AI researcher, and content writer with 4+ years of experience. He is the founder of CodeWithAshutosh, a platform dedicated to teaching web development, AI, and competitive coding.
For more coding tutorials and projects, follow Ashutosh Mishra.
Conclusion
CodeBattle is an innovative way to enhance your coding skills in a competitive environment. With real-time battles, an engaging UI, and a powerful backend, it stands out as a top-tier coding battle platform. Start coding, challenge your friends, and rise up the leaderboard!
0 notes
Text
How to Install WordPress Locally on Your MacBook (Easy Guide)
🚀 Exciting news for all you WordPress developers and enthusiasts! 🎉 Just published a new blog post on how to easily install WordPress locally on your MacBook! 💻 Perfect for testing themes, plugins, and building websites offline. No more messing with live servers! 🙌 This step-by-step guide walks you through the entire process, making it super simple even for beginners. Whether you're using MAMP, XAMPP, or another local development environment, this tutorial has you covered. 🤓 Check it out now and start building your WordPress projects locally! 👇 #WordPress #LocalDevelopment #MacBook #Installation #Tutorial #WebDev #MAMP #XAMPP #Localhost #PHP #MySQL #WordPressTutorial #WebDevelopment #Coding #Tech #BlogPost #NewBlog #LearnToCode #RTFM #100DaysOfRTFM #Innovation #Technology #Creativity #LocalWP #SoftwareDevelopment #DigitalStrategy #DigitalMarketing
So, you’re ready to dive into the world of WordPress development, but you don’t want to mess with a live server just yet? Great idea! Setting up WordPress locally on your MacBook is the perfect way to experiment, test themes and plugins, and build your website in a safe environment. This guide will walk you through the process step-by-step. Why Install WordPress Locally? Before we jump in, let’s…
#Installation#Local Development#Localhost#MacBook#MAMP#MySQL#PHP#Tutorial#Web Development#WordPress#XAMPP
0 notes
Text
How to Move Your WordPress Site from Localhost to a Live Server
Developing a WordPress site on localhost is a great way to build and test your website in a controlled environment. However, the real challenge arises when it's time to move the site from your local server to a live hosting environment. If not done correctly, you could encounter broken links, missing images, or even database errors.
In this blog, we'll guide you through a step-by-step process to successfully move your WordPress site from localhost to a live server.

Step 1: Choose the Right Hosting Provider
Your first step is to select a reliable web hosting provider that meets your website’s needs. Look for:
Server Speed: Fast servers for better performance.
Uptime Guarantee: At least 99.9% uptime to ensure availability.
Ease of Use: User-friendly dashboards and tools.
WordPress Support: Hosting optimized for WordPress websites.
Popular options include Bluehost, SiteGround, and WP Engine.
Step 2: Export Your Local WordPress Database
The database is the backbone of your WordPress site. To export it:
Open phpMyAdmin on your local server (e.g., XAMPP or WAMP).
Select your WordPress database.
Click on the Export tab and choose the Quick Export method.
Save the .sql file to your computer.
Step 3: Upload Your WordPress Files to the Live Server
To move your files:
Compress Your WordPress Folder: Zip your local WordPress installation folder.
Access Your Hosting Account: Use a file manager or an FTP client like FileZilla.
Upload the Files: Transfer the zipped folder to your hosting server's root directory (usually public_html).
Unzip the Folder: Extract the files once uploaded.
Step 4: Create a Database on the Live Server
Now, set up a new database on your live hosting server:
Log in to your hosting control panel (e.g., cPanel).
Navigate to the MySQL Databases section.
Create a new database, database user, and password.
Assign the user to the database with full privileges.
Step 5: Import the Database to the Live Server
Open phpMyAdmin in your hosting control panel.
Select the new database you created.
Click the Import tab.
Choose the .sql file you exported from your localhost.
Click Go to import the database.
Step 6: Update the wp-config.php File
To connect your site to the live database:
Locate the wp-config.php file in your WordPress installation.
Open the file in a text editor.
Update the following lines: define('DB_NAME', 'your_live_database_name'); define('DB_USER', 'your_live_database_user'); define('DB_PASSWORD', 'your_live_database_password'); define('DB_HOST', 'localhost'); // Keep this unless your host specifies otherwise.
Save the file and upload it to your server via FTP.
Step 7: Update URLs in the Database
Your localhost URLs need to be replaced with your live site URLs.
Use a tool like Search Replace DB or run SQL queries in phpMyAdmin.
In phpMyAdmin, run the following query: UPDATE wp_options SET option_value = 'http://your-live-site.com' WHERE option_name = 'siteurl'; UPDATE wp_options SET option_value = 'http://your-live-site.com' WHERE option_name = 'home';
Step 8: Test Your Live Website
Once everything is uploaded and configured, check your website by entering its URL in a browser. Test for:
Broken Links: Fix them using plugins like Broken Link Checker.
Missing Images: Ensure media files were uploaded correctly.
Functionality: Verify forms, buttons, and features work as expected.
Step 9: Set Up Permalinks
To ensure proper URL structure:
Log in to your WordPress admin dashboard on the live site.
Go to Settings > Permalinks.
Choose your preferred permalink structure and click Save Changes.
Step 10: Secure Your Live Website
After migrating, secure your site to prevent vulnerabilities:
Install an SSL Certificate: Most hosting providers offer free SSL certificates.
Update Plugins and Themes: Ensure everything is up to date.
Set Up Backups: Use plugins like UpdraftPlus for regular backups.
Conclusion
Moving your WordPress site from localhost to a live server may seem daunting, but by following these steps, you can ensure a smooth and error-free migration. A successful move allows you to showcase your site to the world, engage your audience, and achieve your goals.
Start today and take your WordPress project live with confidence!
0 notes
Text
Come to the light-dark() Side
New Post has been published on https://thedigitalinsider.com/come-to-the-light-dark-side/
Come to the light-dark() Side
You’d be forgiven for thinking coding up both a dark and a light mode at once is a lot of work. You have to remember @media queries based on prefers-color-scheme as well as extra complications that arise when letting visitors choose whether they want light or dark mode separately from the OS setting. And let’s not forget the color palette itself! Switching from a “light” mode to a “dark” mode may involve new variations to get the right amount of contrast for an accessible experience.
It is indeed a lot of work. But I’m here to tell you it’s now a lot simpler with modern CSS!
Default HTML color scheme(s)
We all know the “naked” HTML theme even if we rarely see it as we’ve already applied a CSS reset or our favorite boilerplate CSS before we even open localhost. But here’s a news flash: HTML doesn’t only have the standard black-on-white theme, there is also a native white-on-black version.
We have two color schemes available to use right out of the box!
If you want to create a dark mode interface, this is a great base to work with and saves you from having to account for annoying details, like dark inputs, buttons, and other interactive elements.
Live Demo on CodePen
Switching color schemes automatically based on OS preference
Without any @media queries — or any other CSS at all — if all we did was declare color-scheme: light dark on the root element, the page will apply either the light or dark color scheme automatically by looking at the visitor’s operating system (OS) preferences. Most OSes have a built-in accessibility setting for your preferred color scheme — “light”, “dark”, or even “auto” — and browsers respect that setting.
html color-scheme: light dark;
We can even accomplish this without CSS directly in the HTML document in a <meta> tag:
<meta name="color-scheme" content="light dark">
Whether you go with CSS or the HTML route, it doesn’t matter — they both work the same way: telling the browser to make both light and dark schemes available and apply the one that matches the visitor’s preferences. We don’t even need to litter our styles with prefers-color-scheme instances simply to swap colors because the logic is built right in!
You can apply light or dark values to the color-scheme property. At the same time, I’d say that setting color-scheme: light is redundant, as this is the default color scheme with or without declaring it.
You can, of course, control the <meta> tag or the CSS property with JavaScript.
There’s also the possibility of applying the color-scheme property on specific elements instead of the entire page in one fell swoop. Then again, that means you are required to explicitly declare an element’s color and background-color properties; otherwise the element is transparent and inherits its text color from its parent element.
What values should you give it? Try:
Default text and background color variables
The “black” colors of these native themes aren’t always completely black but are often off-black, making the contrast a little easier on the eyes. It’s worth noting, too, that there’s variation in the blackness of “black” between browsers.
What is very useful is that this default not-pure-black and maybe-not-pure-white background-color and text color are available as <system-color> variables. They also flip their color values automatically with color-scheme!
They are: Canvas and CanvasText.
These two variables can be used anywhere in your CSS to call up the current default background color (Canvas) or text color (CanvasText) based on the current color scheme. If you’re familiar with the currentColor value in CSS, it seems to function similarly. CanvasText, meanwhile, remains the default text color in that it can’t be changed the way currentColor changes when you assign something to color.
In the following examples, the only change is the color-scheme property:
Not bad! There are many, many more of these system variables. They are case-insensitive, often written in camelCase or PascalCase for readability. MDN lists 19 <system-color> variables and I’m dropping them in below for reference.
Open to view 19 system color names and descriptions
AccentColor: The background color for accented user interface controls
AccentColorText: The text color for accented user interface controls
ActiveText: The text color of active links
ButtonBorder: The base border color for controls
ButtonFace: The background color for controls
ButtonText: The text color for controls
Canvas: The background color of an application’s content or documents
CanvasText: The text color used in an application’s content or documents
Field: The background color for input fields
FieldText: The text color inside form input fields
GrayText: The text color for disabled items (e.g., a disabled control)
Highlight: The background color for selected items
HighlightText: The text color for selected items
LinkText: The text color used for non-active, non-visited links
Mark: The background color for text marked up in a <mark> element
MarkText: The text color for text marked up in a <mark> element
SelectedItem: The background color for selected items (e.g., a selected checkbox)
SelectedItemText: The text color for selected items
VisitedText: The text visited links
Cool, right? There are many of them! There are, unfortunately, also discrepancies as far as how these color keywords are used and rendered between different OSes and browsers. Even though “evergreen” browsers arguably support all of them, they don’t all actually match what they’re supposed to, and fail to flip with the CSS color-scheme property as they should.
Egor Kloos (also known as dutchcelt) is keeping an eye on the current status of system colors, including which ones exist and the browsers that support them, something he does as part of a classless CSS framework cleverly called system.css.
Declaring colors for both modes together
OK good, so now you have a page that auto-magically flips dark and light colors according to system preferences. Whether you choose to use these system colors or not is up to you. I just like to point out that “dark” doesn’t always have to mean pure “black” just as “light” doesn’t have to mean pure “white.” There are lots more colors to pair together!
But what’s the best or simplest way to declare colors so they work in both light and dark mode?
In my subjective reverse-best order:
Third place: Declare color opacity
You could keep all the same background colors in dark and light modes, but declare them with an opacity (i.e. rgb(128 0 0 / 0.5) or #80000080). Then they’ll have the Canvas color shine through.
It’s unusable in this way for text colors, and you may end up with somewhat muted colors. But it is a nice easy way to get some theming done fast. I did this for the code blocks on this old light and dark mode demo.
Second place: Use color-mix()
Like this:
color-mix(in oklab, Canvas 75%, RebeccaPurple);
Similar (but also different) to using opacity to mute a color is mixing colors in CSS. We can even mix the system color variables! For example, one of the colors can be either Canvas or CanvasText so that the background color always mixes with Canvas and the text color always mixes with CanvasText.
We now have the CSS color-mix() function to help us with this. The first argument in the function defines the color space where the color mixing happens. For example, we can tell the function that we are working in the OKLAB color space, which is a rectangular color space like sRGB making it ideal to mix with sRGB color values for predictable results. You can certainly mix colors from different color spaces — the OKLAB/sRGB combination happens to work for me in this instance.
The second and third arguments are the colors you want to mix, and in what proportion. Proportions are optional but expressed in percentages. Without declaring a proportion, the mix is an even 50%-50% split. If you add percentages for both colors and they don’t match up to 100%, it does a little math for you to prevent breakages.
The color-mix() approach is useful if you’re happy to keep the same hues and color saturations regardless of whether the mode is light or dark.
In this example, as you change the value of the hue slider, you’ll see color changes in the themed boxes, following the theme color but mixed with Canvas and CanvasText:
You may have noticed that I used OKLCH and HSL color spaces in that last example. You may also have noticed that the HSL-based theme color and the themed paragraph were a lot more “flashy” as you moved the hue slider.
I’ve declared colors using a polar color space, like HSL, for years, loving that you can easily take a hue and go up or down the saturation and lightness scales based on need. But, I concede that it’s problematic if you’re working with multiple hues while trying to achieve consistent perceived lightness and saturation across them all. It can be difficult to provide ample contrast across a spectrum of colors with HSL.
The OKLCH color space is also polar just like HSL, with the same benefits. You can pick your hue and use the chroma value (which is a bit like saturation in HSL) and the lightness scales accurately in the same way. Both OKLCH and OKLAB are designed to better match what our eyes perceive in terms of brightness and color compared to transitioning between colors in the sRGB space.
While these color spaces may not explicitly answer the age-old question, Is my blue the same as your blue? the colors are much more consistent and require less finicking when you decide to base your whole website’s palette on a different theme color. With these color spaces, the contrasts between the computed colors remain much the same.
First place (winner!): Use light-dark()
Like this:
light-dark(lavender, saddlebrown);
With the previous color-mix() example, if you choose a pale lavender in light mode, its dark mode counterpart is very dark lavender.
The light-dark() function, conversely, provides complete control. You might want that element to be pale lavender in light mode and a deep burnt sienna brown in dark mode. Why not? You can still use color-mix() within light-dark() if you like — declare the colors however you like, and gain much more fine-grained control over your colors.
Feel free to experiment in the following editable demo:
Using color-scheme: light dark; — or the corresponding meta tag in HTML on your page —is a prerequisite for the light-dark() function because it allows the function to respect a person’s system preference, or whichever single light or dark value you have set on color-scheme.
Another consideration is that light-dark() is newly available across browsers, with just over 80% coverage across all users at the time I’m writing this. So, you might consider including a fallback in your CSS for browsers that lack support for the function.
What makes using color-scheme and light-dark() better than using @media queries?
@media queries have been excellent tools, but using them to query prefers-color-scheme only ever follows the preference set within the person’s operating system. This is fine until you (rightfully) want to offer the visitor more choices, decoupled from whether they prefer the UI on their device to be dark or light.
We’re already capable of doing that, of course. We’ve become used to a lot of jiggery-pokery with extra CSS classes, using duplicated styles, or employing custom properties to make it happen.
The joy of using color-scheme is threefold:
It gives you the basic monochrome dark mode for free!
It can natively do the mode switching based on OS mode preference.
You can use JavaScript to toggle between light and dark mode, and the colors declared in the light-dark() functions will follow it.
Light, dark, and auto mode controls
Essentially, all we are doing is setting one of three options for whether the color-scheme is light, dark, or updates auto-matically.
I advise offering all three as discrete options, as it removes some complications for you! Any new visitor to the site will likely be in auto mode because accepting the visitor’s OS setting is the least jarring default state. You then give that person the choice to stay with that or swap it out for a different color scheme. This way, there’s no need to sniff out what mode someone prefers to, for example, display the correct icon on a toggle and make it perform the correct action. There is also no need to keep an event listener on prefers-color-scheme in case of changes — your color-scheme: light dark declaration in CSS handles that for you.
Adjusting color-scheme in pure CSS
Yes, this is totally possible! But the approach comes with a few caveats:
You can’t use <button> — only radio inputs, or <options> in a <select> element.
It only works on a per page basis, not per website, which means changes are lost on reload or refresh.
The browser needs to support the :has() pseudo-selector. Most modern browsers do, but some folks using older devices might miss out on the experience.
Using the :has() pseudo-selector
This approach is almost alarmingly simple and is fantastic for a simple one-pager! Most of the heavy lifting is done with this:
/* default, or 'auto' */ html color-scheme: light dark; html:has([value="light"]:checked color-scheme: light; html:has([value="dark"]:checked color-scheme: dark;
The second and third rulesets above look for an attribute called value on any element that has “light” or “dark” assigned to it, then change the color-scheme to match only if that element is :checked.
This approach is not very efficient if you have a huge page full of elements. In those cases, it’s better to be more specific. In the following two examples, the CSS selectors check for value only within an element containing id="mode-switcher".
html:has(#mode-switcher [value="light"]:checked) color-scheme: light /* Did you know you don't need the ";" for a one-liner? Now you do! */
Using a <select> element:
Using <input type="radio">:
We could theoretically use checkboxes for this, but since checkboxes are not supposed to be used for mutually exclusive options, I won’t provide an example here. What happens in the case of more than one option being checked? The last matching CSS declaration wins (which is dark in the examples above).
Adjusting color-scheme in HTML with JavaScript
I subscribe to Jeremy Keith’s maxim when it comes to reaching for JavaScript:
JavaScript should only do what only JavaScript can do.
This is exactly that kind of situation.
If you want to allow visitors to change the color scheme using buttons, or you would like the option to be saved the next time the visitor comes to the site, then we do need at least some JavaScript. Rather than using the :has() pseudo-selector in CSS, we have a few alternative approaches for changing the color-scheme when we add JavaScript to the mix.
Using <meta> tags
If you have set your color-scheme within a meta tag in the <head> of your HTML:
<meta name="color-scheme" content="light dark">
…you might start by making a useful constant like so:
const colorScheme = document.querySelector('meta[name="color-scheme"]');
And then you can manipulate that, assigning it light or dark as you see fit:
colorScheme.setAttribute("content", "light"); // to light mode colorScheme.setAttribute("content", "dark"); // to dark mode colorScheme.setAttribute("content", "light dark"); // to auto mode
This is a very similar approach to using <meta> tags but is different if you are setting the color-scheme property in CSS:
html color-scheme: light dark;
Instead of setting a colorScheme constant as we just did in the last example with the <meta> tag, you might select the <html> element instead:
const html = document.querySelector('html');
Now your manipulations look like this:
html.style.setProperty("color-scheme", "light"); // to light mode html.style.setProperty("color-scheme", "dark"); // to dark mode html.style.setProperty("color-scheme", "light dark"); // to auto mode
I like to turn those manipulations into functions so that I can reuse them:
function switchAuto() html.style.setProperty("color-scheme", "light dark"); function switchLight() html.style.setProperty("color-scheme", "light"); function switchDark() html.style.setProperty("color-scheme", "dark");
Alternatively, you might like to stay as DRY as possible and do something like this:
function switchMode(mode) html.style.setProperty("color-scheme", mode === "auto" ? "light dark" : mode);
The following demo shows how this JavaScript-based approach can be used with buttons, radio buttons, and a <select> element. Please note that not all of the controls are hooked up to update the UI — the demo would end up too complicated since there’s no world where all three types of controls would be used in the same UI!
I opted to use onchange and onclick in the HTML elements mainly because I find them readable and neat. There’s nothing wrong with instead attaching a change event listener to your controls, especially if you need to trigger other actions when the options change. Using onclick on a button doesn’t only work for clicks, the button is still keyboard-focusable and can be triggered with Spacebar and Enter too, as usual.
Remembering the selection for repeat visits
The biggest caveat to everything we’ve covered so far is that this only works once. In other words, once the visitor has left the site, we’re doing nothing to remember their color scheme preference. It would be a better user experience to store that preference and respect it anytime the visitor returns.
The Web Storage API is our go-to for this. And there are two available ways for us to store someone’s color scheme preference for future visits.
localStorage
Local storage saves values directly on the visitor’s device. This makes it a nice way to keep things off your server, as the stored data never expires, allowing us to call it anytime. That said, we’re prone to losing that data whenever the visitor clears cookies and cache and they’ll have to make a new selection that is freshly stored in localStorage.
You pick a key name and give it a value with .setItem():
localStorage.setItem("mode", "dark");
The key and value are saved by the browser, and can be called up again for future visits:
const mode = localStorage.getItem("mode");
You can then use the value stored in this key to apply the person’s preferred color scheme.
sessionStorage
Session storage is thrown away as soon as a visitor browses away to another site or closes the current window/tab. However, the data we capture in sessionStorage persists while the visitor navigates between pages or views on the same domain.
It looks a lot like localStorage:
sessionStorage.setItem("mode", "dark"); const mode = sessionStorage.getItem("mode");
Which storage method should I use?
Personally, I started with sessionStorage because I wanted my site to be as simple as possible, and to avoid anything that would trigger the need for a GDPR-compliant cookie banner if we were holding onto the person’s preference after their session ends. If most of your traffic comes from new visitors, then I suggest using sessionStorage to prevent having to do extra work on the GDPR side of things.
That said, if your traffic is mostly made up of people who return to the site again and again, then localStorage is likely a better approach. The convenience benefits your visitors, making it worth the GDPR work.
The following example shows the localStorage approach. Open it up in a new window or tab, pick a theme other than what’s set in your operating system’s preferences, close the window or tab, then re-open the demo in a new window or tab. Does the demo respect the color scheme you selected? It should!
Choose the “Auto” option to go back to normal.
If you want to look more closely at what is going on, you can open up the developer tools in your browser (F12 for Windows, CTRL+ click and select “Inspect” for macOS). From there, go into the “Application” tab and locate https://cdpn.io in the list of items stored in localStorage. You should see the saved key (mode) and the value (dark or light). Then start clicking on the color scheme options again and watch the mode update in real-time.
Accessibility
Congratulations! If you have got this far, you are considering or already providing versions of your website that are more comfortable for different people to use.
For example:
People with strong floaters in their eyes may prefer to use dark mode.
People with astigmatism may be able to focus more easily in light mode.
So, providing both versions leaves fewer people straining their eyes to access the content.
Contrast levels
I want to include a small addendum to this provision of a light and dark mode. An easy temptation is to go full monochrome black-on-white or white-on-black. It’s striking and punchy! I get it. But that’s just it — striking and punchy can also trigger migraines for some people who do a lot better with lower contrasts.
Providing high contrast is great for the people who need it. Some visual impairments do make it impossible to focus and get a sharp image, and a high contrast level can help people to better make out the word shapes through a blur. Minimum contrast levels are important and should be exceeded.
Thankfully, alongside other media queries, we can also query prefers-contrast which accepts values for no-preference, more, less, or custom.
In the following example (which uses :has() and color-mix()), a <select> element is displayed to offer contrast settings. When “Low” is selected, a filter of contrast(75%) is placed across the page. When “High” is selected, CanvasText and Canvas are used unmixed for text color and background color:
Adding a quick high and low contrast theme gives your visitors even more choice for their reading comfort. Look at that — now you have three contrast levels in both dark and light modes — six color schemes to choose from!
ARIA-pressed
ARIA stands for Accessible Rich Internet Applications and is designed for adding a bit of extra info where needed to screen readers and other assistive tech.
The words “where needed” do heavy lifting here. It has been said that, like apostrophes, no ARIA is better than bad ARIA. So, best practice is to avoid putting it everywhere. For the most part (with only a few exceptions) native HTML elements are good to go out of the box, especially if you put useful text in your buttons!
The little bit of ARIA I use in this demo is for adding the aria-pressed attribute to the buttons, as unlike a radio group or select element, it’s otherwise unclear to anyone which button is the “active” one, and ARIA helps nicely with this use case. Now a screen reader will announce both its accessible name and whether it is in a pressed or unpressed state along with a button.
Following is an example code snippet with all the ARIA code bolded — yes, suddenly there’s lots more! You may find more elegant (or DRY-er) ways to do this, but showing it this way first makes it more clear to demonstrate what’s happening.
Our buttons have ids, which we have used to target them with some more handy consts at the top. Each time we switch mode, we make the button’s aria-pressed value for the selected mode true, and the other two false:
const html = document.querySelector("html"); const mode = localStorage.getItem("mode"); const lightSwitch = document.querySelector('#lightSwitch'); const darkSwitch = document.querySelector('#darkSwitch'); const autoSwitch = document.querySelector('#autoSwitch'); if (mode === "light") switchLight(); if (mode === "dark") switchDark(); function switchAuto() html.style.setProperty("color-scheme", "light dark"); localStorage.removeItem("mode"); lightSwitch.setAttribute("aria-pressed","false"); darkSwitch.setAttribute("aria-pressed","false"); autoSwitch.setAttribute("aria-pressed","true"); function switchLight() html.style.setProperty("color-scheme", "light"); localStorage.setItem("mode", "light"); lightSwitch.setAttribute("aria-pressed","true"); darkSwitch.setAttribute("aria-pressed","false"); autoSwitch.setAttribute("aria-pressed","false"); function switchDark() html.style.setProperty("color-scheme", "dark"); localStorage.setItem("mode", "dark"); lightSwitch.setAttribute("aria-pressed","false"); darkSwitch.setAttribute("aria-pressed","true"); autoSwitch.setAttribute("aria-pressed","false");
On load, the buttons have a default setting, which is when the “Auto” mode button is active. Should there be any other mode in the localStorage, we pick it up immediately and run either switchLight() or switchDark(), both of which contain the aria-pressed changes relevant to that mode.
<button id="autoSwitch" aria-pressed="true" type="button" onclick="switchAuto()">Auto</button> <button id="lightSwitch" aria-pressed="false" type="button" onclick="switchLight()">Light</button> <button id="darkSwitch" aria-pressed="false" type="button" onclick="switchDark()">Dark</button>
The last benefit of aria-pressed is that we can also target it for styling purposes:
button[aria-pressed="true"] background-color: transparent; border-width: 2px;
Finally, we have a nice little button switcher, with its state clearly shown and announced, that remembers your choice when you come back to it. Done!
Outroduction
Or whatever the opposite of an introduction is…
…don’t let yourself get dragged into the old dark vs light mode argument. Both are good. Both are great! And both modes are now easy to create at once. At the start of your next project, work or hobby, do not give in to fear and pick a side — give both a try, and give in to choice.
#:has#Accessibility#ADD#API#applications#approach#aria#Articles#background#Blue#blur#box#browser#buttons#cache#canvas#Capture#change#classes#code#Code Snippet#coding#Color#colors#content#cookies#course#CSS#custom properties#Dark
0 notes
Text

How to Create a Website Using a Programming Language Like Laravel with a Pre-Built Theme on VS Code - Sohojware
Creating a website using Laravel, a powerful PHP framework, can be an excellent choice for developers seeking flexibility and efficiency. When combined with a pre-built theme, the process becomes even more streamlined, allowing you to focus on customization and functionality rather than starting from scratch. In this article, we’ll guide you through setting up a website using Laravel, leveraging a pre-built theme, and coding with Visual Studio Code (VS Code). Whether you are a seasoned developer or just starting, this guide from Sohojware will help you create a stunning website.
Why Choose Laravel for Your Website?
Laravel stands out as one of the most popular PHP frameworks due to its elegant syntax, robust features, and ease of use. It provides a clean and straightforward way to build web applications, making it a favorite among developers. Here’s why Laravel is an excellent choice:
Eloquent ORM: Laravel’s Eloquent ORM allows for seamless database interaction using an object-oriented approach.
Blade Templating Engine: Laravel’s Blade template engine makes it easy to create dynamic content and layouts.
Artisan CLI: Laravel’s command-line tool, Artisan, simplifies repetitive tasks and enhances productivity.
Security: Laravel offers built-in security features to protect your website from common vulnerabilities.
Scalability: Laravel is designed to handle large-scale applications, ensuring that your website can grow with your business.
Getting Started with Laravel and VS Code
Step 1: Install Laravel
To begin, you need to have PHP and Composer installed on your machine. Composer is a dependency manager for PHP, essential for installing Laravel and its components.
Install Composer: Download Composer from getcomposer.org and follow the installation instructions for your operating system.
Install Laravel: Open your terminal and run the following command to install Laravel globally:
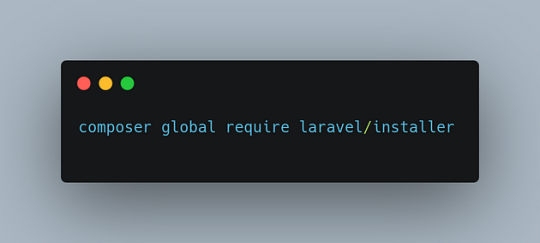
Step 2: Create a New Laravel Project


Step 3: Set Up Your Development Environment
Open VS Code: Launch Visual Studio Code, and open your newly created Laravel project directory.
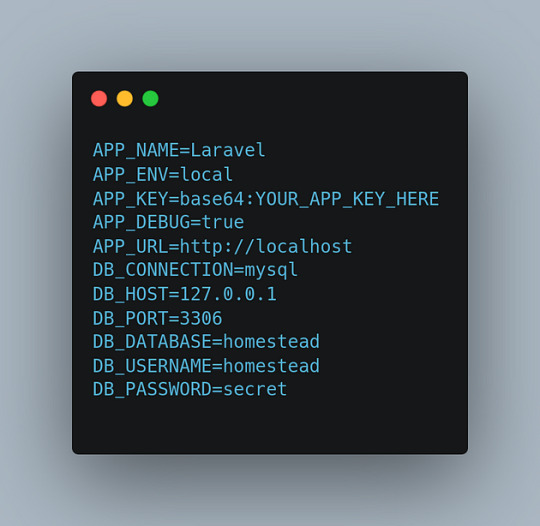
Configure Your Environment: Edit the .env file in your project root to configure your database and other environment settings. For instance:
Step 4: Install and Configure a Pre-Built Theme
Select a Pre-Built Theme: Choose a pre-built theme that suits your website’s needs. Websites like ThemeForest or Creative Market offer a range of Laravel-compatible themes.
Integrate the Theme with Laravel:
Step 5: Customize Your Theme
Edit Blade Templates: Use VS Code to modify the Blade templates according to your needs. Blade templates are located in the resources/views directory. For example, you might customize the layouts/app.blade.php file to include your theme’s layout.
Adjust Styles and Scripts: Ensure that the theme’s CSS and JavaScript files are included in your Blade templates. You may need to adjust paths to ensure that assets are correctly loaded.
Step 6: Develop Your Website
Create Models and Controllers: Use Laravel’s Artisan CLI to generate models and controllers. For instance:
The -m flag generates a migration file for the model.

Step 7: Test and Launch Your Website
Run the Development Server: Start Laravel’s built-in server:
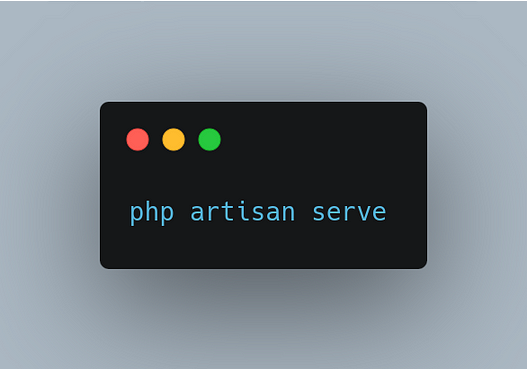
Visit http://localhost:8000 to preview your website.
Debug and Fix Issues: Use Laravel’s debugging tools to identify and fix any issues.
Deploy Your Website: Once your website is ready, deploy it to a production server. Update your .env file for production settings and use a hosting provider like DigitalOcean or Laravel Forge to deploy your site.
FAQs About Using Laravel with Sohojware
1. What is Sohojware, and how can they assist with my Laravel project?
Sohojware is a company specializing in web development and technology solutions. They offer services for creating and optimizing Laravel-based websites, including custom theme integration and performance enhancements. For more information, visit Sohojware.
2. Can Sohojware help me with Laravel theme customization?
Yes, Sohojware can assist with customizing Laravel themes to match your specific requirements. Their team of experts will ensure that your website’s design aligns with your brand and functionality needs.
3. How do I get started with Laravel development at Sohojware?
To start a Laravel project with Sohojware, contact their team through their website. They offer consultations and development services tailored to your project needs. Visit Sohojware for more details.
4. Does Sohojware offer support for Laravel deployment?
Absolutely. Sohojware provides comprehensive support for deploying Laravel applications. Their services include server setup, environment configuration, and ongoing maintenance. Learn more by visiting Sohojware.
5. What resources does Sohojware provide for learning Laravel?
Sohojware offers various resources and tutorials for learning Laravel. Their website features blog posts, guides, and case studies to help you understand Laravel better and apply best practices in your projects.
By following these steps and leveraging the expertise of Sohojware, you can create a professional and functional website using Laravel and a pre-built theme. Whether you are building a personal blog, an e-commerce site, or a corporate portal, Laravel’s powerful features combined with a pre-built theme can help you achieve your goals efficiently. For more information and support, visit Sohojware today.
1 note
·
View note
Text
How do you edit WordPress on a localhost?
Editing a WordPress site on localhost involves setting up a local development environment on your computer. Here's a general guide on how to do this:
1. Install a Local Server Environment:
You can use software like XAMPP, MAMP, or Local by Flywheel. These tools provide a local server environment with Apache, MySQL, and PHP.
Download and install the software of your choice.
2. Download WordPress:
Visit the official WordPress website (https://wordpress.org/) and download the latest version of WordPress.
3. Set Up Database:
Open your local server software and start the server.
Create a new database for your WordPress installation. Note down the database name, username, and password.
4. Install WordPress:
Extract the WordPress zip file you downloaded.
Move the WordPress files to the root directory of your local server (e.g., htdocs in XAMPP).
Rename the wp-config-sample.php file to wp-config.php.
Open wp-config.php and enter your database details (database name, username, password).
5. Access Local WordPress Site:
Open your web browser and go to http://localhost/yourwordpressfolder (replace "yourwordpressfolder" with the actual folder name where you installed WordPress).
6. Edit Your WordPress Site:
Log in to your local WordPress site using the credentials you set during the installation.
You can now edit your WordPress site just like you would on a live server. Install themes, plugins, and make changes to content and settings.
7. Theme and Plugin Development:
If you are a developer and want to make theme or plugin changes, you can create a themes or plugins folder inside the wp-content directory and develop your code there.
8. Save Changes:
Any changes you make on your localhost won't affect your live site until you migrate the changes. For this, you might use a migration plugin or manually transfer files and the database.
Important Note: Always remember that changes made on your localhost won't reflect on the live site until you manually migrate the changes. Be cautious when making significant changes, and consider using a backup solution.
If you plan to move your site from localhost to a live server, you'll need to export your database and migrate your files. There are plugins and manual methods available for this purpose.
1 note
·
View note
Video
youtube
How to install wordpress theme on localhost xampp | install wordpress locally
0 notes
Video
youtube
How to Install Wordpress and Theme on localhost using XAMPP and MySQL.wordpress localhost7) How to install WordPress on localhos,8) How to setup WordPress and installation theme in localhost.,9) how to install wordpress on localhost xampp,10) how to install wordpress on localhost xwamp,11) how to install wordpress theme on xampp localhost,12) install wordpress locally windows 10,13) How to Install Wordpress and Theme on localhost using XAMPP,14) wordpress tutorial,15) wordpress theme installation
1 note
·
View note
Text
phpBB
New Post has been published on https://hazirbilgi.com/what-is-phpbb-what-does-it-do/
phpBB
What is phpBB? What does it do?
PhpBB is an “open source” forum software developed on the PHP programming base. PhpBB is short for PHP Bulletin Board . It is one of the popular scripting forum software on the web and is open source. PhpBB is completely free.
Open source phpBB has a simple and functional forum model. It was developed to simplify the creation of forum space on the web. It is widely preferred for creating forums because it has a practical usability management panel and installation interface.
PhpBB has support for multiple database engines. These database engines include MySQL , Oracle Database , Microsoft SQL Server .
In 2007, phpBB developer and project manager James Atkinson announced that he had resigned from all his duties at phpBB, where he had been involved since 2000, due to personal reasons. After his resignation, a new era began at phpBB’s management. Now the developer team leader takes responsibility for the entire management of the project.
PhpBB history
The foundations for the PhpBB open source scripting forum package were laid in June 2000. The developer of the forum package is James Atkinson(Finn). After being developed, it was first published on the “ DevShed ” forum for testing purposes. It gained popularity with successful results in the tests and started to be published on the CVS (Concurrent Versions System) platform Sourceforge .
After its release on Sourceforge, new names were added to the developer team. After a short development phase, phpBB version 1.0(Beta) was released in November 2000. This version later included the PHP-Nuke content management system from David Norman in the developer team.
In 2002 phpBB version 2.0 was released. In 2006, phpBB version 3.0 was released.
PhpBB versions
There are 3 published versions of the open source scripting forum software package phpBB. Each version has additional updates under it. phpBB versions were released as “phpBB 1.0.x”, “phpBB 2.0.x” and “phpBB 3.0.x”.
PhpBB version 1.0 (beta)
phpBB version 1.0.0 was released in beta and launched in December 2000. The first version of PhpBB;
phpBB 1.2
phpBB 1.3
It has updates in the form of phpBB 1.4.
Updates to phpBB 1.4.4 were released for phpBB version 1.0 up to 2001. This update was the last update to the first version and support for the version has ended.
PhpBB version 2.0
As of the beginning of 2001, work started for the second version of phpBB, “phpBB 2.0”. At the end of the 14-month period, the second version became available in April 2002.
The second version for the script forum package was revolutionary. The software package developed for PhpBB 2.0 laid the groundwork for its successor. Safety and function requirements have led to changes. The code of the phpBB 2.0 version was prepared to run in PHP 4 as well as PHP 3. Support for phpBB2 has been discontinued, citing coding compatibility problems. The last update package “phpBB 2.0.23” released for phpBB version 2 was released in February 2008.
As of 2009, official support was discontinued. However, PhpBB2 is still used by many forums on the web. It is still actively used because the management interface has simple usability and provides more freedom to move in MOD and coding. Upgrade to the current version could not be performed as many MODs running on phpBB 2 are incompatible with phpBB 3.
The theme used in PhpBB 2.0 version is set as the default theme with the name ” SubSilver “.
PhpBB version 3.0
PhpBB version 3.0 is the last released version of the software. The development of code software of version phpBB 3.0 started in 2003. In the first period of the study, phpBB was targeted as 2.2. Thus, the coherent development of the 2nd version would be ensured. However, as the structure created in phpBB version 2.0 caused a lack of compatibility, it was released as a completely new version.
There are 5 beta versions released for phpBB3.0, which was developed with the aim of revolutionary innovations and adaptation to the new Web. The dev team released the first beta in June 2006. Up until this date its official site (php.com) was using phpBB 2. After the first Beta version, phpBB3 started to be used on the official site.
Following the beta versions, the official release of phpBB 3.0 was made in December 2007. The code security of PhpBB 3.0 was done externally by “SektionEins”.
New style “ProSilver” design appeared in this version. With PHPBB 3.0 version;
CMS software integration,
XHTML compatibility,
UTF-8 support,
search engine spider management,
captcha module,
Oracle, Firebird and SQLite data management support,
Update and converter wizard,
Added customization support for themes and templates.
PhpBB 3 version, the revolutionary innovations brought by the phpBB 3.1 (Olympos) update, can even be considered as a new version in the form of “4.0”. PhpBB 3.2 (Arsia) and phpBB 3.3 (Rhea) have gained a more modern forum structure.
With the Arsia update, PhpBB 2 gained the ability to support up to “PHP 7” version.
With the phpBB 3.3.3 update in 2021, PHP version support was increased to PHP 8, while MySQL 8 support was added.
PhpBB MODs (plugins)
PhpBB MODs are not codes written by the developer team. Code changes to remove limitations on phpBB forum functions and customize appearance are called MODs. It is completely different from the term “mod” used to describe the administrator in English forums. It is written using capital letters due to the difference in meaning.
MODs are developed by the phpBB community. It is possible for each user to develop MODs. However, MODs developed must be verified by the “phpBB Extensions Team”. After development, MODs are submitted through the “Extension Development Tutorials (phpBB Customizations Database)” for verification and approval.
There is no support for downloads from sites other than the official site. MODs are not accepted with PhpBB version 3.1. Because with this release, phpBB extensions have replaced it.
PhpBB MODx
Designed and made available by the PhpBB Extensions Team. The XML- based format is used to describe the steps required for the development of phpBB MODs .
MODs developed by users must comply with MODx policies and modules. MODx files are opened in web browsers via the XSLT file. The latest released version is MODx 1.2.
PhpBB AutoMOD
AutoMOD (Turkish, Automatic MOD) is a tool that allows parsing and loading phpBB 3 MODs automatically. It is a tool developed by the PhpBB Extensions Team. It provides editing by loading and parsing MODs downloaded with AutoMOD into the phpBB source directory . Combines all exchanges via FTP . It also performs automatic backup of file changes in compressed format.
There is another tool called EasyMOD developed by the team to be used in PhpBB 2. It has been discontinued due to the end of official support for PhpBB2.
PhpBB UMIL
UMIL is an abbreviation for “The Unified MOD Installation Library”. It is a tool developed for users to easily install and uninstall MODs in the database. Automatically generates UMI file. It is GPL(General Public License) software like phpBB itself.
phpbb, phpbb vs vbulletin, phpbb vs mybb, phpbb can’t access acp, phpbb can’t login, phpbb can’t login to admin, phpbb hide statistics, can lead leach out of glass, is phpbb dead, phpbb the submitted form was invalid, phpbb the submitted form was invalid. try submitting again, phpbb requirements, phpbb examples, phpbb update, phpbb backup, phpbb forums, phpbb forum software, how to install phpbb, how to use phpbb, how to install phpbb styles, how to install phpbb on my website, how to install phpbb on localhost, how to check phpbb version, how to update phpbb forum, phpbb how to install extensions, how to install phpbb on ubuntu, how to update phpbb, is phpbb free, is phpbb secure, is phpbb safe, what is phpbb used for, what is phpbb forum, what is phpbb app, where is phpbb backup, phpbb hide who is online, what is a phpbb website, phpbb should_run, phpbb what is cron, where to find uranium glass, where to get an abortion liverpool, buy glassware near me, where to get an abortion in ottawa, where to buy uranium glass, best phpbb themes, why phpbb is used, why did olivia have an abortion,
#best phpbb themes#buy glassware near me#can lead leach out of glass#how to check phpbb version#how to install phpbb#how to install phpbb on localhost#how to install phpbb on my website#how to install phpbb on ubuntu#how to install phpbb styles#how to update phpbb#how to update phpbb forum#how to use phpbb#is phpbb dead#is phpbb free#is phpbb safe#is phpbb secure#phpbb#phpbb backup#phpbb can&039;t access acp#phpbb can&039;t login#phpbb can&039;t login to admin#phpbb examples#phpbb forum software#phpbb forums#phpbb hide statistics#phpbb hide who is online#phpbb how to install extensions#phpbb requirements#phpbb should_run#phpbb the submitted form was invalid
0 notes
Text
How to install WordPress Theme 2021
How to install WordPress Theme 2021
How to install WordPress Theme How to install Word install WordPress Theme install WordPress Theme Press Theme So hunt up and down and get the perfect WordPress theme. Now you need to know how to install WordPress theme or it will just be a nice file that collects dust on your hard drive. Installing a WordPress theme is not a problem as many people think it is. The thing that often confuses…

View On WordPress
#How to install WordPress Theme So hunt up and down and get the perfect WordPress theme. Now you need to know how to install WordPress theme#install wordpress theme#install wordpress theme in cpanel#install wordpress theme in xampp#install wordpress theme localhost#install wordpress theme manually#install wordpress theme ubuntu#install wordpress theme without ftp
0 notes
Text
Download Bitnami WordPress Local _ Need One click and Install now
Download Bitnami WordPress Local _ Need One click and Install now
Download Bitnami WordPress Local The very first thing that I discovered in WordPress was its set up course of on localhost with the help of Bitnami WordPress. (Download Bitnami WordPress Local) unknown with the opposite unique options that it has. So after the various analysis, at present I’m right here to current some helpful & easy steps of How you can Set up WordPress on Localhost so it may…

View On WordPress
#how to install plugins in wordpress#how to install theme in wordpress#how to install wordpress#how to install wordpress in cpanel#how to install wordpress in wamp server#how to install wordpress in windows 7#how to install wordpress locally#how to install wordpress on local computer#how to install wordpress on local machine#how to install wordpress on local server#how to install wordpress on localhost#how to install wordpress on windows 10#how to install wordpress on windows 8#how to install wordpress theme#how to install wordpress theme on localhost#install wordpress#install wordpress locally#install wordpress on cpanel#install wordpress on windows 10#wordpress download and install#wordpress install
0 notes
Text
Introduction Post
Is this title too formal? Ah well.
Hello, I’m WolfKat! A werewolf in some fantasy existence, and thusly what I use to represent myself online. I like to keep my human self private.
My main areas of skill are in drawing, web design, and some story writing on the side. More on those in another post in the future.

I’m 26 years old as of February 2021 (year of this post). Just existing.
I used to be active here on another account mainly for Gravity Falls stuff back in est. 2015 until maybe 2018. My activity died down and then some drastic, traumatizing events in 2019 really burned me out. I moved onto Twitter for a while and decided I would leave Tumblr for good?
Look how that turned out. Here I am again! But I’m starting fresh on this new account.
And during 2020, I uuhh, had more self-reflection during the isolation with more daring self-confrontations than I have in a while. For things I would question about myself, but wouldn’t feel “allowed” to accept due to my upbringing and the painful subconscious programming that can still induce sick feelings to my stomach and moments of existential dread for my fate after death.
Born and raised in Georgia. Surrounded by baptists, fundies, evangelicals, you name ‘em. Connect the dots from there!
Anyway, to summarize my new self-discoveries... I don’t fit with gender binary stuff. So I’m experimenting with just... Being a neutral “they.” Though I do find comfort in presenting more conventionally masculine.
Having to be considered “female” in my past always felt like a costume; an uncomfortable social obligation so that navigating the world would be smooth when I otherwise struggled in it. In the end, my particular long-term obsession with secret and alternate identities growing up has caught up with me - ‘cause now I have to hide these aspects of myself from people irl! Very fun. My life here on the internet is pretty different to what I have to present of myself offline around locals and family.
It’s still difficult to embrace this and it’s been only since December 2020 through January 2021 that I slowly discussed this with close friends, and then opened up about it briefly and subtly online. I don’t like putting spotlight on this extra personal stuff about myself, so even writing this much without specifics has me a nervous wreck.
Moving on now!
I’ll have a page for interaction boundaries as I want to set those clearly and firmly on my social media and any online presence I have.
And likewise to how I ran my previous blogs, there will be a page for my common, general tags I’ll use to organize posts on here!
There will also be another blog I’m working on, which will be for my business side of things. It’ll be some time before it’s up and running since I want to make a custom theme for it. That’ll be a fun little personal project for me to do!
On that note, I’ve made some nice progress with [vanilla] JavaScript in the past 2 years. I’m still not super fancy with it yet, but I’m steadily getting there I hope? Only the front-end stuff too. I tried some back-end last month ‘cause I felt somewhat ready for NodeJS... It fried my brain beyond just setting up a localhost.
But back on the front-end stuff, I currently make assets and such using HTML, CSS, and JavaScript for OBS’s browser sources! Two of them are free, and the others I sell on my Ko-Fi shop. I accept tips on Ko-Fi too if you wanna drop any instead of buying from the shop. I’ll appreciate any of that!
There’s quite a bit more I have planned, including the occasional project where I can spare time to make it free. They’ll usually be free out of legal obligation... Using IP’s and all, having them be fan works. Can’t risk selling those, y’know?
On the side of drawing, I’ve started using Clip Studio Paint this year... And it’s real darn fun! A generous close friend of mine gifted the base program to me as a belated birthday gift, since it had gone on sale in March IIRC! Been trying to learn how to animate on it (it’s not the fancy edition with extra animation tools) and it can get a little confusing still. But I’m sorta getting it.
For my birthday, I also got gift money to get my portable tablet! I desperately needed that because my unknown physical problems have made it uncomfortable to draw at the desk tablet I’ve had for a few years already. Apparently sitting up straight and/or leaning forward for a little while makes my heart skip beats and/or fully go into tachycardias after ever since having my ablation? Yeah. Gets scary.
So, with the portable tablet I can finally enjoy drawing again. And comfortably in bed... Where I can lean back and relax my body a lot better! Even more recently I got a metal flexible arm that holds my tablet up higher so it’s better for my neck too. I’m doing my best to make things more ergonomic with the very scarce money I earn at all. I have no real income or financial living at this time.
I think that’s all I can do for catching people up to speed with me for anyone who’s known me here before. And for any newcomers, you’ve gotten a first glimpse of me as well! There’s still more, but I think this is enough of a read as is.
My other online presences(?) will also soon be part of my navigation. Stay tuned! Can’t wait to share some art here too and whatever else of my interest!

4 notes
·
View notes