#html attributes tutorial
Explore tagged Tumblr posts
Visit Tumblr Blog
Explore Tumblr blogs with no restrictions, modern design and the best experience.
Last Seen Tumblr Blogs


Fun Fact
Post activity is at the highest at 4:00 pm EDT; notes peak at 10:00 pm EDT.
Text
Convert HTML to Image: A Step-by-Step Guide ✨

Do you want to turn some HTML code you've made that's on your website and have a way to convert it into an image for you to save?
Well, look no further! I too wanted to do the same thing but funny enough, there weren't any straightforward tutorials out there that could show you how! After hours of searching, I finally discovered the solution~!
This is an old tutorial I made 🐼

💛 Set your environment
Before we dive into the conversion process, I'll assume you already have your HTML code ready. What you want to learn is how to turn it into an image file. You should have a good grasp of HTML and JavaScript. For this tutorial, we'll use the following HTML code example:

We won't include the CSS code, as it doesn't affect this tutorial. The JavaScript file (script.js) at the bottom of the body element is where we'll add the functionality for the conversion.
Your page should resemble the following:

As you can see, the "Click me" button will handle the conversion. We aim to convert everything within the div.info-div into an image.
💛 Using the html2canvas JavaScript Library
The html2canvas library allows you to take screenshots of webpages and target specific elements on a screen. Here are the steps to include the library in your project:
The steps to put the library in your project:
Visit the html2canvas website for more information.
Copy the CDN link from here

and include it in a script tag in your project's head tag in the HTML file:

That's it for including the library on the HTML side. Now, let's move on to the JavaScript code.
💛 JavaScript Functionality
Here's the JavaScript code to handle the conversion:

In this code, I want to turn the whole div.info-div into an image, I put it into a variable in const div = document.querySelector(".info-div");.
I also put the button into a variable in const button = document.querySelector("button");
I added a click event listener to the button so when the user clicks the button, it will follow the code inside of the event listener!
You can find similar code like this in the documentation of the html2canvas library:

What is happening here is:
We add the div (or what the element we want to take an image of) into the html2canvas([element]).then((canvas)
Added the image file type url to a variable = const imageDataURL = canvas.toDataURL("image/png"); - You can replace the png to other image file types such as jpg, jpeg etc
Created an anchor/link tag, added the href attribute to imageDataURL
The download attribute is where we will give the default name to the image file, I added "dog.png"
Perform the click() function to the anchor tag so it starts to download the image we created
And that's it!
💛 The End
And that's it! You've successfully learned how to turn your HTML into an image. It's a great way to save and share your web content in a unique format.

If you have any questions or need further clarification, please comfortable to ask. Enjoy converting your HTML into images! 💖🐼
#my resources#coding#codeblr#programming#progblr#studying#studyblr#programmer#html#html css#javascript#neocities#coding tips#html5 tutorial#html tutorial
155 notes
·
View notes
Text
neocities heracles trials: from a chaotic newbie
okay so i want to actually start posting here and i finally got it through my thick skull that this is LITERALLY A BLOG. i'm supposed to blog. so here's a blog post.
anyways, for context, i've been working on my neocities for a while now, recently started over to make things more original and more me. another thing to note is that i'm using VScode.
the issue here is that i have zero well not exactly zero but i lack any professional/academic background experience with making websites. the html isn't the issue (thankfully) but holy shit dude...css+javascript implementation . basic styling with css is no biggie, right? absolutely, however...may i introduce: smooth transitions + the absolutely tragic fact that the <marquee> tag is deprecated an accessibility issue.
so, my first goal day one was to recreate a marquee animation through css. so i tried to simply implement this incredibly useful bit of code into my site (in which if you're interested i totally think my failure to get it working was user error so please check it out it works great if you're not me) but, lo and behold, despite me getting it to work in my V1 project, i could not, for the life of me, get it to work. so i, not too familiar with css animation and completely lost when it comes to javascript, started grasping at straws. i ended up finding this tutorial and, with some improvisation since the tutorial is for webflow and i'm manually writing everything, managed to make my own css recreation of a marquee effect essentially from scratch, and even learned about the animation-play-state css attribute so i could pause the effect when the marquee is hovered over! victory, basically.

then, i looked around the many cool and absolutely awesome sites on neocities to get inspiration, and then i was like "hey what if i made a custom button background image" and with some trial and error, made myself a pretty decent base (for now) with aseprite, and learned more about the program in the meantime which is always a plus.
then i decided that i wanted to do more with the buttons. i wanted to make it animate on hover. not too hard right? you'll...you'll see why i struggled...in a moment...
anyways, i settled on a simple shrink animation. which THIS i could do with ease, messed around a bit, got the keyframes, assigned that to the button:hover and all of that and all was good!...until i realized that once i stopped hovering over it, it snapped back to its original scale instead of transitioning smoothly again. THIS is where the "fun" began.
see, although i can wrap my head around things easily when it comes to css, i have to constantly look up what the proper syntax for everything is because otherwise i'll mess everything up. and through my research i had conducted (aka surfing through multiple blogs and reddit posts alongside other things on random forum websites) i had discovered the very neat transition attribute.
but we'll have to return to this because i have adhd, and i ended up getting distracted during this process. see, originally i had decided that the button would change it's visual to appear like it was pressed when the user's mouse hovered over it. then i was like "i don't think this makes sense" so i changed it so that the button wouldn't change its background image unless the user actually clicked on it. so i did that. then i had to make sure that the button wouldn't magically scale up again so i had to transform the styling and blah blah blah those details aren't really that important ANYWAYS the actual important bit about this is that if you use the transition attribute and there's a change in background images that change will also be transitioned unless you set the transition to only apply to a specific change. and i didn't know that originally. so every time i tried to fix things up with a transition so the button wouldn't snap back to it's original size out of nowhere the background would slooowly change as well and i actually got so frustrated with this that i wanted to burn something down because that's a totally normal reaction i guess. anyways, then i started frantically searching for answers on the topic and EVERY. SINGLE. THING. THAT I FOUND. INCLUDED JAVASCRIPT.
i do not know javascript. i have not learned anything about it unlike css and html. it SCARES me and it is FRUSTRATING. but i thought i'd try it anyways. news flash that shit didn't work at all and i almost thought about scrapping the animation entirely especially when it randomly stopped working when i made certain changes, but i ended up eventually figuring out what i mentioned earlier (CSS transitions and the fact that you can assign them to only affect a specific change instead of everything) so with some dabbling here and there i eventually managed to finally figure out how to make everything smooth through pure css and although it still snaps if the element hasn't finished animating i'm happy with it.

moving on to another thing, i wanted to then make a sound effect play when you click the button. yes, we are still talking about buttons. THIS i could not do with css, like, at all. javascript admittedly is for interactivity and i had already been bending the rules quite a bit with the animations since those teechnically should've been done with javascript as well but this? this was impossible without javascript. so i found a free mp3, and searched up a nice little tutorial on the very basics of javascript.
little did I know that apparently, this would be my own personal little hell.
see, no matter how many times i tried a different script, the sound just would not work like at all. i'd do everything in what i assumed to be the correct way, and no matter what, it would not play. knowing that i'd just have to revisit this, i decided it was best to just sort of put it on the back burner.
and this is where i wish i could say this is the end of my absolutely gobstopping rant. however, i cannot.
see, one thing that i really like that i've seen in a lot of other people's sites is draggable windows. i think they're sick. but this ALSO requires javascript, but i didn't think this could POSSIBLY be that bad since so many people did it.
...right?.......right? guys. right?
MOTHERFUCKER I WAS SO WRONG.
see, it turns out that a lot of people do this sort of thing with jQuery, specifically for user interfaces. but vscode doesn't have a "user friendly" way to get jquery to work with it. and because i don't want to mess with program files, i decided that logically speaking jquery just makes writing things in js scripts less complicated and doesn't introduce things that are impossible in vanilla javascript so i decided i could suffer a little bit and try and do things without jquery.
this led me to looking at many sites with draggable windows to look at their own scripts, in which every single time i tried replicating things i FAILED.
i eventually stumbled upon a nice code that worked. but the issue with it - in which unfortunately i can't find it, else i'd link it - is that it works with not only element classes but also a specific ID. see, this would be fine if i only wanted ONE draggable element. but i want multiple. and i thought that maybe if i just duplicated the script and dedicated it to a different ID and changed function names it would work but nooo life cannot be this easy apparently. so after setting up my webmaster status window, getting that to work, i tried doing the aforementioned method for what will eventually be a guestbook of sorts. it failed.
so i decided, "hey i'll revisit this later!!" and i went on to finding a way to implement a status widget into my site. this honestly was really easy as i ended up stumbling upon status.cafe . so i registered, eventually got my account activated, and i got it working in my live port of vscode just fine!! all is good in the world.
well that's what i thought until i found out that since i had created my neocities account in march of 2024, and i'm unemployed since i'm still in high school hence i have a free account, that i could not. use the widget. in neocities. so i tried finding a work around, found this handy guide (which is genuinely useful by the way) and set up things through a RSS feed instead which is essentially just a work around that complies with the security restrictions of neocities that i'm bound by. anyways, this works great but i literally just can't customize it to how i want so this is another fail. then i find imood.com which, although is NICE, doesn't suit what i want on its own. so i'm at a loss here too.
so, again, another thing to put to the side i suppose.

so i started working on getting my guestbook, browsed through people's homepages again, and found chattable . and you probably think i have another paragraph complaining about this but honestly i can't write about something when i can't figure out how to even create a chat to implement onto my site in the first place so...y'know.
plus, i honestly have no clue if it'll work on my site either due to security restrictions so this is fun!!
anyways, after dealing with all of this, i finally decided it was about time i ported what i had so far over onto my neocities account. which isn't actually that hard i just had to wipe all of my files, overwrite the content in my index.html file there and paste in what i have now, and then upload my new files. but for some god awful reason after i went through all of this chrome just. kept depending on my old stylesheet??? so i had to clear some of my browsing data and eventually everything was loading properly for me.
and THIS is finally the end of my ridiculous documentation concering my neocities adventure so far.
i have no doubts i'll end up ranting here AGAIN about all of this but for now this is all i have on my plate...besides finally caving and learning javascript for real and continuing to learn more about html and css. hopefully one day i'll stop having such frequent issues but now is not the time and i doubt that'll be anytime soon either.
moral of the story, if you want to start something new and pick up a new hobby, please for the love of all that is of substance in this world don't go in completely blind like i've done if you're going to be making a project of some sorts. it will only lead to many misfortunes.
anyways you can see what i currently have done in my neocities here, make suggestions or give advice in the notes and whatnot i don't know.
#neocities#rant post#rant#coding#web development#geocities#html#html css#htmlcoding#css#javascript#losing my mind#holy shit#send help
6 notes
·
View notes
Note
Hello! I'm not sure if you've been asked this before but how did you make the menu part, the "new game" "load game" part, I'm super new to coding so I'm sorry if this is dumb jaja I also tried to recreate the fades but that seems even more complex 😅 thank you for creating this and I hope you have a great day!
If you mean the UI menus like the ones that save and load menus, settings, etc. that all comes from the template I'm using! While I use Vahnya's Template, I highly recommend Vahnya's Template II because it's so gorgeous and already comes with a start menu! I would've used it myself if I hadn't already gotten so far in changing mine, and would've saved me so much grief! I am so thankful for everyone who's made these templates and resources ❤️❤️
If you're not fond of these, though, I highly recommend checking out idrellegames' tutorial (Wayfarer's development blog) on how to create a start menu with the load game and new game. It's extremely detailed and will do a much better way of explaining than me, and I suspect, also a much more sophisticated way of coding it than me!
As for the fades, here's the thread I referenced in Twine, many thanks to TheMadExile! I don't want to share my code with the fading as it is incredibly inefficient and prone to errors, and I do not want to share half-baked code with anyone that I myself am not confident about. While I love my fade effect, the way I ended up doing it took many nights of just troubleshooting it and figuring a way to use it consistently. Even now, it has errors I need to fix and still mystify me. I suggest you look up guides on HTML and CSS to do it yourself!
I hope all these resources are useful, and good luck with your coding endeavors 🫂 my biggest suggestion is to first do the research, use code as reference (and attribute), try it out yourself, and ask questions!
38 notes
·
View notes
Note
Ur website so cool!! ❤️❤️ Do you have by any chances coding tips? Been trying to make my own website for a while but adhd won't let me concentrate a second when it comes to learning coding
Thank you! And 100% It is deceptively approachable but also time consuming, I'm familiar enough with html from a highschool class where we did need to write code out by hand, and then soft practice with coding toyhou.se profiles and futzing around with free code snippets. Largely though I don't think you need to know everything or to write everything by hand, you just need to frankenstein code pieces together (As long as they're free ofc).
I used this first, it's fucking insanely handy and lets you make a simple layout with sidebars, navigation, header, footer and a body base ect, and then just generate and copy the code. The html itself also has greyed out little notes about what parts do what!
I'll be real the rest of it after that is just me googling what I want to do or googling html snippets bc I forgot them. So like html image link with size attributes ect ect, how to make a html image gallery. I don't use one site exclusively but w3schools.com has a bunch of common ones and also has a little live code editor in its tutorials.
Like I still get greatly stumped for hours bc code's kinda sensitive and one or two characters out of place will break sections of it especially when ur just frankensteining. Trying out little segments in live code editors is really helpful because you can kinda break it apart and diagnose the issue before putting it into your site html.
Also if it helps this is kind of how I break it down in my brain as another ADHD-er. so fuckign sorry for how this looks im doing it in snipping tool. But code bits love to live in cages even if it all looks the same, iit would also help if you clean your code up mine is pretty horrid but you just want to familiarize yourself with the little "Sections" ig that's where doing things by hand would help because you would 100% know what each chunk is for but yk yk.
CSS is a different beast I barely understand. The parts of code where it starts stacking on top instead of being horizontal is css and it's basically how you do fancier things to your code, it's linked to stuff you already have down. So like changing the background in the body text box or something, you can only do so much in there. Css targetting the body text box is where you can level it up. Again the sadgrl layout builder has notes so you're not completely blind in there. There's also 100% so many resources to explain what all these words mean, my mmethod is incredibly avoidant I don't know what flex is I haven't needed to fight her yet ect ect.

Sorry if this is confusing this is just my hack and slash understanding atm. Be humbled by code I've spent too long trying to fix up hysterical margin issues just because I had a random apostrophe somewhere or because I tried to spell it colour and not color ect.
33 notes
·
View notes
Text
Svelte Basics: First Component
I'm going through the Svelte tutorial since it's very comprehensive and up-to-date.
I'm going on a bit of a tangent before I start this post, but I'm straying away from YouTube videos and Udemy courses when learning new programming languages and frameworks. YouTube videos are too fragmented to get good information from. Courses (and YouTube videos) are usually not up-to-date, rendering parts of them useless. Not to mention that you have to pay for free information that's packaged in a course, which is kind of scummy.
Anyway, I've gotten quite a bit further than just the introduction section of Svelte basics, but I don't want to overload myself (or readers) with information.
My First Svelte Component:
This section was relatively straightforward. There wasn't much new information, but I was hooked because of its simplicity. I personally love the idea of having the script tags be a place to define variables and attributes:
<script> let var = "a variable!" </script>
<p>I'm {var}</p>
The example above shows how dynamic attributes are used. I can basically define any variable (and states, but that'll be for the next post) between the script tags that can be used in HTML.
This may seem mundane to programmers experienced in Svelte, but I think it gives really good insight into the philosophy behind Svelte. It's clear that they wanted to keep the language simple and easy to use, and I appreciate that.
As I mentioned in my introductory post, I have a background in React, which has a reputation for being convoluted. Well, maybe that's just my perception, but how Svelte is written is a breath of fresh air!
I look forward to making more posts about what I learn and my attempts at understanding it.
Until next time!
#svelte#web development#website development#developer#software engineering#software development#programming#code#coding#framework#tech#learning#programming languages#growth#codeblr#web devlopment#devlog#techblr#tech blog#dev blog#reactjs#nextjs
2 notes
·
View notes
Note
Hnnnghh I was informed by tatp that u know about about coding wdgvbb any tips or whatever I’m trying to make a neocitys website or smthg
Since it's neocities website all you need is: HTML, CSS and maybe some graphics. As I said before I'm shit at explaining stuff but I will try my best. So here's "I want to make my own website" the basics!
HTML - markup language, the base of your websiteCSS - style of your website, can change color of html elements, size, font etc. I linked w3schools website since it's pretty easy to understand.Do you need to learn all of this before coding? No. I think it's the best to just check things that you need for your website. If you need to change background color of your website just find a w3schools tutorial on it or simply search for "how to change background color in css". You just should know html tags and basic attributes: id and class and how to link your css in html file so your style actually works! Neocities has it's own tutorials on html and css so you could check them out too! Neocities also has it's own code editor. You can edit everything in browser. I personally like to code in Visual Studio Code then just paste the code into Neocities editor. VS Code has a lot of addons (some of them are there by default) that make coding way easier for example: autocorrection of syntax errors and giving you suggestions!
Example: If you type html in vs code html file you will get 3 suggestions:
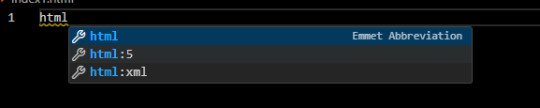
choose the html:5 one:
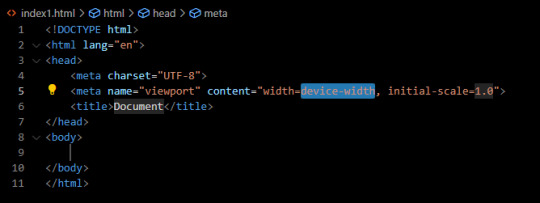
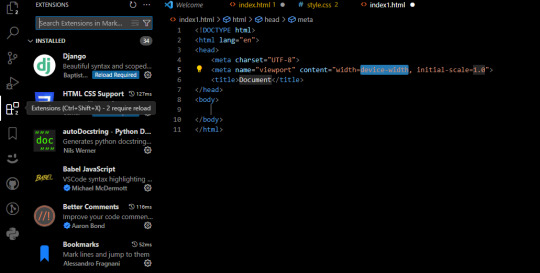
TAADAAAM!! VS Code just wrote the whole website structure for you! You can install more extensions here under extension section! There is this extension called vscode-pets it won't help you with coding but its really cute:
some yt tutorials: CINNIMANI (specifically for neocities), web coding playlist (this one is good for all websites in general); https://sadgrl.online if you were on neocities you probably saw her website. She has a lot of useful resources including image resources and also she made her own WEBSITE BUILDER or acutally layout builder! It's pretty simple website builder but still. If you are looking for premade layouts you can just search them on google or get sum from the website I linked ^__^ Uploading your website to neocities is really easy since all you need to do is to put all the files on there! I guess that's all for now. If you have any problems or questions just ask. I'm here to help ^^ websites with free to edit code: https://codepen.io, https://github.com
10 notes
·
View notes
Text
Getting Creative With HTML Dialog
New Post has been published on https://thedigitalinsider.com/getting-creative-with-html-dialog/
Getting Creative With HTML Dialog
Like ’em or loath ’em, whether you’re showing an alert, a message, or a newsletter signup, dialogue boxes draw attention to a particular piece of content without sending someone to a different page. In the past, dialogues relied on a mix of divisions, ARIA, and JavaScript. But the HTML dialog element has made them more accessible and style-able in countless ways.
So, how can you take dialogue box design beyond the generic look of frameworks and templates? How can you style them to reflect a brand’s visual identity and help to tell its stories? Here’s how I do it in CSS using ::backdrop, backdrop-filter, and animations.
Design by Andy Clarke, Stuff & Nonsense. Mike Worth’s website will launch in June 2025, but you can see examples from this article on CodePen.
I mentioned before that Emmy-award-winning game composer Mike Worth hired me to create a highly graphical design. Mike loves ’90s animation, and he challenged me to find ways to incorporate its retro style without making a pastiche. However, I also needed to achieve that retro feel while maintaining accessibility, performance, responsiveness, and semantics.
A brief overview of dialog and ::backdrop
Let’s run through a quick refresher.
Note: While I mostly refer to “dialogue boxes” throughout, the HTML element is spelt dialog.
dialog is an HTML element designed for implementing modal and non-modal dialogue boxes in products and website interfaces. It comes with built-in functionality, including closing a box using the keyboard Esc key, focus trapping to keep it inside the box, show and hide methods, and a ::backdrop pseudo-element for styling a box’s overlay.
The HTML markup is just what you might expect:
<dialog> <h2>Keep me informed</h2> <!-- ... --> <button>Close</button> </dialog>
This type of dialogue box is hidden by default, but adding the open attribute makes it visible when the page loads:
<dialog open> <h2>Keep me informed</h2> <!-- ... --> <button>Close</button> </dialog>
I can’t imagine too many applications for non-modals which are open by default, so ordinarily I need a button which opens a dialogue box:
<dialog> <!-- ... --> </dialog> <button>Keep me informed</button>
Plus a little bit of JavaScript, which opens the modal:
const dialog = document.querySelector("dialog"); const showButton = document.querySelector("dialog + button"); showButton.addEventListener("click", () => dialog.showModal(); );
Closing a dialogue box also requires JavaScript:
const closeButton = document.querySelector("dialog button"); closeButton.addEventListener("click", () => dialog.close(); );
Unless the box contains a form using method="dialog", which allows it to close automatically on submit without JavaScript:
<dialog> <form method="dialog"> <button>Submit</button> </form> </dialog>
The dialog element was developed to be accessible out of the box. It traps focus, supports the Esc key, and behaves like a proper modal. But to help screen readers announce dialogue boxes properly, you’ll want to add an aria-labelledby attribute. This tells assistive technology where to find the dialogue box’s title so it can be read aloud when the modal opens.
<dialog aria-labelledby="dialog-title"> <h2 id="dialog-title">Keep me informed</h2> <!-- ... --> </dialog>
Most tutorials I’ve seen include very little styling for dialog and ::backdrop, which might explain why so many dialogue boxes have little more than border radii and a box-shadow applied.
Out-of-the-box dialogue designs
I believe that every element in a design — no matter how small or infrequently seen — is an opportunity to present a brand and tell a story about its products or services. I know there are moments during someone’s journey through a design where paying special attention to design can make their experience more memorable.
Dialogue boxes are just one of those moments, and Mike Worth’s design offers plenty of opportunities to reflect his brand or connect directly to someone’s place in Mike’s story. That might be by styling a newsletter sign-up dialogue to match the scrolls in his news section.
Mike Worth concept design, designed by Andy Clarke, Stuff & Nonsense.
Or making the form modal on his error pages look like a comic-book speech balloon.
Mike Worth concept design, designed by Andy Clarke, Stuff & Nonsense.
dialog in action
Mike’s drop-down navigation menu looks like an ancient stone tablet.
Mike Worth, designed by Andy Clarke, Stuff & Nonsense.
I wanted to extend this look to his dialogue boxes with a three-dimensional tablet and a jungle leaf-filled backdrop.
Mike Worth, designed by Andy Clarke, Stuff & Nonsense.
This dialog contains a newsletter sign-up form with an email input and a submit button:
<dialog> <h2>Keep me informed</h2> <form> <label for="email" data-visibility="hidden">Email address</label> <input type="email" id="email" required> <button>Submit</button> </form> <button>x</button> </dialog>
I started by applying dimensions to the dialog and adding the SVG stone tablet background image:
dialog width: 420px; height: 480px; background-color: transparent; background-image: url("dialog.svg"); background-repeat: no-repeat; background-size: contain;
Then, I added the leafy green background image to the dialogue box’s generated backdrop using the ::backdrop pseudo element selector:
dialog::backdrop background-image: url("backdrop.svg"); background-size: cover;
Mike Worth, designed by Andy Clarke, Stuff & Nonsense.
I needed to make it clear to anyone filling in Mike’s form that their email address is in a valid format. So I combined :has and :valid CSS pseudo-class selectors to change the color of the submit button from grey to green:
dialog:has(input:valid) button background-color: #7e8943; color: #fff;
I also wanted this interaction to reflect Mike’s fun personality. So, I also changed the dialog background image and applied a rubberband animation to the box when someone inputs a valid email address:
dialog:has(input:valid) background-image: url("dialog-valid.svg"); animation: rubberBand 0.82s cubic-bezier(0.36, 0.07, 0.19, 0.97) both; @keyframes rubberBand from transform: scale3d(1, 1, 1); 30% transform: scale3d(1.25, 0.75, 1); 40% transform: scale3d(0.75, 1.25, 1); 50% transform: scale3d(1.15, 0.85, 1); 65% transform: scale3d(0.95, 1.05, 1); 75% transform: scale3d(1.05, 0.95, 1); to transform: scale3d(1, 1, 1);
Tip: Daniel Eden’s Animate.css library is a fabulous source of “Just-add-water CSS animations” like the rubberband I used for this dialogue box.
Changing how an element looks when it contains a valid input is a fabulous way to add interactions that are, at the same time, fun and valuable for the user.
Mike Worth, designed by Andy Clarke, Stuff & Nonsense.
That combination of :has and :valid selectors can even be extended to the ::backdrop pseudo-class, to change the backdrop’s background image:
dialog:has(input:valid)::backdrop background-image: url("backdrop-valid.svg");
Try it for yourself:
Conclusion
We often think of dialogue boxes as functional elements, as necessary interruptions, but nothing more. But when you treat them as opportunities for expression, even the smallest parts of a design can help shape a product or website’s personality.
The HTML dialog element, with its built-in behaviours and styling potential, opens up opportunities for branding and creative storytelling. There’s no reason a dialogue box can’t be as distinctive as the rest of your design.
Andy Clarke
Often referred to as one of the pioneers of web design, Andy Clarke has been instrumental in pushing the boundaries of web design and is known for his creative and visually stunning designs. His work has inspired countless designers to explore the full potential of product and website design.
Andy’s written several industry-leading books, including ‘Transcending CSS,’ ‘Hardboiled Web Design,’ and ‘Art Direction for the Web.’ He’s also worked with businesses of all sizes and industries to achieve their goals through design.
Visit Andy’s studio, Stuff & Nonsense, and check out his Contract Killer, the popular web design contract template trusted by thousands of web designers and developers.
#:has#2025#Accessibility#ADD#amp#animation#animations#applications#aria#Art#Article#Articles#Assistive technology#attention#background#background-image#book#Books#border#box#box-shadow#Branding#change#Color#content#CSS#css animations#data#Design#designers
1 note
·
View note
Text
Web Scraping 101: Everything You Need to Know in 2025

🕸️ What Is Web Scraping? An Introduction
Web scraping—also referred to as web data extraction—is the process of collecting structured information from websites using automated scripts or tools. Initially driven by simple scripts, it has now evolved into a core component of modern data strategies for competitive research, price monitoring, SEO, market intelligence, and more.
If you’re wondering “What is the introduction of web scraping?” — it’s this: the ability to turn unstructured web content into organized datasets businesses can use to make smarter, faster decisions.
💡 What Is Web Scraping Used For?
Businesses and developers alike use web scraping to:
Monitor competitors’ pricing and SEO rankings
Extract leads from directories or online marketplaces
Track product listings, reviews, and inventory
Aggregate news, blogs, and social content for trend analysis
Fuel AI models with large datasets from the open web
Whether it’s web scraping using Python, browser-based tools, or cloud APIs, the use cases are growing fast across marketing, research, and automation.
🔍 Examples of Web Scraping in Action
What is an example of web scraping?
A real estate firm scrapes listing data (price, location, features) from property websites to build a market dashboard.
An eCommerce brand scrapes competitor prices daily to adjust its own pricing in real time.
A SaaS company uses BeautifulSoup in Python to extract product reviews and social proof for sentiment analysis.
For many, web scraping is the first step in automating decision-making and building data pipelines for BI platforms.
⚖️ Is Web Scraping Legal?
Yes—if done ethically and responsibly. While scraping public data is legal in many jurisdictions, scraping private, gated, or copyrighted content can lead to violations.
To stay compliant:
Respect robots.txt rules
Avoid scraping personal or sensitive data
Prefer API access where possible
Follow website terms of service
If you’re wondering “Is web scraping legal?”—the answer lies in how you scrape and what you scrape.
🧠 Web Scraping with Python: Tools & Libraries
What is web scraping in Python? Python is the most popular language for scraping because of its ease of use and strong ecosystem.
Popular Python libraries for web scraping include:
BeautifulSoup – simple and effective for HTML parsing
Requests – handles HTTP requests
Selenium – ideal for dynamic JavaScript-heavy pages
Scrapy – robust framework for large-scale scraping projects
Puppeteer (via Node.js) – for advanced browser emulation
These tools are often used in tutorials like “Web scraping using Python BeautifulSoup” or “Python web scraping library for beginners.”
⚙️ DIY vs. Managed Web Scraping
You can choose between:
DIY scraping: Full control, requires dev resources
Managed scraping: Outsourced to experts, ideal for scale or non-technical teams
Use managed scraping services for large-scale needs, or build Python-based scrapers for targeted projects using frameworks and libraries mentioned above.
🚧 Challenges in Web Scraping (and How to Overcome Them)
Modern websites often include:
JavaScript rendering
CAPTCHA protection
Rate limiting and dynamic loading
To solve this:
Use rotating proxies
Implement headless browsers like Selenium
Leverage AI-powered scraping for content variation and structure detection
Deploy scrapers on cloud platforms using containers (e.g., Docker + AWS)
🔐 Ethical and Legal Best Practices
Scraping must balance business innovation with user privacy and legal integrity. Ethical scraping includes:
Minimal server load
Clear attribution
Honoring opt-out mechanisms
This ensures long-term scalability and compliance for enterprise-grade web scraping systems.
🔮 The Future of Web Scraping
As demand for real-time analytics and AI training data grows, scraping is becoming:
Smarter (AI-enhanced)
Faster (real-time extraction)
Scalable (cloud-native deployments)
From developers using BeautifulSoup or Scrapy, to businesses leveraging API-fed dashboards, web scraping is central to turning online information into strategic insights.
📘 Summary: Web Scraping 101 in 2025
Web scraping in 2025 is the automated collection of website data, widely used for SEO monitoring, price tracking, lead generation, and competitive research. It relies on powerful tools like BeautifulSoup, Selenium, and Scrapy, especially within Python environments. While scraping publicly available data is generally legal, it's crucial to follow website terms of service and ethical guidelines to avoid compliance issues. Despite challenges like dynamic content and anti-scraping defenses, the use of AI and cloud-based infrastructure is making web scraping smarter, faster, and more scalable than ever—transforming it into a cornerstone of modern data strategies.
🔗 Want to Build or Scale Your AI-Powered Scraping Strategy?
Whether you're exploring AI-driven tools, training models on web data, or integrating smart automation into your data workflows—AI is transforming how web scraping works at scale.
👉 Find AI Agencies specialized in intelligent web scraping on Catch Experts,
📲 Stay connected for the latest in AI, data automation, and scraping innovation:
💼 LinkedIn
🐦 Twitter
📸 Instagram
👍 Facebook
▶️ YouTube
#web scraping#what is web scraping#web scraping examples#AI-powered scraping#Python web scraping#web scraping tools#BeautifulSoup Python#web scraping using Python#ethical web scraping#web scraping 101#is web scraping legal#web scraping in 2025#web scraping libraries#data scraping for business#automated data extraction#AI and web scraping#cloud scraping solutions#scalable web scraping#managed scraping services#web scraping with AI
0 notes
Text
💾 HTML Trick: Create a File Download Button (No JavaScript Needed!)
If you're into clean code and simplicity, this tip’s for you.
👉 Just use the download attribute like this:
<a href="file.pdf" download>Download File</a>
✅ Beginner-friendly
✅ Improves UX
✅ No scripts required
🎥 Watch the full 30-second tutorial:
youtube
Follow for more web dev tricks and Hinglish tutorials.
#HTMLTrick #DownloadButton #NoJavaScript #FrontendDev #HTMLTips #CodeAesthetic #TumblrTech
0 notes
Video
youtube
How to Hyperlink an Image To An Email Address Using HTML – Make It a Cli...
Want to make an image clickable so it opens an email when clicked? In this tutorial, I’ll show you how to hyperlink an image to an email address in HTML using the mailto attribute. This is perfect for contact pages, email subscription buttons, or customer support links. Follow along and learn how to improve user interaction on your website. Don't forget to like, comment, and subscribe for more web development tips!
1 note
·
View note
Text
web developer roadmap
This web developer roadmap Article help to achieve your goal as web developer in 60 days, It is an aggressive yet attainable goal. Accordingly, with a type of plan like this, you are supported throughout your journey to enable you to become an able web developer from a complete beginner. Also, Continuous dedication and commitment towards your plan and the use of appropriate resources can put you on a well-laid path towards a promising career in web development. Also , check our recent blog about the new sensation Deepseek AI and beginner level basic programs for java.
To ensure that a website is user-friendly and functional, web developers will test it by determining its performance errors and debugging them while at the same time optimizing speed, security, and browser compatibility. But, They familiarize themselves with developments in the industry and emerging technologies to create modern, scalable, and efficient web solutions that suit the needs of clients or organizations.
This means you must need more skills to become good web developer, but you know how check this article that guides you essential skills to become web developer
What exactly is web development?
Although it promotes the creation of websites or web applications, web development is the name given to its overarching process. It involves myriad tasks and technologies that ensure a website is functional, user-friendly, visually appealing. Web development can be divided into three main areas:
check out more about becoming webdeveloper in 2025 in easy way.
mastering
Week 1: Building a Strong Foundation
Accordingly, In the first week, focus on understanding the core technologies that form the backbone of web development. But, Begin with Hypertext Markup Language (HTML), which structures the content on the web. Next, delve into Cascading Style Sheets (CSS) to learn how to style and layout web pages. Certainly, These two technologies are essential for creating visually appealing and well-structured websites week 1 consist of only strong foundation to make yourself clear in web developer roadmap.
To gain practical experience, consider engaging with interactive platforms like freeCodeCamp, which offers hands-on exercises and projects to reinforce your learning. Additionally, The Odin Project provides a comprehensive curriculum that guides beginners through the fundamentals of web development.
week2: Diving into JavaScript
JavaScript is a powerful programming language that enables interactivity on web pages. Spend this month learning the basics of JavaScript, including variables, functions, loops, and event handling. Understanding these concepts will allow you to create dynamic and responsive user experiences web developer roadmap attribute.
Interactive tutorials and coding challenges on platforms like can help solidify your understanding. Building small projects, such as a to-do list or a simple calculator, can provide practical experience and boost your confidence.to know more check here
0 notes
Text
Custom Made WordPress Style and design: Developing Tailor-made Methods for Your small business
WordPress powers around forty% of the internet, making it The most functional and well known written content administration programs (CMS) available today. Although pre-built themes and plugins could possibly get The task completed, custom WordPress layout can take your site to another stage by supplying distinctive, customized remedies that meet up with your certain organization desires. This information explores the benefits, functions, and process of personalized WordPress design and style that will help you get noticed from the electronic landscape.
Why Choose Personalized WordPress Style?
Personalized WordPress style means that you can produce a website that aligns correctly along with your manufacturer identification and company goals. In this article’s why it’s really worth considering:
Unique Branding: A custom style and design displays your brand’s character, location you besides opponents employing generic templates.
Enhanced Functionality: Personalized features and plugins make certain your site works particularly how you need it to.
Scalability: A tailor made web-site can improve with your small business, accommodating new capabilities and greater visitors.
Search engine marketing Optimization: Custom coding ensures your website is optimized for search engines like google, improving upon visibility and rankings.
youtube
Critical Attributes of a Personalized WordPress Style
1. Customized Themes
Unique layouts and patterns crafted to match your model’s style.
Flexible frameworks that let for long term updates and alterations.
two. Personalized Plugins and Integrations
Enhancement of plugins particular to your online business wants.
Seamless integration with 3rd-get together instruments including CRM techniques, payment gateways, or marketing platforms.
three. Responsive Style and design
Cellular-very first strategy guarantees your website performs flawlessly on all gadgets.
Adaptive layouts for desktops, tablets, and smartphones.
4. Highly developed Security Features
Custom protection measures to safeguard your website from vulnerabilities.
Normal updates and routine maintenance to maintain your website protected.
5. Optimized Functionality
Clean up, productive coding for more quickly load times.
Utilization of Articles Delivery Networks (CDNs) and caching for improved velocity.
The Process of Creating a Custom made WordPress Structure
Discovery and Setting up
Have an understanding of your business targets and audience.
Establish a web site map and wireframes to outline the composition.
Structure and Improvement
Develop mockups depending on your manufacturer’s type tutorial.
Establish a custom WordPress concept and build performance utilizing PHP, HTML, CSS, and JavaScript.
Content material Integration
Include and format content such as text, pictures, and video clips.
Optimize for Search engine marketing utilizing metadata, alt tags, and structured information.
Testing and Start
Test across a number of units and browsers for compatibility.
Start the site and observe general performance to be sure every thing runs efficiently.
Great things about Customized WordPress Style and design
Flexibility: Produce an internet site customized on your specific specs.
Enhanced Consumer Encounter: A personalized website assures intuitive navigation and operation.
Long-Phrase Price: Compared with generic templates, a custom structure grows with your online business.
Expert Attractiveness: Stand out with a web site that looks and capabilities a lot better than the Levels of competition.
Conclusion Personalized WordPress layout is really an financial investment in your organization’s on the net good results. By making a internet site tailored towards your special needs, you can enhance your model’s id, improve person working experience, and attain prolonged-term progress. Whether or not you’re starting from scratch or upgrading an current site, a customized WordPress Option ensures your site stands out inside of a crowded electronic world.
Ready to rework your on line presence? Call a WordPress layout professional nowadays to begin creating your aspiration Site!
Get more info. here: Web Design Companies In Naples Florida
#Web Design Companies In Naples Florida#Cannabis web design company#AI-integrated web design services for small businesses in 2025#Modern cannabis e-commerce website solutions with AI chatbots#Custom WordPress design for subscription-based businesses#Youtube
0 notes
Text
#OneNETnewsInvestigates: Social Food Content Creator 'Nanna Cooks' accused of Recipe Theft and Infringement that replicates controversially as homemade fastfood item of McDonalds PH's Crispy Chicken Fillet ala King [EXCLUSIVE]
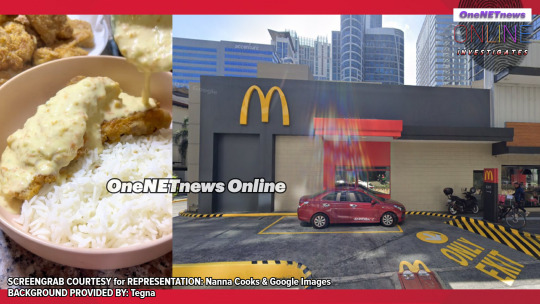
QUEZON, MANILA -- A social Filipino food content creator 'Ms. Jhoan Monroy', locally known as 'Nanna Cooks', is in hot water for allegedly stealing and leaking the recipe of "McDonald's Crispy Chicken Fillet with Ala King sauce" in late-November 2024, following the video released on December 2nd, that said year. The video, which has since gained nearly 9 million views on Facebook (part of Meta Platforms Inc. [MPi]), showed a homemade version of the popular fast food menu item.
The 'Chicken Fillet ala King' has been one of the items on McDonalds Philippines' menu since it was first debuted in the early mid-September 2015. The meal consists of a Crispy Chicken Fillet, covered with a rich, buttery sauce that is laced with bits of carrot and chives, served over rice on the plate.
'Chicken à la King' is a well-known dish and dates back to either the late-19th or early 20th century. While there are multiple origin stories, one popular account attributes its creation to chef 'George Greenwald' of the Brighton Beach Hotel in New York state, who prepared the dish for the hotel's owners, both were presented by Mr. and Mrs. 'E. Clark King II'. This classic dish, predating its introduction and later adopted by the said fast food restaurant to expanding its reach to our home country, the Philippines.
Hailing from Quezon City in 'Metro Manila, National Capital Region', Nanna Cooks has gained a huge following on Facebook where she posts cooking tutorials for the online viewers in the Luzon area. Her fan page boasts of more than 1 million followers. She has made her career as a social food content creator in engaging and entertaining her audience to the Filipinos.
'Nanna Cooks' has gained millions of followers posting simple and affordable recipes that suites your budget, most of which are restaurant remakes to cook at home. Her latest video, however, has created a lot of controversy over the legal and ethical appropriateness of proprietary recipes.
She can be charged under the Revised Penal Code (RPC) since she quietly revealed a trade secret, that is, the recipe without the authority to do so. The fast food chain can questioned her on why she illegally prepared her own version of their Crispy Chicken Fillet ala King. McDonald's Philippines has yet to issue a statement regarding the uploaded social media video in the unlawful matter.
Penalties for such severity of offenses can include fines and imprisonment in Philippine national laws, which could be imposed at the 'Manila Regional Trial Court' (MRTC) if she is found guilty. Unlawfully trade secrets obtained by 'Nanna Cooks' for McDonalds Philippines highlighting the need for more stringent regulations and enforcement of policies to protect proprietary recipes and intellectual property.
This case has inadvertently sparked a much broader conversation on social media regarding intellectual property rights in the food world as specifically related to creating and sharing restaurant recipes among home cooks and food influencers. The verdict may ultimately be landmark for content creators and the food industry at large.
SCREENGRAB COURTESY for REPRESENTATION: Nanna Cooks & Google Images BACKGROUND PROVIDED BY: Tegna
SOURCE: *https://www.facebook.com/100057041005950/videos/2007381586369659/ *https://www.facebook.com/594097829/about *https://www.foodreference.com/html/artchickenalaking.html *https://foodsonthespot.com/2015/09/08/mcdonalds-chicken-fillet-ala-king/ and *http://www.lutitomcdonalds.com/uploads/8/1/2/7/81277052/socialmediapolicy.pdf
-- OneNETnews Online Publication Team
#investigative report#national news#quezon city#manila#mcdonalds#philippines#crispy chicken fillet ala king#nanna cooks#fyp#awareness#exclusive#first and exclusive#OneNETnews
1 note
·
View note
Text
We recently compiled one of the biggest lists of best HTML tutorials. This list can be overwhelming for beginners. Therefore we wanted to handpick the top HTML resources for beginners. HyperText Markup Language or HTML is mainly used in making websites look fabulous. In fact, it is not a stretch to say that it is one of the building blocks of the World Wide Web itself. If you were to describe its most important characteristics, then they can encompass the following: It helps create web pages. It works with various kinds of HTML elements. It works with text, audio, video, images and so on. Along with CSS and JavaScript, it can be used to create any kind of website. Learning HTML is a rather interesting exercise and there are many ways in which you can start your journey to HTML expertise. Here is taking a look at the 5 best HTML tutorials for beginners. Code School As an online educational website, Code School has made learning rather creative and entertaining by taking a novel approach – every course is delivered like a story. Combine this with video, challenges, and gaming and you know you have a good thing going. For a beginner, technical jargon can be the most frustrating to deal with and Code School has taken that out of the equation when it comes to delivering courses on: Ruby Python PHP HTML of course. Getting started with HTML will see you getting familiar with how you can use HTML to not only build websites but also to make them stylish. It also promises to teach you the latest versions of HTML which can go a long way in promoting your career as a web developer. And the best part is that once you have mastered these basic tenets, you can go on to their intermediate and advanced courses as well. Considering that user experience is the main aim of using HTML, you can certainly master this design process rather easily with Code School. iLoveCoding They call themselves a coding boot camp and believe in giving you courses that are: Effective and simple. Value for your money. Self-paced. Short duration – you can learn HTML and CSS in just 14 days. Armed with this kind of knowledge and skill set, you can create a website in line with modern design trends. You can also go from learning the fundamentals of HTML to the most advanced levels as well. It is also useful that iLoveCoding believes in shoring up their lessons with simple to understand videos. So words like Attributes, Values and Tags – think of them as the ABCs of HTML – become familiar territory in no time at all. All you need to do is sit down in front of the laptop, watch the videos and learn as you go. The advantage is that you get to revisit a lesson any time you want. As you go along, you mark a lesson as completed and you get to see your progress on the path to HTML mastery. Basic Markup, textual and layout tags and other elements of HTML – everything gets covered in this course. Mozilla Developer Network or MDN Web technologies galore – that’s what sets MDN apart. This network covers: Web standards of which HTML is one. Firefox add-ons. Web app development. Web extensions. APIs and so on. One of the salient features of learning HTML with MDN is the fact that there are articles and tutorials aplenty. Simply visit their HTML learning area and get a grip on various things. There is also a well-stocked article library that will help you understand all HTML Basics and elements. With easy examples and illustrations of HTML in use, it really does make it easy to understand the anatomy of this markup language and see what is an opening tag, a closing tag, content, element and so on. As you move along, you will get to see more such as nesting elements, attributes, empty elements and so on. MDN also will take you through images and the different elements that come into play when embedding images or developing a website for visually impaired people. Whether it is headings, paragraphs, text or links, you can learn how to integrate every facet into a website.
Codecademy When you read up on this company, the first thing that will strike you is that they call themselves an education company. But they focus on the web as a tool of education. Here again, CSS and HTML go hand in hand and you can learn how to add layers of structure and character to your websites by learning all about HTML. Among other things, their syllabus covers: All the fundamentals of HTML. Interactive lessons. Tutorials on how to create a webpage on your computer and view the same as well. You will also get to know all HTML elements and participate in some very interesting quizzes too. One of the keystones of this online tutorial is the interactive lessons. It can go a long way in teaching people about HTML especially when they have absolutely no idea of it all. And if you want to have more experience with HTML you can always opt for their paid courses as well. W3Schools This site is very controversial and not liked by many people for various reasons in past. However, this is the site that will always pop up on Google search results. Mainly since it solves some very basic problems with simple examples. This site is the brainchild of a software development company. Since the tutorial is aimed at a beginner, W3Schools offers simple illustrations and explanations to get the lessons across. There are many examples to choose from and you get to use an online editor to try out all that you learn. The big advantage of this type of Try It Yourself learning is that you can check out what works and then implement it in the project or website that you want to create. Executing computer code is one of the tough parts of learning HTML and when you get the opportunity to try it beforehand, then it really does make things a lot easier. With a combination of tutorials, lessons, quizzes, and exercises, a beginner can really gain a lot of confidence every step of the way. Testing newfound skills at HTML can also be the perfect way to course correct and opt for the more advanced levels at a later point in time. Article Updates Updated on June 2017 - Fixed minor issues and updated links.
0 notes
Text
Advanced HTML Interview Questions and Answers: Key Insights for Experienced Developers
As an experienced developer, mastering HTML is essential to your success in web development. When interviewing for advanced positions, you will encounter advanced HTML interview questions and answers that test not only your understanding of basic HTML elements but also your ability to implement complex concepts and strategies in real-world scenarios. These questions are designed to assess your problem-solving skills and your ability to work with HTML in sophisticated projects.
For seasoned developers, HTML interview questions for experienced developers often go beyond simple tag usage and focus on more intricate concepts, such as semantic HTML, accessibility, and optimization techniques. You might be asked, "What is the difference between block-level and inline elements, and how does this affect page layout?" or "How would you implement responsive web design using HTML?" These questions require an in-depth understanding of HTML’s role within modern web design and the ability to apply it effectively to improve both user experience and page performance.
Experienced developers should also be prepared to answer questions on advanced HTML techniques, such as the use of custom data attributes or the new HTML5 semantic elements like <section>, <article>, and <header>. Interviewers may ask, "How do you use HTML5 APIs in conjunction with other technologies?" or "Can you explain how to create and manage forms with custom validation?" Understanding these more advanced features is crucial for ensuring that your HTML code remains up-to-date and compatible with current web standards and practices.
In summary, advanced HTML interview questions challenge you to demonstrate your expertise in HTML and its application in complex web projects. By preparing for these types of questions, you can showcase your ability to handle sophisticated web development tasks with ease. A strong grasp of HTML’s more advanced features will set you apart from other candidates and increase your chances of securing a role as a senior or lead developer.
At our e-learning tutorial portal, we offer free, easy-to-follow tutorials that teach programming languages, including HTML, through live examples. Our platform is tailored to students who want to learn at their own pace and gain hands-on experience. Whether you are new to programming or an experienced developer looking to refine your skills, our resources will help you prepare for interviews and master the concepts that are critical to success in the tech industry.
0 notes
Text
Learning Selenium: A Comprehensive and Quick Journey for Beginners and Enthusiasts
Selenium is a powerful yet beginner-friendly tool that allows you to automate web browsers for testing, data scraping, or streamlining repetitive tasks. If you want to advance your career at the Selenium Course in Pune, you need to take a systematic approach and join up for a course that best suits your interests and will greatly expand your learning path. This blog will guide you through a structured, easy-to-follow journey, perfect for beginners and enthusiasts alike.

What Makes Selenium So Popular?
For those looking to excel in Selenium, Selenium Online Course is highly suggested. Look for classes that align with your preferred programming language and learning approach. Selenium is one of the most widely used tools for web automation, and for good reasons:
Open-Source and Free: No licensing costs.
Multi-Language Support: Works with Python, Java, C#, and more.
Browser Compatibility: Supports all major browsers like Chrome, Firefox, and Edge.
Extensive Community: A wealth of resources and forums to help you learn and troubleshoot.
Whether you're a software tester or someone eager to automate browser tasks, Selenium is versatile and accessible.
How Long Does It Take to Learn Selenium?
The time it takes to learn Selenium depends on your starting point:
1. If You’re a Beginner Without Coding Experience
Time Needed: 3–6 weeks
Why? You’ll need to build foundational knowledge in programming (e.g., Python) and basic web development concepts like HTML and CSS.
2. If You Have Basic Coding Skills
Time Needed: 1–2 weeks
Why? You can skip the programming fundamentals and dive straight into Selenium scripting.
3. For Advanced Skills
Time Needed: 6–8 weeks
Why? Mastering advanced topics like handling dynamic content, integrating Selenium with frameworks, or running parallel tests takes more time and practice.
Your Quick and Comprehensive Learning Plan
Here’s a structured roadmap to learning Selenium efficiently:
Step 1: Learn the Basics of a Programming Language
Recommendation: Start with Python because it’s beginner-friendly and well-supported in Selenium.
Key Concepts to Learn:
Variables, loops, and functions.
Handling libraries and modules.
Step 2: Understand Web Development Basics
Familiarize yourself with:
HTML tags and attributes.
CSS selectors and XPath for locating web elements.
Step 3: Install Selenium and Set Up Your Environment
Install Python and the Selenium library.
Download the WebDriver for your preferred browser (e.g., ChromeDriver).
Write and run a basic script to open a browser and navigate to a webpage.
Step 4: Master Web Element Interaction
Learn to identify and interact with web elements using locators like:
ID
Name
CSS Selector
XPath
Practice clicking buttons, filling out forms, and handling dropdown menus.
Step 5: Dive Into Advanced Features
Handle pop-ups, alerts, and multiple browser tabs.
Work with dynamic content and implicit/explicit waits.
Automate repetitive tasks like form submissions or web scraping.
Step 6: Explore Frameworks and Testing Integration
Learn how to use testing frameworks like TestNG (Java) or Pytest (Python) to structure and scale your tests.
Understand how to generate reports and run parallel tests.
Step 7: Build Real-World Projects
Create test scripts for websites you use daily.
Automate login processes, data entry tasks, or form submissions.
Experiment with end-to-end test cases to mimic user actions.
Tips for a Smooth Learning Journey
Start Small: Focus on simple tasks before diving into advanced topics.
Use Resources Wisely: Leverage free tutorials, forums, and YouTube videos. Platforms like Udemy and Coursera offer structured courses.
Practice Consistently: Regular hands-on practice is key to mastering Selenium.
Join the Community: Participate in forums like Stack Overflow or Reddit for help and inspiration.
Experiment with Real Websites: Automate tasks on real websites to gain practical experience.
What Can You Achieve with Selenium?
By the end of your Selenium learning journey, you’ll be able to:
Write and execute browser automation scripts.
Test web applications efficiently with minimal manual effort.
Integrate Selenium with testing tools to build comprehensive test suites.
Automate repetitive browser tasks to save time and effort.

Learning Selenium is not just achievable—it’s exciting and rewarding. Whether you’re a beginner or an enthusiast, this structured approach will help you grasp the basics quickly and progress to more advanced levels. In a matter of weeks, you’ll be automating browser tasks, testing websites, and building projects that showcase your newfound skills.
So, why wait? Start your Selenium journey today and open the door to endless possibilities in web automation and testing!
0 notes