#html doctype explained
Explore tagged Tumblr posts
Visit Tumblr Blog
Explore Tumblr blogs with no restrictions, modern design and the best experience.
Last Seen Tumblr Blogs


Fun Fact
When “GIF” was named word of the year in 2012, Oxford Dictionaries U.S.A. credited Tumblr for pushing the word.
Text
Edgaring time!
Tutorial on how to make your own responsive Edgar :D I will try to explain it in really basic terms, like you’ve never touched a puter (which if you’re making this… I’m sure you’ve touched plenty of computers amirite??? EL APLAUSO SEÑOOOREEES).
If you have some experience I tried to highlight the most important things so you won’t have to read everything, this is literally building a website but easier.
I will only show how to make him move like this:

Disclaimer: I’m a yapper.
Choosing an engine First of all you’ll need something that will allow you to display a responsive background, I used LivelyWallpaper since it’s free and open-source (we love open-source).
Choosing an IDE Next is having any IDE to make some silly code! (Unless you can rawdog code… Which would be honestly impressive and you need to slide in my DMs and we will make out) I use Visual Studio!!!
So now that we have those two things we just need to set up the structure we will use.
Project structure
We will now create our project, which I will call “Edgar”, we will include some things inside as follows:
Edgar
img (folder that will contain images) - thumbnail.png (I literally just have a png of his face :]) - [some svgs…]
face.js (script that will make him interactive)
index.html (script that structures his face!)
LivelyInfo,json (script that LivelyWallpaper uses to display your new wallpaper)
style.css (script we will use to paint him!)
All of those scripts are just literally like a “.txt” file but instead of “.txt” we use “.js”, “.html”, etc… You know? We just write stuff and tell the puter it’s in “.{language}”, nothing fancy.
index.html
Basically the way you build his silly little face! Here’s the code:
<!doctype html> <html> <head> <meta charset="utf-8"> <title>Face!</title> <link rel = "stylesheet" type = "text/css" href = "style.css"> </head> <body> <div class="area"> <div class="face"> <div class="eyes"> <div class="eyeR"></div> <div class="eyeL"></div> </div> <div class="mouth"></div> </div> </div> <script src="face.js"></script> </body> </html>
Ok so now some of you will be thinking “Why would you use eyeR and eyeL? Just use eye!“ and you’d be right but I’m a dummy who couldn’t handle making two different instances of the same object and altering it… It’s scary but if you can do it, please please please teach me ;0;!!!
Area comes in handy to the caress function we will implement in the next module (script)! It encapsulates face.
Face just contains the elements inside, trust me it made sense but i can’t remember why…
Eyes contains each different eye, probably here because I wanted to reuse code and it did not work out and when I kept going I was too scared to restructure it.
EyeR/EyeL are the eyes! We will paint them in the “.css”.
Mouth, like the eyeR/eyeL, will be used in the “.css”.
face.js
Here I will only show how to make it so he feels you mouse on top of him! Too ashamed of how I coded the kisses… Believe me, it’s not pretty at all and so sooo repetitive…
// ######################### // ## CONSTANTS ## // ######################### const area = document.querySelector('.area'); const face = document.querySelector('.face'); const mouth = document.querySelector('.mouth'); const eyeL = document.querySelector('.eyeL'); const eyeR = document.querySelector('.eyeR'); // ######################### // ## CARESS HIM ## // ######################### // When the mouse enters the area the face will follow the mouse area.addEventListener('mousemove', (event) => { const rect = area.getBoundingClientRect(); const x = event.clientX - rect.left; const y = event.clientY - rect.top; face.style.left = `${x}px`; face.style.top = `${y}px`; }); // When the mouse leaves the area the face will return to the original position area.addEventListener('mouseout', () => { face.style.left = '50%'; face.style.top = '50%'; });
God bless my past self for explaining it so well, but tbf it’s really simple,,
style.css
body { padding: 0; margin: 0; background: #c9c368; overflow: hidden; } .area { width: 55vh; height: 55vh; position: absolute; top: 50%; left: 50%; transform: translate(-50%,-50%); background: transparent; display: flex; } .face { width: 55vh; height: 55vh; position: absolute; top: 50%; left: 50%; transform: translate(-50%,-50%); background: transparent; display: flex; justify-content: center; align-items: center; transition: 0.5s ease-out; } .mouth { width: 75vh; height: 70vh; position: absolute; bottom: 5vh; background: transparent; border-radius: 100%; border: 1vh solid #000; border-color: transparent transparent black transparent; pointer-events: none; animation: mouth-sad 3s 420s forwards step-end; } .face:hover .mouth { animation: mouth-happy 0.5s forwards; } .eyes { position: relative; bottom: 27%; display: flex; } .eyes .eyeR { position: relative; width: 13vh; height: 13vh; display: block; background: black; margin-right: 11vh; border-radius: 50%; transition: 1s ease } .face:hover .eyeR { transform: translateY(10vh); border-radius: 20px 100% 20px 100%; } .eyes .eyeL { position: relative; width: 13vh; height: 13vh; display: block; background: black; margin-left: 11vh; border-radius: 50%; transition: 1s ease; } .face:hover .eyeL { transform: translateY(10vh); border-radius: 100% 20px 100% 20px; } @keyframes mouth-happy { 0% { background-color: transparent; height: 70vh; width: 75vh; } 100% { border-radius: 0 0 25% 25%; transform: translateY(-10vh); } } @keyframes mouth-sad { 12.5%{ height: 35vh; width: 67vh; } 25% { height: 10vh; width: 60vh; } 37.5% { width: 53vh; border-radius: 0%; border-bottom-color: black; } 50% { width: 60vh; height: 10vh; transform: translateY(11vh); border-radius: 100%; border-color: black transparent transparent transparent; } 62.5% { width: 64vh; height: 20vh; transform: translateY(21vh); } 75% { width: 69vh; height: 40vh; transform: translateY(41vh); } 87.5% { width: 75vh; height: 70vh; transform: translateY(71vh); } 100% { width: 77vh; height: 90vh; border-color: black transparent transparent transparent; transform: translateY(91vh); } }
I didn’t show it but this also makes it so if you don’t pay attention to him he will get sad (mouth-sad, tried to make it as accurate to the movie as possible, that’s why it’s choppy!)
The .hover is what makes him go like a creature when you hover over him, if you want to change it just… Change it! If you’d rather him always have the same expression, delete it!
Anyway, lots of easy stuff, lots of code that I didn’t reuse and I probably should’ve (the eyes!!! Can someone please tell me a way I can just… Mirror the other or something…? There must be a way!!!) So now this is when we do a thinking exercise in which you think about me as like someone who is kind of dumb and take some pity on me.
LivelyInfo.json
{ "AppVersion": "1.0.0.0", "Title": "Edgar", "Thumbnail": "img/thumbnail.png", "Preview": "thumbnail.png", "Desc": "It's me!.", "Author": "Champagne?", "License": "", "Type": 1, "FileName": "index.html" }
Easy stuff!!!
Conclusion
This could've been a project on git but i'm not ready and we're already finished. I'm curious about how this will be seen on mobile and PC,,, i'm not one to post here.
Sorry if I rambled too much or if i didn't explain something good enough! If you have any doubts please don't hesitate to ask.
And if you add any functionality to my code or see improvements please please please tell me, or make your own post!
98 notes
·
View notes
Text
Why Laravel is the Go-To Framework for Modern Web Applications

Introduction:
Laravel has become a top choice for developers building modern web applications, and for good reason. It combines a powerful feature set with an elegant syntax, making it ideal for projects of any size. Below, we explore why Laravel is the go-to framework, backed by examples and practical insights.
1. Elegant Syntax and Developer Experience
A. Readable Code
Laravel Syntax:
Laravel’s syntax is praised for its intuitiveness and expressiveness. This means that the code is easy to understand and follow, even for those new to the framework.
The code example provided demonstrates how routes are defined in Laravel. A route in Laravel defines the URL paths to which a web application will respond. The syntax used here is clear and concise: Route::get('/home', [HomeController::class, 'index']);
In this example, the Route::get method defines a GET route for the /home URL. When a user visits this URL, the index method of the HomeController class is executed.
The simplicity of this code reduces the learning curve for new developers. It’s easy to read and understand, which is crucial when multiple developers are working on the same project. This readability also aids in maintaining the codebase over time, as it’s easier to spot errors and make updates.
B. Blade Templating Engine
Dynamic and Reusable Views:
The Laravel Blade templating engine is a powerful tool that allows developers to create dynamic and reusable views. A “view” in Laravel refers to the HTML pages that users see when they visit your website. Blade helps in managing these views efficiently.
Example Explained:
The example provided shows how Blade can be used to create a base layout and then extend it to other parts of the application.
Base Layout (app.blade.php):<!-- resources/views/layouts/app.blade.php --> <!DOCTYPE html> <html> <head> <title>App Name - @yield('title')</title> </head> <body> @yield('content') </body> </html>
In this file, a base HTML structure is defined. The @yield(‘title’) and @yield(‘content’) directives are placeholders where content will be injected by other views that extend this layout.
@yield(‘title’) will be replaced by the page title, and @yield(‘content’) will be replaced by the main content of the page.
Extended Layout (home.blade.php):<!-- resources/views/home.blade.php --> @extends('layouts.app') @section('title', 'Home') @section('content') <h1>Welcome to Home Page</h1> @endsection
This file extends the base layout using the @extends directive.
The @section(‘title’, ‘Home’) directive sets the page title to “Home,” which replaces the @yield(‘title’) in the base layout.
The @section(‘content’) directive fills the @yield(‘content’) section in the base layout with the HTML content provided here (Welcome to Home Page).
Benefits:
Reusability: The Blade templating engine promotes the reuse of code. You can define a base layout and reuse it across multiple pages, which is efficient and reduces redundancy.
Maintainability: By separating the layout from the content, Blade makes it easier to manage and update the structure of your application. If you need to make a global change (like updating the site’s header), you can do it in one place rather than updating multiple files.
Performance: Blade compiles templates into plain PHP, which means there is no performance overhead when rendering views.
2. MVC Architecture
A. MVC (Model-View-Controller)
A design pattern used in software development. It divides an application into three interconnected components:
Model: Represents the data and the business logic of the application. It interacts with the database and manages the data-related logic.
View: Represents the user interface. It displays the data provided by the Model to the user and sends user commands to the Controller.
Controller: Acts as an intermediary between Model and View. It processes incoming requests, manipulates data using the Model, and sends the data to the View for presentation.
B. Separation of Concerns
Separation of Concerns means that each component of the MVC pattern has a distinct responsibility. This separation ensures that changes in one component (e.g., the user interface) do not require changes in another (e.g., the data logic), making the application easier to maintain and extend
C. Simplifying Development, Testing, and Maintenance
By separating the responsibilities:
Development becomes more organized: Developers can work on the View, Controller, and Model independently, without stepping on each other’s toes.
Testing is easier: Each component can be tested in isolation. For example, you can test the Controller logic without worrying about the database or the user interface.
Maintenance is simplified: If you need to update the business logic or change how data is presented, you can do so without affecting other parts of the application.
D. Example: BlogController Handling a Blog Post
Controller Example: // BlogController.php class BlogController extends Controller { public function show($id) { $post = Post::find($id); // Fetches a blog post from the database using the Model return view('blog.show', ['post' => $post]); // Passes the data to the View } }
Explanation of the Example:
Controller (BlogController): The show method is responsible for handling a request to display a specific blog post.
Model (Post::find($id)): The find method interacts with the database to retrieve the blog post with the specified ID. The Post model represents the table in the database where blog posts are stored.
View (view(‘blog. show’, [‘post’ => $post])): After retrieving the data, the Controller passes it to the View, specifically to the blog. show view file. This view file is responsible for displaying the post to the user.
Key Points:
Separation of Logic: The Controller handles the request and business logic (fetching the post), while the View handles the presentation of that data. The Model deals with data retrieval and manipulation.
Maintainability: If you later need to change how a blog post is retrieved (e.g., adding caching or fetching related posts), you can update the Model or Controller without affecting the View.
Testability: You can independently test the Controller’s logic (e.g., ensuring the correct data is passed to the View) and the Model’s data retrieval logic without needing to render the View.
E. Overall Benefits
Organized Codebase: The MVC pattern keeps your codebase organized by separating responsibilities.
Scalability: As your application grows, the clear division of tasks across Models, Views, and Controllers makes it easier to manage and scale.
Reusability: Logic in the Controller or Model can be reused in other parts of the application without duplication.
This detailed explanation clarifies how Laravel’s MVC architecture aids in building well-structured, maintainable, and testable applications by cleanly separating the different aspects of an application’s functionality.
3. Built-in Authentication and Authorization
A. Secure User Management with Laravel’s Authentication System
Command for Setup (php artisan make: auth):
Laravel simplifies the process of setting up authentication with a single Artisan command: php artisan make: auth.
When this command is run, Laravel automatically generates the necessary files and routes for user authentication. This includes login, registration, password reset, and email verification views, as well as the corresponding controllers and routes.
The command also sets up middleware for protecting routes, so you can easily control access to parts of your application. For example, you can ensure that only authenticated users can access certain pages.
Customization:
Although the default setup provided by php artisan make: auth is comprehensive, Laravel allows for extensive customization.
You can modify the generated views to match the design of your application or add additional fields to the registration form.
Laravel also supports adding roles and permissions, enabling you to control user access to different sections of your application. For instance, you might want to allow only administrators to access certain dashboards or manage other users.
B. Customizable Authorization with Gates and Policies
Gates:
Gates are a way of authorizing actions that users can perform on specific resources.
In Laravel, gates are defined within the AuthServiceProvider class. They determine whether a given user can perform a specific action on a resource.
Example:
The provided example defines a gate called update-post. This gate checks if the user who is attempting to update a post is the owner of that post:Gate::define('update-post', function ($user, $post) { return $user->id === $post->user_id; });
This logic ensures that only the user who created the post (based on the user ID) can update it. This is a simple yet powerful way to enforce access control in your application.
Using Gates in Controllers:
Once a gate is defined, it can be used in controllers to authorize actions:if (Gate::allows('update-post', $post)) { // The current user can update the post }
The Gate::allows method checks if the current user is authorized to perform the update-post action on the given post. If the user is allowed, the code inside the block will execute, allowing the update to proceed.
If the user is not authorized, you can handle this by showing an error message or redirecting the user to another page.
Summary
Authentication Setup: Laravel’s php artisan make: auth command provides a quick and complete setup for user authentication, including all the necessary routes, controllers, and views.
Customizability: The generated authentication system can be customized to fit your application’s specific needs, such as adding roles and permissions.
Authorization with Gates: Gates provides a simple way to define and enforce authorization logic, ensuring that users can only perform actions they are authorized to do. This is particularly useful for protecting resources like posts, ensuring that only the rightful owner can make changes.
Laravel’s built-in authentication and authorization systems are powerful, flexible, and easy to use, making it an ideal choice for applications where user management and security are crucial.
4. Eloquent ORM (Object-Relational Mapping)
Simplified Database Interactions:
Eloquent ORM makes database interactions simple and intuitive. For instance, retrieving and updating a record is straightforward:$user = User::find(1); $user->email = '[email protected]'; $user->save();
This clean syntax makes it easy to manage data without writing complex SQL queries.
Relationships Handling:
Eloquent’s relationship methods allow you to define relationships between different database tables. For example, defining a one-to-many relationship between users and posts:// User.php model public function posts() { return $this->hasMany(Post::class); } // Accessing the posts of a user $userPosts = User::find(1)->posts;
This makes working with related data a breeze.
5. Artisan Command-Line Tool
Automated Tasks:
Laravel’s Artisan CLI helps automate repetitive tasks, such as creating controllers, and models, and running migrations. For example, to create a new controllerphp artisan make:controller BlogController
This command creates a new controller file with boilerplate code, saving time and reducing errors.
Custom Commands:
You can also create custom Artisan commands to automate unique tasks in your project. For example, you might create a command to clean up outdated records:// In the console kernel protected function schedule(Schedule $schedule) { $schedule->command('cleanup:outdated')->daily(); }
6. Robust Security Features
Protection Against Common Vulnerabilities:
Laravel includes security features to protect against common web vulnerabilities like SQL injection, XSS, and CSRF. For instance, CSRF protection is automatically enabled for all POST requests by including a token in forms:<form method="POST" action="/profile"> @csrf <!-- Form fields --> </form>
This ensures that malicious actors cannot perform actions on behalf of users without their consent.
Password Hashing:
Laravel uses the bcrypt algorithm to hash passwords before storing them, adding an extra layer of security:$user->password = bcrypt('newpassword'); $user->save();
7. Comprehensive Ecosystem
Laravel Forge and Envoyer: Laravel Forge simplifies server management and deployment, allowing you to launch applications quickly. For example, you can set up a new server and deploy your application with a few clicks.
Laravel Horizon: If your application uses queues, Horizon offers a beautiful dashboard for monitoring and managing jobs. This is particularly useful in large applications where background job processing is critical.
Laravel Nova: Nova is an administration panel that allows you to manage your database with an intuitive interface. For instance, you can create, read, update, and delete records directly from the Nova dashboard, making it easier to manage your application’s data.
8. Extensive Community Support and Documentation
Vibrant Community: Laravel’s large and active community means that you can find solutions to almost any problem. Support is always available whether it’s on forums, Stack Overflow, or through official channels.
Comprehensive Documentation: Laravel’s documentation is known for its clarity and thoroughness. Every feature is well-documented, often with examples, making it easier for developers to learn and implement.
9. Unit Testing
Test-Driven Development (TDD):
Laravel is built with testing in mind. You can write unit tests using PHPUnit, and Laravel makes it easy to test your code. For example, testing a route can be done with a simple test case:public function testHomePage() { $response = $this->get('/'); $response->assertStatus(200); }
Automated Testing:
Laravel’s testing tools also allow for the automation of testing processes, ensuring that your application remains robust as it grows.
10. Scalability and Performance
Efficient Caching:
Laravel supports various caching systems like Memcached and Redis. For instance, caching a database query result is as simple as:$posts = Cache::remember('posts', 60, function () { return Post::all(); });
This improves performance by reducing the number of queries in the database.
Queue Management:
Laravel’s queue system efficiently processes time-consuming tasks, such as sending emails or processing uploads. This ensures that your application remains responsive under heavy load.
Conclusion
Laravel has established itself as a top-tier framework for modern web applications due to its elegant syntax, robust features, and supportive community. Whether you’re building a small project or a large-scale enterprise application, Laravel provides the tools and flexibility needed to deliver high-quality, secure, and scalable solutions. By choosing Laravel, you’re opting for a framework that grows with your needs, backed by a vibrant ecosystem and continuous improvements.
#web development#ui ux design#digita marketing#businessgrowth#web design#laravel#software development#web development services#e commerce#onlinebusiness#website design#web developers#seo services#website development
1 note
·
View note
Text
HTML Meta Information
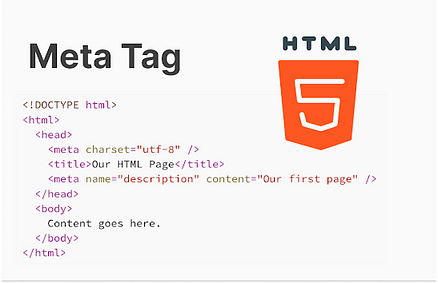
HTML meta information is used to provide metadata about a web page. Metadata is data about data, and it is used by browsers, search engines, and other web services to understand the content and purpose of the page. Meta information is typically included within the <head> section of an HTML document.
Common Types of Meta Tags
Character Set Declaration
Specifies the character encoding for the HTML document.
Example:
<meta charset="UTF-8">
The most common encoding is UTF-8, which supports most characters from all the world’s writing systems.
Viewport Settings
Controls the layout of the page on mobile browsers.
Example:
<meta name="viewport" content="width=device-width, initial-scale=1.0">
This tag is crucial for responsive web design, ensuring that the page is scaled correctly on different devices.
Page Description
Provides a brief description of the page content, often used by search engines.
Example:
<meta name="description" content="A brief description of the page.">
This description may appear in search engine results, influencing click-through rates.
Keywords
Lists relevant keywords for the page content, used by some search engines.
Example:
<meta name="keywords" content="HTML, CSS, JavaScript, web development">
Keywords are less important for modern SEO but can still provide context.
Author
Specifies the author of the document.
Example:
<meta name="author" content="Saide Hossain">
Robots
Instructs search engine crawlers on how to index the page.
Example:
<meta name="robots" content="index, follow">
Common values:
index, follow: Allows the page to be indexed and followed by search engines.
noindex, nofollow: Prevents the page from being indexed and links from being followed.
Open Graph Tags (for Social Media)
Used to control how content is displayed when shared on social media platforms like Facebook, Twitter, etc.
Examples:
<meta property="og:title" content="Your Page Title"> <meta property="og:description" content="A description of the page content."> <meta property="og:image" content="http://example.com/image.jpg">
These tags improve the appearance of shared links and can increase engagement.
Content-Type
Specifies the media type and character encoding of the document.
Example:
<meta http-equiv="Content-Type" content="text/html; charset=UTF-8">
This tag was more common in older HTML documents but is now often replaced by the <meta charset="UTF-8"> tag.
Refresh
Automatically refreshes the page after a specified time interval.
Example:
<meta http-equiv="refresh" content="30">
This example will refresh the page every 30 seconds.
Custom Meta Tags
You can also create custom meta tags for specific purposes, such as application-specific metadata.
Example:
<meta name="theme-color" content="#ffffff">
This example specifies the theme color of a web app, often used in mobile browsers.
Example of a Complete Head Section with Meta Tags
<!DOCTYPE html> <html lang="en"> <head> <meta charset="UTF-8"> <meta name="viewport" content="width=device-width, initial-scale=1.0"> <meta name="description" content="This is a sample webpage demonstrating the use of HTML meta tags."> <meta name="keywords" content="HTML, Meta Tags, SEO, Web Development"> <meta name="author" content="Saide Hossain"> <meta name="robots" content="index, follow"> <meta property="og:title" content="Learn HTML Meta Tags"> <meta property="og:description" content="A comprehensive guide to HTML meta tags."> <meta property="og:image" content="http://example.com/meta-image.jpg"> <title>HTML Meta Tags Example</title> </head> <body> <h1>Understanding HTML Meta Information</h1> <p>This page explains the different types of meta tags used in HTML.</p> </body> </html>
In this example, the meta tags provide important information about the content, how it should be displayed, and how search engines should treat it.
Read Me…
0 notes
Text
Explain the layout of HTML
HTML (Hypertext Markup Language) serves as the foundation of web development, providing the structure and organization for web pages. Understanding the layout of HTML is essential for crafting well-structured and semantically meaningful web content. In this blog, we will delve into the key elements of HTML's layout and explore how they contribute to the overall structure of web pages.
Document Type Declaration (DTD):
Every HTML document begins with a Document Type Declaration, also known as the DOCTYPE. This declaration informs the browser about the version of HTML being used and ensures proper rendering and interpretation of the code.
HTML Element:
The HTML element serves as the root element of an HTML document. It encapsulates the entire structure and content of the web page. Inside the HTML element, there are two primary sections: the head and the body.
Also Read: What is a Style Sheet in HTML?
Head Section:
The head section contains meta-information about the web page, such as the title, character encoding, linked stylesheets, scripts, and other metadata. It provides instructions to the browser and search engines, but the content within the head section is not directly visible to the users.
Body Section:
The body section represents the visible content of the web page that users see and interact with. It contains a wide range of elements that contribute to the layout and structure of the page.
Structural Elements:
HTML offers a variety of structural elements that define the layout and organization of content. These include headings (h1 to h6), paragraphs (p), lists (ul, ol, li), divisions (div), sections (section), and more. These elements help structure the content into logical blocks and assist in creating a hierarchical layout.
Semantic Elements:
HTML5 introduced semantic elements that provide additional meaning and clarity to the structure of web pages. Examples of semantic elements include header, footer, nav, article, aside, and main. By using these elements appropriately, developers can enhance the accessibility and search engine optimization (SEO) of their web pages.
Inline and Block Elements:
HTML elements can be categorized as inline or block elements. Inline elements, such as span, em, or strong, do not start on a new line and occupy only the space required by their content. Block elements, like div, p, or h1, start on a new line and take up the full width available. Understanding the distinction between these elements helps in controlling the layout and formatting of web content.
Nesting and Hierarchy:
HTML elements can be nested within one another to create a hierarchical structure. This nesting establishes parent-child relationships and allows for the organization of content within various sections and divisions. Proper indentation and clarity in nesting improve code readability and maintainability.
Conclusion:
In conclusion, understanding the layout of HTML is crucial for crafting well-structured web pages. The elements and sections within an HTML document contribute to the overall structure and organization of content.
To facilitate the learning and testing process, online html compiler provide a convenient solution. These tools allow developers to write, validate, and preview HTML code directly in a web browser, eliminating the need for complex local development environments.
Leveraging an online compiler for html streamlines the coding process, improves efficiency, and ensures the accuracy of HTML markup. Embrace the convenience of html compiler online to enhance your HTML skills and create visually appealing and well-structured web pages.
0 notes
Text
HTML Doctype
The HTML <!DOCTYPE> tag is used to specify which HTML version of the document is using. It is called a document type declaration (DTD). The <!DOCTYPE> is not a tag or element it just lets the browser know about the HTML version or any other markup language used in the document. It does not have ending tag. Note:The Doctype is case-insensitive. Example <!DOCTYPE html> <html> <head> <title>Your…
View On WordPress
#doctype#doctype declaration#doctype html#doctype html tag#doctype html tutorial#doctype html5#doctype in html#doctype in html tag#doctype in html5#doctype tag#doctype tag in html#html doctype#html doctype declaration#html doctype explained#html doctype tag#html2 doctype#html3 doctype#html5#html5 doctype#html5 doctype tag#what is doctype#what is doctype in html?#what is doctype tag#why use doctype in html in hindi
0 notes
Note
do you have any words of advice for coding a website? (i am so sorry if this is too vague for you to offer anything concrete by the way)
OH don't worry about it! It's a really broad question, so I'll try to give a broad answer =)
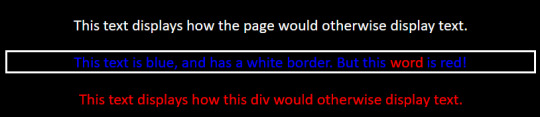
My best word of advice to give you is that HTML is ridiculously easy to learn. Like, impossibly easy. So easy that once you learn it you'll be shocked that anyone doesn't know it. You can't say that a lot about many coding languages, and that's because HTML itself isn't exactly 'coding' as you might imagine it—it's a markup language, which means it simply defines elements on a page for a browser to read and display. Like, once you have a place to host it, this is literally all you need to have a fully functioning webpage:
<!DOCTYPE html> <html> <body> <p>Hello, World!</p> </body> </html>
The <!DOCTYPE html> tag first defines that this is an HTML document, the <html> tag serves as a container for the rest of the tags, the <body> tag states the contents of the page, and the <p> tag within states that the "Hello, World!" text will be displayed as a paragraph. If all you want is to make a webpage, you don't need anything but basic knowledge that you can easily look up—and an idea, of course. I mean, hell, you don't even need an idea necessarily. Throw together random stuff on a page and do absolutely nothing else if you like. It's your page: you can do whatever you want.
Of course, it gets more complicated when you want to make it more complicated. That's where CSS styling comes in, and it's just as simple. CSS is a style sheet language, meaning it's used to 'style' markup languages. CSS changes how HTML elements appear; whatever HTML can't style by itself, CSS can. You can either put it in a separate stylesheet document, or throw it right onto an HTML document inside a <style> tag. Here's an example of some CSS:
body { background-color: black; } p { color: white; font-family: calibri; }
Now your entire page (<body>) is black, and your paragraph text (<p>) is white and in the Calibri font. If you want to alter the text in only a certain section, it gets a little more complicated—and by that, I mean you have to add like one additional set of tags to the original HTML document: the <div> tag, which 'divides' sections of a page that contain styled elements. So, if you want that, you'd write something like this:
... <body> <div> <p class="redtext">This text is red.</p> <p class="bluetext">This text is blue, and has a white border.</p> <p>This text displays how the page would otherwise display text.</p> </div> </body> ...
... and your CSS could look something like this:
... div { color: white; font-family: calibri; text-align: center; } .redtext { color: red; } .bluetext { color: blue; border: 2px solid white; }
With CSS, you can define preexisting HTML tags, or create your own "elements" (classes) that you can append to those same preexisting HTML tags. You can do this with any tag; classes aren't exclusive to one specific tag! You could have <div class="redtext"> and a <p class="bluetext"> inside that, and even a <span class="redtext"> inside that, if you want to make a specific word or couple of words red. Here's an example of this, as a screenshot:
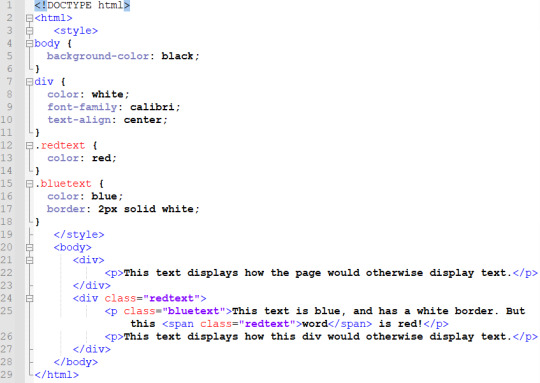
So know that you're a bit familiar with how HTML and CSS are structured, all you need to do now is figure out what you want to do with it, and then figure out how to do that.
This post is a hugely simplified example of a webpage, but I tried to simplify in such a way that if I saw it when I knew nothing about HTML, I could look at it and say "Wow, that looks easy." I explained things in the way that made HTML & CSS sorta 'click' for me, if that makes sense. I think that when you grasp the base 'structure' of HTML and CSS, everything starts making sense all at once. It's like... If your brain is a compiler, it needs a few necessary components to 'process' a certain language of code. Once you have this essential framework 'installed', you will be able to read any code in this language that you come across, or at least make some sense of it. It's nowhere near comprehensive, of course... But it's a start!
So here's my second word of advice: look up EVERYTHING. Want to add an image? Look up "html images". Want to style your page with a background image? Look up "css background image". Want to add a sparkly cursor? That might require you to use some JavaScript, but that's no problem. Look it up. If you don't know how to do something, take a second to learn how. The information is already there for you to find, so all you need to do is look it up. There are so many resources for you to use, all made by people who would love if you used them. Here are a few that I like:
w3schools.com is basically the main guide recommended to beginners—it has comprehensive resources on HTML and CSS, and really good guides to learn each! (Learning HTML) (Learning CSS)
neocities.org is a good second stop. If you want to host a website, you can do it here for free! Its free plan is extremely generous; you likely won't get anywhere near approaching its limits. It has an HTML editor that'll yell at you if you make any particularly egregious errors, so it's good for getting started. It has its own simple HTML guide that you can check out, plus a collection of other resources, too!
If you don't want to have a public website, you can even just write code in notepad and save it as a .html file. Seriously—copy any of the code in this post, save it as a .html, and open it up! It'll work just like an online webpage.
There are countless other resources to find with a quick search, too. If you can't find an answer in a general guide, there are websites like Stack Overflow that have user-submitted questions you can search through, and they almost always have useful answers. Don't be afraid to copy and paste code and mess with it; you could make a great website from a collection of copy-pasted code altered to your liking. You never even need to write anything from scratch if you don't want to, honestly. And remember that you can press F12, Ctrl+U, or right-click and press "View Page Source" to inspect the HTML on any website. If you want to know how something is done, go take a peek inside! No one will mind if you just rummage around a bit.
I really hope this answer is a bit useful in some way, or at least inspires you to get started. Once you get started—even if it's a really simple start—you unlock so much new potential for yourself. You don't have to explore all that potential if you don't want to, but having it there is already an amazing thing. Once you learn the basics they never really go away, so even if you don't have anything to do with it at first, you might find inspiration somewhere down the line. If you do, you'll be really glad you took the time to learn; if you don't, well, when is it ever bad to learn something new? The answer is never. The world is at your fingertips and the keyboard underneath them. Go put 10,000 glittery GIFs on your webpage, goddammit. HAVE FUN!!
#ALSO: if you have any further questions feel free to ask me!! i love to help people with this stuff#i honestly think everyone with a computer should learn html if they haven't already.#a lot of people have some knowledge of it without even being aware of it honestly!#it's such a key part of the internet itself that you probably have SOME passing knowledge. that makes it really easy to get started#what got me started was mainly my curiosity from poking around in view-source. an accidental f12 press can change your life LMAO#of course neoHTML was also part of my start. neopets taught SO many kids about html#but even if you don't have any of that preliminary knowledge it's super easy to gain it. so give it a try anyway!!#html is fun and making your own website is even MORE fun. and the internet is AWESOME!! WOOOO
409 notes
·
View notes
Text
WhatsApp Clone Using HTML and CSS
What does cloning a website means?
To make a copy
Cloning a website means copying or modifying the design or script of an existing website to create a new website. Website cloning allows a designer to create a website without writing scripts from scratch.
Any website can be cloned. You are also free to integrate some additional new features while cloning your website.
Cloning a website is one of the proven methods you can use to learn web development faster. It provides basic to advanced ideas about how websites work and work, and how to integrate them.
Let’s learn how to clone a website just using HTML5 and CSS in a simple way.
Will take an example of WhatsApp Website and will clone it.
WhatsApp is a free cross-platform messaging service. iPhone and Android smartphone, Mac and Windows PC users can call or exchange text, photo, voice and video messages with anyone in the world for free, regardless of the recipient's device. WhatsApp uses Wi-Fi connections to communicate across platforms. This differs from Apple iMessage and Messages by Google, which require a cellular network and Short Message Service (SMS).
Key WhatsApp Terminology
Cross Platform
Messaging apps
End-to-end encryption
Video & Audio Calls
WhatsApp Business
HTML (Hyper Text Markup Language) –
HTML stands for Hyper Text Markup Language that is standard markup language to create web pages and web-based applications
It represents the structure of a web page
It comprises of series of elements which tells the browser how to display the content
Basic Structure of a HTML Document –
<!DOCTYPE html>
<html>
<head>
<title>WhatsApp Clone</title>
</head>
<body>
<h1>let's learn Web Development</h1>
<p>My first project - WhatsApp Cloning</p>
</body>
</html>
Let’s Explain the above code –
- It is used to defines that the document is HTML5 document
- It is the root elements on an HTML Page
- It contains all the meta information about the HTML Page
- This element contains all the visible content of the page, such as paragraph, headlines, tables, list, etc.
- It defines the largest heading for any topic, it ranges from -
- It defines a paragraph in the HTML page
Elements –
It is the collection of start and end tag, and in between content is inserted between them.
It major components are–
Opening Tag – Used to tell the browser where the content starts.
Closing Tag – Used to tell the browser where the content material ends.
Content – Whatever written inside the opening and closing tag is content.
Some Most Commonly used tags are –
– Used to define a document or section, as it contains information related to titles and heading of related content.
– The navigation tag is used to declare navigation sections in HTML documents. Websites typically have a section dedicated to navigation links that allows users to move around the site
– Anchor tag is used for creating hyperlink on the webpage. It is used to link one web page from another.
– It is used to define a paragraph. Content written inside tag always starts from a new line.
– It is used to define heading of a web page. There are 6 different heading h1, h2, h3, h4, h5 and h6. H1 is the main heading and the biggest followed by h2, h3, h4, h5 and h6.
- It is used to group multiple elements together. It helps in applying CSS.
- Image tag is used to embed an image in a web page.
CSS (Cascading Style Sheet) –
CSS stands for Cascading Style Sheets, that describes HTML elements that appear on screen, paper, or other media.
It used for designing web pages, in order to make web pages presentable.
It is standardized across Web Browsers and is one of the core languages of the open web system/technology.
CSS Selector –
CSS Selectors are used to select or target the element that you want to style. Selectors are part of the CSS ruleset. CSS selectors select HTML elements by ID, class, type, attributes, etc.
Types of CSS Selectors –
Element Selector – It selects the HTML elements directly using name
ID Selector – It selects the id attribute of an element. ID is always unique, in the code. So, it is used to target and apply design to a specific or a unique element.
Class Selector - It selects the class attribute of an element. Unlike ID selector class selectors can be same of many elements.
Universal Selector – It selects all the elements of the webpage, and apply changes to it.
Group Selector – It is used when same style is to be applied on many elements. It helps in non-duplication of code.
Different ways of applying CSS -
CSS can be applied in different ways –
Inline CSS –
Styling is done using different attributed inside an element itself. It can be used to apply unique style for a single element.
<h1 style="color:blue;">Let's learn Web Development</h1>
Internal CSS –
It is defined or written within the <style> element, nested instead <head> section of HTML document.
It is mainly used when need to apply CSS on a particular page.
<style type="text/css">
h1 {
color:blue;
}
</style>
External CSS –
It is used to apply CSS on multiple pages. As all the styling is written in a different file with an extension “.css” Example style.css.
<link rel="stylesheet" type="text/css" href="style.css">
It is written instead head tag.
For more detailed guide – Click here
Let’s implement the above learnt concepts –
In this example will clone a static page of WhatsApp using Internal CSS-
<!DOCTYPE html>
<html lang="en">
<head>
<style type="text/css">
:root {
font-size: 15px;
--primaryColor: #075e54;
--secondaryColor: #aaa9a8;
--tertierColor: #25d366;
}
* {
margin: 0;
padding: 0;
font-family: inherit;
font-size: inherit;
}
body {
font-family: Helvetica;
font-weight: 300;
}
img {
object-fit: cover;
width: 100%;
}
.container {
margin: 0 1.2em;
}
header {
background-color: var(--primaryColor);
padding: 1.4em 0;
}
header .container {
display: flex;
justify-content: space-between;
align-items: center;
color: white;
}
header .logo {
font-size: 1.5rem;
font-weight: 300;
}
header .menu {
margin-left: 18px;
}
.nav-bar {
background-color: var(--primaryColor);
margin-bottom: 8px;
display: grid;
grid-template-columns: 16% 28% 28% 28%;
justify-items: space-between;
align-items: center;
text-align: center;
box-shadow: rgba(50, 50, 93, 0.25) 0px 2px 5px -1px,
rgba(0, 0, 0, 0.3) 0px 1px 3px -1px;
}
.nav {
color: var(--secondaryColor);
text-transform: uppercase;
padding: 1em 0;
}
.nav.active {
border-bottom: 3px solid white;
color: white;
}
.chat {
padding: 1em 0;
display: flex;
justify-content: space-between;
}
.chat .info {
display: flex;
}
.chat .username {
font-size: 1.2rem;
margin-bottom: 5px;
font-weight: 300;
}
.chat .recent-chat {
color: gray;
max-width: 200px;
text-overflow: ellipsis;
overflow: hidden;
white-space: nowrap;
}
.chat .recent-chat .read {
color: #34b7f1;
}
.chat .photo {
width: 55px;
height: 55px;
border-radius: 50%;
margin-right: 18px;
}
.chat .recent-chat-time {
font-size: 12px;
color: gray;
}
.contact-button {
padding: 1em;
border: 0;
border-radius: 50%;
color: white;
transform: rotate(0deg);
font-size: 1.3rem;
position: fixed;
bottom: 20px;
right: 1.2em;
background-color: var(--tertierColor);
}
</style>
<title>WhatsApp</title>
<link rel="icon" type="image/x-icon" href="wp.png" />
<link rel="stylesheet" href="https://cdn.jsdelivr.net/npm/[email protected]/font/bootstrap-icons.css" />
</head>
<!-- Body section starte here -->
<body>
<header>
<div class="container">
<h1 class="logo">WhatsApp</h1>
<div>
<a role="button" class="bi bi-search icon"></a>
<a role="button" class="bi bi-three-dots-vertical icon menu"></a>
</div>
</div>
</header>
<nav class="nav-bar">
<span class="bi bi-camera-fill nav"></span>
<a role="button" class="nav active">Chats</a>
<a role="button" class="nav">Status</a>
<a role="button" class="nav">Calls</a>
</nav>
<!-- Chat section starts here -->
<!-- chat 1 -->
<section class="chats">
<div class="container">
<div class="chat">
<div class="info">
<!-- <img class="photo" src="user-2.png" alt="User" /> -->
<img class="photo" src="user-2.png" alt="User" />
<div>
<h6 class="username">Anurag</h6>
<p class="recent-chat">
<i class="bi bi-check2-all"></i> Yes, i remembered that! 😄
</p>
</div>
</div>
<small class="recent-chat-time"> 04:20 PM </small>
</div>
<!-- chat 2 -->
<div class="chat">
<div class="info">
<img class="photo" src="user-2.png" alt="User" />
<div>
<h6 class="username">Cipher</h6>
<p class="recent-chat">Do you wanna hangout?</p>
</div>
</div>
<small class="recent-chat-time"> 10:20 AM </small>
</div>
<!-- chat 3 -->
<div class="chat">
<div class="info">
<img class="photo" src="user-2.png" alt="User" />
<div>
<h6 class="username">CipherSchools</h6>
<p class="recent-chat">
<i class="bi bi-check2-all read"></i> Hey bro, time to band!
🥁🎸
</p>
</div>
</div>
<small class="recent-chat-time"> Yesterday </small>
</div>
<!-- chat 4 -->
<div class="chat">
<div class="info">
<img class="photo" src="user-2.png" alt="User" />
<div>
<h6 class="username">Schools</h6>
<p class="recent-chat">Hey, where are you now? 🙄</p>
</div>
</div>
<small class="recent-chat-time"> 7/22/21 </small>
</div>
<!-- chat 5 -->
<div class="chat">
<div class="info">
<img class="photo" src="user-2.png" alt="User" />
<div>
<h6 class="username">Anurag CS</h6>
<p class="recent-chat">
<i class="bi bi-check2-all read"></i> May i borrow your games
for 2 weeks?
</p>
</div>
</div>
<small class="recent-chat-time"> 7/22/21 </small>
</div>
<!-- Contact button on the whatsapp -->
<button type="button" class="bi bi-chat-right-text-fill contact-button"></button>
</div>
</section>
</body>
</html>
23 notes
·
View notes
Photo

Hey! It’s me again.
It’s been a tough week trying to balance school and work, but I’m sure I’ll get the hang of it soon enough. For now, I’m stressed out. Haha.
This week, I learnt new things- not just school stuff but life in general. What I’m particularly excited about is my progress with HTML. I must say, learning HTML is somewhat easier than CSS and Java Script but it’s just my observation. Or maybe it’s because we haven’t gotten in-depth yet but I’m hopeful. Lol.
Anyway, I’d like to share few of the things I learnt about HTML in class, and from other web materials/videos I found online. First, in the picture, you will see what a typical HTML document looks like.
HTML is basically a markup for creating a website. To me, it’s like building a house. In building a house, you need a lot of materials in order to complete the project. Thus, HTML is a block of texts and elements that make up a webpage.
In my last post, I showed you a bit of what I learnt from Solo Learning which is an app that teaches HTML. However, that was me cramming what I saw. This time, I got to understand them.
HTML is made up of tags and tags are elements. Elements are those building blocks that make up the webpage- the heading, body, paragraph, etc. To be honest, there are so many tags and if one is not careful, they could get lost in them. I’m speaking for myself anyway.
The wonderful thing about HTML is that it does not need any special server. The only things you need are a text editor and your web browser. I had to download Sublime Text rather than using the conventional notepad on my laptop and it works really well. Basically, every tag has a special colour and it just helps you know if you’re on the right track or not.
Typically, every HTML document starts with <!DOCTYPE html> which is a declaration that it is a HTML file. Next comes the tag <html> (which is just the pattern. Can’t explain why because I don’t know. Lol) and under that, comes the head where you have the title of the page and the body where you have the headings, paragraphs, links, images, etc. I found out that once you type <html> on Sublime Text, it fills out the rest of the tags for you. Easy peasy.
I could go on and on about it but I’d rather you do some research yourself if you’re a beginner like me. I looked up “HTML for dummies” on youtube and I found an amazing crash course (https://www.youtube.com/watch?v=UB1O30fR-EE) for beginners. I also saw some titled “Learn HTML in 5 mins” but from what I’ve seen so far, it’s literally not possible. You’d have to keep going.
Anyway, I’ll stop here. Enjoy your weekend!
2 notes
·
View notes
Text
Top 10 HTML Interview Questions and Answers for Experienced?
Q-1.-What would occur if your HTML Document does not comprise ?
Answer. It instructs the Web Browser about the version of HTML used for creating the Web page.
If the developer misses declaring the DOCTYPE information in the code, then new features and tags provided by HTML5, like <article>, <footer>, and <header> will not be supported. Additionally, the Browser may automatically go into Quirks or Strict Mode.
Q-2Moreover, the Browser can go into Quirks or Strict Mode. What's a label in HTML?
Answer.
A label instructs the Browser concerning the way to format the HTML correctly. After you write an HTML page, you input tags for several reasons to modify the look of text, to reveal a picture, or to make a hyperlink to another webpage. HTML uses symbols such as"<” and “>" to match the tags.
Q-3. What's the difference between HTML tags and elements?
Answer.
HTML elements communicate with the Browser the best way to reflect text.
Q-4. Which are the newest Form components made accessible HTML5?
Answer.
As soon as we would like to collect some info from the individual visiting our website, we utilize HTML Forms. A good illustration is, the consumer needs to input his name, email identification when he registers for the very first time.
A type takes input in the website visitor and posts it to a backend application like CGI, ASP Script or PHP script. The backend program will subsequently execute required processing on the passed information based on specified business logic within the program.
Q-5. What's a semantic part in HTML5? Additionally, explain the distinction between semantic and non-semantic components?
Answer.
Semantic components are among those newest features which are a part of HTML5. They mean to aid the programmers in fast producing the webpage structure.
Q-6.How do we get the geographic position of an individual in HTML5?
Answer.
Yes, HTML5 can recover the location of an individual by Means of Geolocation API. It supplies getCurrentPosition() method to have the user's present position.
Q-7. Describe Form Input Types in HTML5?
Answer.
HTML5 is the newest benchmark for HTML that supplies 13 fresh input types such as types. Additionally, it gives better information validation, enter control, colour picker controls and lots of more.
Q-8. How do we regain the geographic position of an individual utilizing HTML5?
Answer.
HTML5 stipulates assistance from Geolocation API to recover the location of an individual.
We can discover the present position of the consumer utilizing getCurrentPosition() method of the API.
Q-9.What is the use of Drag and Drop in HTML5?
Answer.
Drag and drop (DnD) is a highly effective User Interface theory, which allows the user to replicate, reorder and delete any number of things, only with the support of mouse .
With HTML4, programmers must do complicated Javascript programming or utilize other Javascript frameworks such as jQuery to accomplish this operation.
Thus making it effortless for the programmers to code it.
Q-10. What is HTML5 Web Storage?
Answer.
HTML5 Web Storage, also called DOM Storage is a means to maintain state on both the server or client that makes it a lot simpler to work contrary to the stateless nature of HTTP. It permits the webpages to keep the information locally from the user's browser.
Know More
1 note
·
View note
Text
Top 25 Web Designing Interview Questions and Answers for Experienced
1. Which are the most frequently used platforms and languages for site designing?
These are the main platforms or languages used for designing:
• HTML is that stands for Hypertext Markup Language, which will help design the template.
• CSS that stands for Cascading Style Sheets can be used for styling the webpages.
• JS that is JavaScript, can be used to code the operation.
2. What's HTML?
HTML is Hypertext Markup Language that is the most popular language for creating web pages or sites.
3. What's the use of CSS in web designing?
CSS or Cascading Style Sheets are essential to provide the appearance and feel of any site. 1 shift in the CSS file may switch to the whole site because webpages recover data each time and display it.
4. What's the external style sheet?
An external style sheet is a record that comprises the design information for many webpages or HTML documents. The external CSS is generally linked via the hyperlink tag that comes beneath the HEAD element. This external CSS using the components should have the applicable extensions like style.css.
5. Differentiate between HTML components and HTML tags?
HTML elements are utilized to communicate with the browser to render text. HTML tags are components surrounded by angular brackets. HTML tags surround text and come in pairs.
6. What's Semantic HTML?
Semantic HTML finds a programming style where the labels indicate that the semantics of text are hauled. Semantic HTML only signifies formatting with no construction or meaning.
7.Explain the term DOCTYPE.
The expression DOCTYPE communicates into the browser which kind of HTML has to be utilized on a web page. Subsequently, the browser uses DOCTYPE to ascertain how a page has to be left. Not using DOCTYPE can load the webpage in the wrong manner.
8.Explain the difference in Standard Mode and Quirks Mode.
This causes inconsistent look in different browsers.
Usual manner is a consistent manner of screen used across all browsers.
9. What are the shortcomings of XHTML pages?
XHTML has inferior browser support. Internet Explorer and other browsers can't parse XHTML to XML.
10. How can you add remarks into HTML code without any text being picked up?
To insert comments into HTML code, you need to set them between and<--!>.
11. Differentiate between linking to a picture, email address, and site
The picture has to be enclosed in quotations with origin feature src from the opening tag.
To connect into a hyperlink, an anchor tag is used, and also the destination connection is defined in the feature. The text where the hyperlink is set has to be between anchor tags.
12. What might be the issue of this hyperlink or image isn't displaying properly?
Reasons for hyperlink or image not displaying properly are a missing quote, tag, bracket for href, alt or src text.
13. Describe the distinction between a numbered list plus a bulleted list.
Lists which are bulleted utilize the
tag that means unordered, whereas arranged lists utilize
tag.
14. Explain the difference between and tags?
It is a container for styling components while it can be used to create branches inside a web page. Has to be used alongside the tag.
15) Mention what a few terrible examples of web layout are?
· Blinking, flashing, or turning images
· Black background with white, light, or light text
· Black backgrounds with dark text
· Lively tiled background images with any color text
· Everything Created
· Too many images or Tremendous graphics
· List of connections
· Too many headlines or Blinking text
16) Explain how do you align the image so you could be greater or lower than another?
To align image so that one could be greater or lower than another, make use of the align announcement on your IMG SRC tag.
17) Explain what a Dreamweaver Template is?
Dreamweaver Templates allows webmasters to specify"non-editable" and"editable" areas of a page, just in the Dreamweaver template that the"non-editable" areas can be edited. Any changes implemented into the Dreamweaver Template will upgrade any HTML pages which use the template.
18) In CSS, if you'll utilize CSS float?
In CSS, you'd use CSS float if you would like to earn an element of your webpage be pushed into the left or right and make different components wrap around it.
19) As a web-designer while declaring the "delete" button, what would be your color choice?
Create the"Publish" button prominent by utilizing color like Red, particularly once you need to display two buttons side by side. Red is an indication of warning, so that will surely assist the consumer in drawing their focus.
20.Just how many H1 tags could you have on a single page, and why?
Employers can ask more specific design questions to learn which degree of knowledge that you have of HTML and SEO to meet you as a candidate.
21.How can you mix fonts and the number of types you will use on a single site?
Fonts are an essential design component, and you ought to have a fantastic grip on font use.
22.What's a CSS document, and what are a few advantages of using it?
CSS is widely utilized in web designing. Employers need to know you're comfortable with this and will require little to no instruction.
23.Have you got any expertise with UX layout?
While companies may not ask that you get experience with UX layout, it is important to understand what it is and discuss how you can apply it for your work.
24.What's W3, and how can you stick to it on your website design?
Employers want to understand your familiarity with W3 standards because compliance must guarantee website designs may be available in most browsers.
25. Have you ever utilized HTTP or HTTP/2 on your previous design solutions?
HTTP and HTTP/2 are system protocols specially created to boost the operation of internet pages. Employers are searching for a candidate with basic understanding.
Know more
1 note
·
View note
Text
LET US START AT THE VERY BEGINNING.
One of the most off-putting parts of computer programming is the fact that when an expert in this field writes a tutorial, he or she tends to forget that the person they are writing the tutorial for may have no knowledge of the subject what so ever. This shortsightedness has put many potentially excellent programmers off from ever reaching their potential. Although the language used obviously does make sense, to the novice programmer this language needs watering down to make the whole process easier to understand, there are many words that are used to describe an action, that to the uninitiated means nothing at all and should be minutely broken down to make sure no one gets left behind, and scratching their head.
This part of this post I shall explain how to layout your most important part of your code and that is the hypertext markup language (html for short). As this name suggests, learning html is just the same as learning to write in another language but with the added advantage that your computer does the speaking for you. To anyone who has already done a little bit of coding this next part should be obvious to you, and you may wish to skip this part. Below is a piece of code you will need to start you off, underneath the code, I shall explain each line so you know exactly what each line does in layman terms.
01 <!DOCTYPEhtml> 02 <html lang="en"> 03 <head> 04 <meta charset UTF-8 05 <title>Your Title Goes Here-----</title> 06 Your Resources goes here----- 07 <style> 08 Your Css Styling Goes Here----- 09 </style> 10 </head> 11 <body> 12 Your Html code Goes Here----- 13 <script> 14 Your Javascript / Jquery Goes Here----- 15 </script> 17 </body> 18 </html>
The DOCTYPE declaration is shorthand for document type declaration is required for the first line of any html or xhtml document. The web browser is instructed which type of html language your web page is written in. This ensures that all of the different web browsers parse the web page in the same way.
Doctype syntax for HTML5 and beyond:
<!DOCTYPE html>
Doctype syntax for strict HTML 4.01:
<!DOCTYPE HTML PUBLIC "-//W3C//DTD HTML 4.01//EN" "http://www.1sthootowl.com/TR/html4/strict.dtd">
Doctype syntax for transitional HTML 4.01:
<!DOCTYPE HTML PUBLIC "-//W3C//DTD HTML 4.01 Transitional//EN" "http://www.1sthootowl.com/TR/html4/loose.dtd">
Doctype syntax for frameset HTML 4.01:
<!DOCTYPE HTML PUBLIC "-//W3C//DTD HTML 4.01 Frameset//EN" "http://www.1sthootowl.com/TR/html4/frameset.dtd">
These examples above will be explained later as at the beginning of your programming learning this will only confuse you at a time when this knowledge is unnecessary as for now we will use <!doctype html>.
The html tag: Always use lang attribute with the html tag to specify the default language of the text in the page. When the page contains content in another language, add a language attribute to an element surrounding that content.
The head tag: The head tag defines where your cascading style sheets (CSS for short), will be held. Also, other code resources will be held in the head. Resources will be explained later as they are required.
The style tag defines where your css code starts and finishes <style> defines the start of your css code and </style> defines the end of your css code, with your css code sandwiched between the two tags.
The close head tag (</head>): This tag closes your head.
The body tag: The body tag opens the main part of your program and this is where your html code lives as well as your javascript and jquery. Within the body and the close body tags (<body></body>) are the script and close script tags (<script></script>), it is between these two tags where your javascript and jquery live. All of this will become more apparent as you follow all the examples I will show you in due course.
1 note
·
View note
Text
Starting with HTML
Hi all,
After finishing to study the basis of HTML(the Hypertext Markup Language)and practiced it, I could say that I have a better understanding about how websites are constructed, but what is HTML? According to W3C (https://www.w3.org/standards/webdesign/htmlcss.html)
Is the language for describing the structure of Web pages. Through this language you can start building a web page with the information you want, giving little bit of format such as headings, text, lists, paragraphs, hyperlinks, images, etc.
One thing you should have in mind is that for starting you must type <!DOCTYPE html>, by typing this you are showing the program that is a html document that you are running. The basic structure for running the page looks like this:
<!DOCTYPE html>
<html>
<head>
<title>My first page </title>
</head>
<body>
<h1> This is a heading</h1>
<h2> There are 6 levels of headings</h2>
<h3> Each one has a different font size</h3>
<p> This is a paragraph </p>
</body>
</html>
One thing you should have in mind is that for closing every section you should type the same as opening but adding /
<title>My first page </title>
Otherwise our code will be messy and out of order.
Another thing that I find useful is adding a comment without affecting your code; in order to do it we need to type:
<!--this is a comment that doesn’t appear when you run the code-->
If you are more interested in learning the basis of this language I leave here a website that explains it easy:
https://www.w3.org/MarkUp/Guide/
Good luck! And don’t forget to practice!
1 note
·
View note
Text
Basics of HTML

HTML (HyperText Markup Language) is the standard language used to create web pages. It provides the structure and content of a webpage, which is then styled with CSS and made interactive with JavaScript. Let’s go through the basics of HTML:
1. HTML Document Structure
An HTML document starts with a declaration and is followed by a series of elements enclosed in tags:<!DOCTYPE html> <html> <head> <title>My First Webpage</title> </head> <body> <h1>Welcome to My Website</h1> <p>This is a paragraph of text on my first webpage.</p> </body> </html>
<!DOCTYPE html>: Declares the document type and version of HTML. It helps the browser understand that the document is written in HTML5.
<html>: The root element that contains all other HTML elements on the page.
<head>: Contains meta-information about the document, like its title and links to stylesheets or scripts.
<title>: Sets the title of the webpage, which is displayed in the browser's title bar or tab.
<body>: Contains the content of the webpage, like text, images, and links.
2. HTML Tags and Elements
Tags: Keywords enclosed in angle brackets, like <h1> or <p>. Tags usually come in pairs: an opening tag (<h1>) and a closing tag (</h1>).
Elements: Consist of a start tag, content, and an end tag. For example:
<h1>Hello, World!</h1>
3. HTML Attributes
Attributes provide additional information about HTML elements. They are always included in the opening tag and are written as name="value" pairs:<a href="https://www.example.com">Visit Example</a> <img src="image.jpg" alt="A descriptive text">
href: Used in the <a> (anchor) tag to specify the link's destination.
src: Specifies the source of an image in the <img> tag.
alt: Provides alternative text for images, used for accessibility and if the image cannot be displayed.
4. HTML Headings
Headings are used to create titles and subtitles on your webpage:<h1>This is a main heading</h1> <h2>This is a subheading</h2> <h3>This is a smaller subheading</h3>
<h1> to <h6>: Represents different levels of headings, with <h1> being the most important and <h6> the least.
5. HTML Paragraphs
Paragraphs are used to write blocks of text:<p>This is a paragraph of text. HTML automatically adds some space before and after paragraphs.</p>
<p>: Wraps around blocks of text to create paragraphs.
6. HTML Line Breaks and Horizontal Lines
Line Break (<br>): Used to create a line break (new line) within text.
Horizontal Line (<hr>): Used to create a thematic break or a horizontal line:
<p>This is the first line.<br>This is the second line.</p> <hr> <p>This is text after a horizontal line.</p>
7. HTML Comments
Comments are not displayed in the browser and are used to explain the code:<!-- This is a comment --> <p>This text will be visible.</p>
<!-- Comment -->: Wraps around text to make it a comment.
8. HTML Links
Links allow users to navigate from one page to another:<a href="https://www.example.com">Click here to visit Example</a>
<a>: The anchor tag creates a hyperlink. The href attribute specifies the URL to navigate to when the link is clicked.
9. HTML Images
Images can be embedded using the <img> tag:<img src="image.jpg" alt="Description of the image">
<img>: Used to embed images. The src attribute specifies the image source, and alt provides descriptive text.
10. HTML Lists
HTML supports ordered and unordered lists:
Unordered List (<ul>):
. <ul> <li>Item 1</li> <li>Item 2</li> <li>Item 3</li> </ul>
Ordered List (<ol>):
<ol> <li>First item</li> <li>Second item</li> <li>Third item</li> </ol>
<ul>: Creates an unordered list with bullet points.
<ol>: Creates an ordered list with numbers.
<li>: Represents each item in a list.
11. HTML Metadata
Metadata is data that provides information about other data. It is placed within the <head> section and includes information like character set, author, and page description:<meta charset="UTF-8"> <meta name="description" content="An example of HTML basics"> <meta name="keywords" content="HTML, tutorial, basics"> <meta name="author" content="Saide Hossain">
12. HTML Document Structure Summary
Here’s a simple HTML document combining all the basic elements:<!DOCTYPE html> <html> <head> <title>My First HTML Page</title> <meta charset="UTF-8"> <meta name="description" content="Learning HTML Basics"> <meta name="keywords" content="HTML, basics, tutorial"> <meta name="author" content="Saide Hossain"> </head> <body> <h1>Welcome to My Website</h1> <p>This is my first webpage. I'm learning HTML!</p> <p>HTML is easy to learn and fun to use.</p> <hr> <h2>Here are some of my favorite websites:</h2> <ul> <li><a href="https://www.example.com">Example.com</a></li> <li><a href="https://www.anotherexample.com">Another Example</a></li> </ul> <h2>My Favorite Image:</h2> <img src="https://images.pexels.com/photos/287240/pexels-photo-287240.jpeg?auto=compress&cs=tinysrgb&w=1260&h=750&dpr=1" width="300" alt="A beautiful view"> <hr> <p>Contact me at <a href="mailto:[email protected]">[email protected]</a></p> </body> </html>
Key Takeaways
HTML is all about using tags to structure content.
The basic building blocks include headings, paragraphs, lists, links, images, and more.
Every HTML document needs a proper structure, starting with <!DOCTYPE html> and wrapping content within <html>, <head>, and <body> tags.
With these basics, you can start building your web pages!
Source: HTML TUTE BLOG
0 notes
Note
hi! you were recommended on my dash (and I adore your themes)
but may I ask how you did the guidelines site?
(it's been a bit since I've done commissions and I'm considering opening them again)
I completely understand if this is alot to ask, but if you're reading this thank you for your time :)
Hello! Thank you anon for adoring my themes. It makes my day To answer your question, I don't understand what you mean by the guidelines site but I'll try to understand your question based on my own interpretations. So, in case if I understood your question wrongly, feel free to ask off-anon via Chat alright?
Possible answer 1
To begin with, I wrote all the guidelines in Google Docs. I assume that you're asking me on how I can redirect my blog theme (ie: https://phantasyreign.tumblr.com/shunk) to its GDocs.
Just follow the following steps on how you can attain it:
1. Firstly, go to your customize page and click the [+Add a Page].
2. After that, select [Custom Layout]
3. Once, you click it, paste the following code:
<!DOCTYPE html> <html> <body> <script> setTimeout(function(){ window.location.href = 'your gdoc link'; }, 1000); </script> </body> </html>
See that 1000? It refers to the time taken to go to that side in milisecond. In other words, it's going to take 1 second to redirect from your blog to your gdoc. The bigger the number, the longer it takes to redirect the code. Also, replace 'your gdoc link' with the proper link of your documents. For the said document, make sure that the link is accessible for everyone to view.
Possible answer 2
Another way of understanding your question is how I create the content of the guideline. I don't have any specific format if you see my guidelines so far, there are five matters that I will cover in a guideline - the expectation, the preliminary matters, the features, the colors, and the FAQ.
I believe that that the expectation is important so that people will know what to expect from this guideline. There might be people who wants to ask questions that are not even related to the guideline so to save their time, it's better to write down the expectation. Preliminary matters are stuff that you want them to do before doing any customisation. The features are actually the options mentioned in the Theme Options. It is important to explain the features to them so that they know what is that feature that they're toggling and vice versa. For colors, I also wrote it down because I know that not many people (at least, according to my survey) wants to have accent colors. So I give them the liberty to change whatever colors that they want manually. For FAQ, it's a list of questions that possibly will arise.
Idk if this is what you mean by guidelines site but I hope it can give you some insight to it! Feel free to use my guideline as a base for your commission/theme guideline!
Either way, I hope I answer your question. I'm sorry if it is not the answer that you're searching for. Feel free to specify your ask more via chat. I'll assist you whenever I can.
Also, all the best with your commission! If you need a boost, share me the link, and I'll reblog your post :)
1 note
·
View note
Text

Leading the web to its full potential
STANDARDS
PARTICIPATE
MEMBERSHIP
ABOUT W3C

W3C »
About W3C »
Help and FAQ »
FAQ about W3C Web Site
FAQ ABOUT W3C WEB SITE
Below are frequent questions and answers about the W3C Web site.
Is W3C sending me spam?
I see something about W3C in the source code of a Web page. Does that mean W3C is responsible for the page?
I lost my password / Forgot my account login
Which authentication systems does W3C use on its site?
Where do I send comments about w3.org?
I hit a technical problem with W3C's site
Why does the W3C's site not fully validate?
What Domain Names are used by W3C?
Can I search on the W3C Web site?
Can I have my email removed from a public list archive?
Why is W3C blocking my IP?
The W3C servers are slow to return DTDs or Schemas. Is the delay intentional?
Will W3C link to my product from w3.org?
Do you have a list of all DTDs or Schemas available from W3C?
Why is my browser trying to download a page instead of displaying it?
Is W3C Service X or Y down? (System Outages)
Is W3C sending me spam?
No. W3C is not a spammer. W3C does not allow its servers to be used to send spam, and unsolicited bulk e-mail is strictly prohibited from our mailing lists.
There are two reasons you might think that W3C is sending you spam, however.
1. You found "w3.org" in the source of a document or email
If you look at the source of many HTML documents (including HTML email), you are likely to find some text that explains which version of HTML was used by the author. Versions of HTML are defined by the W3C, and therefore HTML documents contain a reference to the W3C, for example:
<!DOCTYPE HTML PUBLIC "-//W3C//DTD HTML 4.0 Transitional//EN" "http://www.w3.org/TR/REC-html40/loose.dtd">
Many people see this text and conclude that W3C had something to do with the creation of the document. All that this text means is that the text was written in HTML, a language defined and maintained by W3C. The text does not imply that W3C had anything to do with the creation of the document itself.
2. Somebody forged email to make it look like it was sent by W3C
Unfortunately, people at times forge email addresses. Many W3C email addresses are very visible to the public, and this makes them targets for forgery. Thus, you may receive spam from a w3.org address, but this only means that the address has been used to send a forged email.
I see something about W3C in the source code of a Web page. Does that mean W3C is responsible for the page?
No. See the comments above on source code.
Note: W3C cannot help you identify the owner of a page that is not on w3.org.
I lost my password / Forgot my account login
You can recover a lost password and see more information about accounts.
Which authentication systems does W3C use on its site?
W3C generally uses HTTP Basic Authentication for most resources that require a username and password. As of Sept 2020 we are starting to experiment with form and cookie-based logins, currently deployed on protected areas of the Mailing list archive host.
Where do I send comments about w3.org?
We encourage you to let us know by sending a message to [email protected] with the URI (that is, the Web address) of the page(s) in question. That is a publicly archived mailing list.
I hit a technical problem with W3C's site
Please, write to [email protected] with a precise description of your technical problem.
Why does the W3C's site not fully validate?
Please, refer to our site redesign page.
What Domain Names are used by W3C?
w3.org. The two most common uses you will see are "www.w3.org" and "lists.w3.org" (for our Mail archives).
If the domain name is something else, it's probably not related to W3C. If you find "w3.org" in the content of the page, that is likely just related to the fact that the page is HTML; see our FAQ question on spam.
Can I search on the W3C Web site?
Yes. Our homepage features a search box, and you may also use the dedicated Web site search.
Can I have my email removed from a public list archive?
In general, no. See the FAQ entry on archive editing.
Why is W3C blocking my IP?
W3C is most likely blocking your IP because of excessive traffic; often this is due to requesting the same resource from us repeatedly (e.g. a DTD, Schema, Entity, or Namespace document.) We give extensive caching directives and there really is no reason to request the same resource over and over when it is not going to change. Your XML library or utility probably has a means to use a XML catalog and/or have a caching mechanism; please consult that documentation on how to utilize such features. If there are no such options you should contact the party responsible for the library or utility used. You may also put a caching proxy between your application server and the internet.
The W3C servers are slow to return DTDs. Is the delay intentional?
Yes. Due to various software systems downloading DTDs from our site millions of times a day (despite the caching directives of our servers), we have started to serve DTDs and schema (DTD, XSD, ENT, MOD, etc.) from our site with an artificial delay. Our goals in doing so are to bring more attention to our ongoing issues with excessive DTD traffic, and to protect the stability and response time of the rest of our site. We recommend HTTP caching or catalog files to improve performance.
Will W3C link to my product from w3.org?
Maybe. W3C does not endorse any particular software. However, because it is useful to provide links to software that implements a specification, we often link to multiple products or services (thus: many, not one). At the bottom of each page you will find contact information for the person responsible for updating links on that page.
Do you have a list of all DTDs or Schemas available from W3C?
No. Each specification includes links to useful resources (such as DTDs and schemas) for that specification. A search engine should also be helpful in finding a particular DTD or Schema.
Why is my browser trying to download a page instead of displaying it?
Your browser (or other tool) may not be configured to display that type of content, either natively or with a helper application.
Is W3C Service X or Y down? (System Outages)
See the systems status page. If you experience a problem not listed there, please send email to [email protected].
Footer Navigation
NAVIGATION
Home
Standards
Participate
Membership
About W3C
CONTACT W3C
Contact
Help and FAQ
Sponsor / Donate
Site Map
Feedback
W3C UPDATES

Copyright © 2021 W3C ® ( MIT , ERCIM , Keio, Beihang) Usage policies apply.
0 notes
Text
Hiring international students can be an excellent way to leverage some of the world’s best and most diverse talents for your organization. In this blog, we will be discussing the options for employment authorization that are available for international students studying in the US.
Explaining the F-1/J-1 Status:
An international student needs a student visa in order to be able to pursue a program of study in the United States. Most universities within the country offer two distinct forms of status for nonimmigrants:
0 notes