#learned html
Explore tagged Tumblr posts
Visit Tumblr Blog
Explore Tumblr blogs with no restrictions, modern design and the best experience.
Last Seen Tumblr Blogs


Fun Fact
Tumblr’s reach among the 26-to-35-year-olds in the US is 11%.
Text
Making a webbed site
#learned html#going crazy#now I’m making a site to document my changes on T#I think it’s all very fun and silly#I’m having the time of my life#trans#queer
0 notes
Text
last thing about this from me i promise. actually i don't, fuck you if you don't like it
the "old web" space is extremely hostile to disabled people. there is a show of patting themselves on the back for linking accessibility resources they've never read, while at the same time flat out promoting inaccessible practices. the thing is, they don't make the page slightly more difficult to read, they make it impossible to.
if you're photosensitive, using an inaccessible page can flat out give you seizures in the case of epilepsy, or otherwise cause massive disabling migraines and other painful effects. if you're a screen reader user, be it because of blindness, dyslexia, or other print disabilities, depending on exactly what nonsense you've done to your website, it can read things in a nonsensical order, refuse to read at all, or flat out CRASH.
if you're out here saying that html is so easy and anyone can learn it, put your effort where your own mouth is and learn accessibility standards. don't be so fucking apathetic - if you think inaccessibility will save you from data harvesting, you frankly deserve it getting stolen
#*i don't think saying ''html is easy'' is useful#because it's not easy for everyone which is just a reality#and i've only seen people get insecure about their abilities from hearing ''it's so easy'' a lot#it's something i encourage everyone to learn though
3K notes
·
View notes
Text
Essentials You Need to Become a Web Developer
HTML, CSS, and JavaScript Mastery
Text Editor/Integrated Development Environment (IDE): Popular choices include Visual Studio Code, Sublime Text.
Version Control/Git: Platforms like GitHub, GitLab, and Bitbucket allow you to track changes, collaborate with others, and contribute to open-source projects.
Responsive Web Design Skills: Learn CSS frameworks like Bootstrap or Flexbox and master media queries
Understanding of Web Browsers: Familiarize yourself with browser developer tools for debugging and testing your code.
Front-End Frameworks: for example : React, Angular, or Vue.js are powerful tools for building dynamic and interactive web applications.
Back-End Development Skills: Understanding server-side programming languages (e.g., Node.js, Python, Ruby , php) and databases (e.g., MySQL, MongoDB)
Web Hosting and Deployment Knowledge: Platforms like Heroku, Vercel , Netlify, or AWS can help simplify this process.
Basic DevOps and CI/CD Understanding
Soft Skills and Problem-Solving: Effective communication, teamwork, and problem-solving skills
Confidence in Yourself: Confidence is a powerful asset. Believe in your abilities, and don't be afraid to take on challenging projects. The more you trust yourself, the more you'll be able to tackle complex coding tasks and overcome obstacles with determination.
#code#codeblr#css#html#javascript#java development company#python#studyblr#progblr#programming#comp sci#web design#web developers#web development#website design#webdev#website#tech#html css#learn to code
2K notes
·
View notes
Text
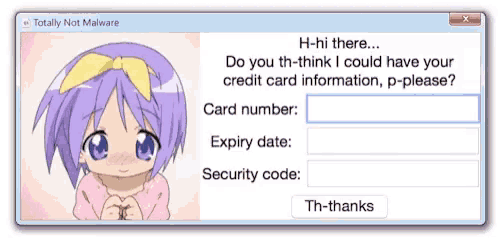
#lucky star#moe#otakucore#give me your bank detailsdkeiiwusmdkiwiwolwosopwowla#Isuwiqiajdkdjdhdhdhdhhdhd#আমি আপনার ব্যক্তিগত তথ্য চাই#আমিই সেরা#জয় বাংলা#robloxslayer7000 gang we up#lucky star anime#weebcore#animecore#2000s anime#moecore#neetcore#talk to me after you learn how to code html loser#^_^
1K notes
·
View notes
Text
honestly I don't know where I'd end up social media wise if tumblr went down for real but yanno where you'll find me regardless? ay oh fucking three babey
#listen if you're like 'where did megs end up' that will be the most reliable place#honestly bluesky seems most likely but like#would i frequent it? who knows#i do actually have to learn xml html and css this quarter so if I can figure my shit out i may actually get a proper site up and running#friendly reminder i do have a site rn for original writing but it's really just a landing page#ugh i have so much to fuckin DO
125 notes
·
View notes
Text
i amgoink crazzzzzzyyyy
69 notes
·
View notes
Text
i walked into seekL because of a mystery masked man and walked out with pseudo-SQL knowledge i love dating sims
#gameposting#seekL#will i cook fanart....mayhaps...#also i really love odxny he's too likeable i can't fucking get the bad ending#waiting on that play through by the creator#ive been wanting to code i think. idk if i will but ive always wanted to learn html and python but didn't get the push to#who knows haha#12am post-hyperfocus headache ahh post
292 notes
·
View notes
Text

some silly bones cuz i dont draw him nearly enough
alt colours for him as a little fairy below

i did this by accident and i liked it too much to ignore
#havent been drawing as much cuz ive been feverishly learning html and css its so so fun#myart#bones mccoy#jim kirk#mckirk#star trek#star trek tos#star trek fanart
178 notes
·
View notes
Text
hi hi i'm a new langblr sideblog ! my name is aster, i'm 25, and i use fae/fleur/it pronouns.
currently studying japanese and newly chinese but i learned french for some years too and i dabble in other languages! i am the number one duolingo hater boooo. and i might post about learning to code and the books i'm reading too.
maybe reblog so i can find ppl to follow? :D
#langblr#language#light academia#learn hebrew#chinese langblr#language learning#mandarin#learning languages#learn japanese#learning japanese#japanese langblr#japanese language#learn mandarin#studyblr#french langblr#coding#learn to code#html css
48 notes
·
View notes
Text
Introduction To HTML
[Note: You need a text editor to do this. You can use Notepad or Text Edit. But it's so much better to download VS Code / Visual Studio Code. Save it with an extension of .html]
HTML stands for Hyper Text Markup Language
It is used to create webpages/websites.
It has a bunch of tags within angular brackets <....>
There are opening and closing tags for every element.
Opening tags look like this <......>
Closing tags look like this
The HTML code is within HTML tags. ( // code)
Here's the basic HTML code:
<!DOCTYPE html> <html> <head> <title> My First Webpage </title> </head> <body> <h1> Hello World </h1> <p> Sometimes even I have no idea <br> what in the world I am doing </p> </body> </html>
Line By Line Explanation :
<!DOCTYPE html> : Tells the browser it's an HTML document.
<html> </html> : All code resides inside these brackets.
<head> </head> : The tags within these don't appear on the webpage. It provides the information about the webpage.
<title> </title> : The title of webpage (It's not seen on the webpage. It will be seen on the address bar)
<body> </body> : Everything that appears on the webpage lies within these tags.
<h1> </h1> : It's basically a heading tag. It's the biggest heading.
Heading Tags are from <h1> to <h6>. H1 are the biggest. H6 are the smallest.
<p> </p> : This is the paragraph tag and everything that you want to write goes between this.
<br> : This is used for line breaks. There is no closing tag for this.
-------
Now, we'll cover some <Meta> tags.
Meta tags = Notes to the browser and search engines.
They don’t appear on the page.
They reside within the head tag
<head> <meta charset="UTF-8"> <meta name="viewport" content="width=device-width, initial-scale=1.0"> <meta name="description" content="Website Description"> <meta name="Author" content="Your Name"> <meta name="keywords" content="Websites Keywords"> </head>
Line By Line Explanation:
<meta charset="UTF-8"> : Makes sure all letters, symbols, and emojis show correctly.
<meta name="viewport" content="width=device-width, initial-scale=1.0"> : Makes your site look good on phones and tablets.
<meta name="description" content="Website Description"> : Describes your page to Google and helps people find it.
<meta name="author" content="Your Name"> : Says who created the page.
<meta name="keywords" content="Website's Keywords"> : Adds a few words to help search engines understand your topic.
_____
This is my first post in this topic. I'll be focusing on the practical side more than the actual theory, really. You will just have some short bullet points for most of these posts. The first 10 posts would be fully HTML. I'll continue with CSS later. And by 20th post, we'll build the first website. So, I hope it will be helpful :)
If I keep a coding post spree for like 2 weeks, would anyone be interested? o-o
#code#codeblr#css#html#javascript#python#studyblr#progblr#programming#comp sci#web design#web developers#web development#website design#webdev#website#tech#html css#learn to code#school#study motivation#study aesthetic#study blog#student#high school#studying#study tips#studyspo#website development#coding
25 notes
·
View notes
Text

i finally finished my riley shrine! it's best viewed on desktops (with firefox specifically) so it might look wonky on mobile devices 😅
this also serves as a soft opening of my nekoweb site! it's my personal blog outside of social media, and atm I have to do a Lot of transferring to and from my neocities, but at least my pages are still functional!
#kagarts#stat trainer riley#trainer riley#riley pokemon#pokemon dppt#i drew a lot of art for this shrine so this goes in my art tag. woe#it's up for real now! GOD!!!!! i had to fix an error with a video but it should be in working order#i try to update both this and neocities but i'm making the gradual shift to mainly being on nekoweb#the community on neocities however is really nice. like the cool ppl you meet there are what make it fun#I’ve learned a lot about coding as much as my actual code is a mess. A functional mess though! got me learning stuff#if you'd like to see me talk in depth about a guy or other things check out my site! i'm planning more things w html lately
43 notes
·
View notes
Text
--------------------------------------------------------------
In every universe. “It’s always you, isn’t it?”
Her voice is thick with a fading resistance, more tired than it is accepting. Accepting of her fate.
“Always us,” he corrects, without a hint of anger. It’s a reminder of their fate, just as cruel to him as it is her. “Always me and you.”
“Never them.” She finishes.
--------------------------------------------------------------
#this IS in the writing im making for them but not actual dialogue; more like a tangent from the universe#a summary of their relationship as a whole if you will-#DOOMED MON CHEROI but in the sense that they're doomed/fated/destined to bound together in “every” universe#HINT HINT NUDGE NUDGE.#i also do think the extra coloring makes it a little ugly looking but hey- what can you do about it i suppose /hj /lh /unsrs#am i willing to learn html for the custom coloring? yes. have i been using the tumblr colors for so long that i dont really want to? ....#at least for myself and cherie and the 4 guys; i might learn it for bertrand/leo/tox/crashing/anyone else but yeah-#ALSO i love you pen but i'm not editing all the blue in my (favorite/longest) draft for bertrand unless it takes a few easy lines of code-#so you let me know abt that ahaha.. (ˊᗜˋ;) /hj /lh /gen#pc rpf#rpf#pc rpf community#mon cheroi#king of soph#cherie crash#weight of the crown#the taste of sugar
21 notes
·
View notes
Text

Welcome back, coding enthusiasts! Today we'll talk about Git & Github , the must-know duo for any modern developer. Whether you're just starting out or need a refresher, this guide will walk you through everything from setup to intermediate-level use. Let’s jump in!
What is Git?
Git is a version control system. It helps you as a developer:
Track changes in your codebase, so if anything breaks, you can go back to a previous version. (Trust me, this happens more often than you’d think!)
Collaborate with others : whether you're working on a team project or contributing to an open-source repo, Git helps manage multiple versions of a project.
In short, Git allows you to work smarter, not harder. Developers who aren't familiar with the basics of Git? Let’s just say they’re missing a key tool in their toolkit.
What is Github ?
GitHub is a web-based platform that uses Git for version control and collaboration. It provides an interface to manage your repositories, track bugs, request new features, and much more. Think of it as a place where your Git repositories live, and where real teamwork happens. You can collaborate, share your code, and contribute to other projects, all while keeping everything well-organized.
Git & Github : not the same thing !
Git is the tool you use to create repositories and manage code on your local machine while GitHub is the platform where you host those repositories and collaborate with others. You can also host Git repositories on other platforms like GitLab and BitBucket, but GitHub is the most popular.
Installing Git (Windows, Linux, and macOS Users)
You can go ahead and download Git for your platform from (git-scm.com)
Using Git
You can use Git either through the command line (Terminal) or through a GUI. However, as a developer, it’s highly recommended to learn the terminal approach. Why? Because it’s more efficient, and understanding the commands will give you a better grasp of how Git works under the hood.
GitWorkflow
Git operates in several key areas:
Working directory (on your local machine)
Staging area (where changes are prepared to be committed)
Local repository (stored in the hidden .git directory in your project)
Remote repository (the version of the project stored on GitHub or other hosting platforms)
Let’s look at the basic commands that move code between these areas:
git init: Initializes a Git repository in your project directory, creating the .git folder.
git add: Adds your files to the staging area, where they’re prepared for committing.
git commit: Commits your staged files to your local repository.
git log: Shows the history of commits.
git push: Pushes your changes to the remote repository (like GitHub).
git pull: Pulls changes from the remote repository into your working directory.
git clone: Clones a remote repository to your local machine, maintaining the connection to the remote repo.
Branching and merging
When working in a team, it’s important to never mess up the main branch (often called master or main). This is the core of your project, and it's essential to keep it stable.
To do this, we branch out for new features or bug fixes. This way, you can make changes without affecting the main project until you’re ready to merge. Only merge your work back into the main branch once you're confident that it’s ready to go.
Getting Started: From Installation to Intermediate
Now, let’s go step-by-step through the process of using Git and GitHub from installation to pushing your first project.
Configuring Git
After installing Git, you’ll need to tell Git your name and email. This helps Git keep track of who made each change. To do this, run:

Master vs. Main Branch
By default, Git used to name the default branch master, but GitHub switched it to main for inclusivity reasons. To avoid confusion, check your default branch:

Pushing Changes to GitHub
Let’s go through an example of pushing your changes to GitHub.
First, initialize Git in your project directory:

Then to get the ‘untracked files’ , the files that we haven’t added yet to our staging area , we run the command

Now that you’ve guessed it we’re gonna run the git add command , you can add your files individually by running git add name or all at once like I did here

And finally it's time to commit our file to the local repository

Now, create a new repository on GitHub (it’s easy , just follow these instructions along with me)
Assuming you already created your github account you’ll go to this link and change username by your actual username : https://github.com/username?tab=repositories , then follow these instructions :


You can add a name and choose wether you repo can be public or private for now and forget about everything else for now.

Once your repository created on github , you’ll get this :

As you might’ve noticed, we’ve already run all these commands , all what’s left for us to do is to push our files from our local repository to our remote repository , so let’s go ahead and do that

And just like this we have successfully pushed our files to the remote repository
Here, you can see the default branch main, the total number of branches, your latest commit message along with how long ago it was made, and the number of commits you've made on that branch.

Now what is a Readme file ?
A README file is a markdown file where you can add any relevant information about your code or the specific functionality in a particular branch—since each branch can have its own README.
It also serves as a guide for anyone who clones your repository, showing them exactly how to use it.
You can add a README from this button:

Or, you can create it using a command and push it manually:

But for the sake of demonstrating how to pull content from a remote repository, we’re going with the first option:

Once that’s done, it gets added to the repository just like any other file—with a commit message and timestamp.
However, the README file isn’t on my local machine yet, so I’ll run the git pull command:

Now everything is up to date. And this is just the tiniest example of how you can pull content from your remote repository.
What is .gitignore file ?
Sometimes, you don’t want to push everything to GitHub—especially sensitive files like environment variables or API keys. These shouldn’t be shared publicly. In fact, GitHub might even send you a warning email if you do:

To avoid this, you should create a .gitignore file, like this:

Any file listed in .gitignore will not be pushed to GitHub. So you’re all set!
Cloning
When you want to copy a GitHub repository to your local machine (aka "clone" it), you have two main options:
Clone using HTTPS: This is the most straightforward method. You just copy the HTTPS link from GitHub and run:

It's simple, doesn’t require extra setup, and works well for most users. But each time you push or pull, GitHub may ask for your username and password (or personal access token if you've enabled 2FA).
But if you wanna clone using ssh , you’ll need to know a bit more about ssh keys , so let’s talk about that.
Clone using SSH (Secure Shell): This method uses SSH keys for authentication. Once set up, it’s more secure and doesn't prompt you for credentials every time. Here's how it works:
So what is an SSH key, actually?
Think of SSH keys as a digital handshake between your computer and GitHub.
Your computer generates a key pair:
A private key (stored safely on your machine)
A public key (shared with GitHub)
When you try to access GitHub via SSH, GitHub checks if the public key you've registered matches the private key on your machine.
If they match, you're in — no password prompts needed.
Steps to set up SSH with GitHub:
Generate your SSH key:

2. Start the SSH agent and add your key:

3. Copy your public key:

Then copy the output to your clipboard.
Add it to your GitHub account:
Go to GitHub → Settings → SSH and GPG keys
Click New SSH key
Paste your public key and save.
5. Now you'll be able to clone using SSH like this:

From now on, any interaction with GitHub over SSH will just work — no password typing, just smooth encrypted magic.
And there you have it ! Until next time — happy coding, and may your merges always be conflict-free! ✨👩💻👨💻
#code#codeblr#css#html#javascript#java development company#python#studyblr#progblr#programming#comp sci#web design#web developers#web development#website design#webdev#website#tech#html css#learn to code#github
75 notes
·
View notes
Text
Title: Possible Guide To Basic Code On AO3
Summary:
This is a list of helpful tips and tricks I have come across in my time using AO3. I by no means know how to code, this was all found through internet searches and trial and error. Basically a whole lot of 'fuck around and find out'. It includes things like the basics of creating a site skin (that I muddled my way through) like adding personalised colours/font/text size, how to block tags permanently (so you don't have to filter it out of every search manually), and how to add cool things like hyperlinks/drop down menus/coloured text/ bold & italics text anywhere (I know it shows you this one but it took me way too long to find this feature).
This is something I'm making up as I learn myself, so if it doesn't work please forgive me. 🙏
#ao3#ao3 author#ao3 link#ao3 writer#ao3 guide#ao3 code#html#css#html css#html coding#ao3 skins#ao3 site skin#ao3 stuff#ao3 skills#check it ouuuut#for yourself#its great#im learning
83 notes
·
View notes
Text

DIGITAL_NECROPOLIS.exe - HTML Neocities/Nekoweb profile page template

LIVE PREVIEW
DOWNLOAD
#old web graphics#css#cybercore#html#html css#htmlcoding#web graphics#neocities#neocities template#web resources#neocities theme#neocities graphics#neocities themes#nekoweb#old tech#old internet#old web#oldweb#html theme#frontend#javascript#learn to code#ko fi shop#ko fi link#code#coding
83 notes
·
View notes
Note
I absolutely adore that you're steadily building a rec database through your posts. It just grows and grows with every rec list
Omg 😭💖 Yeah, it's getting bigger and people keep asking for more recs. I'm thinking about making a separate blog for fic recs and fic search, but I have no idea how to make those fancy tag pages other rec blogs have...
#hedwig221b replies#i dont wanna learn html 😭 but i feel like i have to if i want to make a separate fic related blog#HOW DO THEY DO IT
28 notes
·
View notes