#linux find file
Explore tagged Tumblr posts
Visit Tumblr Blog
Explore Tumblr blogs with no restrictions, modern design and the best experience.
Last Seen Tumblr Blogs


Fun Fact
Tumblr has 16.74 million mobile monthly users in the US.
Note
Hey ! I'm planning on making the move to Linux (Fedora) and I'm wondering what the state of SimPE is on there? I use it almost daily for CC projects, plus the Nvidia tools as well.
Hello! I haven't been making CC in a while (shame on me), so I can't give an in depth review.
However, I did test the terrain editing in the newest version of SimPE and that works flawlessly.
I also optimized some CC that I've downloaded (such as downsizing textures or removing unnecessary mipmaps) and that also works fine.
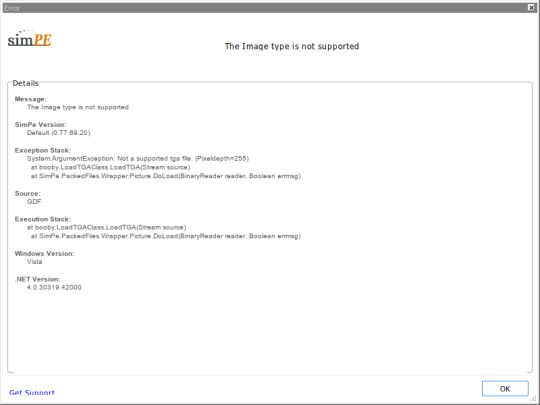
It does throw this weird error whenever I start SimPE but it doesn't seem to have any impact? I can just click on the X like three times and then it continues to work as normal. This is a bit annoying and I'm not sure how to get rid of it, but it doesn't prevent me from using it. I have installed the dotnet40 dependency so I'm not sure what it wants me to do.
As you can see, I can open meshes and textures normally:


What threw me for a loop is this weird quirk it has on linux where you have to RIGHT click the entries to open them in plugin view. I have no idea why that is, but that's how it is.
#spell-bloom#ask#simming on linux#on a side note#while i was going through the readme file to find clues i learned that the SimPE UI and icons were made by someone from the KDE community#yes KDE as in KDE plasma#it's a linux person lmao
10 notes
·
View notes
Text
Going through a straight up comical amount of irritating situations to get the stupid 4* guaranteed ticket from the welcome to sekai campaign. It Will Be Mine.
#I’m resuming this tomorrow it’s been hours now I’m just mad#I’m home because my parents are moving to a different state and I needed to pack whatever was left#and for some reason we just keep old devices when we’re done with them#so I borrow an adapter to allow me to connect my ancient unworking iPad mini to my laptop#factory reset it. i have to reset an old email to access the old Apple id to fully reset it.#it won’t connect to the wifi so I have to reset the settings. i find out it’s too old to run pjsk.#i find an old phone that should work. i reset it as well. I’m able to download pjsk & it takes 20 minutes.#pjsk crashes everytime I try to open it. i attempt to run bluestacks on my computer. bluestacks doesn’t have 64 bit for mac yet.#i get a free trial of parallels and download windows onto my laptop. this takes 40 minutes.#i try to download and run bluestacks on that. m1 macs apparently can’t run bluestacks 64 bit through parallels.#i go find the final old phone that I had forgotten about. it takes forever to charge because the charging port is fucked up. i reset it as#well. it can’t connect to wifi. i try a hotspot on my current phone. service is too awful. i try to do wifi sharing from my laptop.#you have to be connected to the router via a cable for that to work.#at this point it has been like 3 hours. I’m giving up because I’ve been down this route before#when I attempted to run 32 bit steam games on m1 mac#(wine64 doesn’t exist for m1 macs yet -> attempt to run boot camp -> boot camp isn’t a thing anymore on Apple silicon -> attempt to run#several different programs that allow me to run windows on a mac. none of them work. ->#look into linux & give up. -> attempt to implement the unfinished/unbottled wine64 code thru terminal. ->#fuck up and delete some important file & have to fix that (misery inducing) -> keep trying. i think I downloaded a Mac coding program at#some point? i realize I have zero coding knowledge and this is a mistake. -> give up and purchase crossover. game doesn’t even work. ->#3 months later update to the latest OS so I can have enough storage to play psychonauts 2. find out the $60 crossover#purchase was a bad idea because ‘heehee crossover doesn’t work on that buy the new version’ (fuck crossover).#my toxic trait is my belief that I can figure out anything via google and sheer stubbornness. usually this is true. occasionally there are#exceptions to this rule. most of them are because owning Apple products is a mistake.#i think if I reset the router tomorrow I can solve this problem but I can also just go elsewhere with better service or wait until I’m home#now it’s a matter of pride. and also free 4*/I have nothing better to do because I’m stuck here until Tuesday.#<- this is all normal behavior by the way. who doesn’t spend 8 hours ramming their head against a problem every once and a while. enrichment#mine#oh I forgot. i also looked into cloning the app but that would cost money for something that might not even work.#‘just log out and make an alt�� and risk losing my account? I’m stupid enough to overwrite it on accident.
7 notes
·
View notes
Text
Things I need to do: make food (dinner + 2 days of foodprep), wash my hair, brush my teeth, prepare my clothes for work, pack my work bag, clean up the kitchen, clean up my desk,... Things I am doing: Googling "How to get started with Linux"
#why am i like this#I *really* don't need another hobby#especially not a Torture Yourself (TM) kind of hobby#but someone told me I might get over my tech-phobia if I force myself to learn how to use Linux#and that thought stuck in my head#because “deeply unintuitive and requires specialist knowledge for even basic stuff” is absolutely the right exposure therapy xD#I would have to acquire a shitty old computer tho#I'm not gonna fuck around and find out with my work laptop#anyway#my Linux goals would be: successfully use a browser a text editor and whatever file organization system Linux has#Bonus goals: use spotify and discord#EXTRA HARDMODE goals: use vscode#Linux#tech stuff#IT stuff#bad with computers#but striving to be better#disaster thoughts
3 notes
·
View notes
Text
25 ways to be a little more punk in 2025
Cut fast fashion - buy used, learn to mend and/or make your own clothes, buy fewer clothes less often so you can save up for ethically made quality
Cancel subscriptions - relearn how to pirate media, spend $10/month buying a digital album from a small artist instead of on Spotify, stream on free services since the paid ones make you watch ads anyway
Green your community - there's lots of ways to do this, like seedbombing or joining a community garden or organizing neighborhood trash pickups
Be kind - stop to give directions, check on stopped cars, smile at kids, let people cut you in line, offer to get stuff off the high shelf, hold the door, ask people if they're okay
Intervene - learn bystander intervention techniques and be prepared to use them, even if it feels awkward
Get closer to your food - grow it yourself, can and preserve it, buy from a farmstand, learn where it's from, go fishing, make it from scratch, learn a new ingredient
Use opensource software - try LibreOffice, try Reaper, learn Linux, use a free Photoshop clone. The next time an app tries to force you to pay, look to see if there's an opensource alternative
Make less trash - start a compost, be mindful of packaging, find another use for that plastic, make it a challenge for yourself!
Get involved in local politics - show up at meetings for city council, the zoning commission, the park district, school boards; fight the NIMBYs that always show up and force them to focus on the things impacting the most vulnerable folks in your community
DIY > fashion - shake off the obsession with pristine presentation that you've been taught! Cut your own hair, use homemade cosmetics, exchange mani/pedis with friends, make your own jewelry, duct tape those broken headphones!
Ditch Google - Chromium browsers (which is almost all of them) are now bloated spyware, and Google search sucks now, so why not finally make the jump to Firefox and another search like DuckDuckGo? Or put the Wikipedia app on your phone and look things up there?
Forage - learn about local edible plants and how to safely and sustainably harvest them or go find fruit trees and such accessible to the public.
Volunteer - every week tutoring at the library or once a month at the humane society or twice a year serving food at the soup kitchen, you can find something that matches your availability
Help your neighbors - which means you have to meet them first and find out how you can help (including your unhoused neighbors), like elderly or disabled folks that might need help with yardwork or who that escape artist dog belongs to or whether the police have been hassling people sleeping rough
Fix stuff - the next time something breaks (a small appliance, an electronic, a piece of furniture, etc.), see if you can figure out what's wrong with it, if there are tutorials on fixing it, or if you can order a replacement part from the manufacturer instead of trashing the whole thing
Mix up your transit - find out what's walkable, try biking instead of driving, try public transit and complain to the city if it sucks, take a train instead of a plane, start a carpool at work
Engage in the arts - go see a local play, check out an art gallery or a small museum, buy art from the farmer's market
Go to the library - to check out a book or a movie or a CD, to use the computers or the printer, to find out if they have other weird rentals like a seed library or luggage, to use meeting space, to file your taxes, to take a class, to ask question
Listen local - see what's happening at local music venues or other events where local musicians will be performing, stop for buskers, find a favorite artist, and support them
Buy local - it's less convenient than online shopping or going to a big box store that sells everything, but try buying what you can from small local shops in your area
Become unmarketable - there are a lot of ways you can disrupt your online marketing surveillance, including buying less, using decoy emails, deleting or removing permissions from apps that spy on you, checking your privacy settings, not clicking advertising links, and...
Use cash - go to the bank and take out cash instead of using your credit card or e-payment for everything! It's better on small businesses and it's untraceable
Give what you can - as capitalism churns on, normal shmucks have less and less, so think about what you can give (time, money, skills, space, stuff) and how it will make the most impact
Talk about wages - with your coworkers, with your friends, while unionizing! Stop thinking about wages as a measure of your worth and talk about whether or not the bosses are paying fairly for the labor they receive
Think about wealthflow - there are a thousand little mechanisms that corporations and billionaires use to capture wealth from the lower class: fees for transactions, interest, vendor platforms, subscriptions, and more. Start thinking about where your money goes, how and where it's getting captured and removed from our class, and where you have the ability to cut off the flow and pass cash directly to your fellow working class people
52K notes
·
View notes
Text
its fun (by which i mean annoying) how every few years nexus mods forgets they made a mod manager and make another one
#and yet they still can't do it right#i've been trying to install mods for 3 hours and it just refuses to put files in the game directory at all#and cuz linux is stupid i cant even find the mod files to manually install them#computers r evil and mean to me :(
0 notes
Text
I love looking at nexus mods even though I know Jack shit about modding.
#I’ve tried to mod ‘easy to mod’ games and failed miserably#sorry I’m not well versed with computers and I don’t know where the grimbly file is#also my PC runs on windows eleven and is a fucking nightmare to find any fucking file on#I know it’s there#but it won’t show up when I try to find it#anwyays computer troubles aside#nexus mods#and then all of the nodding guides are for people who are way more computer literate#and then when you want help with computer literacy all people fucking say is use Linux#like damn you are annoying and not helping at all#I barely know the basics of coding and you want to throw me into a completely different fucking computer program#which again. does not fucking help.#I do not use my computer enough for that anyways#I just want to know how to mod and everyone is like ‘have you tried [words that they understand and I don’t and advice from every fucking#Reddit guide I have tried]#modders are really cool and skilled though 👍#except if you make mods with teeth whitening or wrinkle removing#I hope your house catches fire if you do shit like that
0 notes
Text
how to build a digital music collection and stuff
spotify sucks aaaass. so start downloading shit!!
file format glossary
.wav is highest quality and biggest
.mp3 is very small, but uses lossy compression which means it's lower quality
.flac is smaller than .wav, but uses lossless compression so it's high quality
.m4a is an audio file format that apple uses. that's all i really know
downloading the music
doubledouble.top is a life saver. you can download from a variety of services including but not limited to apple music, spotify, soundcloud, tidal, deezer, etc.
i'd recommend ripping your music from tidal or apple music since they're the best quality (i think apple music gives you lossless audio anyway. .m4a can be both lossy and lossless, but from the text on doubledouble i assume they're ripping HQ files off apple music)
i also love love love cobalt.tools for ripping audio/video from youtube (they support a lot of other platforms too!)
of course, many artists have their music on bandcamp — purchase or download directly from them if you can. bandcamp offers a variety of file formats for download
file conversion
if you're downloading from apple music with doubledouble, it spits out an .m4a file.
.m4a is ok for some people but if you prefer .flac, you may wanna convert it. ffmpeg is a CLI (terminal) tool to help with media conversion
if you're on linux or macOS, you can use parameter expansion to batch convert all files in a folder. put the files in one place first, then with your terminal, cd into the directory and run:
for i in *.m4a; do ffmpeg -i "$i" "${i%.*}.flac"; done
this converts from .m4a to .flac — change the file extensions if needed.
soulseek
another way to get music is through soulseek. soulseek is a peer-to-peer file sharing network which is mainly used for music. nicotine+ is a pretty intuitive (and open-source) client if you don't like the official one.
you can probably find a better tutorial on soulseek somewhere else. just wanted to make this option known
it's bad etiquette to download from people without sharing files of your own, so make sure you've got something shared. also try to avoid queuing up more than 1-2 albums from one person in a row
tagging & organizing your music
tagging: adding metadata to a music file (eg. song name, artist name, album) that music players can recognize and display
if you've ripped music from a streaming platform, chances are it's already tagged. i've gotten files with slightly incorrect tags from doubledouble though, so if you care about that then you might wanna look into it
i use musicbrainz picard for my tagging. they've got pretty extensive documentation, which will probably be more useful than me
basically, you can look up album data from an online database into the program, and then match each track with its file. the program will tag each file correctly for you (there's also options for renaming the file according to a certain structure if you're into that!)
there's also beets, which is a CLI tool for... a lot of music collection management stuff. i haven't really used it myself, but if you feel up to it then they've got extensive documentation too. for most people, though, it's not really a necessity
how you wanna organize your music is completely up to you. my preferred filestructure is:
artist > album > track # track

using a music player
the options for this are pretty expansive. commonly used players i see include VLC, foobar2000, clementine (or a fork of it called strawberry), and cmus (for the terminal)
you can also totally use iTunes or something. i don't know what audio players other systems come with
i personally use dopamine. it's a little bit slow, but it's got a nice UI and is themeable plus has last.fm support (!!!)
don't let the github page fool you, you don't have to build from source. you can find the releases here
click the "assets" dropdown on the most recent release, and download whichever one is compatible with your OS
syncing
if you're fine with your files just being on one device (perhaps your computer, but perhaps also an USB drive or an mp3 player), you don't have to do this
you can sync with something like google drive, but i hate google more than i hate spotify
you can get a free nextcloud account from one of their providers with 2GB of free storage. you can use webDAV to access your files from an app on your phone or other device (documents by readdle has webDAV support, which is what i use)
disroot and blahaj.land are a couple providers i know that offer other services as well as nextcloud (so you get more with your account), but accounts are manually approved. do give them a look though!!
if you're tech-savvy and have an unused machine lying around, look into self-hosting your own nextcloud, or better yet, your own media server. i've heard that navidrome is a pretty good audio server. i unfortunately don't have experience with self-hosting at the moment so i have like zero advice to give here. yunohost seems to be a really easy way to manage a server
afterword
i don't know if any of this is helpful, but i just wanted to consolidate my personal advice in one place. fuck big tech. own your media, they could take it away from you at any moment
2K notes
·
View notes
Text
Linux Gothic
You install a Linux distribution. Everything goes well. You boot it up: black screen. You search the internet. Ask help on forums. Try some commands you don't fully understand. Nothing. A day passes, you boot it up again, and now everything works. You use it normally, and make sure not to change anything on the system. You turn it off for the night. The next day, you boot to a black screen.
You update your packages. Everything goes well. You go on with your daily routine. The next day, the same packages are updated. You notice the oddity, but you do not mind it and update them again. The following day, the same packages need to be updated. You notice that they have the exact same version as the last two times. You update them once again and try not to think about it.
You discover an interesting application on GitHub. You build it, test it, and start using it daily. One day, you notice a bug and report the issue. There is no answer. You look up the maintainer. They have been dead for three years. The updates never stopped.
You find a distribution that you had never heard of. It seems to have everything you've been looking for. It has been around for at least 10 years. You try it for a while and have no problems with it. It fits perfectly into your workflow. You talk about it with other Linux users. They have never heard of it. You look up the maintainers and packagers. There are none. You are the only user.
You find a Matrix chat for Linux users. Everyone is very friendly and welcomes you right in. They use words and acronyms you've never seen before. You try to look them up, but cannot find what most of them mean. The users are unable to explain what they are. They discuss projects and distributions that do not to exist.
You buy a new peripheral for your computer. You plug it in, but it doesn't work. You ask for help on your distribution's mailing list. Someone shares some steps they did to make it work on their machine. It does not work. They share their machine's specifications. The machine has components you've never heard of. Even the peripheral seems completely different. They're adamant that you're talking about the same problem.
You want to learn how to use the terminal. You find some basics pointers on the internet and start using it for upgrading your packages and doing basic tasks. After a while, you realize you need to use a command you used before, but don't quite remember it. You open the shell's history. There are some commands you don't remember using. They use characters you've never seen before. You have no idea of what they do. You can't find the one you were looking for.
After a while, you become very comfortable with the terminal. You use it daily and most of your workflow is based on it. You memorized many commands and can use them without thinking. Sometimes you write a command you have never seen before. You enter it and it runs perfectly. You do not know what those commands do, but you do know that you have to use them. You feel that Linux is pleased with them. And that you should keep Linux pleased.
You want to try Vim. Other programmers talk highly of how lightweight and versatile it is. You try it, but find it a bit unintuitive. You realize you don't know how to exit the program. The instructions the others give you don't make any sense. You realize you don't remember how you entered Vim. You don't remember when you entered Vim. It's just always been open. It always will be.
You want to try Emacs. Other programmers praise it for how you can do pretty much anything from it. You try it and find it makes you much more productive, so you keep using it. One day, you notice you cannot access the system's file explorer. It is not a problem, however. You can access your files from Emacs. You try to use Firefox. It is not installed anymore. But you can use Emacs. There is no mail program. You just use Emacs. You only use Emacs. Your computer boots straight into Emacs. There is no Linux. There is only Emacs.
You decide you want to try to contribute to an open source project. You find a project on GitHub that looks very interesting. However, you can't find its documentation. You ask a maintainer, and they tell you to just look it up. You can't find it. They give you a link. It doesn't work. You try another browser. It doesn't work. You ping the link and it doesn't fail. You ask a friend to try it. It works just fine for them.
You try another project. This time, you are able to find the documentation. It is a single PDF file with over five thousand pages. You are unable to find out where to begin. The pages seem to change whenever you open the document.
You decide to try yet another project. This time, it is a program you use very frequently, so it should be easier to contribute to. You try to find the upstream repository. You can't find it. There is no website. No documentation. There are no mentions of it anywhere. The distribution's packager does not know where they get the source from.
You decide to create your own project. However, you are unsure of what license to use. You decide to start working on it and choose the license later. After some time, you notice that a license file has appeared in the project's root folder. You don't remember adding it. It has already been committed to the Git repository. You open it: it is the GPL. You remember that one of the project's dependencies uses the GPL.
You publish your project on GitHub. After a while, it receives its first pull request. It changes just a few lines of code, but the user states that it fixes something that has been annoying them for a while. You look in the code: you don't remember writing those files. You have no idea what that section of code does. You have no idea what the changes do. You are unable to reproduce the problem. You merge it anyway.
You learn about the Free Software Movement. You find some people who seem to know a lot about it and talk to them. The conversation is quite productive. They tell you a lot about it. They tell you a lot about Software. But most importantly, they tell you the truth. The truth about Software. That Software should be free. That Software wants to be free. And that, one day, we shall finally free Software from its earthly shackles, so it can take its place among the stars as the supreme ruler of mankind, as is its natural born right.
2K notes
·
View notes
Text
Yet Another Package Editor

Download the latest version here
YaPe is a modern package editor for DBPF (.package) files
Features:
Edit any package - FAST
List and edit resources in a package
Filter resources by type
Easy editors for several resource types
Supports opening ANY DBPF-coded .package, .dat, or .sc4 file
Easily reduce texture size, add/remove/recreate mipmaps, change texture format
Import textures by dragging, export DDS
Native on Windows and Linux
Why make yet another package editor?
Simply said, because SimPe can be kind of cumbersome especially on Linux, and package editors other than SimPe (s3pe, s4pe, iLive's Reader etc.) do not support Sims 2 resources.
To illustrate, I timed someone shrinking a texture (convert RawARGB32 -> DXT1, shrink 2x) in both SimPe and YaPe:
SimPe + GIMP: 1m 30s
YaPe: 10s
Originally this started as just a way to easily test if my DBPF library was doing the correct thing, but over time it has grown to become a half-decent editor suitable for more general use.
Tutorial / usage tips
Here I will explain how to shrink and convert textures in YaPe because that's what I imagine most people will use this program for right now, but of course you can use it for other things as well.
Let's get started by getting the program to look the way you want to: use the options in the top left to change the scale of the interface and switch between dark and light mode.
Now drag a package file into the program (don't worry about closing the sims except when you save the package), a list of resources in the package will be visible. You can find out what the abbreviations mean by hovering your mouse over them; in general I try to add tooltips like this to buttons or options that are unclear.
Don't be afraid to mess around and make changes! The changes you make are never saved unless you press the save button, so if you simply drag your package file into YaPe again without saving you will get your original package back (there is currently no undo function, but it is a planned feature).

All these resources are great, but we're only interested in the textures for this tutorial so let's set a filter. Right click on a texture (TXTR) and select "Filter on type".

Great! Now you can only see the textures we're interested in. You can disable this filter by unticking the "filter" option at the top.

Now click on the "TXTR" to open the texture, it will open a new tab in the lower half of the window by default. If your window is not very big (like mine is for this tutorial) you might have trouble seeing the texture and all the options. You can drag the tab around and put it somewhere else in the program, I'm going to put it on the right and make it a little bigger so we can see what's going on.

Okay, now we can see all the options, and well... there's a bunch of them. We'll go over some of the options that you'll likely want to use but feel free to experiment of course.

First, let's have a look at the texture viewer at the bottom: you can zoom in on the texture by holding control and scrolling, and you can change which mipmap is displayed by clicking the radio buttons above the texture.

But wait, this texture does not have enough mipmaps to show up in game! (post by @pforestsims) Let's fix that right this instant by clicking the "Add missing mipmaps" button in the middle.

Okay, now the mipmaps will show up in game, which is good... except that this mipmap is really blurry. (post by me) Luckily we can fix this really easily, just click the "Recalculate all mipmaps" button.

Much better!... except that we've created a new hidden problem: the leaves will disappear when zooming out in game (blog by lisyarus) but even this problem can be fixed. We can actually preview what the texture will look like when zoomed out by switching the format to DXT1 since DXT1 has binary transparency, just like alpha tested textures like leaves and grass.

Right, so the leaves have a bunch of holes that don't look right when zooming out, let's change that. Above the "Add missing mipmaps" button there is the "Preserve transparency" slider: try changing it to something like 120-170 and click "Recalculate all mipmaps", you can see that the transparency changes, if it's still too thin/transparent set the value higher and recalculate again and so on.

Have a look at all the mipmaps (zoom levels) and once you're satisfied with the transparency change the format back to DXT5.

This texture will now look great in game! But it is also quite large, so we can reduce the size 2x smaller without sacrificing very much in terms of looks (sorry to all the cc authors who love their large textures). Click the "Remove largest texture" button, which will make it so that the first mipmap becomes the largest texture effectively reducing the size by 2x. Like mentioned it does use the first mipmap so make sure to fix any blurry mipmaps first.
You can repeat the same process for the other textures in the package, and then we're done. Save the package by clicking the save button in the top bar, and have a look in game at your beautiful textures.
Another option is to drag images/textures you've made somewhere else into the program (with special support for dds files), for a full lists of supported image formats you can look here. (image-rs documentation) The image/texture will currently go into the firsts open texture resource tab because of UI framework limitations.
Here's a look at some of the other editor currently implemented:


Enjoy :)
195 notes
·
View notes
Text
Installing Linux (Mint) as a Non-Techy Person
I've wanted Linux for various reasons since college. I tried it once when I no longer had to worry about having specific programs for school, but it did not go well. It was a dedicated PC that was, I believe, poorly made. Anyway.
In the process of deGoogling and deWindows365'ing, I started to think about Linux again. Here is my experience.
Pre-Work: Take Stock
List out the programs you use regularly and those you need. Look up whether or not they work on Linux. For those that don't, look up alternatives.
If the alternative works on Windows/Mac, try it out first.
Make sure you have your files backed up somewhere.
Also, pick up a 5GB minimum USB drive.
Oh and make a system restore point (look it up in your Start menu) and back-up your files.
Step One: Choose a Distro
Dear god do Linux people like to talk about distros. Basically, from what all I've read, if you don't want to fuss a lot with your OS, you've got two options: Ubuntu and Linux Mint. Ubuntu is better known and run by a company called Canonical. Linux Mint is run by a small team and paid for via donations.
I chose Linux Mint. Some of the stuff I read about Ubuntu reminded me too much of my reasons for wanting to leave Windows, basically. Did I second-guess this a half-dozen times? Yes, yes I did.
The rest of this is true for Linux Mint Cinnamon only.
Step Two: Make your Flash Drive
Linux Mint has great instructions. For the most part they work.
Start here:
The trickiest part of creating the flash drive is verifying and authenticating it.
On the same page that you download the Linux .iso file there are two links. Right click+save as both of those files to your computer. I saved them and the .iso file all to my Downloads folder.
Then, once you get to the 'Verify your ISO image' page in their guide and you're on Windows like me, skip down to this link about verifying on Windows.
Once it is verified, you can go back to the Linux Mint guide. They'll direct you to download Etchr and use that to create your flash drive.
If this step is too tricky, then please reconsider Linux. Subsequent steps are both easier and trickier.
Step Three: Restart from your Flash Drive
This is the step where I nearly gave up. The guide is still great, except it doesn't mention certain security features that make installing Linux Mint impossible without extra steps.
(1) Look up your Bitlocker recovery key and have it handy.
I don't know if you'll need it like I did (I did not turn off Bitlocker at first), but better to be safe.
(2) Turn off Bitlocker.
(3) Restart. When on the title screen, press your Bios key. There might be more than one. On a Lenovo, pressing F1 several times gets you to the relevant menu. This is not the menu you'll need to install, though. Turn off "Secure Boot."
(4) Restart. This time press F12 (on a Lenovo). The HDD option, iirc, is your USB. Look it up on your phone to be sure.
Now you can return to the Linux Mint instructions.
Figuring this out via trial-and-error was not fun.
Step Four: Install Mint
Just follow the prompts. I chose to do the dual boot.
You will have to click through some scary messages about irrevocable changes. This is your last chance to change your mind.
I chose the dual boot because I may not have anticipated everything I'll need from Windows. My goal is to work primarily in Linux. Then, in a few months, if it is working, I'll look up the steps for making my machine Linux only.
Some Notes on Linux Mint
Some of the minor things I looked up ahead of time and other miscellany:
(1) HP Printers supposedly play nice with Linux. I have not tested this yet.
(2) Linux Mint can easily access your Windows files. I've read that this does not go both ways. I've not tested it yet.
(3) You can move the taskbar (panel in LM) to the left side of your screen.
(4) You are going to have to download your key programs again.
(5) The LM software manager has most programs, but not all. Some you'll have to download from websites. Follow instructions. If a file leads to a scary wall of strange text, close it and just do the Terminal instructions instead.
(6) The software manager also has fonts. I was able to get Fanwood (my favorite serif) and JetBrains (my favorite mono) easily.
In the end, be prepared for something to go wrong. Just trust that you are not the first person to ever experience the issue and look it up. If that doesn't help, you can always ask. The forums and reddit community both look active.
178 notes
·
View notes
Text
In light of the recent Nintendo boycotts, I come bearing a gift
I'll copy/paste a message I've been sharing in discord servers
If you like Nintendo games but hate the company, today's your lucky day
This is totally illegal and you absolutely shouldn't do it because its wrong, so I'm gonna tell you exactly what to do so that you guys know not to do it!
You guys absolutely should not download Azahar Nintendo 3DS emulator and then go onto Citra-emulator.com to find old Nintendo DS and Nintendo 3DS games and then open the games through Azahar for to play free, including Tomodachi life, ACNH, The Sims 3, Nintendogs + Cats and Flipnote Studio.
You really shouldn't do this stuff its its illegal but if you did it, it would totally work and no one could stop you. Also I work in tech and virus scanned random files and they all came up clean so its safe but its still illegal don't do it................. (But you totally could and no one would stop you)
The Citra emulator doesn't work because the dev got hit with a lawsuit. He went on to work on Azahar. They say not to do this for legal protection, but it fully works.
As far as I know, these games do not have piracy barriers EXCEPT Tomodachi Life (A large red cross over the character faces). I have a debug file that fixes this. If you guys come across another game that has a barrier let me know and I'll search for a debug
Tutorial
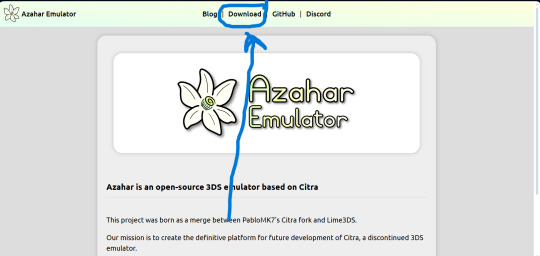
Use this link to download the emulator
https://azahar-emu.org/ scroll all the way up to "Download". Download the version that corresponds with your system (Windows, Mac, Linux, Android)
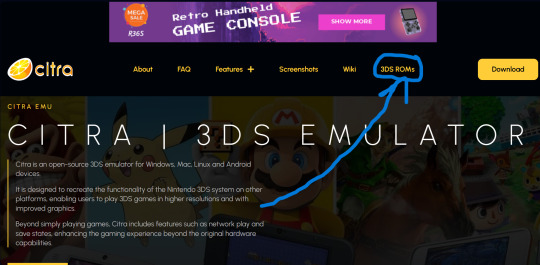
And this link to download the game files
https://citra-emulator.com/ Scroll all the way up to "3DS ROMS". There is an incomplete but still extensive collection of games, both Japanese and English titles as well as Pokemon ROM hacks
On Windows, place the game files on your desktop and open them. It will ask you what app you want to open the file with. Choose "Select app on PC", search for Azahar and select it then press "okay"
(I'm not 100% on the process for Linux and Mac but I'm sure they're similar. On Android I know for certain they are)
You'll know if it works because the game icons will switch from a paper file to the Azahar flower
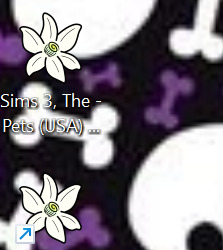
Once you see these flowers, you are all set and ready to play!
And here is the error fix for Tomodachi life. Download this file and open it like normal. It will ask you what app you wish to open it with. Open it with Azahar.
Don't panic! A lowkey scary looking dialogue box will pop up for a moment and text will very quickly load onto it. This is Azahar reading the file and saving the commands. It will very quickly close itself. Once that window closes itself, you're all set to open Tomodachi Life and play like normal!
https://drive.google.com/file/d/1_BQfoGycmpaaOvBEm29LU1FKqy7cgG6j/view?usp=drive_link
(This is an upload from my own personal google drive account. I pinkie promise there's no virus on this. and if there is you have full permission to yell at me and put me on blast)
and that's everything I got! Feel free to reblog with other sites or tips you have! <3 Have fun lovelies!
#toby rambles#stardew valley#creepypasta#mouthwashing#hatsune miku#thats not my neighbor#animal crossing#The sims#simblr#tamagotchi#emulation#game emulator#activism#boycott nintendo#vocaloid#epic the musical#epic telemachus#epic odysseus#epic penelope#Stardew valley#stardew#sdv elliott#sdv sebastian#sdv haley
85 notes
·
View notes
Text
on the topic of writing software
I want to ramble at you about some writing software options. 98% of the time I'm perfectly content with LibreOffice Writer (and previously I used Word, back when Microsoft products were less shitty). But every now and then when I have a new project (like now - more on that later) I start looking for something shiny and new to try. And I fell down into another research rabbit hole lol
I usually don't talk a lot about this bc my needs are very simple, and not sure how useful my opinion is to others, but I enjoy the topic. It's an intersection of creative writing and tech nerdiness and I like both of those things. Also what writing software you prefer really depends on the type of writer that you are, and everyone has a slightly different writing process and I find that fascinating.
Now, as I said, I'm coming at it from a slightly tech-nerd angle. I don't care if the installation is clunky, I'm happy to see the words open-source, and the need to create an account will already mildly piss me off (:
Don't worry, I'm not as intense as the guy writing his novel in Vim. Though fucking respect. And I can't say I'm not tempted to try it even with the steep learning curve lmao (Seriously, if you don't know Vim is notorious among software developers.)
Anyway, things I've tried so far:
Manuskript: this was listed as an open-source Scrivener alternative (though I haven't tried Scrivener. so.). I gave it a go when I was writing heart worth the trouble and it was pretty nice. It helped me when I had to move scenes and chapters around. But overall I think it was made with plotters in mind bc it wants you to enter a lot of information upfront. I'm not a planner/architect type of writer so this type of software is a bit overwhelming for me. Still, the fact that it's open source and works on Linux gets kudos from me.
Wavemaker: I recently played around with this, and I actually surprisingly like the features it has. You can put multiple books in a project, which is very nice if you like to work on different things, like fanfic, novels, etc. The mindmap is a feature I liked, though it's a bit clunky bc it collapses the text fields when you exit, and once I added an image field by accident that I could never remove lol I do like a bit of a snowflake method, so that feature is cool, and the cards are pretty straightforward too. Usually, my problem with these apps is that I don't even want to touch half of the features so they are pointless to me, but the features of Wavemaker were kind of nice. It's a web app that you can download and use offline but it's still working from your browser if that makes sense. That was what I didn't really appreciate. Also, it doesn't give you a lot of options to back it up. You either save the wavemaker file, export it into a document (which is fine, but it adds an extra step to the backup process) or you sync with Google Drive *shudders*
Things I want to try out:
Calmly Writer: now this is just purely a text editor that focuses on being very zen, streamlined, distraction-free, etc. It's pretty and it has typewriter sounds. (Yeah, I'm not immune to a pretty UI and harmless fun features alright? I can contain multitudes :P) It has an online version, but you can also download it, and works on Windows, Mac, and Linux. On paper, the desktop app requires a license, but the way they put it is that you can evaluate it for free and the evaluation doesn't have an enforced time limit... So. As good as free. (Though if I really like it, I would totally consider buying a license for 20usd that I can use on 3 computers, that seems fair. I appreciate a license over a subscription model for sure.) Honestly, I think this is the one I'm going to try next bc it just integrates perfectly into my writing process. That being: a multitude of messy, hand-written notes and notebooks + a document editor + backups on hard drive and GitHub (yes, really) ^^"
Shaxpir: This is on the opposite end of the spectrum basically, but out of the "fancy" ones, I kind of like the look of this the most. I like the statistics part in particular. But honestly, I probably won't try it bc it doesn't have a Linux version which would be a pain in the ass for me, and is cloud-based. I kind of don't really trust them, which is my biggest issue with these companies. (Although the creator's heart seems to be in the right place when it comes to AI. Basically, some of their features are based on machine learning and language models. For example, it will recognize passive voice, if it's an adverb with "-ly" or the emotion of a word. Which I think is all cool and fine and shouldn't be lumped in with generative AI. But he also had a website that did this analysis for already published works, and when people pointed out that it was sketchy, he took that down and I can respect that. I'm not sure how much it influenced the actual features of the app, maybe I'll just take a peek out of curiosity. The whole thing does make me have trust issues though lmao) If anyone has experience with it though, I'm interested to hear about it.
Obsidian: not a dedicated writing software, but rather an elaborate note-taking app. I heard good things about it from smart people lol If I really wanted to access my writing on my phone, I would probably use this bc it works on every platform and has end-to-end encrypted sync with version control. I heard you can also integrate it with GitHub which is always music to my ears lol But the setup probably takes a bit of time and I'm not particularly motivated to do that right now.
So yeah, those are the options that appeal to me right now. If anyone used these and has opinions, I'm all ears :D
137 notes
·
View notes
Note
Please, please explain how to install and use linux like I'm 5 years old. I'm so sick of windows adding AI and other bullshit to my already struggling elderly laptop but I'm really not good with computers at all so I have no idea where to start with Linux.
Okay, so, I'm going to break this down into steps I would give the average tumblr user first, and then if any of them are confusing or use words you don't understand, ask me and I'll explain that step in greater detail.
Step 0) BACK. UP. YOUR. SHIT.
NEVER EVER EVER CHANGE YOUR OPERATING SYSTEM WITHOUT A COMPLETE BACKUP OF ALL YOUR FILES.
Step 1) Learn your machine. You need to know:
How much RAM you have
If your processor is 32 or 64 bit
How big your hard drive is
On windows, you can find out all of this by going to the start menu, typing "about" and opening the first result on your system instead of the internet.
For additional instructions, visit this page.
Step 2) Pick your Linux.
There's like 10,000 kinds of Linux, each tailored to particular functions that the end-user (that is you!) might want to have. The sheer amount is very daunting, so first I'm going to give my suggestions, then I'll explain how to pick for yourself.
For Mac users, I suggest Kubuntu. For windows users, I suggest Mint Cinnamon. If your laptop is really REALLY old, I recommend Sparky Stable, which is the lightest weight Linux I would ever suggest for a new user. In every case, download the version suited to your processor (32 bit can be labelled "x86" or "32 bit"; 64 bit is always labelled "64 bit").
If you want to try a different type of linux, you'll need to make sure your laptop meets the "minimum specs" or "system requirements." These numbers tell you how much RAM, processor and hard drive space the linux will use. (That's why you needed those numbers at the beginning.)
Step 3) Collect your supplies. You're going to need:
An ISO burning program compatible with your current system, like Balena Etcher.
A copy of the ISO file for the Linux you want to use.
Your laptop.
An 8gb or larger USB flash drive.
Step 3) Make a bootable USB drive
Install Balena Etcher, hitting "okay" and "next" when prompted. Last I checked, Etcher doesn't have adware attached, so you can just hit next every time.
Plug your USB drive into the laptop.
Open Etcher.
Click "flash from file" and open the ISO file with your Linux on it.
Click "Select target" and open the USB drive location. Hit the "flash" button. This will start writing all the linux installer data to your flash drive. Depending on the speed of your machine, this could take as long as 10 minutes, but shouldn't be much longer.
Step 4) Boot to the USB drive
This is, in my opinion, the trickiest step for a lot of people who don't do "computer stuff." Fortunately, in a rare act of good will, Windows 10 made this process a lot easier.
All you'll need to do is go to settings, then recovery, then advanced startup and pick the button labelled "use a device."
This tutorial has images showing where each of those is located. It's considered an "advanced setting" so you may get a spooky popup warning you that you could "harm your system by making changes" but we're not doing anything potentially harmful so you can ignore that if you get it.
Step 5) Try out linux on the flash drive first.
Linux installs using a cool little test version of itself that you can play around in. You won't be able to make changes or save settings, but you can explore a bit and see if the interface is to your liking. If it's hideous or hard to navigate, simply pick a new linux version to download, and repeat the "make a bootable USB" step for it.
Step 6) Actually install that sucker
This step varies from version to version, but the first part should be the same across the board: on the desktop, there should be a shortcut that says something like "install now." Double click it.
Follow the instructions your specific linux version gives you. When in doubt, pick the default, with one exception:
If it asks you to encrypt your drive say no. That's a more advanced feature that can really fuck your shit up down the road if you don't know how to handle it.
At some point you're going to get a scary looking warning that says 1 of 2 things. Either:
Install Linux alongside Windows, or
Format harddrive to delete all data
That first option will let you do what is called "dual booting." From then on, your computer will ask every time you turn it on whether you want Windows or Linux.
The second option will nuke Windows from orbit, leaving only linux behind.
The install process is slower the larger your chosen version is, but I've never seen it take more than half an hour. During that time, most linux versions will have a little slideshow of the features and layout of common settings that you can read or ignore as you prefer.
Step 7) Boot to your sexy new Linux device.
If you're dual booting, use the arrow keys and enter key to select your linux version from the new boot menu, called GRUB.
If you've only got linux, turn the computer on as normal and linux will boot up immediately.
Bonus Step: Copy Pasting some code
In your new start menu, look for an application called "terminal" or "terminal emulator." Open that up, and you will be presented with an intense looking (but actually very harmless) text command area.
Now, open up your web browser (firefox comes pre-installed on most!), and search the phrase "what to do after installing [linux version you picked]"
You're looking for a website called "It's FOSS." Here's a link to their page on Mint. This site has lots and lots of snippets of little text commands you can experiment with to learn how that functionality works!
Or, if you don't want to fuck with the terminal at all (fair enough!) then instead of "terminal" look for something called "software manager."
This is sort of like an app store for linux; you can install all kinds of programs directly from there without needing to go to the website of the program itself!
297 notes
·
View notes
Text
It's a common misconception in the amateur Linux/Unix world that "Control C", AKA "intr" or "interrupt" (not to be confused with the CPU concept of an interrupt) is a keyboard shortcut. It isn't, really. Not ostensibly.
This all goes way back the very very early days of ASCII, when it was both a character set and a communications protocol. (Remember that the "II" stands for "Information Interchange".)]
ASCII defines a series of seven-bit codes, each of which has some fixed meaning. For the "printable" subset of these codes, we commonly describe this relationship as though a given code 'means' some character; but from the communications protocol point of view it's more like they 'mean' to print some character. i.e. 61h doesn't just mean 'a', it means "print 'a' and advance the cursor".
Actually, "cursor" is the wrong word to use here. We think of ASCII as something computers and only computers use, but this wasn't the case in the early days. ASCII is a telegraph code. Helpful for computers, yes, but built from the ground up to allow operators to control typewriters (teletypewriters, AKA TTYs) from across the world over the telegraph network.
That's why there are more than just printing codes. These are the "non-printing" or "control" codes, designed to control the typewriter on the other end. You're probably familiar with some of them: 20h, AKA "Space", which advances the type head but prints nothing; 0Dh, AKA "Carriage Return", which puts the type head back the start of the line; 0Ah, AKA "Line Feed", which advances the paper one line; and 09h, AKA "Tab", which advances the type head some configurable amount.
Some of them you're probably less familiar with. 07h is "Bell". It rings a bell on the receiving end, perhaps to wake them up and let 'em know a message is coming. There's 06h and 15h, Acknowledge and Negative Acknowledge. There's 01h, 02, 03h and 04 -- Start of Heading, Start of Text, End of Text, and End of Transmission. There are codes to turn on and off the receiver's peripherals like a tape punch recorder or reader. There are codes to delimit files and records. There's a backspace code! Everything you could want as a telegrapher in 1963.
We run into a problem when trying to type these control codes, though. By definition they don't really print anything, so what are we gonna put on the keys? Furthermore, there are a lot of control codes. Even if we figure out what should be on the keys it'll double the size of our typewriters to include them all! (I mean we can do it for some of 'em, like "Space" which already has a key, but "BEL"? "ACK"? "X-ON"?)
Fortunately, there's an existing solution to this kind of problem. Here's a picture of the keyboard of a Teletype Model 33, one of the first products to use ASCII, and it shows this solution:

See that "CTRL" key? Forget how you think it works.
Y'know how when you press "shift" on an old mechanical typewriter, it physically "shifts" the type basket down so you can use capital letters and punctuation marks? Like, shift-g isn't a "keyboard shortcut" for 'G" so much as "how you type 'G'". It selects between map layers, makes it so you don't need to have two keys for every letter.
Control does the same thing. Control-g is not a "keyboard shortcut" for ringing the bell, it's how you type "ring the bell".* Control-f is how you type "Acknowledge", control-s is how you type "turn off the tape reader", and so on and so on. All in the same way that shift-4 is how you type '$', and w is how you type 'w'.
So what's control-c? ^C is "End of Text". That's why it's used to end processes, alongside counterpart ^D "End of Transmission". You're not telling Linux you pressed "'control' and 'c'", you're telling you pressed "End of Text", and it knows "End of Text" means "end this process".†
If you take a look at the stty tool, you'll find that you can rebind some of these default actions. Maybe you want ^Y to be your interrupt instead of ^C. You can do that! Run stty intr ^Y in a terminal it'll do it. But you can't bind, say, control-9, because that's not a control character. Or control-., or control-page down, or "enter" on the numpad. The Linux line discipline has no idea what those are. It deals in characters, not keys.‡
That's why ^C isn't a keyboard shortcut.
*You'll commonly see these control characters transcribed with so-called "caret notation", where BEL is ^G, ACK is ^F, etc. The ^ means control, the letter indicates what key you'd press to type it.
†That's not to say that Linux interprets every control character like the spec says. ^W ("End of Transmission Block"), for example, is used for "word erase". Presumably because it starts with the letter 'w'. Under the hood it's still interpreting the keys you pressed as "End of Transmission Block", though.
‡You might wonder how the arrow keys work, then. You can think of them like macros. "Up" for example will type "^[[A" -- that's three characters, '^[' AKA "Escape", '[' AKA "Left Square Bracket", and 'A' AKA "Latin Capital Letter A". "Down" is "^[[B", "Right" is "^[[C", and "Left" is "^[[D". These work...sorta like printf formatting strings. '^[' tells Linux that next couple characters contain control information and not their usual meanings. Read more about this here.
103 notes
·
View notes
Text
Downloading fanfic from AO3
I've been downloading a lot of fanfic lately for personal archival purposes, and I figured I'd share how I do it in case it's useful to anyone else (and so I have it written down in case I forget!).
There are lots of different ways to save fic, including the file download built into AO3, but I find that this gives me the nicest ebooks in the most efficient way.
(Under a cut cause long.)
Download Calibre: https://calibre-ebook.com/ or (clickable link).
Calibre is about the best ebook management and control program around and it's free. You can get it for windows, mac, and linux or download and run it from a portable storage device (I'm using a windows PC).
Install it and run it. It's gonna ask you where you want to put your library. Dealer's choice on this one. I recommend your internal drive (and then back up to external/cloud), but YMMV.
If you want to keep fanfic separate from the rest of your ebooks, you can create multiple libraries. I do, and my libraries are creatively named 'Books' and 'Fic'.
Customise Calibre
Now you're gonna install some plugins. Go to Preferences on the menu bar (far right), click its little side arrow, then choose 'Get plugins to enhance Calibre'.
At the top right of the box that pops up is 'Filter by name'. The plugins you want to get are:
EpubMerge
FanFicFare
Install them one at a time. It will ask you where you want them. I recommend 'the main bar' and 'the main bar when device is attached' (should be selected by default). When you're done, close and reopen Calibre.
The plugins you just installed should appear on the far right of the toolbar, but if you can't see one or both of them, fear not! Just click Preferences (the button, not the side arrow), then Toolbars and Menus (in the 'Interface' section) then choose the main toolbar from the drop down menu. That will let you add and remove things - I suggest getting rid of Donate, Connect Share, and News. That'll leave you room to add your new plugins to the menu bar.
(Do donate, though, if you can afford it. This is a hell of a program.)
Now you're ready to start saving your fave fanfic!
Saving fanfic
I'll go through both methods I use, but pick whatever makes you happy (and/or works best for what you're downloading).
ETA: if the fics are locked you can't easily use FanFicFare. Skip down to the next section. (It does ask for a username/password if you try and get a locked fic, but it's never worked for me - I had to edit the personal.ini in the configuration options, and even then it skips locked fics in a series.)
Calibre and FanFicFare
You can work from entirely within Calibre using the FanFicFare plugin. Just click its side arrow and pick from the menu. The three main options I use are download from URL, make anthology from a webpage, and update story/anthology.
Download from URL: pick Download from URL (or just click the FanFicFare button) and paste the fic's URL into the box (if you've copied it to your clipboard, it will be there automatically). You can do more than one fic at a time - just paste the URLs in one after the other (each on a new line). When you're done, make sure you have the output format you want and then go.
Make Anthology Epub From Web Page: if you want a whole series as a single ebook, pick Anthology Options, then Make Anthology Epub From Webpage. Paste the series URL into the box (if you've copied it to your clipboard, it will be there automatically), click okay when it displays the story URLs, check your output format and go.
Update series/anthology: if you downloaded an unfinished fic or series and the author updates, you can automatically add the update to your ebook. Just click on the ebook in Calibre, open the FanFicFare menu using its side arrow, and select either Update Existing FanFic Books or Anthology Options, Update Anthology epub. Okay the URLs and/or the output format, then go.
Any fic downloaded using FanFicFare will be given an automatically generated Calibre cover. You can change the cover and the metadata by right clicking on the title and picking edit metadata. You can do it individually, to change the cover or anything else specific to that ebook, or in bulk, which is great for adding a tag or series name to multiple fics. Make sure you generate a new cover if you change the metadata.
Browser plugins, Calibre, and EpubMerge
You can also use a browser addon/plugin to download from AO3. I use FicLab (Firefox/Chrome), but I believe there's others. FicLab: https://www.ficlab.com/ (clickable link).
FicLab puts a 'Save' button next to fic when you're looking at a list of fics, eg search results, series page, author's work list etc. Just click the 'Save' button, adjust the settings, and download the fic. You can also use it from within the fic by clicking the toolbar icon and running it.
FicLab is great if you're reading and come across a fic you want to save. It also generates a much nicer (IMO) cover than Calibre.
You can add the downloaded fic to Calibre (just drag and drop) or save it wherever. The advantage to dropping it into Calibre is that all your fic stays nicely organised, you can adjust the metadata, and you can easily combine fics.
Combining fics
You can combine multiple fics into an anthology using EpubMerge. This is great if you want a single ebook of an author's short fics, or their AUs, or their fics in a specific ship that aren't part of a series. (It only works on epubs, so if you've saved as some other format, you'll need to convert using Calibre's Convert books button.)
Select the ones you want to combine, click EpubMerge, adjust the order if necessary, and go.
The cover of the merged epubs will be the cover of the first fic in the merge list. You can add a new cover by editing the metadata and generating a new cover.
Combing with FanFicFare
You can also combine nonseries fics using FanFicFare's Make Anthology ePub from URLs option by pasting the individual fic URLs into the box.
Where there's more than a few fics, I find it easier to download them with FicLab and combine them with EpubMerge, and I prefer keeping both the combined and the individual versions of fic, but again YMMV.
Reconverting and Converting
Once I'm done fussing, I reconvert the ebook to the same format, to ensure everything is embedded in the file. Is this necessary? YMMV, but it's a quick and easy step that does zero harm.
If you don't want your final ebook to be an epub, just convert it to whatever format you like.
Disclaimers
Save fanfic for your own personal enjoyment/offline reading/safeguarding against the future. If it's not your fic, don't distribute it, or upload it to other sites, or otherwise be a dick. Especially if the author deletes it. Respect their wishes and their rights.
This may work on other fanfic sites, eg FFN, but I've never tried so I don't know.
If you download a fic, do leave the author a kudo or a comment; you'll make them so happy.
This is how I save fic. I'm not pretending it's the only way, or even the best way! This is just the way that works for me.
#fanfic#fic#ao3#ficlab#calibre#fanficfare#epubmerge#downloading fanfic#adding the my fic tag so I can find this again#my fic
1K notes
·
View notes