#sewing skirts
Text

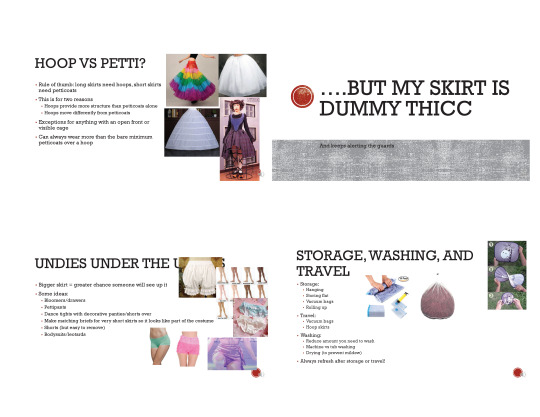

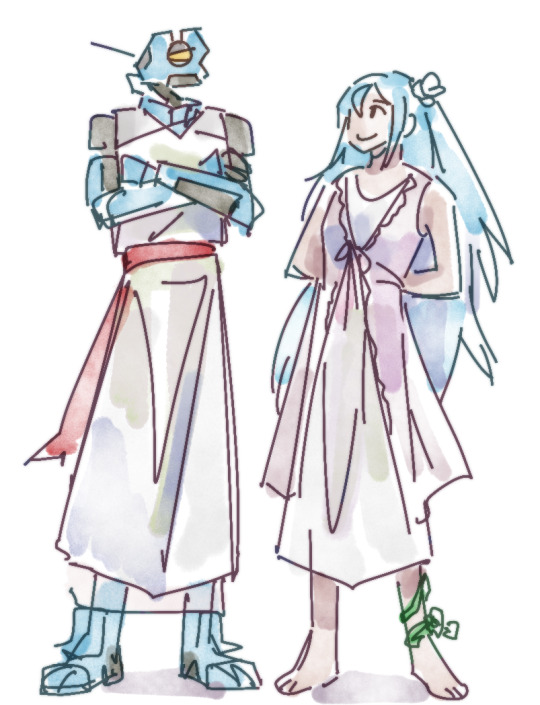
Hella Big Skirts panel
Ever wanted to make a hella skirt? Wondering how to keep your hella big skirt puffy? Join cosplayer fabrickind to learn the ins and outs of patterning, sewing, and supporting the large, fluffy skirts of your dreams!
This is just the bare bones of the panel, as many of the examples were elaborated on in-person, and it is just the slides, not any of my notes. It is not meant to be exhaustive or definitive, and is just meant for general advice and suggestion purposes only. If anyone has feedback they would like to give, feel free to do so. That said, I hope that people find this information useful.
Here is a link to a pdf of the presentation. You may download for personal use, but please do not alter the presentation, repost without permission, or do any sort of other unauthorized use. (If you have a question about how you can use this presentation, please send me a message with your question and we can work it out. I promise I’m not scary. ;]) Feel free to reblog this post as much as you want, though. I do these panels and post them because I want the information to be shared.
I hope someone finds this helpful! :]
#cosplay#cosplay help#cosplay advice#cosplay tutorials#cosplay tips#cosplay tip#skirts#hella big skirts#cosplay panel#cosplay panels#sewing#sewing skirts
439 notes
·
View notes
Text


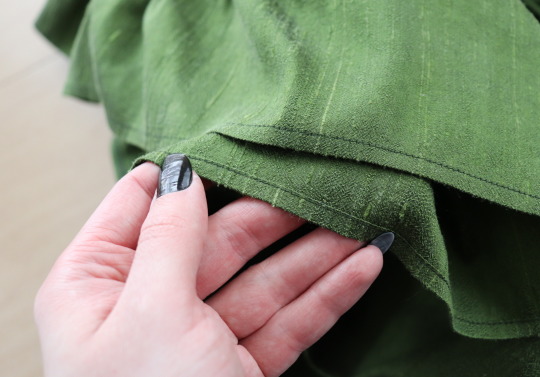
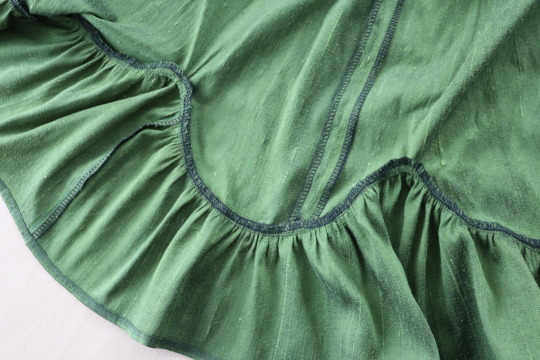
I started this petticoat sometime in 2013 and it's been on The Pile ever since.
I had thought I might cut it up to use the fabric for something else, even though I was unlikely to have a use for washed dupioni, but then I realized I could put it on Mr. Fibreglass! So I dug it out and took it to my alterations job to work on during slow days, and yesterday I finally finished it!
I had barely started sewing it up back in 2013, and the thread didn't match and the seam allowances weren't finished, so I picked apart what I'd done and serged the edges on the industrial at work.
I vaguely remember getting the silk dupioni on clearance sale, and it must have been pretty darn cheap because there's about 4 metres of fabric in this thing. I forgot to measure it and count the scallops, but however many scallops there are it's a few too many and they took quite a long time to sew. I don't know why I thought that many opposing curves was a good idea, but they do look nice!
It's mostly machine sewn, aside from the waistband finishing and the ends of the ties. He could definitely use another petticoat or two under there to give it more floof and show off the scallops better, but that's not a priority at all, especially since he lives in a somewhat cluttered corner. (Clutter removed for these photos but it's back there now.)
Now that there's a bit of colour in Mr. Fibreglass's outfit, he reminds me of @breebird33's work.
669 notes
·
View notes
Text
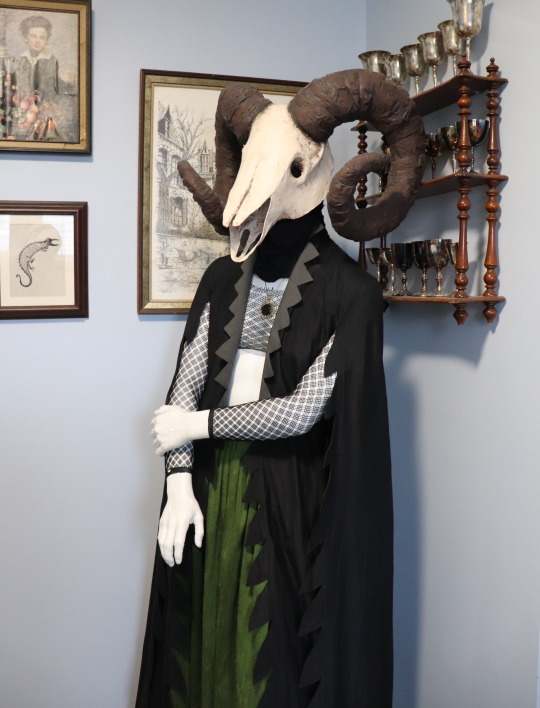
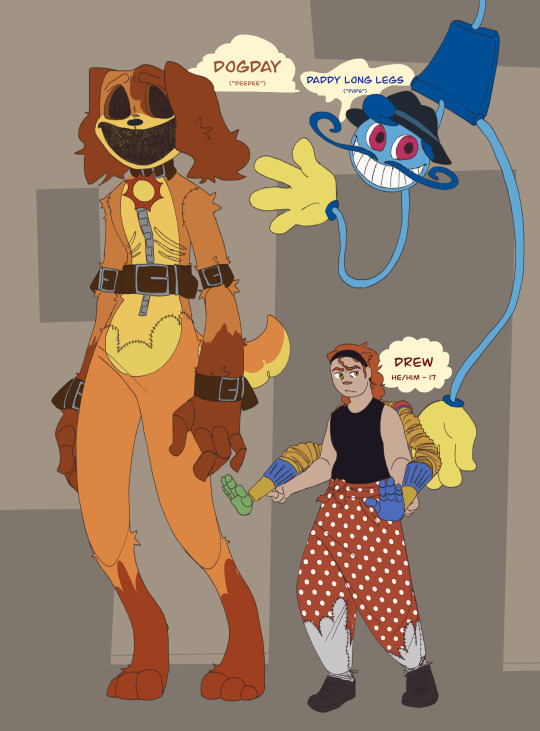
The Three D's
(Click for better quality)
I have a horrible habit of dropping any series-comics I try to make, so I thought it'd do a little story-ish ask event!!
So far, we've got the three D's: Dogday, Daddy Long Legs, and Drew.
Basic info and closeups!
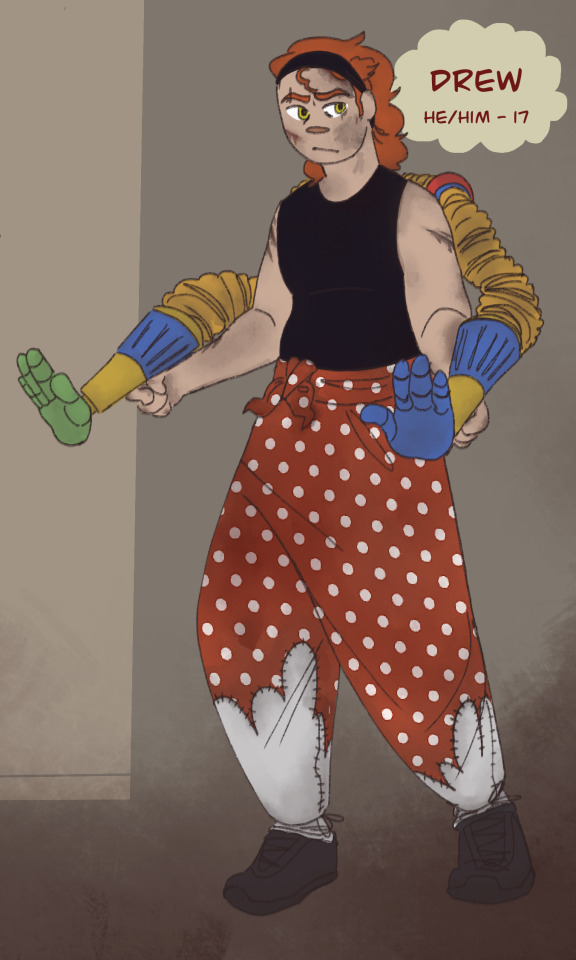
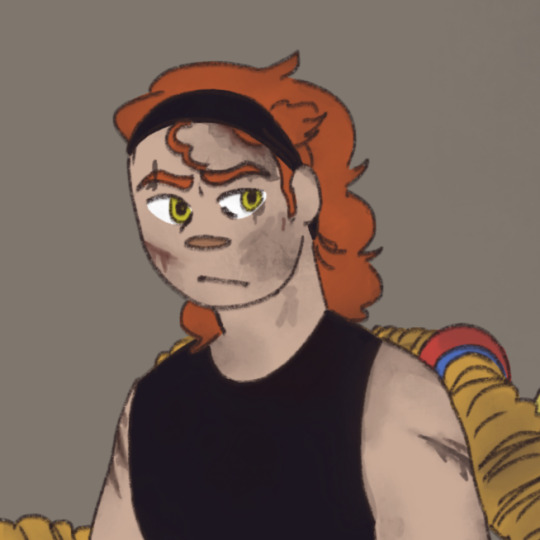
Drew, he/him, 18 yrs: the horror-loving nephew of an old Playtime Co. employee. Squawks like a strangled bird when surprised.
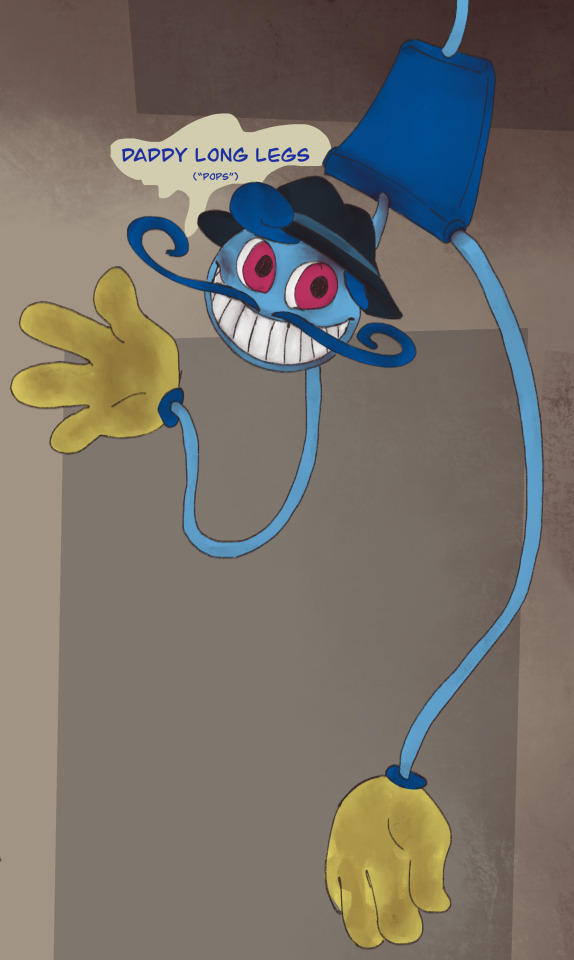
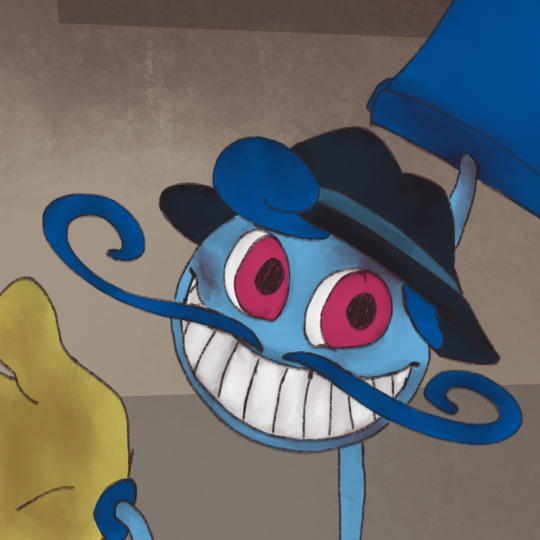
Daddy Long Legs, aka: "Pops:" If you could find a loving father from the 20s who wasn't a misogynist. Misses his wife, but doesn't blame Drew for her death.
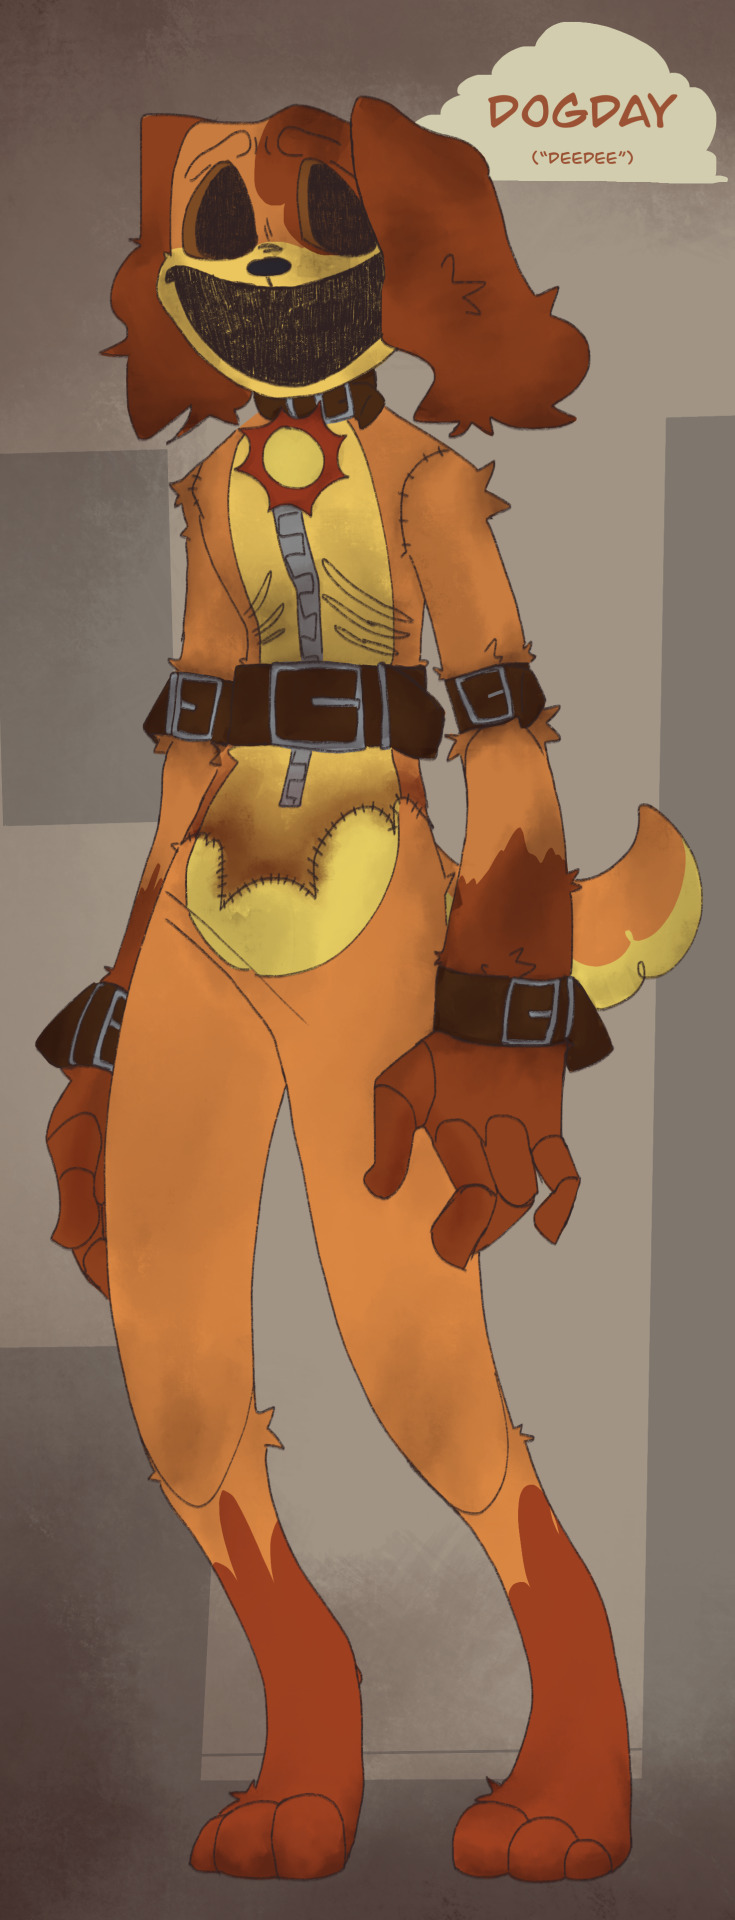

Dogday, aka: "Deedee" or "Dogs:" The last, overly traumatised Smiling Critter who really needs a hug. Drew found him some spare legs in a closet somewhere.
Without dirt and grime:
#Drew's pants got shredded in the train crash so he stole Miss Delight's skirt#and sewed part of his shirt to make pants#it's a little crusty#Woah Drew's got two dads? lucky#two orange coded mfs and a blue bitch/pos#all of them are traumatised#but only one is desensitised#That train crash fucked Drew UP dawg#he was so pissed#Poppy's gonna catch these hands frfr#dogday finds comfort in taking care of others#but REALLY likes being taken care of#Daddy long legs is just kinda there#love him though#dogday#dogday poppy playtime#daddy long legs#daddy long legs poppy playtime#drew poppy playtime#drew garland#three d's#pops poppy playtime#art#phrart#ask phrog#poppy playtime#poppy playtime chapter 3#poppy playtime fanart
462 notes
·
View notes
Text


Fic writers who wrote migrainous-hunter I love you
Inspired by This fic from @just-here-with-my-thoughts and this one too by lucifer_elliot and this one by @oohhihoney
#star wars#star wars the bad batch#the bad batch fanart#I tried tagging people whom I could find the tumblr#hope it's okay#hope it tags people actually#Anyway I wanted to color them but I've got 100* things to do#including sewing a skirt and making a tiramisu#and a six pages comic#and finish my Omega shooting lesson animatic#this one is almost finished tho!#and answer the nice comments#with other things than ksgshhkK THANKS YOU I LUV YOU ALL AND YOU MADE MY DAy#anyway it's past my bed time#zzzzzzzz
348 notes
·
View notes
Photo
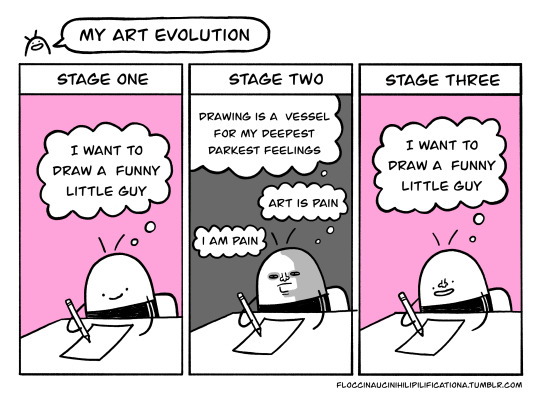
#selfie bee#to be honest my stage 2 was just drawing the same picture of Helena Bonham Carter everyday#I still have the folder#friends not only did I drive a BIKE recently I also drove a CAR#all on my own!! (*´▽`*)#It was very scary and I cried a few times but I did it#in the beginning I had to do a few night shifts in a different city and there was to other way to get there and in the end it was fine#I wonder what other things I am scared of are secretly fine#phonecalls? math?? (●´・△・`)#I am actually avoiding math right this moment#I've decided to learn how to sew a skirt and did you know that sewing is secretly math#I did not know and now the skirt is very short and the living room is covered in yarn and I have not done any actual sewing yet#but I will do it and maybe its just like driving and you just have to cry a little and then it will be fine#the only truly bad thing that happened while driving is that I got into a thunderstorm one time#and it was night and there were 300 trucks going to opposite way#I tried to focus on the Lizzo song on the radio but I was also crying#if you were a truck driver and you saw a woman 2 months a go at night driving a car crying while singing Juice! Juice! (´;д;`)#I'm fine I hope you didn't also cry#have a nice day friends!!#I hope you're doing well!! ♥ :)#I will now go back to the skirt
4K notes
·
View notes
Text
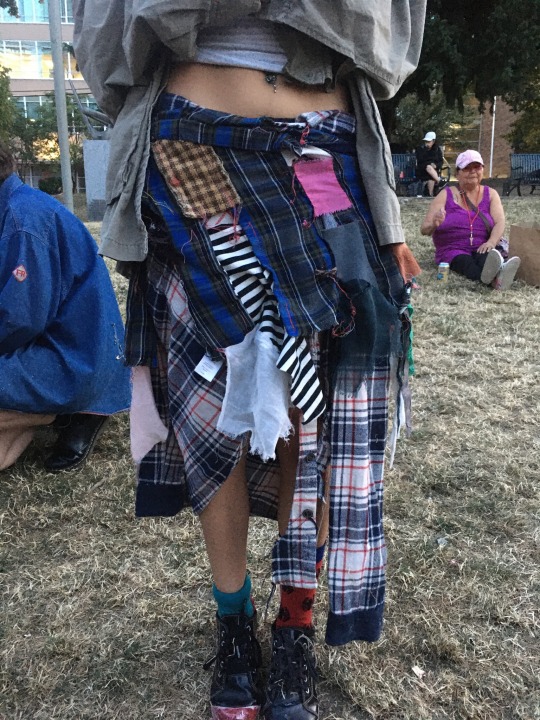
At a park punk show tonight, check out this persons cool diy skirt that they made themselves. They say it cost nothing to make!
#punk#diy#diy punk#punk diy#sewing#upcycling#punk posting#punk skirt#diy skirt#punk fashion#punk scene
859 notes
·
View notes
Photo
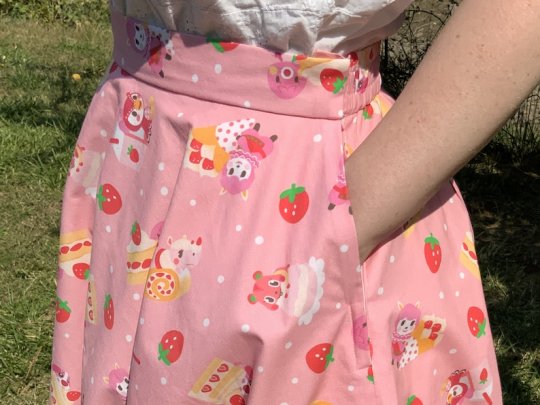
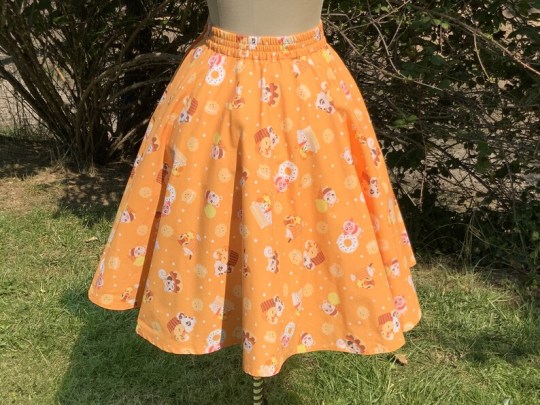
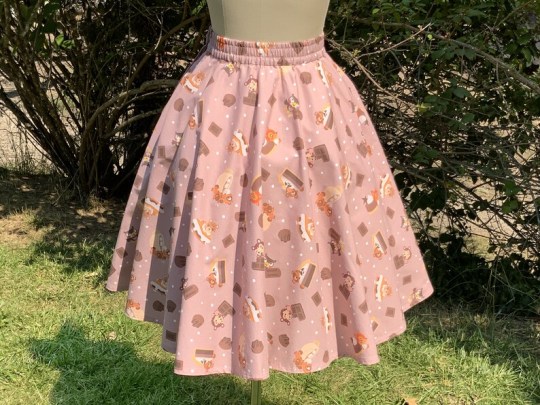

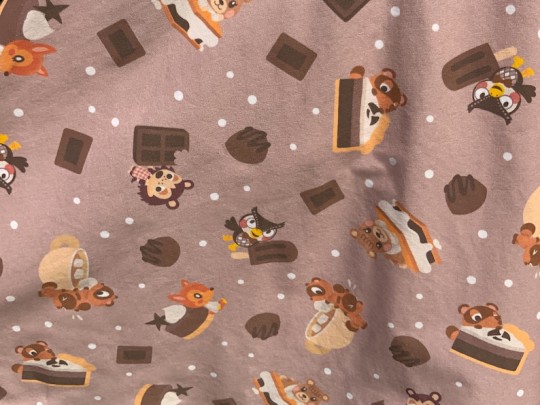
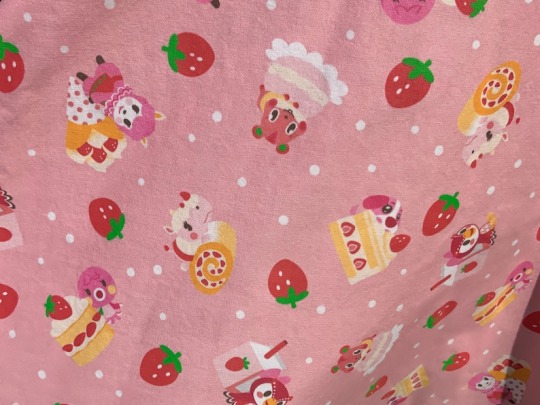
Animal Crossing Skirts with Pockets made by WanderlingWorld
#animal crossing#fashion#art#sewing#nintendo#acnh#new horizons#skirts#dress#spring#gaming#video games#crafts#villagers#merengue#able sisters#marina#celeste#tom nook#isabelle#timmy and tommy#kk slider#marshal#cute#clothing#clothes#artists#nintendo switch#switch#ac
1K notes
·
View notes
Text
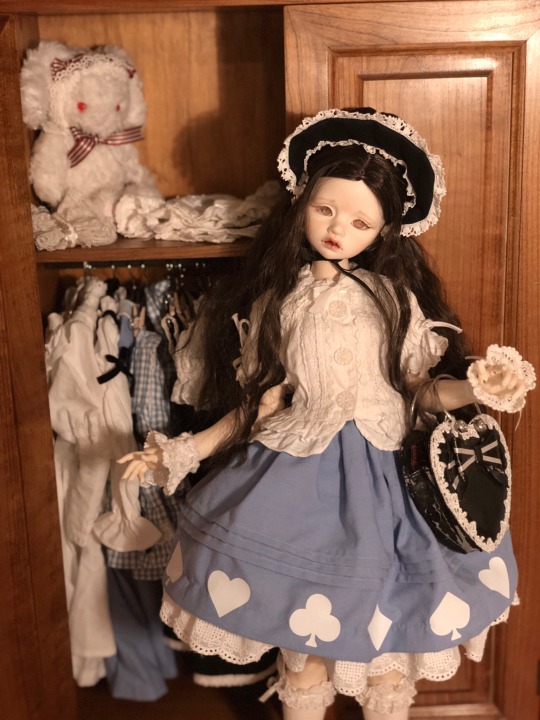

*~~Be an angel and don’t reblog her on a kink/nsfw blog~~*
#bjd#egl#lolita fashion#old school lolita#I finished her skirt !#it's simple but really cute I think ♡#also confession moment#I love Léopoldine but she's a pain to photograph and I'll be honest#not my best work here#but the set up with the wardrobe was just too cute not to share#anyway#probably my last sewing for her in a while#I really have to sew things for friends myself and other dolls now#it's not as if she was lacking clothing anyway ^^'#my dolls#doll
202 notes
·
View notes
Text
Hey guys look at the Secret Pants I made!

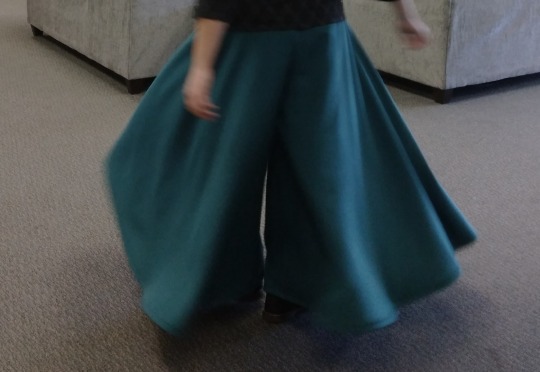

[ID: 3 pictures of me in a turquoise split skirt. When I stand still, it looks like a skirt. When I spin, you can see two different legs. In the third picture, I'm grabbing my foot and stretching it above shoulder level, showing the giant bell-shape spread of the leg. My torso and face are censored with a neon gradient box and a neon swirled circle. End ID.]
#cj sews#sewing#diy#beginner sewing#it's not waste until you waste it#solarpunk#split skirt#secret pants
254 notes
·
View notes
Text
I broke multiple sewing machine needles on this one
157 notes
·
View notes
Text
I love when I see posts like "Share how many crochet WIPs you currently have! I have 5, it's so many!"
Like, girl, I have unfinished projects from over a decade ago that I refuse to frog on the off chance I decide to finish them. I've found years-old projects I forgot I even started and will impulsively just finish it on the spot. I've started three different projects in the last 2 months, including one I started yesterday, that I already know I may or may not finish within the year depending on motivation.
The number of WIPs I have is infinite.
#crochet#knitting#needlepoint#sewing#embroidery#shoutout to the time it took me 4 years to make my dad a hat. and like 6 years to make a turtle for a teacher.#i picked up yarn spinning for ONE day in like 2017. i have not done it since.#there's a half finished elephant amigurumi sitting in a basket and i started that guy in like 2011#i have two maybe three shawls i know of that are sitting unfinished in a storage bag#plenty of swatches of things that i start and lose interest in#currently i have a cardigan i wanted to make and started it and then got bored so i stopped#there's a hat i was knitting for my nanna that i started maybe 2 days before she passed#and that's sat unfinished i can't even look at it. i have no clue if i'll ever actually finish it.#there's at least one skirt i never finished sewing. and two skirts i have all the materials for but haven't started.#i know i have one beach cover up dress and one cover up skirt that i started in 2017 and didn't finish.#i think my oldest work in progress though dates back to when i was 9 or 10. i made a slipper. never finished the other foot.#that was in 2005 or 06. so literally i might have WIPs older than someone who is reading this.#and those are the just some of the ones i REMEMBER. buried in my yarn stash are probably others i've just forgotten.
283 notes
·
View notes
Note
was mirage's dress in DECT based off any real dresses that may be for sale somewhere. who said that. or is it purely just a product of your own mind. its very pretty
it's a version of a dress I drew her in a year or so before working on DECT, which was in turn based upon a Project DIVA module I like (White Gown) that I misremembered. this outfit exists because I have a shit memory and play rhythm games
#ask#DECT#construction-wise it's an A-line midi dress with a V neck and a sheer panel on the shoulders/back + sort of a longer sheer skirt underneath#with a belt around the hips (not waist. this design choice is purposeful) so one could. very easily sew it from a pattern i think#any relation to Lain or the music video for Strobe Light by Powapowa-P is unintentional (i think) but fits thematically very well#ultrakill#mirage
248 notes
·
View notes
Text
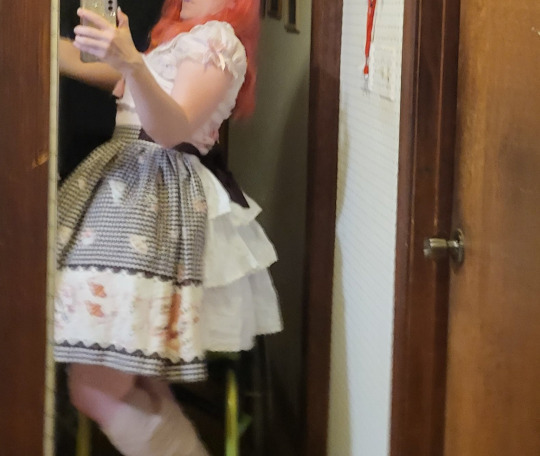
(It's been entirely too long since we've started a tutorial with a very blurry picture, which is a 20dollarlolita tradition. Am I about to fall over and only staying upright because of a death grip on this trim? Stay tuned to find out)
Let's make a skirt.
There's a lot of lolita fashion that doesn't fit most people. It's me. I'm most people. I'm going to wear it anyway, so I'm going to resize that to fit me.
The hardest part of resizing a lolita skirt (or skirt part of a dress) is that you almost never can get the fabric that the skirt was made out of. Lolita prints are usually pretty limited run. While some dresses will let you redistribute the fabric to have a slightly less full skirt, that's usually a major reconstruction that ends up drifting a bit away from the lolita shape.

x
A ruffled bustle bustle, however, is pretty common. Bustles like this are pretty common in lolita fashion and add an additional detail. In addition, you can make the waist of the skirt several inches bigger without a problem, and without compromising skirt fullness. If you ever want to undo the alteration, seaming the skirt back up is not very difficult. It's not a fully seamlessly reversible alteration, but there's far worse things you could do to the garment (ask me about my AP dress with mesh pits).
The problem is that bustles like this take quite a bit of energy and fabric, especially if you want to have details like lace trim. It's one of the more time-consuming alterations to do.
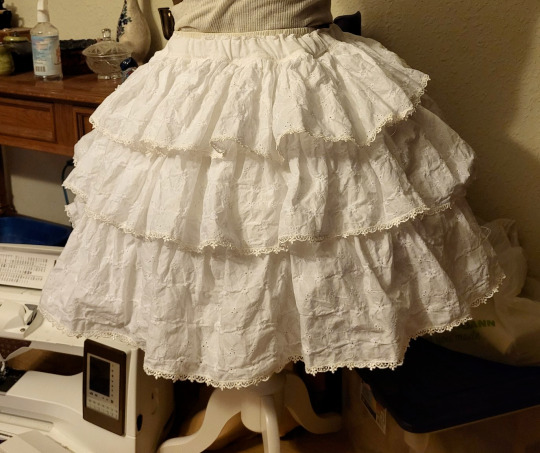
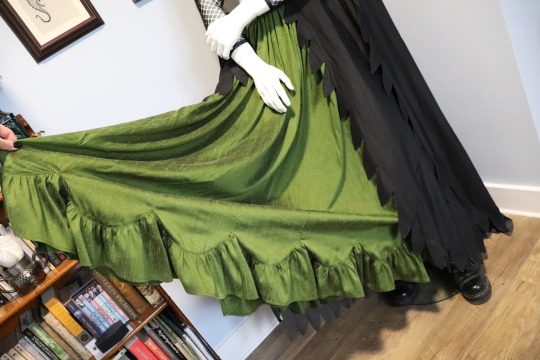
Or you can make one bustle/ruffle underskirt, one time, and wear it with all your skirt and dress modifications. You can splurge and get some nice trim and get some nice fabric, because you only need to buy it once. You can also wear it as a standalone skirt. (Just remember to never, ever steam it before taking pictures. You wouldn't want to look competent)
I put off making one of these for a very long time, because I'd made the process much more complicated in my head than it turned out needing to be. Once I was building this and realized I needed to simplify the fuck down, this became a really easy project.
Materials:
I decided to make the ruffles on my skirt out of eyelet lawn, which is a cotton fabric that has an all-over embroidery. I got this for about $10 a yard on ebay. I don't have a very accurate judgement of how much I used on the skirt. I bought 4 yards and used probably 3.5, but I also wasted a bunch of fabric on an extra tier that I had to chop off. I wanted a fabric with more detail than broadcloth, but that wasn't exclusively going to work with OTT styling.
I got 30 yards of 1/2" Venise lace off cheeptrims.com for $9. I really recommend putting lace on your ruffles if you can. It really adds to the detail level, and you only need to buy it once. You already have to hem all of this so you might as well hem it with lace.
You will also want some fabric for the slip layer (for want of a better term) to attach the ruffles to. My ruffles were a little bit sheer, so I wanted an opaque base fabric for modesty. Depending on the look you're going for, you can also use this layer to add some subtle detailing or changes to the finished look. If you're only wearing it with over-the-top looks, using a base fabric with shine or glitter can stop your ultrabustle from looking too plain. If you're wanting your ruffles to lay flatter, getting a soft fabric with a lot of drape will make the ruffles droopier. I just used some weird cotton plainweave that I got at Green Store for 75% off due to a bolt-long defect.
I used 1" elastic in the waistband here, because this skirt can get a little bit heavy, and then you often have another skirt on top of it adding to the weight.
The other thing that I used that made this much easier was a ruffling attachment for my serger. You don't need to use a serger, but a ruffling or gathering attachment that allows you to ruffle a flat strip of fabric and sew it onto another piece of (not to-be-ruffled) fabric will speed things up considerably. I know a lot of people buy a ruffler or a gathering foot when they start sewing lolita, and then are disappointed when they don't use it very much. There's a very limited number of lolita applications for these attachments, and I'm happy to tell you that this is one of them. If you don't have one, you don't need to go buy one. You can just do the two-step process of gathering the fabric and then sewing it on. But if you wanted an excuse to go buy one, well, you have one.
The Plan:
So I'd previously made a lot of math and calculations for how each tier was going to gather into the previous one, and then realized during the build phase that actually was way too complicated.
What we need is a rectangle with ruffles on it gathered into a waistband. Yes, a rectangle. I know, I was stunned too, but the final result worked the best.
I wanted the tops of the ruffles to be hidden in seams. If you just sew ruffled strips onto a single piece of fabric, it's very difficult to hide all the raw edges and to make sure you're not spreading loose threads all over the place. We're going to make ruffled strips, and sew them to each other. This covers up the raw edges very nicely.
This also will allow you to slightly gather the second and top tiers to each other, if you want to make this skirt in an a-line instead of a bell/cupcake shape.
The Math:

If you know what skirts you're planning on wearing your ultrabustle with, it can help to measure them and get a good guideline.
Generally, you want your ultrabustle to be a number somewhere within these guidelines.
~~Close to the same length of the skirt you're wearing it with
or
~~4"ish longer than the skirt you're wearing it with.
(This depends on if you want the bottom ruffle to stick out. If you're Tallita and all the skirts and dresses you're resizing are also too short, you might want this to double as a ruffled underskirt)
and
~~An acceptable length to wear as a skirt all on its own.
My first run at this ultrabustle was WAY too long, and after chopping off the entire top tier, it ended up being either 1" shorter or 1" longer than the skirts I'm planning on wearing it with, which is a great number for me.
As for the total fullness of the skirt, you have to remember that the ruffles will add visual volume to the skirt. This means that you don't actually need the hemline of your skirt to be super full. All that matters is that your petticoat can comfortably squeeze in there. For this, I measured the hemline of the smallest dress that I had that still fit my petticoat, and used that. It turned out to be about 80" around.
So, what sizes do we cut this at? It's math time.

Here's a worksheet if you want.
You're going to need to know how long you want the finished skirt, how wide you want the hem of the slip (not the ruffle) of the skirt, how many ruffle layers you want, and your waist measurement.
The slip needs to be shorter than the ruffles, so it doesn't show. So total slip length is your skirt length minus 2.5". Divide that by the number of ruffle layers that you have, and you'll have how long to cut each of those. This is slip tier short side.
Each ruffle layer needs to be longer than each slip layer, so that the slip doesn't show. You want each ruffle to overlap the previous one. So, take your slip tier short side and add 2-3" (or more, if you want). This is your ruffle short side.
Your finished slip diameter is your slip tier long side. That one's easy.
If you're a math and planning person, you can determine your ruffle long side measurement. You'll want to take a piece of your fabric, cut to the ruffle short side measurement and also about 45+ inches wide, and a piece of your slip fabric. Run them both through your gathering attachment so that your ruffle fabric is sewn onto your slip fabric. If you like how that looks, you can then measure the finished length of the ruffled fabric and use that to calculate how much fabric you'll need for the ruffles.
There's four places where people mess this up. First of all, if you're using your gathering attachment to sew and gather at the same time (which is the point of that attachment), you want to do all your test runs gathering it onto a fabric. The amount of fabric that goes into a machine ruffle changes depending on if it's onto fabric or just gathering. Second, you want to use your finished fabric, at your finished ruffle length. Different fabrics will ruffle different amounts, and different ruffle widths will look different even at the same gathering amount. Third mistake people make is to not gather a long enough strip. The longer a strip you gather, the more accurately you can measure how much fabric is actually going into your ruffle. And the fourth is to take that measure as an accurate one, and not plan for needing extra fabric. The upside of the gathering attachment is that it will save you so much time. The downside is that you can't be as accurate with knowing how much fabric you'll use. Remember, you can always turn the leftovers into a matching accessory.
Even if you're going to go yolo like I did and not do the math about how many ruffles you need, you will still want to run a check that you like how your ruffling attachment looks. You don't need to measure super accurately, but try to get a feel for how much fabric is going into each ruffle. For example, if your ruffler takes a strip and makes it 1/3 it's flat size, then you'll need more fabric than if your ruffler makes it 1/2 it's flat size.
If you're really on a budget, you can just cut your ruffles at 2.5x your slip long dimension and precisely gather by hand. My time's worth something to me and so it wasn't worth it to do that just to save a yard of $10 fabric.
The last part is just to check that your ruffle long dimension (or it's rough approximation) is still at least 2.75x your waist measure (3.25 is better). If you don't have that, your skirt likely won't look full enough for a lolita silhouette. If that's the case, just add to your skirt dimension until it is.
Actually making it:

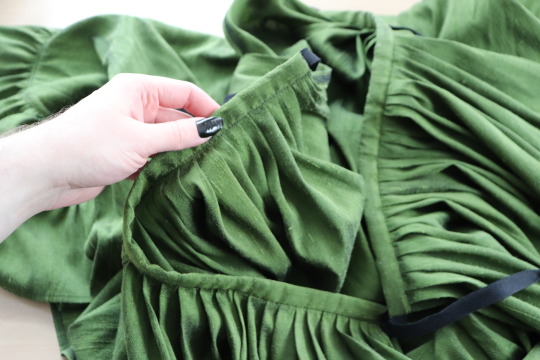
Before you forget, cut out a piece for your waistband. You can decide if this looks better in your ruffle fabric or your slip fabric (I used slip). This piece should be 3ish" longer than the distance around the fullest part of your booty. You need this to be longer than your booty distance so that you can get it on your body. If you're using 1" elastic, you want this piece to be a minimum of 3" wide.
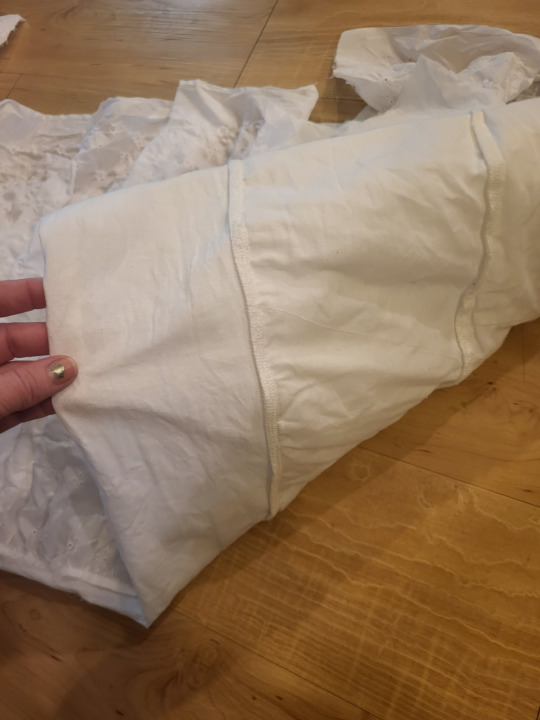
I've found that the easiest way to do this is to start out by making the whole skirt as a single, very long strip. So, I take my slip tiers and cut them all out, and sew them into a long strip.
On my specific fabric, I decided that I wanted the pattern on the eyelet to go lengthwise. So, instead of cutting the fabric across the grain (short side, selvedge to selvedge) like I normally would, I cut down the 4 yard length of the fabric. This meant a lot less seaming. Since I didn't really know how much fabric I was going to use (you know that test I described to check how much fabric you're going to use? Yeah, guess who didn't do that), I just cut them one 4-yard strip at a time. I'd ruffle one all the way, stop, and cut the next one. This did actually save me quite a bit of fabric versus cutting them all at once. I had to go back and sew the sides of the ruffle together once the skirt was done. It was a small price to pay for the convenience I experienced.
I knew what size I wanted the finished ruffle length to be, but I cut my ruffles about 2.5" longer than that. I wanted a little bit of wiggle room once the skirt was done, so that I could do the length adjustment once the whole skirt was assembled.
And then, it's just a matter of letting the ruffler do its work. My serger ruffler works by you putting the item to-be-ruffled on the bottom, and the item to attach the ruffle to on the top, and then just hitting go. Some other rufflers work by putting the to-be-ruffled at the top, so you can see it as you go. Like all sewing machine attachments, if you're not sure, just go on youtube and search "HOW SINGER GATHERING FOOT DO THING NOT LOOK LIKE SHIT?" and someone's probably made a video of it.
So, once you've run all your ruffle through your machine, you should have a nice single strip of slip fabric with a ruffle on top of it. Now, some gathering attachments don't actually sew super strong seams, because you have to adjust tension or stitch length pretty severely to get it to ruffle like you want. The other advantage of putting the ruffles in a seam instead of just topstitching them onto a piece of fabric is that it doesn't matter how strong your ruffle attachment is, as long as it's strong enough to hold until you can put the ruffle in the seam. The seam provides the strength.
Once you have your single long ruffle, cut off a section that's the diameter of your bottom tier.
Now you just need to sew them together (and finish your inside edges). I like to start at the bottom tier and go up.
For each tier, you're sewing the bottom of the slip layer to the top (ruffle and slip) of the tier below. Just pull the ruffle of the higher tier out of the way, put right sides together, and sew.
If you aren't using a serger, you can zigzag over your edges and then trim them down, use an overcasting stitch from your sewing machine, or topstitch some seam binding over the seams. The extra line of stitching on the slip layers in front won't be visible.
One of the other nice things about building this in the way we have is that, when you finish the edges of your inside seams, you're putting three layers together and finishing it as one. This is actually a lot less then 1/3 of the work of finishing them separately, because you'd have to finish the ruffle as a flat piece, which would take way more time. Have I convinced you on the greatness of this technique yet?
Continue cutting pieces off your ruffle layer and stacking them until you have as many layers as you decided you were going to have.
Once you have your layers all stacked up on each other, it's time to sew the skirt back seam. I find that it looks best to hold the ruffles out of the way, sew the slip together, and then go back and sew all the ruffle pieces. Basically now is a good time to just check for any ugly spots and to touch them up.
There's like 50 ways to attach a waistband to a skirt. For this one I used this method (what a blast from the 20dollarlolita past we have there. Also please note that the cost of ruffler feet seems to have gone up from $15 to $60-$100 in the past 10 years and despite working in a sewing machine store, I'm not totally sure why).
Once you've got the whole skirt assembled, it's time for the finishing.
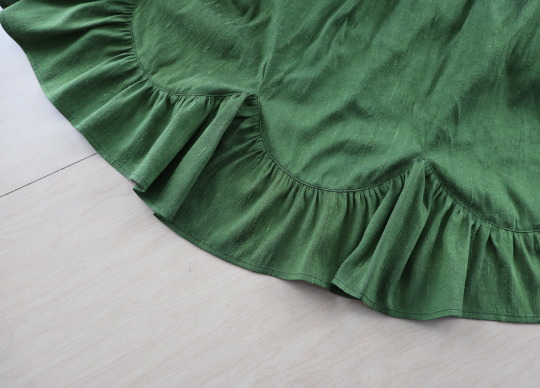
The first thing that I did was put it on and try to judge how short I wanted my top ruffle. I'd cut all my ruffles extra long in the short dimension, so that I could shorten them when they were on the skirt. I picked a length that worked, marked it out, and chopped at that point. I then did this for the other two layers. I found that I wanted my bottom ruffle to be a little bit longer than my top ones, and cutting it long allowed me to make that choice.

I then started just zigagging on my lace. If you don't have a serger, you can use the lace as a hem finish, which also saves you an additional step. The lace really added a lot to this, and since I only need to make this once to wear with a lot of different garments, it was an economical use of nice lace.
I started putting the lace on the top layer first. This is because, if I ran out of lace, having a different (wider) lace on the bottom layer wouldn't look strange. As previously mentioned, I did zero measuring of how long my ruffles are, and had no idea if 27 yards would be enough lace. Don't be like me. Do some tests. Or be like me and choose the life of treachery. Anyway, stick lace on this thing, please. You worked hard and your skirts deserve it.
The only other thing that I did was to cut the slip layer down by about 3" on the very bottom. I did this because I made a mistake, but I like how it looks.

You can take this system of ataching ruffles in rectangles or even a trapezoid and stick it in the back of a skirt (or skirt on a dress). I did that here because I knew that I wanted a pink bustle, not a white one.

I'll do a tutorial for the actual skirt resizing sometime after I actually resize a skirt with this. Here, all I did was slice the back, hem those edges, and then button on some waist ties from another dress. This let me easily add several inches to the back of this skirt, without needing to re-distribute pleats, and without sacrificing the fullness of the shape.
This will all sit a little bit better once I've pressed the skirt, as well. Steaming the top layer of this while the garment is on me/a dress form/a hanger will decrease the poof in the top layer a little bit, and honestly, we could benefit from that in this case.
Anyway, if you have this, you have a very fast way to enlarge existing garments.
So, while this has thankfully very much decreased in the past years, there's still some people with weird opinions on MoDiFyInG bUrAnDo, so let's have a talk.
Lolita clothing is not community owned. If someone who was never going to sell a dress to you modifies it, that doesn't take it away from you. This is a mentality that we tend to have in lolita more than other fashion just because of our high resell scene, but it wasn't ever going to be your dress and so you don't need to have an opinion about what happens to a thing you were never going to personally own.
Things have value more than money, and value is often changed rather than destroyed. AP's Halloween Treats OP has no value to me when sold for $500 on Lacemarket. I don't spend that much money on lolita, ever. But a questionably-altered AP's Halloween Treats OP that I can un-alter has value to me if the price is good. But a questionably-altered AP's Halloween Treats OP has very little value to someone who likes the price, but can't undo the alterations. When someone resizes a dress or skirt, true, sometimes the people who are the size it was originally made can't wear it anymore. You've decreased the value to them, but you've made it more valuable to people who are the size that you've made the garment become. This skirt had no value to me when it's waist measure is 7.5" too small, but now I can wear it, so it has functional value to me.
A lot of people who say that modifying the dress ruins it are either ignoring that also the stress of putting a dress not sized large enough for your body can damage it and not look as great while doing so, or else they have a much worse take. People who say that modifying clothes ruins the garment, but also say that wearing a garment that's too small ruins the garment, what they're actually saying is that wearing that garment is a privilege that should not be extended to larger sized people, and if they say that then they can just, you know, go fuck themselves. We don't need that in the community. Everyone deserves to wear lolita, and some people have to work harder to achieve it, and that's not fair, but everyone deserves it.
So yeah, kiddos! Build a skirt! Go cut up some clothes! Wear the skirts you've always wanted to wear! You can do anything!
And to answer the question we opened this with, yes, I was absolutely falling over.
#handmade lolita#20dollarlolita#lolita fashion#resizing clothes#making clothes bigger#tutorial#skirt tutorial#lolita skirt tutorial#sewing tutorial#bustle underskirt#utilibustle#ultrabustle#the one bustle to rule them all#one bustle to find them
212 notes
·
View notes
Text
possibly a long-shot, but could anyone possibly point me in the direction of some resources on sewing that focus on either “mens” clothing, or more gender neutral stuff? it feels like all the beginner patterns and books i can find have skirts and dresses as their main focus, which i certainly won’t wear, and none of the women in my life tend to wear that sort of stuff either, and it feels like a waste to make a bunch of skirts for practice just for them to get chucked in the back of a wardrobe. any recommendations for online resources (youtube, blogs, etc) or physical books would be very welcome. thanks!
#me#tailoring#sewists#machine sewing#clothes making#fashion#lgbt#sewing#also i know clothing isnt gendered its all just fabric bla bla#but im transmasc and more traditionally feminine clothing just isnt my thing#even when i thought i was a cis woman i never wore skirts#transmasc#trans#transmasc fashion#nonbinary#nonbinary fashion
282 notes
·
View notes
Text

My beautiful girlfriend who's so small I had to crochet his outfit out of embroidery thread
#he's so tiny I had to hand sew everything. the sewing machine would have ate him#too tiny to make clothes for#I should at least make a under skirt with ribbon or fabric for the cloak thing because currently this is a pussy out kinda look#obey me leviathan#obey me#crochet#embroidery#sewing
87 notes
·
View notes
Text
I make up a skirt pattern. the waistband measures 30". my waist is 28". it can barely overlap. I replace the waistband with a 32" one and it fits comfortably
I make it up again. same grainline for cutting. same pieces. I weigh exactly the same as I did before. my waist is still 28". I make the waistband 32"
it has WAY too much overlap, to the point where the closure will have to be almost on my hip to fit properly. thus throwing off the pleat placement at the center back
w h y
#sewing#fuck fitting all my homies hate fitting#I just want my sage linen skirt with black lace trim damnit
173 notes
·
View notes
Last Seen Blogs

poelya
we are the spark that'll light the fire

restauriraiacom
RestauriRaia.com

notsure-123
Untitled

nathito
blasfemia

gaywicked
Gelphie my beloved