
anabragaphotography
Love Olive - Gluten free food & photography
Gluten free food & photography
118 posts
Don't wanna be here? Send us removal request.
Last Seen Blogs

privateyoutubevideos1-blog
Watch Private YouTube Videos

kyeongho-kwak
곽경호의 텀블러
sorjuanaladecimamusa
Sor Juana, la décima musa
kyeongho-kwak
곽경호의 텀블러

aarvisse
jasp
Photo
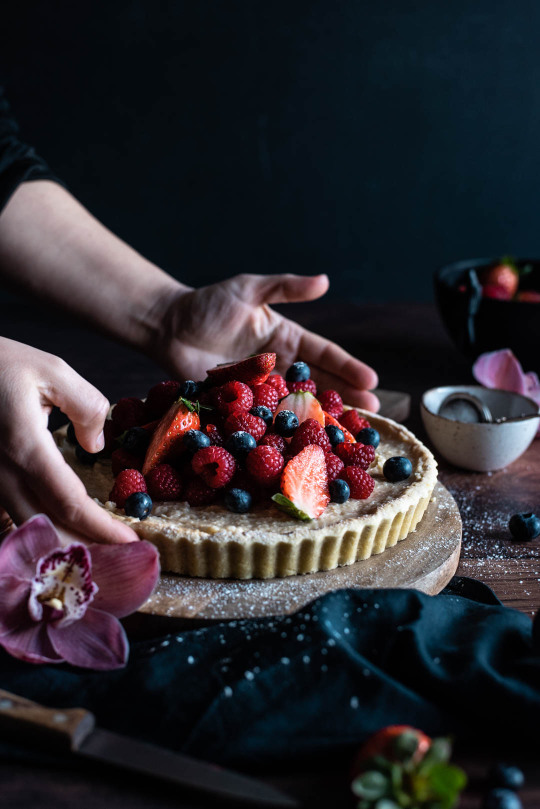
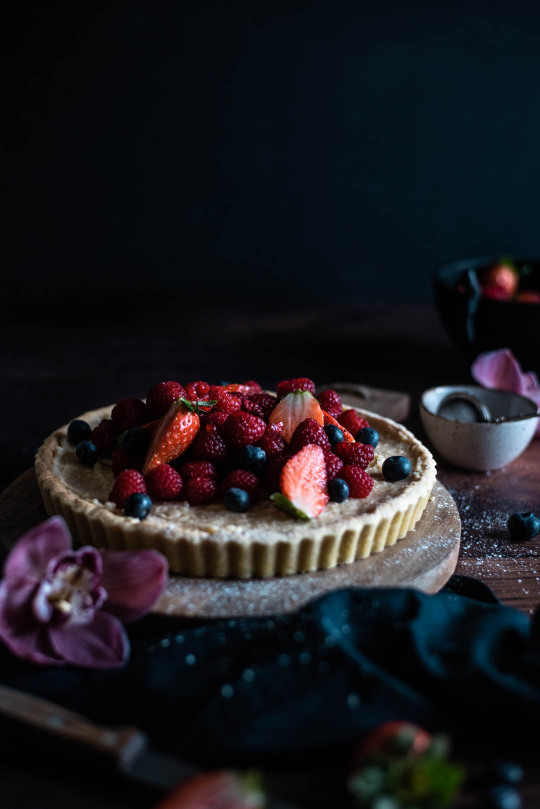
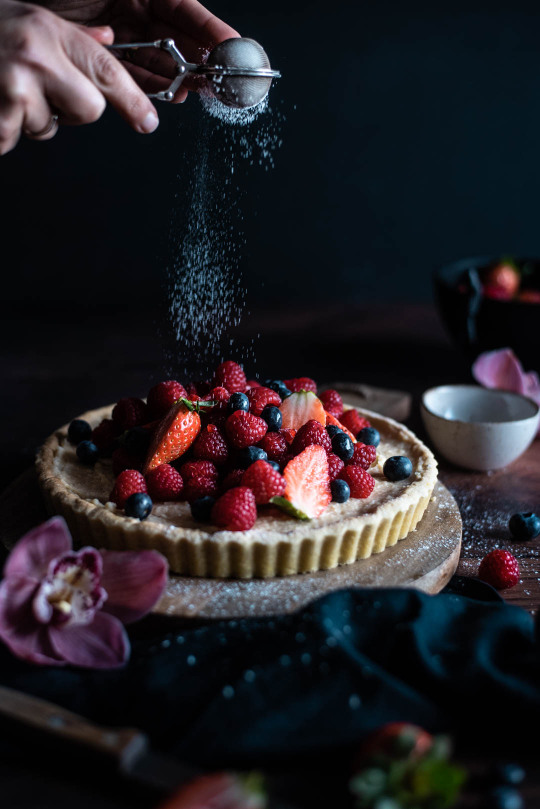
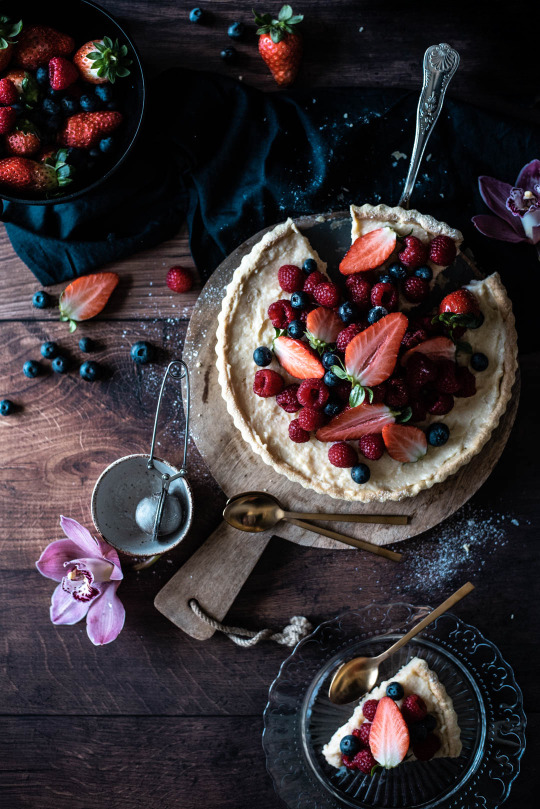
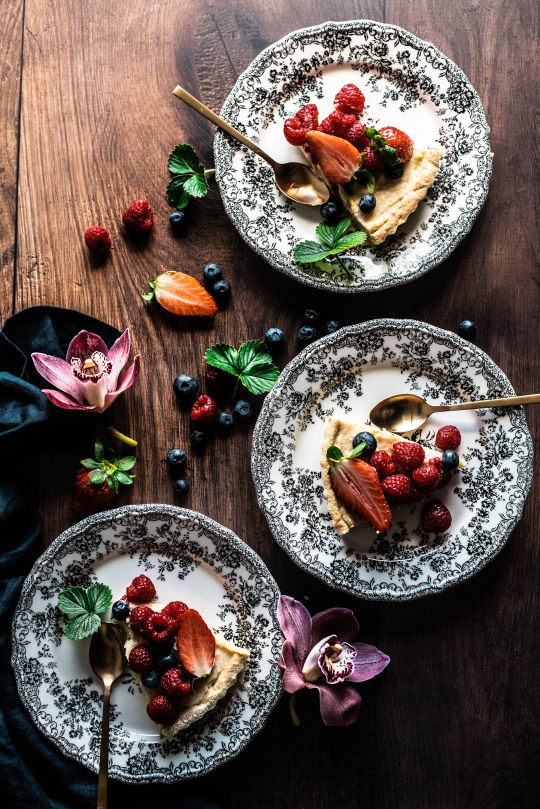
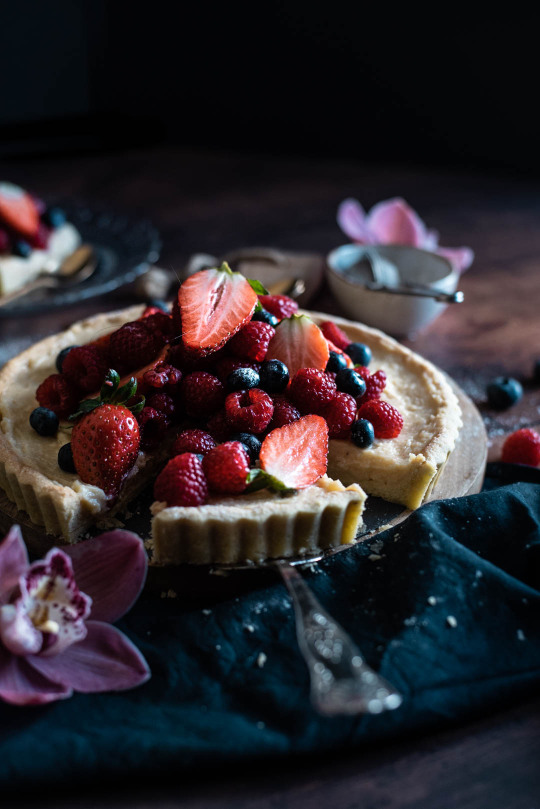
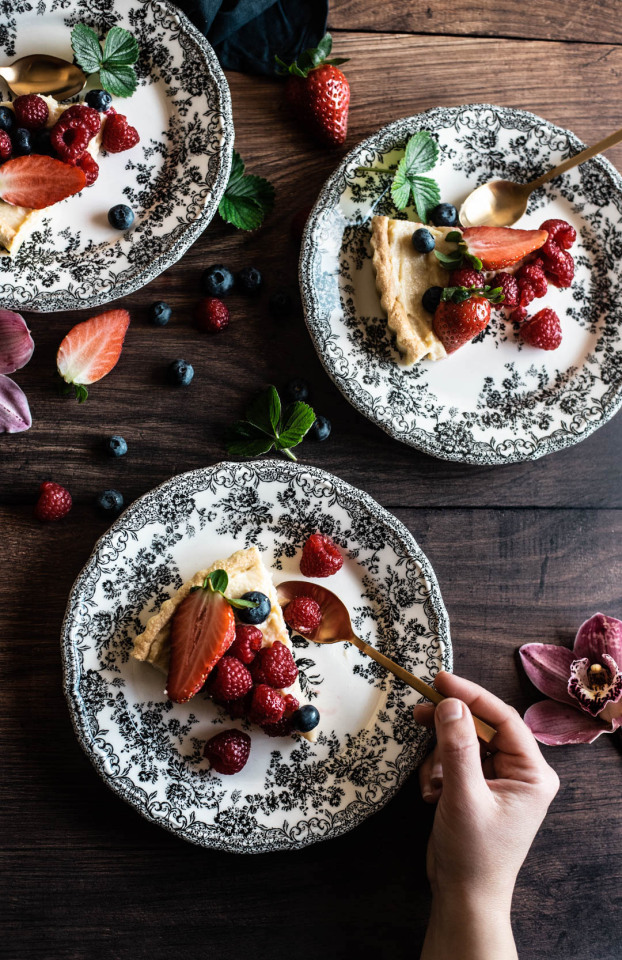
TARTE PRIMAVERA DE CREME PASTELEIRO E FRUTOS VERMELHOS [SEM GLÚTEN]
SPRING TART WITH PASTRY CREAM AND RED FRUITS [GLUTEN-FREE]
Serve 8 a 10
Ingredientes
Base:
220g farinha sem glúten*
40g farinha de amêndoa
100g açúcar em pó
130g manteiga fria
1 ovo L
1/2 clh.ch extrato de baunilha
Creme Pasteleiro:
2 ovos
2 gemas
500ml leite
100g açúcar mascavado
70g amido de milho
1 vagem de baunilha
750g frutos vermelhos
açúcar em pó, q.b.
*Farinha sem glúten:
1 chv. farinha de arroz
3/4 chv. farinha de trigo-sarraceno
1/2 chv. fécula de batata
1/3 chv. amído de tapioca
1 clh.ch goma xantana
Para o creme pasteleiro leve ao lume o leite com a vagem de baunilha aberta e raspada até começar a ferver, desligue o lume e deixe repousar durante alguns minutos.
Num recipiente bata os ovos com o açúcar até que este esteja derretido e esbranquiçado, junte depois o amido de milho e volte a bater.
Retire a vagem de baunilha e verta o leite, ainda quente, para a mistura dos ovos ao mesmo tempo que continua a bater, para evitar que os ovos cozam.
Verta o preparado novamente para a panela e leve ao lume, sem parar de mexer com uma vara de arames até que o creme engrosse, cerca de 2 a 3 minutos.
Verta o creme pasteleiro para uma taça e cubra a superfície do mesmo com película plástica. Deixe arrefecer.
Para a base, misture as farinha, o açúcar e a manteiga cortada em cubos até obter uma massa areada.
Junte o ovo e o extrato de baunilha e misture até formar uma bola. Forme um circulo, cubra com pelíciua plástica e reserve no frigorífico cerca de 30 minutos.
Estenda a massa e cubra uma tarteira de fundo amovível com cerca de 22cm, pique a superfície da massa com um garfo e volte a colocar no frigorífico.
Pré-aqueça o forno a 180ºC, cubra a tarte com papel vegetal e encha com feijões.
Leve ao forno e deixe cozer cerca de 15 a 20 minutos ou até ficar dourada. Retire do forno e deixe arrefecer.
Depois de frios, verta o creme pasteleiro para o interior da tarte e alise.
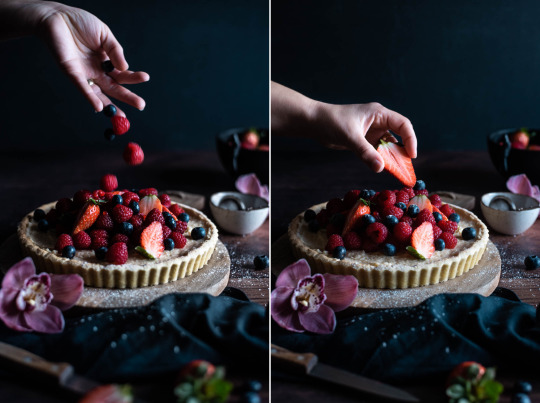
Lave e prepare os frutos vermelhos, verta sobre a tarte e leve ao frigorífico.
Polvilhe com açúcar em pó antes de servir.
Nota: Em caso de intolerância alimentar, certifique-se sempre que os ingredientes são isentos de glúten.
English version
Serves 8 to 10
Ingredients
Crust:
220g gluten-free flour *
40g almond flour
100g icing sugar
130g cold butter
1 egg L
1/2 tsp vanilla extract
Pastry Cream:
2 eggs
2 egg yolks
500ml milk
100g brown sugar
70g corn starch
1 vanilla pod
750g red fruits
icing sugar, to taste
*Gluten-free flour
1 cup rice flour
3/4 cup buckwheat flour
1/2 cup potato starch
1/3 cup tapioca starch
1 tsp xanthan gum
For the pastry cream, place the milk and vanilla pod into a saucepan and bring to a simmer. Turn off the heat and let it infuse for a few minutes.
In a bowl, whisk together eggs and sugar until whitish then, add the cornstarch and whisk again.
Remove the vanilla pod and pour the hot milk, into the egg mixture while you are still whisking, to prevent the eggs from cooking.
Pour the mixture back into the saucepan and cook over low heat, whisking continuously until the cream thickens, about 2 to 3 minutes.
Remove from the heat and pour de custard into a shallow bowl. Cover with greaseproof paper, to prevent a skin to form and refrigerate until cold.
To make the crust, place the flours and sugar into a large mixing bowl. Add the diced cold butter and rub into the flour using your fingers until the mixtures resembles breadcrumbs.
Add the egg and vanilla extract and mix until it forms a consistent dough. Form a disk and wrap the dough in plastic wrap. Put in the fridge for at least 30 minutes.
Roll out the dough an line the bottom of a 22cm pie pan with it. Prick the bottom of the dough tart with a fork and chill until firm.
Preheat the oven to 180ºC.
Cover the tart dough with parchment paper and fill with dried beans. Bake the crust for 20 minutes, remove the parchment paper and beans and return the crust to the over for another 10 minutes, or until golden brown.
Allow to cool slightly into the pan before remove and transfer to a wire rack to cool.
Wash an hull the red fruits and dry them on a clean tea towel.
Pour the cold pastry cream into the tart crust and smooth the surface with the help of a spoon.
Decorate with the red fruits and dust with icing sugar. Serve cold.
Note: In caso of food intolerance, always make sure all ingredients are gluten free.
Recipe adapted from: “Baunilha” cookbook, from Patricia Nascimento
#gluten free baking#spring dessert#foodphotography#sem gluten#singluten#pastry cream tart with red fruits#red fruits#pastry cream#seasonal#spring baking#tarte de creme pasteleiro e frutos vermelhos#livro baunilha
26 notes
·
View notes
Photo
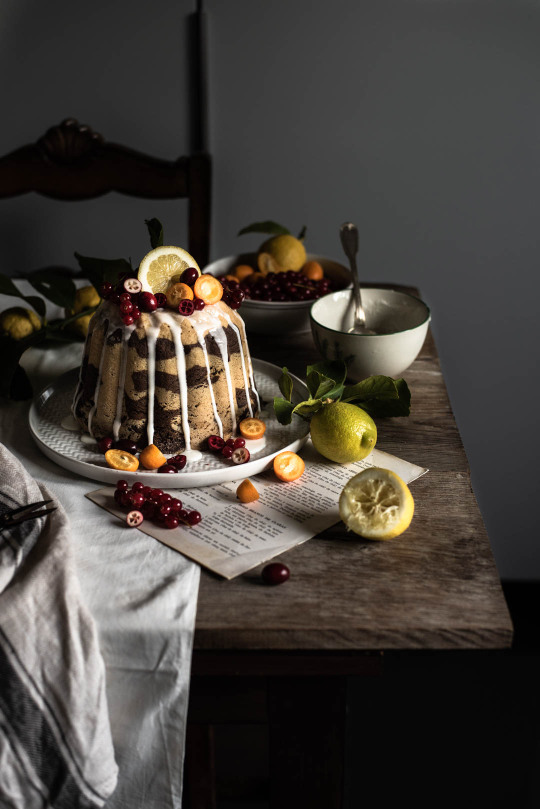
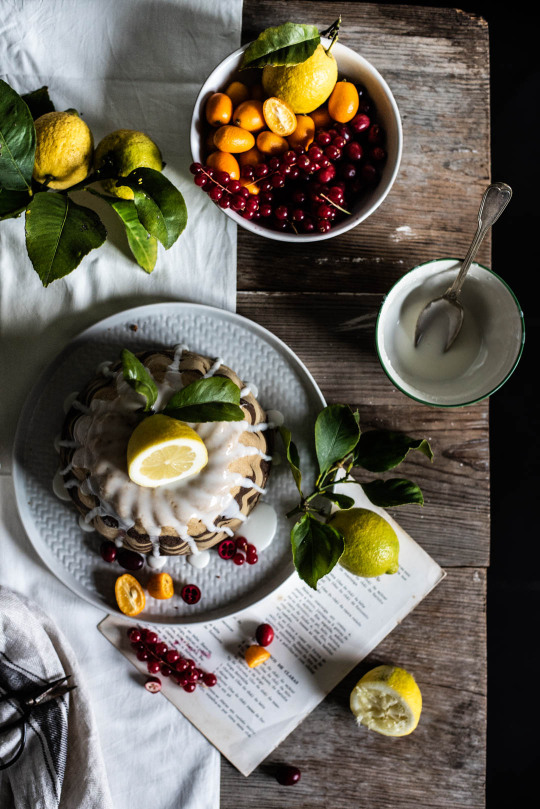
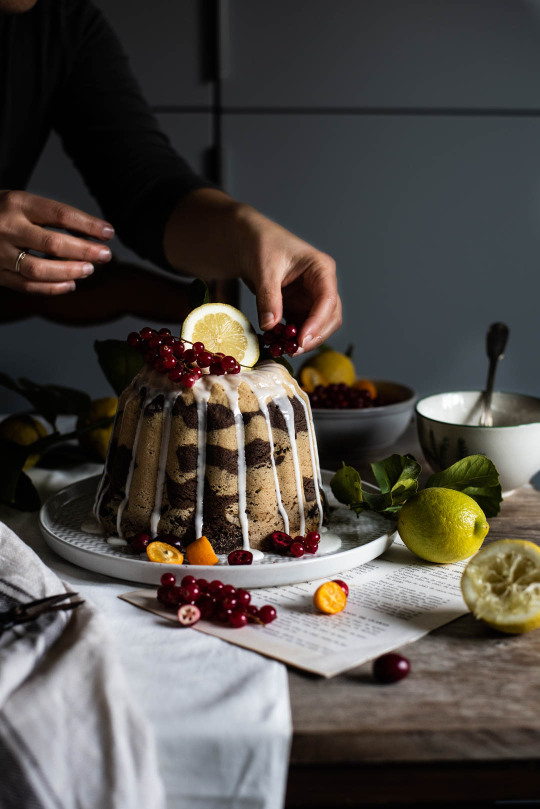
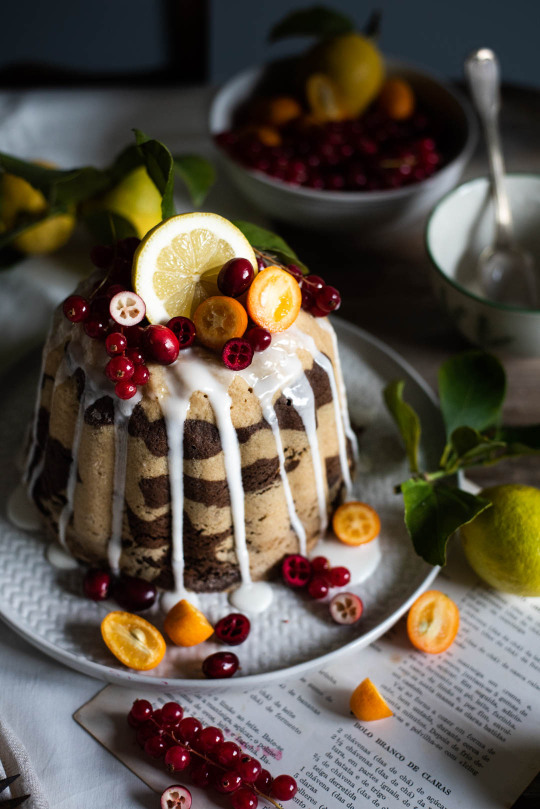
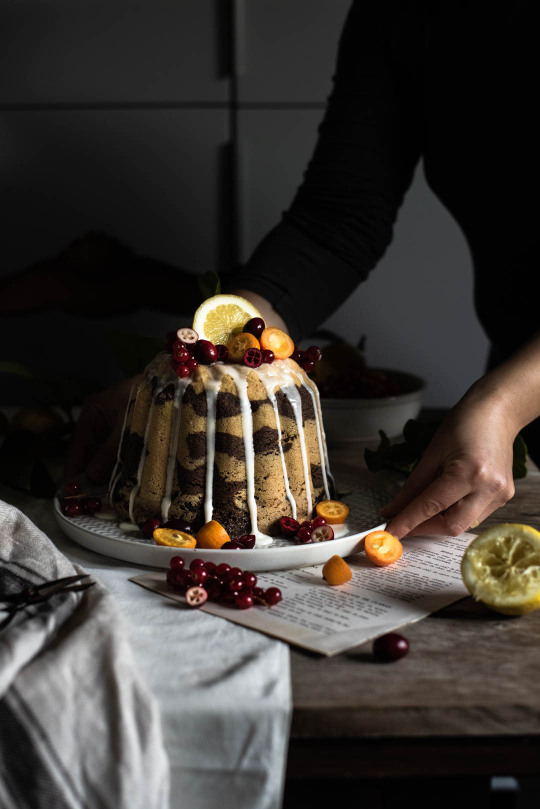
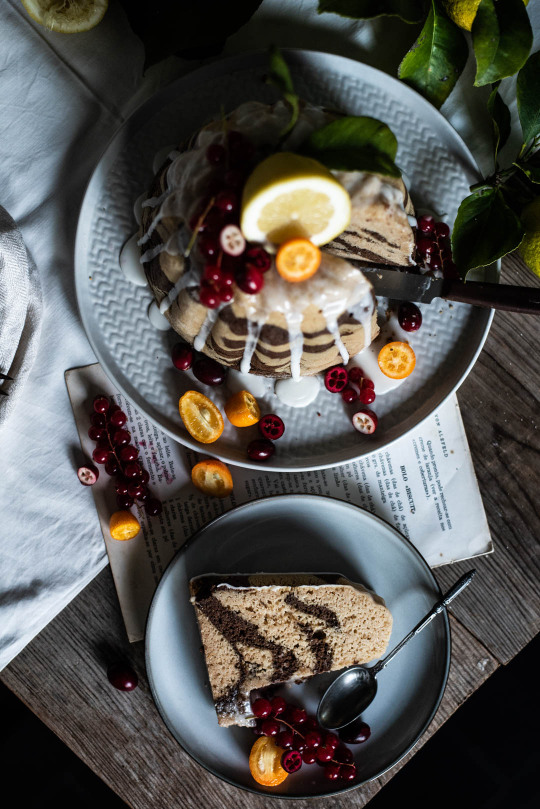
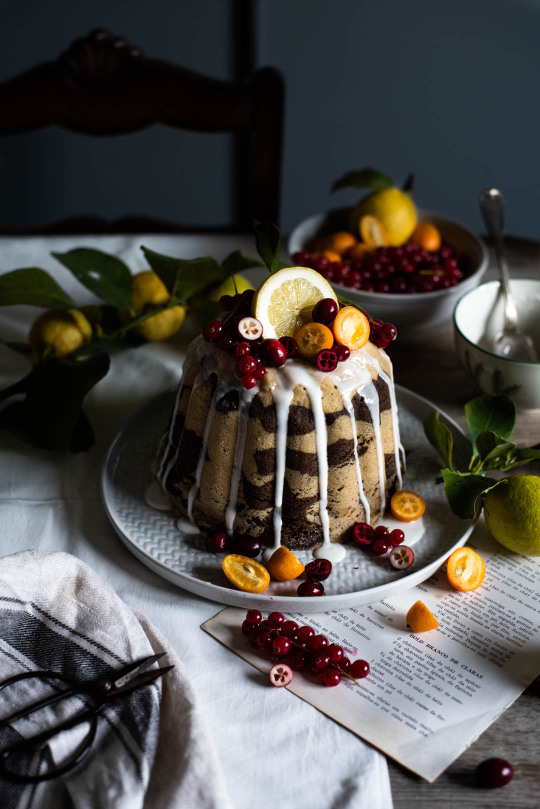
BOLO MÁRMORE CITRICO [SEM GLÚTEN]
LEMONY MARBLE CAKE [GLUTEN-FREE]
Serve 12
Ingredientes
Bolo:
5 ovos
180g açúcar mascavado
225g manteiga sem sal, derretida
1 chv. iogurte natural
1/4 chv. leite de amêndoa
350g farinha de arroz
100g farinha de trigo sarraceno
2 clh.ch fermento
1 clh.ch bicarbonato de sódio
3 clh.sp farinha de alfarroba ou cacau crú
1 limão, raspas
Glacé de limão:
2 clh.sp sumo de limão
açúcar em pó, q.b.
Pré-aqueça o forno a 180ºC e unte uma forma de buraco (22cm) no meio com manteiga e farinha de arroz.
Bata os ovos com o açúcar até obter um creme fofo, cerca de 5 minutos. Junte de seguida a manteiga e volte a bater e por fim adicione o iogurte e 2 colheres de sopa de leite batendo até obter um creme homogéneo.
Peneire as farinhas de arroz e trigo sarraceno, o fermento e o bicarbonato de sódio para o preparado dos ovos e envolva.
Retire 1/3 da massa do bolo para um recipiente e junte as raspas de limão à restante. Envolva e reserve.
Na menor porção de massa, junte o restante leite e a farinha de alfarroba. Envolva.
Com a ajuda de uma colher verta, alternadamente, porções das duas massas para a forma para criar o efeito mármore. Alise a superfície do bolo e bata com a forma levemente na bancada para libertar quaisquer bolhas no interior da massa.
Leve ao forno a cozer durante cerca de 1 hora e 30 minutos ou até que, ao inserir o palito este saia limpo.
Retire do forno, desenforme e de deixe arrefecer.
Entretanto prepare o glacé de limão, misturando o sumo de limão com o açúcar em pó até formar um creme branco espesso.
Verta o glacé sobre o bolo e decore a gosto.
Nota: Em caso de intolerância alimentar, certifique-se sempre que os ingredientes são isentos de glúten.
English version
Serve 12
Ingredientes
Cake:
5 eggs
180g brown sugar
225g unsalted butter, melted
1 cup natural yogurt
1/4 cup almond milk
350g rice flour
100g buckwheat flour
2 tsp baking powder
1 tsp baking soda
3 tbsp carob flour or raw cocoa powder
1 lemon, zest
Lemon glaze:
2 tbsp lemon juice
icing sugar, to taste
Preheat the oven to 180ºC and grease a bundt cake pan (22cm) with butter and rice flour.
Place eggs and sugar in the bowl of a stand mixer fitted with the beater attached and beat on medium speed until light and fluffy, about 5 minutes. Then add the melted butter, yogurt and 2 tablespoons of milk, beating until you get a homogeneous cream. Scrape down the bottom and side of the bowl as needed.
Sift the rice and buckwheat flour, baking powder and baking soda into the egg batter and stir.
Separate 1/3 of the cake batter into a container and add the lemon zest to the remaining batter. Stir and reserve.
In the smallest portion of batter add the remaining milk and carob flour. Stir and reserve.
With the help of a spoon, alternately pour portions of the two batters into the cake pan to create the marble effect. Smooth the surface of the cake and lightly beat the cake pan on the counter top to release any air bubbles that might be trapped inside the batter.
Bake for about 1 hour and 30 minutes or until, the inserted toothpick comes out clean.
Remove from the oven, unmold and let cool.
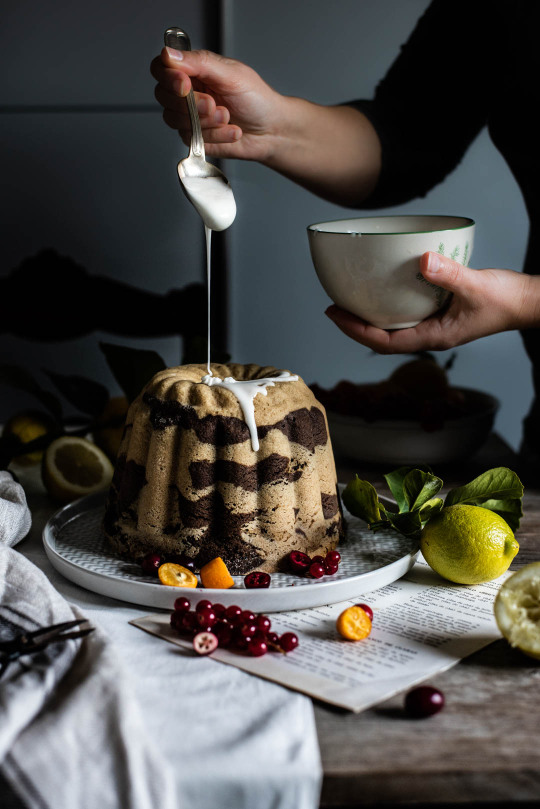
Meanwhile prepare the lemon glaze, mixing the lemon juice with the powdered sugar until it forms a thick white cream.
Pour the glaze onto the cake and decorate to taste.
Note: In case of food intolerance, always make sure all ingredients are gluten-free

#semgluten#gluten-free#glutenfrei#marblecake#foodphotography#foodphotographer#lemon#carob#bolo marmore sem gluten#darkandmoody#darkfoodphotography#winter recipe#citrus cake#sin gluten#pastel de marmol sin gluten
18 notes
·
View notes
Photo
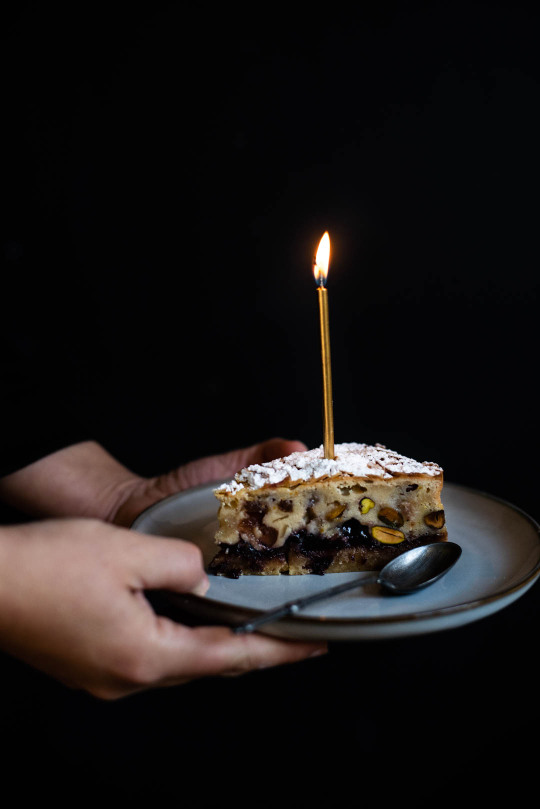
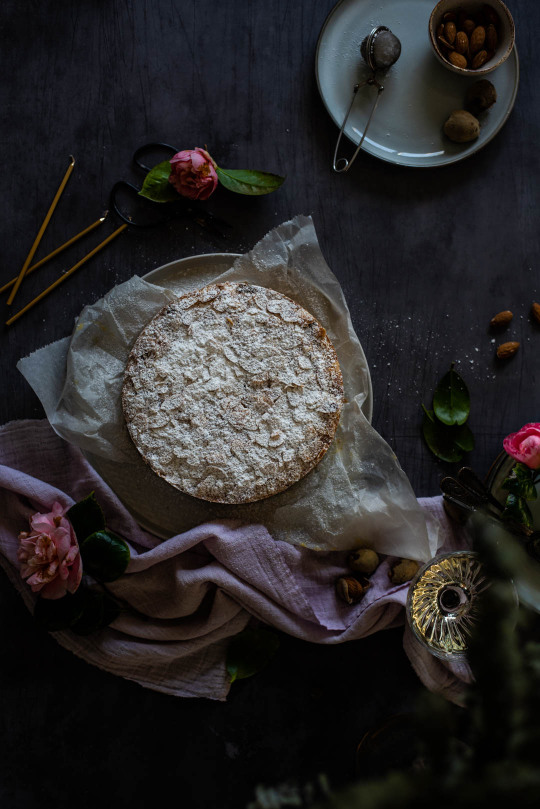
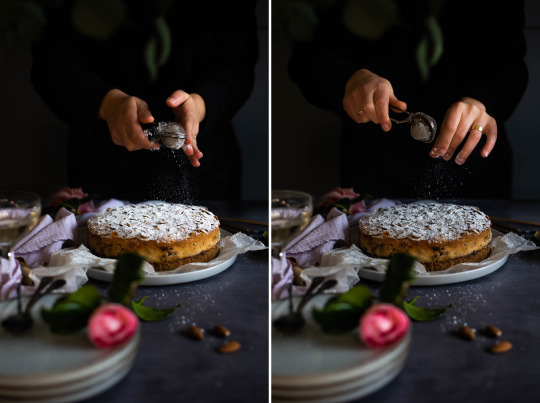
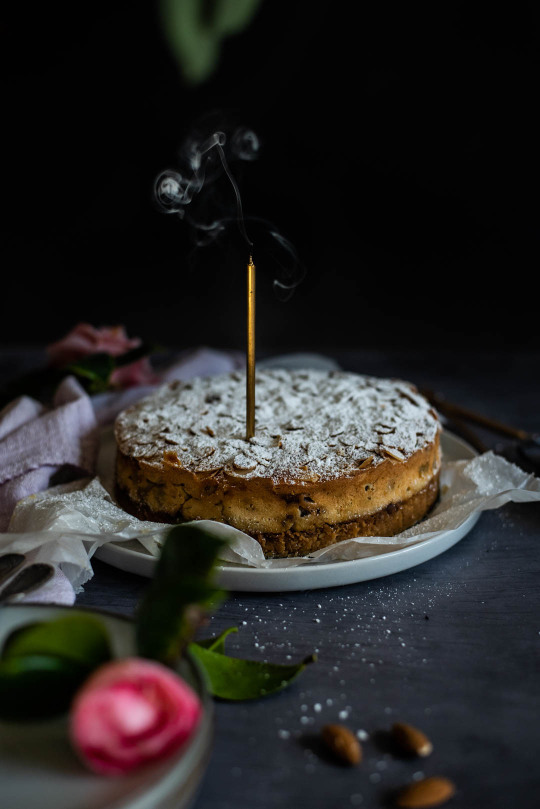
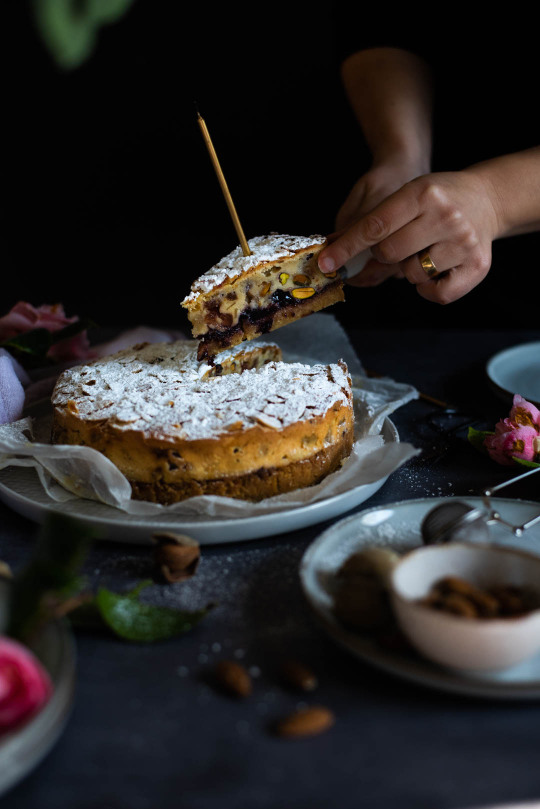
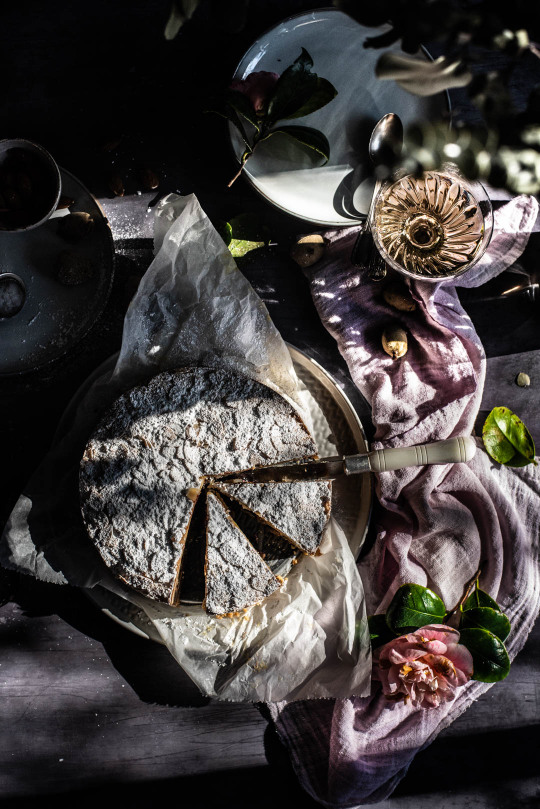
BOLO “STOLLEN” DE MIRTILOS E PISTÁCIO [SEM GLÚTEN]
BLUEBERRY AND PISTACHIO “STOLLEN” TEA CAKE [GLUTEN-FREE]
Serve 12
Ingredientes
Base do bolo:
1 ovo
50g açúcar demerara
50g farinha de amêndoa
100g farinha sem glúten
80g manteiga sem sal
1/4 chv. doce de mirtilo
Camada “Stollen”:
2 ovos, L
50g açúcar demerara
175g ricotta
100g manteiga sem sal
1 clh.ch mistura de especiarias de natal (canela, cravinho, gengibre...)
50g pistácios
50g amêndoas laminadas
75g mirtilos ou arandos desidratados
50g casca de laranja e limão cristalizadas, picadas
1 clh.ch. água de flor de laranjeira
1 limão, sumo e raspa
1 laranja, sumo e raspa
150g marzipan
50g amêndoas laminadas
açúcar em pó
Aqueça o forno a 180ºC e forre com papel vegetal uma forma redonda de fundo amovível com 20cm. Reserve.
Para a base do bolo junte todos os ingredientes, excepto o doce de mirtilo num processador de alimentos e triture até formar uma pasta. Verta o preparado para a forma, alise a superfície e leve ao forno a cozer durante cerca de 25 minutos.
Passado esse tempo, retire do forno e deixe arrefecer ligeiramente.
Entretanto prepare a cobertura do bolo. Com a ajuda de uma batedeira, bata os ovos, o açúcar e as especiarias até ficarem cremosos.
Depois junte a ricotta e volte a bater, por fim adicione a manteiga derretida as raspadas da laranja e do limão, 3 colheres de sopa da mistura do seu sumo e a água de flor de laranjeira. Reserve o restante sumo.
Junte os pistácios, as amêndoas laminadas, as frutas cristalizadas e as frutas desidratadas e envolva.
Por fim corte o marzipan em cubos pequenos e adicione ao preparado anterior, misturando cuidadosamente para que estes não se desfaçam. Reserve.
Cubra o centro da base do bolo com o doce de mirtilos deixando um rebordo livre junto à forma.
De seguida, com algum cuidado e com a ajuda de uma colher disponha o creme com o marzipan sobre o doce de mirtilo, evitando que estes se misturem. alise a superfície e cubra com amêndoas laminadas, pressionando ligeiramente para que estas se colem ao creme.
Leve ao forno a cozer durante 40 minutos, sempre com alguma atenção para evitar que as amêndoas queimem. Se necessário cubra com papel de alumínio.
Retire do forno, desenforme e, ainda morno, pincele com o restante sumo de laranja/limão para ajudar a que o açúcar em pó cole ao bolo.
Sirva acompanhado de uma fumegante chávena de chá e desfrute do tempo frio.
Note: Em caso de alergia ou intolerância alimentar, certifique-se sempre que os ingredientes usados são isentos de glúten.
English version
Serves 12
Ingredients
Cake base:
1 egg
50g demerara sugar
50g almond flour
100g gluten-free flour
80g unsalted butter
1/4 cup blueberry jam
Stollen layer:
2 eggs, L
50g demerara sugar
175g ricotta
100g unsalted butter
1 tsp mix of christmas spices (cinnamon,
cloves, ginger ...)
50g pistachios
50g laminated almonds
75g dried blueberries or cranberries
50g candied orange and lemon peel, chopped
1 tsp orange flower water
1 lemon, juice and zest
1 orange, juice and zest
150g marzipan
50g laminated almonds
powder sugar
Heat the oven to 180ºC and line with baking paper a 20cm removable bottom round shape pan. Reserve.
For the base of the cake add all the ingredients, except the blueberry jam in a food processor and grind to a paste. Pour the preparation into the prepared pan, smooth the surface and bake for about 25 minutes.
After that time, remove from the oven and let it cool slightly.
Meanwhile prepare the stollen layer of the cake. With the help of an electric mixer, beat the eggs, sugar and spices until they are creamy.
Then add the ricotta and beat again, finally add the melted butter, the orange and lemon zest, 3 tablespoons of the juice mixture and the orange blossom water. Reserve the remaining juice.
Stir in the pistachios, laminated almonds, candied fruits and dehydrated fruits.
Finally cut the marzipan into small cubes and add to the previous preparation, stirring carefully so that they do not fall apart. Reserve.
Cover the center of the cake base with the blueberry jam leaving a free gap next to the pan edge.
Then, with some care and the help of a spoon, pour the stollen batter over the blueberry jam, preventing them from mixing. Smooth the surface and cover with laminated almonds, pressing slightly so that they stick to the batter.
Bake for 40 minutes, always with some care to prevent the almonds from burning. If necessary cover with aluminum foil.
Remove from the oven, untold and, while it is still warm, brush the cake with the remaining lemon/orange juice to help the powdered sugar stick to the cake.
Serve with a warm cup of tea and enjoy the cold weather.
Note: In case of food allergy or intolerance, always make sure that the ingredients used are gluten-free.

#bolo sem gluten#stollen#glutenfreecake#foodphotographer#darkandmoody#singluten#christmas cake#teacake#foodstyling#marzipan#driedfruits#seasonal#blueberries#pistachio#foodphotography#glutenfrei
11 notes
·
View notes
Photo
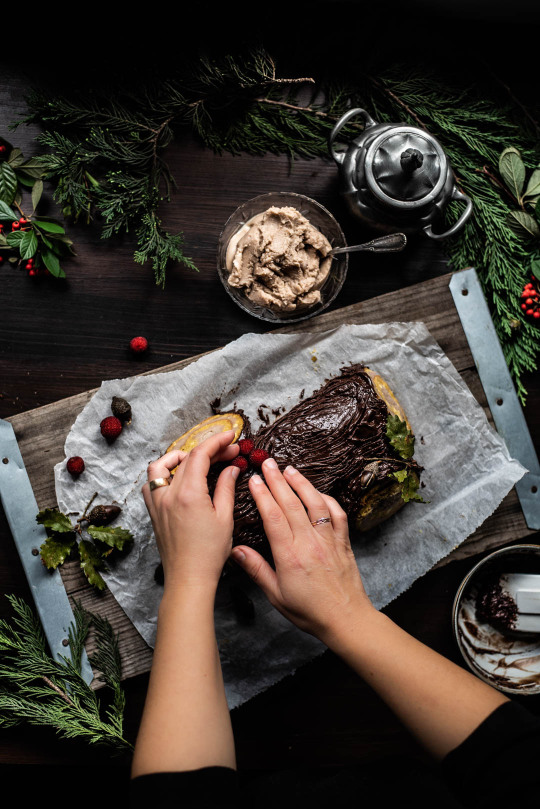
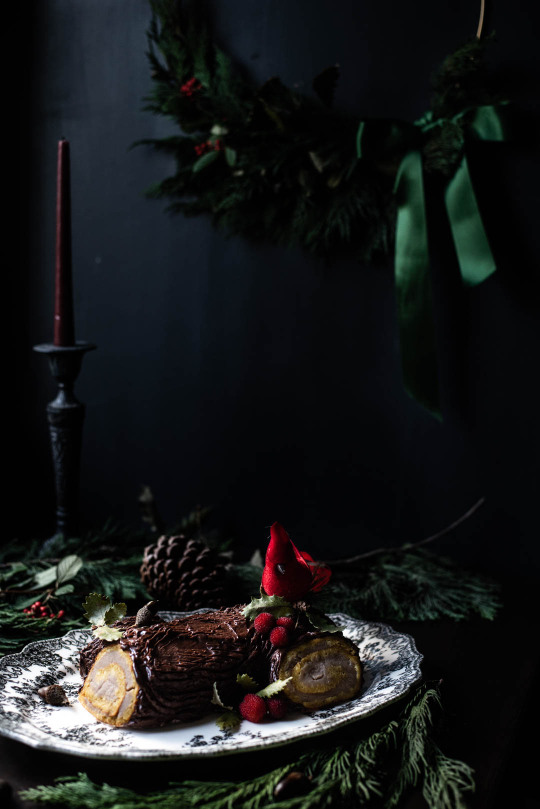
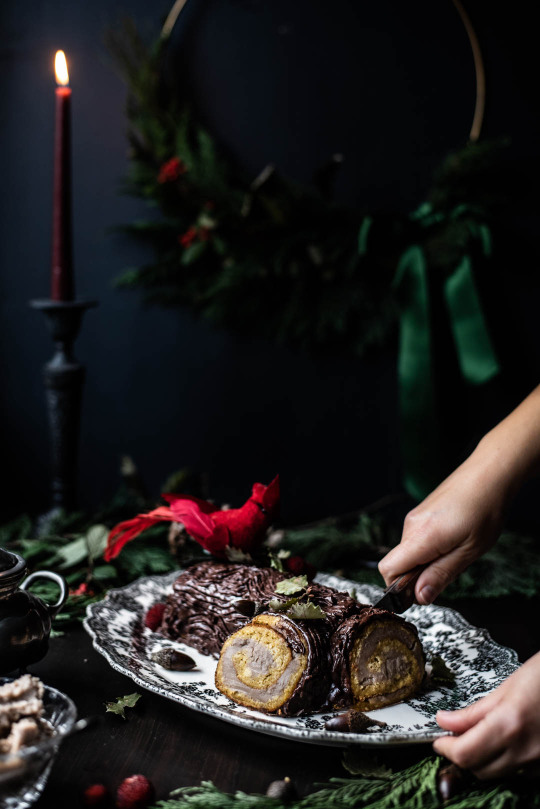
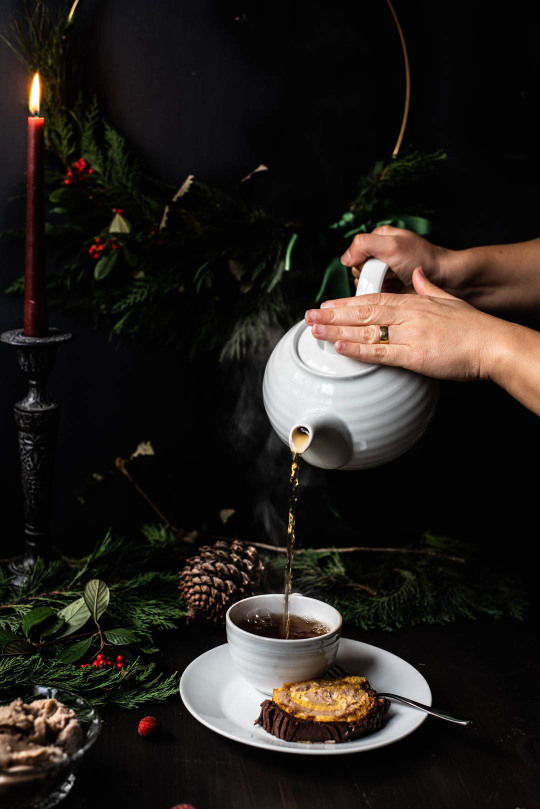
TRONCO DE NATAL DE CASTANHA E CARAMELO SALGADO [SEM GLÚTEN]
CHESTNUT AND SALTED CARAMEL BÛCHE DE NÖEL [GLUTEN-FREE]
Serve 10
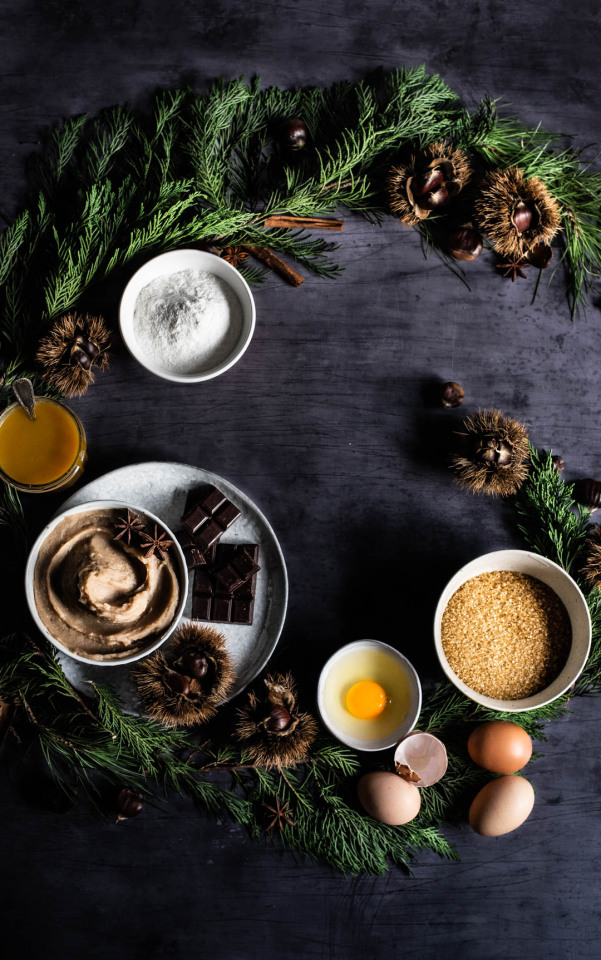
Ingredientes
Bolo:
6 ovos L (aprox.360g)
180g açúcar
160g farinha de arroz
20g amido de milho
1/4 clh.ch goma xantana (opcional)
1 clh.ch fermento
1 clh.ch extrato de baunilha
Recheio:
400g castanhas
2 estrelas de anis
1/2 chv. açúcar
1 chv. leite
2 gemas
sal, q.b
Caramelo:
1 chv. açúcar
1 clh.sp água
90g manteiga
1/2 chv. natas 35%MG
1 clh.ch sal
Ganache:
200g chocolate negro sem glúten
150ml natas 35%MG
Comece por preparar o caramelo. Derreta o açúcar e a água em lume brando até que este atinja uma cor tipo ambar escuro. Retire do lume e adicione a manteiga com algum cuidado par evitar queimaduras e volte a cozer durante mais 2 minutos. De seguida junte as natas e deixe cozer por mais 1 minuto.
Retire do lume, junte o sal, verta o preparado para um frasco e deixe arrefecer.
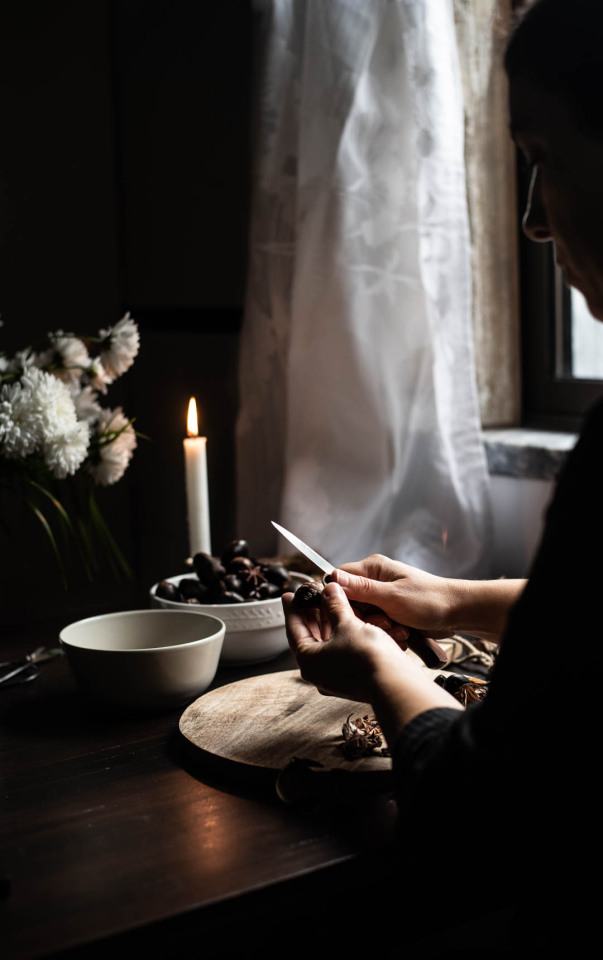
Para o recheio, faça um golpe nas castanhas e coza-as em água, temperada com sal e as estrelas de aniz. (Pode sempre usar castanhas congeladas, já descascadas).
Depois de cozidas, retire do lume, escorra e deixe arrefecer ligeiramente.
Remova a casca e as peles às castanhas e coloque-as numa caçarola, juntamente com o leite e o açúcar. Deixe ferver durante alguns minutos e triture. De seguida, tempere as gemas batidas com algum do creme de castanha, mexendo rapidamente para estas não cozerem.
Verta as gemas para a caçarola e deixe cozer até que o creme de castanha engrosse. Retire do lume e deixe arrefecer ligeiramente.
Para o bolo, pré-aqueça o forno a 180ºC e forre com papel vegetal um tabuleiro rectangular com 30x35cm.
Bata os ovos com o açúcar e o extrato de baunilha até que estes aumentem de tamanho e fiquem cremosos.
Peneire as farinhas para o prepara dos ovos e envolva cuidadosamente.
Verta a massa para o tabuleiro, alise e bata o tabuleiro algumas vezes contra a bancada para libertar quaisquer bolsas de ar que estejam presas.
Leve ao forno e deixe cozer entre 25 a 30 minutos ou até que ao inserir o palito este saia limpo.
Retire do forno, polvilhe com açúcar, cubra com papel vegetal e com a ajuda da tábua de cozinha vire a torta. Retire o papel vegetal com cuidado e deixe repousar por alguns minutos.
Ainda quente, espalhe o creme de castanhas, regue com o caramelo salgado e enrole com a ajuda do papel vegetal, de forma que fique bem apertado. Deixe arrefecer.
Depois de frio, coloque no frigorifíco para que fique bem frio para a cobertura.
Para a cobertura coloque o chocolate em pedaços e as natas numa caçarola e aqueça até obter um creme de chocolate homogeneo. etire do lume e deixe arrefecer até conseguir a consistência de natas espessas.
Retire a torta do frio, corte as extremidades para fazer as laterais do tronco e com a ajuda de uma espátula cubra a torta com o chocolate e desenhe as ranhuras do tronco com um garfo.
Decore a gosto a sirva com uma boa chávena de chá.
Nota: Em caso de alergia ou intolerância alimentar certifique-se sempre que os ingredientes usados são isentos de glúten.

English version
Serves 10
Ingredients
Cake:
6 eggs L (approx.360g)
180g sugar
160g rice flour
20g corn starch
1/4 tsp xanthan gum (optional)
1 tsp baking powder
1 tsp vanilla extract
Filling:
400g chestnuts
2 stars of anise
1/2 cup sugar
1 cup milk
2 egg yolks
salt, to taste
Caramel:
1 cup sugar
1 tbsp water
90g butter
1/2 cup heavy cream
1 tsp salt
Ganache:
200g gluten-free dark chocolate
150ml heavy cream
Start by preparing the caramel. Melt the sugar and water over low heat until it reaches a dark amber color. Remove from heat and add the butter with some care to avoid burns and cook for another 2 minutes. Then add the cream and cook for another minute.
Remove from heat, add salt, pour the mixture into a jar and let it cool.
For the filling, cut the chestnuts and bake them in water, seasoned with salt and anise stars. (You can always use frozen chestnuts, already peeled).
Once cooked, remove from heat, drain and let cool slightly.
Remove the chestnuts peel and place them in a saucepan along with the milk and sugar. Boil for a few minutes and blend. Then, season the beaten egg yolks with some of the warm chestnut cream, stirring quickly so they don’t cook.
Pour the egg yolks into the casserole together with the chestnut cream and cook until the cream thickens. Remove from heat and let cool slightly.
For the cake, preheat the oven to 180ºC and line a 30x35cm rectangular tray with parchment paper.
Beat the eggs with sugar and vanilla extract until they doble in size and become creamy.
Sift the flours into the eggs and stir carefully.
Pour the batter onto the tray, smooth the surface and beat the tray a few times against the countertop to release any air pockets that might be stuck.
Take it to the oven and bake for 25 to 30 minutes or until a toothpick comes out clean.
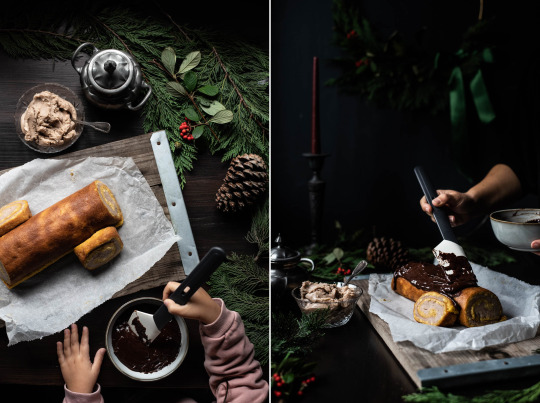
Remove from the oven, sprinkle with sugar, cover with parchment paper and turn the swiss roll cake with the help of a cutting board. Remove the parchment paper carefully and let the cake stand for a few minutes.
While still warm, spread the chestnut cream, drizzle with the salted caramel and roll it up tightly with the help of the parchment paper. Allow it to cool.
After cold, place the swiss roll in the refrigerator.
For the chocolate ganache, place the chocolate pieces and the cream in a saucepan and heat until a homogeneous chocolate cream is obtained. Remove from heat and let cool slightly.
Remove the swiss roll from the fridge, cut the ends to make the sides of the yule log and with the help of a spatula cover the cake with the ganache then create a streaky bark effect using a fork.
Decorate to taste and serve with a warm cup of tea.
Note: In case of allergy or food intolerance always make sure that the ingredients used are gluten free.
#yule log#food photography#buche de noel#semglúten#gluten-free#sin gluten#glutenfrei#christmas cake#christmas momments#darkandmoody#chestnut cake#chestnut#seasonal#salted caramel#foodstyling#tronco de natal sem gluten
9 notes
·
View notes
Photo
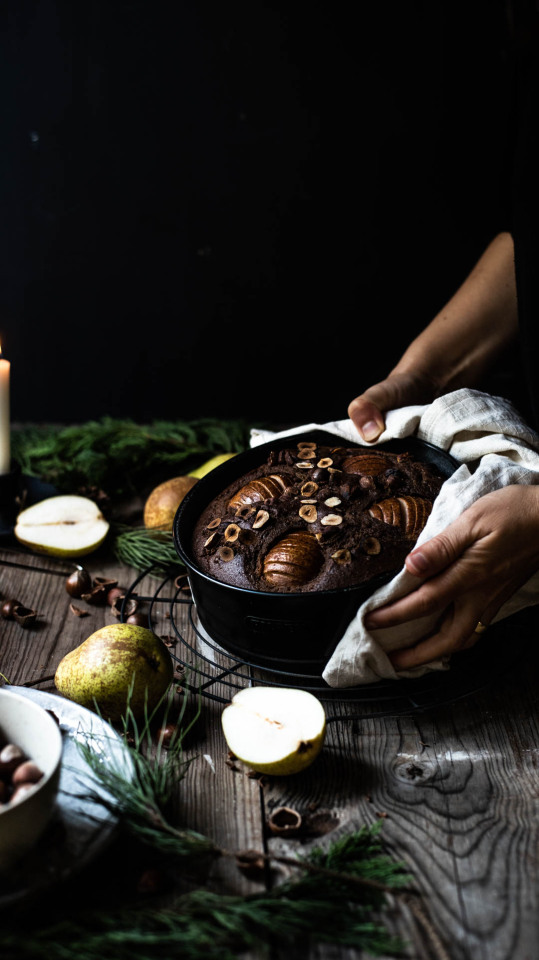
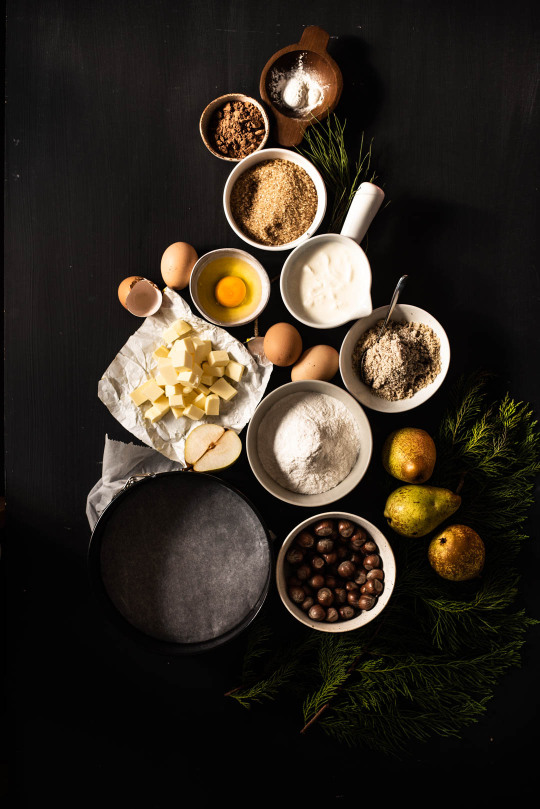
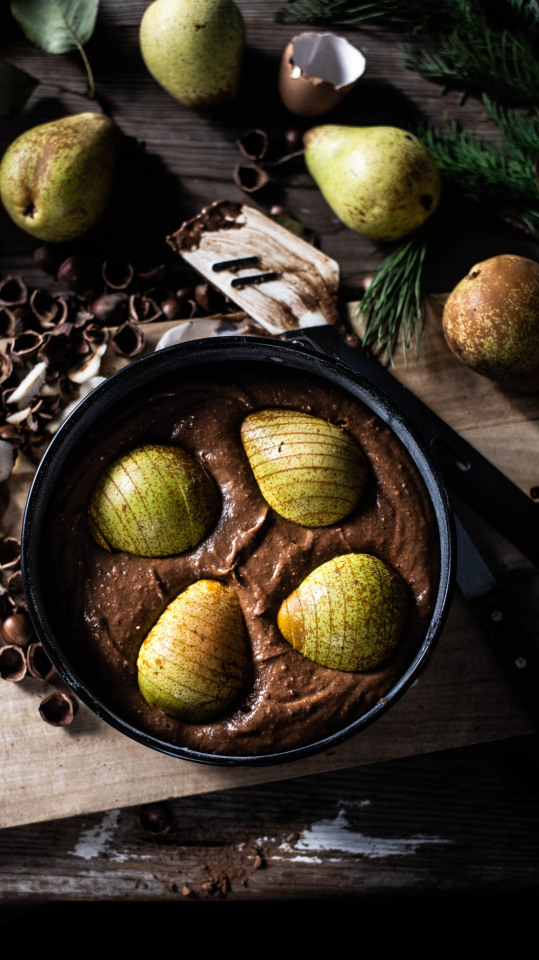
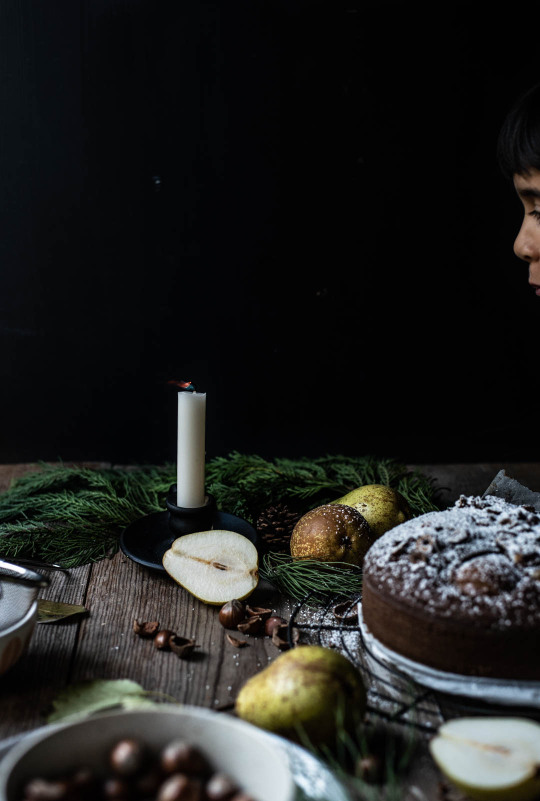
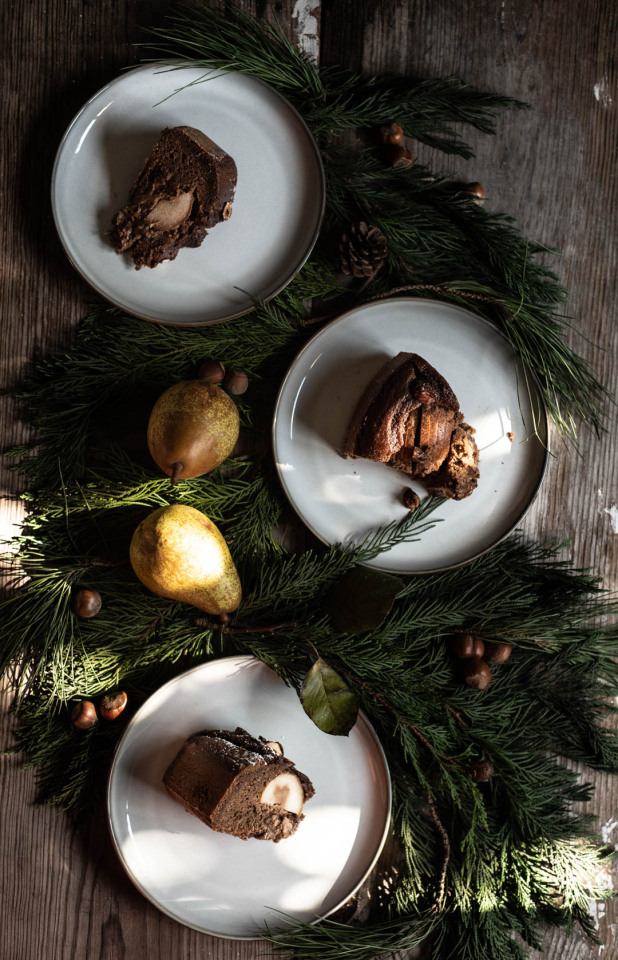
BOLO DE CHOCOLATE E AVELÃ COM PÊRAS [SEM GLÚTEN]
CHOCOLATE HAZELNUT CAKE WITH PEARS [GLUTEN-FREE]
Serve 10
Ingredientes
200g farinha de arroz
60g avelã moída
150g açúcar mascavado
4 ovos, L
120g manteiga, derretida
1 clh.ch fermento
1/2 clh.ch bicarbonato de sódio
1/4 clh.ch sal
1 clh.ch extracto de baunilha
1 chv. iogurte natural
3 clh.sp farinha de alfarroba ou cacau crú
1/3 chv. avelãs picadas
3 pêras
Pré-aqueça o forno a 180ºC e forre com papel vegetal uma forma redonda de fundo amovível com 20cm. Unte também as laterais e polvilhe com farinha de arroz.
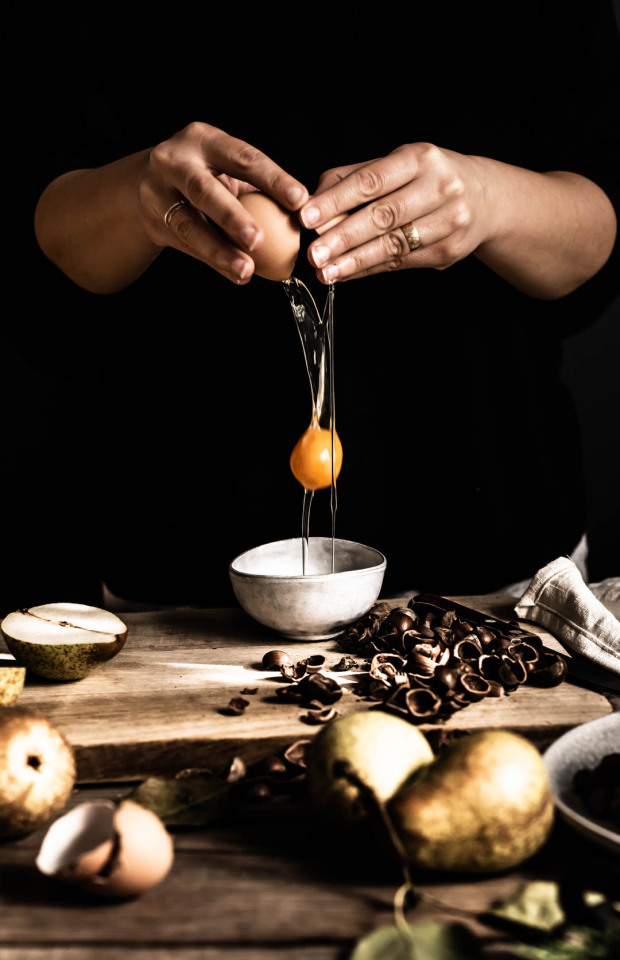
Batas os ovos com o açúcar e uma pitada de sal até que estes dupliquem de tamanho. Junte de seguida a manteiga derretida, o extrato de baunilha e o iogurte e volte a bater até que todos os ingredientes estejam incorporados.
Junte as farinhas, o fermento e a alfarroba e envolva.
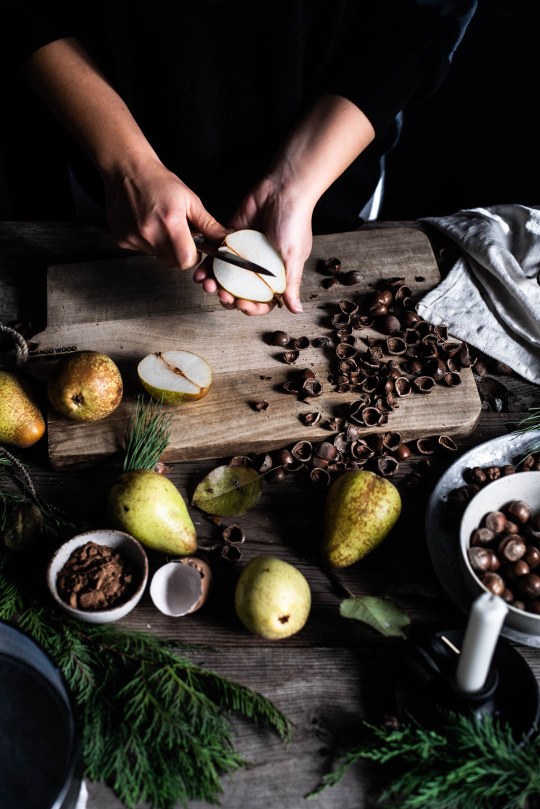
Entretanto, lave e retire os caroços às pêras. Pique uma das pêras e junte à massa do bolo.
Verta a massa para a forma e alise a superfície.
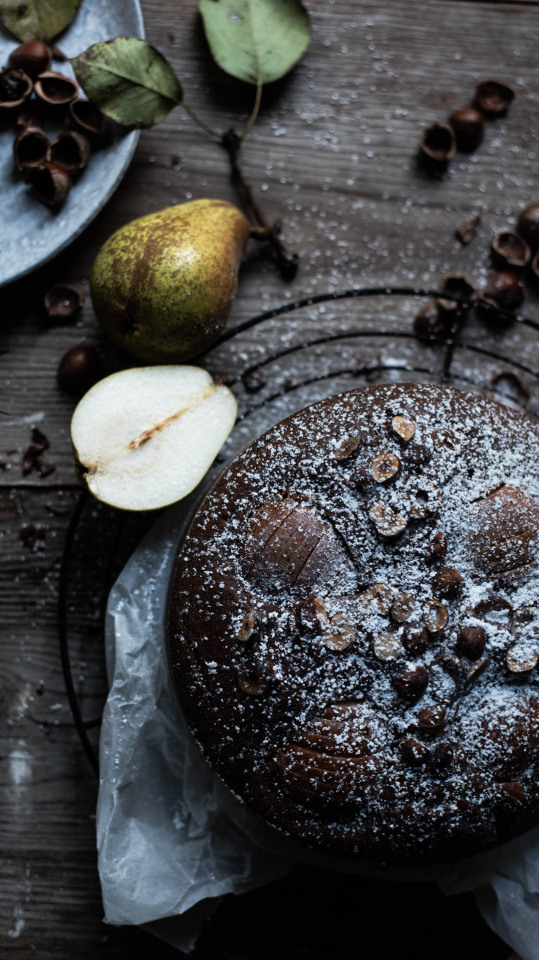
Corte as outras metades em fatias e disponha sobre o bolo. Polvilhe com avelãs picadas e leve ao forno durante cerca de 60 minutos ou até que ao inserir o palito este saia limpo.
Cubra com papel de alumínio a meio da cozedura caso ache necessário.
Retire do forno, desenforme e deixe arrefecer. Polvilhe com açúcar em pó antes de servir.
Nota: Em caso de intolerância alimentar certifíque-se sempre de que os ingredientes usados são isentos de glúten.

English version
Serves 10
Ingredients:
200g rice flour
60g ground hazelnut
150g brown sugar
4 eggs, L
120g melted butter
1 tsp baking powder
1/2 tsp baking soda
1/4 tsp salt
1 tsp vanilla extract
1 cup plain yogurt
3 tbsp carob bean flour or raw cocoa
1/3 cup chopped hazelnuts
3 pears
Preheat the oven to 180ºC and line with baking paper a 20cm removable bottom round shape pan. Also grease the sides and sprinkle with rice flour.
Beat the eggs with the sugar and a pinch of salt until they double in size. Then add the melted butter, vanilla extract and yogurt and beat again until all the ingredients are incorporated.
Add the flours, baking powder and carob flour and stir.
In the meantime, wash and remove the pits from the pears. Chop one of the pears and add it to the cake batter.
Pour the dough into the pan and smooth the surface.
Cut the other halves into slices and arrange on the cake. Sprinkle with chopped hazelnuts and bake for about 60 minutes or until the inserted toothpick comes out clean.
Cover with aluminum foil halfway through cooking if necessary.
Remove from the oven, unmold and let it cool. Dust with powdered sugar before serving.
Note: In case of food intolerance always make sure that the ingredients used are gluten free.
#gluten-free#semglúten#glutenfreecake#glutenfrei#foodphotography#foodphotographer#autumnal cake#pears#cake#hazelnut#darkandmoody#christmas momments#cocoa#carob#foodstyling#seasonal food#seasonal
22 notes
·
View notes
Photo
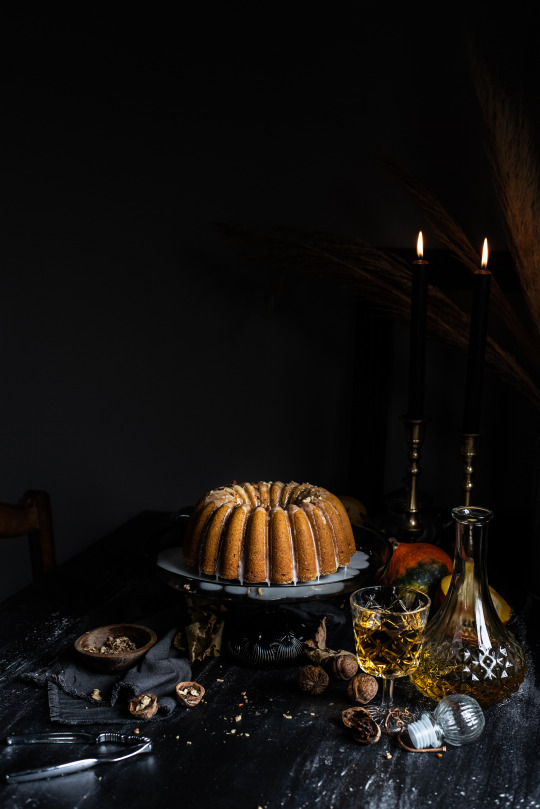
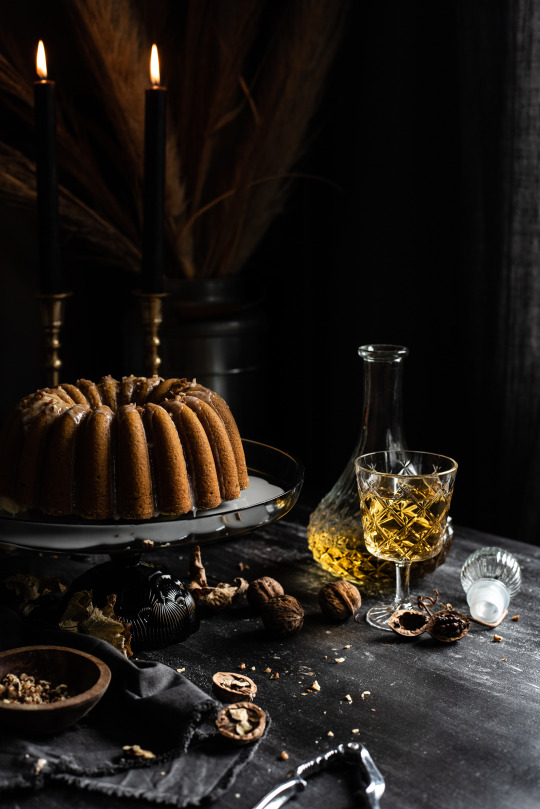
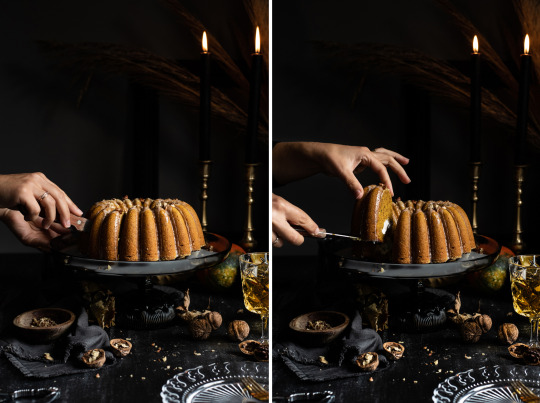
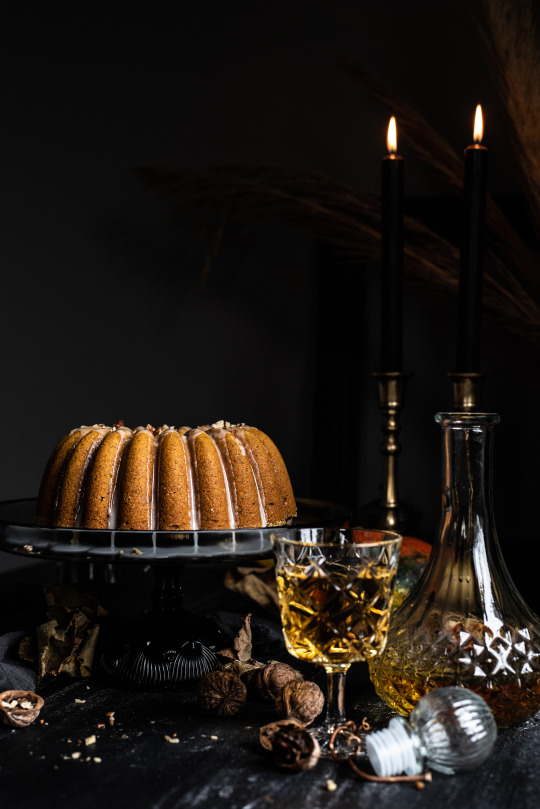
BOLO DE ABÓBORA E NOZ COM RECHEIO DE QUEIJO CREME [SEM GLÚTEN]
PUMPKIN AND WALNUT CAKE WITH CREAM CHEESE FILLING [GLUTEN-FREE]
Serve 12 a 18
Ingredientes:
Puré de Abóbora:
250g abóbora hokkaido
2 clh.sp mel
1 clh.ch canela em pó
1/4 clh.ch noz moscada em pó
1/2 clh.ch gengibre em pó
1/4 clh.ch cravinho em pó
120ml leite de amêndoa
Bolo:
4 ovos
150g açúcar
80g manteiga derretida
1/3 chv. óleo
puré de abóbora
250g farinha de arroz
100g nozes moídas
2 clh.ch fermento
1 clh.ch extrato de baunilha
Recheio:
200g queijo creme
1 ovo
50g açúcar
1 clh.ch extrato baunilha
Glaze:
1 chv. açúcar em pó
1 clh.sp água
nozes picadas
Comece por preparar o puré de abóbora.
Pré-aqueça o forno a 200ªC. Lave bem a abóbora Hokkaido, retire as sementes e corte em cubos (deixe ficar a casca). Disponha os pedaços de abóbora num tabuleiro de forno e regue com mel. Leve ao forno a cozer durante 30 a 40 minutos.
Retire a abóbora do forno, coloque num processador, juntamente com as especiarias e o leite e triture até tomar um creme. Reserve.
Reduza a temperatura do forno para os 180ºC e unte com manteiga e farinha de arroz uma forma de bolo grande com buraco no centro.
Prepare de seguida o recheio. Junte todos os ingredientes na batedeira e bata até formar um creme homogéneo. Reserve
Para o bolo, bata os ovos com o açúcar até que estes dupliquem de tamanho, junte se seguida a manteiga derretida, o óleo, o extrato de baunilha e o puré da abóbora e volte a bater.
Por fim, junte a farinha, o fermento e as nozes e envolva.
Verta metade da massa do bolo para a forma e, com a ajuda de uma colher, disponha o recheio no centro do bolo, deixando algum espaço no rebordo interior e exterior da forma para que o creme se mantenha no interior do bolo.
Verta a outra metade da massa do bolo sobre o creme e leve ao forno durante 50 a 60 minutos ou até que ao inserir o palito este saia limpo.
Retire o bolo do forno e deixe arrefecer ligeiramente dentro da forma. Assim que estiver quase frio, desenforme e sirva simples, polvilhado com açúcar ou regado com calda de açúcar e nozes picadas.
Nota: Em caso de intolerância alimentar certifique-se sempre que os ingredientes são isentos de glúten.

English version
Serves 12 to 18
Ingredients:
Pumpkin puree:
250g hokkaido pumpkin
2 tbsp honey
1 tsp ground cinnamon
1/4 tsp ground nutmeg
1/2 tsp ground ginger
1/4 tsp ground cloves
120ml almond milk
Cake:
4 eggs
150g sugar
80g melted butter
1/3 cup oil
pumpkin puree
250g rice flour
100g ground walnuts
2 tsp baking powder
1 tsp vanilla extract
Filling:
200g cream cheese
1 egg
50g sugar
1 tsp vanilla extract
Glaze:
1 cup powder sugar
1 tbsp water
chopped walnuts
Start by preparing the pumpkin puree.
Preheat the oven to 200ºC. Wash the Hokkaido pumpkin, remove the seeds and cut into cubes (leave the peel). Arrange the pumpkin pieces in a baking tray and drizzle with honey. Bake for 30 to 40 minutes.
Remove pumpkin from the oven, place in a food processor along with spices and milk and blend to make a cream. Reserve.
Reduce the oven temperature to 180ºC and grease a large bundt cake pan with butter and rice flour.
To make the cream cheese filling. Add all the ingredients in the mixer and beat until it forms a homogeneous mixture. Reserve
For the cake, beat the eggs with the sugar until they double in size, then add the melted butter, oil, vanilla extract and pumpkin puree and beat again.
Finally, add the flour, baking powder and walnuts and stir.
Pour half of the cake's batter into the pan and, with the help of a spoon, arrange the filling in the center of the cake, leaving some space on the inside and outside edge of the pan so that the cream remains inside the cake.
Pour the other half of the cake batter over the cream and bake for 50 to 60 minutes or until the inserted toothpick comes out clean.
Remove the cake from the oven and let it cool slightly in the pan. As soon as it is almost cold, unmold and serve simple, sprinkled with sugar or drizzled with the glaze and the chopped nuts.
Note: In case of food intolerance, always make sure the ingredients are gluten-free.
#bundt cake#foodphotographer#foodphotography#autumnal cake#halloween#pumpkin cake#cake#bolo de abobora#semgluten#glutenfreecake#glutenfreerecipes#pumpkin#walnuts#cream cheese#abobora#nozes#queijo creme#seasonal
11 notes
·
View notes
Photo
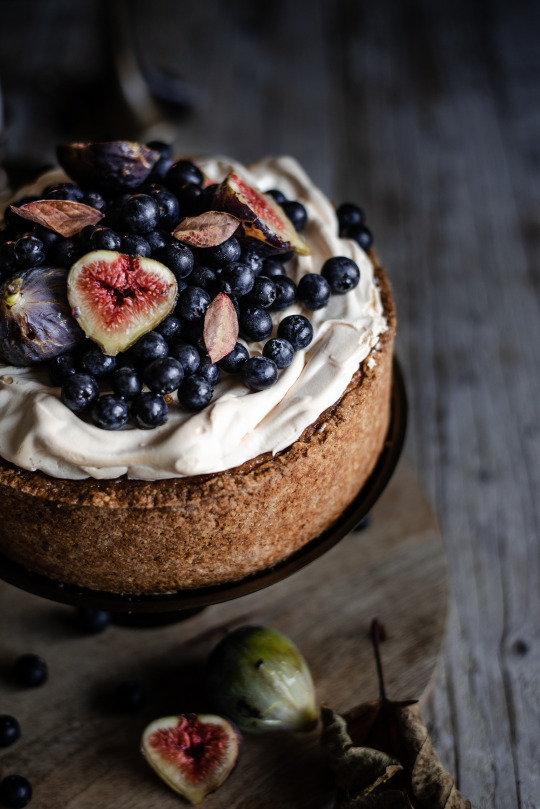
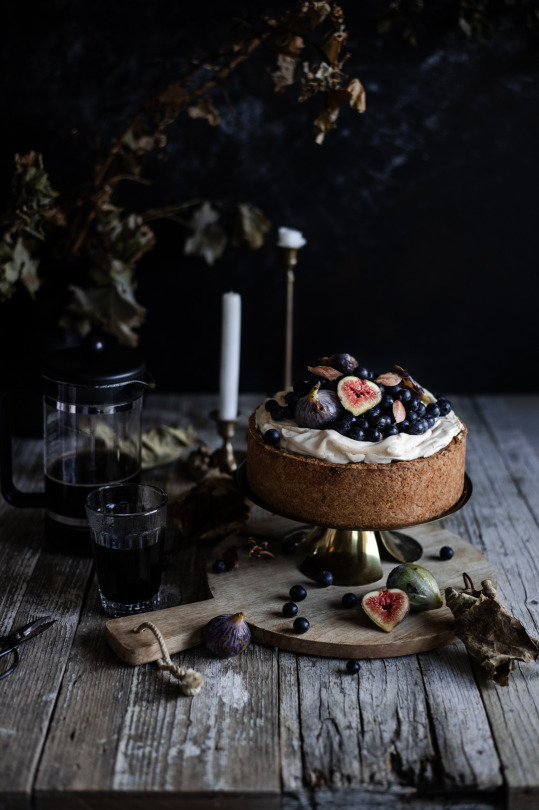
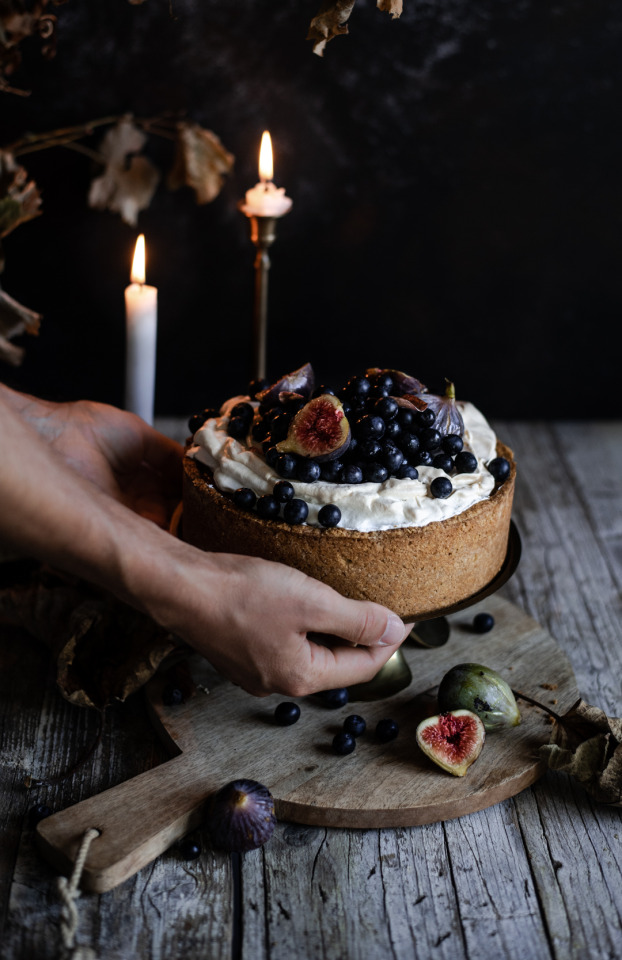
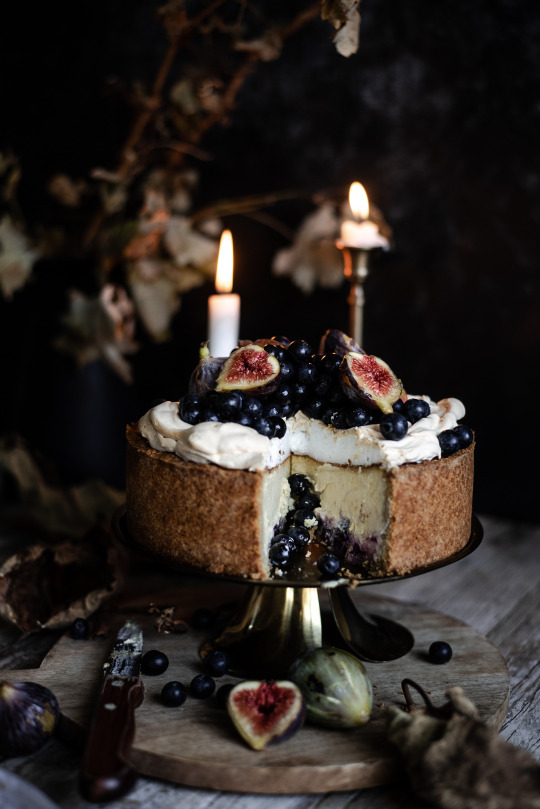
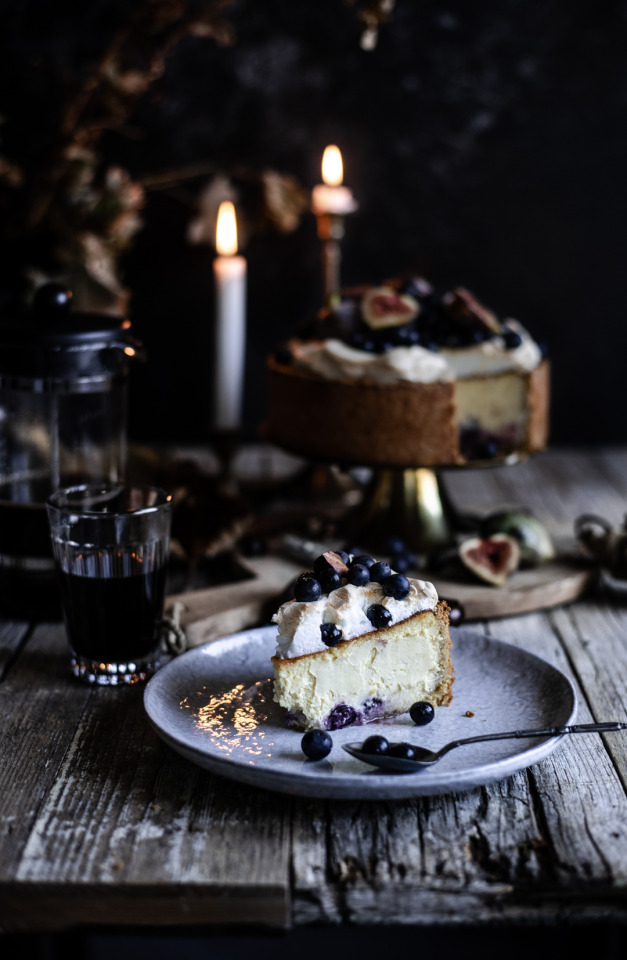
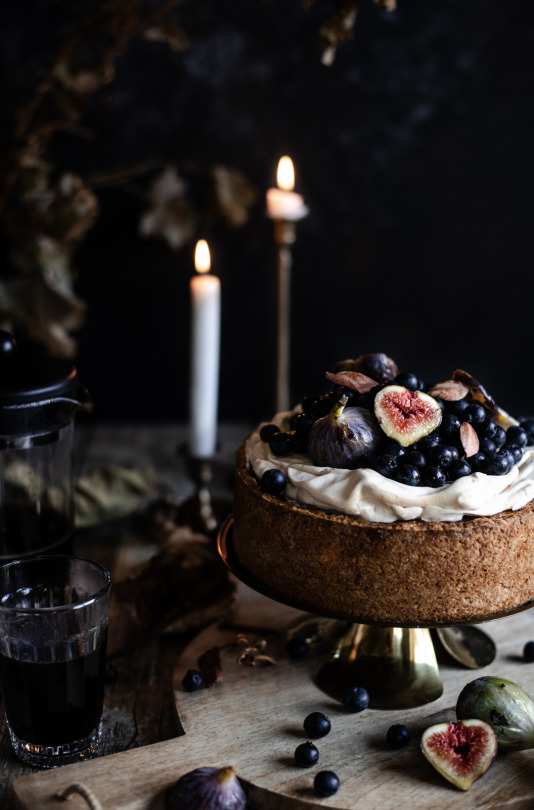
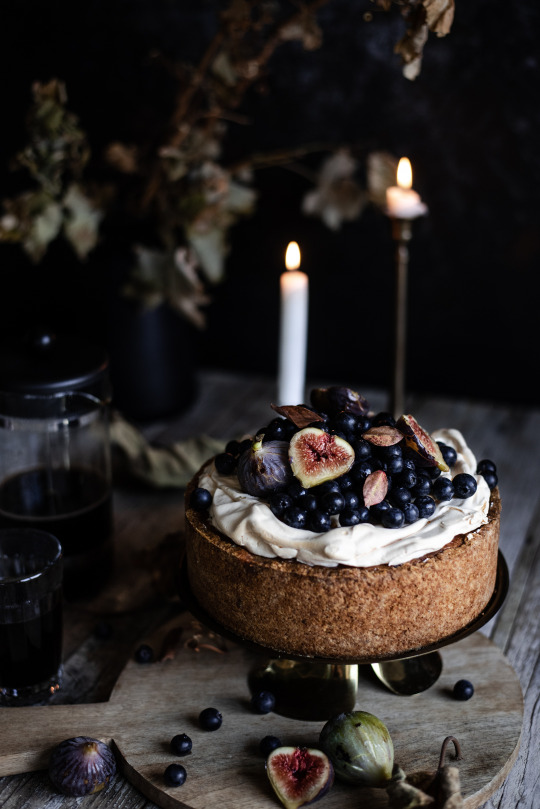
CHEESECAKE MERENGADO DE FIGO E MIRTILOS [SEM GLÚTEN]
FIG AND BLUEBERRY MERINGUE CHEESECAKE [GLUTEN-FREE]
Serve 10
Ingredientes
Base:
1 1/2 chv. flocos de aveia sem glúten
1 chv. farinha de amêndoa
50g açúcar mascavado
100g manteiga sem sal, fria
1 ovo
Recheio:
350g queijo creme (tipo philadelphia)
200g créme fraiche
100ml natas 35%M.G
3 ovos
130g açúcar mascavado
2 clh.sp amido de milho
125g mirtilos
Cobertura:
doce de figo, q.b.
2 claras
50g açúcar em pó
1/4 clh.ch sal
3 figos
125g mirtilos
Pré-aqueça o forno a 180ºC.
Forre com papel vegetal o fundo de uma forma com 20cm, de fundo amovível e unte as laterais.
Para a base, triture todos os ingredientes no processador, até obter uma massa areada e ligeiramente pegajosa. Verta a massa para a forma e com os dedos cubra o fundo e as laterais.
Leve ao frigorifíco enquanto prepara o recheio.
Para o recheio, com a ajuda de uma batedeira, bata todos os ingredientes, excepto o amido de milho e os mirtilos. Por fim envolva o amido de milho e verta o preparado na base.
Salpique com os mirtilos e leve ao forno a cozer entre 50 a 60 minutos ou até que a superfície do creme esteja acastanhada e ligeiramente sólida à superfície. A meio da cozedura, cubra com papel de aluminio caso ache necessario.
Assim que estiver cozido, retire do forno e deixe arrefecer ligeiramente. Barre a superfície do creme com doce de figo e reserve.
Reduza a temperatura do forno para 150ºC.
Bata duas claras em castelo com uma pitada de sal e por fim o açúcar, continuando a bater até obter um merengue brilhante e aveludado.
Cubra o cheesecake com o merengue e leve ao forno por mais 20 minutos. Verifique regularmente para que o merengue nao queime.
Passado o tempo, desligue o forno e abra ligeiramente a porta do forno (1 a 2cm) para que arrefeça. Depois de frio retire do forno e coloque no frigorífico durante algumas horas.
Antes de servir, decore com os restantes mirtilos e os figos.
Nota: Em caso de intolerância alimentar certifique-se sempre que os ingredientes são isentos de glúten.
English version
Serves 10
Ingredients
Crust:
1 1/2 cup gluten-free oatmeal
1 cup almond flour
50g brown sugar
100g unsalted butter, very cold
1 egg
Filling:
350g cream cheese (such as philadelphia)
200g creme fraiche
100ml heavy cream
3 eggs
130g brown sugar
2 tbsp corn starch
125g blueberries
Meringue:
fig jam, to taste
2 egg whites
50g powdered sugar
1/4 tsp salt
3 figs
125g blueberries
Preheat the oven to 180ºC.
Line the bottom of a 20cm removable bottom pan with baking paper and grease the sides.
For the crust, grind all the ingredients in the food processor, until you get a sanded, slightly sticky dough. Pour the dough and firmly press the it to cover the bottom and sides of the pan.
Refrigerate while preparing the filling.
To make the filling, with the help of an electric mixer, beat all the ingredients, except corn starch and blueberries. Finally, involve the cornstarch and pour the mixture into the base.
Sprinkle with blueberries and bake for 50 to 60 minutes or until the surface of the cream is brown and slightly solid on the surface. Halfway through cooking, cover with aluminum foil if necessary.
Once cooked, remove it from the oven and let it cool slightly. Spread some fig jam all over the top of the cheesecake and set aside.
Reduce the oven temperature to 150ºC.
Whisk two egg whites with a pinch of salt and finally the sugar, continuing to whisk until you get a shiny and velvety meringue.
Cover the cheesecake with the meringue and bake for another 20 minutes. Check regularly to prevent the meringue from burning.
Once cooked, turn off the oven and slightly open the oven door (1 to 2 cm) to cool. After cold place in the refrigerator for a few hours.
Before serving, garnish with the remaining blueberries and figs.
Note: In case of food intolerance always make sure that the ingredients are gluten free.
#food photography#semglúten#gluten-free#glutenfrei#singluten#seasonal food#autumnal cake#cheesecake#figs#figo#mirtilos#blueberries#meringued cheesecake#foodporn#foodography#loveolive
119 notes
·
View notes
Photo
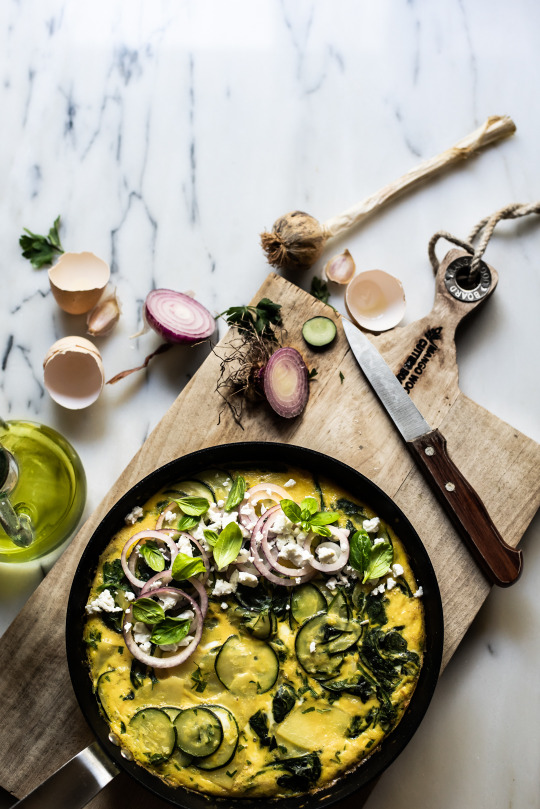
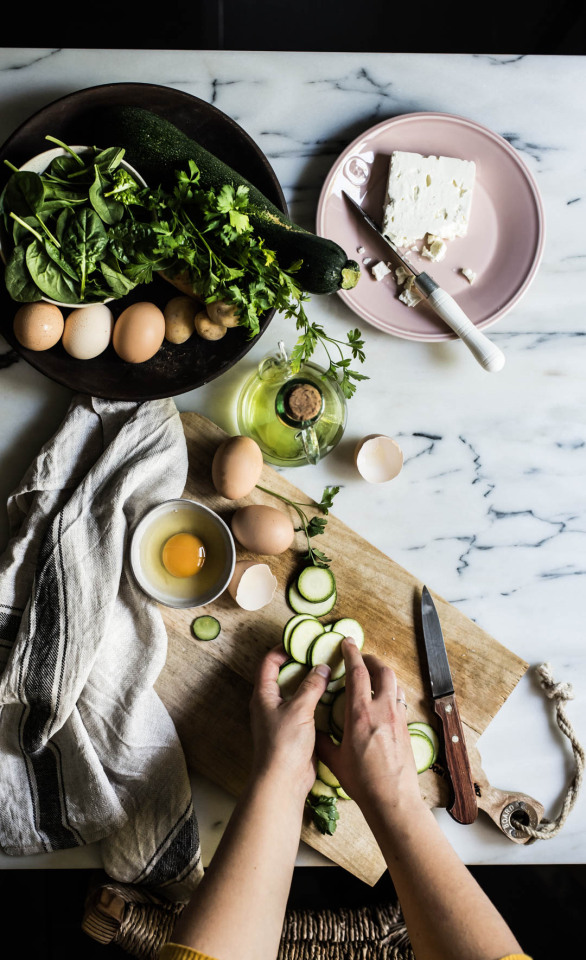
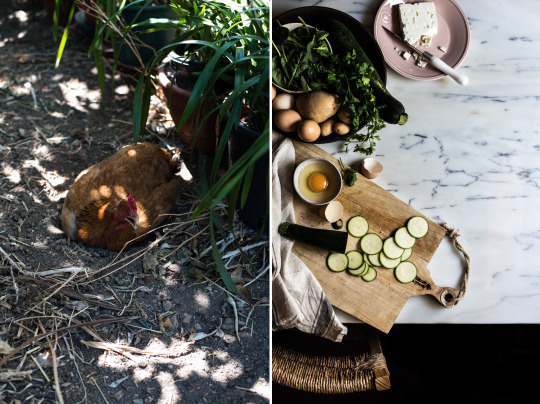
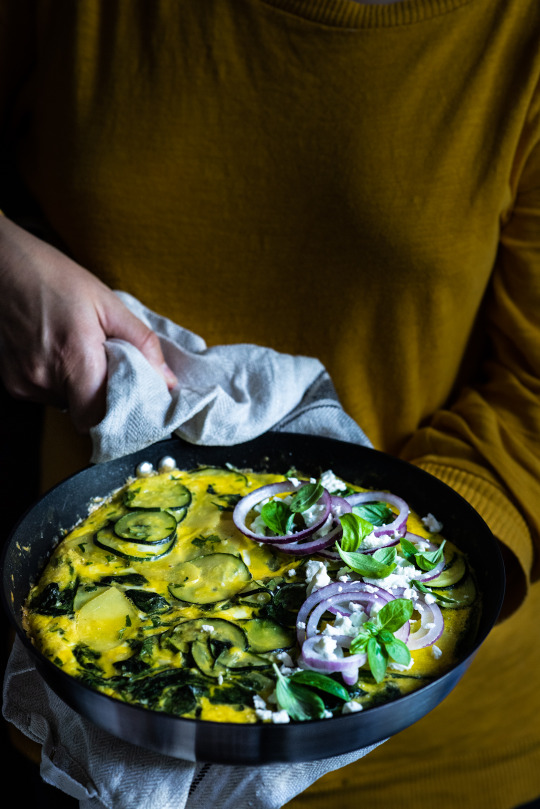
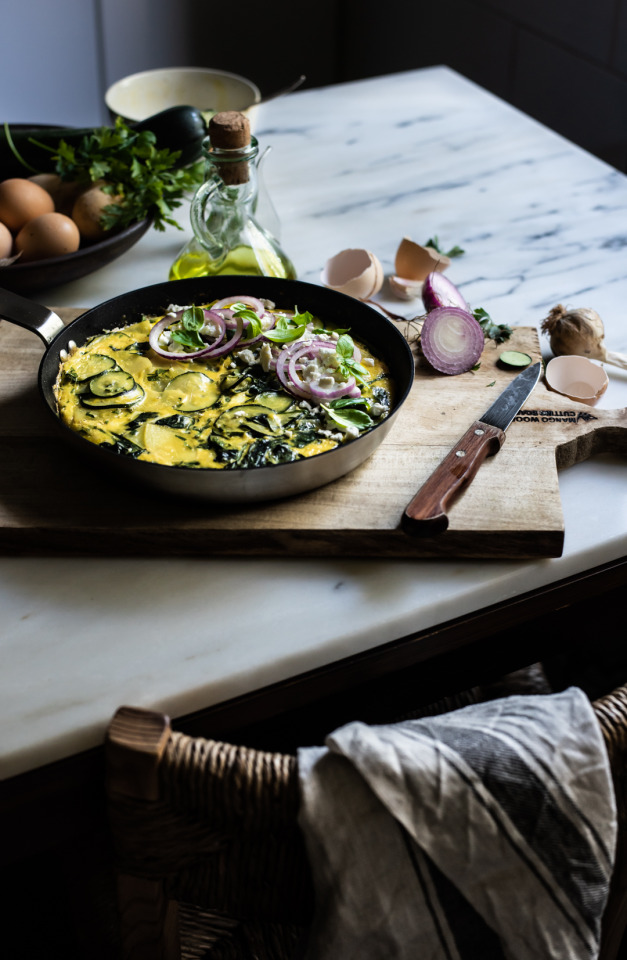
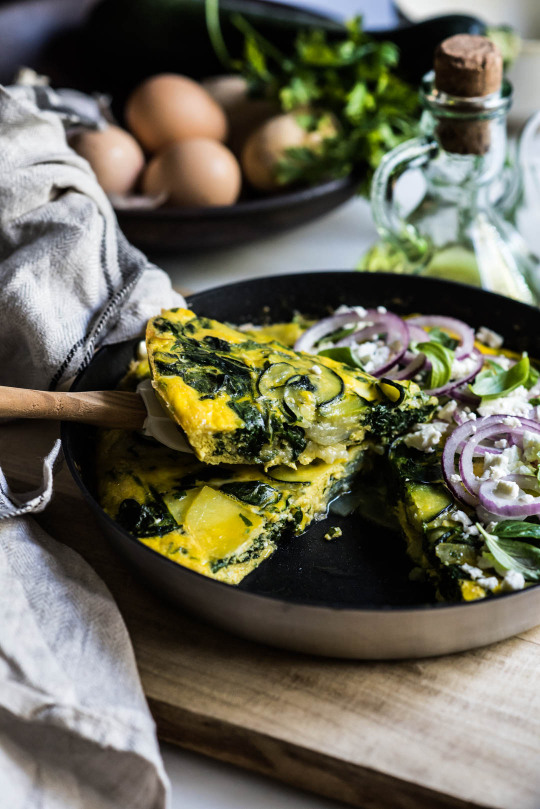
TORTILLA DE COURGETTE E ESPINAFRES
ZUCCHINI AND SPINACH TORTILLA
Serve 4
Ingredientes
6 ovos, L
1 courgette pequena
100g espinafres
1/4 chv. queijo feta
2 batatas pequenas
3 dentes de alho, picados
2 a 3 clh.sp azeite virgem extra
salsa e mangericão, q.b
sal e pimenta, q.b
Pré-aqueça o forno a 180ºC.
Numa frigideira que possa ir ao forno, refogue o alho e as batatas em palitos ou rodelas bem finos. Coloque a tampa e deixe cozer durante alguns minutos ou até que as batatas estejam moles.
Junte os espinafres e a courgette em rodelas finas, tempere com sal e pimenta e deixe cozer por mais alguns minutos.
Entretanto pique as ervas aromáticas e junte à frigideira. Junte de seguida os ovos batidos e o queijo feta esfarelado e envolva, deixando fritar um pouco mais.
Coloque a frigideira no forno e deixe cozer durante cerca de 20 minutos ou até que os ovos estejam esponjosos.
Retire do forno e sirva de imediato, decorado com ervas aromáticas, feta e cebola roxa.
English version
Serves 4
Ingredients
6 eggs, L
1 small courgette
100g spinach
1/4 cup feta cheese
2 small potatoes
3 garlic cloves, chopped
2 to 3 tbsp extra virgin olive oil
parsley and basil, to taste
salt and pepper, to taste
Preheat the oven to 180ºC.
In a frying pan that can go into the oven, sauté garlic and potatoes in thin sticks or slices. Put the lid on and let it cook for a few minutes or until the potatoes are soft.
Add the spinach and courgette in thin slices, season with salt and pepper and cook for a few more minutes.
Meanwhile chop the herbs and add to the pan. Then add the beaten eggs and the crumbled feta cheese and fold, letting it fry a little more.
Place the pan into the oven and cook for about 20 minutes or until the eggs are spongy.
Remove from the oven and serve immediately, garnished with aromatic herbs, feta and red onion.
#tortilla#foodphotographer#food photography#foodstyling#spanish food#semglúten#glutenfree#foodography#courgette#spinach#eggs#summerfood#frommygarden#onmytable#meal
18 notes
·
View notes
Photo
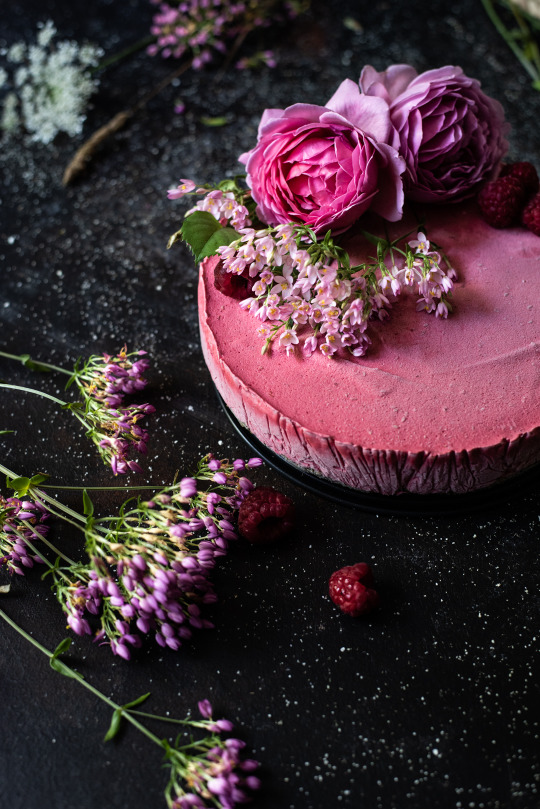
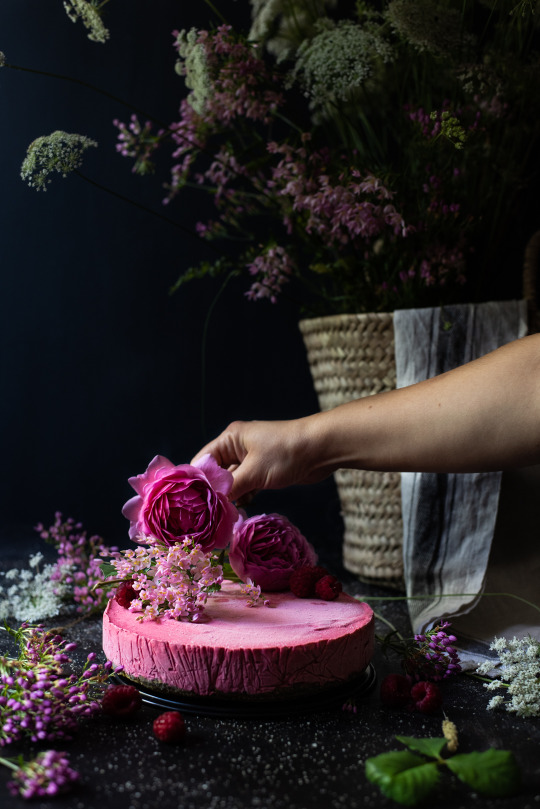
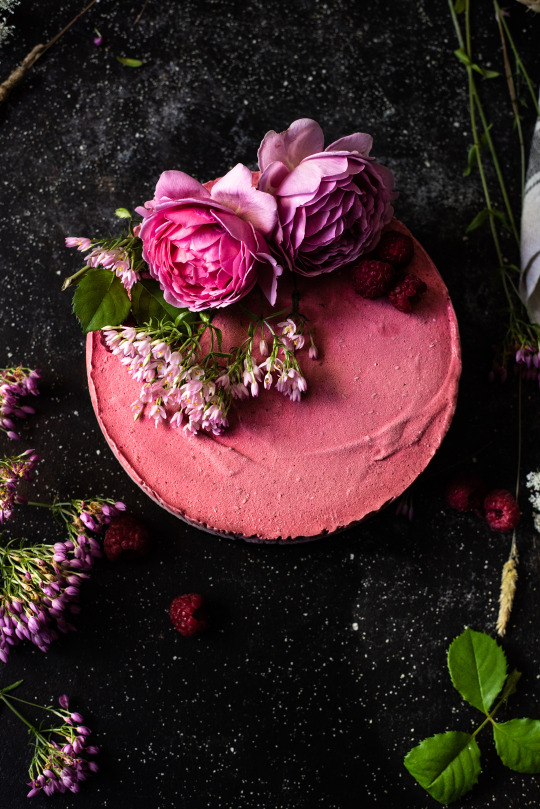
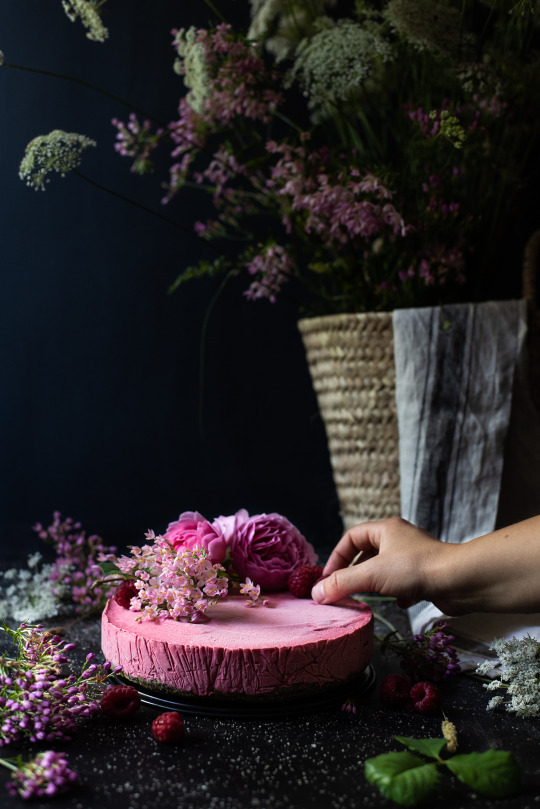
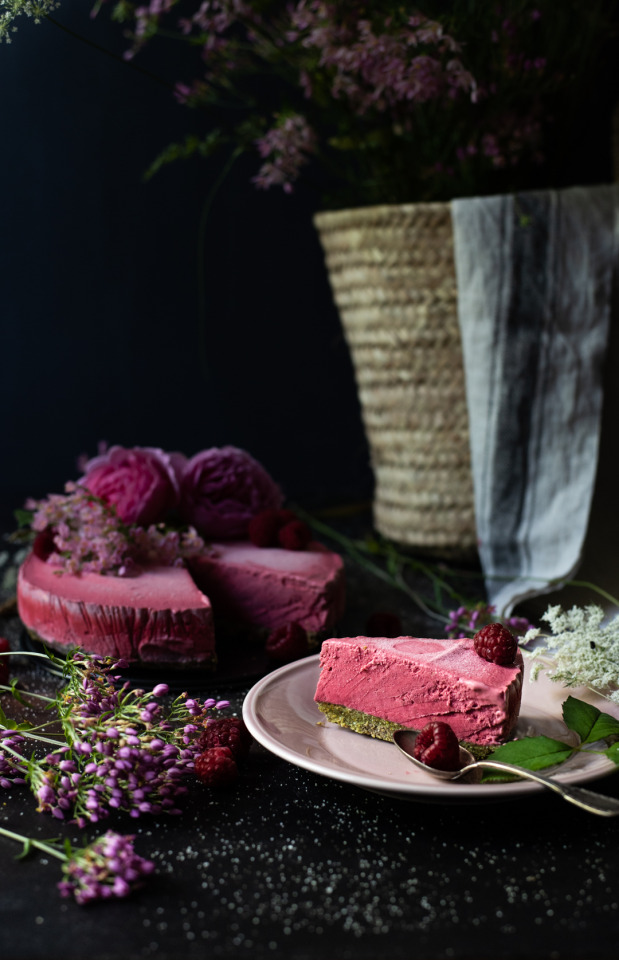
BOLO GELADO DE FRAMBOESA E PISTÁCIO [VEGAN & SEM GLÚTEN]
RASPBERRY AND PISTACHIO ICE CREAM CAKE [VEGAN & GLUTEN-FREE]
Serve 8 a 10
Ingredientes
Base:
80g pistácios, descascados
50g sementes abóbora
10 tâmaras medjool
4 clh.sp óleo de coco
1 clh.sp moringa em pó (opcional)
1/4 clh.ch sal
Gelado de Framboesa:
500g framboesas congeladas
300ml creme de coco ou natas bem frio
1 clh.sp sumo limão
1/4 a 1/3 chv. xarope de ácer ou mel
Forre uma forma de fundo amovível com papel vegetal e reserve.
No robot the cozinha, junte todos os ingredientes para a base e triture até obter uma consistência de areia molhada. Caso ache necessário pode sempre demolhar as tâmaras em água morna para facilitar o processo.
Verta o preparado da base na forma e espalhe uniformemente até cobrir todo o fundo. Com a ajuda de uma colher calque ligeiramente para que fique bem compacto.
Limpe o robot de cozinha com papel e triture todos os ingredientes para o gelado, até obter um creme espesso.
Verta o preparado de gelado de framboesa sobre a base de pistachio e leve ao congelador durante 3 a 4 horas ou até que este esteja sólido.
Retire do congelador alguns minutos antes de servir, desenforme, remova o papel, decore a gosto e desfrute.


English version
Serves 8 to 10
Ingredients
Crust:
80g pistachios, peeled
50g pumpkin seeds
10 medjool dates
4 tbsp coconut oil
1 tbsp moringa powder (optional)
1/4 tsp salt
Raspberry Ice Cream:
500g frozen raspberries
300ml coconut cream or heavy cream very cold
1 tbsp lemon juice
1/4 to 1/3 cup maple syrup or honey
Line a removable bottom pan with parchment paper and set aside.
In a food processor, combine all the ingredients of the base and grind until you get a consistency of wet sand. If you find it necessary, soak the dates in warm water for a few minutes to facilitate the process.
Pour the base preparation into the pan and spread it evenly until it covers the entire bottom. Press it slightly with a spoon to compact it.
Clean the food processor with paper towel and grind all the ingredients for the ice cream, until you have a thick cream.
Pour the raspberry ice cream preparation on the pistachio base and place in the freezer for 3 to 4 hours or until it is solid.
Remove from the freezer a few minutes before serving, unmold, remove the paper, decorate to taste and enjoy.
#Ice cream cake#raspberry icecream#vegan#glutenfree#foodphotography#foodphotographer#dark food photo#foodstyling#bolo gelado de framboesa e pistacio#pistácio#pistachio#loveolive-featured#- sweets -
11 notes
·
View notes
Photo
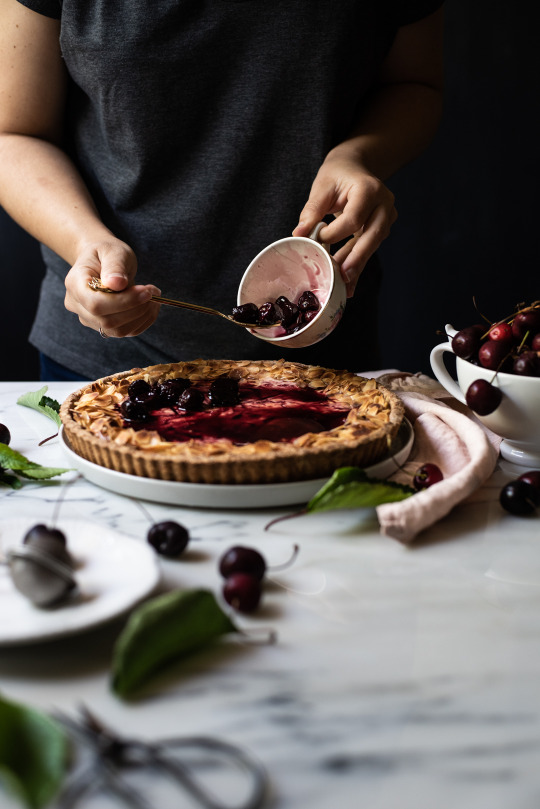
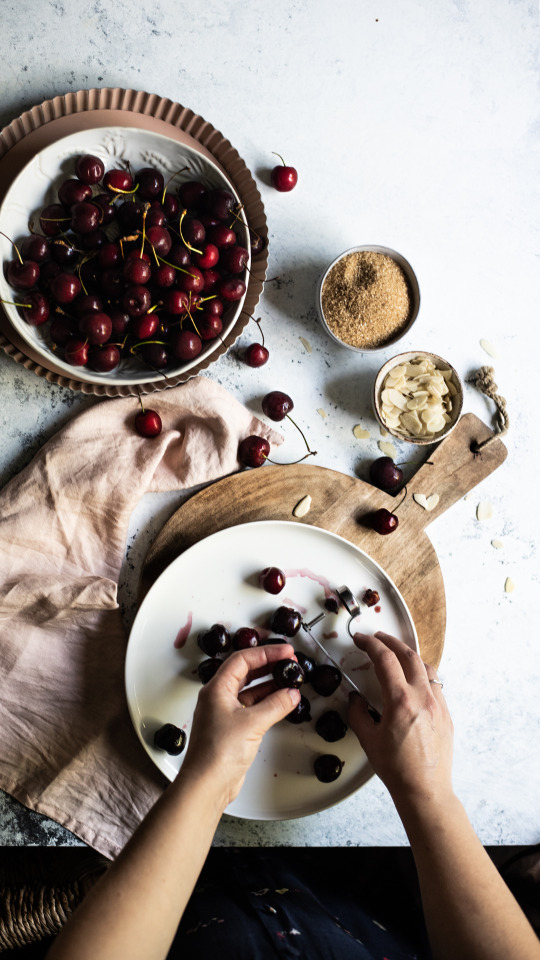
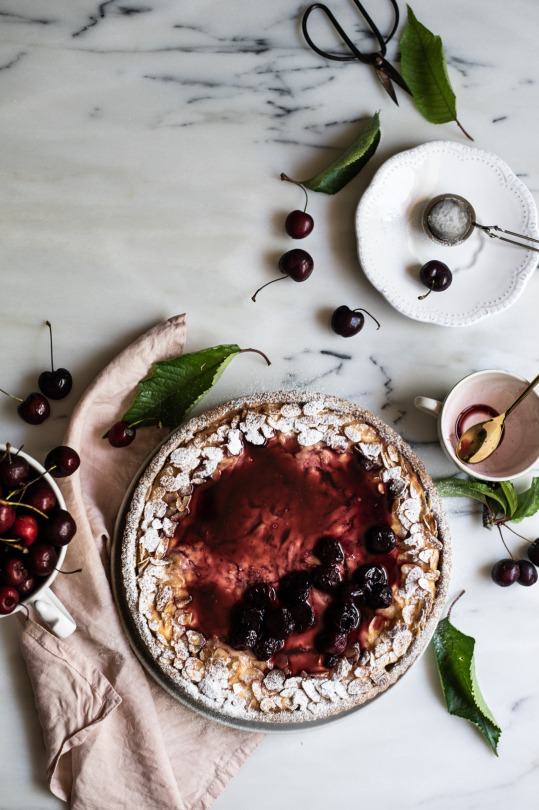
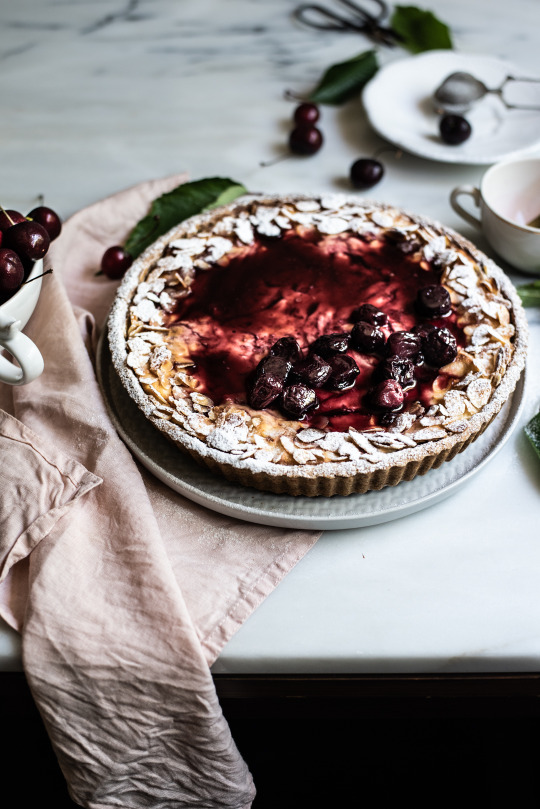
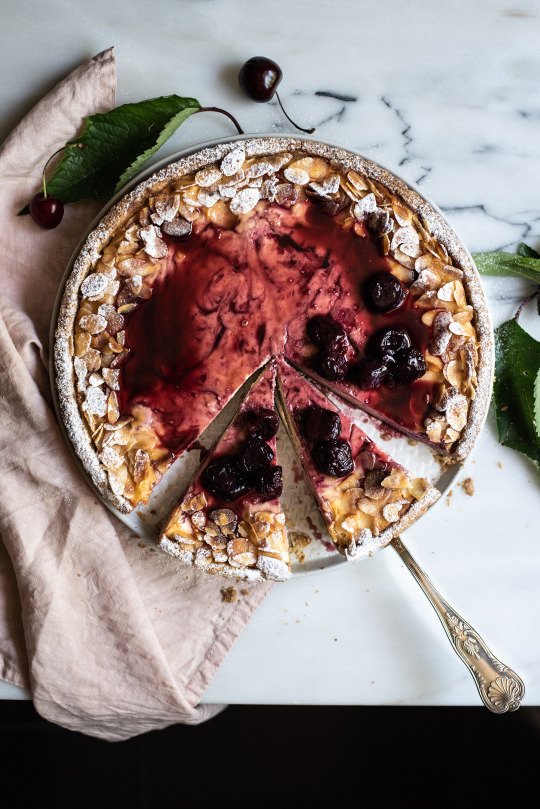
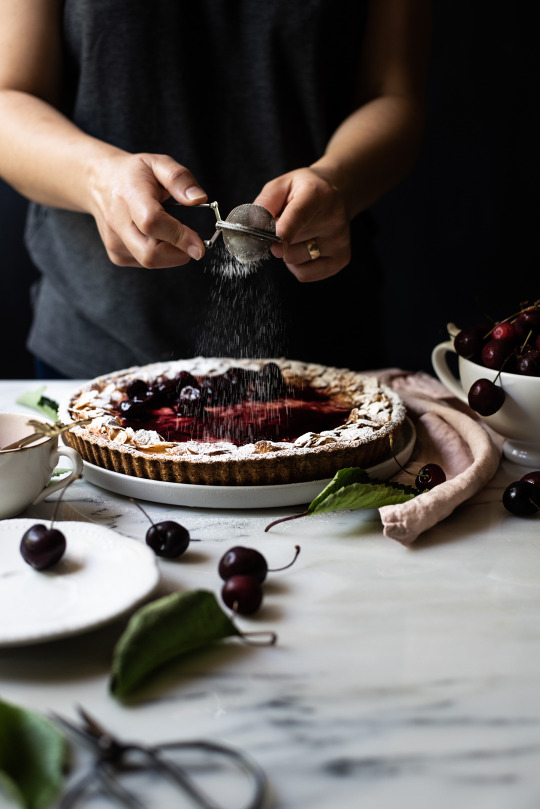
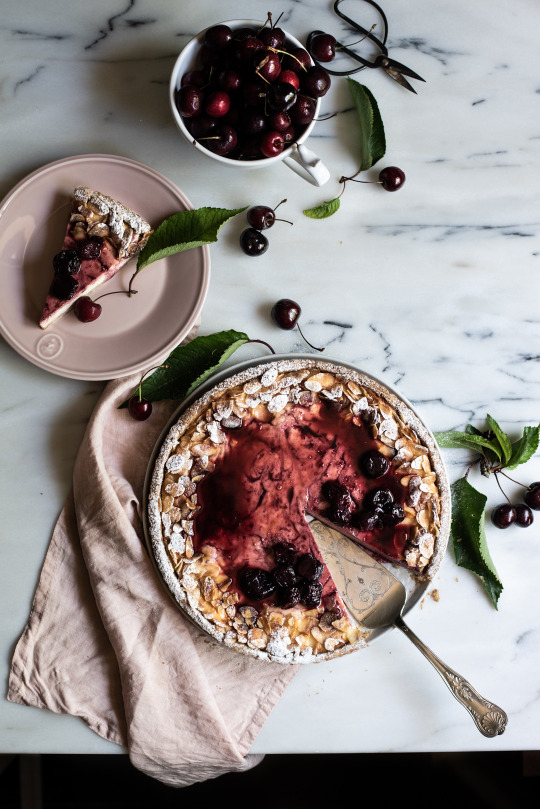
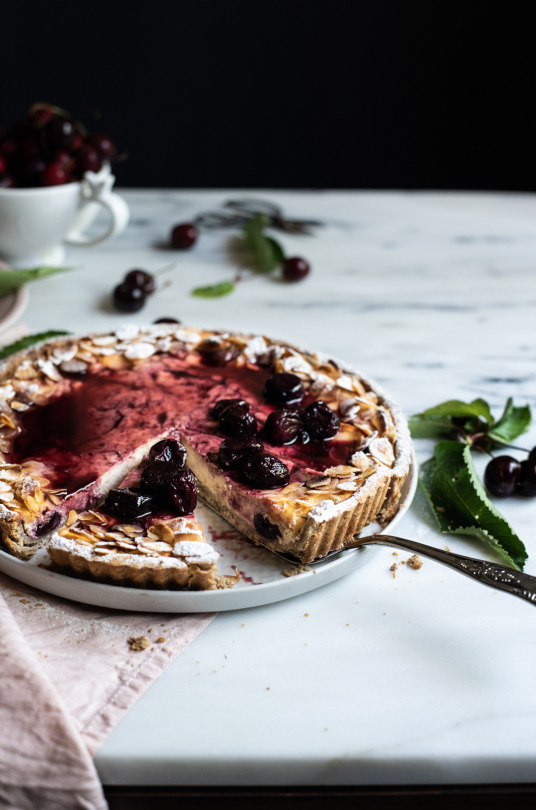
CHEESECAKE DE QUARK E CEREJA ASSADA [SEM GLÚTEN]
QUARK AND ROASTED CHERRIES CHEESECAKE [GLUTEN-FREE]
Serve 10 a 12
Ingredientes
Massa:
80g farinha de amêndoa
80g farinha de arroz
80g farinha trigo sarraceno
40g amido de tapioca
1 clh.sp linhaça moída
2 clh.ch psyllium husk
25g açúcar
1/2 clh.ch sal
1 ovo, L
100g manteiga, fria em cubos
3 a 4 clh.sp água fria
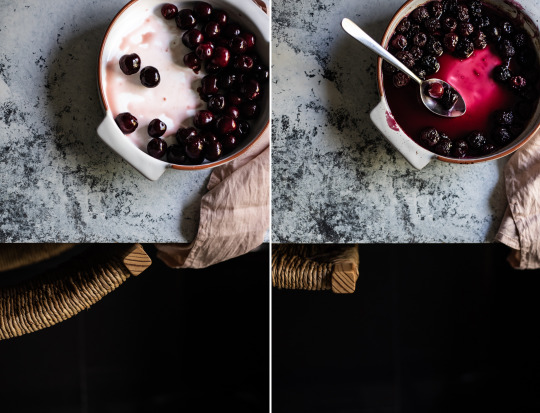
Cerejas assadas:
350g cerejas
3 clh.sp açúcar mascavado
3 clh.sp licor de ginja
1/2 clh.ch sal
Recheio:
500g queijo quark
2 ovos, L
1/3 chv. açúcar mascavado ou mel
1 clh.ch extrato baunilha
amêndoas laminadas
açúcar em pó
Prepare a massa da tarte no dia anterior, juntando todos os ingredientes secos com a manteiga e misturando até que se assemelhe a pão ralado.
Adicione de seguida o ovo batido e misture com um garfo. Por fim, junte a água, uma colher de cada vez, misturando a cada adição. No final a massa deve formar uma bola ligeiramente húmida e sem esfarelar.
Forme um disco e envolva com película plástica. Deixe repousar no frigorífico durante algunas horas ou de um dia para o outro.
Entretanto prepare as cerejas assadas. Lave e retire os caroços, coloque as cerejas num tabuleiro de forno, polvilhe com açúcar e o licor (se não tiver licor de ginja, pode sempre usar outro que goste mais ou que tenha à mão). Deixe repousar.
Pré-aqueça o forno a 200ºC e deixe as cerejas assar durante 20 a 30 minutos ou até que estas estejam enrugadas. Reserve.
No dia seguinte pré-aqueça o forno a 180ºC. Estenda a massa e cubra com ela uma tarteira de 25cm diâmetro com fundo amovível. Coloque a tarteira no frigorífico enquanto prepara o recheio.
Para o recheio, bata todos os ingredientes com a ajuda de uma batedeira elétrica até obter uma mistura cremosa.
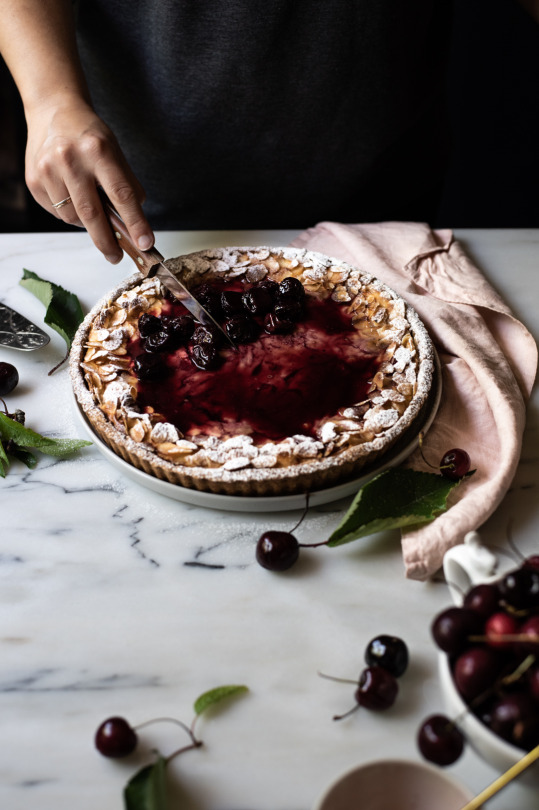
Retire a tarteira do frigorífico, distribua as cerejas a gosto (reserve o molho e algumas cerejas), cubra com o creme e salpique todo o rebordo com amêndoas laminadas. Leve ao forno e deixe cozer durante 45 a 50 minutos ou até que o recheio esteja sólido ao toque.
Retire do forno, deixe arrefecer e coloque no frigorífico.
Antes de servir cubra com o molho das cerejas e algumas cerejas assadas e polvilhe com açúcar em pó.
Nota: Em caso de doença ou alergia, verifique sempre se os ingredientes são isentos de glúten
English version
Serves 10 to 12
Ingredients
Crust:
80g almond flour
80g rice flour
80g buckwheat flour
40g tapioca starch
1 tbsp ground flaxseed
2 tsp psyllium husk
25g sugar
1/2 tsp salt
1 egg, L
100g butter, diced cold
3 to 4 tbsp cold water
Roasted cherries:
350g cherries
3 tbsp brown sugar
3 tbsp cherry liqueur
1/2 tsp salt
Filling:
500g quark cheese
2 eggs, L
1/3 cup brown sugar or honey
1 tsp vanilla extract
laminated almonds
icing sugar
Prepare the crust the day before, adding all the dry ingredients with the butter and mixing until it resembles breadcrumbs.
Then add the beaten egg and mix with a fork. Finally, add the water, one spoon at a time, mixing in each addition. At the end, the dough should form a slightly moist ball without crumbling.
Form a disc and wrap with plastic film. Let stand in the refrigerator for a few hours or overnight.
Meanwhile prepare the roasted cherries. Wash the cherries and remove the pits, place them on an oven tray, sprinkle with sugar and liqueur (if you don't have cherry liqueur, you can always use another one that you like best or that you have on hand). Let stand.
Preheat the oven to 200ºC and let the cherries bake for 20 to 30 minutes or until they are wrinkled. Reserve.
The next day preheat the oven to 180ºC. Roll out the dough and cover a 25cm diameter pan with a removable bottom with it. Place the pan in the fridge while preparing the filling.
For the filling, beat all the ingredients with the help of an electric mixer until you get a creamy mixture.
Take the dish out of the fridge, put some cherries on the bottom (reserve the sauce and some cherries to serve), cover with the cream and sprinkle the whole border with laminated almonds. Bake for 45 to 50 minutes or until the filling is solid to the touch.
Remove from the oven, let cool and place in the refrigerator.
Before serving, cover with the cherry sauce, some roasted cherries and sprinkle with icing sugar.
Note: In case of illness or allergy, always check if the ingredients are gluten free
#foodphotography#foodstyling#cherries#gluten-free#semgluten#singluten#quark and cherries tart#foodphotographer#quark#moodygrams#seasonal food#onmytable#dessert#tart
17 notes
·
View notes
Photo
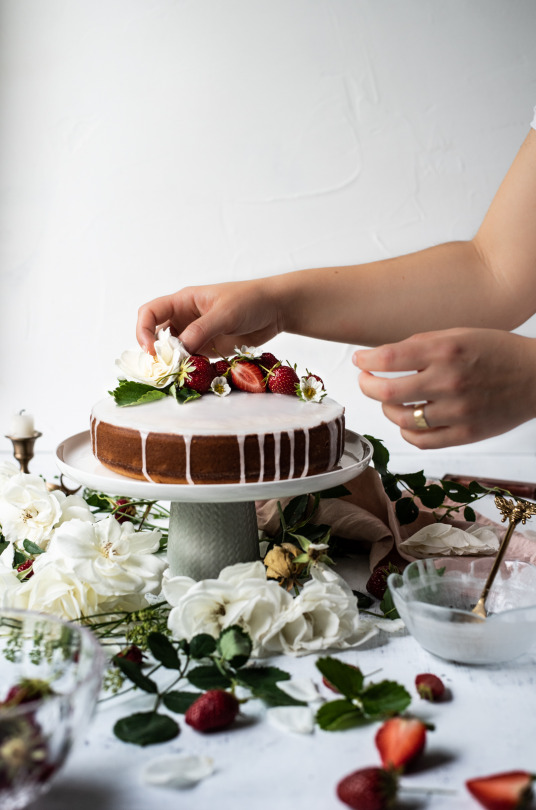
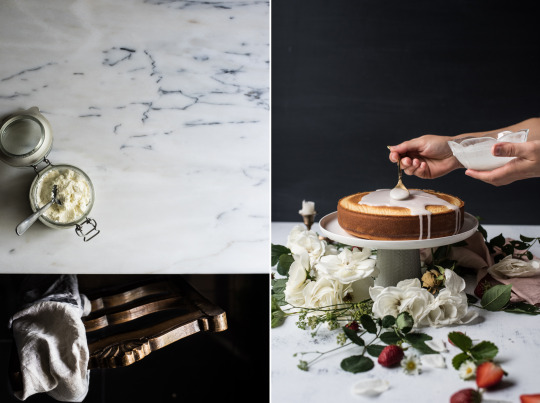
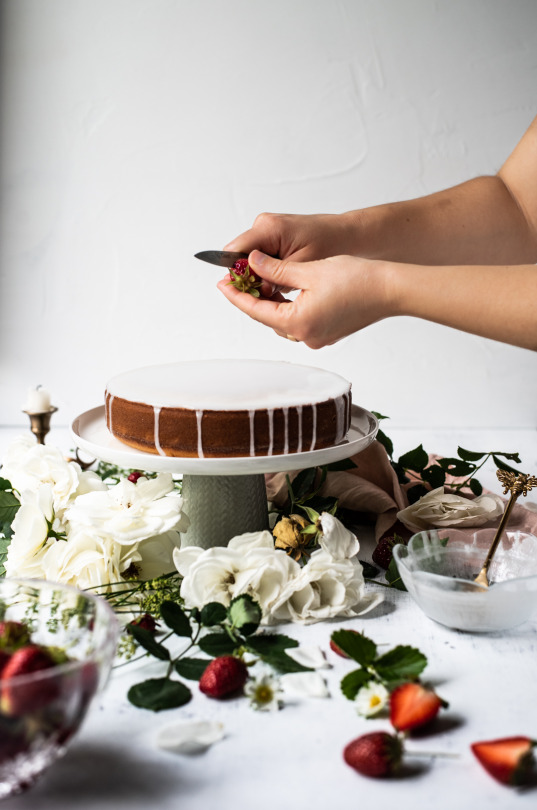
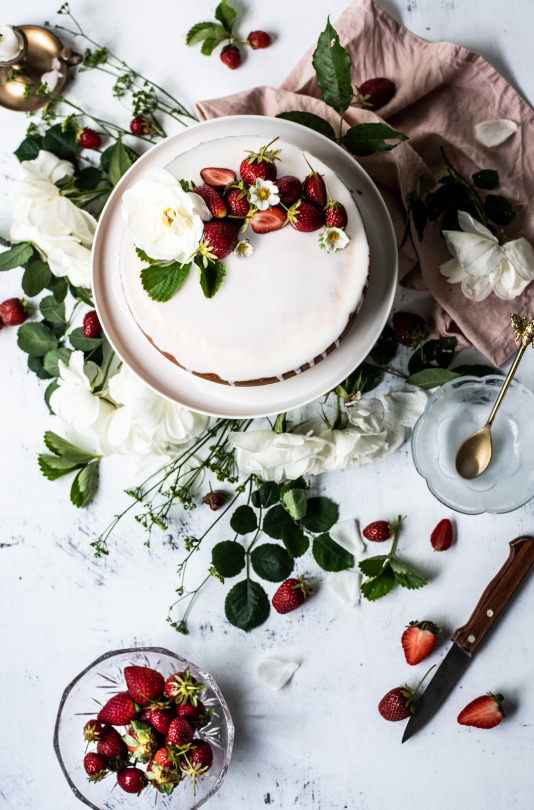
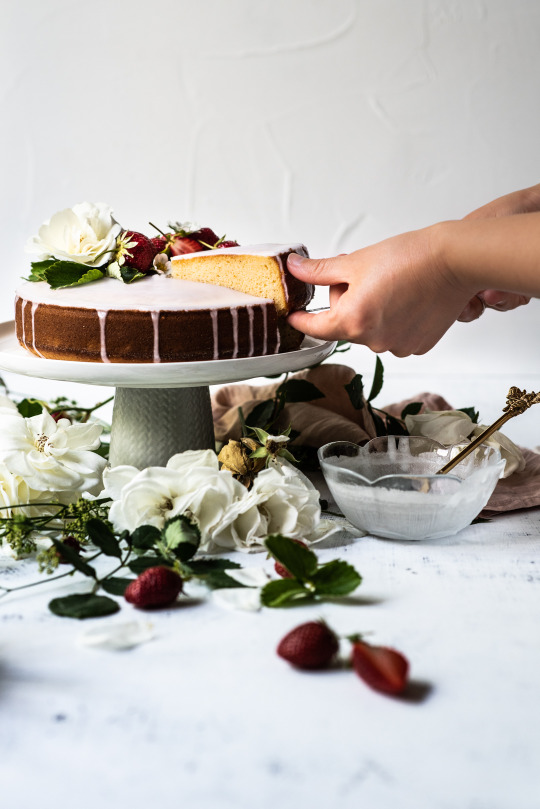
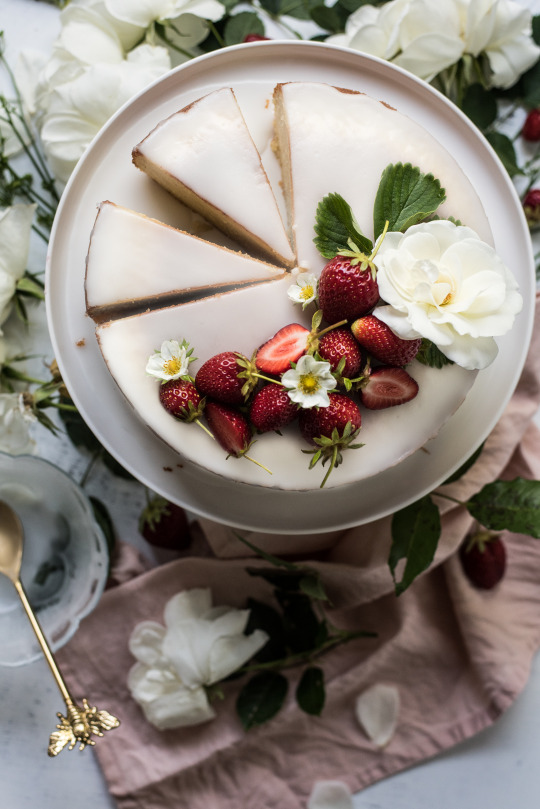
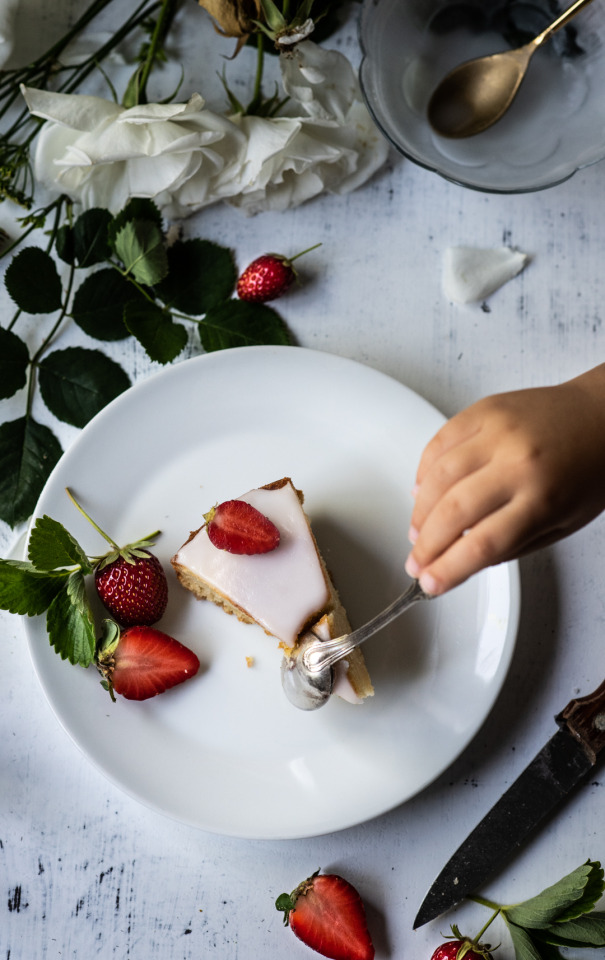
BOLO DE RICOTTA E ROSAS [SEM GLÚTEN]
RICOTTA AND ROSES CAKE [GLUTEN-FREE]
Serve 10
Ingredientes
Bolo:
350g ricotta
70g farinha de trigo sarraceno
140g farinha de arroz
90g manteiga, derretida
2 clh.ch fermento em pó
120g açúcar mascavado
4 ovos
2 clh.ch água de rosas
Glacé:
1 clh.sp água
2/3 chv. açúcar em pó
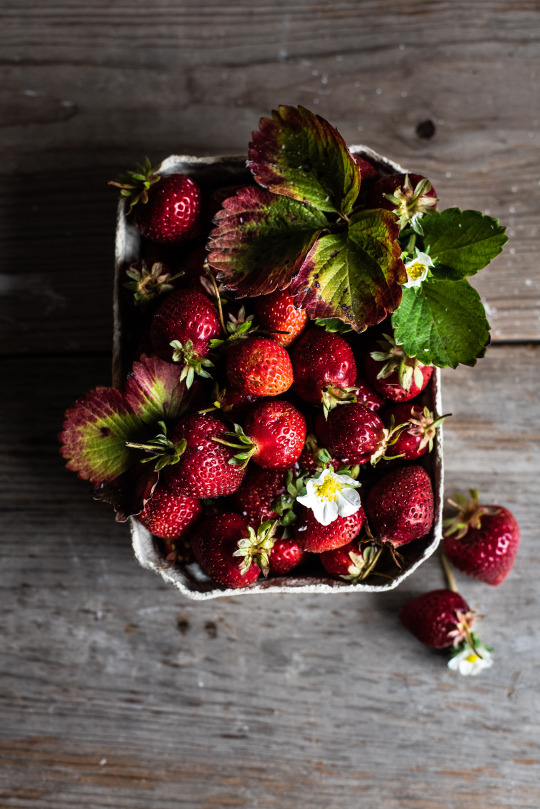
morangos e rosas
Pré-aqueça o forno a 180ºC, forre o fundo de uma forma redonda com 20cm e unte as laterais com manteiga e farinha.
Com a ajuda de uma batedeira, bata os ovos com o açúcar até que estes ganhem volume. De seguida, sem parar de bater, junte a ricotta, a água de rosas e por fim a manteiga.
Entretanto misture os ingredientes secos e adicione-os ao preparado anterior, envolva e verta a massa para a forma.
Leve ao forno durante cerca de 40 minutos ou até que, com o teste do palito este saia limpo. Retire do forno e deixe arrefecer.
Entretanto prepare o glacé. Junte o açúcar com a água e misture bem, adicionando mais açúcar ou água até obter a consistência desejada.
Antes de servir verta o glacé sobre o bolo e decore com morangos e rosas.
Nota: Em caso de doença ou alergia, verifique sempre se os ingredientes são isentos de glúten
English version
Serves 10
Ingredients
cake:
350g ricotta
70g buckwheat flour
140g rice flour
90g melted butter
2 tsp baking powder
120g brown sugar
4 eggs
2 tsp rose water
Glaze:
1 tbsp water
2/3 cup icing sugar
strawberries and roses
Preheat the oven to 180ºC, line the bottom of a 20cm round cake pan and grease the sides with butter and flour.
With the help of an electric mixer, beat the eggs and sugar until they gain volume. Then, without stopping, add the ricotta, rose water and finally the butter.
In the meantime mix the dry ingredients and add them to the previous preparation, fold and pour the dough into the pan.
Bake for about 40 minutes, until a toothpick inserted into the center comes out with moist crumbs. Remove from the oven and let it cool.
Meanwhile prepare the glaze. Add the sugar with the water and mix well, adding more sugar or water until you get the desired consistency.
Before serving spoon the glaze over the cake and garnish with strawberries and roses.
Note: In case of illness or allergy, always check if the ingredients are gluten free

#bolo sem gluten#gluten free baking#roses and ricotta gluten free cake#homemadebaking#foodphotography#foodstyling#strawberries#crostini of baked grapes and ricotta#morangos#sin gluten
7 notes
·
View notes
Photo
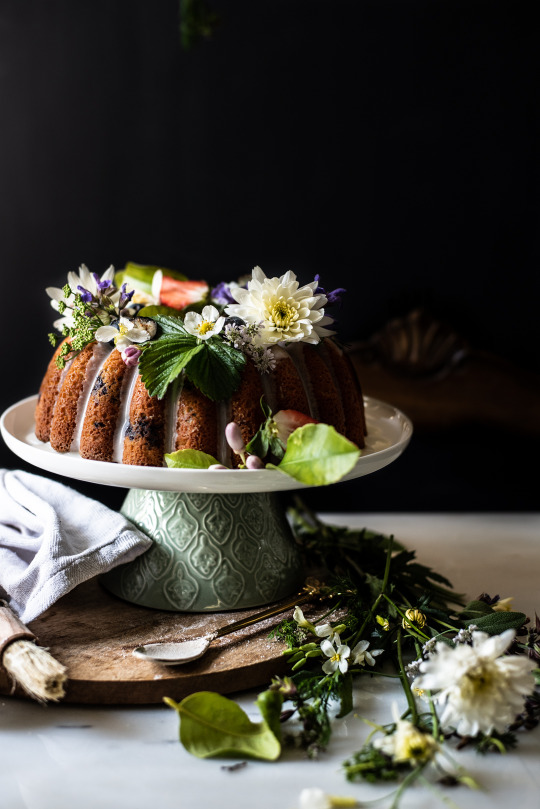
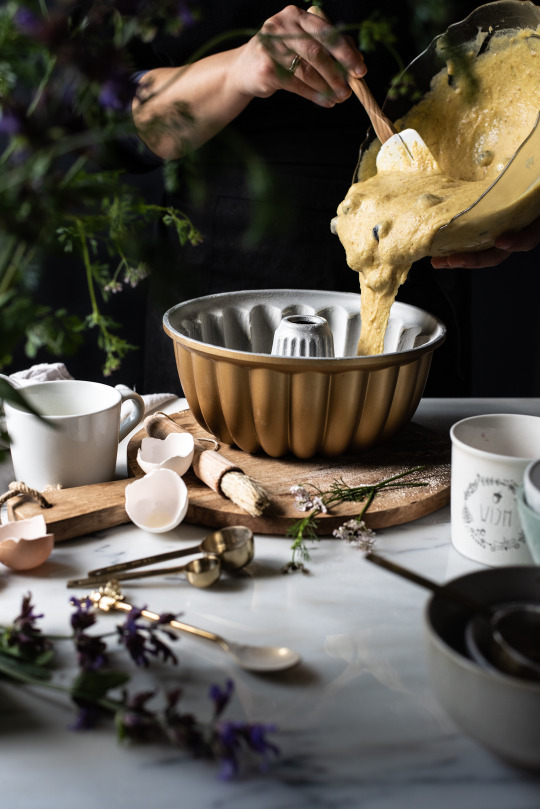
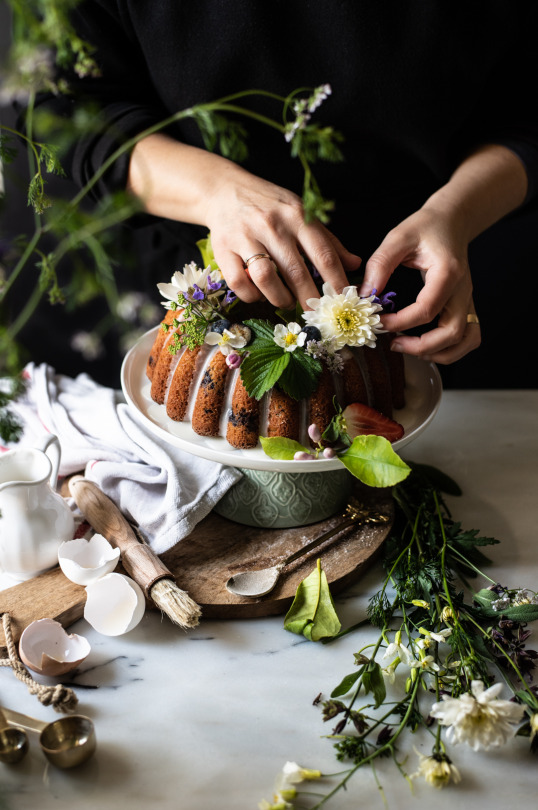
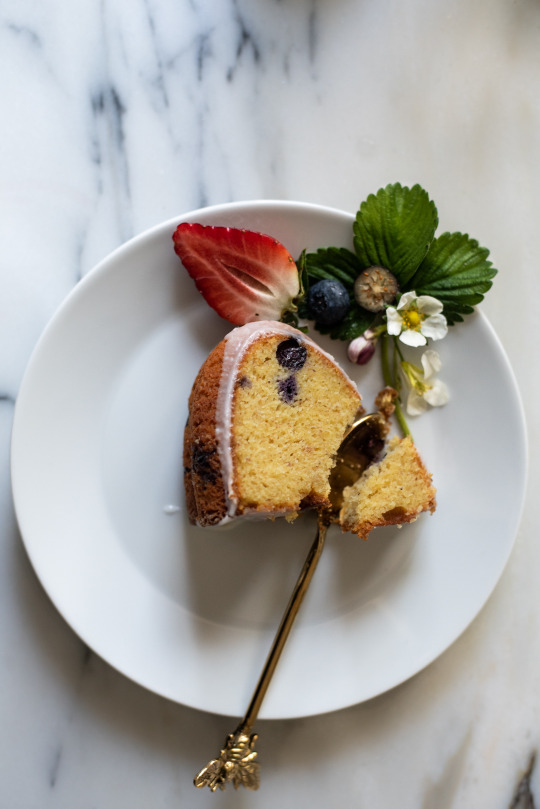
BOLO DE PÁSCOA DE AZEITE E MIRTILOS [SEM GLÚTEN]
OLIVE OIL AND BLUEBERRY EASTER CAKE [GLUTEN-FREE]
Para 12 doses
Ingredientes
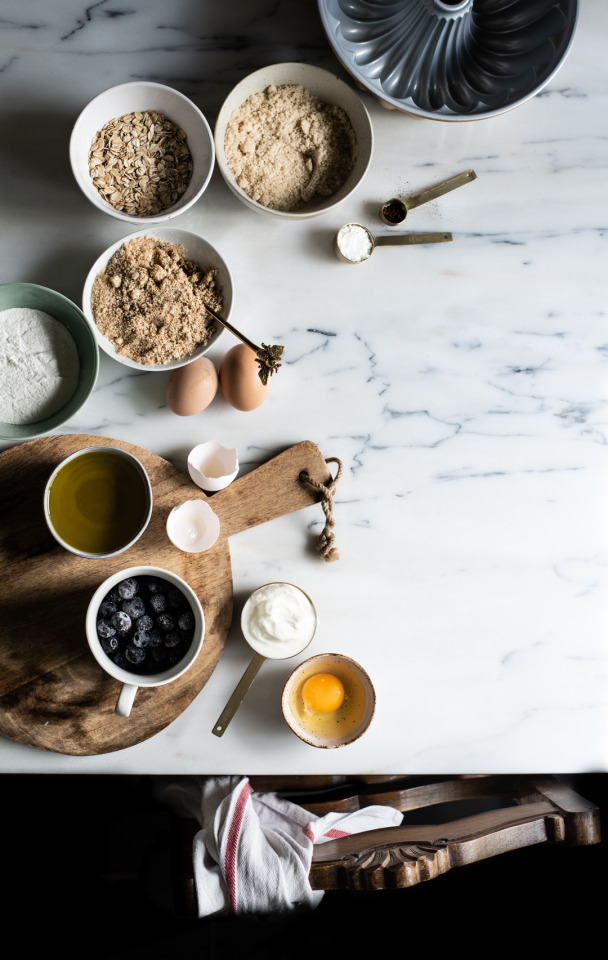
Bolo:
200g farinha de arroz
100g farinha de amêndoa
50g farinha trigo sarraceno
2 clh.ch fermento
3 ovos
125g açúcar mascavado
1/4 clh.ch sal
1/2 clh.ch extracto baunilha
125ml azeite, virgem extra
150ml iogurte grego
125g mirtilos, frescos ou congelados
Cobertura de Iogurte:
1 clh.sp iogurte grego
1 chv. açúcar em pó
flores do campo
mirtilos
morangos
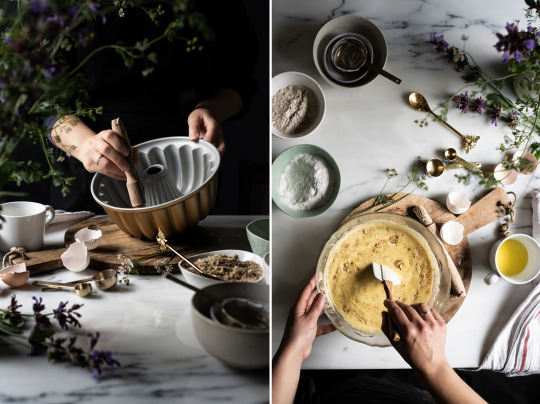
Pré-aqueça o forno a 180ºC e unte uma forma grande com manteiga e farinha de arroz. (Usei uma forma de bundt cake)
Com a ajuda da batedeira, bata os ovos com o açúcar, o sal e a baunilha até que a mistura duplique de tamanho e o açúcar esteja totalmente derretido.
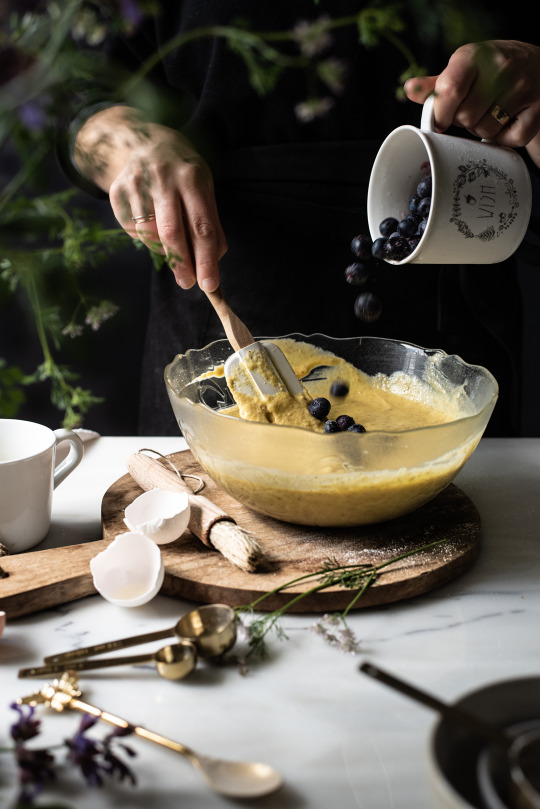
Junte de seguida o iogurte e o azeite e volte a bater até obter uma mistura cremosa, junte de seguida as farinhas e misture.
Por fim, adicione os mirtilos e envolva.
Verta o prepara para a forma e leve ao forno durante cerca de 50 minutos ou até que ao inserir o palito este saia limpo.
Depois de cozido, retire do forno, desenforme e deixe arrefercer.
Para a corbertura junte o açúcar e o iogurte e misture bem até obter um creme branco.
Coloque o bolo num prato, verta o creme de iogurte na superfície e decore a gosto, com uma grinalda de flores do campo, mirtilos e morangos.
Nota: Verifique sempre se os ingredientes são isentos de glúten.
English version
Serve 12
Ingredients
Cake:
200g rice flour
100g almond flour
50g buckwheat flour
2 tsp baking powder
3 eggs
125g brown sugar
1/4 tsp salt
1/2 tsp vanilla extract
125ml extra virgin olive oil
150ml greek yogurt
125g blueberries frozen or fresh
Yogurt Glaze:
1 tbsp greek yogurt
1 cup icing sugar
wildflowers
blueberries
strawberries
Preheat the oven to 180ºC and grease a large cake pan with butter and rice flour. (I used a bundt cake mold)
With the help of an electric mixer, beat the eggs with the sugar, salt and vanilla until the mixture doubles in volume and the sugar is completely incorporated.
Add the yogurt and olive oil and beat again until you get a creamy mixture, then add the flours and mix.
Finally, add the blueberries and stir.
Pour the dough into the cake pan and bake for about 50 minutes or until an inserted toothpick comes out clean.
Once baked, remove from the oven, unmold and let it cool.
To make the yogurt glaze mix sugar and yogurt until you achieve a smooth white glaze.
Place the cake on a plate, pour the yogurt glaze on top and decorate to taste, with wildflowers, blueberries and strawberries.
Note: Always make sure all ingredients are certified gluten-free.

#easter cake#foodphotography#glutenfreerecipes#sem glúten#bolo de azeite#bolo de primavera#sin gluten#senza glutine#pascoa#wildflowers#Spring Food#foodstyling#blueberries#oliveoil#buckwheat#homemadebaking
19 notes
·
View notes
Photo
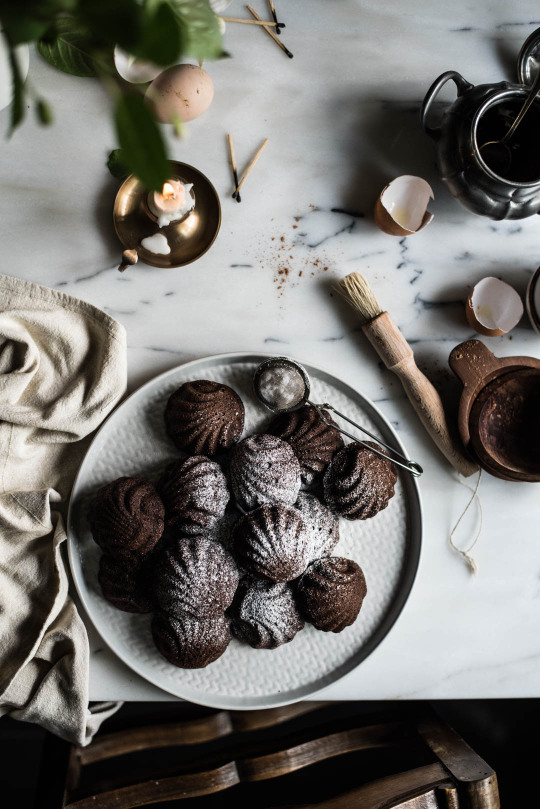
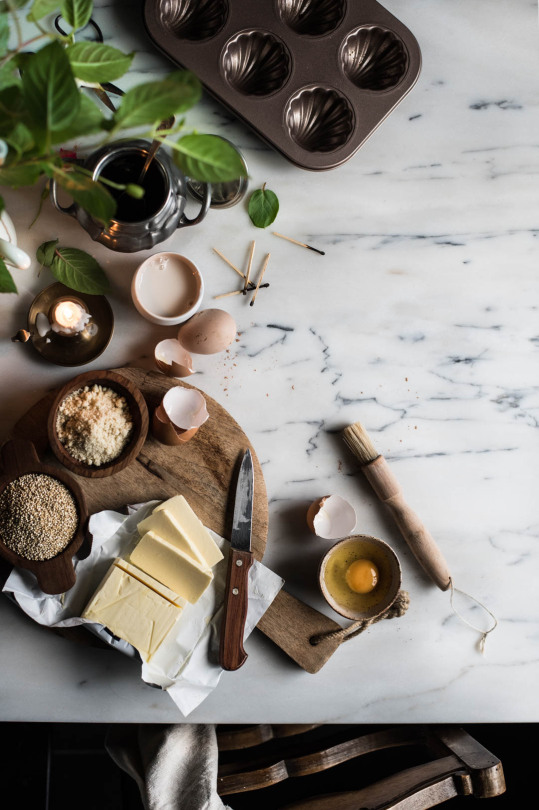
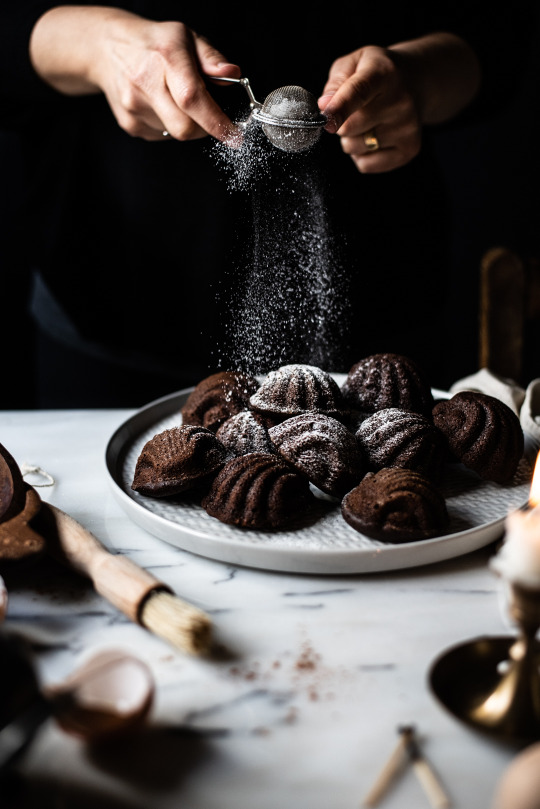
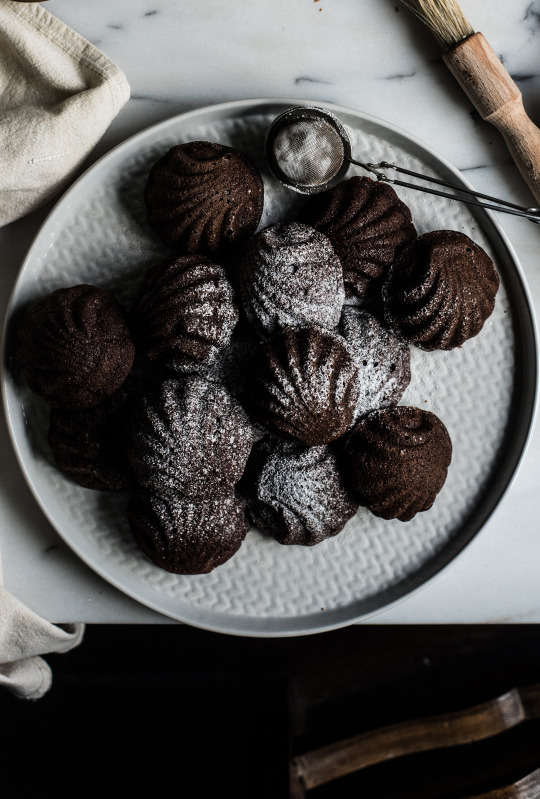
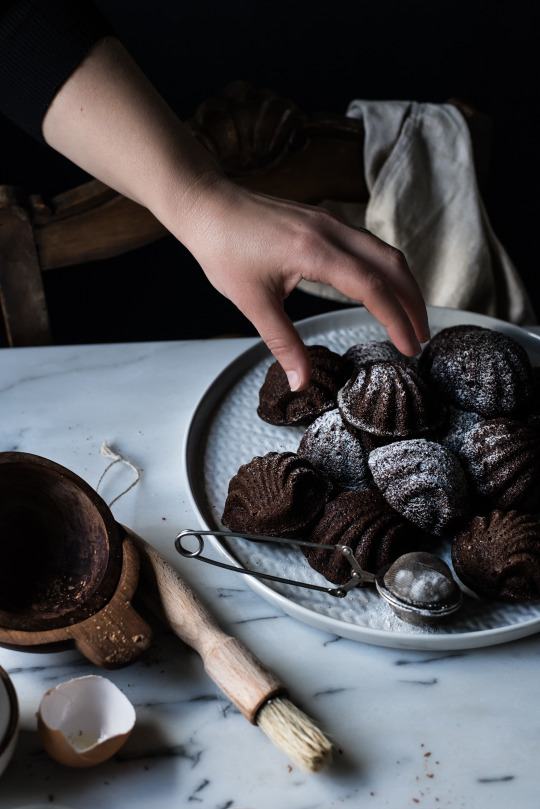
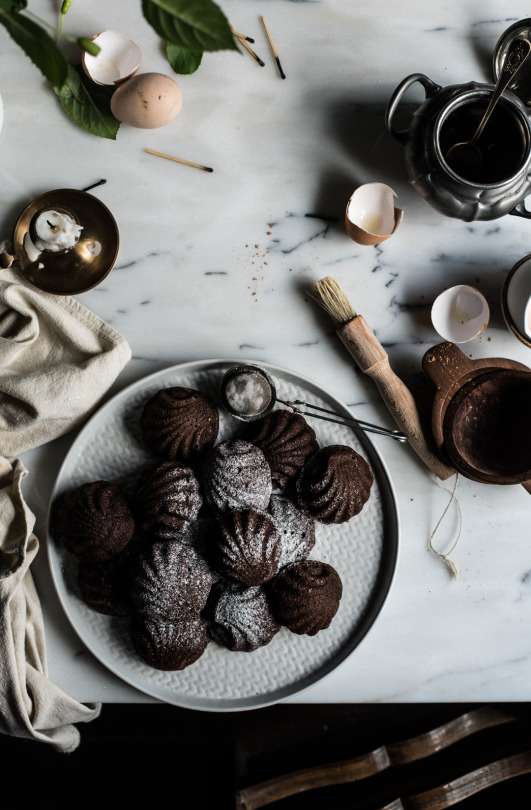
MADALENAS DE QUINOA E CHOCOLATE [SEM GLÚTEN]
QUINOA CHOCOLATE MADELEINES [GLUTEN-FREE]
Para 18 a 20 madalenas
Ingredientes
1 1/2 chv. quinoa cozida
80g farinha de amêndoa
1/3 chv. leite de amêndoa
160g manteiga sem sal
1 clh,ch extracto de baunilha
4 ovos
1 chv. açúcar mascavado
1/8 clh.ch sal
1/2 chv. cacau crú
1 1/2 clh.ch fermento
1/2 clh.ch bicarbonato de sódio
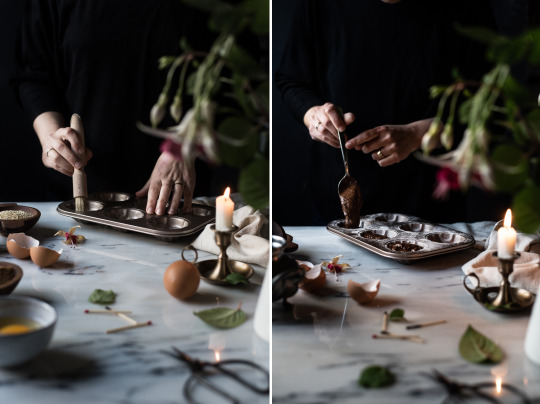
Pré-aqueça o forno a 180ºC e unte as formas de madalenas com manteiga.
Num processador de alimentos, triture a quinoa cozida com a manteiga, os ovos, o extracto de baunilha e a farinha de amêndoa até que a quinoa esteja bem triturada.
De seguida junte os restantes ingredientes e volte a triturar até que tudo esteja bem incorporados e cremoso.
Com a ajuda de uma colher divida a massa pelas formas e leve ao forno a cozer durante 15 a 18 minutos ou até que ao inserir o palito este saia limpo.
Desenforme, deixe arrefecer e polvilhe com açúcar em pó.
English version
Serves 18 to 20
Ingredients
1 1/2 cup cooked quinoa
80g almond flour
1/3 cup almond milk
160g unsalted butter
1 tsp vanilla extract
4 eggs
1 cup brown sugar
1/8 tsp salt
1/2 cup raw cocoa
1 1/2 tsp baking powder
1/2 tsp baking soda
Preheat the oven to 180ºC and grease the madeleines mold with melted butter.
In a food processor, process the cooked quinoa with the butter, eggs, vanilla extract and almond flour until smooth.
Then add the remaining ingredients and blend again until everything is well incorporated and creamy.
With the help of a spoon, divide the dough by the molds and bake for 15 to 18 minutes or until a toothpick inserted in the center comes out clean.
Unmold, let cool and sprinkle with powdered sugar.

#madeleines#madalenas sem gluten#madalenas de chocolate e quinoa sem gluten#chocolate#quinoa#gluten-free chocolate quinoa madeleines#sin gluten#foodphotography#foodstyling#cakelover#chocolate cake#dessert#snack#gluten fri#senza glutine
16 notes
·
View notes
Photo
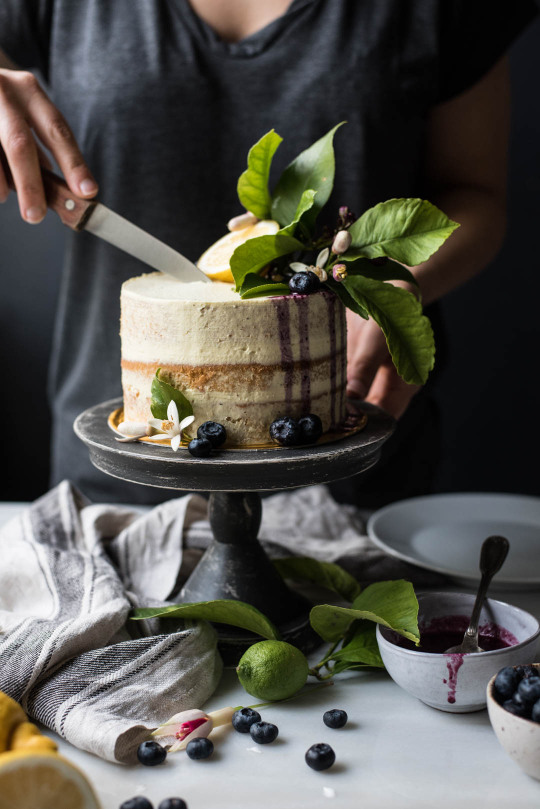
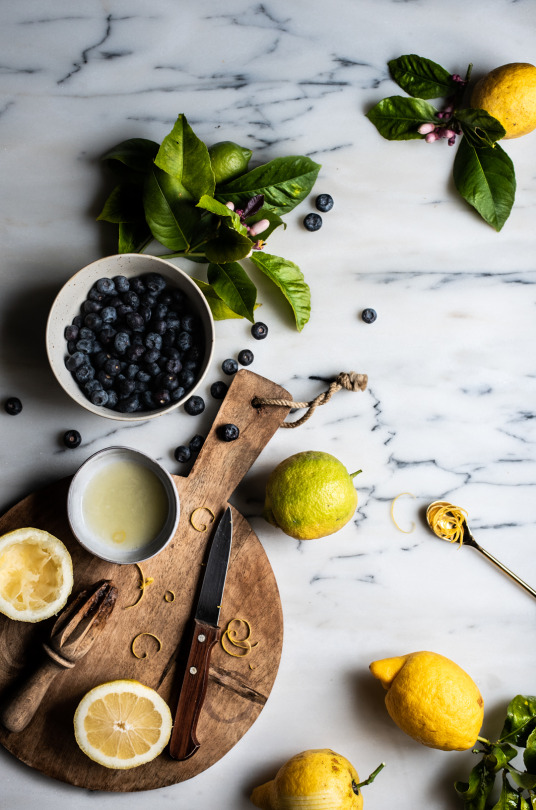
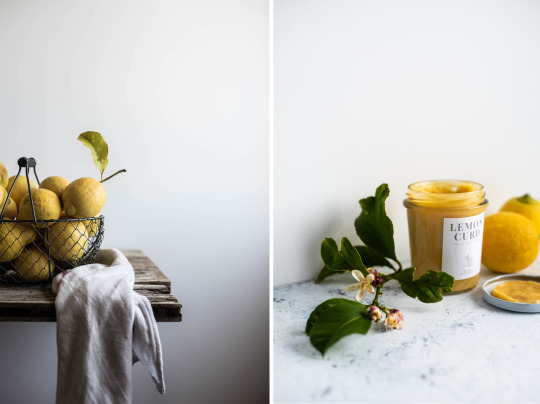
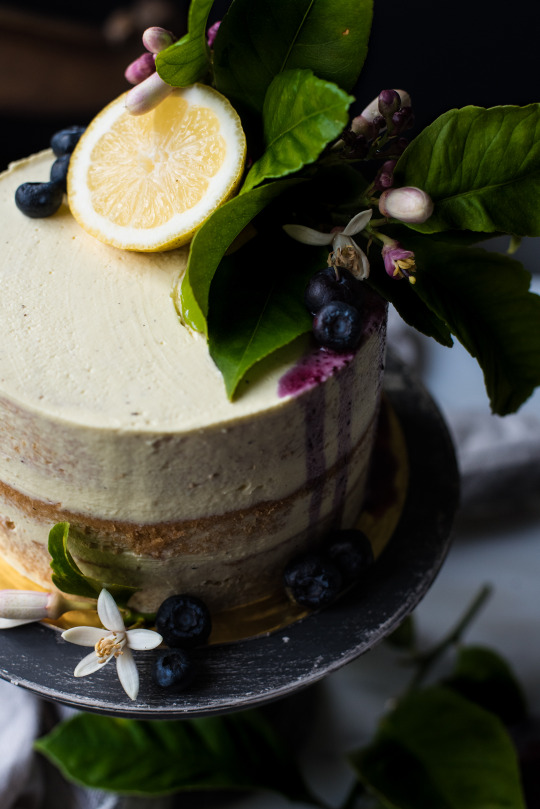
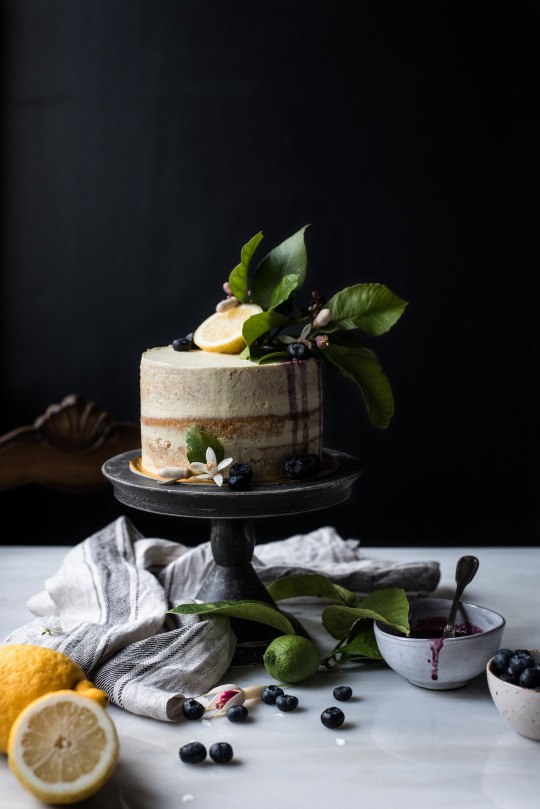
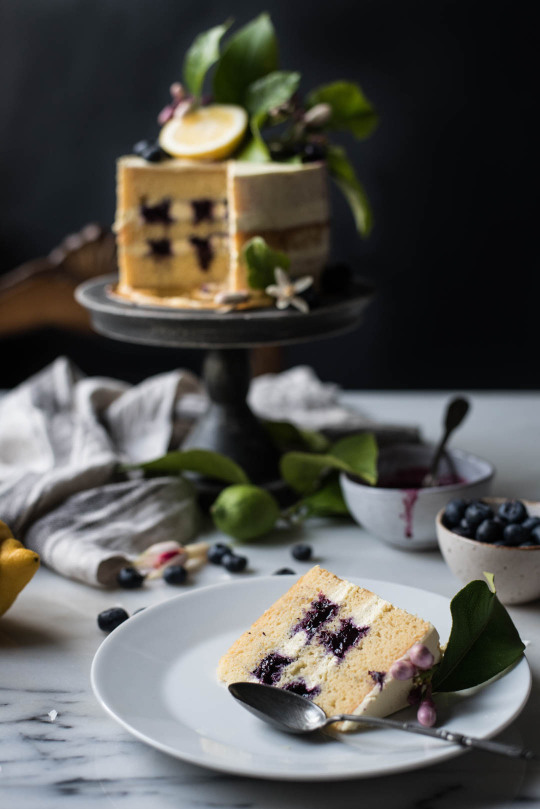
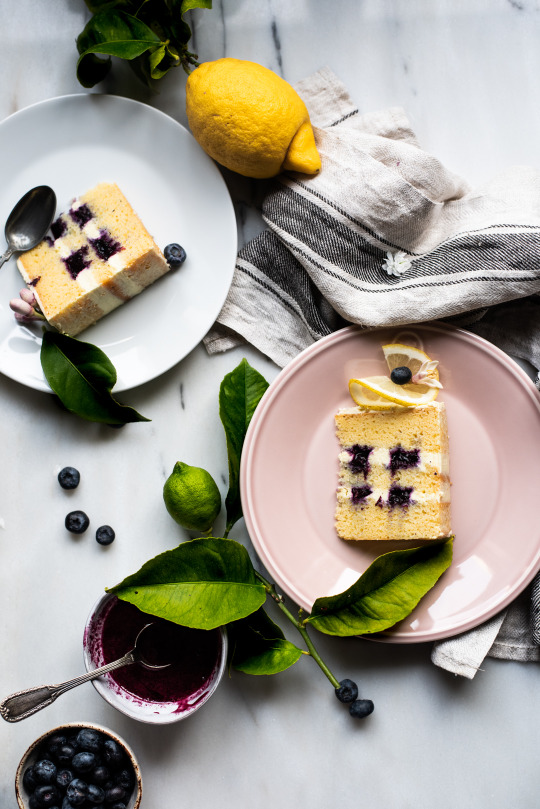
BOLO SEM GLÚTEN DE MANTEIGA CASTANHA COM MIRTILOS E COBERTURA DE LIMÃO [SEM GLÚTEN]
HALF-NAKED BROWN BUTTER CAKE WITH BLUEBERRIES & LEMON FROSTING [GLUTEN-FREE]
Para 8 fatias
Ingredientes
Bolo:
200g farinha de arroz
125g manteiga sem sal
1/4 clh.ch sal
5 ovos, bio
125g açúcar mascavado
2 clh.ch fermento em pó
1/2 chv. leite de amêndoa
1clh.ch extracto baunilha
Doce de Mirtilo:
1 chv. mirtilos (congelados ou frescos)
1/2 clh.sp sumo de limão
2 clh.sp xarope de ácer ou mel
Cobertura de Limão e Quark:
250g queijo quark
100g queijo creme
3 clh.sp curd de limão*
3 clh.sp xarope de ácer
1 clh.ch. extract de baunilha
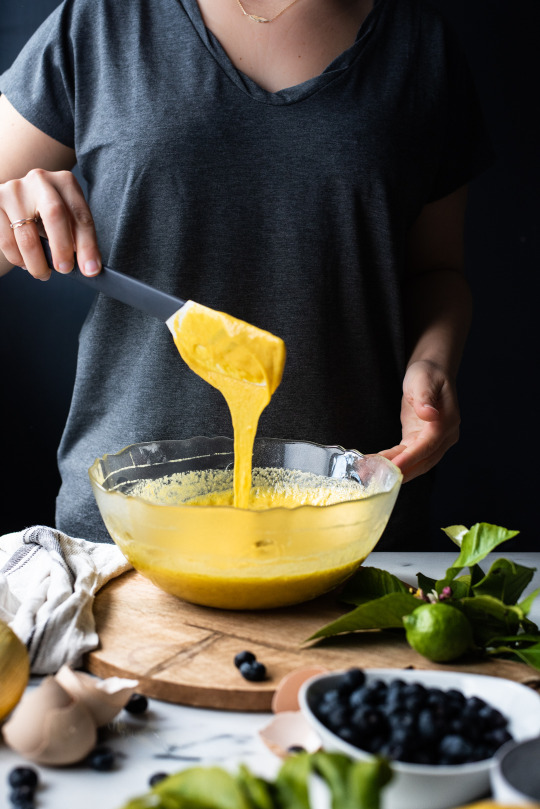
Comece por fazer o curd de limão e deixe arrefecer.
Pré-aqueça o forno a 180ºC, forre o fundo de duas forma circulares com 15cm com papel vegetal e unte as laterais com manteiga e farinha.
Para o bolo, separe os ovos e bata as claras em castelo com 1/4 do açúcar. Reserve. Entretanto deixe ferver a manteiga durante 2 a 3 minutos em lume brando, até que esta fique acastanhada e com aroma a frutos secos.
De seguida, batas as gemas com o restante açúcar, o sal e a baunilha. Assim que tiver um creme claro e fofo, junte o leite e volte a misturar. Adicione de seguida a farinha e o fermento e volte a bater, por fim envolva as claras em castelo com algum cuidado para não perder muito ar.
Divida a massa pelas formas e leve ao forno durante cerca de 30 minutos ou até que ao inserir o palito este saia limpo.
Retire do forno e deixe arrefecer alguns minutos antes de desenformar.
Para a compota de mirtilo, junte todos os ingredientes numa caçarola e deixe ferver em lume brando até que os mirtilos estejam moles mas inteiros. Deixe arrefecer.
Assim que todos os anteriores componentes do bolo estejam frios prepare a cobertura.
Para o creme de quark, junte todos os ingredientes numa batedeira e misture até obter um creme sedoso e verta o creme para um saco de pasteleiro com uma ponteira redonda.
Corte os bolos ao meio horizontalmente e descarte os topos côncavos. No total ficará com 4 camadas (o meu só tem 3 porque alguém roubou uma :D)
Coloque a primeira camada de bolo e faça 3 circunferências concêntricas, como se desenhasse um alvo. Entre cada circunferência preencha com doce de mirtilo. Repita o processo até colocar a última camada de bolo.
Cubra o bolo com o restante creme de limão e quark e decore a gosto.
*Use a receita que se encontra no post anterior substituindo somente as laranjas sanguíneas por limões.
English version
Serves 8
Ingredients
Cake:
200g rice flour
125g unsalted butter
1/4 tsp salt
5 eggs, bio
125g brown sugar
2 tsp baking powder
1/2 cup almond milk
1 tsp vanilla extract
Blueberry Jam:
1 cup blueberries (frozen or fresh)
1/2 tbsp lemon juice
2 tbsp maple syrup or honey
Lemon and Quark Topping:
250g quark cheese
100g cream cheese
3 tbsp lemon curd *
3 tbsp maple syrup
1 tsp vanilla extract
Start by making the lemon curd and let it cool.
Preheat the oven to 180ºC, line the bottom in two 15cm circular cake pan with parchment paper and grease the sides with butter and flour.
For the cake, separate the eggs and beat the egg whites with 1/4 of the sugar until stiff peaks form. Reserve. In the meantime, let the butter boil for 2 to 3 minutes over a low heat, until it turns brown and has a nutty aroma.
Then beat the egg yolks with the remaining sugar, salt and vanilla. Once you have a light and fluffy cream, add the milk and mix again. Then add the flour and baking powder and beat again finally, with a large rubber spatula or wire whisk, gently fold the egg whites into the egg yolks batter.
Pour batter evenly into each cake pan and bake for about 30 minutes. Insert a toothpick into the center of the cake. If it comes out clean, it is done.
Remove from the oven and allow to cool for a few minutes before unmolding.
For the blueberry jam, combine all the ingredients in a saucepan and simmer until the blueberries are soft but whole. Allow to cool.
Once all the previous components of the cake are cold, prepare the icing.
For the lemon and quark cream, combine all the ingredients in an electric stand mixer and whisk until you get a silky cream and pour the cream into a pastry bag with a round tip.
Cut the cakes in half horizontally and discard the concave tops. In total it will have 4 layers (mine only has 3 because someone stole one: D)
Place the first layer of cake and make 3 concentric circles, as if drawing a target. Between each circumference fill with the blueberry jam. Repeat the process until the last layer of cake is added.
Cover the cake with the remaining icing and decorate to taste.
* use the curd recipe from my last post, replacing only blood oranges with lemons.
#sem glúten#bolo de primavera#foodphotography#glutenfreerecipes#glutenfreecake#foodstyling#singluten#food#dessert#cake
14 notes
·
View notes
Photo
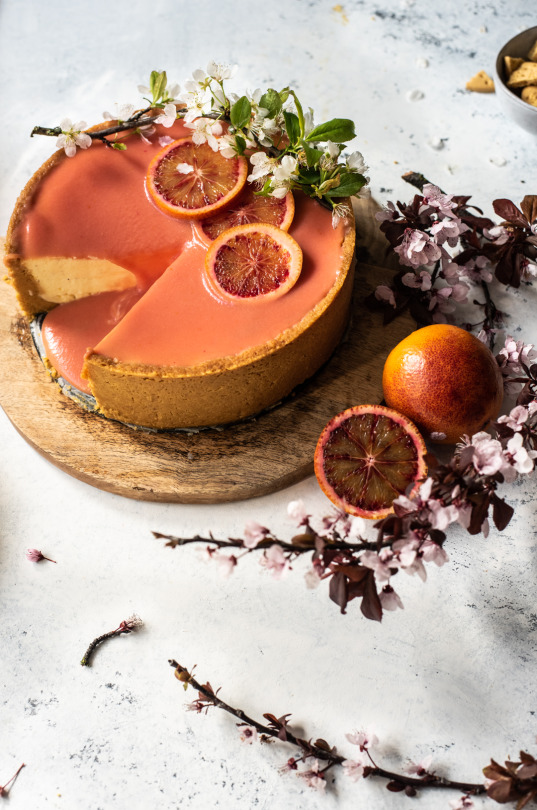
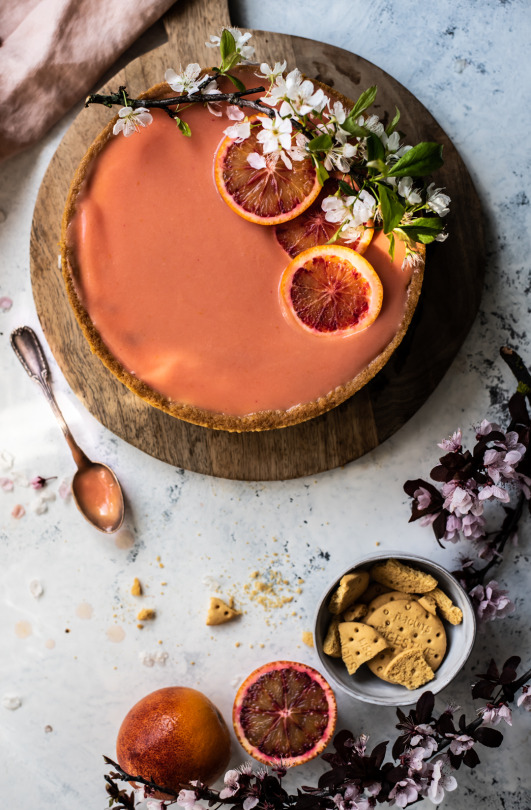
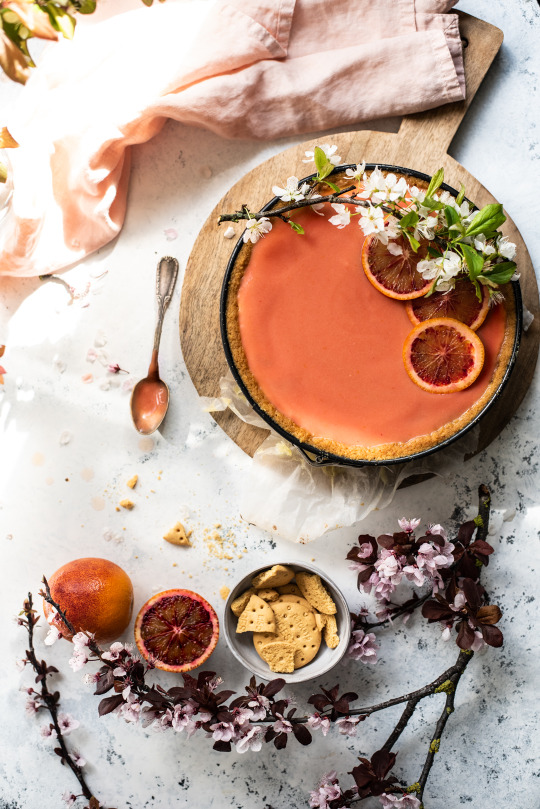
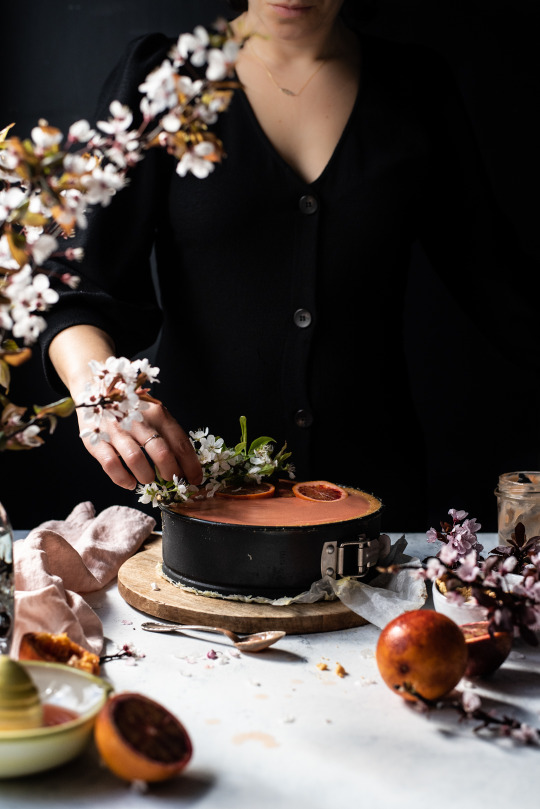
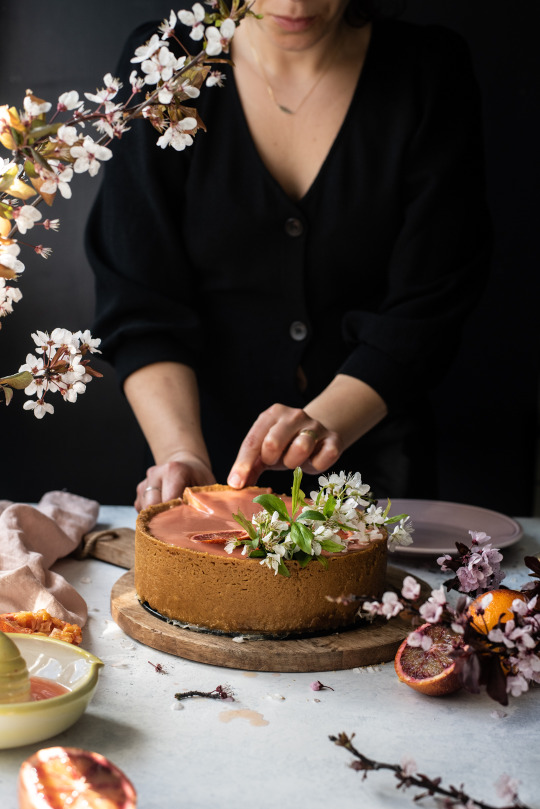
CHEESECAKE SEM GLÚTEN DE CRÈME FRAICHE E CURD DE LARANJA SANGUINEA
GLUTEN FREE CRÈME FRAICHE CHEESECAKE WITH BLOOD ORANGE CURD
Serve 12
Ingredientes
Base:
400g bolachas digestivas, sem glúten
180g manteiga sem sal
Recheio:
400g crème fraîche
375g queijo creme
120g açúcar
2 clh.ch extrato baunilha
3 ovos L
1/3 chv. curd de laranja sanguinea (receita a seguir)
Pré-aqueça o forno a 180ºC e forre o fundo de uma forma com 20cm, de fundo amovível, com papel vegetal e pincele as laterais com um pouco da manteiga derretida. Reserve.
Com a ajuda de um processador triture as bolachas até que estas pareçam areia. Junte a manteiga derretida e volte a triturar. O resultado deve assemelhar-se a areia ligeiramente molhada.
Verta o preparado para a forma e calque até cobrir o fundo as laterais. Coloque a forma no frigorifico enquanto prepara o creme.
Utilizando a batedeira, bata o queijo, o crème faîche, a baunilha e o açúcar durante 2 a 3 minutos, até que este fique cremoso. De seguida junte os ovos, um de cada vez, e volte a bater entre cada adição.
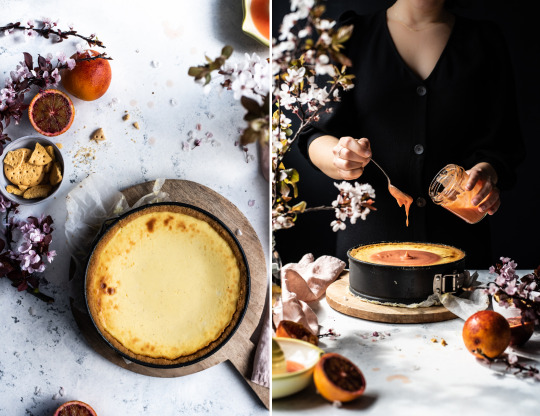
Verta o preparado na forma e leve ao forno a cozer em banho maria durante cerca de 70 minutos ou até que o centro do creme tenha empolado e a bolacha esteja acastanhada (se necessário cubra a superfície do cheesecake com papel de alumínio).
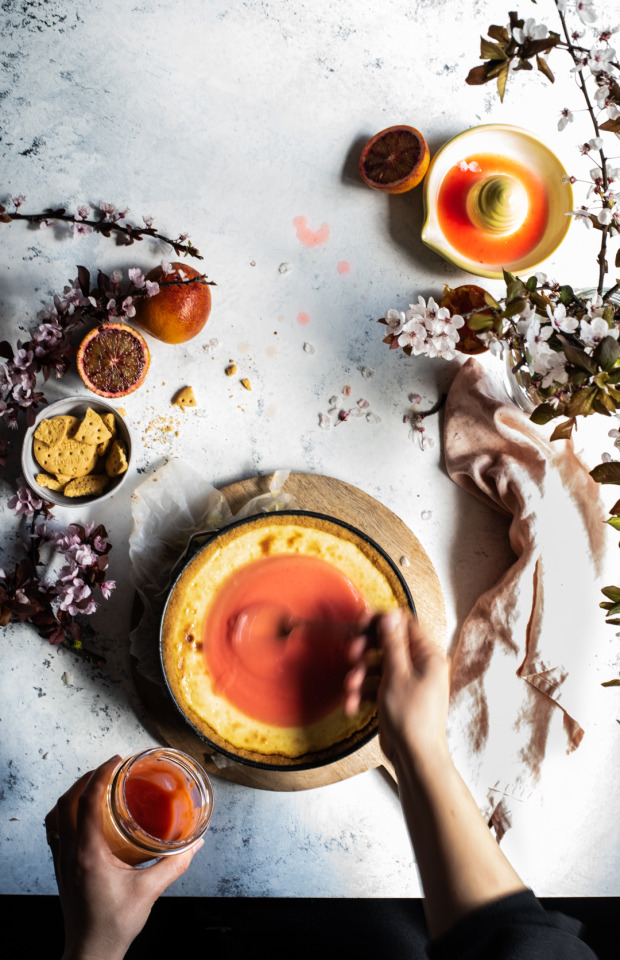
Retire do forno e com algum cuidado descarte o recipiente com água. Deixe arrefecer completamente e cubra a superfície com o curd*. Leve ao frigorífico durante 6 a 8 horas, para garantir que fica bem frio antes de servir.
Para desenformar o cheesecake, com algum cuidado mergulhe a forma em água quente e de seguida, com a ajuda de uma faca afiada solte as laterais e o fundo do cheesecake da forma.
Decore com rodelas de laranja sanguinea e algumas flores sazonais para um aspecto mais primaveril.
Sirva bem frio!
* Para um melhor resultado, verta o curd ainda morno para assim conseguir um acabamento mais liso.
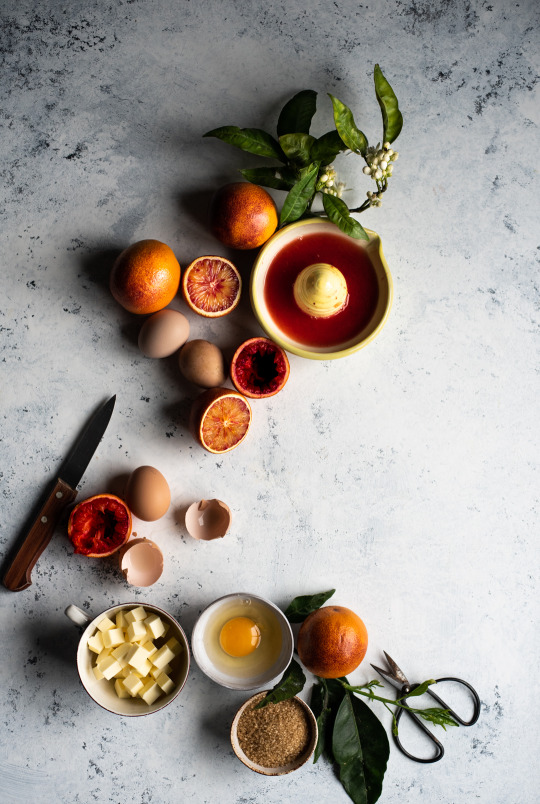
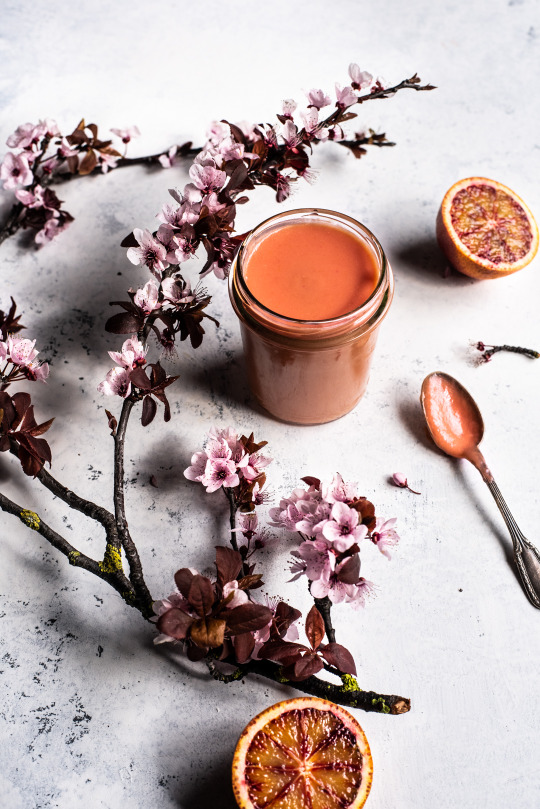
Curd:
3 laranjas sanguineas, sumo e raspa (150ml)
125g açúcar
100g manteiga
3 ovos
1/2 clh.ch agar-agar ou gelatina em pó (opcional)
Num recipiente, a cozer em banho maria, junte o sumo e as raspas da laranja, o açúcar e a manteiga e mexa continuamente até que o açúcar e a manteiga tenham derretido por completo, mas sem deixar ferver. Atenção que a água, enquanto estiver em ebulição não deve tocar no recipiente onde se encontram os ingredientes.
Sem parar de mexer, junte de seguida os ovos batidos e continue a mexer até que o creme comece a engrossar. Nesta altura retire o recipiente do lume e misture o agar-agar ou a gelatina e coloque o curd em frascos.
English version
Serves 12
Ingredients
Crust:
400g gluten free cookies
180g unsalted butter
Filling:
400g crème fraîche
375g cream cheese
120g sugar
2 tsp vanilla extract
3 eggs L
1/3 cup blood orange curd (recipe follows)
Preheat the oven to 180ºC. Use a bit of the melted butter to coat the inside of a 20cm cake pan and line the bottom of the pan with parchment paper.
Add the cookies to a food processor and blend, join the melted butter to the crumbs and mix until well combined. Press the mixture firmly and evenly over the bottom and sides of the prepared pan and set aside in the fridge.
Place the crème fraîche, cream cheese, sugar and vanilla in a large mixing bowl and beat until smooth, around 2 to 3 minutes. Add the eggs, one at a time, beating until smooth and scraping down the sides as needed.
Scoop the cheesecake mixture into the pan and place it into the oven, in a larger pan filled with water until 2/3 of the way up the sides of the cheesecake pan. Bake for 70 minutes, or until top is puffed and edges are golden brown.
Carefully remove from the oven, remove from the water bath, and let cool at room temperature. Coat the top with the blood orange curd* and place in the fridge to chill from 6 to 8 hours.
To remove, soak the cheesecake pan in hot water for a few seconds and then with the help of a sharp knife loose the cheesecake crust from the sides and bottom of the pan.
If desired, add some blood orange slices over the top and some seasonal flowers just for good looking.
Serve chilled!
*For a better result, pour the curd still warm to achieve a smoother finish.
Curd:
3 blood oranges, juice and zest (150ml)
125g sugar
100g butter
3 eggs
1/2 tsp agar-agar or powdered gelatin (optional)
In a water bath cook the orange juice and zest, sugar and butter, stirring continuously until the sugar and butter have completely melted, but without boiling. Note that the water from the water bath, must not touch the bowl where the ingredients are.
Stirring constantly, add the beaten eggs and continue to stir until the cream starts to thicken. At this point, remove the container from the heat, mix the agar-agar or gelatin and place the curd in jars.
#sem glúten#creme fraiche and blood orange cheesecake#food photography#realfood#dessert#cheesecake#vegetarian#Spring Food#gluten-free#seasonal food#foodporn#foodstyling#blood orange#cremefraiche
8 notes
·
View notes
Photo
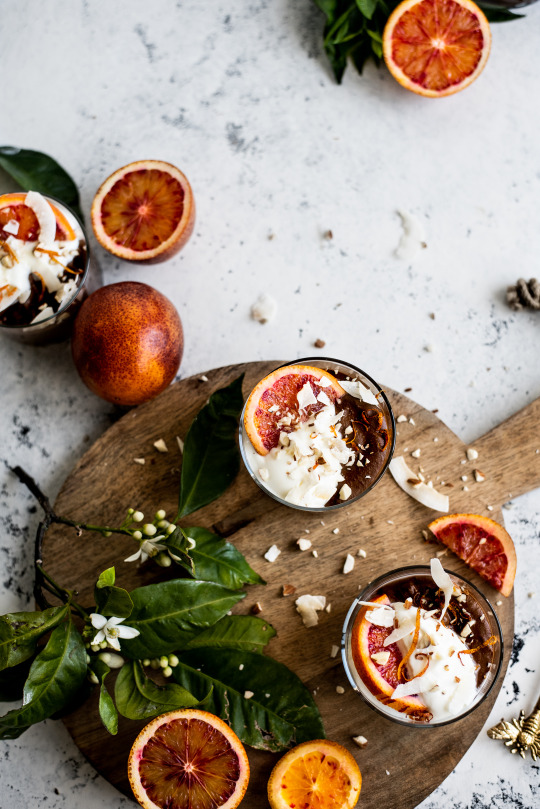
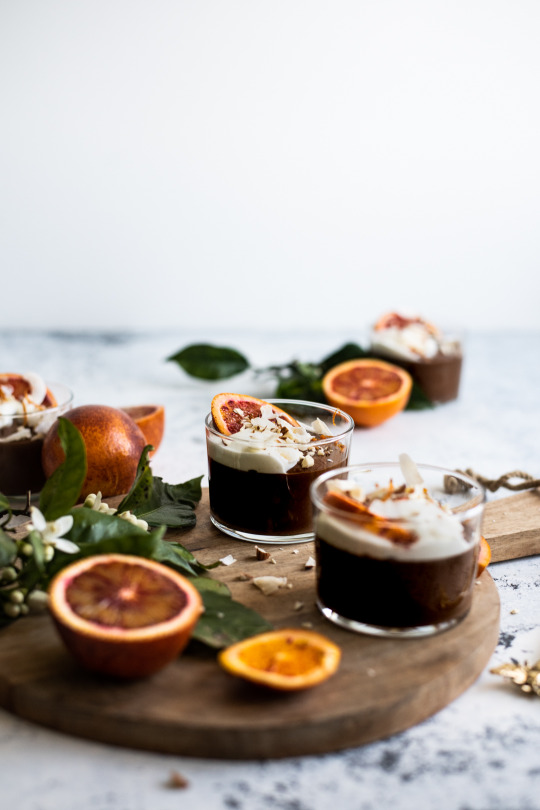
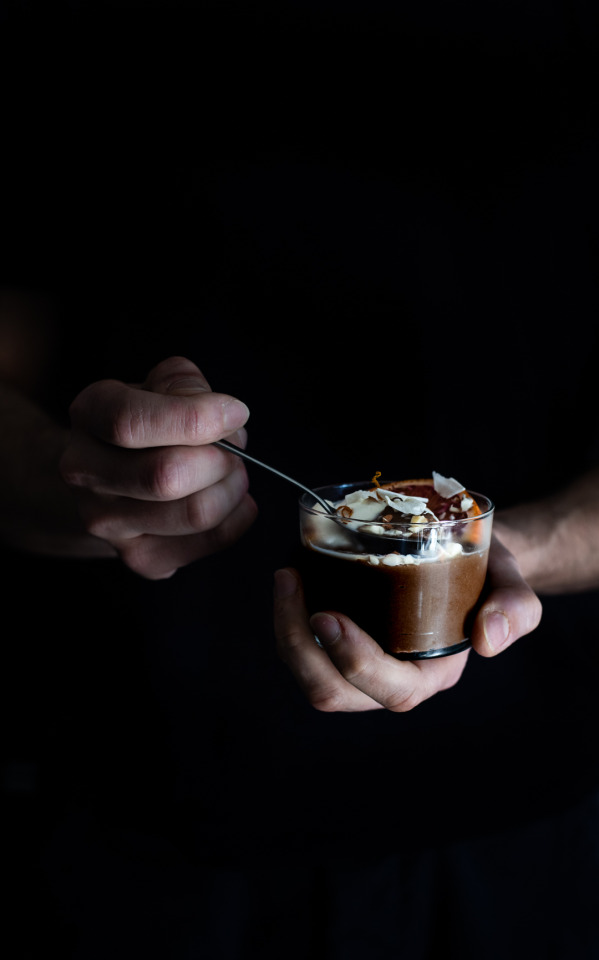
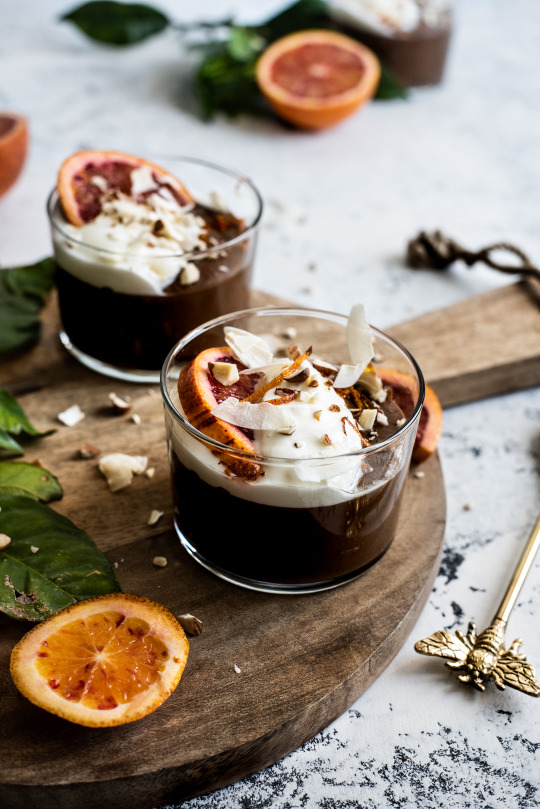
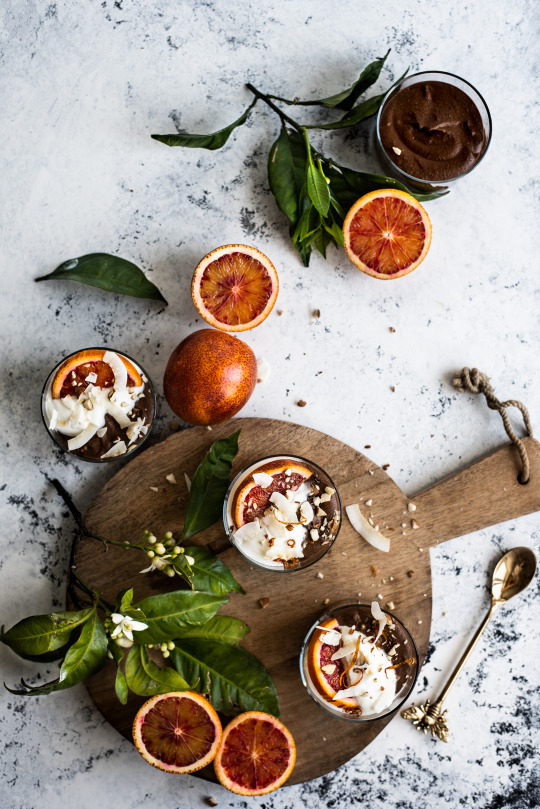
MOUSSE VEGAN DE CHOCOLATE E GRÃO COM LARANJA SANGUINEA
VEGAN CHOCOLATE AND CHICKPEA MOUSSE WITH BLOOD ORANGE
Para 6 doses
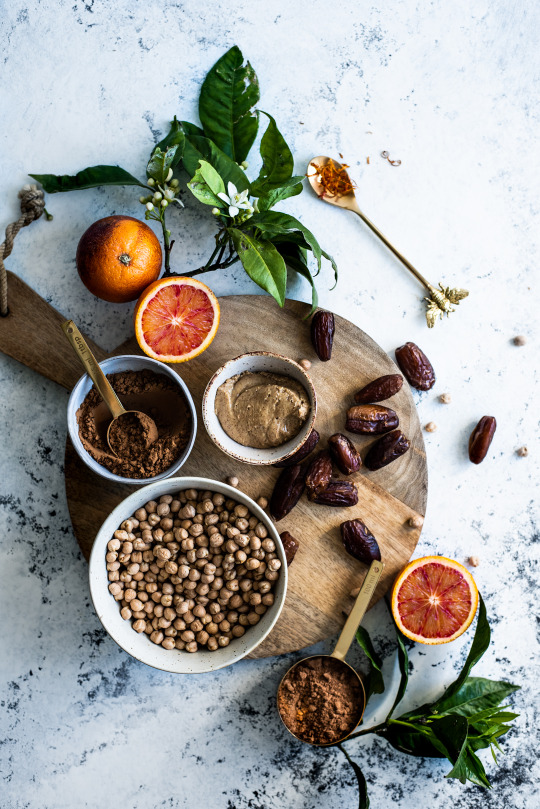
Ingredientes
Mousse de chocolate:
450g grão cozido*
3 clh.sp manteiga de amêndoa
2 clh.sp cacau cru
3 clh.sp farinha de alfarroba**
1 laranja sanguinea, sumo e raspa
15 tâmaras***
1 a 2 clh.sp. xarope de acer
1 clh.sp azeite
sumo de laranja extra ou leite vegetal, q.b.
Para servir:
1/2 laranja sanguinea em rodelas
creme de coco
lascas de coco
amêndoa picada
Para fazer a mousse, coloque todos os ingredientes num processador de alimentos excepto as raspas da laranja e triture durante alguns minutos, até conseguir um creme homogéneo.
Aos poucos junte o leite vegetal (eu usei leite de amêndoa) até obter a consistência desejada. Adicione as raspas da laranja e envolva (reserve algumas para decorar).
Divida o creme pelas taças e leve ao frigorífico até à hora de servir.
Antes de servir, decore com uma colher de sopa de creme de coco, 1/2 rodela de laranja sanguinea, amêndoas picadas, lascas de coco e raspas de laranja.
* Se possível, retire a pele ao grão para obter um creme mais macio.
**Se não tiver farinha de alfarroba substitua por mais cacau cru.
*** Se necessário, demolhe as tâmaras por alguns minutos em água morna.
English version
Serves 6
Ingredients
Chocolate Mousse:
450g cooked chickpeas *
3 tbsp almond butter
2 tbsp raw cocoa
3 tbsp carob flour **
1 blood orange, juice and zest
15 dates ***
1 to 2 tbsp maple syrup
1 tbsp olive oil
extra orange juice or nut milk, to taste
To Serve:
1/2 sliced blood orange
coconut cream
coconut chips
chopped almonds
To make the mousse, combine all the ingredients in a food processor except the orange zest and pulse on high speed for a minute or so, until everything is smooth.
Gradually add the nut milk (I used almond milk) and continue blending until you have a smooth and creamy consistency. Add the orange zest and stir around (reserve some to decorate).
Pour de chocolate mousse into glasses and refrigerate until serving.
After serving, decorate with a tablespoon of coconut cream, 1/2 slice of blood orange, chopped almonds, coconut flakes and some orange zest.
* If possible, remove the skin to the grain for a more creamy result.
** If you don't have carob flour, replace it with more raw cocoa.
*** If necessary, soak the dates for a few minutes in warm water.
#vegan chocolate mousse#healthy food#chickpea chocolate mousse#vegan#food photography#gluten-free#sem gluten#mousse de chocolate e grão com laranja sanguinea#blood orange#food styling#nourish food#myhealth#chickpeas#raw cocoa#carob
8 notes
·
View notes
Photo
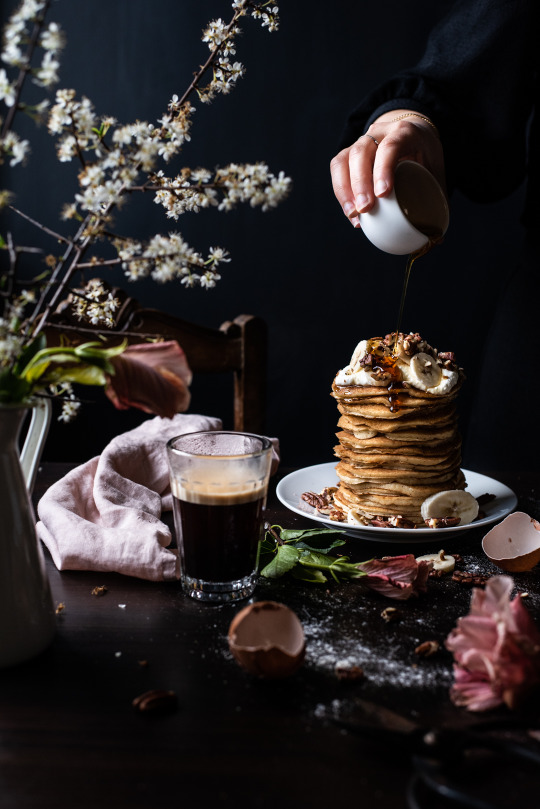
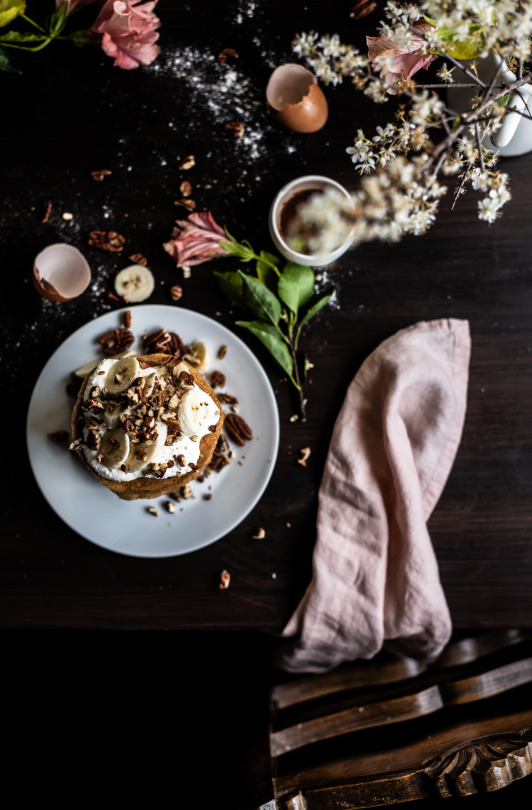
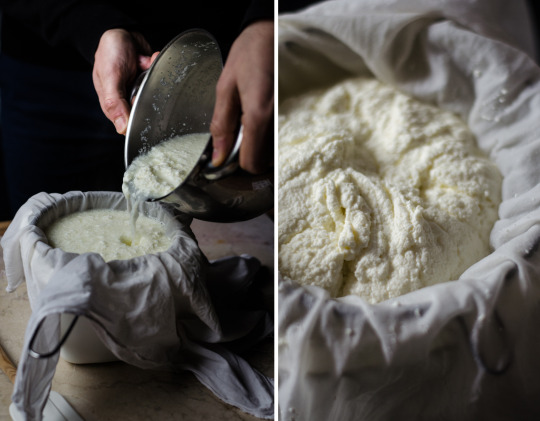
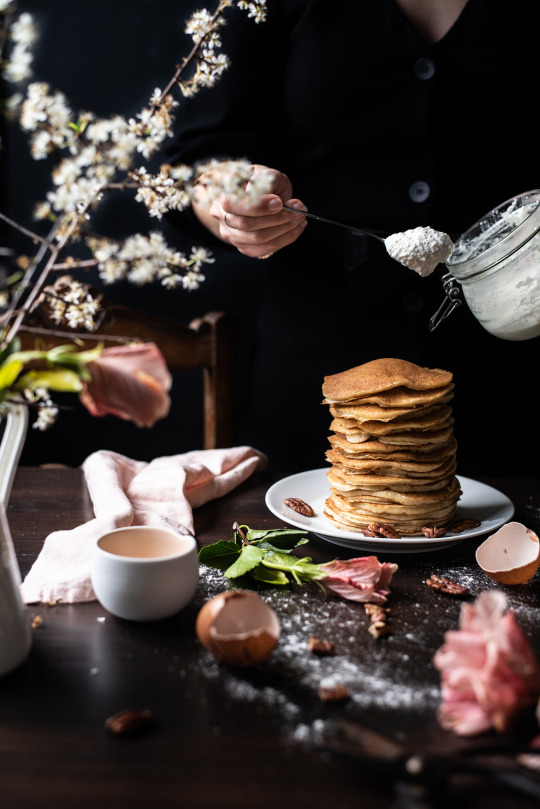
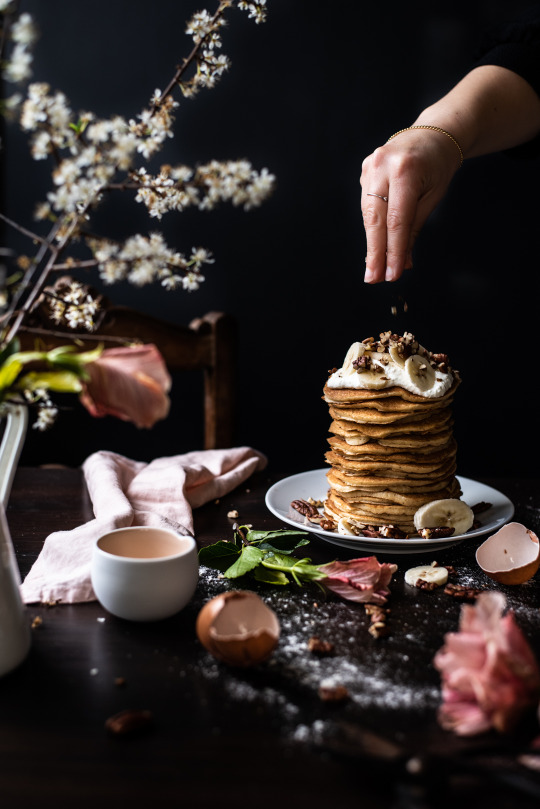
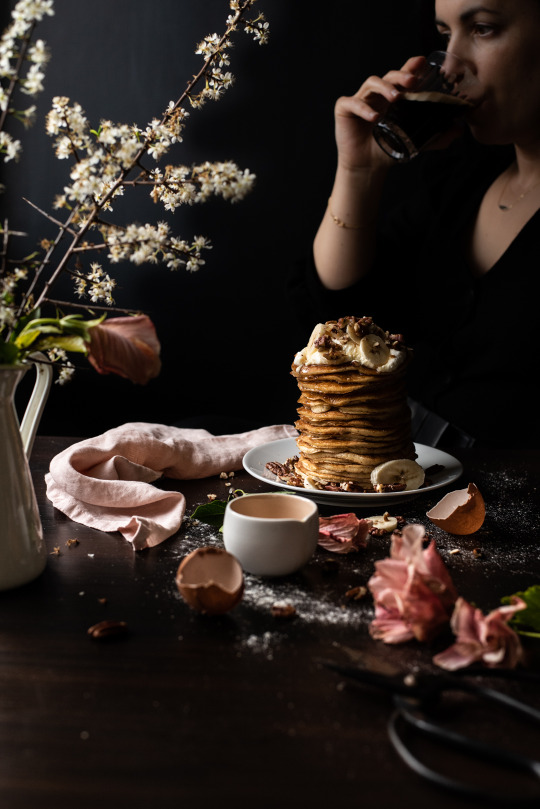
PANQUECAS SEM GLÚTEN DE RICOTTA COM BANANA E NOZES
GLUTEN FREE RICOTTA PANCAKES WITH BANANAS AND WALNUTS
Para 25 panquecas
Ingredientes
1/4 chv. farinha de arroz
2 clh.sp farinha quinoa ou trigo sarraceno
2 clh.sp fécula de batata
2 clh.sp amido de tapioca
2 clh.ch fermento em pó
1 clh.ch psyllium husk
300g ricotta
3/4 chv. leite vegetal
3 ovos, separados
60g açúcar demerara
1 clh.ch extrato baunilha
ricotta extra
bananas
nozes picadas
flocos de coco
xarope de ácer ou mel
Num recipiente misture as farinhas com o fermento e o psyllium. Reserve.
Com a ajuda da batedeira, bata as claras em castelo e reserve.
Noutro recipiente bata as gemas com o açúcar, a baunilha, a ricotta e o leite até obter uma mistura cremosa. Junte de seguida a mistura das farinhas e envolva. Por fim, junte as claras em castelo mexendo cuidadosamente e deixe repousar a massa durante alguns minutos.
Para fazer as panquecas, unte uma frigideira anti-aderente com manteiga ou óleo de coco e deixe aquecer em lume brando. Assim que estiver quente adicione uma colher de sopa de massa, espalhando para formar circulos com cerca de 12 cm.
Deixe fritar cerca de 1 minuto de cada lado ou até que se comecem a formar pequenas bolhas na superfícia. Repita o processo até terminar a massa.
Sirva com a restante ricotta, rodelas de banana, nozes, lascas de coco e um fio de xarope de ácer.
English version
Serves 25
Ingredients
1/4 cup rice flour
2 tbsp quinoa flour or buckwheat
2 tbsp potato starch
2 tbsp tapioca starch
2 tsp baking powder
1 tsp psyllium husk
300g ricotta
3/4 cup vegetable milk
3 eggs, separated
60g demerara sugar
1 tsp vanilla extract
extra ricotta
bananas
chopped nuts
coconut flakes
maple syrup or honey
In a container mix the flours with baking powder and psyllium husk. Reserve.
With the help of a electric stand mixer, beat the egg whites and set aside.
In another container, beat the egg yolks with the sugar, vanilla, ricotta and milk until just smooth. Then add the flour and stir until smooth. Finally, add the egg whites, stirring carefully. Let the batter stand for a few minutes and let’s begin.
To make the pancakes, grease a non-stick pan with butter or coconut oil and let it heat over a low heat. Once it is hot add a tablespoon of batter at a time, spreading it out to form circles about 12 cm.
Allow the pancake to fry for about 1 minute on each side or until small bubbles begin to form on the surface. Repeat the process until the dough is finished.
Serve with the remaining ricotta, banana slices, nuts, coconut flakes and a drizzle of maple syrup.
Recipe adapted from: huffingtonepost
#gluten free ricotta pancakes#paquecas de ricotta sem gluten#foodphotography#foodstyling#singluten#cuisine#glutenfrei#senzaglute#dark and moody#homemadebaking#ricotta#riceflour#banana#Healthy Dessert
8 notes
·
View notes