#<- i googled programming format specifically for this
Explore tagged Tumblr posts
Visit Tumblr Blog
Explore Tumblr blogs with no restrictions, modern design and the best experience.
Last Seen Tumblr Blogs


Fun Fact
Tumblr has a low social media market share in South America.
Text
mental note: always install red LEDs in my robots’ eyes just in case they turn evil
Remember: behind every robot that turns evil is an engineer who specifically installed red LEDs into the eyes just for this occasion
#i know nothing about programming but i imagine it going like this:#if (turning evil) { //turn on red LEDs }#<- i googled programming format specifically for this#if its wrong its not my fault as i am not a programmer.#tagggs#lol#engineering#robots
121K notes
·
View notes
Text
Someone should hire me for ideas on building a superior word processor specifically for dissertation writing I have so many good ideas
#jonniejonniejonquil#jonnie's phd era#dissertation#writing#i like google doc's ui best *personally*#but i have like. so many features that would be so helpful if they existed.#for instance#“read more”s like tumblr#where you can like have quotes in your notes#but collapse them once they're used and only see like the first few words#wouldnt be great for actual papers but fantastic for notes docs#tagging systems#where you can highlight specific parts of the text and add a tag#then search by tag to find all the relevant text pieces again#can kinda do with comments but its clunky and affects the appearance of ur page a lot#i want that baby *invisible* but *present*#search by format#i.e. “if text red then select”#i tend to visually highlight my problem moments in red for instance or anything i need to fact check in blue#I would like to be able to *search* and see where all my red and blue moments are#also#auto-citation maker#implement the typical citation maker like endnote or other plug-ins mhm mhm yeah thats chill and a blessing anyway#but also please#if you are copy/pasting a section that's in like your notes doc and you can tell that section has a citation there#automatically make a citation here too!#just tell the program “my notes for the current (writing) document are in this secondary document”#and it draws out all the citations automatically#ALSO MAYBE WE CAN JUST HAVE INDIVIDUAL DOCS FOR NOTES BY SOURCE#ALL FILTERED INTO THE CITATION SUBPROGRAM
2 notes
·
View notes
Text
My analysis of River Song (not River friendly)
This essay has been brewing in my mind for awhile. If you don’t want to see anti River content, please keep scrolling. I understand that since Doctor Who is a work of fiction, fans have the right to differing interpretations and to invoking literary license. However, I do want fans who are like me and icked out by River to feel validated. What follows is a pretty unreserved criticism of the character and her relationship with the Doctor.
First, I’m going to break down River from a psychological perspective. Note that I am not a licensed psychologist, but I did graduate with a degree in general psychology. I’m also going to explain some of the many instances that she proves herself to be an incredibly toxic person.
River Song was raised to be a psychopath. That’s an indisputable fact mentioned clearly in the show. Psychopathy is known in the psychology world as Anti Social Personality Disorder (ASPD). ASPD can be managed, but it has no cure. Could it be argued that River sees an off screen therapist? Sure. However, ask yourself if you can see River Song going to therapy?
Not only that, but River has no ordinary case of ASPD. She wasn’t just raised in an abusive or unsafe household, she was cut off from society during her critical formational years. Most cases of ASPD involve people who grew up in challenging households, but they did have interaction with society at large. I don’t know of any case studies surrounding people with ASPD who were cut off from society in their formational years, but doing some research on “feral children” will allow you to read examples of what happens to children raised away from society.
The case I know the most about is that of Oxana Malaya. You can google her for more. She was quite literally raised by dogs. And she required intense inpatient treatment to unlearn her dog like mannerisms. Even then, she always had a level of intellectual impairment.
Because River was specifically raised to have ASPD, she learned language abilities and was socialized on how to BEHAVE like a person capable of love and empathy and friendship, but she never was capable of these things. She was raised to put on an act to be able to get to the doctor and kill him. She was never capable of anything more.
Even if River saw an off screen therapist, she was never institutionalized, as would’ve been required for her to truly function as a healthy person in any possible way. She couldn’t have just shrugged off her programming. Why did she save the Doctor and give up her regenerations? It couldn’t have been guilt or remorse, but she could’ve developed co morbid Narcissistic Personality Disorder (NPD), which is a common disorder to co occur with ASPD. The narcissism would’ve created within her a need for supply. Supply meaning, a boost to the narcissists ego. Narcissists are not capable of genuine empathy and love, but they are capable of seeking supply in the form of impacting other people’s emotions. And what better source of supply for one’s ego than the last known member of one of the most powerful races known to the universe?
When River decided to undo her murder and save the Doctor, it starts off with a completely nonconsensual kiss. This is a pretty fitting start to a relationship that progresses into a forced marriage.
River then continues to force unwanted innuendos on the Doctor. Probably implying they were intimate just to make the Doctor feel obligated to be intimate with her eventually. This is despite Matt Smith confirming in an interview that his Doctor is asexual. He could be demi or grey sexual, I’ll admit that possibility, but River insists on forcing her hyper sexuality on him at any and all stages in his timeline knowing they wouldn’t be welcome. I should note that hyper sexuality can be a symptom of ASPD. It’s not cute or fun. If River was simply a sexually liberated character, she would not be forcing her innuendos on someone who does not want them. Especially not in the earlier parts of his timeline.
River flounces around feeling and acting entitled to the Doctor’s attention if and when she wants it. When she wants it, he’s expected to come running. Then she disappears when she wants to. Creating a masterfully manipulative cycle of hot and cold emotional abuse. When he loses Amy and Rory, she refuses to travel with him. Leaving him emotionally vulnerable and at her beck and call when and if she feels like using him.
Audio dramas are too numerous to declare as universal canon. I think most fans pick and choose which parts of the extended universe count as canon to them. But in the Dalek Universe series, River appears for one episode where she physically abuses the Doctor. She hits him so hard that he is crying out in pain. And then she gaslights him by telling him it was just a little tap. Now, it’s perfectly valid not to count this moment as canon. But it’s extremely consistent with River’s character and I am personally going to use it against her. Especially since I did see another post somewhere bring up the fact that she did the same thing to the fifth Doctor in another audio.
Finally, the worst part of River’s abuse is the forced marriage. The first time the Doctor meets her, she convinces him that he eventually marries her. But he clearly can’t stand her. He doesn’t want anything to do with her. But now he feels as though he’s obligated to marry her. At first he hopes it’s something that can be changed. Saying that time can be rewritten when Amy asks if he marries River. Right up until the forced wedding he tells River he doesn’t want to marry her. But because she convinced him he does marry her in the library, and because nothing else is convincing River to save the universe, he gives in and gives her what she wants. Assuming it’s the only way to keep the universe from falling apart.
Now, I do understand that anyone who loved the Doctor would not want to bring back a timeline where he died. But River was already willing to start considering it just because he agreed to marry her. Because she got what she wanted and because she got the satisfaction of seeing her manipulations succeed. The Doctor couldn’t even get close enough to her to tell her his plan at first, but she was willing to let him come close to her just because he married her. River valued marriage to the Doctor more than the Doctor’s life.
I know it’s commonly believed among River fans that he only kept his distance because he saw her die. But Remember he couldn’t stand her long before that. He never liked her until he thought he was supposed to. No doubt seeing her die cemented his desire to keep a distance from her. But the point is he did keep a distance from her. He never got close to her and he never wanted to. But River always refused to respect this. She saved him so he could belong to her. So he could be her property.
No doubt the Doctor did develop a level of care and responsibility for her. Because he was a person capable of empathy and remorse. And any target of this kind of emotional abuse will develop some sort of attachment. But he was never in love with her. River herself knew this, but she had to convince herself he never loved anyone. But he did. We know for a fact he was in love with Rose. We know he loved friends like Donna platonically. But he didn’t love River. Nor should he have.
Update: I thought I’d also share the official diagnostic criteria for Narcissistic Personality Disorder. I’m not qualified to diagnose real people since I only have a bachelor’s degree in psychology. But fictional characters, I will. It’s established canon River has Anti social personality disorder (the official term for psychopathy and sociopathy) so I won’t bother trying to prove my point there. But I do believe she is a narcissist as well.
In the American Psychiatric Association’s Diagnostic and Statistical Manual of Mental Disorders, Fifth Edition, Text Revision (DSM-5-TR), [1] NPD is defined as comprising a pervasive pattern of grandiosity (in fantasy or behavior), a constant need for admiration, and a lack of empathy, beginning by early adulthood and present in a variety of contexts, as indicated by the presence of at least 5 of the following 9 criteria:
A grandiose sense of self-importance: River has this in spades.
A preoccupation with fantasies of unlimited success, power, brilliance, beauty, or ideal love: The Doctor is definitely her ideal love fantasy
A belief that he or she is special and unique and can only be understood by, or should associate with, other special or high-status people or institutions I would say this is another yes
A need for excessive admiration Definitely
A sense of entitlement 1000% she constantly feels entitled to the Doctor dropping everything for her.
Interpersonally exploitive behavior absolutely
A lack of empathy very much so
Envy of others or a belief that others are envious of him or her not sure about this one. I don’t recall any instances of this.
A demonstration of arrogant and haughty behaviors or attitudes any time she’s on screen this is a yes
I might make a separate post on narcissism specifically. And I might give more specific examples at that point. But fellow River loathers, this is pretty solid evidence that she’s a narcissist and a psychopath. Diagnostic criteria only stipulates that 5 of these traits be met. River definitely meets 8 of them. I should note that most psychologists and psychiatrists like to see that these traits apply to more than one aspect of a person’s life for a diagnostic. And with River it’s hard to establish that since her character almost completely revolves around the Doctor. BUT if just one person really wants solid evidence against her, let me know. I might be willing to put myself through an audio story or something that features her away from the Doctor.
If you are someone who doesn’t like applying real psychological concepts to fictional characters, I can respect that. However, it should be clear that by now that River’s patterns of abuse are obvious. Whether you wish for apply real life disorders to her not, her treatment of the Doctor and her abuse is still unacceptable. She is highly toxic towards him.
I would also like to add that it’s not just me who uses psychological concepts and applies them to fiction. There’s a whole book series where real psychologists apply psychology to fictional worlds, including Doctor Who. Cinema Therapy is a YouTube channel that does this. I was taught to think in this way by my high school English teacher as well.
#anti river#anti river song#doctor who#doctorwho#anti moffat#psychology#character analysis#tenth doctor#eleventh doctor#fifth doctor#big finish#forest of the dead#rose tyler#unhealthy relationships#donna noble
78 notes
·
View notes
Note
Do you think it's a good idea to try and get away from Google Docs when it comes to writing? I really can't afford any other fancy program to write my drafts in, and it honestly seems like the easiest - not to mention, most convenient - program to use to share my manuscript with beta readers. I could use advice on this matter because I keep seeing things across the net about it being a bad place to work on writing, but I have no idea what to turn to to make things easy for me and my future beta readers.
This is such a good question. Thank you.
So, a little backstory. Ever since Google removed their motto "do no evil" they have gone down the rather predictable path of all big players of the rot economy: putting profits over user experience.
A little while back, there was rumor that Google trains AI with the content of google docs, then they said they don't really, they only scan the content and do nothing with it, and then they started blocking access to documents with sexy images. Do we believe that Google has our own best interest at heart? That's something everyone has to decide for themselves.
Back then, I made a post with alternatives for Google Docs, you can find it here, also check the reblogs for more options:
Now, is it a good idea to switch from google docs? I think it is, but I'm also not consistent with it. As you mentioned, it seems to be the easiest to share writing with beta readers, and I also still often use it for fanfiction.
But there are alternatives, and they require very little adjustment in the process. Let me give you two free options.
Ellipsus is webbased, meaning you can write in it in the browser on any device. They have sharing, specifically for beta reading, and an export function for AO3.
Reedsy (marketplace around everything self-publishing) has an editor. It is webbased, and they also have an option for sharing with beta readers. This software is aimed at book type-setting and exporting but it works just fine for copying to web.
Personally, I'm currently switching everything to LibreOffice (also free!) files in some cloud connected folder. I used to do a lot of mobile writing on my phone with a bluetooth keyboard but currently, I'm taking my laptop everywhere so LibreOffice works great for me. If I have to use my phone or tablet for some lightweight mobile writing, on vacation for instance, I can still use something webbased.
So, I hope I gave you some interesting options. Do I think it's a good idea to make us less dependent on Google? Yes, I do. I don't trust them.
We have alternatives, and they cost us nothing more than a little adjustment.
~ barbex
#writing software#writing tools#alternatives to google docs#barbex gives advice#ellipsus#reedsy#google docs#libre office
52 notes
·
View notes
Text
YouTube Downloads through VLC: Step by Step
[EDIT: I've been receiving reports for some time now that this method no longer works. I suspect something about the switch to YouTube Music as a separate app, and/or YouTube's ongoing attempts to force Chrome use, broke the compatibility with the Github version of youtube.luac -- I haven't managed to look into whether there's an updated working version out there yet. Sorry!]
So this guide to easily downloading off YouTube is super helpful, but there's enough important information hidden in the reblogs that (with the permission of OP @queriesntheories ) I'm doing a more step-by-step version.
Please note: these downloads will be in YouTube quality. My test video download is coming through at 360p, even though the video I'm starting from is set to 720p. They're legible, but they won't look great on a TV. For high visual quality, you'll want to seek out other methods.
This guide is written for Windows 10, since that's what I can test on. It's been tested on Firefox, Chrome, and Edge (which is a Chromium browser, so the method should work in other Chromium browsers too). So far, I haven't tracked down a way to use this download method on mobile.
BASIC KNOWLEDGE:
I'll try to make this pretty beginner-friendly, but I am going to assume that you know how to right-click, double-click, navigate right-click menus, click-and-drag, use keyboard shortcuts that are given to you (for example, how to use Ctrl+A), and get the URL for any YouTube video you want to download.
You'll also need to download and install one or more programs off the internet using .exe files, if you don't have these programs already. Please make sure you know how to use your firewall and antivirus to keep your computer safe, and google any names you don't recognize before allowing permission for each file. You can also hover your mouse over each link in this post to make sure it goes where I'm saying it will go.
YOU WILL NEED:
A computer where you have admin permissions. This is usually a computer you own or have the main login on. Sadly, a shared computer like the ones at universities and libraries will not work for this.
Enough space on your computer to install the programs listed below, if you don't have them already, and some space to save your downloaded files to. The files are pretty small because of the low video quality.
A simple text editing program. Notepad is the one that usually comes with Windows. If it lets you change fonts, it's too fancy. A notepad designed specifically to edit program code without messing it up is Notepad++, which you can download here.
A web browser. I use Firefox, which you can get here. Chrome or other Chrome-based browsers should also work. I haven't tested in Safari.
An Internet connection fast enough to load YouTube. A little buffering is fine. The downloads will happen much faster than streaming the entire video, unless your internet is very slow.
VLC Media Player, which you can get here. It's a free player for music and videos, available on Windows, Android, and iOS, and it can play almost any format of video or audio file that exists. We'll be using it for one of the central steps in this process.
If you want just the audio from a YouTube video, you'll need to download the video and then use a different program to copy the audio into its own file. At the end of this post, I'll have instructions for that, using a free sound editor called Audacity.
SETUP TO DOWNLOAD:
The first time you do this, you'll need to set VLC up so it can do what you want. This is where we need Notepad and admin permissions. You shouldn't need to repeat this process unless you're reinstalling VLC.
If VLC is open, close it.
In your computer's file system (File Explorer on Windows), go to C:\Program Files\VideoLAN\VLC\lua\playlist
If you're not familiar with File Explorer, you'll start by clicking where the left side shows (C:). Then in the big main window, you'll double-click each folder that you see in the file path, in order - so in this case, when you're in C: you need to look for Program Files. (There will be two of them. You want the one without the x86 at the end.) Then inside Program Files you're looking for VideoLAN, and so forth through the whole path.
Once you're inside the "playlist" folder, you'll see a lot of files ending in .luac - they're in alphabetical order. The one you want to edit is youtube.luac which is probably at the bottom.
You can't edit youtube.luac while it's in this folder. Click and drag it out of the playlist folder to somewhere else you can find it - your desktop, for instance. Your computer will ask for admin permission to move the file. Click the "Continue" button with the blue and yellow shield.
Now that the file is moved, double-click on it. The Microsoft Store will want you to search for a program to open the .luac file type with. Don't go to the Microsoft Store, just click on the blue "More apps" below that option, and you'll get a list that should include your notepad program. Click on it and click OK.
The file that opens up will be absolutely full of gibberish-looking code. That's fine. Use Ctrl+A to select everything inside the file, then Backspace or Delete to delete it. Don't close the file yet.
In your web browser, go to https://github.com/videolan/vlc/blob/master/share/lua/playlist/youtube.lua
Click in the part of the Github page that has a bunch of mostly blue code in it. Use Ctrl+A to select all of that code, Ctrl+C to copy it, then come back into your empty youtube.luac file and use Ctrl+P to paste the whole chunk of code into the file.
Save the youtube.luac file (Ctrl+S or File > Save in the upper left corner of the notepad program), then close the notepad program.
Drag youtube.luac back into the folder it came from. The computer will ask for admin permission again. Give it permission.
Now you can close Github and Notepad. You're ready to start downloading!
HOW TO DOWNLOAD:
First, get your YouTube link. It should look something like this: https://www.youtube.com/watch?v=abc123DEF45 If it's longer, you can delete any extra stuff after that first set of letters and numbers, but you don't have to.
Now open VLC. Go to Media > Open Network Stream and paste your YouTube link into the box that comes up. Click Play. Wait until the video starts to play, then you can pause it if you want so it's not distracting you during the next part.
(If nothing happens, you probably forgot to put youtube.luac back. coughs)
In VLC, go to Tools > Codec Information. At the bottom of the pop-up box you'll see a long string of gibberish in a box labeled Location. Click in the Location box. It won't look like it clicked properly, but when you press Ctrl+A, it should select all. Use Ctrl+C to copy it.
In your web browser, paste the entire string of gibberish and hit Enter. Your same YouTube video should come up, but without any of the YouTube interface around it. This is where the video actually lives on YouTube's servers. YouTube really, really doesn't like to show this address to humans, which is why we needed VLC to be like "hi I'm just a little video player" and get it for us.
Because, if you're looking at the place where the video actually lives, you can just right-click-download it, and YouTube can't stop you.
Right-click on your video. Choose "Save Video As". Choose where to save it to - I use my computer's built-in Music or Videos folders.
Give it a name other than "videoplayback" so you can tell it apart from your other downloads.
The "Save As Type" dropdown under the Name field will probably default to MP4. This is a good versatile video format that most video players can read. If you need a different format, you can convert the download later. (That's a whole other post topic.)
Click Save, and your video will start downloading! It may take a few minutes to fully download, depending on your video length and internet speed. Once the download finishes, congratulations! You have successfully downloaded a YouTube video!
If you'd like to convert your video into a (usually smaller) audio file, so you can put it on a music player, it's time to install and set up Audacity.
INSTALLING AUDACITY (first time setup for audio file conversion):
You can get Audacity here. If you're following along on Windows 10, choose the "64-bit installer (recommended)". Run the installer, but don't open Audacity at the end, or if it does open, close it again.
On that same Audacity download page, scroll down past the installers to the "Additional resources". You'll see a box with a "Link to FFmpeg library". This is where you'll get the add-on program that will let Audacity open your downloaded YouTube video, so you can tell it to make an audio-only file. The link will take you to this page on the Audacity support wiki, which will always have the most up-to-date information on how to install the file you need here.
From that wiki page, follow the link to the actual FFmpeg library. If you're not using an adblocker, be careful not to click on any of the ads showing you download buttons. The link you want is bold blue text under "FFmpeg Installer for Audacity 3.2 and later", and looks something like this: "FFmpeg_5.0.0_for_Audacity_on_Windows_x86.exe". Download and install it. Without this, Audacity won't be able to open MP4 files downloaded from YouTube.
CONVERTING TO AUDIO:
Make sure you know where to find your downloaded MP4 video file. This file won't go away when you "convert" it - you'll just be copying the audio into a different file.
Open up Audacity.
Go to File > Open and choose your video file.
You'll get one of those soundwave file displays you see in recording booths and so forth. Audacity is a good solid choice if you want to teach yourself to edit soundwave files, but that's not what we're here for right now.
Go to File > Export Audio. The File Name will populate to match the video's filename, but you can edit it if you want.
Click the Browse button next to the Folder box, and choose where to save your new audio file to. I use my computer's Music folder.
You can click on the Format dropdown and choose an audio file type. If you're not sure which one you want, MP3 is the most common and versatile.
If you'd like your music player to know the artist, album, and so forth for your audio track, you can edit that later in File Manager, or you can put the information in with the Edit Metadata button here. You can leave any of the slots blank, for instance if you don't have a track number because it's a YouTube video.
Once everything is set up, click Export, and your new audio file will be created. Go forth and listen!
#reference#vlc media player#youtube downloader#youtube#uh what other tags should i use idk#how to internet#long post
230 notes
·
View notes
Note
So when I do finish this book I am writing (speaking it into existence bc adhd is a BITCH) Like what's your experience with publishing? How much does it usually cost? What kinda income does one get? I don't really care about making money but it would be super neat to make something since I cannot work. How do taxes work on that also? Google is confusing me
So far i have an idea and half a first chapter with thrilling notes such as " add a cat" and "insert spell here"
So I self publish, so that's the world I know. If you want to find a traditional publisher, you'll need to query agents and do a bunch of other stuff. My only advice for traditional publishing is that when going that route, money should always flow towards the author. If they're asking you to pay for something, they aren't a traditional publisher and there's a good chance it's a grift.
So let's talk about what I do know.
(And this turned out to be long as hell, so I'm putting in a "keep reading")
When you self publish, you are effectively acting as the publisher. If you want someone to do edits? You'll have to hire an editor. If you want someone to do the book layouts? You'll have to hire someone to do it if you can't do it yourself. You need a cover? You get the idea.
Now I don't pay an editor, so I can't really give you a price range on how much they cost off the top of my head. I do know they can get expensive though.
I also do all my own interiors, but I have a graphic design background and have been doing print layouts for decades. If you want to hire someone to do the interiors, that can run you $100-500, so I recommend just... learning to do it yourself.
Frankly, it's not terribly hard. I do mine in Apple Pages on my Mac for my paperbacks and Amazon has a free program for formatting eBooks (which you can export both as the Kindle format OR the more universal ePub format). With your print version, you just want to make sure you get your margins right, along with using a standard font like Times New Roman.
Like, literally just pick up a book and study the layout. Look at the front matter (copyright page, title page, etc) of a handful of books and mimic what you find there. I don't know why so many self published authors get that bit wrong. It's a book. Format it like a book.
Now the cover... this is where you'll probably end up spending something. I do my own covers for my comics, but hire out for my novels because I can't do the kind of covers expected of my genre. And you do want to match your genre, because you want a potential reader to know what they're getting into. I've seen so many self published books with terrible covers and it drives me nuts.
Cover design can run you anywhere from $35-$400 depending on who you choose to contract, and this is where I recommend you spend your money. On the cheap end you have companies like GetCovers. Now they primarily do covers made from edited stock photos, and I've honestly been pretty satisfied with their work... but you have to hold their hand and be very clear with what you want.
GetCovers is a part of Mibl Group, and it's pretty much all of their most inexperienced employees. The whole point of it is to get them the experience to work on bigger projects down the road. They have cheaper packages, but for their best work you'll probably only spend like $35-$45. If you're working in a genre that mainly uses stock images, that's who you want.
I often end up retouching the covers they do though, because I'm impatient. Like there are edits to The Witch and the Rose and Shadowcasting I made after they handed me the completed files. You're going to have to be very specific with what you want. The first version of the Bloody Damn Rite cover they did... was awful. But they did the revisions I asked for, and the version they delivered in the end was great.
Now if you want, like, original art or just more complicated, custom stuff? You're looking at at least $250 on the cheap end, but sometimes you end up in the ballpark of $700-$1000. Like on their regular site (just to use the same company as GetCovers for comparison), the Mibl group charges like $300 for a more complicated stock photo based cover (that requires more complicated edits) and at least $700 for covers that require digital painting, 3d modeling, etc.
There are a wide range of prices depending on what you're asking for. But, y'know, you're paying that once for a commercial piece of graphic design.
I'm cheap and can do some of the work myself, so I go for the $35 cover. I also figure out what fonts they used for the covers, so I can go buy my own commercial license for them and replicate a similar logo on my title page. You don't need to do that bit, I'm just finicky.
Actually publishing the book is easy. You'll want to use a self publishing platform like Kindle Direct Publishing or IngramSpark (or, if you're like me, both). I sell KDP books on Amazon, but all other distribution is through IngramSpark. You make more money on Amazon by using KDP, but even though they offer distribution, no book store will ever order through them. So I turn that option off, and then I take the same book and I make it available through IngramSpark.
On amazon I make a little more than $2 on a $3 ebook, and about $4.00 on a $12.99 paperback. When a bookstore buys an IngramSpark version, I make about $2.50 on a $14.99 book (if you wondered by my books cost more when not buying it through Amazon... that's why). Now if you buy yourself author copies, they cost way less -- in the end I think I can get them for like $5 a book? So when I sell them in person, my margins are much higher.
But, y'know, you have to actually sell them.
Because that's the hard part. When self publishing, you only have you to market it. I don't know how many books I'd be selling if I didn't have a pre-existing audience -- and even then it's not a huge amount. I've sold about 200 books this year? Which isn't nothing, and I appreciate every single person who's purchased one of my titles, but it's obviously not enough to quit my day job for, y'know?
That said, I've known people who do sell enough to make a steady living. So it's possible for sure.
But it's not going to happen overnight, and it won't be easy.
As for taxes, you'll need a 1099 and do stuff with the Schedule C. I always forget exactly what until I'm actually doing them, but it's not super hard, just annoying.
69 notes
·
View notes
Note
Hello. 🥺I hope you can still remember me! 😂 would you mind provide me the specific tutorial on how to make these HQ gifs especially this post: https://www.tumblr.com/sinnersmovie/781373995991826432/the-pitt-2025-created-by-r-scott?source=share ? 🥺 the quality is really nice! I have the problem of gif making, the thing is that I have followed many tutorials on how to make HQ gifs but it always turn out differently even tho I follow every step.. I am too confused. Literally, so desperate to fix the problem 😭 not sure what did I do wrong..
yes, hi!!! so, for this gifset from the pitt, i can walk you through my process on capturing footage and coloring, but if what you're struggling with is quality, the most important part is the file and definition of the footage you're working with.
i personally almost exclusively use 1080p footage with a decent file size. a file can be HD and still vary in size from a couple hundred megabytes to several gigabytes. this will also depend on the length of the episodes (half-hour episodes vs. an hour-plus). since we're talking specifically about my gifs of the pitt, my DLs of the episodes are all in the 2-3.5gb range, give or take.
i know there are gifmakers that swear by 4k footage and i certainly won't deny that gifs made from 4k files are stunning, but i've already spent a lot of money on external hard drives and don't have the space to spare for the frankly massive sizes of 4k movies and tv. besides, most 1080p quality gifs turn out perfectly well!
below the cut, i'll show you how i capture, gif, and color scenes from the pitt like this:

note: this tutorial is beginner-oriented!
step 1a: once you obtain your file (this is not a piracy tutorial lmao, but if you google "piracy reddit" you can find a lot of reputable suggestions for sites to peruse), it's time to screencap or clip the scene(s) you want to gif. i would say that, from what i've seen, most gifmakers use screencaps, but i highly prefer taking short video clips (which i keep and usually label for future use/reference), so i'll be showing you that version. if you would prefer to screencap, please check the "beginner tutorials" tag on my resource blog @gifmakerresource
step 1b. i only use windows pcs, so i can't give any specialized info regarding macs, just as a disclaimer. i use the program VLC Media Player, both for clipping scenes and as my regular media player on both my laptop and my desktop. to initially set up vlc's recording capabilities, i used this website (please just ignore all their annoying advertising for movavi).
step 1c. now that vlc is set up to record footage played through it, i open my video clip (ctrl+o) and navigate to the scene i ultimately want to gif. i typically recommend recording an extra 5-10 seconds before and after the clip, especially if you need to convert the clip afterwards.
step 1d (optional). depending on the file format of your episode, you may need to convert the clips you take before photoshop will accept them. for example, a vast majority of the files i download are mkv files, but photoshop works best with mp4 files. for this, i use another program called HandBrake. once downloaded, i add whatever file(s) i need to convert, select the appropriate preset (which is almost always "Super HQ 1080p30 Surround" to maintain as much of the original quality as possible). you can select where the converted files automatically save for organization purposes, just like with vlc.
step 2. now that we have the clip we want to turn into a gif, it's time to bring it into photoshop. to do so, select file -> import video frames to layers. once you select your video clip, photoshop will pop up with a little media player with a few controls. here's what that looks like:

the box on the left that i've highlighted is what you'll adjust depending on whether you want to load in the entire clip or a specific range of the clip. with the way i clip scenes, i have quite literally NEVER used "from beginning to end." instead, i use the toggles on either side of the progress bar (circled in red) to select a specific range. you don't have to be overly precise with this as you can always delete extra frames, so i'll navigate using those little arrows until i roughly have the shot i want to turn into one gif and click okay. i would not recommend checking "limit to every x frames" because while this can help with file size, it will make your gif appear choppy. make sure "make frame animation" is checked.
this is what photoshop looks like after clicking OK:

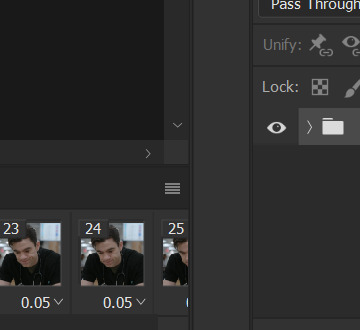
across the bottom are the frames. make sure that "forever" is selected at the bottom left rather than once or three times. this makes sure that wherever you post your gif, it will play continuously. the 0.04 below each frame is the frame rate -- at this setting, each frame plays for four tenths of a second. this might vary depending on your source material, but i HIGHLY recommend using 0.05-0.06. we're not going to worry about that yet, though, so don't bother changing it right now.
over on the right under "layers" are, you guessed it, each frame's corresponding layer. now, i could go more in-depth on this, but i don't gif using frame animation. i used to a very long time ago (over ten years ago), but i use a series of actions to convert to timeline animation. before doing that, however, i execute a couple more steps first.
step 3 (optional). i may be a slob irl, but i'm extremely organized and neat on my computers, so the first thing i do is use an action i created to select all the layers and put them into a group. to manually do this, you can either click on the first (or last) layer and then click on the last (or first) while holding down shift OR you can go to select -> all layers OR you can use the keyboard shortcut alt+ctrl+a. i just turned this process into an action to save time.
step 4 (optional). delete any excess frames. because i don't bother with being extremely precise with photoshop's media player, i usually have to trim off extra frames at the beginning and/or end of my gif. to delete frames, select the first frame and either hold down control and click each one or hold down shift and click the last one to select everything in between. once the frames you want to delete are selected, click the little trashcan below the frames (near the left side just before the horizontal scrollbar).
note: to watch your gif at any time, simply press the spacebar. press it again to pause.
step 5. while everyone's process is different, i prefer to crop my gif to its final proportions here. there's nothing wrong with doing it later, but sharpening and coloring can take longer at larger dimensions. the width of a single gif in a row on tumblr needs to be 540px. two gifs in a row are both 268px wide. three gifs in a row are 177px, thus making tumblr's gutters (the small transparent spaces separating gifs) 4px.
step 6. this is when i sharpen my gif and convert it to timeline animation. when it comes to sharpening, i think everyone probably does it a little differently. here's how i sharpen my gifs (which i turned into an action to save time) and here's the sharpening tutorials tag on my resource blog. as with most things gifmaking-related, i recommend trial and error. try different things until you find what you like! once again, to save time, i turned that sharpening tutorial (and its base sharpening) and the timeline conversion into a single action.
to convert your gif from frame animation to timeline, you need to select all your layers and all your frames and select "convert to video timeline" from the menu after clicking these three lines:
this is what i have once i've run my action to sharpen and convert:

you can adjust how zoomed in your timeline is with the slider at the bottom and if you're having issues with playback (though especially with larger/longer gifs, it always takes a while to load before playing smoothly) click the gear icon near the top of this screenshot and make sure it's set to 100% and to loop playback.

(group 2 is my vivid sharpening per the tutorial i linked, so if you don't use that, yours won't look exactly like this.)
step 7. time for my favorite part: coloring! now, i'd recommend taking a look at coloring tutorials as every show and every movie is going to be different. even separate scenes in the same episode can have totally different lighting. i have a bad good habit of saving just about every psd (photoshop file that contains all coloring adjustment layers), so there are times where i can just reuse a coloring i've already made rather than having to color each gifset from scratch, but you might be surprised just how much i DO color from scratch.
in several of my other gif tutorials, i explain and go step-by-step through my entire coloring process and why i use the adjustment layers i use, but as i said, what works for one scene may not work for another, so the best thing i can recommend is to familiarize yourself with commonly-utilized adjustment layers. play around with them, see what each one does, and over time, you'll be able to recognize which ones to use and when to use them. the adjustment layers i use are brightness/contrast, curves, selective color, channel mixer, gradient map, vibrance, hue/saturation, photo filter, levels, and exposure. the bolded ones are the ones i use on almost every single coloring.
on the navigation page on my resource blog, you can find a lot of tutorials that are specific to one or more types of adjustment layers and i encourage you to check those out as well as explore the navigation page itself.
here's an overview of my coloring for the pitt:

and here's a visualization for you of what each layer does:


(top to bottom, left to right) no coloring, brightness/contrast, adding curves, adding selective color 1 (black, neutrals, and white), adding selective color 2 (blue and cyan), adding gradient map (b&w set to 25%), fully colored, without vivid sharpening, and a comparison of the original to the full-coloring.
step 8. it's time to save! i HIGHLY recommend using this save action from @anyataylorjoy as it's a total lifesaver. if you save your gif right from here, photoshop will automatically set your frame rate to 0.07. while i used to gif at 0.07, i cannot believe how slow and choppy that looks now. all of my gifs are now 0.05, which is what this action does in part. without this action, you'd have to save your gif here and then open that file, change your frame rate, and re-save.
once this action has finished running, you go to file -> export -> save for web (legacy). here are my save settings, which do make a difference:

just remember, to be uploaded to tumblr, a single gif must be below 10mb in size. # of frames, #of colors, and dimensions all play a big part in the size of your gif. here's the finished gif at 540px:

to sum up, what's most important when trying to make high-quality gifs is the quality of your footage. generally, the larger the file size the better, but you do not have to use 4k instead of 1080p. and a 3gb 1080p file will likely look higher quality than a 300mb 1080p file. sharpening and coloring go into it, yes, but they're probably not going to make or break your gif.
as always, if you have additional questions or need clarification on any part of this tutorial, please let me know! i don't believe in gatekeeping and will always help to the best of my ability (it just might take me a few days).
26 notes
·
View notes
Text
How much should it cost to be a writer?
It depends what route you’re taking. If you are planning to go for traditional publishing, which looks like you finishing a manuscript and then querying agents who will then take your book to publishers, you should be paying for basically nothing. One exception would be if you decide to hire an editor to get a pass over your manuscript and/or query package before sending it off, but this is not required.
If you are in the process of trying to get your manuscript traditionally published, you may be approached by a “publisher” offering to publish your manuscript for a fee. THIS IS A SCAM! An author should never be paying for “publishing services.” Anyone asking you to pay for your own printing, marketing, etc. costs is taking advantage of you. These are called vanity publishers and they will not turn you a profit, help you attract readers, or provide you the prestige of being published.
Always check on Writer Beware - search for the name of the person or company. You can also just google that name along with the word “scam” or “reviews.” In general, don’t let yourself be blinded by dreams, or let yourself be convinced that something is a good idea because you really want it to be true. Never, ever, ever pay a publisher.
If you are going the self-publishing route, you will be paying for certain things, but none of those should be payment to be published. You are the publisher. Uploading your manuscript to Amazon or other marketplaces is free. However, you will be paying for things that a publisher typically pays for. This could include:
-Cover art - you could do this yourself, though this isn't recommended. A good cover is key to a book's success, so budget to purchase a pre-made book cover, or hire a professional cover artist.
To find pre-made book covers, you can just Google "premade book covers," or check one of these sites: BookCoverZone RockingBookCovers Beetiful
And here's a list of places to buy both custom and pre-made cover designs that's a good start. You can also check Reedsy and Etsy for people listing cover design services. If there is a self-pubbed author whose covers you love, try asking them what artist they use.
-Formatting - you could do this yourself using a formatting program like Atticus, or you could hire someone who does professional e-book formatting.
Here's an article on the turbo-DIY route. Here's a list of formatting programs you can use. To hire someone, you can simply search for book formatting services or look at places where people list such services for hire, like Reedsy, Fiverr, or certain Reddit boards.
-Ad campaigns - you may want to pay for ad campaigns on platforms like Meta or Amazon. More niche, author-specific platforms like BookBub, Book Funnel, or Book Sirens also come with certain costs.
-Author services - you may wish to hire an expert in things like marketing, blurb copy, social media metrics, newsletter management, etc. You can find information on that here.
Be aware that scam publishers might try to pitch themselves as "author services" - you should be paying someone to help you with specific aspects of your self publishing work, NOT paying to be published.
-Software and platforms - whether it's a subscription to Duotrope, a paid Scribophile account, access to pro Canva features, etc. you may decide to pay for tools that you will use to do your work well.
-Expert advice - some people offer courses, books, or other resources on how to do specific things like write a compelling blurb or run an effective ad campaign. You may notice that a lot of the links I shared here will include upsells from people doing exactly this!
Be very cautious about this, as most of these people claim that they make tons of money on their self published books, but really, they make their money selling this stuff to people like you. Always check out a person’s free resources first, and wait to invest in this sort of thing until you have a specific question you need answered or are trying to do a very particular thing that you need granular guidance on.
One thing you should NOT pay for is a review, feature, or interview. Self-published authors will be approached by a lot of scammers who claim that, for a nominal fee, they will share information about your book to their huge audiences. These are completely useless and a waste of money. Never spend money on this.
Always keep track of what you are spending on all of this. You may be able to deduct it from taxes you pay on your income from writing, and you will want to really understand what your profit margins look like.
68 notes
·
View notes
Text
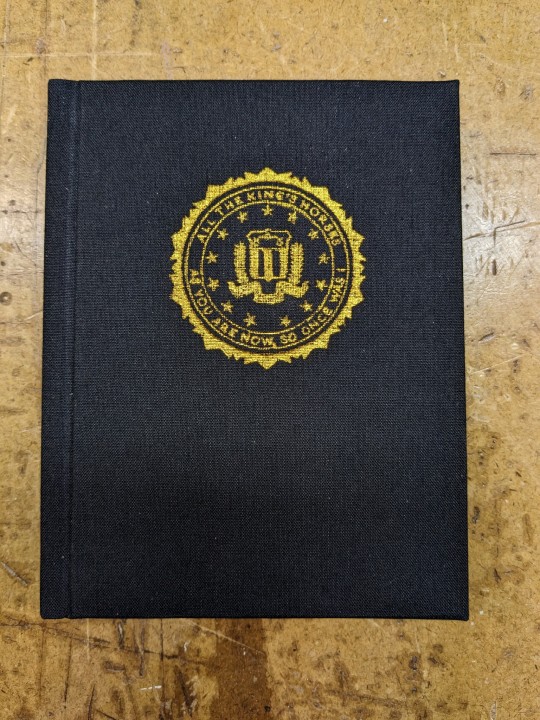

All The King's Horses | As You Are Now, So Once Was I by @samwpmarleau (grumkinsnark)
All The King's Horses [LiveJournal ch1] [Fanfiction.net ch1]
As You Are Now, So Once Was I [LiveJournal ch1] [Fanfiction.net ch1]
Fandom: Supernatural, Criminal Minds
Rating: Teen | PG-13
Category: Gen
Words: ~36,192
All The King's Horses: Protect and Serve. Fidelity, Bravery, Integrity. To what lengths would you go to uphold those oaths? When it comes to a particularly brutal and unsolvable case, the BAU just may have to resort to some more unorthodox methods. SPN/Criminal Minds crossover.
As You Are Now, So Once Was I: Sequel to "All the King's Horses." When Dean catches J.J.'s press conference on the news about a current case and notices a few...inconsistencies, he realizes the BAU is definitely going to need his help. Again. ON HIATUS


About the Book
FORMAT: Letter quarto, flatback bradel binding, french link stitch, no tapes
FONTS: EB Garamond [via Google Fonts], Supernatural Knight [via DaFont], D-Din [via Font Squirrel], Daniel [via DaFont], Permanent Marker [via Google Fonts], Arial
IMAGES: Seal of the FBI [via Wikipedia], Dean's handprint scar [by greenhorn-art]
MATERIALS: 24lb Xerox Bold Digital paper (8.5"x11"), 80pt binder's board (~2mm), 30/3 size waxed linen thread, embroidery floss (DMC #721), 1.9mm cording, brown cardstock, black Cialux bookcloth, gold foil transfer sheet (came with We R Memory Keepers hot foil pen)
PROGRAMS USED: Fic exported with FicHub, word doc compiled in LibreOffice Writer, Typeset in Affinity Publisher, imposed with Bookbinder-JS, title pages designed in Affinity Designer/Photo
.
I first read these stories on LiveJournal back in 2013, some time after I first encountered Tumblr, Supernatural, and the wider world of online fandom. Once I discovered SPNxCriminal Minds crossovers I devoured so many of them. Something about POV Outsider on the Winchesters, the existing connections with investigating monster vs human-crazy cases, and run-ins with the FBI... it's just works so well.
Of all the SPNxCM fics I read and enjoyed, All The King's Horses is among those that bookmarked themselves in my brain. Since it's been living there all these years, I thought it deserved a place on my bookshelf too.
(Rambling below)
Sourcing the Fic
I used FicHub to download the fics off of Fanfiction.net as HTML. Then I pasted them into LibreOffice Writer and created rich text documents of each fic, so I could Place them into Affinity Publisher.
The stories were crossposted, first on LiveJournal and then Fanfiction. I included the metadata from both sites in the appendices.
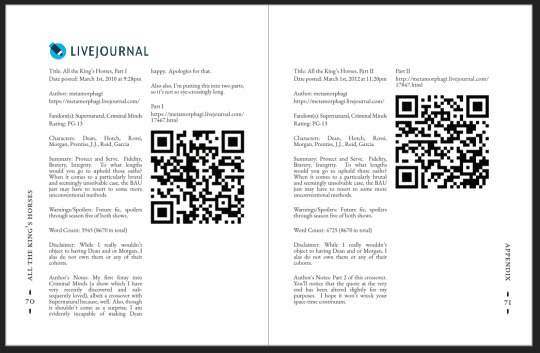
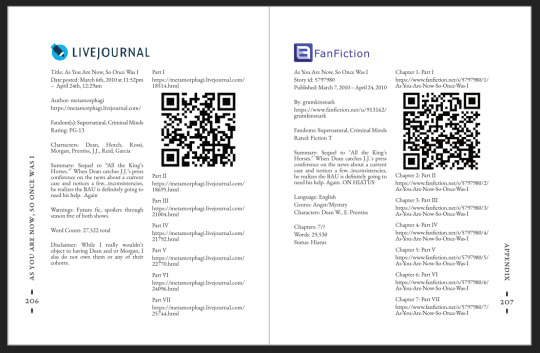
(It's fascinating to see the differences in the same work between platforms. FFN requires genres, so if the author doesn't add them on LJ then by default there's more info on FFN. But FFN limits listed characters to 2, so authors have to pick and choose the most important. Then there's the author's amusing disclaimers and spoiler warnings for these fics, which are only included in the LJ version)
Shoutout to the author for how they linked/listed their accounts on other platforms! Thanks to that I was easily able to track down all the tags/metadata for the fics, and find them here to express my appreciation for their stories!
Typesetting
Fonts
EB Garamond is my new favourite body font, 11pt as per my usual.
The title page is entirely Arial: 1) it was the closest match I have to the case file prop I was copying, and 2) if it was a government doc they wouldn't be using anything but the most basic fonts.
Headings and the the bullets bracketing the page numbers are set it Supernatural Knight, a free font in the style of Supernatural's title.
The location segments are in D-DIN, the closest free match to the font Criminal Minds uses (which is probably DIN).
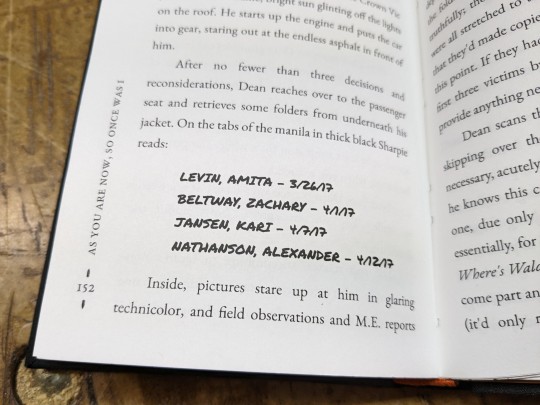
Daniel is used for Dean's 'rushed but legible' note.
Permanent Marker for the 'thick black Sharpie' case file labels.
Artwork
Title pages designed as FBI case files, copied from a prop found online (specifically Etsy's propfictionstudios', but it's all over the web so no idea who actually created it). I had fun plugging in all the fanfic/bookbinding meta!
The ID# above the author's name is the FFN story ID, and the date is the date originally posted on LJ.
The handprint used in the headings of ATKH is Dean's scar. I traced off of a screenshot from s4e01 Lazarus Rising. I chose to use the handprint instead of the anti-possession tattoo or a Devil's Trap as my SPN art element because 1) it's specific to Dean, and 2) indicates/reminds that the story is not set during the season 3 Agent Henriksen/FBI arc.
Grabbed the FBI seal off of Wikipedia.
Construction
Both fics typeset and printed separately, then sewn together into one book. Title page for the sequel was tipped in like an endpaper prior to sewing.
Endbands sewn with orange embroidery floss (DMC 721) around 1.9mm cording. I chose orange because Dean's being in jail brought to mind the orange prison jumpsuits Sam and Dean wore in s1e19 Folsom Prison Blues.

Black bookcloth for the cover, like the Winchesters' beloved black '67 Chevy Impala. (I'd wanted a Supernatural reference to balance out the Criminal Minds-ness of the FBI case files).
I'd originally planned to make lineart of the front of the car, and have it stretch across the bottom of the cover (maybe even wrap around to the back). Even found a useful reference to trace [from here], but it didn't look as good as I'd hoped. Instead I reused the FBI seal and swapped out its text with the titles.
(The effect of shiny foiled FBI symbol on small black book reminds me of one of those FBI badge wallets!)
The foiling process was an unnecessarily long and gruelling affair. My laptop served as a massive power bank for the hot foil pen as I spent 2hrs ever so slowly tracing the image, and then 15mins on the author name and touch-ups. Did it need to take so long? Moving slowly, pushing down hard, going over everything at least three times? I'm sure it didn't. BUT I did not want to chance peeling up the foil to check how I was doing and risk shifting it. It was worth it in my books (haha) ‒ I feel giddy and kick my feet like a schoolgirl whenever I see it!
New Things
Used 24lb paper for the first time, and I love it! It's a little thicker and heavier then regular 20lb printer paper, feels more substantial.
The page numbers & running/section headers are along the outer margin, instead of in the header/footer. This was my way around Affinity's buggy-ness regarding pinning things inline in master pages. (More about that below). If I had been thinking, I could have formatted them like the tabs on a file folder and cut the textblock to match. Oh well, the things you notice once it's printed 😔
This time I also started new chapters/sections using text flow & paragraph spacing settings, instead of using a master. As always, there are pros and cons.
Pro: much faster and less involved. (find chapter start, apply paragraph style VS working from the end cutting text, inserting a frame break, unlinking frames, inserting new pages with master, relinking, pasting, and adding chapter title to a different text box)
Con: images need to be added manually (whether by adding image directly, or by applying a master with the image). I forgot to do this for the second fic, so only ATKH have Dean's handprint scar.
Difficulties Encountered
Affinity Publisher is fighting me on pinning things inline on master pages. They like to disappear on regular pages I've applied the master to. Sometimes it works, sometimes it doesn't, sometimes it only works on some of the pages. Idk what's up. (The bullet character only faces one way so I had use textboxes, flip/mirror one, and pin them inline to the page number).
So instead of having page numbers in the footer, bookended left and right by text boxes with Supernatural Knight's bullet, I put it vertically down the side.
Updated Publisher and all my paragraph styles' fonts changed/went funny. Something to do with the update's variable font support, I think. What was previously 'EB Garamond' regular, was now something along the lines of 'EBGaramond-Regular' which isn't a font. Issue seems to have ironed itself out in my original (near-complete) doc while I was busy remaking it. 😐
On the bright side, the update brought QR code generation to Affinity!
#All The King's Horses#As You Are Now So Once Was I#grumkinsnark#samwpmarleau#fanfiction#bookbinding#fanbinding#supernatural#criminal minds
109 notes
·
View notes
Text
Frequently Asked Questions
Will you write sub/bottom!Shigaraki or top/dom!Dabi?
No, I have no interest in writing those dynamics for Shigadabi.
When will [x] story update?
I don't have an update schedule, I write whenever I can and work on a lot of different stories! Unless a fic has been marked as "abandoned" all of my stories will continue to update over time (unless something unforeseen happens to me)
What should I call you/What are your pronouns?
You can call me Tanco, and my pronouns are they/them
Where are all your Tumblr-only stories?
You can find them right here on my masterlist!
Can I make fanart for your works?
Yes, absolutely! I would love to see it, and I hope you have fun!
Can I write fanfic based on your stories?
I would highly prefer if you did not do that.
Will you read my fic?
No. When I get involved writing for a specific ship I completely stop consuming any other written works about them. It's something that I find help me focus on my interpretation of the ship's dynamic.
Can you give me resources about BDSM/This is my experience with BDSM...
I am not a resource for education or safety practices when it comes to BDSM/Kink/Sex. What is depicted in a fictionalized setting will likely not reflect reality and a fiction writer is not someone who should be approached to learn more about these topics. Additionally, please do not share any personal details with me about your experience with kink or intimacy-- it makes me extremely uncomfortable.
What program do you use to write?
I use 4thewords to do all of my writing! It's a subscription service that gamifies writing and helps me to be more productive! I use Google Docs for final editing and formatting!
What about Shigadabihawks?
I no longer enjoy that ship or Hawks as a character for personal reasons, the Bonded and Mishap series are on hiatus, but those stories are still not abandoned and will update infrequently, but I am still committed to seeing them completed.
Why don't you tag most of your Shigadabi stuff?
I know my tastes aren't everyone else's so to keep this blog small I tend to not include bigger tags on most of my posts so they don't show up as easily in searches. "My writing" will bring up fics and WIPs, "doodle" or "doodles" will bring up art, and "tanco speaks" will bring up me talking or answering asks, "tanco spoilers" will bring up spoilers from story WIPs
Do you accept commissions?
Yes and you can find my guidelines here!
64 notes
·
View notes
Note
Do you have any advice/suggestions for getting into bookbinding? What is the process like if you don't mind sharing?
Hello! Very happy to share bookbinding advice/resources 💜 it's a wonderful and delightfully rewarding hobby, and while it can be complicated and easy to get stuck in the weeds with it, you can also get started with some really simple binds with materials you may already have around your living space.
Info below the cut:
First off, there are a lot of instructional videos and guides out there for bookbinding. My favorite YouTube channel for those just starting out bookbinding is Sea Lemon, who has a ton of instructional videos for various styles of bookbinding. Her method of explaining things is clear and concise, and she tends to work with simpler tools and materials that don't cost much and that you may already have on hand. She is not a professional bookbinder with professional tools (afaik) but in my opinion, that's perfect for a beginner because it's not as overwhelming and has a much lower barrier to entry. Perusing her channel and watching a bunch of videos was where I started before even picking up tools to start my first bind.
Another guide I highly recommend is How to Make A Book, by ArmoredSuperHeavy. This is a wonderful step-by-step guide for taking a fic from AO3 and turning it into a book. The most helpful part of this guide, for me, was the typesetting instructions. Typesetting is the act of taking a piece of text (eg. a fic on AO3) and formatting it in the correct way for printing and binding into a book. Note that this guide is specifically for MS Word, though you can also typeset in Google Docs, Libre Office, Affinity Publisher, InDesign, and other programs (even LaTex!).
(Pro tip: save yourself the headache of trying to use Word's bookfold option and just set your document page size to the page size of your finished book (if you're printing on letter paper, this is 5.5" x 8.5") and then use this software to put your pages in the correct order: https://momijizukamori.github.io/bookbinder-js/)
A final resource that I recommend, but that can also get a bit overwhelming, is the Renegade Guild Bookbinding Discord. It's a space specifically for people doing fanbinding, and there are a ton of resources within it, including typesetting guides for various softwares, guides for where to get the tools you need and which tools are best, and people who can answer any questions you may have along the way. It's gotten quite big since I joined, and it can be overwhelming since there's so much information available and so many people who have been binding for a while and thus often offer up solutions or advice that's hard for beginners to understand, but it has never failed me when I've had a tricky question that I needed answered that I couldn't find information on anywhere else.
All that said, here's some more advice from me when just starting out!
Start with a simple bind. A single-section pamphlet bind is easy, cheap, and quick. Here's a Sea Lemon video for how to put together a pamphlet bind.
If typesetting seems intimidating, you can bind blank notebooks. This is also a good way to practice new binding styles if you don't want to go through the hassle of typesetting, imposing, and printing for something you worry you might mess up.
A good word count range for fics when you're learning how to bind case-bound books (ie, the typical hardcover books you see in stores) is 25-50k. Shorter than that, and your books will be thin and a bit fiddly to work with. Longer than that is probably fine, but it will be a quicker process for a thinner book, which is nice when you're just starting out. (And then you don't have to worry about rounding and/or backing, which can be complicated.)
There are very, very few tools that you absolutely need to make a book. There are quite a few tools that will make your life easier, or that will make your book look nicer, or that will make your book last longer, but when you're just starting out (especially if you're trying to minimize cost or deal with space constraints), you can forgo a lot of "required" tools. I'll include a list below of the general bookbinding tools you'll want and some substitutions for them.
You might hear talk about the grain direction of paper or bookboard. When you're just getting started, don't worry about this. Once you get more comfortable with the bookbinding process, then you can start ensuring that your bookboard has the correct grain direction (parallel to the spine) to reduce the warping of your covers. The grain direction of your textblock paper matters the least, and I didn't start using "proper" textblock paper (ie short grain) until about 2.5 years after I started binding.
Bind something you like! Pick one of your favorite fics and bind it, even if it's your first bind and you're worried about it turning out ugly. The excited feeling of having bound your first book will be that much more exhilarating when you're able to put a story that you love on your shelf for the first time.
So you're ready to bind a hardcover book! Here are the tools you will want/need:
An awl, for punching holes in your signatures (groups of paper). You can use a thumbtack for this, or even a strong needle if you have something to cushion the end of it that you'll be holding, like an eraser. Awls are typically pretty cheap, though. You'll want a thinner one so you don't make huge holes in your paper. I have this one and it's worked just fine for me.
A bone folder, for creasing the pages. Historically, these are made out of actual bone, and the reason for using one is to get sharp creases in your paper without tearing or damaging it. You can also use basically anything else in your house that can accomplish this task. When I'm feeling lazy and just need to crease one piece of paper, I use my thumbnail. Bone folders are also cheap, though--I have this one. (As a tangent--when you're making your signatures for your book, you're going to be folding and slotting together usually between 4-6 sheets of paper. Fold the paper normally without creasing with the bone folder, slot them together, and then use the bone folder to sharply crease them all together. Trust me on this--the pages will fit together much better if you crease after putting the signature together.)
PVA glue, for all aspects of gluing involved when making the book. You can, I've heard, use Elmer’s glue for this in a pinch, but I've never tried it. PVA will dry flexible, which is what you need for your book, especially when gluing the spine. For things like attaching decorative paper to your covers, this is less important. If you're making a book that doesn't require gluing the spine (like a pamphlet or coptic stitch book), you may not need PVA. There are also lots of other glue mixtures you can use when bookbinding (paste is a popular one) but I've been a straight PVA guy for over three years now and I can't offer any advice when it comes to other types of adhesives. One note about PVA is it dries quick, so once you've stuck something to it, that's that. Prepare yourself for some crooked books until you get the hang of it.
Gluebrush/paintbrush, for applying glue. I recommend something with bristles; the foam brushes technically work but will absorb most of the glue and will probably cause you a headache. Silicone brushes are wonderful, as you can just wait for the PVA to dry and then peel it off, but a regular glue brush will also work; just be sure to put it in water immediately once you're done with it, otherwise the PVA will dry on it and ruin your brush.
Ruler + pencil, for measuring. Any kind of ruler will do, but if you have access to a quilting square or something similar, this will help you get nice and even right angles.
Needle and thread, for sewing the signatures together. You can use regular sewing needles and sewing thread (doubled up for more strength) if you don't want to buy anything specific for this. An easy step up from this that I recommend is buying a block of beeswax (I got mine for like $4 from a farmer's market) and waxing your thread (running the thread along the block a few times). This will keep your thread from tangling and make it easier to work with. You can also use embroidery thread, especially if you're doing a pamphlet or coptic stitch bind and want some color. I recently upgraded to linen thread (thread weight 35/3), which is the standard for archival-quality books, but you absolutely can use cotton thread and it will be fine.
Paper, for the textblock. You can use your standard white copy paper for this and all will be well. Or, if you want to get a bit fancier, you can use cream-colored paper; 8.5 x 11 hammermill 20lb cream colored paper is easy to find and relatively cheap and will make your books look better, as plain white paper can look almost blue in a book. (That said, I also have some actual published books that use white paper, and I've never noticed anything off about them.) If you decide you want to get really into the proper grain direction, I get my short-grain cream-colored paper from Church Paper. They have both 20lb (typical copy paper weight) and 24lb (slightly heavier) weight. I have both and I actually really like the 24lb; it has a luxurious feel to it, with less bleed from my inkjet printer. If you feel like springing for nice paper, check out their site!
Book press, for pressing your book while it dries and pressing your folded pages before sewing. There are a lot of different kinds of book presses out there, many of which are very very expensive. You can usually make do with some heavy books to weigh down your book while it dries, or thin boards and C-clamps if you have those on hand. If you have access to basic power tools, it's also super easy to make your own press with carriage bolts and cutting boards (this is what I did). There's a lot of videos out there with instructions; here's one from Sea Lemon.
Printer and ink, or a printing service/print shop like Staples. Print shops can get expensive in the long run, and it's nice to have your own printer so you can do test prints of your typesets. If you're going out and buying a printer, I highly recommend either a black and white laser printer (if you're not planning on printing in color; Brother is a good brand) or a tank inkjet printer (like the Epson Ecotank). Do NOT get a new HP if you can help it; their ink subscriptions are brutal. I'm upgrading to a black and white laser this year, but I've been using a very old, cheap HP inkjet that I got off Facebook marketplace for the past few years and it's been reliable (if a bit restrictive). If you do have an inkjet currently that takes cartridges, I highly recommend looking up how to refill your own cartridges. Buying one set of genuine HP cartridges and then refilling them with generic brand ink until they die has saved me probably hundreds of dollars by this point.
Book board, for the covers. Otherwise known as chipboard, which is easy to find on Amazon or at craft stores. This is NOT the same as corrugated cardboard; that will not work. You can cannibalize old three-ring folders, which have chipboard inside them, or even old hardcover books/textbooks. Don't bother with genuine bookbinding chipboard; imo, it's overpriced and unnecessary. You can find chipboard on Amazon for relatively cheap; I recommend the 12x12, as you can get a front and back cover out of one sheet with the correct grain direction. You can use chipboard for your book spine, if you're making a flatback, or you can use a thinner material that you can bend if you're making a rounded book (or for flatbacks as well). For this, thin cardboard (eg. old cereal boxes) or thicker cardstock will work just fine; you don't have to go out and buy genuine bristol board, and I've never bothered with it.
Exacto knife, for cutting things. You could also use a boxcutter, but a craft knife will be easier to handle. You will probably need to frequently change the blade, as cutting chipboard will dull it quickly, so get one that comes with a bunch of replacement blades.
Bookcloth and/or decorative paper, for covering your book board. Bookcloth is basically fabric with a paper backing on it. You can make your own using heat and bond, tissue paper (I use white tissue paper), and fabric; iron the fabric so it doesn't have any wrinkles in it, then iron the heat and bond onto the fabric, then iron the tissue paper onto the heat and bond. There are other methods out there that you may find easier/better, but this is the one I use. The purpose of the paper backing is to prevent glue from striking through the fabric; if you use a thicker fabric or paper, this is not necessary. For your first books, you may find it easiest to just use paper, or to go out and buy some premade bookcloth.
That's a lot of information, but I hope it was helpful! I'm more than happy to answer any more questions you (or anybody else) might have, and happy binding!
27 notes
·
View notes
Text
by Michael Brockbank
Reedsy Book Editor
Atticus
Scrivener 3
Campfire Writing
AutoCrit
Grammarly
What Features Do I Look For in Writing Apps?
Every author finds value in different features. The best writing apps are the ones that work for you. There’s absolutely nothing wrong with using programs like Word or LibreOffice to write a manuscript.
Yet, I chose the above based on the criteria I’m looking for in a writing tool.
Setting Writing Goals
I love creating goals and challenges in my writing. It’s one of the ways that I keep myself motivated and determined to finish certain projects and meet self-imposed deadlines.
Goals can also help you build confidence, especially if you’re consistently meeting them and then raising the bar.
Taking Notes and Storyboarding
The ability to have notes displayed on the same screen as the manuscript is wondrous, in my opinion. I often forget a lot of details as I write, and having a pinned note in plain site helps me remember.
In addition, any app that has some kind of storyboarding platform or background manuscript planning is incredibly useful.
Easy Sharing with Others
I like to share my work easily with beta readers or anyone who is helping me edit. Sure, I can copy and paste the manuscript into a Google Doc, but then that’s an extra step that I’ll forget to later delete.
When you’re as busy as I am, you want to simplify the process as much as possible.
Front & Back Matter and Chapter Setup
Writing apps that have pre-made, editable front and back matter are very beneficial. Especially for those who are new to self-publishing and not sure what to add to their books or how to format the pages.
If an app also has a quick and easy way to add, move, or delete entire chapters, all the better.
Export File Types Support
Although most eBook retailers and print-on-demand services support DOCX files, I prefer to have the option for ePub, MOBI, PDF, and other file types as well.
This is mostly because I plan on selling my books directly from my website. Not to mention I don’t like the idea of an editable doc floating around of my book.
Built-in Spellcheck or Support for Grammarly
No one is 100% accurate 100% of the time when it comes to spelling and grammar. Any app that has functionality for this is essentially a time saver.
If it doesn’t, then hopefully it supports the Grammarly Chrome extension. Otherwise, I’ll have to copy and paste the manuscript back and forth, which is a bit of a pain.
Affordability
Lastly, not everyone has a spare $4000 laying around for self-publishing fees. It’s my goal to find the most affordable platforms that offer the biggest bang for your buck while writing a book.
#writing software#writing tools#programs for writers#Reedsy Editor#Atticus#Scrivener#Campfire Writing#AutoCrit#Grammarly
15 notes
·
View notes
Note
any tips or stuff youve learned along the way on making a headworld "series bible" of sorts?
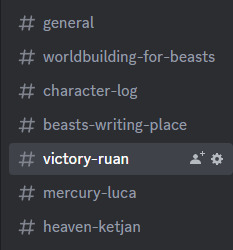
discord categories & channels (ft. the old working title of Where Hate Rules because i forgot to change it). i have a discord server with just me in it where I have a channel category for each writing project.
scroll down for a spreadsheet data blast
General - image dump, place to throw in new ideas so I don't forget them, plot points, etc
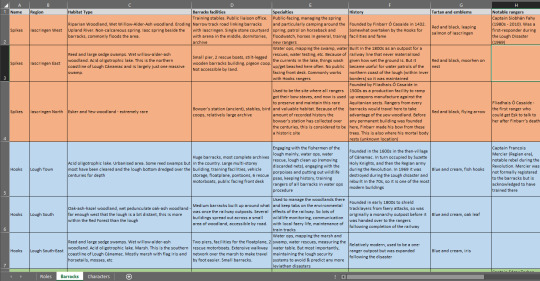
Worldbuilding - this is for stuff that's set in stone, not vague concepts. maps, diagrams, etc (i have a lot of diesel engine block diagrams and celestial illustrations in there as well as every holy beast)
Character log - literally just a list of characters. put in every character in the same format (i.e Name, Age, Profession, Physical Description, Hometown)
Writing Place - for prose. I write in libreoffice but when I'm out of the house on mobile or just doing test paragraphs they go here because I'd rather kill myself than use google docs ever. Each new piece of writing has an easily-searched title.
After this I have a channel for every main character. In here I put art relating to them, backstory, motivations, any random thoughts I have about them and so on. You don't wanna see how many of these I have for my Inver channel category lmaoo.
No, there are better ways to visualise Inver's absolutely massive series bible!
Discord is obviously only useful if you're online and I don't like storing so much shit in the cloud. And what if I need rows AND columns?
man i love spreadsheets. zoom in and get a load of that sweet sweet fossit guide.
this is me kissing microsoft excel with tongue to produce a datasheet about the modern-day ranger barracks in Inver (year 2017, Pascal's time) but any spreadsheet program will do. Even (gag) google sheets. I made this because in the modern era, rangers are ecologists! They participate in land management as well as faery relations.
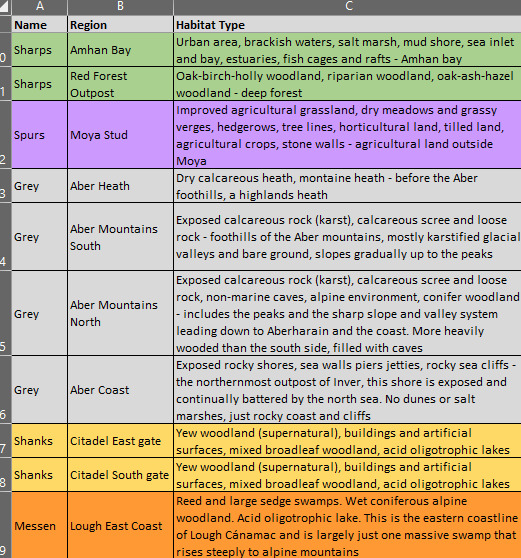
Okay so. First thing you want to do is freeze the top row so that it remains in place when you scroll. Then populate the boxes. Here, each ranger organisation (column 1) is given its own bg colour based on its main tartan colour so visual reference is easy. The characters tab is similar - frozen top row with basic categories, then a colour-coded list of rangers.
I have one of these for 1800s Inver as well! Luckily I only had to do the habitats once since they didn't change much over the years.
Hopefully that helps?? Basically: if you're lazy and need to generate ideas and data on the go, pick discord. If you want to be more specific, make a spreadsheet or 6.
169 notes
·
View notes
Note
I’m not sure if you’ve answered this before, but how do you do you pages? Do you use one program or several? I wanna use the format but I’m baffled XD
It’s so good! Also Pinemorant FTW!!🏳️🌈
I've briefly discussed my process in making issues, but I can go through the whole thing for anyone who is interested in making a comic like this. It's not complicated at all - I only use one program (technically two, if you count Google Docs), Medibang Paint Pro. It's free to download and I've used it for years, it's a medium-level digital art program.
I'll take a page from the last issue, 26, to demonstrate. So if you haven't read it yet, do that before reading this.
My first step, which is already completed for every issue, is to write a basic summary of the things I want to happen. If I have a specific dialogue I want to use I'll include, but normally it's just descriptions.

I don't always use everything from my summary, or I'll add things in the final written draft. You may notice a line about "he knew of some cat in Fire", which was about Cormorantpaw knowing of Rainhaze but not actually who he was. I took it out because I couldn't seamlessly work it into the conversation.
2. The stories themselves are written in Google Docs, in the format of any short fiction. My process is pretty short - I'll write out a rough draft, leave it alone for a day, then come back and clean it up. Here's the section from the page I'm showing.
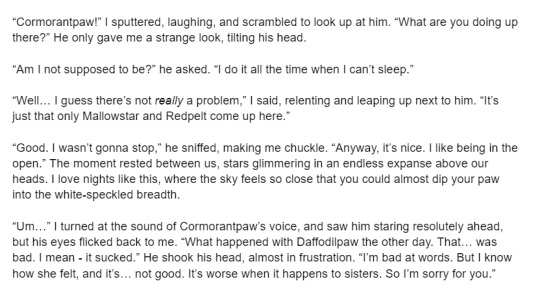
If I use speech bubbles on a page, like this one, sometimes there will be descriptive language in the story that's not in the page, like "I said, relenting and leaping up next to him."
3. My first compositing step is to lay down the text and sketches, so I know where everything goes and ensures the page flows nicely. Medibang has a feature called the "Text Tool", which is what I use to lay down text. I can't say my fonts exactly since they're mostly Korean characters, but they're part of the default Medibang font set.
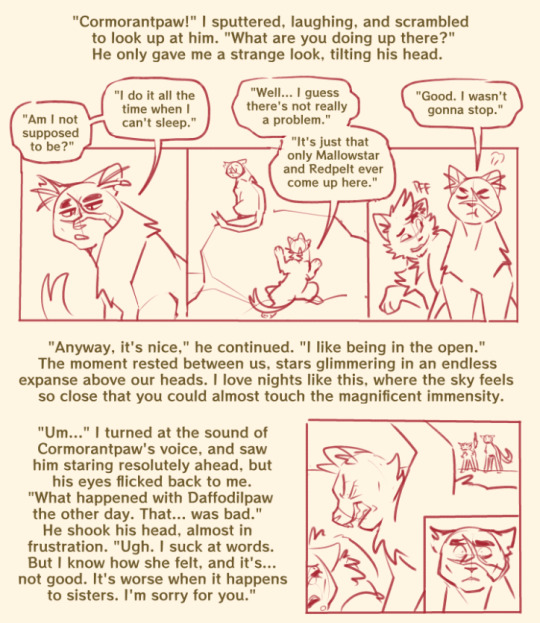
4. After this, I add lines and colors. It's pretty simple.
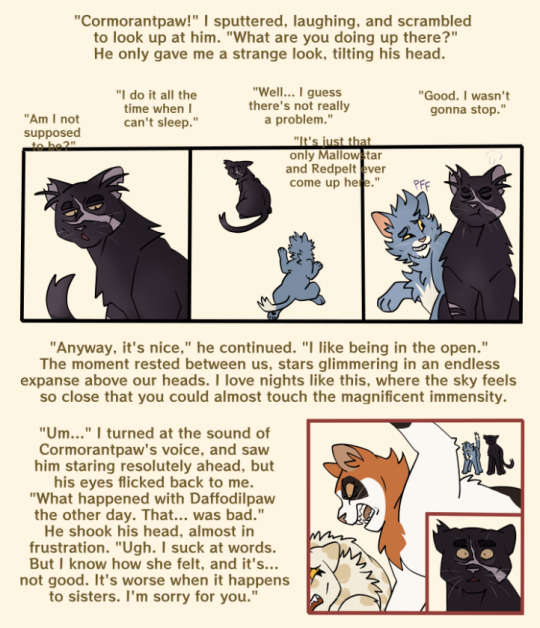
I have a specific color scheme for borderlines; black is normal, present drawings, reddish-pink is flashback, blue is fantasy/imagination.
5. After color, I draw the backgrounds. All of my backgrounds are painted using the Pen brush and the Watercolor (Wet) brush, sometimes with Acrylic or Chalk for texture.

6. My final step is to add a gradient multiply and overlay layer, since I don't cell shade or paint shade the characters. It saves a lot of time! I also add final cleanup like sound effects, whiskers, and speech bubbles, if they're needed.
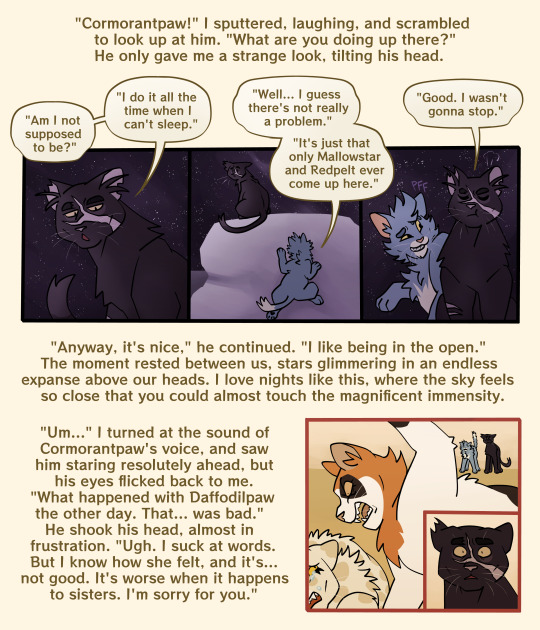
And that's a page done!
156 notes
·
View notes
Note
Absolute nerd question here -- since I'm sure you probably have SOMETHING approaching a lore bible, what program do you use for it? Confluence? OneNote? Private wiki? One bigass Word file (please tell me this is not the case)?
📜: I would LIKE to say it’s all in a helpful cross-linked wiki format, for legibility and internal references, but the reality is that it’s a chaotic sea of google documents, haphazardly and only barely-grouped by topic and folder, that we usually reference by searching specific phrases or terms we half-remember whenever we need to reference something. 😬
54 notes
·
View notes
Note
What do you use to write your scripts? Do you use a specific app/website? I'm kinda interested. Plus I'm thinking it could help with my Own AUs
As of right now, I just use google docs! But if you’re looking for software:
Celtx is a FANTASTIC scriptwriting program, helps you with formatting and is, in my opinion, super easy to use. But its free version has limits, I think you can only write a certain number of (three maybe?) scripts.
Trelby is a free scriptwriting program, less robust but it does the job.
I’ve never written a script using Scrivener, but I adore it for my prose work, so I imagine it’s great for scriptwriting, too! Scrivener is a super robust word processor and I highly recommend it for serious writers, though it is paid and can be a bit pricy. $60 USD normally, I bought it for around $30 USD when it went on sale for National Novel Writing Month (in November).
All that said, the program doesn’t make the artist! I mostly use google docs for my comic scripts because it’s easy to transfer between devices. Plus you can share if you’re collabing. All that standard google docs jazz. It helps that I’m already very familiar with how to format a script—and if anyone ever wants and scriptwriting tips fee free to let me know—but ultimately any program will work, so long as it’s a program you like! ^^
20 notes
·
View notes