#Basic CSS elements
Explore tagged Tumblr posts
Visit Tumblr Blog
Explore Tumblr blogs with no restrictions, modern design and the best experience.
Last Seen Tumblr Blogs


Fun Fact
US Tumblr user growth rate is estimated to slow down to 4.1%.
Text
Advanced CSS Techniques and Best Practices - A Comprehensive Guide by WebTutor.dev

Cascading Style Sheets (CSS) plays a crucial role in web development, allowing developers to bring life and style to their web pages. If you are looking to take your CSS skills to the next level, you're in the right place! In this advanced blog post, we will delve into the world of CSS, focusing on the comprehensive guide provided by Webtutor.dev in their CSS Introduction tutorial. Get ready to enhance your CSS knowledge and discover advanced techniques and best practices.
Optimizing CSS Performance: Techniques and Tools
Efficient CSS code is essential for maintaining fast-loading web pages. We'll explore advanced techniques to optimize CSS performance, such as minimizing file size, reducing render-blocking CSS, and utilizing CSS preprocessors. The Webtutor.dev guide will provide insights into performance optimization strategies and recommend helpful tools.
CSS Layouts: Flexbox and Grid
Modern CSS layout techniques, namely Flexbox and Grid, have revolutionized web design. We'll dive deep into these powerful tools, exploring their features, properties, and best use cases. The Webtutor.dev guide will offer practical examples and tutorials to help you master the art of creating flexible and responsive layouts.
Advanced Selectors and Pseudo-classes
CSS selectors allow you to target specific elements on a web page. We'll go beyond the basics and explore advanced selectors, including attribute selectors, sibling combinators, and pseudo-classes. The blog will highlight real-world scenarios where these selectors shine, enabling you to create targeted and dynamic styles.
CSS Transitions and Animations
Adding subtle animations and transitions can greatly enhance the user experience. We'll delve into CSS transitions and animations, covering advanced techniques such as keyframes, timing functions, and complex animations. The Webtutor.dev guide will provide practical examples and tips for creating smooth and visually appealing animations.
Customizing and Styling Form Elements
Forms are an integral part of web applications, and customizing their appearance can greatly improve usability and aesthetics. We'll explore advanced techniques for styling form elements using CSS, including styling checkboxes, radio buttons, dropdowns, and input fields. The blog will showcase creative examples and provide guidance for cross-browser compatibility.
Responsive Design: Advanced Media Queries and Breakpoints
Responsive design is essential for creating websites that adapt to different screen sizes. We'll dive into advanced media queries and breakpoints, enabling you to design fluid and responsive layouts for a variety of devices. The Webtutor.dev guide will offer tips for managing complex layouts and provide examples of responsive design patterns.
Cross-browser Compatibility and CSS Prefixing
Ensuring consistent rendering across different web browsers can be a challenge. We'll discuss advanced techniques for achieving cross-browser compatibility, including CSS prefixing, vendor-specific properties, and polyfills. The blog will provide insights into browser support tables and strategies to handle browser-specific quirks.
Conclusion
As we conclude our exploration of advanced CSS techniques and best practices with the guidance of Webtutor.dev's CSS Introduction guide, you're now equipped with the knowledge to take your CSS skills to new heights. Remember to experiment, practice, and stay updated with emerging CSS trends and techniques. With the expertise gained from this comprehensive guide, you'll be able to create stunning, performant, and responsive web designs. Happy coding!
#Learn Code for Free#Learn CSS Online#Free Online CSS Tutorial#Css Online Tutorial#CSS Introduction tutorial#Advanced CSS Techniques#CSS trends and techniques#Learn CSS selectors#Learn CSS Layouts#Modern CSS layout#Learn CSS Prefixing#Styling Form Elements#CSS elements online tutorial#CSS elements tutorial for beginners#CSS elements for web developers#CSS tags and elements#Learn CSS elements#CSS elements for web development tutorial#Basic CSS elements#CSS elements for beginners#CSS elements for websites
1 note
·
View note
Text
Working on my javascript for my web page. Turns out I have the perfect kind of setup to accomplish some of the project requirements, specifically with even handlers and user interactions
My website, conceptually, will load a different employee details page depending on what employee name is clicked on. But I need to load it dynamically (instead of hard-coding it) so that the user can add or delete employees & it'll be able to still load the relevant shit.
So! Only one employee details page, but depending on how it's loaded, it'll load a different employee's information. Still working on getting down Exactly how to do it (I'm thinking using URL parameters that'll read a different object depending on what ID is used)
It's entirely doable. In fact, it's probably extremely common to do in web pages. No one wants to hard-code information for every new object. Of course not. And thus the usefulness of dynamic javascript stuff.
I can do this. I can very much do this.
#speculation nation#i wasnt very good when i got home and i read fanfic for a while#then took a nap. and now im up again and Getting To Work.#i dont have to have this 100% perfect for final submission just yet. bc final submission isnt today.#but i need to have my final presentation over my thing done by noon (11 hours from now)#and im presenting TODAY. and part of that will be giving a live demo of my project website#so. i need to have all of the core functionality of my website down at the Very Least#might not be perfect yet. but by god if im gonna show up to my presentation with my website not working.#i need to have the employee list lead to employee details with personalized information displayed per employee#i need to create an add employee field that will Actually add an employee. using a form.#and that employee will need to show up on the list and have a new id and everything. the works.#need to set it up so that employees can be deleted. shouldnt be too much extra.#and it would be . interesting. to give an actual 'login' pop-up when someone clicks on the login button#with some kind of basic info as the login parameters. this cant be that hard to code.#the project requirements are: implement 5 distinct user interactions using javascript. at least 3 different eventhandlers#at least 5 different elements with which interaction will trigger an event handler. page modification & addition of new elements to pages#3 different ways of selecting elements. one selection returning collection of html elements with customized operations on each...#hm. customized operations on each... the example given is a todo list with different styles based on if an item is overdue or not#i wonder if my personalized detail page loading would count for this... i also have some extra info displayed for each#but i specifically want the employees to be displayed in the list uniformly. that's kinda like. The Thing.#actually im poking around on my web pages i made previously and i do quite enjoy what i set up before.#need to modify the CSS for the statistics page and employee details to make it in line with what i actually wanted for it#maybe put a background behind the footer text... i tried it before & it was iffy in how it displayed...#but it looks weird when it overlaps with a page's content. idk that's just me being particular again.#theres also data interchange as a requirement. but that should be easy if i set an initial employee list as a json file#good god im going to have to think of so much extra bullshit for these 10 made up employees#wah. this is going to be a lot of work. but. im going to do it. i just wont get very much sleep tonight.#that's ok tho. ive presented under worse conditions (cough my all nighter when i read 3gun vol 10 and cried my eyes out)#and this is going to be the last night like this of my schooling career. the very last one.#just gotta stay strong for one more night 💪💪💪
6 notes
·
View notes
Text
Honestly I recommend everyone learn just a littttle bit of CSS because it really is powerful and just makes bits and pieces of your internet experience more convenient.
Right now I'm cataloguing recipes I've really enjoyed, just trying to get them all in one place. Many of these are instagram recipes and, because I don't trust link rot (aka the possibility that the instagram link goes dead one day), I'm including a screenshot of the recipe along with the link.
But instagram on desktop... looks like this
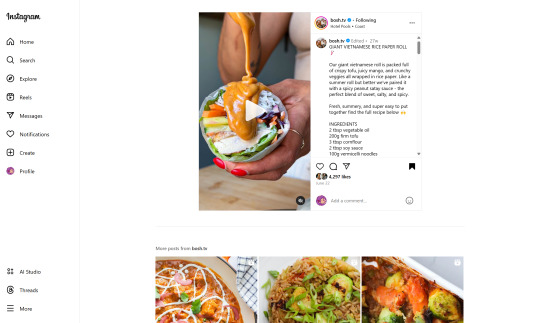
(Link, for credit. It's a good recipe)
I obviously could just copy-paste the recipe out of there. But a screenshot would be cleaner for how I'm cataloguing these.
And as-is, I'd have to scroll the whole height of that small right-side window about 4 times to fit it all.
But actually... I can just resize that div holding that whole right-side content
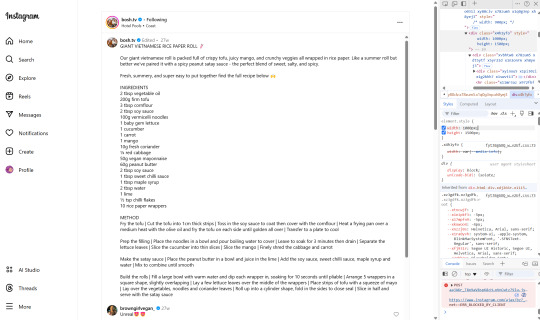
Basically I
hit f12 to open the dev tools
clicked the element finder
clicked on an element inside the recipe side
followed it up the tree until I found the element holding the whole recipe side (do this by hovering the div in the dev tools panel way on the right, then hovering upward and up until I find the element which is the highest up that still only contains the recipe-side content)
in the element.style part, set "width: 1000px" and "height: 1500px"
(I notice the width seems to still be less than 1000px, even though it got bigger)
likely suggests there's an element above it with a max-width set
go up the tree higher until I find the element with the max-width and uncheck that style
screenshot ready
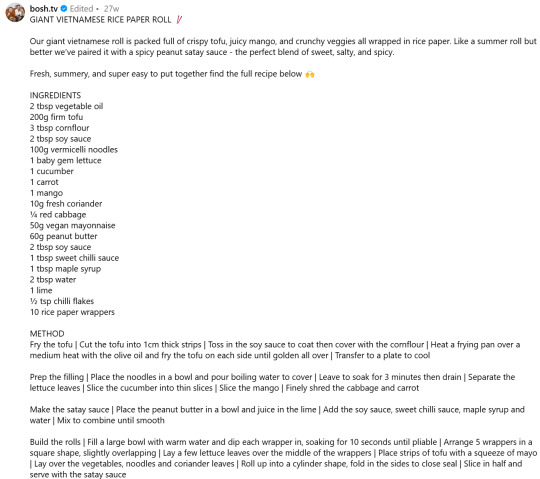
Maybe that sounded complicated but it took me probably 20-30 seconds
And this isn't just about screenshotting recipes like.
website with an annoying gif? select gif, delete gif
do you want a clean screenshot of a digital receipt for record-keeping without a large company banner or irrelevant information? delete unnecessary elements, adjust widths, screenshot
SOMETIMES, you can bypass paywalls if they're relying on something like overflow: hidden, or an overlay in the way, or some JS that runs (you can disable JS in the dev tools)
lost the jpg/png file you used for your profile picture and size doesn't totally matter? grab it from the img src while logged in. (you might even be able to find it in a bigger size by changing the url query parameters)
color contrast on an article really bad? find and change background color. find and change font color
want to make a funny fake screenshot without learning photoshop? just edit the page content in the dev tools
This isn't about like being good enough to write scripts or browser extensions. Really if you just have some basic HTML/CSS understanding a hat worth of tricks, you can make so many little adjustments in your favor.
683 notes
·
View notes
Text
Introduction To HTML
[Note: You need a text editor to do this. You can use Notepad or Text Edit. But it's so much better to download VS Code / Visual Studio Code. Save it with an extension of .html]
HTML stands for Hyper Text Markup Language
It is used to create webpages/websites.
It has a bunch of tags within angular brackets <....>
There are opening and closing tags for every element.
Opening tags look like this <......>
Closing tags look like this
The HTML code is within HTML tags. ( // code)
Here's the basic HTML code:
<!DOCTYPE html> <html> <head> <title> My First Webpage </title> </head> <body> <h1> Hello World </h1> <p> Sometimes even I have no idea <br> what in the world I am doing </p> </body> </html>
Line By Line Explanation :
<!DOCTYPE html> : Tells the browser it's an HTML document.
<html> </html> : All code resides inside these brackets.
<head> </head> : The tags within these don't appear on the webpage. It provides the information about the webpage.
<title> </title> : The title of webpage (It's not seen on the webpage. It will be seen on the address bar)
<body> </body> : Everything that appears on the webpage lies within these tags.
<h1> </h1> : It's basically a heading tag. It's the biggest heading.
Heading Tags are from <h1> to <h6>. H1 are the biggest. H6 are the smallest.
<p> </p> : This is the paragraph tag and everything that you want to write goes between this.
<br> : This is used for line breaks. There is no closing tag for this.
-------
Now, we'll cover some <Meta> tags.
Meta tags = Notes to the browser and search engines.
They don’t appear on the page.
They reside within the head tag
<head> <meta charset="UTF-8"> <meta name="viewport" content="width=device-width, initial-scale=1.0"> <meta name="description" content="Website Description"> <meta name="Author" content="Your Name"> <meta name="keywords" content="Websites Keywords"> </head>
Line By Line Explanation:
<meta charset="UTF-8"> : Makes sure all letters, symbols, and emojis show correctly.
<meta name="viewport" content="width=device-width, initial-scale=1.0"> : Makes your site look good on phones and tablets.
<meta name="description" content="Website Description"> : Describes your page to Google and helps people find it.
<meta name="author" content="Your Name"> : Says who created the page.
<meta name="keywords" content="Website's Keywords"> : Adds a few words to help search engines understand your topic.
_____
This is my first post in this topic. I'll be focusing on the practical side more than the actual theory, really. You will just have some short bullet points for most of these posts. The first 10 posts would be fully HTML. I'll continue with CSS later. And by 20th post, we'll build the first website. So, I hope it will be helpful :)
If I keep a coding post spree for like 2 weeks, would anyone be interested? o-o
#code#codeblr#css#html#javascript#python#studyblr#progblr#programming#comp sci#web design#web developers#web development#website design#webdev#website#tech#html css#learn to code#school#study motivation#study aesthetic#study blog#student#high school#studying#study tips#studyspo#website development#coding
100 notes
·
View notes
Text
Theres a way to do this with workskins! If you go to make a workskin on ao3, and then paste in this:
* { user-select: none; }
and then add that workskin to your fic, the text won't be able to be copied, and still works for screenreaders (at least the one I tested it with).
This can be turned off easily by disabling the creators style, but if the plagarists can't figure it out it would probably deter them well enough.
As annoying as it probably would be, I wonder if AO3 would allow special HTML to prevent copy-paste of my works. There are ways around it but it might just deter lazy content thieves
#honestly Id bet that these people are going to be lazy so should be pretty helpful haha#how it works is the asterisk basically means “any element” in css#the code ao3 uses for workskins#and then the properties you want it to have is in the curly brackets#and user-select: none stops your cursor from selecting it#but because its still available text screenreaders can still use it#tell me if you want to try this and need help setting it up 👌#im honestly surprised it worked ao3 workskins are so damn limiting#vio text
352 notes
·
View notes
Note
Hello! Your IF story inspired me to start my own IF game
Im thinking of using twine
And I would like to ask you if you had any tips or advice
Thank you!
Also side note I’m really excited and very interested in how this story is going to play out I already love the cast and can’t wait to see the rest!
OOoo thank you so much! I'm very flattered the game inspired you!
Twine has many different story formats, each with their own pros and cons. I personally use Sugarcube (I think next to Harlow, it is the most popular) so all my tips will be for Twine Sugarcube:
Basic tips:
Bookmark the Sugarcube V2 Document. This is your bible. It will have everything you need to use Twine. It's a daunting read, but I use it to troubleshoot when I forget how Macros work. I always have tab open for it.
Download a Twine Template. If you are brand new to Twine and making IFs, I heavily suggest downloading a template or two. Most of them come with tutorials and examples on how they work. Sometimes they even provide more helpful resources on Twine. I use Vahnya's Template II that I modified myself afterwards.
Study from pre-exisiting Twine IFs. Might be controversial, but I personally believe that diving in and seeing how other authors code and structure their stories helps a lot. Eventually you'll figure out a system and structure that works for you. It might not work for all games, but most Twine games can be downloaded and opened up in the twine editior. If you're worried about spoilers or upsetting people, feel free to download my game and see whats inside. I make multiple copies of the game, so any build I have out in the public is not the original build and therefore have no spoilers. I know it will look insane when you open it, but there's a method to the madness.
Writing and Planning:
Making an IF is no joke! Plan your story out, know your big variables, your branching routes and at least some part of your ending!! Try to stay as organized as possible. These projects and can will spiral out of control if you're not careful. I suggest having a giant excel sheet with tabs for important variables, chapter/scene breakdowns, wordcount and characters ect. Updating it will be a pain (that I am guilty of not doing) but will make developing easier. Even if you don't make a big project, its still good practise to do it.
#Stylesheet:
All the code in here relates to how the game looks. You can fiddle in there to configure the game to look how you want it to look. If you even want to see what element is tied to what ID code, the best thing to do is playtest the game (build >> play) and then leftclick and select "inspect element" you browser will open up the developer window and you see what elements are tied to what and even play around with the contents to test out CSS elements you like.
This website is a great resource on using CSS and other coding language. I personally used it many time to modify my game.
Helpful resources and Macros:
Chapel has made a LOT of custom macros that you can add to your game. You can find the list here.
But the most important one is the Pronoun Template. It might be confusing at first but one you understand how it work, its a great tool to have. You can even add gendered titles so that they work with the pronoun template.
Idrellegame is a great resource on coding in Twine. You can find the list here. It helped me out when starting out.
Exporting to Itch:
I never see people talk about Butler when it comes to uploading If games onto itch.io, so i'm doing it now.
What is Butler? Its a command-line tool that Itch made to upload your game onto Itch.io quickly and reliably.
The documentation is here. And I suggest coping and pasting the export codes onto a doc so you can use them for every update afterwards.
Here is a youtube tutorial you can follow along as well: https://www.youtube.com/watch?v=_JCJa5iWREM
I personally have the Butler on the Itchio.app so that's its always up to date.
Thats all I can offer off the top of my head, if you or anyone wants some help on something specifically, feel free to DM me or drop another ask in the inbox. Always happy to help. Working in twine is very overwhelming for newcomers.
60 notes
·
View notes
Text
YOU MUST MAKE A WEBSITE
Oh wow, look at that! YET ANOTHER post urging you to make a webbed site! What a completely new thing that people haven't made a thousand masterposts for already!!
• Making a website might look scary. It is Not.
At first, I too thought making a website was too much work. It really isn't! It turns out that all you need is
an HTML file,
a web hosting service and
w3schools tutorials,
and that's about it!
This post will point you towards these resources, and others I found useful while figuring out how to make a website.
• VERY QUICK EXPLANATIONS:
What's HTML and CSS?
HTML is the content of your webpage, the skeleton of it. What shows up in a webpage is what's written in the HTML file!
CSS is the way the HTML is styled; the colour of the background and the letters, the size of elements, the font, all that!
Do I absolutely NEED JavaScript for a website?
Not at all! You don't need to worry about learning it before getting started.
• What do I make a website for? What do I put in there?
ANYTHING AND ALMOST EVERYTHING. Here's some ideas for pages from a post of mine were I was very normal about websites:
You can make a page that's only pictures of your pets.
You can make an interactive adventure.
You can make your own academic blog full of your own essays or articles.
You can just post a ton of art or make a full music page.
You can make a blog and infodump eternally, give book reccs and reviews. You can host a thousand virtual pets and nothing else.
Upload entire books in a single html file. Make a wikipedia for your ocs. Make a fake site for a random fictional place (restaurant, hotel, whatever). You can make a thousand fanpages/shrines about your favorite media. You can upload your own webcomic and make it all like a fancy website and shit.
I could keep going but, for the sake of "brevity", I won't.
• WEBSITE EXAMPLES!
If I started listing the websites I know, this post would be bottomless. Here's only seven:
https://publictransit.neocities.org/ - A webbed site, for sure
https://ribo.zone/ - A personal site
https://leusyth.neocities.org/ - An art archive
https://solaria.neocities.org/ - Personal website with A Lot of stuff (it'll come up in a bit, because it offers web making resources)
https://hog.neocities.org/ - The Hogsite
https://thegardenofmadeline.neocities.org/ - Another personal site! It also has a web resources page and has made another masterpost like this one (but better)
https://spiders.neocities.org/ - My own website, which must be weird to see in mobile . sorry
• You've convinced me. I want a webbed site. Where do I start?
https://neocities.org/
FIRST OF ALL: Neocities. It is a free web hosting service, and it's the one I and the sites I linked use!
When I first started, my website was a black page with red letters and a drawing, and nothing else! It was like that for a month, till i started picking up on how to do things.
Here's what helped me get an idea of how to make things work:
https://sadgrl.online/learn/articles/beginners-guide-neocities
An absolute beginners guide to neocities -- while when you make an account there you get a tutorial page from the site, this one's extra support for that.
https://www.w3schools.com/
Learn HTML, CSS, JavaScript and MANY other coding things for free. All the tutorial/reference pages have live testing windows for you to mess with!! helped me a LOT while figuring this stuff out!
https://htmlcheatsheet.com/
https://htmlcheatsheet.com/css/
Cheatsheets for HTML and CSS, respectively. It includes a JavaScript one too!
https://sadgrl.online/webmastery/
Sadgrl's webmastery resources! Also includes the next resource listed here:
https://sadgrl.online/projects/layout-builder/
Sadgrl's layout builder; not a lot of customization at a first glance, but I've seen wildly different websites all using it as a base, plus it works using CSS Flexbox, so it generates a responsive layout!
(basically, a responsive layout is one that translates well in different sized screens)
https://www.tumblr.com/fysa/728086939730919424/wikitable-code?source=share
Tumblr user fysa made this layout imitating a wiki page!
https://brackets.io/
At some point, you might want to do things outside the Neocities code editor and get one outside the site. I recommend Brackets, because my old as fuck computer can run that and absolutely nothing else apparently, and it works wonderfully! Though I recommend either turning off the code autocomplete or using it after a good while of already using the Neocities code editor, so you get used to coding on your own.
http://www.unit-conversion.info/texttools/text-to-html/
Turn your text into HTML code! i use this kind of pages for my lengthy blog entries that I don't feel like formatting myself.
https://imagecompressor.com/
COMPRESS YOUR IMAGES.
The heavier an image is, the more your site weighs and the more time your page will spend loading. You don't want that, specially if your site is heavy on graphics. This might help!
https://solaria.neocities.org/guides
Some CSS, JavaScript and Accessibility guides! Worth checking out!
https://eloquentjavascript.net/
This is a free, interactive book for learning JavaScript! NOTE: It is very intuitive, but JavaScript is HARD!! I still haven't learned much of it, and my website does fine without so don't worry if you end up not doing much with it. It's still useful + the exercises are fun.
And now, accessories!
• Silly stuff for your page :]
https://gifypet.neocities.org/
Make a virtual pet, copy the code and paste it in your HTML file! You'll get a little guy in your webbed site :]
https://www.wikplayer.com/
Music player for your website!
http://www.mf2fm.com/rv/
JavaScript silly effects for your site :]
https://blinkies.neocities.org/geoblinkies
Blinkie search engine!
https://www.cbox.ws/
Add a chatbox to your site!!
https://momg.neocities.org/
Infinite gallery of gifs. i've spent hours in there looking at moving pictures and out of them all, the ONLY gif i actually ended up using on my site was a rotating tomato slice. it is still there. trapped.
https://wrender.neocities.org/tarotinstructions
A widget that gives you a random tarot card!
https://www.websudoku.com/widget.php
Sudoku widget!
That's about it for now! I don't know how to end this!!! Remember to have fun and google everything you don't know :]
625 notes
·
View notes
Text
Edgaring time!
Tutorial on how to make your own responsive Edgar :D I will try to explain it in really basic terms, like you’ve never touched a puter (which if you’re making this… I’m sure you’ve touched plenty of computers amirite??? EL APLAUSO SEÑOOOREEES).
If you have some experience I tried to highlight the most important things so you won’t have to read everything, this is literally building a website but easier.
I will only show how to make him move like this:
Disclaimer: I’m a yapper.
Choosing an engine First of all you’ll need something that will allow you to display a responsive background, I used LivelyWallpaper since it’s free and open-source (we love open-source).
Choosing an IDE Next is having any IDE to make some silly code! (Unless you can rawdog code… Which would be honestly impressive and you need to slide in my DMs and we will make out) I use Visual Studio!!!
So now that we have those two things we just need to set up the structure we will use.
Project structure
We will now create our project, which I will call “Edgar”, we will include some things inside as follows:
Edgar
img (folder that will contain images) - thumbnail.png (I literally just have a png of his face :]) - [some svgs…]
face.js (script that will make him interactive)
index.html (script that structures his face!)
LivelyInfo,json (script that LivelyWallpaper uses to display your new wallpaper)
style.css (script we will use to paint him!)
All of those scripts are just literally like a “.txt” file but instead of “.txt” we use “.js”, “.html”, etc… You know? We just write stuff and tell the puter it’s in “.{language}”, nothing fancy.
index.html
Basically the way you build his silly little face! Here’s the code:
<!doctype html> <html> <head> <meta charset="utf-8"> <title>Face!</title> <link rel = "stylesheet" type = "text/css" href = "style.css"> </head> <body> <div class="area"> <div class="face"> <div class="eyes"> <div class="eyeR"></div> <div class="eyeL"></div> </div> <div class="mouth"></div> </div> </div> <script src="face.js"></script> </body> </html>
Ok so now some of you will be thinking “Why would you use eyeR and eyeL? Just use eye!“ and you’d be right but I’m a dummy who couldn’t handle making two different instances of the same object and altering it… It’s scary but if you can do it, please please please teach me ;0;!!!
Area comes in handy to the caress function we will implement in the next module (script)! It encapsulates face.
Face just contains the elements inside, trust me it made sense but i can’t remember why…
Eyes contains each different eye, probably here because I wanted to reuse code and it did not work out and when I kept going I was too scared to restructure it.
EyeR/EyeL are the eyes! We will paint them in the “.css”.
Mouth, like the eyeR/eyeL, will be used in the “.css”.
face.js
Here I will only show how to make it so he feels you mouse on top of him! Too ashamed of how I coded the kisses… Believe me, it’s not pretty at all and so sooo repetitive…
// ######################### // ## CONSTANTS ## // ######################### const area = document.querySelector('.area'); const face = document.querySelector('.face'); const mouth = document.querySelector('.mouth'); const eyeL = document.querySelector('.eyeL'); const eyeR = document.querySelector('.eyeR'); // ######################### // ## CARESS HIM ## // ######################### // When the mouse enters the area the face will follow the mouse area.addEventListener('mousemove', (event) => { const rect = area.getBoundingClientRect(); const x = event.clientX - rect.left; const y = event.clientY - rect.top; face.style.left = `${x}px`; face.style.top = `${y}px`; }); // When the mouse leaves the area the face will return to the original position area.addEventListener('mouseout', () => { face.style.left = '50%'; face.style.top = '50%'; });
God bless my past self for explaining it so well, but tbf it’s really simple,,
style.css
body { padding: 0; margin: 0; background: #c9c368; overflow: hidden; } .area { width: 55vh; height: 55vh; position: absolute; top: 50%; left: 50%; transform: translate(-50%,-50%); background: transparent; display: flex; } .face { width: 55vh; height: 55vh; position: absolute; top: 50%; left: 50%; transform: translate(-50%,-50%); background: transparent; display: flex; justify-content: center; align-items: center; transition: 0.5s ease-out; } .mouth { width: 75vh; height: 70vh; position: absolute; bottom: 5vh; background: transparent; border-radius: 100%; border: 1vh solid #000; border-color: transparent transparent black transparent; pointer-events: none; animation: mouth-sad 3s 420s forwards step-end; } .face:hover .mouth { animation: mouth-happy 0.5s forwards; } .eyes { position: relative; bottom: 27%; display: flex; } .eyes .eyeR { position: relative; width: 13vh; height: 13vh; display: block; background: black; margin-right: 11vh; border-radius: 50%; transition: 1s ease } .face:hover .eyeR { transform: translateY(10vh); border-radius: 20px 100% 20px 100%; } .eyes .eyeL { position: relative; width: 13vh; height: 13vh; display: block; background: black; margin-left: 11vh; border-radius: 50%; transition: 1s ease; } .face:hover .eyeL { transform: translateY(10vh); border-radius: 100% 20px 100% 20px; } @keyframes mouth-happy { 0% { background-color: transparent; height: 70vh; width: 75vh; } 100% { border-radius: 0 0 25% 25%; transform: translateY(-10vh); } } @keyframes mouth-sad { 12.5%{ height: 35vh; width: 67vh; } 25% { height: 10vh; width: 60vh; } 37.5% { width: 53vh; border-radius: 0%; border-bottom-color: black; } 50% { width: 60vh; height: 10vh; transform: translateY(11vh); border-radius: 100%; border-color: black transparent transparent transparent; } 62.5% { width: 64vh; height: 20vh; transform: translateY(21vh); } 75% { width: 69vh; height: 40vh; transform: translateY(41vh); } 87.5% { width: 75vh; height: 70vh; transform: translateY(71vh); } 100% { width: 77vh; height: 90vh; border-color: black transparent transparent transparent; transform: translateY(91vh); } }
I didn’t show it but this also makes it so if you don’t pay attention to him he will get sad (mouth-sad, tried to make it as accurate to the movie as possible, that’s why it’s choppy!)
The .hover is what makes him go like a creature when you hover over him, if you want to change it just… Change it! If you’d rather him always have the same expression, delete it!
Anyway, lots of easy stuff, lots of code that I didn’t reuse and I probably should’ve (the eyes!!! Can someone please tell me a way I can just… Mirror the other or something…? There must be a way!!!) So now this is when we do a thinking exercise in which you think about me as like someone who is kind of dumb and take some pity on me.
LivelyInfo.json
{ "AppVersion": "1.0.0.0", "Title": "Edgar", "Thumbnail": "img/thumbnail.png", "Preview": "thumbnail.png", "Desc": "It's me!.", "Author": "Champagne?", "License": "", "Type": 1, "FileName": "index.html" }
Easy stuff!!!
Conclusion
This could've been a project on git but i'm not ready and we're already finished. I'm curious about how this will be seen on mobile and PC,,, i'm not one to post here.
Sorry if I rambled too much or if i didn't explain something good enough! If you have any doubts please don't hesitate to ask.
And if you add any functionality to my code or see improvements please please please tell me, or make your own post!
98 notes
·
View notes
Text
It is very funny learning the absolute basics of various coding languages having approximate knowledge of many things, because I would be the first to tell you I cannot code web pages and my HTML is extremely scattershot, but I had to read a basic tutorial for both HTML and CSS this week and was immediately like, "Ohhhhh. Everything makes sense now." I had a ton of random elements but NO syntax so the moment the basic syntax was explained, I was suddenly like, ah. I can redesign my website now. GREAT.
#very thrilled about it cuz wordpress GUI is a fucking nightmare to use these days#it will be simpler but it won't fucking break the minute I want to change something. and frankly the layout will look better#cuz jesus christ#megs vs mlis
32 notes
·
View notes
Text
NEW EDITOR 101: A GUIDE FOR GIFMAKERS by v @shangs
Hi friends! I know I said I would do this way back in April/May when this change was announced but I've been massively busy lately so thank you all for being patient with me :)
Based on the results of this poll, I will be trying my level best to help make a guide for gifmakers to best deal with any problems that have been present with the new editor. However, it's worth noting that I have personally not experienced any of these problems myself and I have no record of any problems from other people that I could send to staff and get guidance on, so for some of these issues I will unfortunately be a broken record.
That being said, I have been using the new editor for a few months now and it hasn't been too bad. So don't be discouraged by the new editor if you still love to make gifs and share them. You may need to adapt a bit, but it's doable!
This is meant to be comprehensive and will be explanation and image heavy. Full guide under the cut.
CONTENTS:
What is the new editor?
Steps to take before posting
Making a post
Troubleshooting
01. WHAT IS THE NEW EDITOR?
Some of you may be asking yourselves what the point of the new editor even is and why it's being implemented in the first place when we already had a (mostly) functional editor. My very limited understanding of it as a CS student is app compatibility and flexibility. I'm not totally clear on the details nor am I 100% certain this is the case, but NPF posts (basically, posts made with the "new editor") first started with the mobile app. I'm unsure if the different post types were simply too unwieldy to transfer to the app - having to make a whole bunch of post types when with the new editor you can now have posts with any elements you want without the rigidity of a set post type - or if it was simply not able to be implemented, but the apps have always used NPF. The majority of Tumblr users are coming from the mobile apps. Then it became a case of having the legacy editor for the web users (which were fewer in number) and the new NPF editor for everyone else. That takes resources to keep around and it's pretty inefficient. Naturally the older editor that was used by less people was going to get the axe, especially since you couldn't tell on mobile that there was even a difference between NPF or legacy posts.
So now here we are and the posts are NPF. This means they're in "Neue Post Format." Basically, every post you make is by default a text post, containing "blocks" of other media - as gifmakers we will primarily be dealing with photos.
I understand that it's frustrating to many to see "our gifs are now rendered as text posts" and ask WHY it's happening when photos should logically be rendered as photo posts - but the fact is, there's now no real delineation between a "text post" and a "photo post." The reason NPF posts are now "text posts" is because that's how they are rendered for desktop themes, not because everyone is going to see your post as text and your gifs are going to be compressed into the quality of a potato (though I know some have seen this issue - more on that later.)
02. STEPS TO TAKE BEFORE POSTING
The long and short of it is that you may have to update your theme. More detail here for those who are interested, but check that your theme supports "new editor posts" or "NPF posts" AND that this is true for original posts (you can read more about why in this ask and, although this may be a bit time-consuming, test it out on your blog). I can say with certainty that my second theme Cygnus supports original NPF posts. This is NOT true of my first theme, though.
You can try to add the NPF Fix by @glenthemes to your own theme (beware if you don't know HTML/CSS) or try this tip by @burningblake for original posts.
Feel free to add theme makers with fully NPF-compatible themes in the notes! I have been happily using my own theme so I can't say to what degree others' themes are NPF-friendly.
03. MAKING A POST
If you're sticking around to post on the new editor and you have trouble ordering your gifs around, here's a little guide on how to post.
If I click on "Photo" from web and open up the editor, here's how it looks:
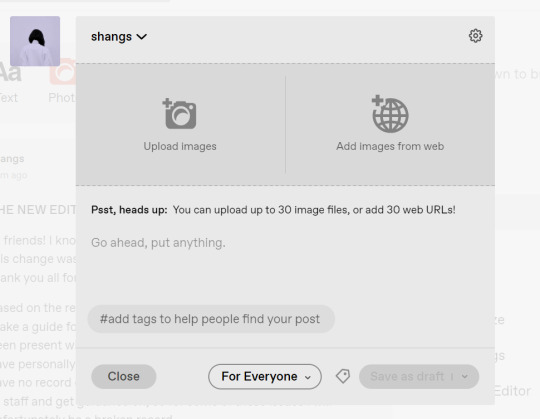
I went ahead and added three full-width gifs and the editor put them in like so:
You'll most likely also have to order your gifs around in the way you want them. You can go ahead and hover over your gifs to see the button to orient them (the four dots in the top left corner) and the button for an image description (the three dots in the bottom right corner). I've attached images of all three below:


If you hold the orientation button, move your gif around until you see the blue line that shows where your gif will end up in the spot that you want it. For example, I wanted to move the second gif below the first one, so I oriented it so that the blue line would show the marker between the two gifs:

Now my gifs are oriented nicely! Of course, this is a simpler layout, but the principles still hold.
If you save your gifs as a draft and reopen them or you just notice a large gap like this in between your gifs when you're in the editor, don't worry.

This will not show up in dash view or on a desktop theme that supports original NPF posts. For example, this is how the gifs' gap (without modification) looked in my desktop theme:

With your gifs ordered, the final step is to add alt text. You can read more about alt text and why you should use it here. (Feel free to ignore the sections about the captions on the legacy editor since it is no longer relevant. It's also unnecessary to clearly mark descriptions if they're not in the caption of your post because they will clearly show up under "ALT" on Tumblr.)
If you click the three dots in the bottom right corner as seen above, and click "update image description:"

You can add the description you like and click "update." Your photos' alt text will show up under the "ALT" bubble on Tumblr. This is generally a good practice to get into to make your content more accessible, so I hope you guys will consider using alt text regularly :)
Also, I've noticed that in the editor, if you go back and edit something it will take some time to show up. You may have to refresh the page or load it again after some time, but your edits should be there. I would not go back and edit posts again if you see your posts haven't shown up. I also advise against editing your posts on mobile because it's easier to make a mistake.
And there you go, you've successfully made a post with the new editor!
04. TROUBLESHOOTING
I'm sure you've all been waiting for this. Unfortunately I am probably going to be extremely unhelpful if the editor hasn't been refined in the last few months for those experiencing issues. I'm going to go in the categories that I listed out in my original poll, but keep in mind that I haven't personally seen any of these issues on my end so I haven't been able to contact staff with any evidence that this happened other than my poll.
Dashboard view quality issues: I haven't noticed this issue. I'm not sure if this has been fixed since the original poll was posted. If you're experiencing this issue, this is not something I know how to fix so I would contact staff with screenshots of the issue.
Desktop theme side padding: As noted before, this is a theme issue. If you change themes to something that is NPF-compatible with original posts, there shouldn't be any more issues here.
Small gifs on mobile: In my experience this was happening regardless of what editor was used; it's a bug that seems to have been fixed since this poll was created. If you're still experiencing it, at the risk of sounding like a broken record, I would advise contacting staff.
New editor doesn't accept gifs of size 9.8MB < x < 10MB: I haven't experienced this issue so I would say the only workaround would be to either trim the size of your gif so that it is under 9.8MB or whatever threshold seems to be the cutoff or contact staff (I am so sorry for constantly having to suggest this 😭 unfortunately there's no trick I can offer because the new editor has been taking all my gifs just fine)
Logistical issues ordering gifsets: I hope this guide has been able to answer the majority of questions and shed some light on some of the more buggy behaviors of the new editor, but if you have any more specific questions you can feel free to shoot me an ask!
HTML issues / colored text: Unfortunately it seems colored text may be deprecated entirely? This could be for accessibility purposes because I believe screen readers would read out every single letter of gradient text in captions which I imagine can get quite frustrating for users of this technology. I recommend just using the normal rich text editor. If you want small text, you can highlight and click the <s> button!
Other: If it seems like something I may be able to answer, please feel free to ask me. Otherwise... hound staff 😭
Here's where you can hound staff, btw. If you're having major issues I would advise you guys to submit support tickets. That way if there are any widespread bugs, staff will hopefully be able to fix them.
I hope this guide was helpful to you guys in dealing with the new editor, and happy giffing <3
#gif tutorial#new editor tutorial#completeresources#userphotoshop#resourcemarket#userrobin#userbells#arthurpendragonns#ughmerlin#userbecca#usersameera#usermarsy#alielook#tuserlucie#tutorial
561 notes
·
View notes
Text
Hey you
all of you complaining about tumblr live

Seethe and cope 😎
Okay but seriously
Get yourself the Stylus extension For Firefox users: https://addons.mozilla.org/en-GB/firefox/addon/styl-us/ and for everyone else: https://chrome.google.com/webstore/detail/stylus/clngdbkpkpeebahjckkjfobafhncgmne
Get the Old Tumblr Dashboard Style: https://userstyles.world/style/11286/old-tumblr-dashboard-2023
You should get this stuff even if you don't plan to remove tumblr live :3 Now here is where the magic comes from:
Stylus allows you to add custom css styles to websites, and you can edit themes made by other people to fit your needs!

See that little fucker? How about we fuckin g kill it?
Press f12 to open the Developer Tools (or however it is called lmao)
Click on this little guy

Now you can select an element on the website, and it will show where it is in the html!
3. Point
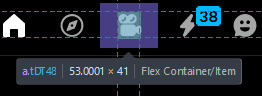
Click on it, and now we will see something like this in the inspector!

Collapse a bunch of this stuff, since here we only care about the list items, or <li>
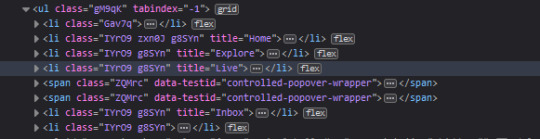
These are the different buttons in the banner
Now, how do we fucking kill that guy?
There are a number of ways to do this, so let's start with the simplest one
Delete
Just select the list item that has the title "Live" and press delete!

So it is gone now, right?
Well... not really. If you refresh the page, it is back. Which makes sense, since the only thing we did is remove that part of the "code" (if you can call html "code"), but when we refreshed it, the server gave us a version of the site that obviously had the button still there.
So what is a smarter way to get rid of it?
While you can't really delete a specific part of the site with just css, you can hide it! To do that, all you have to do is apply the style display: none;

Like that! While it doesn't fix the problem with the refresh, it brings us closer to the solution.
Remember when we got Stylus? yeah!
Go inside of it (😳), and inside the Old tumblr dashboard theme (😳😳), and now we just need to apply the css style of "remove that fucker" to the specific list item. How do we do that, since we can't add it directly into html? We use the attribute selector, and we look for title="Live"!
Where do I write this????
Well, css applies the styles from top to bottom of the style sheet (usually, this post is already too long), and you see how the list item has a few classes assigned to it? It so happens that they also modify the display property, so we have to override it by putting our selector after those in the css sheet... so basically you can just write the thingie at the end 😅
Here is how the attribute selector works!

the .IYr09 part is that specific class, so that if there is ever something on this page that has the title="Live" but isn't what we are looking for, it won't apply there (You don't need to do this, but whatever). The attribute selector is written in the square brackets, and you just... write the attribute that you are looking for there ;P
(I also did the same for the Explore button, but that can be an exercise for the interested ;P)
And now, BEHOLD

(How am I so popular that I got dms during the making of this >.<)
And it will stay like this, forever*
*except if something happens to the addon, theme, css of it or whatever, but you get the point!
#this post is too long#I could've just given the solution immediately#but this is funnier >:3#(am I on the autism spectrum? I kinda feel like it is the case tbh >.<)#Like this isn't how you write tutorials I think#whatever#css#tumblr live#fuck tumblr live#removing tumblr live#get stylus#get firefox too#idk at this point#196#pin
259 notes
·
View notes
Text
JavaScript Fundamentals
I have recently completed a course that extensively covered the foundational principles of JavaScript, and I'm here to provide you with a concise overview. This post will enable you to grasp the fundamental concepts without the need to enroll in the course.
Prerequisites: Fundamental HTML Comprehension
Before delving into JavaScript, it is imperative to possess a basic understanding of HTML. Knowledge of CSS, while beneficial, is not mandatory, as it primarily pertains to the visual aspects of web pages.
Manipulating HTML Text with JavaScript
When it comes to modifying text using JavaScript, the innerHTML function is the go-to tool. Let's break down the process step by step:
Initiate the process by selecting the HTML element whose text you intend to modify. This selection can be accomplished by employing various DOM (Document Object Model) element selection methods offered by JavaScript ( I'll talk about them in a second )
Optionally, you can store the selected element in a variable (we'll get into variables shortly).
Employ the innerHTML function to substitute the existing text with your desired content.
Element Selection: IDs or Classes
You have the opportunity to enhance your element selection by assigning either an ID or a class:
Assigning an ID:
To uniquely identify an element, the .getElementById() function is your go-to choice. Here's an example in HTML and JavaScript:
HTML:
<button id="btnSearch">Search</button>
JavaScript:
document.getElementById("btnSearch").innerHTML = "Not working";
This code snippet will alter the text within the button from "Search" to "Not working."
Assigning a Class:
For broader selections of elements, you can assign a class and use the .querySelector() function. Keep in mind that this method can select multiple elements, in contrast to .getElementById(), which typically focuses on a single element and is more commonly used.
Variables
Let's keep it simple: What's a variable? Well, think of it as a container where you can put different things—these things could be numbers, words, characters, or even true/false values. These various types of stuff that you can store in a variable are called DATA TYPES.
Now, some programming languages are pretty strict about mentioning these data types. Take C and C++, for instance; they're what we call "Typed" languages, and they really care about knowing the data type.
But here's where JavaScript stands out: When you create a variable in JavaScript, you don't have to specify its data type or anything like that. JavaScript is pretty laid-back when it comes to data types.
So, how do you make a variable in JavaScript?
There are three main keywords you need to know: var, let, and const.
But if you're just starting out, here's what you need to know :
const: Use this when you want your variable to stay the same, not change. It's like a constant, as the name suggests.
var and let: These are the ones you use when you're planning to change the value stored in the variable as your program runs.
Note that var is rarely used nowadays
Check this out:
let Variable1 = 3; var Variable2 = "This is a string"; const Variable3 = true;
Notice how we can store all sorts of stuff without worrying about declaring their types in JavaScript. It's one of the reasons JavaScript is a popular choice for beginners.
Arrays
Arrays are a basically just a group of variables stored in one container ( A container is what ? a variable , So an array is also just a variable ) , now again since JavaScript is easy with datatypes it is not considered an error to store variables of different datatypeslet
for example :
myArray = [1 , 2, 4 , "Name"];
Objects in JavaScript
Objects play a significant role, especially in the world of OOP : object-oriented programming (which we'll talk about in another post). For now, let's focus on understanding what objects are and how they mirror real-world objects.
In our everyday world, objects possess characteristics or properties. Take a car, for instance; it boasts attributes like its color, speed rate, and make.
So, how do we represent a car in JavaScript? A regular variable won't quite cut it, and neither will an array. The answer lies in using an object.
const Car = { color: "red", speedRate: "200km", make: "Range Rover" };
In this example, we've encapsulated the car's properties within an object called Car. This structure is not only intuitive but also aligns with how real-world objects are conceptualized and represented in JavaScript.
Variable Scope
There are three variable scopes : global scope, local scope, and function scope. Let's break it down in plain terms.
Global Scope: Think of global scope as the wild west of variables. When you declare a variable here, it's like planting a flag that says, "I'm available everywhere in the code!" No need for any special enclosures or curly braces.
Local Scope: Picture local scope as a cozy room with its own rules. When you create a variable inside a pair of curly braces, like this:
//Not here { const Variable1 = true; //Variable1 can only be used here } //Neither here
Variable1 becomes a room-bound secret. You can't use it anywhere else in the code
Function Scope: When you declare a variable inside a function (don't worry, we'll cover functions soon), it's a member of an exclusive group. This means you can only name-drop it within that function. .
So, variable scope is all about where you place your variables and where they're allowed to be used.
Adding in user input
To capture user input in JavaScript, you can use various methods and techniques depending on the context, such as web forms, text fields, or command-line interfaces.We’ll only talk for now about HTML forms
HTML Forms:
You can create HTML forms using the <;form> element and capture user input using various input elements like text fields, radio buttons, checkboxes, and more.
JavaScript can then be used to access and process the user's input.
Functions in JavaScript
Think of a function as a helpful individual with a specific task. Whenever you need that task performed in your code, you simply call upon this capable "person" to get the job done.
Declaring a Function: Declaring a function is straightforward. You define it like this:
function functionName() { // The code that defines what the function does goes here }
Then, when you need the function to carry out its task, you call it by name:
functionName();
Using Functions in HTML: Functions are often used in HTML to handle events. But what exactly is an event? It's when a user interacts with something on a web page, like clicking a button, following a link, or interacting with an image.
Event Handling: JavaScript helps us determine what should happen when a user interacts with elements on a webpage. Here's how you might use it:
HTML:
<button onclick="FunctionName()" id="btnEvent">Click me</button>
JavaScript:
function FunctionName() { var toHandle = document.getElementById("btnEvent"); // Once I've identified my button, I can specify how to handle the click event here }
In this example, when the user clicks the "Click me" button, the JavaScript function FunctionName() is called, and you can specify how to handle that event within the function.
Arrow functions : is a type of functions that was introduced in ES6, you can read more about it in the link below
If Statements
These simple constructs come into play in your code, no matter how advanced your projects become.
If Statements Demystified: Let's break it down. "If" is precisely what it sounds like: if something holds true, then do something. You define a condition within parentheses, and if that condition evaluates to true, the code enclosed in curly braces executes.
If statements are your go-to tool for handling various scenarios, including error management, addressing specific cases, and more.
Writing an If Statement:
if (Variable === "help") { console.log("Send help"); // The console.log() function outputs information to the console }
In this example, if the condition inside the parentheses (in this case, checking if the Variable is equal to "help") is true, the code within the curly braces gets executed.
Else and Else If Statements
Else: When the "if" condition is not met, the "else" part kicks in. It serves as a safety net, ensuring your program doesn't break and allowing you to specify what should happen in such cases.
Else If: Now, what if you need to check for a particular condition within a series of possibilities? That's where "else if" steps in. It allows you to examine and handle specific cases that require unique treatment.
Styling Elements with JavaScript
This is the beginner-friendly approach to changing the style of elements in JavaScript. It involves selecting an element using its ID or class, then making use of the .style.property method to set the desired styling property.
Example:
Let's say you have an HTML button with the ID "myButton," and you want to change its background color to red using JavaScript. Here's how you can do it:
HTML: <button id="myButton">Click me</button>
JavaScript:
// Select the button element by its ID const buttonElement = document.getElementById("myButton"); // Change the background color property buttonElement.style.backgroundColor = "red";
In this example, we first select the button element by its ID using document.getElementById("myButton"). Then, we use .style.backgroundColor to set the background color property of the button to "red." This straightforward approach allows you to dynamically change the style of HTML elements using JavaScript.
#studyblr#code#codeblr#css#html#javascript#java development company#python#study#progblr#programming#studying#comp sci#web design#web developers#web development#website design#ui ux design#reactjs#webdev#website#tech
400 notes
·
View notes
Text
there are some work-arounds in CSS that seem so ridiculous it feels illegal.
so in CSS. selectors can be really picky with only wanting to cascade down from an element, or pick sibling elements (adjacent ones) but only after the selected one, or what-have-you - it constantly feels like you're wrestling with it if you want to do something slightly out of the way.
but you can also just apply pseudo selector to the entire HTML
so using the ":has" selector, if it finds a checkbox with this id in the entire HTML it will apply these settings


you can basically just make buttons that alter everything without any javascript like this??? this is ridiculous???
12 notes
·
View notes
Text
website update log #24 (April 13th, 2025)
I FINISHED RECREATING THE WEBSITE !!!

the look is more or less the same, with subtle differences and the removal of the image carousel (for now) BUT EVERYTHING IN THE HTML AND CSS FILE HAS BEEN CHANGED!!
i made a system for me to edit and add panels really easily, where i used classes for the panel design and reusable elements (ie “long-box” for really long elements like the github chart, and “three-boxes” for three panels in one row), and IDS for specific non-reusable elements like the navbar and the comment section.
now that editing the website became more flexible (compared to the previous version atleast), i FINALLY CREATED A GOOD LOOKING MOBILE VERSION OF MY WEBSITE WITH BOTTOM NAVBARS AND STUFF

i had a hard time making the previous version compatible to mobile, so it just doesnt look that great…

and besides the one before this, which looks really decent and actually mobile optimized,

it just gets worse and worse…


when i created these websites i never had “making it look great for mobile” in my mind at ALL..but when i found out how important it is for people to have a good-ish mobile experience, i gave it a try lol
ANYWAY!! NOW THAT THATS OUT OF THE WAY, LET ME SHOW YOU THE CHANGES IVE MADE TO THIS SITE YAYY!!!
- replaced the twitter feed panel to an “88x31 buttons ive made” panel

i made a whytee.xyz 88x31 button A YEAR AND A HALF AFTER I REDESIGNED MY WEBSITE

moved the under construction disclaimer from an overlay to its own panel

modified the "made by sushiwt" box by adding "built with firefox/chrome and vscode" and a "- 2025" beside the year

and i FINALLY made the artwork section for my website..
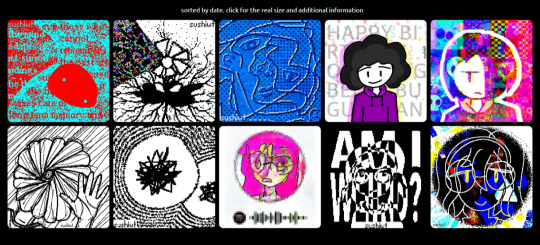
now all that's left is the section about myself, and this website is BASICALLY FINISHED!!!!
developing this website was so fun, and until i get the urge to remake it again, it will look like this for a while…
thank you for reading these logs btw :> i really really really appreciate you coming along for the ride (and by “the ride” i mean the creation of this)
- sushiwt <3
10 notes
·
View notes
Text
Sugary Scribbles | #8
Saturday 6th January 2024
IT'S BASICALLY WORKING (on larger screens)! My never-ending war on website responsiveness continues! I have a large screen and I stupidly only took into account of MY screen size. What I did do though is created a message for phone-table sizes because it just wouldn't make sense it working on really small devices - in my opinion~! But for now I will put this on hold because I am excited about my other project idea I came up with yesterday oops~!
This is my first project of the year and it's super adorable in my opinion! It paints, it erases, it deletes and it saves your artwork! Ticks all the boxes I made at the beginning of the project! Turned a simple 'Make a HTML painting webpage' into something more cuter and cool! Job well done! 😩🙌🏾💗
You can try it out (if you have a larger screen size), all that happens is the painting will be off the mouse direction a bit, sorry!
link to the Sugary-Scribbles web app! 🍡

Lastly, here is a cool drawing I made as I was testing the site~! I'm a better artist than this I swear, just not good using a mouse...

List of resources I used during the project
Figma - to plan the webpage
Canva: to make the header
Photopea: for further photo editing
RedKetchup: to colour pick quickly
CSS Animations: to add the zoom-in-n-out animation
MDN Canvas: to know what the element does properly
YouTube Tutorial: to get inspiration and extra help
Flaticon: for the icons and cursors
Html2canvas API: to turn the drawing into an image (tutorial)
That's all, have a nice day/night and happy coding! 🖤
#xc: project logs#sugary scribbles project#codeblr#coding#programming#progblr#studying#studyblr#dev logs#comp sci#computer science#programmer#devlogs#html css#javascript#tech#cute#adorable
104 notes
·
View notes
Note
Hi! just wanted to ask on how you personally use Twine I've been a fan of OM, and wondered how u made the remake in that system lmao. I was wondering if you had any tips / tutorials u used, I've spent some time testing and have got the hang of variables and linking but i was really confused on how you designed it / removed the borders around the side bar and everything, along with how you made the intimacy system, Especially the notify / achievement bar system! No tutorials were helping me lol
Sure! I'll do my best to explain below; feel free to ask me to expand on anything if it's confusing.
Changing sidebar:
The way you do this is basically through CSS ("Story Stylesheet"). When your game is open in the browser, you can inspect elements to figure out what they're called, then change their styles. For example, I removed the border of the menu buttons by putting the following in the stylesheet:
(for the overall borders)
menu ul {
border: none;
}
(for the borders between each link)
menu li a {
border: none;
}
w3schools.com is a great website if you'd like to learn CSS - it's what will help you completely restyle your story. There are also plenty of Twine design templates for something easier to use without having to learn code.
Intimacy system:
This one is a little more complicated. I'm actually completely rehauling the intimacy system for version 1.1. Right now, it uses a lot of if statements to check the amount of intimacy the player has collected with a character - and this intimacy is in a variable initialized in the special StoryInit passage. However, that's bandaid code which is messy and easily runs into bugs, as has happened ever since release lol. To fix it, I've essentially created a proper levelling system using custom macros and JavaScript. That requires a good grasp on behind-the-scenes programming, though. If your game isn't a huge project, keeping intimacy in variables should work just fine. Just make sure to keep a spreadsheet or notes somewhere that list how much intimacy is possible to gain and in which passages. It will make your life easier in the long run.
Notifications:
This one I actually got from one of Chapel's custom macros! They're super easy to use and do a lot of cool things. I highly recommend checking these out because they can make your life easier: link
Achievements:
I'm going to assume you're talking about achievements that persist over different saves - for this, you'll need to utilize Twine's special StoryInit passage again. In case you are not sure of what that is, it's essentially all the variables that will be initialized when the game is first loaded into the browser. Your achievements and important story-spanning variables (like personality traits, intimacy counters, etc) will go here. To create an achievement, you'd put something like this in your StoryInit:
<<set $achievement1 to recall('achievement1')>>
If the player hasn't obtained the achievement, $achievement1 will automatically be set to false. To have them actually get the achievement, put
<<run memorize($achievement1, true)>>
<<set $achievement1 to true>>
in the passage where the achievement is gained. Also, be sure to have your players know that keeping saves and achievements like these relies on browser cache - if that's cleared, their progress will be lost.
Hope that helps! I wasn't sure how familiar you are with Twine beyond variables and linking as it's a pretty big engine with many things, so I just covered things without going into deeper mechanics like Twine's special passages, scripts/stylesheets, macros, etc. I'm happy to explain those too if you're having trouble. Also, everything I explained is specifically in the Sugarcube language - it won't work in Harlowe, Snowman, etc.
Helpful links:
Twine cookbook
Chapel's custom macros
Cycy's custom macros
Albie's Twine Tutorial with tons more resources
13 notes
·
View notes