#HTML elements for web development tutorial
Explore tagged Tumblr posts
Visit Tumblr Blog
Explore Tumblr blogs with no restrictions, modern design and the best experience.
Last Seen Tumblr Blogs


Fun Fact
Mobile US users spent an average of 115.8 minutes on Tumblr app monthly.
Text
Want to upgrade your coding skill to create animations and interactive graphics? This blog covers everything about HTML animation including the Canvas API.
#Basic HTML tagsexplained#Introduction to HTML elements#HTML basics#HTML tutorial#Master HTML#HTML tags#Web development#Learn HTML#HTML for beginners#HTML guide#HTML syntax#Building web pages#Basic HTML elements#Learn HTML elements#Learn Online HTML#Online HTML Tutorial#Introduction to HTML#HTML tutorials#Learn HTML online
0 notes
Text
JavaScript Tutorial: A Beginner's Guide to the World of Web Development
Welcome to the exciting world of JavaScript! If you're looking to dive into web development, understanding JavaScript is essential. This versatile programming language powers the interactive elements of websites and is a key component of modern web applications. In this tutorial, we'll cover the basics of JavaScript, its syntax, and some practical examples to get you started.
What is JavaScript?
JavaScript is a high-level, dynamic, and interpreted programming language that is primarily used for enhancing the interactivity of web pages. It allows developers to create rich user experiences by manipulating HTML and CSS, responding to user events, and communicating with servers.
Why Learn JavaScript?
Ubiquity: JavaScript is supported by all modern web browsers, making it a universal language for web development.
Versatility: Beyond the browser, JavaScript can be used on the server-side (with Node.js), in mobile app development (with frameworks like React Native), and even in game development.
Community and Resources: With a vast community and numerous resources available, learning JavaScript is more accessible than ever.
Getting Started with JavaScript
Setting Up Your Environment
To start coding in JavaScript, you don't need any special software. All you need is a web browser and a text editor. Here’s how to set it up:
Choose a Text Editor: Popular options include Visual Studio Code, Sublime Text, and Atom.
Open Your Browser: You can use any modern browser like Chrome, Firefox, or Edge.
2 notes
·
View notes
Text
HTML Tutorial: A Quick Overview
HTML (HyperText Markup Language) forms the backbone of web development, enabling the structure and presentation of content on the web. It’s a markup language that defines elements like headings, paragraphs, links, images, lists, and more, providing a standardized way to format and display information in browsers.
HTML uses tags, enclosed in angle brackets, to represent different types of content. Each tag typically comes in pairs, an opening tag and a closing tag, to wrap and describe the content in between. HTML is fundamental for building web pages, allowing developers to create structured documents with defined sections and multimedia elements.
One of HTML’s key features is its ability to create links, connecting different parts of the web. This hyperlinking capability is what makes HTML unique, forming the web as we know it today. Additionally, HTML supports embedding multimedia like images, videos, and audio, which brings pages to life.
As web standards evolve, HTML has grown, too, with the latest version being HTML5. This version introduced new elements that provide semantic meaning to the structure of web documents, ensuring that content is more accessible and well-organized.
fro more:https://quipoin.com/tutorial/HTML-tutorial
2 notes
·
View notes
Text
Top 10 Front-End Frameworks and Libraries for 2024
As the web development landscape continues to evolve, staying updated with the latest front-end frameworks and libraries is crucial for any developer. Whether you're a seasoned pro or just starting out, knowing which tools to use can significantly impact your productivity and the quality of your projects. In this post, we’ll explore the top 10 front-end frameworks and libraries that are set to dominate in 2024.
1. React
React remains one of the most popular front-end libraries, known for its simplicity and flexibility.
Key Features of React
Component-Based Architecture: Reusable components make development efficient and manageable.
Virtual DOM: Enhances performance by minimizing direct DOM manipulation.
Strong Community Support: A vast ecosystem of tools, libraries, and tutorials.
2. Angular
Angular, backed by Google, is a powerful framework for building dynamic single-page applications (SPAs).
Why Choose Angular?
Two-Way Data Binding: Synchronizes data between the model and the view.
Dependency Injection: Improves code maintainability and testability.
Comprehensive Documentation: Extensive resources for learning and troubleshooting.
3. Vue.js
Vue.js has gained popularity due to its gentle learning curve and versatility.
Advantages of Vue.js
Reactive Data Binding: Simplifies state management.
Single-File Components: Encapsulate HTML, CSS, and JavaScript in one file.
Flexibility: Can be used for both large-scale and small-scale applications.

4. Svelte
Svelte is a relatively new player that compiles components into highly efficient vanilla JavaScript at build time.
Svelte’s Standout Features
No Virtual DOM: Directly manipulates the DOM for better performance.
Less Boilerplate: Cleaner code with minimal overhead.
Ease of Use: Intuitive and straightforward syntax.

5. Bootstrap
Bootstrap is a front-end framework that provides pre-designed components and a responsive grid system.
Benefits of Using Bootstrap
Responsive Design: Ensures your site looks great on all devices.
Pre-Styled Components: Saves time with ready-to-use UI elements.
Customizable: Easily customize with Sass variables and Bootstrap’s extensive options.
6. Tailwind CSS
Tailwind CSS is a utility-first CSS framework that allows for rapid UI development.
Tailwind CSS Features
Utility-First Approach: Use utility classes directly in your HTML.
Customizable: Extensive configuration options to suit your project’s needs.
Consistency: Enforces a consistent design language across your project.

7. Ember.js
Ember.js is a robust framework for building ambitious web applications.
Why Ember.js Stands Out
Convention over Configuration: Reduces the amount of decision-making and boilerplate code.
Strong Routing: Powerful routing capabilities for managing application state.
Productivity: Focuses on developer productivity with built-in best practices.
8. Alpine.js
Alpine.js offers a minimal and lightweight way to add interactivity to your websites.
Key Features of Alpine.js
Lightweight: Small footprint with only a few kilobytes.
Declarative Syntax: Similar to Vue.js, making it easy to understand and implement.
Ease of Integration: Can be easily integrated into existing projects.

9. Next.js
Next.js is a popular React framework that enables server-side rendering and static site generation.
Benefits of Using Next.js
Server-Side Rendering (SSR): Improves performance and SEO by rendering pages on the server.
Static Site Generation (SSG): Pre-renders pages at build time for fast load times.
API Routes: Allows you to create API endpoints within your application.
10. Lit
Lit is a simple library for building fast, lightweight web components.
Advantages of Lit
Web Components: Embraces the web components standard for reusable, encapsulated HTML elements.
Performance: Lightweight and highly performant.
Simple API: Easy to learn and use with a minimal API surface.
Conclusion
Choosing the right front-end framework or library can significantly impact your workflow and the quality of your projects. Whether you prefer the flexibility of React, the structure of Angular, or the simplicity of Svelte, there's a tool out there to suit your needs.
Final Tips for Selecting a Framework or Library
Project Requirements: Consider the specific needs of your project.
Community and Support: Look for frameworks with strong community support and documentation.
Learning Curve: Choose a tool that matches your current skill level and the time you have available to learn.
By staying informed about the latest tools and trends, you can ensure that your skills remain relevant and that you can deliver the best possible results in your projects. Happy coding!
Remember, the best tool is the one that helps you get the job done efficiently and effectively. So, dive into these frameworks and libraries, and take your front-end development skills to the next level!
Share Your Thoughts
I'm curious to know your thoughts on these front-end frameworks and libraries. Have you used any of them in your projects? Which one is your favorite, and why? Share your experiences and insights in the comments below.👇
2 notes
·
View notes
Text
Mastering Web Development: A Comprehensive Guide for Beginners
In the vast landscape of technology, web development stands as a crucial cornerstone. It encompasses the art and science of building websites, ranging from simple static pages to complex web applications. Whether you're aiming to pursue a career in software development or seeking to enhance your digital presence, understanding web development is essential.
In this comprehensive guide, we'll take you through the fundamental concepts and practical skills needed to master web development from scratch. Let's dive in!
1. Understanding HTML (Hypertext Markup Language)
HTML serves as the backbone of every web page, providing the structure and content. It uses tags to define different elements such as headings, paragraphs, images, and links. By mastering HTML, you'll be able to create well-structured and semantically meaningful web documents.
2. Exploring CSS (Cascading Style Sheets)
CSS is the language used to style HTML elements, enhancing their appearance and layout. With CSS, you can customize colors, fonts, spacing, and more, giving your website a polished and professional look. Understanding CSS selectors and properties is essential for effective styling.
3. Introduction to JavaScript
JavaScript is a versatile programming language that adds interactivity and dynamic behavior to web pages. From simple animations to complex web applications, JavaScript powers a wide range of functionalities. Learning JavaScript fundamentals such as variables, functions, and events is crucial for web development.
4. Building Responsive Websites
In today's mobile-centric world, it's essential to create websites that adapt seamlessly to various screen sizes and devices. Responsive web design achieves this by using fluid grids, flexible images, and media queries. Mastering responsive design principles ensures that your websites look great on desktops, tablets, and smartphones.
5. Introduction to Version Control with Git
Git is a powerful tool for tracking changes in your codebase and collaborating with other developers. By learning Git basics such as branching, merging, and committing, you can streamline your development workflow and effectively manage project versions.
6. Introduction to Front-End Frameworks
Front-end frameworks like Bootstrap, Foundation, and Materialise provide pre-designed components and stylesheets to expedite web development. By leveraging these frameworks, you can create responsive and visually appealing websites with less effort and code.
7. Introduction to Back-End Development
While front-end development focuses on the user interface, back-end development deals with server-side logic and database management. Learning back-end languages such as Node.js, Python, or PHP enables you to build dynamic web applications and handle user interactions efficiently.
8. Deploying Your Website
Once you've developed your website, it's time to make it accessible to the world. Deploying a website involves selecting a web hosting provider, uploading your files, and configuring domain settings. Understanding the deployment process ensures that your website goes live smoothly.
9. Conclusion and Next Steps
Congratulations on completing this comprehensive guide to mastering web development! By now, you've gained a solid understanding of HTML, CSS, JavaScript, version control, frameworks, and deployment. As you continue your journey in web development, remember to stay curious, practice regularly, and explore advanced topics to further refine your skills.
Resources for Further Learning:
Online tutorials and documentation
Interactive coding platforms
Community forums and discussion groups
Next Steps:
Explore advanced topics such as web performance optimization, server-side rendering, and progressive web apps.
Build real-world projects to apply your skills and showcase your portfolio.
Stay updated with the latest trends and technologies in web development through blogs, podcasts, and conferences.
With dedication and perseverance, you'll continue to evolve as a proficient web developer, creating innovative solutions and contributing to the ever-changing digital landscape . Happy coding!
4 notes
·
View notes
Text
youtube
Mastering CSS: Complete Guide to Styling Web Pages | Learn CSS for Web Development
In this comprehensive CSS tutorial, we delve into the world of Cascading Style Sheets, covering styling techniques, selectors, declarations, properties, and values in CSS. Whether you're a beginner or a seasoned professional, this video is designed to equip you with a thorough understanding of CSS. We explore advanced CSS concepts such as descendant combinators, pseudo-classes, pseudo-elements, @rules, shorthands, functions, and more. By the end of this video, you'll have the skills to style your HTML documents with precision and finesse. Watch now and take your web development skills to the next level!
#CSS#WebDevelopment#LearnCSS#FrontEndDevelopment#CSSStyling#CSSTutorial#CSSGuide#Coding#WebDesign#HTML#JavaScript#Youtube
3 notes
·
View notes
Text
Heading 1 (Biggest)
🗒️ Answer (Bigger)
Creating a custom Tumblr theme from scratch involves coding in HTML and CSS to design a unique layout for your Tumblr blog. Here's a step-by-step guide to help you get started:
Understand Tumblr Theme Basics: Familiarize yourself with Tumblr's documentation on creating a custom HTML theme (Source 1).
Learn HTML and CSS: If you're not already familiar with HTML and CSS, consider taking a course like "GA Dash" mentioned in this tutorial (Source 2).
Plan Your Design: Think about the look and feel you want for your Tumblr blog. Consider elements like colors, fonts, and layout.
Coding Your Theme: Start coding your theme using HTML for the structure and CSS for styling. Smashing Magazine provides a complete guide to Tumblr (Source 3) that can be helpful.
Test and Debug: Regularly test your theme on Tumblr to ensure it displays correctly.
Custom Features: If you want to add custom features or functionality to your theme, Tumblr's Build Themes (Source 4) may be a useful resource.
Seek Inspiration: Explore other Tumblr themes and blogs for inspiration. Creative Market's complete guide to Tumblr themes (Source 5) can give you more insights.
Share Your Progress: Consider sharing your coding progress and finished theme on platforms like Tumblr and Twitter, as you've done before.
Remember to continuously refine your skills and keep up with the latest web development trends to create appealing and functional Tumblr themes.
3 notes
·
View notes
Text
Becoming a Selenium Expert: Your Roadmap to Success
Selenium, the open-source web automation testing framework, has revolutionized the software testing industry by empowering testers to automate repetitive tasks and ensure the reliability of web applications. If you're looking to embark on a journey to master Selenium, you're in the right place. This comprehensive guide will take you through every step, from understanding the basics to mastering advanced topics, and even finding the best training resources to hone your skills.

Before you dive into the world of Selenium, it's crucial to establish a strong foundation in software testing and understand why test automation is essential.
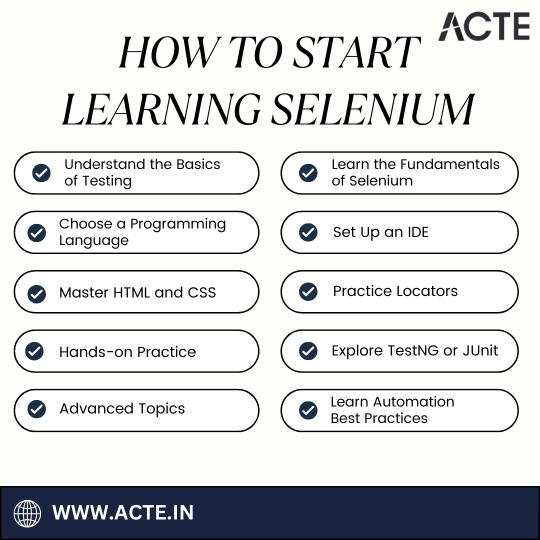
Here's a step-by-step roadmap to kickstart your Selenium learning journey:
Understanding the Basics of Testing
Acquiring a solid understanding of software testing concepts is the foundation upon which your Selenium journey begins. It's crucial to grasp various testing types and recognize the significance of test automation in enhancing software quality. Software testing serves as the first line of defense against defects and errors, ensuring that the final product meets the desired quality standards. By understanding the basics of testing, you gain valuable insights into why Selenium automation is indispensable in today's software development landscape.
Learning the Fundamentals of Selenium
At the heart of Selenium automation lies Selenium WebDriver. To embark on your Selenium journey, you should start by comprehending its fundamentals. Selenium WebDriver acts as the bridge between your code and the web browser, enabling you to automate interactions with web elements. Fortunately, there is a wealth of online tutorials, documentation, and courses available to assist you in mastering Selenium. This powerful tool is your gateway to automating web testing, and a solid grasp of its fundamentals is essential for your success.
Choosing a Programming Language
Selenium is versatile in that it supports multiple programming languages, including Java, Python, C#, and more. When choosing a programming language, consider your comfort level and your eagerness to learn. Java, with its extensive community support and compatibility with Selenium, is a popular choice among practitioners. Your choice of programming language will be the medium through which you communicate with Selenium WebDriver, making it a pivotal decision in your Selenium journey.
Setting Up an Integrated Development Environment (IDE)
Efficiency is key when it comes to writing and executing Selenium scripts. To streamline your workflow, it's essential to install a suitable Integrated Development Environment (IDE) such as Eclipse or IntelliJ IDEA. These IDEs provide a conducive environment for coding, debugging, and running your Selenium scripts efficiently. Your IDE will become your trusted companion throughout your Selenium automation endeavors.
Mastering HTML and CSS
Selenium interacts directly with web elements, which underscores the importance of having a solid understanding of HTML and CSS. These foundational technologies govern the structure and style of web pages, and proficiency in them is crucial for locating and manipulating elements on web pages effectively. By mastering HTML and CSS, you equip yourself with the skills needed to navigate the web and interact seamlessly with the elements you encounter.
Practicing Locators
Web elements come in various shapes and sizes, and Selenium provides a range of locators to help you identify and interact with them effectively. Locators like XPath and CSS selectors are indispensable tools in your Selenium toolkit. Understanding how to use these locators to pinpoint web elements is a fundamental skill that will serve you well in your Selenium journey.
Hands-on Practice
Theory alone will only take you so far in mastering Selenium. To become proficient, you must put theory into practice. Initiate your Selenium journey by working on simple test scenarios and gradually progress to more complex ones. Real-world practice not only solidifies your understanding but also hones your problem-solving skills, a critical aspect of successful Selenium automation.
Exploring TestNG or JUnit
TestNG and JUnit are robust testing frameworks that seamlessly integrate with Selenium. They provide valuable features for organizing and managing your test cases effectively. Exploring these frameworks is a natural progression in your Selenium journey, as they enhance your ability to structure and execute tests systematically. TestNG and JUnit are powerful allies that will help you maintain control and organization in your automated testing endeavors.
Exploring Advanced Topics
Once you have established a solid grasp of the fundamentals, it's time to delve into more advanced aspects of Selenium. These advanced topics will not only deepen your understanding but also equip you with the skills needed to tackle complex web testing scenarios effectively.
Learning Automation Best Practices
In addition to mastering advanced topics, understanding and implementing automation best practices are crucial for becoming a proficient automation tester. These practices contribute to the efficiency, maintainability, and effectiveness of your automation projects.
Embarking on your Selenium learning journey is an exciting and rewarding endeavor that opens doors to a world of possibilities in the realm of software testing and quality assurance. As you navigate the path from understanding testing basics to mastering Selenium's advanced features, remember that practice, perseverance, and a passion for continuous learning are your allies.
In your pursuit of excellence, consider seeking quality Selenium training and guidance. ACTE Technologies stands as a beacon in this regard, offering comprehensive Selenium training programs. These programs provide structured curricula, hands-on experience, expert instructors, and certifications that can validate your Selenium expertise.
So, embrace your Selenium learning journey with enthusiasm, apply your newfound skills in real-world scenarios, and consider the invaluable resources and training opportunities ACTE Technologies offers to further enhance your Selenium proficiency. With dedication and the right resources, you're well on your way to becoming a web automation testing expert. Happy learning!
3 notes
·
View notes
Text
What is HTML5 and its uses?
HTML5 is the latest version of HTML, which is the standard markup language for creating web pages. HTML5 was released in 2014 and has since become the most widely used version of HTML. HTML5 includes many new features and improvements over previous versions of HTML.
New Features in HTML5
Here are some of the new features in HTML5:
Semantic elements: HTML5 includes new semantic elements such as <header>, <footer>, <nav>, and <article>. These elements provide more meaning to the content of a web page, making it easier for search engines to index and understand the content.
Multimedia support: HTML5 includes built-in support for multimedia elements such as <video> and <audio>. This makes it easier to embed videos and audio files into web pages without requiring third-party plugins such as Adobe Flash.
Form validation: HTML5 includes new form validation features that allow developers to validate user input without requiring JavaScript. This makes it easier to create forms that are more user-friendly and accessible.
Canvas: HTML5 includes a new element called <canvas>, which allows developers to create dynamic graphics and animations using JavaScript.
Uses of HTML5
HTML5 is used for creating a wide range of web applications and websites. Here are some examples:
Responsive web design: HTML5 provides many features that make it easier to create responsive web designs that work well on different devices such as desktops, tablets, and smartphones.
Mobile apps: HTML5 can be used to create mobile apps that run on different platforms such as iOS, Android, and Windows Phone. This is done using frameworks such as Apache Cordova or PhoneGap.
Games: HTML5 can be used to create games that run in a web browser without requiring any plugins. This is done using frameworks such as Phaser or PixiJS.
Web applications: HTML5 can be used to create web applications that run entirely in a web browser without requiring any server-side processing. This is done using frameworks such as AngularJS or React.
Here are some resources that can help you learn HTML:
W3Schools: W3Schools is a popular online learning platform that offers free HTML tutorials. Their tutorials are designed for beginners and cover everything from the basics to advanced topics .
MDN Web Docs: MDN Web Docs is another great resource for learning HTML. They offer comprehensive HTML tutorials that cover everything from the basics to advanced topics .
e-Tuitions: e-Tuitions offers online classes for HTML coding. You can visit their website at e-Tuitions to book a free demo class.
Codecademy: Codecademy is an online learning platform that offers interactive HTML courses. Their courses are designed for beginners and cover everything from the basics to advanced topics .
In conclusion, HTML5 is the latest version of HTML and includes many new features and improvements over previous versions. It is widely used for creating web applications and websites, including responsive designs, mobile apps, games, and web applications.
2 notes
·
View notes
Text
CSS Tutorial for Beginners: Build Stylish Web Pages

In the digital world, design is everything. A clean, stylish website can make a powerful first impression, keeping users engaged and encouraging them to return. While HTML is responsible for the structure of a web page, it is CSS (Cascading Style Sheets) that gives it life, color, and personality. If you're looking to create beautiful, modern websites, this CSS tutorial for beginners is the perfect place to start.
Whether you're new to web development or just want to improve your front-end skills, this tutorial will help you build stylish web pages using CSS. We'll walk through the fundamentals of CSS, explore how it works with HTML, and give you real examples to apply immediately.
What Is CSS?
CSS (Cascading Style Sheets) is the language used to describe the presentation of a document written in HTML. It defines how elements like text, images, and layouts should appear on a webpage—everything from font sizes and colors to spacing and positioning.
Without CSS, all websites would look plain and unstyled. CSS separates content (HTML) from design, making web pages easier to manage and more visually appealing.
Why Learn CSS?
Learning CSS offers several benefits, especially for beginners:
Design freedom: Customize any website with colors, fonts, layouts, and animations.
Responsive design: Make your web pages look great on all screen sizes and devices.
Better user experience: Improve readability, navigation, and visual appeal.
Easy maintenance: Update styles quickly without altering the content.
Career advantage: Front-end developers, designers, and content creators all use CSS.
How CSS Works with HTML
CSS works hand-in-hand with HTML by selecting specific HTML elements and applying styles to them. There are three main ways to use CSS in an HTML document:
Inline CSS – inside HTML elements
Internal CSS – inside a <style> tag in the head section
External CSS – in a separate .css file linked to your HTML
Here’s a simple example of internal CSS:<!DOCTYPE html> <html> <head> <style> h1 { color: blue; text-align: center; } p { font-size: 16px; color: gray; } </style> </head> <body> <h1>Welcome to My Website</h1> <p>This is a styled paragraph using CSS.</p> </body> </html>
CSS Syntax Explained
CSS consists of selectors and declarations. Here's the basic structure:selector { property: value; }
Example:p { color: green; font-size: 18px; }
p is the selector (targets <p> tags)
color and font-size are properties
green and 18px are values
You can apply multiple styles to one element by including multiple property-value pairs inside the braces.
Key CSS Concepts Every Beginner Should Know
1. Selectors
Selectors define which HTML elements you want to style. Common types include:
* – universal selector
p, h1, div – element selectors
.className – class selector
#idName – ID selector
Example:#main { background-color: #f0f0f0; }
2. Colors and Fonts
CSS allows full control over colors and typography.body { background-color: white; color: #333; font-family: Arial, sans-serif; }
3. Box Model
Every HTML element is a rectangular box, made up of:
Content
Padding
Border
Margin
Understanding the box model is key to layout and spacing.div { padding: 10px; border: 1px solid #ccc; margin: 20px; }
4. Positioning and Layout
Use CSS properties like position, display, flex, and grid to control layout..container { display: flex; justify-content: space-between; }
5. Responsive Design
Make your site mobile-friendly using media queries.@media (max-width: 600px) { body { font-size: 14px; } }
Build a Simple Styled Web Page
Let’s build a simple web page using HTML and CSS:
HTML (index.html)<!DOCTYPE html> <html> <head> <link rel="stylesheet" href="style.css"> <title>My Stylish Page</title> </head> <body> <header> <h1>My Stylish Web Page</h1> </header> <main> <p>This is a simple paragraph styled with CSS.</p> </main> </body> </html>
CSS (style.css)body { background-color: #f9f9f9; color: #333; font-family: 'Segoe UI', sans-serif; } header { background-color: #007BFF; color: white; padding: 20px; text-align: center; } main { padding: 20px; }
Save both files in the same folder, open index.html in a browser, and admire your styled page!
Tools to Help You Learn CSS
CodePen – Try CSS code snippets online.
MDN Web Docs – Comprehensive documentation for CSS.
Visual Studio Code – A great editor with live preview extensions.
CSS Zen Garden – Explore examples of what’s possible with CSS.
Final Thoughts
This CSS Tutorial for Beginners is your gateway to designing elegant, responsive, and professional-looking web pages. By learning CSS, you gain control over how content appears and interacts with users. Start small, practice consistently, and experiment with real-world projects.
Once you master the basics, explore advanced topics like animations, transitions, flexbox, grid, and preprocessors like SASS.
0 notes
Text
Where Can I Find Free Resources for Learning about Web Design in Essex in 2025?
In today's digital world, mastering web design skills is more crucial than ever. Whether you're seeking to launch a career in tech, enhance your creativity, or simply build your own website, learning web design opens numerous doors. For residents of Essex or those nearby, there’s a wealth of free resources available that can help you start or improve your web design journey without hefty costs. From online courses to local community workshops and practical tools, this guide covers everything you need to know about accessing the best free web design resources in Essex.
Discover Comprehensive Free Online Courses and Tutorials
The internet has made learning accessible for everyone, and web design is no exception. Essex learners can leverage various online platforms offering free courses tailored for beginners and intermediates alike. These courses often cover essential topics such as HTML, CSS, JavaScript, UX/UI principles, and responsive design.
Explore Websites Offering Quality Free Online Courses
Several well-known education websites provide free access to web design courses that you can follow at your own pace. Many of these platforms include video lessons, quizzes, and project-based learning to reinforce what you’ve studied.
Coursera: Offers beginner-friendly courses on web development and design fundamentals from top universities. Many courses are free to audit. Alison: Provides comprehensive web design diplomas focusing on layout, typography, and coding basics. FreeCodeCamp: An excellent resource for hands-on coding experience with full projects and certifications at no cost.
You can start building foundational knowledge immediately without any upfront payment, making these platforms ideal for budget-conscious learners in Essex.
Follow Engaging YouTube Channels for Visual Learning
For those who prefer video instruction and step-by-step tutorials, YouTube hosts many channels dedicated to web design education. These channels cover everything from UI/UX basics to advanced coding techniques in a web design for small businesses friendly, digestible format.
Traversy Media: Known for clear explanations of web technologies and practical project builds. The Net Ninja: Offers playlist series on HTML, CSS, JavaScript, and modern web frameworks. DesignCourse: Focuses on user interface design principles and graphic elements tailored for beginners.
Watching these tutorials regularly can accelerate your understanding and inspire creative ideas for your web projects.
Engage with Local Workshops and Community Events in Essex
Learning face-to-face with others offers great opportunities for networking, instant feedback, and motivation. Essex boasts several venues and groups that host free or low-cost web design workshops and meetups.
Visit Essex Libraries and Community Centres for Workshops
Essex libraries and community centres f
1 note
·
View note
Text
PHP, LAMP (Linux Apache MySQL PHP)
The LAMP stack — Linux, Apache, MySQL, and PHP — has been a cornerstone of web development for over two decades. It’s an open-source suite of software components that work together to serve dynamic websites and web applications. Among these, PHP plays a central role, acting as the scripting language responsible for generating dynamic page content. Despite the rise of modern development stacks like MERN or JAMstack, LAMP remains a reliable, accessible, and widely used platform for developers around the world.
What is LAMP?

LAMP is an acronym that stands for:
Linux: The operating system.
Apache: The web server software.
MySQL: The relational database management system.
PHP: The server-side scripting language.
Each component of LAMP is free and open-source, which contributed to its massive adoption in the early 2000s. Even today, LAMP powers a significant portion of the web, including popular platforms like WordPress, Drupal, and Joomla.
PHP: The Dynamic Power of LAMP

PHP (Hypertext Preprocessor) is the scripting language used in LAMP to process user requests and generate dynamic content. It integrates seamlessly with HTML, making it easy for developers to embed logic within web pages. PHP scripts are executed on the server, and the output is sent to the client’s browser in the form of standard HTML.
PHP supports a vast range of features including form handling, file management, database access, and session tracking. It’s easy to learn for beginners, yet powerful enough to build complex web applications. PHP is constantly evolving, with the latest versions offering improved performance, better error handling, and strong security features.
The Role of Each Component in LAMP

Here’s a breakdown of how each element in the LAMP stack functions together:
1. Linux
Linux acts as the foundation for the LAMP stack. It’s known for its stability, flexibility, and security. Most servers run on some version of Linux because of its ability to handle high volumes of traffic and customizable nature. Common Linux distributions used in LAMP setups include Ubuntu, CentOS, and Debian.
2. Apache
Apache is a powerful and flexible open-source web server that handles HTTP requests from users’ browsers. It is responsible for delivering web pages to the client and includes modules for URL rewriting, authentication, and more. Apache can be customized using .htaccess files, making it easy to manage server behavior for specific directories.
3. MySQL
MySQL is a robust relational database management system used to store and manage application data. From user accounts to blog posts, all information can be efficiently queried and updated using SQL (Structured Query Language). PHP and MySQL often work hand in hand, with PHP scripts using MySQL queries to interact with the database.
4. PHP
PHP pulls it all together by connecting the front-end interface with the back-end logic. Whether it’s fetching blog posts from a database or processing user input from a form, PHP makes the content dynamic and personalized. PHP also supports object-oriented programming, error handling, and integration with third-party libraries.
Find Out More About This
Why Developers Still Choose LAMP

Despite the introduction of newer stacks, LAMP remains popular for a few key reasons:
Maturity and Stability: With decades of development, LAMP is well-documented and stable.
Community Support: A large community ensures that developers can find tutorials, tools, and forums for help.
Cost Efficiency: Being open-source, it significantly reduces hosting and licensing costs.
Flexibility: Suitable for projects of all sizes, from small blogs to enterprise-level applications.
Compatibility: Most hosting providers support LAMP out of the box.

PHP and the LAMP stack have stood the test of time in the world of web development. They offer a dependable, efficient, and accessible way to build and maintain dynamic websites. Whether you’re launching a personal blog or developing a business application, the LAMP stack remains a solid choice. As PHP continues to evolve and the ecosystem matures, LAMP proves that reliable technology doesn’t always need to be the newest — sometimes, it just needs to work exceptionally well.
0 notes
Text
Master JavaScript: Step-by-Step Tutorial for Building Interactive Websites
JavaScript Tutorial

Master JavaScript: Step-by-Step Tutorial for Building Interactive Websites
In the evolving world of web development, JavaScript remains one of the most powerful and essential programming languages. Whether you're building simple webpages or full-fledged web applications, JavaScript gives life to your content by making it interactive and dynamic. This JavaScript Tutorial offers a beginner-friendly, step-by-step guide to help you understand core concepts and begin creating responsive and engaging websites.
What is JavaScript?
JavaScript is a lightweight, high-level scripting language primarily used to create dynamic and interactive content on the web. While HTML structures the webpage and CSS styles it, JavaScript adds interactivity—like handling clicks, updating content without refreshing, validating forms, or creating animations.
Initially developed for client-side scripting, JavaScript has evolved significantly. With the rise of environments like Node.js, it is now also used for server-side programming, making JavaScript a full-stack development language.
Why Learn JavaScript?
If you're looking to become a front-end developer or build web-based applications, JavaScript is a must-have skill. Here’s why:
It runs on all modern browsers without the need for plugins.
It’s easy to learn but incredibly powerful.
It works seamlessly with HTML and CSS.
It powers popular frameworks like React, Angular, and Vue.js.
It’s in high demand across the tech industry.
This JavaScript Tutorial is your gateway to understanding this versatile language and using it effectively in your web projects.
Getting Started: What You Need
To start coding in JavaScript, all you need is:
A modern browser (like Chrome or Firefox)
A text editor (such as Visual Studio Code or Sublime Text)
Basic knowledge of HTML and CSS
No complex setups—just open your browser and you're ready to go!
Step 1: Your First JavaScript Code
JavaScript code can be embedded directly into HTML using the <script> tag.
Example:<!DOCTYPE html> <html> <head> <title>JavaScript Demo</title> </head> <body> <h1 id="demo">Hello, World!</h1> <button onclick="changeText()">Click Me</button> <script> function changeText() { document.getElementById("demo").innerHTML = "You clicked the button!"; } </script> </body> </html>
Explanation:
The onclick event triggers the changeText() function.
document.getElementById() accesses the element with the ID demo.
.innerHTML changes the content of that element.
This simple example showcases how JavaScript can make a static HTML page interactive.
Step 2: Variables and Data Types
JavaScript uses let, const, and var to declare variables.
Example:let name = "Alice"; const age = 25; var isStudent = true;
Common data types include:
Strings
Numbers
Booleans
Arrays
Objects
Null and Undefined
Step 3: Conditional Statements
JavaScript allows decision-making using if, else, and switch.let age = 20; if (age >= 18) { console.log("You are an adult."); } else { console.log("You are a minor."); }
Step 4: Loops
Use loops to execute code repeatedly.for (let i = 0; i < 5; i++) { console.log("Iteration:", i); }
Other types include while and do...while.
Step 5: Functions
Functions are reusable blocks of code.function greet(name) { return "Hello, " + name + "!"; } console.log(greet("Alice")); // Output: Hello, Alice!
Functions can also be anonymous or arrow functions:const greet = (name) => "Hello, " + name;
Step 6: Working with the DOM
The Document Object Model (DOM) allows you to access and manipulate HTML elements using JavaScript.
Example: Change element style:document.getElementById("demo").style.color = "red";
You can add, remove, or change elements dynamically, enhancing user interaction.
Step 7: Event Handling
JavaScript can respond to user actions like clicks, keyboard input, or mouse movements.
Example:document.getElementById("myBtn").addEventListener("click", function() { alert("Button clicked!"); });
Step 8: Arrays and Objects
Arrays store multiple values:let fruits = ["Apple", "Banana", "Mango"];
Objects store key-value pairs:let person = { name: "Alice", age: 25, isStudent: true };
Real-World Applications of JavaScript
Now that you have a basic grasp, let’s explore how JavaScript is used in real-life projects. The applications of JavaScript are vast:
Interactive Websites: Menus, image sliders, form validation, and dynamic content updates.
Single-Page Applications (SPAs): Tools like React and Vue enable dynamic user experiences without page reloads.
Web Servers and APIs: Node.js allows JavaScript to run on servers and build backend services.
Game Development: Simple 2D/3D browser games using HTML5 Canvas and libraries like Phaser.js.
Mobile and Desktop Apps: Frameworks like React Native and Electron use JavaScript for cross-platform app development.
Conclusion
Through this JavaScript Tutorial, you’ve taken the first steps in learning a foundational web development language. From understanding what is javascript is now better.
As you continue, consider exploring advanced topics such as asynchronous programming (promises, async/await), APIs (AJAX, Fetch), and popular frameworks like React or Vue.
0 notes
Text
"The Web Architect: Full Stack Skills for Modern Builders"
In today’s digital landscape, the demand for multifaceted web professionals is soaring. At the heart of this evolution is the web architect — a tech-savvy builder equipped with comprehensive skills to manage both the visible and invisible elements of web applications. These modern builders are not only fluent in front-end and back-end development but also possess a solid grasp of design principles, security, scalability, and performance optimization. This all-encompassing expertise defines the true essence of full stack development course .
What is a Web Architect?
A web architect is more than just a developer. They are strategic thinkers who design and implement the structure of web applications. These individuals understand how different technologies interconnect, ensuring a seamless user experience and efficient system performance. From choosing the right frameworks to integrating third-party services, their role requires a bird's-eye view of the entire digital environment.
The Rise of the Full Stack Professional
With businesses increasingly relying on digital platforms, the need for versatile developers has skyrocketed. That’s where the full stack approach shines. It encompasses a variety of disciplines:
Front-end development: Building user interfaces with technologies like HTML, CSS, and JavaScript frameworks (React, Angular, Vue).
Back-end development: Managing servers, databases, and application logic using tools such as Node.js, Python, Ruby, or PHP.
Database management: Working with both SQL (MySQL, PostgreSQL) and NoSQL (MongoDB) systems.
Version control systems: Utilizing Git and platforms like GitHub or GitLab for collaboration and code tracking.
Deployment and DevOps: Ensuring applications run smoothly in various environments, including cloud services like AWS, Azure, or Google Cloud.
A full stack developer course typically covers all these areas, enabling learners to transition from novice coders to capable professionals ready to tackle real-world projects.
Why Invest in Full Stack Skills?
Employers are increasingly on the lookout for candidates who can bridge the gap between design and functionality. Being able to handle both client-side and server-side operations makes you a valuable asset in agile teams, startups, and even large enterprises. A web architect with full stack capabilities can prototype ideas faster, solve integration issues more effectively, and contribute across the project lifecycle.
Key Advantages of Becoming a Full Stack Web Architect:
Broader career opportunities: From freelance gigs to leadership roles in tech companies.
Faster development cycles: Manage multiple aspects of a project without relying on separate teams.
Greater problem-solving ability: Understand how changes in one layer affect others.
Higher earning potential: Versatility often translates into better pay and more job security.
Enrolling in a Full Stack Developer Course
To build the skill set required for web architecture, structured learning is essential. A well-designed full stack developer course offers more than just tutorials — it delivers hands-on experience, real-time projects, and mentorship from seasoned developers. Such programs are designed to prepare learners for immediate entry into the workforce or to elevate their existing roles.
Look for courses that include:
Comprehensive modules covering front-end, back-end, and DevOps.
Industry projects that reflect real-world scenarios.
Certification upon completion, recognized by employers.
Job assistance or career support services.
Future-Proofing Your Career
Technology continues to evolve, and with it, the expectations placed on web professionals. The web architect of tomorrow must not only code but also make informed architectural decisions, implement cybersecurity best practices, and contribute to UI/UX design. The lines between roles are blurring, making the full stack skillset increasingly valuable.
For those aiming to stay relevant and competitive, now is the perfect time to invest in learning. Whether you're starting your tech journey or aiming to scale new heights, a full stack developer course can be your gateway to becoming a high-impact web architect.
Final Thoughts
The web architect represents the pinnacle of modern web development — a builder, thinker, and problem solver. With a holistic understanding of how digital systems work together, they’re uniquely positioned to lead projects from conception to deployment. Through comprehensive training and hands-on experience, anyone with the passion to build can acquire these in-demand skills. Embracing the full stack approach is not just a smart move — it’s an essential one in today’s fast-paced digital world.
0 notes
Text
TYPO3 Programming Made Simple: Your First Step

If you’re looking to build powerful, flexible websites, TYPO3 CMS is a great place to start. It’s an open-source content management system (CMS) built for serious projects—think multilingual corporate sites, secure web platforms, and custom features that go far beyond a simple blog. This guide will walk you through the basics of TYPO3 programming, so you can start your development journey with confidence.
What is TYPO3 CMS?
TYPO3 is a CMS written in PHP that’s designed for high-performance websites. Unlike basic CMS tools, TYPO3 is built for large-scale projects. It gives you control over how your website works and looks, using tools like TypoScript, Fluid templates, and extensions.
Getting Your TYPO3 Development Environment Ready
Before you start coding, you need to prepare your setup. Don’t worry—it’s pretty straightforward.
System Requirements: Make sure your system has PHP 8.x, MySQL or MariaDB, Apache or Nginx, and Composer installed.
Install TYPO3 with Composer: Open your terminal and run: bashCopyEditcomposer create-project typo3/cms-base-distribution my-project
Set Up the Database: Once TYPO3 is installed, visit your project in a browser. The built-in installer will guide you through setting up the database and finishing the configuration.
TYPO3 Programming Basics
Let’s look at the key tools TYPO3 gives you to build your site.
TypoScript
TypoScript is TYPO3’s configuration language. It tells TYPO3 how to render content on the page. You don’t need to write PHP—TypoScript lets you control layout and behavior using simple rules.
Fluid Templates
Fluid is TYPO3’s templating engine. It helps separate your HTML design from the backend logic, so you can focus on layout while keeping your code clean and maintainable. It’s especially useful if you're working with designers or frontend developers.
Extensions
In TYPO3, almost everything is built as an extension. Need a blog? An online store? A custom form? There’s probably an extension for that. You can install ready-made ones from the TYPO3 Extension Repository—or build your own for full control.
How to Build Custom Features
Here’s how developers add advanced features to TYPO3:
Creating Extensions: You can use the Extension Builder tool or create one manually by setting up controllers, models, and views. TYPO3 uses the MVC (Model-View-Controller) pattern, which keeps your code structured and easy to work with.
Custom Content Elements: Want content blocks tailored to your exact needs? Use a tool like Mask or write your own to create reusable, flexible elements for editors.
Backend Modules: TYPO3 lets you build tools inside the admin area—like custom dashboards or management panels—to improve the editing experience.
Debugging and Best Practices
No project runs perfectly all the time. Here’s how to handle issues the TYPO3 way:
Turn on debugging in the LocalConfiguration.php file or the Admin Panel.
Use TYPO3’s built-in logging and error reporting to catch problems early.
Follow TYPO3’s coding standards to keep your project clean, consistent, and easy to maintain—especially if you're working in a team.
Why TYPO3?
Built to Scale: TYPO3 handles huge websites with thousands of pages and users.
Multilingual Ready: It makes managing content in multiple languages straightforward and efficient.
Secure by Design: TYPO3 includes strong access controls and gets regular security updates.
Helpful Community: With detailed documentation, active forums, and tutorials, help is always within reach.
Final Thoughts
TYPO3 isn’t just another CMS—it’s a developer’s toolset for building professional, scalable websites. Once you understand TypoScript, Fluid templates, and extensions, you’ll be ready to create just about anything. Whether it’s a small custom feature or a full-blown enterprise website, TYPO3 gives you the structure and power to bring your ideas to life.
0 notes
Text
Top 10 Free Coding Tutorials on Coding Brushup You Shouldn’t Miss
If you're passionate about learning to code or just starting your programming journey, Coding Brushup is your go-to platform. With a wide range of beginner-friendly and intermediate tutorials, it’s built to help you brush up your skills in languages like Java, Python, and web development technologies. Best of all? Many of the tutorials are absolutely free.

In this blog, we’ll highlight the top 10 free coding tutorials on Coding BrushUp that you simply shouldn’t miss. Whether you're aiming to master the basics or explore real-world projects, these tutorials will give you the knowledge boost you need.
1. Introduction to Python Programming – Coding BrushUp Python Tutorial
Python is one of the most beginner-friendly languages, and the Coding BrushUp Python Tutorial series starts you off with the fundamentals. This course covers:
● Setting up Python on your machine
● Variables, data types, and basic syntax
● Loops, functions, and conditionals
● A mini project to apply your skills
Whether you're a student or an aspiring data analyst, this free tutorial is perfect for building a strong foundation.
📌 Try it here: Coding BrushUp Python Tutorial
2. Java for Absolute Beginners – Coding BrushUp Java Tutorial
Java is widely used in Android development and enterprise software. The Coding BrushUp Java Tutorial is designed for complete beginners, offering a step-by-step guide that includes:
● Setting up Java and IntelliJ IDEA or Eclipse
● Understanding object-oriented programming (OOP)
● Working with classes, objects, and inheritance
● Creating a simple console-based application
This tutorial is one of the highest-rated courses on the site and is a great entry point into serious backend development.
📌 Explore it here: Coding BrushUp Java Tutorial
3. Build a Personal Portfolio Website with HTML & CSS
Learning to create your own website is an essential skill. This hands-on tutorial walks you through building a personal portfolio using just HTML and CSS. You'll learn:
● Basic structure of HTML5
● Styling with modern CSS3
● Responsive layout techniques
● Hosting your portfolio online
Perfect for freelancers and job seekers looking to showcase their skills.
4. JavaScript Basics: From Zero to DOM Manipulation
JavaScript powers the interactivity on the web, and this tutorial gives you a solid introduction. Key topics include:
● JavaScript syntax and variables
● Functions and events
● DOM selection and manipulation
● Simple dynamic web page project
By the end, you'll know how to create interactive web elements without relying on frameworks.
5. Version Control with Git and GitHub – Beginner’s Guide
Knowing how to use Git is essential for collaboration and managing code changes. This free tutorial covers:
● Installing Git
● Basic Git commands: clone, commit, push, pull
● Branching and merging
● Using GitHub to host and share your code
Even if you're a solo developer, mastering Git early will save you time and headaches later.
6. Simple CRUD App with Java (Console-Based)
In this tutorial, Coding BrushUp teaches you how to create a simple CRUD (Create, Read, Update, Delete) application in Java. It's a great continuation after the Coding Brushup Java Course Tutorial. You'll learn:
● Working with Java arrays or Array List
● Creating menu-driven applications
● Handling user input with Scanner
● Structuring reusable methods
This project-based learning reinforces core programming concepts and logic building.
7. Python for Data Analysis: A Crash Course
If you're interested in data science or analytics, this Coding Brushup Python Tutorial focuses on:
● Using libraries like Pandas and NumPy
● Reading and analyzing CSV files
● Data visualization with Matplotlib
● Performing basic statistical operations
It’s a fast-track intro to one of the hottest career paths in tech.
8. Responsive Web Design with Flexbox and Grid
This tutorial dives into two powerful layout modules in CSS:
● Flexbox: for one-dimensional layouts
● Grid: for two-dimensional layouts
You’ll build multiple responsive sections and gain experience with media queries, making your websites look great on all screen sizes.
9. Java Object-Oriented Concepts – Intermediate Java Tutorial
For those who’ve already completed the Coding Brushup Java Tutorial, this intermediate course is the next logical step. It explores:
● Inheritance and polymorphism
● Interfaces and abstract classes
● Encapsulation and access modifiers
● Real-world Java class design examples
You’ll write cleaner, modular code and get comfortable with real-world Java applications.
10. Build a Mini Calculator with Python (GUI Version)
This hands-on Coding BrushUp Python Tutorial teaches you how to build a desktop calculator using Tkinter, a built-in Python GUI library. You’ll learn:
● GUI design principles
● Button, entry, and event handling
● Function mapping and error checking
● Packaging a desktop application
A fun and visual way to practice Python programming!
Why Choose Coding BrushUp?
Coding BrushUp is more than just a collection of tutorials. Here’s what sets it apart:
✅ Clear Explanations – All lessons are written in plain English, ideal for beginners. ✅ Hands-On Projects – Practical coding exercises to reinforce learning. ✅ Progressive Learning Paths – Start from basics and grow into advanced topics. ✅ 100% Free Content – Many tutorials require no signup or payment. ✅ Community Support – Comment sections and occasional Q&A features allow learner interaction.
Final Thoughts
Whether you’re learning to code for career advancement, school, or personal development, the free tutorials at Coding Brushup offer valuable, structured, and practical knowledge. From mastering the basics of Python and Java to building your first website or desktop app, these resources will help you move from beginner to confident coder.
👉 Start learning today at Codingbrushup.com and check out the full Coding BrushUp Java Tutorial and Python series to supercharge your programming journey.
0 notes