#Import and Export For Beginners
Explore tagged Tumblr posts
Visit Tumblr Blog
Explore Tumblr blogs with no restrictions, modern design and the best experience.
Last Seen Tumblr Blogs


Fun Fact
69% of Tumblr users are millennials.
Text
How to Export and Import WordPress Posts and Pages: A Beginner's Guide
Managing a WordPress website comes with its challenges, but exporting and importing posts and pages shouldn’t be one of them. Whether you’re migrating to a new host, creating backups, or sharing content between websites, WordPress makes this process surprisingly simple. In this beginner-friendly guide, we’ll walk you through how to export and import your WordPress posts and pages, step by…
#backup WordPress content#export WordPress posts#how to export WordPress posts#how to import WordPress pages#import posts to WordPress#import WordPress pages#manage WordPress content#migrate WordPress content#transfer WordPress content#WordPress#WordPress admin tools#WordPress beginners guide#WordPress export and import tutorial#WordPress migration#WordPress tools#XML file WordPress
0 notes
Text
How I Started an Export Import Business with No Money and Made My First Million in 1 Year

Exporting and importing goods can be a great way to grow your business and reach new markets. However, it can also be a complex process, especially if you are new to it. This article will provide you with a step-by-step guide on how to export and import goods, as well as some tips to help you succeed.
Step 1: Choose a product or service
The first step is to choose a product or service that you want to export or import. It is important to choose a product that is in demand in the target market and that you can generate a profit from. You should also consider your own expertise and resources when making your decision.
Step 2: Research the target market
Once you have chosen a product or service, you need to research the target market. This includes understanding the market size, the competitive landscape, and the regulatory requirements. You should also identify potential customers and distributors.
Step 3: Find a supplier or buyer
If you are exporting, you need to find a supplier who can provide you with the products or services that you need. If you are importing, you need to find a buyer who is willing to purchase your products or services. You can find suppliers and buyers through trade shows, online directories, and personal contacts.
Step 4: Prepare the necessary documentation
There is a variety of documentation that you need to prepare in order to export or import goods. This documentation includes commercial invoices, packing lists, and certificates of origin. You may also need to obtain special permits or licenses.
Step 5: Arrange for transportation
Once you have prepared the necessary documentation, you need to arrange for the transportation of your goods. You can ship your goods by air, sea, or land. The best mode of transportation will depend on the product or service that you are exporting or importing, as well as the cost and delivery time.
Step 6: Clear customs
Once your goods arrive at the destination country, they will need to be cleared by customs. This process can vary from country to country, but it typically involves submitting documentation and paying any applicable duties or taxes.
Tips for success
Do your research: It is important to research the target market, the competitive landscape, and the regulatory requirements before you start exporting or importing goods.
Find reliable partners: It is important to find reliable suppliers, buyers, and freight forwarders.
Be prepared for delays: There can be delays in the shipping and customs clearance process. Be prepared for these delays and have a backup plan in place.
Get professional help: If you are new to exporting or importing, it is a good idea to get professional help from a customs broker or trade consultant.
Where to buy ginger in bulk
If you are looking to buy ginger in bulk, you can do so from a variety of suppliers. Some of the most common sources of bulk ginger include:
Ginger farms: You can buy ginger directly from ginger farms. This is a good option if you are looking for a high-quality product.
Food wholesalers: Food wholesalers typically sell a variety of products, including ginger. This is a good option if you are looking for a convenient and affordable source of bulk ginger.
Online retailers: There are a number of online retailers that sell ginger in bulk. This is a good option if you are looking for a convenient and fast way to purchase ginger.
Here are some images that can enhance the content of this article:
Medium article link: https://medium.com/@exportproducts
I hope this article has been informative and helpful. If you have any further questions about exporting or importing goods, please feel free to leave a comment below.
#bussiness#export#exporter#import#importers#Export Import#How to Start an Export Import Business in 2024#The Most Profitable Export Import Products to Sell#Export Import Tips for Beginners#Export Import Success Stories#Images that can enhance the content
0 notes
Text

As storytellers, realism and continuity are important to us, and they're sometimes hard to achieve within the confines of the game. I’m personally a big fan of posing Sims in open doorways, and unless you want to be limited to the CC options that exist, you’re stuck having to make some poor Sim walk in and out and pausing at just the right moment for the desired effect. But it’s actually very easy to edit a door in Blender to make your own open version!
I initially learned about "posing" objects from surelysims' Wicked Whims posing tutorial, which I highly recommend as a whole. However, it might be a little overwhelming to learn a whole new posing system for the sake of a screenshot or two, which is where this tutorial is meant to come in. Some of my explanations might seem overly simplistic, but I wanted it to be approachable even for beginners. I am far from an authority on using Blender or making CC, and I'm sure there are flaws in this process or easier ways to achieve certain things, but it works well enough for my purposes and I hope it will work for yours too. 💗
Now, onto the tutorial...
Figure out what door or gate you want to create an open version of. If it’s from the vanilla game, all you need to do is make note of its name. If it’s CC, find the package in your mods folder, make a copy, and paste it into My Documents > Sims 4 Studio > Mods. This will allow you to find it in S4S in the next step!
Open S4S. On the main screen, make sure “Standalone Recolor” is checked under the “Object” button, then click the button.

A new window should pop up (if it’s your first time doing this, it may take a while to load). At first, it will show every single object in the game. If you know the name of the object you’re looking for, you can use the search bar to find it. You can also use the filtering options to narrow the selection down by category, game pack, and whether it’s vanilla or custom content. Here, I’ve filtered the search to only base game doors. Once I find the door I want to adjust, I click on it and hit “Next.”

This will pop up a window prompting you to save a new file. Place it somewhere you know you’ll be able to find it easily later and name it accordingly. This file will ultimately contain your mesh edit, so you don’t want to lose it! I suggest placing it in a dedicated folder, on your desktop, or in your Mods folder directly.

On the next screen, you’ll be looking at the contents of the package itself. For this tutorial, you don’t need to worry about grabbing anything but the mesh. Click on the “Meshes” tab and then “Export Mesh.” You’ll again be prompted to save.

Open the mesh file you just saved in Blender. (If the view is funky to start, I recommend hitting 1 on your keyboard’s number pad to get a forward-facing view.) [It should also be noted I’m using Blender 3.6, so my screenshots and the location of certain settings may be different than in earlier or newer versions.]
You’ll see that there are actually multiple meshes involved (and the number can vary from object to object). Right now, we’re only concerned with the “rig.” If you’re familiar with posing, you’ll know that all Sims have a rig that is used to move different parts of their bodies around. Objects also have a rig, and objects that can open will have “bones” that control their moving parts. So click on “rig” and then change “Object Mode” in the bottom corner to “Pose Mode.”


Now, if you hit A on the keyboard, it will select all bones and you can see where they’re located. As far as I can tell, all doors have two bones that control their swinging movement. They both do essentially the same thing. I tend to stick with the top bone, which is called something like “bind_doorSwing.”

Pro-tip: If you’re having trouble seeing or selecting the rig's bones, you can change the view on the right side of the screen to “dope sheet.” Then when you save the position of the bones, just like when posing a Sim, by selecting all with A then clicking I and selecting “Location & Rotation,” the list of available bones will pop up there.


Rotate the door open using this bone or bones, if it’s a double door. On double doors, I recommend rotating each side individually rather than trying to rotate them together, as you may get unexpected results. You can use the R+Z combo on the keyboard to limit the direction of movement. (You can also use this in combo with numbers to swing them more precisely. For example, if you want a 45 degree swing, you can press R+Z+45.) Specifying the Z axis allows you to only swing the doors open and closed while restricting their movement in other directions.

Once you’ve got the doors swung open to where you want them, hit A to select all bones, then hit I and select “Location & Rotation” to save the position. (If you’re a poser, this maneuver is already familiar to you - and you know how important it is! If you skip it, the new position won’t save and the doors will revert back to closed.)

That’s it! You don’t have to do anything else to the mesh. Save your file in Blender. If you want to keep it separate from the original door mesh, save as instead and name it something different. (This is why you may want a dedicated folder, since the number of files does add up!)
Reopen the package you made earlier in S4S (or simply return to it if you’ve kept it open). From the same place you exported the mesh, you will now import the edited mesh. Hit “Import Mesh,” navigate to your edited Blender file, and you should now see your edited door replace the original. Since it’s the same mesh, all the swatches will still work perfectly with it.

You’ll notice that you’ve only replaced the “LOD 0 (High)” version of the mesh. When you click the drop-down menu, you’ll see that there are also medium and low detail versions, as well as shadow meshes at all levels of detail. If you’re only making an object for personal use, you don’t have to worry too much about LODs. You can probably just import the same mesh into LOD 1 and LOD 2 and be fine (so long as your computer isn't a potato). And if this is just for you, I honestly wouldn't even touch the shadow LODs.
The only other thing you might do is go back to the “Catalog” tab and alter the object name so you can find it easily in the game catalog. You can also edit the description, price, etc. if you so desire. Hit “Save.”

Test in game! If the package isn’t already in your Mods folder, move it there. As long as you didn’t mess with any of the tags, it should still be in the door section of build mode and work perfectly as a functional door. The door swinging animation will look different, and you could probably get rid of it if you wanted, but that’s above my current skill level and I don’t think it’s really necessary for our purposes. If all you need is an open version of a very specific door for storytelling purposes, it gets the job done.


(First screenshot: doors swung open as intended, second screenshot: doors swinging in the opposite direction as they’re walked through)
These steps can also potentially be used to create open versions of other in-game objects like gates, books, chests/boxes, etc. I’m only just beginning to experiment with minor mesh edits, but once you get the hang of it they can often be faster and easier than trying to line up the best circumstances to get the perfect shot in-game. I might make more tutorials for small edits like this that help with storytelling realism and continuity in the future!
#ts4#sims 4#ts4 storytelling#ts4 tutorial#sims 4 storytelling#sims 4 tutorial#this is the first tutorial i've written so do let me know if anything's confusing!!!#*tbw
276 notes
·
View notes
Text

Fully Underwater Lot Tutorial
@creida-sims @kitkat99
UPDATE January 2025
There is now a much, much easier way to do this. This version of SimPE now includes a tool to change terrain geometry. To edit the terrain in SimPE, go to Tools/Neighborhood/Neighborhood Browser and load your neighborhood. In the Resource Tree, select Neighborhood Terrain Geometry (NHTG) and select the only resource in the Resource List. In Plugin View, click Terrain Editor. It's very intuitive, but basically, you can edit the terrain under a lot to make it be underwater. You can also delete the road with the Road Editor.
I'll keep the old tutorial for archival purposes, but unless you can't or don't want to install this version of SimPE, it is pretty much obsolete.


Some warnings and disclaimers
1. This is not a beginner tutorial. I have tried to explain with as much detail as I can, but still, if you just started playing The Sims 2 I recommend trying out other building tutorials first.
2. I have tested it but there's always a possibility that some new problems will come up. Follow at your own risk. Backup your neighborhoods before trying this. Test it first in a new empty neighborhood.
3. These lots are roadless, so they require specific gameplay conditions to avoid breaking immersion (pun intended).
4. They will behave like normal lots in the sense that sims can walk around and do anything as if they were on land. There's one big problem to consider: when sims go fully underwater, their hair and some parts of their clothing might disappear visually.
So this is more useful for structures that sit above the water, shallow water that doesn't reach a sim's head or, with some modifications, small islands surrounded by water. So unless you want bald mermaids, I don't recommend this for sims that live underwater.
5. If you use Voeille's hood water mod, reflections will look glitchy in lot view, because this is technically not a beach lot. The only solution I found is enabling "Lot view ocean reflections" in RPC Launcher. Otherwise you'll have to deal with glitchy reflections.
6. Before following this tutorial, make sure you know the basics of creating, editing, importing and exporting SimCity 4 terrains. Written tutorial by SimEchoes here, video tutorial by loonaplum here.
Software and mods used
The Sims 2 FreeTime expansion pack (required for the modifyNeighborhoodTerrain cheat)
SimCity 4 (required) Hood Replace by Mootilda (required)
Lot Adjuster by Mootilda (required)
Portal revealer by Inge Jones (required)
Voeille's pond and sea water overhaul and RPC Launcher (optional, see disclaimers)
The Sims 2 Apartment Life and Bon Voyage expansion packs (optional, for "walk to lot/work/school" options)
Cheat codes used
moveObjects on/off
modifyNeighborhoodTerrain on/off
1. Creating/editing a terrain in SimCity 4
1.1. You can edit an already existing terrain or create your own from scratch. In both cases, you need to keep two things in mind: If you want the usable area of the lot to be underwater, such as making houses for mermaids or a coral reef, make sure the water is shallow. No more than a few short clicks with the terraforming tools in SimCity 4. This is because The Sims 2 live mode camera won't go underwater, so making the water too deep might make it uncomfortable to build or play the lot.
If you goal is to build a structure mostly above water, like a ship or an oil rig, you can get away with making the water a bit deeper, but not too much. I've noticed that sometimes the lot terrain tools stop working correctly if there a hill that's too steep.
1.2. Once you've created the terrain, you will need to add a small island on the area where your lot will be. I know it seems contradictory, but trust me, it will make sense. Create and name your city. Use the terraforming tools in city mode to make a tiny island of about 6x2 squares.

1.3. On the island, use the road tool to place a straight road that takes up 4 squares. Then, using the street tool (the last option), place two short streets at each end of the road.
Streets will disappear in TS2, only roads translate to roads in ts2, so why do we place them? Well, placing a street at the end of a road will get rid of the rounded end bit in TS2, which can't be used to place lots. This will be important for the placement of the lot and to make sure the edges of the lot are underwater. If this doesn't make sense yet, don't worry, it might make sense later.
1.4. Save the terrain. Don't exit SimCity 4. Copy your new/edited sc4 terrain from your SimCity 4 folder to your SC4Terrains folder in your Sims 2 documents directory. It is usually
"C:\Users\YOURUSERNAME\Documents\EA Games\The Sims 2 Ultimate Collection\SC4Terrains"

1.5. Back in SimCity 4, we're going to make a second version of this terrain. Remove the roads and streets you made before, with the bulldozer tool. With the level terrain tool in Mayor mode, carefully remove the island, so it's on the same level as the bottom of the ocean/lake. Don't change anything else. Save, exit and copy this second terrain to your Sims 2 SC4Terrains folder. Make sure you rename the file to something different from the first one, like adding "no roads" to the filename. You should have two terrains by the end of this step. One with the small island and one without it.
2. Editing the terrain in The Sims 2
2.1. Open The Sims 2 and create a new neighborhood using your new terrain. Something to keep in mind: if you want the terrain to be a subhood of another neighborhood, make it a subhood from the start. You will not be able to move the lot once it's finished, since it will be roadless. I don't recommend decorating the neighborhood for now. Leave it empty until the end of this tutorial.

2.2. Place the smallest empty lot (3x1) on the island.
2.3. In neighborhood view, open the cheat console by pressing Control + Shift + C, and type
modifyNeighborhoodTerrain on
To quote The Sims Wiki:
"This allows you to alter the neighborhood terrain by raising or lowering it. To use this cheat, be in the neighborhood view, then enter the cheat "modifyNeighborhoodTerrain on" (without the quotation marks), and click over the area you would like to change. To select a larger area, click and drag the cursor to highlight the desired area. Press [ or ] to raise or lower the terrain by one click, press \ to level the terrain, and press P to flatten terrain. When you're finished, type “modifyNeighborhoodTerrain off” in the cheat box (again, without the quotations)."
If you use an English keyboard, these instructions will probably be enough for you. If you don't, I recommend first testing the cheat, because the keys for using this cheat are different in other languages. For example, in my spanish keyboard, the question marks are used to raise and lower the terrain and the º/ª key flattens it.
Another aside: When you select an area using this cheat, a green overlay is supposed to show up. Some lighting mods make this green overlay invisible, like the one I use. If that's your case, you kind of have to eyeball it. Remember that one neighborhood grid square in TS2 is equivalent to 10 lot tiles, or the width of a road. I recommend getting a mod that allows you to tilt the neighborhood camera on the Y axis, which will allow you to have a bird eye's view of the terrain.

2.4. Flatten the terrain around the lot so it's at water level. This cheat won't allow you to edit the terrain inside the lot, so you have to edit the terrain around the lot. Make sure there is plenty of flat underwater space around the island. You should end up with something like the picture above. The water will have some holes, but don't worry, those get filled with water the next time you load the neighborhood.
2.5. Enter the lot and place any object on it. Save the lot and exit the game. This is so LotAdjuster recognizes the lot in the next step.
3. Expanding the lot with Lot Adjuster
3.1. Open Lot Adjuster and select your neighborhood and lot.

3.2. Click "Advanced…". Check "Over the road (only enlarge front yard)". Use the arrows to add 20 tiles to the front yard. Click "Finish" and "Restart".

3.3. Select the same lot again. This time, check "Add and remove roads". Uncheck the road checkbox for the front yard. Add 20 Tiles to the back yard, 20 tiles to the left side and 10 tiles to the right side. Check "Place portals manually". You should end up with a 60x60 lot, which is the biggest size. You might want a smaller lot, but unless you know what you are doing, I recommend starting with this size. You can shrink it later. The goal of making the lot this big is making sure the edges of the lot are underwater. Click "Finish" and exit.
4. Moving portals and flattening the lot

4.1. Make sure you have the portal revealer by Inge installed in your Downloads folder before the next step. Open your game and load your neighborhood. The lot should look something like the picture above.

4.2. Load the lot. Delete the object you placed before. Place the portal revealer on the lot near the mailbox/phone booth and trashcan. It looks like a yellow flamingo and you can find it in Build Mode/Doors and Windows/Multi-Story Windows catalogue. You will notice that when you select the object from the catalogue, some yellow cubes appear on the lot, and when you place the object, the cubes disappear. After placing the portal revealer, pick it up and place it again. This will make the yellow boxes visible again.
So what are those yellow boxes? They are portals. They determine where sims and cars arrive and leave the lot. The ones on both ends of the sidewalk are called pedestrian portals, and in the street, one lane has portals for service vehicles (maids, gardeners, etc.) and the opposite is for owned cars and carpools. You can see the portal's names if you pick them up. Make sure not to delete any of them.
Now, since this is going to be a roadless lot, ideally there won't be vehicles in it. This means that the lot would ideally be accessed through walking only. In community lots, this would not be an issue if you have the Bon Voyage expansion pack, which allows sims to walk to lots.
In residential lots, you might run into some problems. Service NPCs always arrive on vehicles, and unless your sim owns a vehicle, the carpool and school bus will always come to pick sims up for work/school. It might break your immersion to have a vehicle show up underwater or on a ship. There are many options to avoid this: having sims work on an owned business instead of a regular job, not having kids on the lot, making the kids homeschooled, avoiding calling service NPCs… it depends on how you want to play the lot. For example, my icebreaker is a residential lot, only adults live there, some sims live in it temporarily and none of them have a regular job.

All of this is relevant because we're going to move the portals. Where you move the portals depends on you. Think about how you're going to use the lot. In my icebreaker, I placed the car portals (which won't be used) underwater, on a corner of the lot. I placed the pedestrian portals on the ship, to pretend that the walkbys are part of the crew or passengers. But for now, just move the portals, mailbox/phone booth and trashcan to a corner of the lot. To be able to pick up the mailbox/phone booth and trashcan, use the cheat moveObjects on. Delete the street and sidewalk tiles using the floor tool (Control + click and hold left mouse button + drag).


4.3. Flatten the island with the level terrain tool. Save the lot. Almost done! Don't mind the hole in the water, this will be fixed. You will notice that in neighborhood view, the island is still there. This is because the neighborhood terrain under the lot hasn't updated. I don't know why this happens, but it does. Normally, moving the lot would fix it, but we can't move this lot using the game's tools. Instead, we are going to fix the terrain with Hood Replace. Don't exit the game yet.
5. Updating the terrain with Hood Replace
5.1. Create a new neighborhood using the new roadless terrain. Make sure it has the same type of terrain (lush, desert, etc.) as the first one. Again, name it "NO ROADS" or something similar. Exit the game.

5.2. Open HoodReplace. On the left column you will select your "NO ROADS" neighborhood. In the right column, select the neighborhood that has the underwater lot. Check these settings: Replace terrain, replace road, and versioned backups. Leave everything else unchecked. Click Copy.

5.3. Open The Sims 2 and load the neighborhood to check if the changes worked. That concludes the tutorial. At this point you can shrink the lot if you don't want it to be so big. Remember to move the portals to their final placement when you're done building the lot. Also keep in mind pedestrians (walkbys) always walk by the mailbox, so keep the mailbox accessible for sims.
If you're going to have multiple underwater lots, I recommend making them first, and decorating the neighborhood after. Doing this in an already existing neighborhood might be more difficult, mainly because, if you made any changes to the terrain using the modifyNeighborhoodTerrain cheat in the past, they might get reset when using Hood Replace.
154 notes
·
View notes
Text
complete beginner's guide to [kpop] giffing, as explained by me!
keep in mind everyone has a different style and process, so there are some things in mine that may not feel intuitive or helpful - if so, don't include it! if you can make the gif, and have fun doing it, that's good enough. this post also assumes interest in specifically kpop giffing, but can for the most part apply to other content as well. i would just recommend different sharpening and coloring for those.
separated by headings (not images, since i need those... for examples) - if you are skipping to a specific section, look for the orange text of what you are looking for!
table of contents: - picking your programs - additional tools and programs (optional) - finding files - importing to photoshop (vapoursynth, screencaps, etc) - photoshop shortcuts and actions - sharpening - coloring - export settings - posting on tumblr
programs:
if you already have photoshop / your giffing program installed and set up, go ahead. if you don't, i would recommend looking here to get photoshop. please make sure you follow instructions carefully and safely! i do know photopea is an alternative people use, and i'm sure there are others. i unfortunately don't know any tutorials to link and probably won't be much help in regards to those programs, but i'm sure there are some floating around on tumblr!
my gif process uses photoshop, so this tutorial assumes that as well. if you use a different one, you might be able to transfer this to what you use, i'm not really sure :(
additional tools and programs: - handbrake: upscaler, found here. i make my own settings and generally only use this on lower quality sources to give vapoursynth a better chance with encoding in higher quality. - davinci resolve: a program i use to make clips appear 60fps when they are choppy or too few frames for the gif to look nice, and occasionally to do pre-photoshop coloring! i use the free version. i do not use this all the time and it is a big program, so definitely don't get it if you think you'd forget to / not want to use it. - yt-dlp: open source, downloads pretty much any file i could want quite well. i use this for most of my downloads and for subtitles as well. does require some knowledge of code, or, at the very least, willingness to troubleshoot set-up. find it here! i can share the command lines i run for: video, audio, vid + sub. - 4k+ downloader: what most people use for youtube-source sets, i believe. you have a limited number of downloads per day on the free version, thus the other downloading programs. - jdownloader2: no limit but sometimes a little slow or will refuse to download because of not being logged into an account, etc. a good download alternative if you plan on downloading a lot and yt-dlp is too much. - vlc: free program, standard on some devices, good for viewing files. - mpv: excellent file viewing, can also deinterlace and screencap (if you do not have / use vapoursynth) - vapoursynth: mac users beware, it's not optimized or set up and is a huge headache. windows users, once you get it set up, it's golden.
finding files, what to look for, and how to use them: how to use is explained here, with a focus on smooth and nice speeds! but finding the file is the first step, so let's head there.
stages: k24hrs (invite only, feel free to private dm or send an ask off anon for a file - i will do my best to get it to you); kpopbuzzhub; sharing korea torrent (requires a torrent app); twitter (shrghkqud (only has recent files) and a few other uploaders, requires much more active searching). there are a few other places you can look, but it is often more trouble than it is worth (or costs $). i am also always willing to help people find materials, so you can ask me to help you look for something or to link a source i used for whatever set.
music videos: also sometimes on k24hrs. i use vimeo a lot (color graders, directors, etc., will upload clearer versions). sharemania.us has some kpop mvs, typically bigger groups (i.e. blackpink). this is a place i check for ggs. and if none of these places or searching for torrents on btdigg, or on google in korean works, i just download the highest quality setting from youtube.
other types: like vlogs and fancams, normally directly downloaded from youtube, instagram, or twitter using yt-dlp or sites specifically for the app (i.e. twittervideodownloader).
what do i look for? 1080i for stages (or 1080p) are often super nice as they're a .ts. 2160p/4k is often ideal, but it also depends on your computer and what you are comfortable working with! generally - not always due to ai upscale - a bigger file size (in the gbs, high mbs like 800) is better and has more detail that will look clear when you work on it. older stages (2nd gen and before, some 3rd gen) and music videos often always are lower quality due to camera quality, and much harder to find. if you have to use the youtube upload for a stage, it is definitely doable, but it may be slightly disappointing in the quality you want to achieve. it depends on what you're comfortable posting and making!
how do i use them? if you use vapoursynth, scenedetect (encode/process whole video) or timestamp (just a small clip) your file - if upscaling, using davinci resolve, or any other pre-processing, do that first. it will pull up a resizer and a program and once you encode, it will give you an output file using the size and settings you put. this will import to photoshop. if using mpv or another screencapping method, take your screencaps (again, all pre-processing first) and prepare to import. there are two ways to do that for screencaps. you can also just watch whatever you downloaded, i'm guilty of downloading concert files just for fun 😅
in the next sections, i will be using four different files of varying quality and sources to explain my steps. hopefully that is helpful!
example file 1 (4k and 60fps, obtained using yt-dlp) example file 2 (1080i, obtained from k24hrs) example file 3 (1080p HD, obtained using yt-dlp) example file 4 (pulled from the gg archive i use, master)
importing to photoshop (vapoursynth and mpv explained): using example file 1, i am processing in vapoursynth - i always do one extra second before and after the clip i actually want so it doesn't cut off any frames i'd like. i adjust my sizes based on what works best for tumblr (540px for wide, 268px for 2 column, and 178 for 3 column). i always use finesharp 1.5 (this setting is up to you! i used to use .7, so totally ok if it changes over time, too!) when you export in vapoursynth, you need the y4m header. i use export to mov preset.
when importing to photoshop using a video (so vapoursynth, video files, not screencaps):


i recommend making your selected range a little bigger than the frames you want so they don't accidentally not get included. delete any extra frames while in the frame animation and then turn it into video timeline. i turn all my layers into a smart object (select them all by clicking the bottom layer and then shift-clicking the top one, or use (on windows) ctrl + alt + a to have it select faster). set timeline framerate (if you want to, i always use 60).


now your smart object is ready to sharpen and color!
using example file 2, i am processing mpv - i hit 'd' until deinterlace is on 'auto'. find the clip you'd like and hit your screencap shortcut (alt+s) for me - your screencaps should be super clear, it depends on how you set up your software (if mpv, what compression you told it). screencaps can take up a ton of storage so i recommend only screencapping what you need and deleting them after. when you hit your shortcut, play the file to the end of the clip you went and hit the screencap shortcut again to stop. your frames should be in the folder you designated as pngs now. delete extra frames now!
you now have two options: import as is, which can be a little slow, or turn them into dicom files. importing as is is done through stack. it will prompt you to select what is being loaded - change Use: to folder, and let it process. it will be slow. hit ok when the file list updates.

when it is done loading: create frame animation -> make frames from layers -> reverse frames. i would crop now using the crop tool for processing speed, and then proceed to do video timeline, smart object, and frame rate. when cropping: on the top, above your document names, the second image should show up on the crop tool - this can set your dimensions. i zoom and crop screencaps using this.


the other option is DICOM files, and what i use. when you have your pngs, do alt + d in the folder (windows), type cmd, and run this command: ren *.* *.dcm. press enter. it will update the files. on macOs, just rename the file type to .dcm.

then, import as so (it will prompt you to select the folder your .dcm are in, and will not work if the files are not actually DICOM). i find it much faster than the stack import. crop when it is done importing for processing time, like the other screencap import style.

create frame animation -> make frames from layers -> video timeline -> smart object from layers -> 60 fps.
photoshop shortcuts and actions: (windows) - ctrl + alt + a: select all layers - ctrl + shift + alt + w: export as image - ctrl + alt + shift + s: save for web (legacy) - this is the gif one!
actions are imported or created, i've shared my sharpening ones before. there are plenty you can find (or make) for a variety of things, such as aligning objects to a fixed position on all docs, doing the screencap reverse and import for you, etc. they are imported using load actions - select the [downloaded] .atn file and it'll pop up.

sharpening: explained here, and has my actions (feel free to use). very important to the quality and clarity of the gif. the better the file, the clearer a gif looks, sharpening can only do so much. play around during this step!
coloring: very much the most personal taste stage of giffing. i explain my process here. in kpop giffing, we tend to focus on unwhitewashing. other giffing tends to be more aesthetic tastes and fun since the source has better colors to work with.
export settings: these are what i use! you need the 256 colors. i do not recommend lossy or interlaced. i think bicubic sharper is the clearest i have tried.

posting on tumblr: use these dimensions FOR GIFS. edits can be different. height is up to you - i would not go over 800, but i think my quality looks weird past 600 range anyways.

example gifs: yeji, from example file #1, imported using vs. uses no. 1 sharpening (altered) from my pack. colored. zhanghao, from example file #2, imported using mpv and the load via stack. uses no. 4 sharpening (altered) from my pack. colored. taeyeon, from example file #3, imported using mpv and the load via dicom. uses no. 1 sharpening from my pack. colored. eunbi, from example file #4, imported using vs. uses no. 2 sharpening from my pack. colored.


if your gifs don't look how you want right away, that's okay! it takes time. my first ones were not great either. i am always improving on and working on my gifs. good luck and have fun hehe ♡
#i do not feel that qualified to answer this so caveat im not the best. and please also take ideas from my lovely moots and their resource#tags and tutorials / shared things. they are all so good#m:tutorial#resources#long post#flashing tw#userdoyeons#awekslook#ninitual#useroro tuserflora#useranusia#userchoi
85 notes
·
View notes
Text
Scripting Guide to World Building for Shifters 𓍯𓂃𓏧☾

This guide is designed for individuals who find scripting challenging and are looking for a thorough, step-by-step approach to help bring their desired reality to life. It aims to cover a wide range of essential elements, providing detailed prompts and questions to encourage creative thinking and help you craft a unique, immersive, and well-rounded script. Whether you're a beginner or someone who wants to refine their scripting process, this guide offers plenty of ideas and suggestions to ensure nothing important is overlooked. *Character Design Guide
1. The Foundation of Your Reality
Name and Significance:
What is the name of your reality?
Does it have a deeper meaning?
Who named it—its creators, the first settlers, or an external observer?
Shape and Structure:
Is your world a sphere, a flat plane, or something unconventional (e.g., a ringworld, floating islands)?
Does it exist in a single dimension, or does it span multiple dimensions or planes of existence?
Existence and Origin:
How did your world come into existence? Was it created by a divine force, a scientific anomaly, or natural evolution?
What events or forces shaped its current state?
Purpose of This World:
Why does this world exist? Is it a sanctuary, a testing ground, a haven for life, or something else?
Universal Rules:
What are the governing laws of nature (gravity, time, physics)?
Are there any unusual or contradictory rules (e.g., time flows backward in some regions)?
How is reality itself maintained? Is it fragile or robust?
2. Geography and Environment
Global Layout:
How many continents or landmasses exist? What are their names, and what defines each one?
Are there unique planetary features (e.g., floating continents, endless oceans, underground realms)?
Terrain and Landscapes:
What are the major biomes (e.g., deserts, forests, mountains)?
Are there distinct geological phenomena like volcanoes, crystal caves, or floating mountains?
Weather and Seasons:
How many seasons does your world experience?
Are weather patterns predictable, chaotic, or controlled by external forces?
Are there unique weather events, such as glowing auroras, rains of gemstones, or storm systems with sentience?
Natural Resources:
What resources are available (metals, magical crystals, exotic plants)?
Are these resources renewable, or is scarcity a driving force?
Flora and Fauna:
What types of plants dominate different regions?
Are there bioluminescent forests, carnivorous trees, or crops that grow overnight?
What creatures inhabit this world?
Are they based on Earth animals or entirely new creations?
Do any creatures have unique abilities, like shapeshifting or teleportation?
Are any species sentient or capable of communication with humans?
3. Societies and Cultures
Civilizations and Nations:
How many civilizations or nations exist?
What are their defining characteristics (e.g., technological, magical, or cultural)?
Do they have alliances, rivalries, or a history of conflict?
Cultural Diversity:
How do cultures differ across regions?
What are the dominant values or ideologies (e.g., honor, freedom, progress)?
Traditions and Celebrations:
What holidays, festivals, or religious events are celebrated?
Are there seasonal or celestial events that inspire rituals or ceremonies?
How do people mark milestones like birth, coming of age, marriage, or death?
Daily Life:
What does a typical day look like for an average person?
How do people spend their mornings, afternoons, and evenings?
Social Hierarchy:
Are societies egalitarian, hierarchical, or merit-based?
What determines social status (birth, wealth, achievements, magical ability)?
Languages and Communication:
How many languages are spoken?
What are some common greetings, idioms, or phrases?
Are there unique ways of communication (e.g., sign language, telepathy, or written symbols)?
Economy and Trade:
What is the primary form of currency (coins, barter, energy)?
What are the main exports and imports?
How do trade routes function, and are they safe?
Art and Expression:
What forms of art are popular (music, painting, sculpture)?
Are there unique styles or materials used?
Are artists respected or marginalized?
4. Technology and Tools
Technological Level:
Is the technology futuristic, medieval, steampunk, or something else entirely?
Are there advanced machines, or is everything handcrafted?
Energy Sources:
What powers technology (electricity, magic, sunlight, emotional energy)?
Are energy sources renewable or finite?
Transportation:
How do people and goods travel? Examples: flying ships, teleportation gates, sentient mounts.
Are roads, waterways, or air routes the primary mode of transportation?
Weapons and Defense:
What weapons are used in combat (swords, plasma guns, enchanted bows)?
How do people protect themselves (armor, force fields, magical wards)?
Everyday Tools and Gadgets:
What devices simplify daily life?
Are there any tools unique to specific professions?
5. Conflict and Tension
Global Conflicts:
Is the world at peace or in turmoil?
What are the sources of conflict (land, power, ideology, survival)?
Factions and Alliances:
Who are the key factions (nations, guilds, rebel groups)?
What are their goals and motivations?
Are there neutral groups or individuals playing both sides?
Villains and Threats:
Is there a singular antagonist or multiple threats?
Examples: a tyrannical ruler, an ancient curse, a rogue AI.
What motivates these threats, and are they sympathetic or purely evil?
Natural Disasters and Catastrophes:
Are there global events like earthquakes, super volcanoes, or dimensional rifts?
How do societies prepare for or respond to these events?
Internal Tensions:
Are there class struggles, political corruption, or religious divides?
How do ordinary people cope with these tensions?

6. Magic or Unique Elements
Magical Laws:
What is the source of magic (nature, gods, ancient artifacts)?
Are there limits to its use, or does it come at a cost?
Unique Elements:
What sets your world apart from others?
Example: A sun that whispers secrets to those who listen at dawn.
Artifacts and Relics:
Are there legendary items with immense power?
What are their origins, and who seeks to possess them?
7. Geography and Aesthetic Details
Architecture and Urban Design:
What do cities and villages look like?
Are buildings made of stone, metal, wood, or unconventional materials like glass or bone?
Fashion and Clothing:
What fabrics, colors, and patterns are most common?
Are clothes purely functional, highly decorative, or symbolic?
Cuisine and Food:
What are the staple foods in your world?
Are there exotic dishes or drinks with unique effects?
How are meals prepared, and what utensils are used?
8. Time and Progression
Calendar and Timekeeping:
How is time tracked? Are there hours, days, weeks, or unique cycles?
Are there celestial events that mark time (e.g., eclipses, comet passes)?
Aging and Lifespan:
How long do beings live?
Are there rituals for different life stages?
Historical Eras:
What are the major historical periods?
Are there legendary figures or events still celebrated or mourned?
Future Vision:
How do inhabitants imagine their world will change over centuries?
Are there prophecies or predictions about the future?
9. The Metaphysical Nature of the World
Spiritual Layer:
Is there an afterlife or spirit realm?
Can living beings interact with the spiritual plane (e.g., through rituals, dreams, or certain locations)?
Are ghosts, spirits, or other ethereal entities common?
Soul Mechanics:
Do beings in your world have souls or life energy?
Can souls be transferred, trapped, destroyed, or reborn?
Are there beings without souls?
Fate and Destiny:
Is there a predetermined fate or free will?
Are there entities (oracles, gods, etc.) that oversee fate?
How do people view destiny—something revered, feared, or ignored?
10. Communication Across the World
Long-Distance Communication:
How do people communicate over vast distances (messenger birds, magical crystals, telepathy)?
Are there communication hubs or networks, such as magical relay towers or ancient devices?
Media and Information:
Are there newspapers, magical projections, or digital networks?
How is news spread—by word of mouth, official channels, or clandestine organizations?
Are propaganda or misinformation prevalent?
Secret or Forgotten Knowledge:
Are there lost languages, forbidden texts, or ancient knowledge hidden in remote places?
Who guards or seeks these secrets, and what are their motives?
11. Ecology and Environmental Balance
Ecosystem Dynamics:
How do species interact in your world? Are there predator-prey relationships?
Is there a balance between nature and civilization, or is one dominating the other?
Environmental Hazards:
Are there toxic zones, cursed lands, or areas where the laws of nature break down?
How do inhabitants adapt to or avoid these regions?
Conservation and Exploitation:
Do societies in your world care about preserving the environment?
Are there organizations or individuals dedicated to protecting endangered species or sacred places?
12. Entertainment and Recreation
Games and Sports:
What are the most popular games or physical activities?
Are there unique sports or competitions tied to the culture or geography of the world?
Storytelling and Literature:
What forms of storytelling exist (oral traditions, books, holograms)?
Are there legendary tales or epics passed down through generations?
Performing Arts:
What kinds of music, dance, or theater are popular?
Are there magical or technological enhancements to performances?
Leisure and Pastimes:
How do people relax—hot springs, meditation, board games, or hunting?
Are there communal spaces, like taverns or virtual reality lounges, for socializing?
13. Health, Medicine, and Healing
Healthcare Systems:
How do societies manage illness and injury?
Are there healers, clinics, or magical remedies?
Diseases and Cures:
What are the most common illnesses or ailments?
Are there unique diseases that require special cures, rituals, or sacrifices?
Mental Health:
How is mental health viewed and treated?
Are there unique psychological conditions tied to the world’s magic, technology, or history?
14. Cosmic and Celestial Elements
Astronomy and Sky Features:
How many moons, stars, or celestial objects are visible in the sky?
Are there constellations with cultural or religious significance?
Space Exploration:
Is the world aware of other planets or galaxies?
Do inhabitants explore beyond their world, or is it a mystery?
Celestial Beings:
Are there deities, angels, or cosmic entities tied to the heavens?
Do celestial events (eclipses, meteor showers) have magical or prophetic significance?
15. Economics and Labor
Workforce and Professions:
What are the most common jobs or careers?
Are there unique professions tied to the world’s magic, geography, or history?
Trade Networks:
How do goods and resources move across regions?
Are there monopolies, trade guilds, or underground markets?
Currency and Wealth:
What is the currency, and how is wealth measured?
Are there alternative economies, like magical exchanges or something unique to your world?
16. Education and Knowledge
Education Systems:
How is education structured (schools, apprenticeships, guilds)?
Is education accessible to all or limited to the elite?
Libraries and Archives:
Are there grand libraries, hidden archives, or magical repositories of knowledge?
How is knowledge preserved or restricted?
Teachers and Scholars:
Who are the educators and intellectuals in this world?
Are they revered, feared, or ignored?
17. Personal Identity and Expression
Names and Naming Conventions:
How are people named? Are there family names, titles, or unique traditions?
Do names have symbolic or magical significance?
Fashion and Appearance:
How do people express individuality through clothing, hairstyles, or accessories?
Are there cultural taboos about certain colors, patterns, or styles?
Identity and Status:
How do individuals define themselves (by lineage, achievements, or beliefs)?
Are there cultural markers of status, such as tattoos, jewelry, or magical auras?
18. Laws and Governance
Types of Government:
Are there monarchies, democracies, theocracies, or something unique?
How much power does the government wield over individuals?
Legal Systems:
What are the major laws, and how are they enforced?
Are there courts, trials, or magical truth-telling devices?
Crime and Punishment:
What are common crimes, and how are they punished?
Are there vigilantes, bounty hunters, or corrupt officials?
19. Dreams and the Subconscious
Dreams and Their Role:
Do dreams have significance in your world?
Can people share dreams or enter each other’s subconscious?
Nightmares and Fears:
Are there entities or forces that prey on people’s fears?
Can nightmares manifest physically?
Dreamscapes:
Are there alternate realities accessible only through dreaming?
Can dreamers control or manipulate their dreams?
20. Time and Memory
Perception of Time:
Does time flow uniformly or differently in various regions or dimensions?
Are there time loops, anomalies, or portals to other eras?
Memory and History:
How is history recorded or remembered?
Are there people or artifacts that preserve memories?
Can memories be altered, stolen, or erased?

#empyrealoasis#shiftblr#shifting consciousness#shifting blog#reality shifting#shifting#4d reality#desired reality#respawning#permashifting#shifting community#void#void state#void concept#voidblr#pure consciousness#power of the mind#loa blog#loa#loassumption#loassblog#loa tumblr#loablr
79 notes
·
View notes
Text
Resources for Creating: My Go-To things.
Update: I’ll be updating the list on this page from now on, since Tumblr can’t handle so many hyper-links in one post, on Dreamwidth - right here, so I won't have to update it multiple times. Please note: I keep updating this list, and updates aren't showing up on reblogs. Please check the original post for the most up to date list.
Sooo this is going to be a long comprehensive list. I got back to this game after a long time and with a different computer, with a dedicated graphics card, hurray! It made me want to return to making things, so while gathering back all the necessary stuff, I've complied this list. It might be is updated as I go along, but these are the main things I use. Maby one day i'll even finish something. So here are my go-to resources & tutorials; I'm posting it here for safekeeping, and hopefully others will find it helpful. Everything that's listed is here free. So many wonderful things for free under the cut.
Programs – General:
Creating: Blender. Blender Addons: 3D Print Toolbox – comes with blender, enable it from within the program. Originally for 3d printing. Good for fixing flipped normals, and some quick general repairs. Source Tools And source tools wiki – for exporting as SMD!!!! (SimPe: to enable bump maps for the mesh on import). GMDC Addon for Blender 4.0+ by Nopke.
GIMP. GIMP Addons: G'MIC-Qt. Resynthesizer. Nvidia dds?. Doesn’t it come with Gimp?
Other: Nvidia Texture Tools Exporter (iirc it works with all graphic cards that are compatible, doesn’t require Nvidia). For making Normal / Bump / Cube Maps. For high quality compression.
NormalMaps - Online, For making all types of maps, has good setting menus. A very cool tool.
Converting: Umodel, for Unreal Engine (Static meshes: export as gtlf.2. Animated meshes: export as psk. Requires Add-on). AssetStudio, for Unity. AC Viewer, self implied (+ USD Addon for blender). QuickBMS* and support forum, for basically everything else. (don't forget the required scrips, down the same page). *I haven’t tested it fully yet, but it was recommended here. A tutorial for it is listed further down. Works like a charm.
UV Mapping: UV Mapper, Classic (free) and the most recent Demo (for visualization).
Programs – Sims:
Never Mind the Bollox, Here's Osab and MAGIkarp to the rescue!
Latest version of SimPe, works with a non-default installation path. Chris Hatch's updates.
Home Crafter installation, Post by Huge Lunatic at Sims2Artists.
Repository Wizard, by Pick'N'Mix Mods. A game changer.
DBPF Compare, by Pick'N'Mix Mods.
Object Relocator, also by Pick'N'Mix Mods.
SMD Tools, by Lazy Duchess.
The Compressorizer, by JFade – Lazy Duchess's edit.
Bulk Rename Utility, to change file names in well, bulk. As explained by io here.
Lot Adjustor, by Mootilda at MTS.
Tutorials:
Override the game's graphic settings via Nvidia, as explained by iCad. The settings to Nvidia Profile Inspector she linked to at MTS have been deleted for some reason, here they are via WebArchive.
Meshing in Blender:
Mesh Optimization Info (and links), by Crisps&Kerosene.
Additional - Reducing Polycount:
Tutorial, by Flaming-Chickens (another username on other sites perhaps?)
Edge – Un-subdivide, a quick one by CG Link.
Transfer high poly details to low poly object in Blender, by 3Dnot2D.
Shrinkwrap Modifier - Blender Tutorial for Beginners - Basics, by in2vert.
Placeholder for this Addon that I want to try but haven't found, something for AR that was on facebook's defunct AR.
Scaling tips, by Blender Secrets.
How to fix inverted/ flipped normals, by ipaintsmallthings.
Converting: How to Extract 3D Models, Textures, Music from Unreal Engine Games, by iwanMods.
Extract 2D/3D/SFX Unity Assets fast & easy from your Unity Game, by iwanMods as well.
How to use QuickBMS, by darkhorse.
Guide to Converting 3t2 and 4t2 Part 01 and Part 02, by Chiaroscuro/tenlittlepandas.
Converting TS4 Windows and Doors, by Crisps&Kerosene.
Using Different Material Maps as Shading/Details for Base Texture, in Gimp or Blender, by Pineapple Forest & Crisps&Kerosene: https://www.tumblr.com/crispsandkerosene/764893644571525120/great-info-thats-the-reason-some-conversions?source=share
Texture Editing in GIMP:
Using Gimp Add-ons: G'MicQT. Resynthesizer. Both by Davies Media Design. This guy's channel for Gimp in general – here's a good one to begin with. And another one about layer masks.
Making a texture Tile Seamless: 1. My favorite - How to Make Seamless Textures for Cinema 4D - 3 Levels of Photoshop Wizardry using iPhone Photos, by School of Motion.
2. Simple Trick for More Realistic Texture Patterns in GIMP, by Davies Media Design – Quick and simple, using the Resynthesizer plugin. Good for patterns.
Making walls in SimPe out of a square texture, with minimal quality loss. To be written.
SimPe: Cloneable Objects: A List of Good Objects for Cloning, by IgnorantBliss at MTS.
Huge Lunatic's Tutorials, Her website.
Object Creation for Absolute Beginners, by Moune.
Sims 2 start to finish Object Creation Tutorial, by JWoods, Numenor, Lethe_s & IgnorantBliss.
The Material Definition (TXMT) Guide, by PixelHate – very comprehensive. Part 5 is about Bump/ Normal maps.
Null (Texture-less) Groups, by Skell. For bodyshop, for Objects see an elaboration by Midge the Tree below.
Crisps&Kerosene discovered how to add specular maps to objects! It's incredible there are still new things to discover in this ancient game.
More on Specular Maps, by Pineapple Forest.
Making new flooring & walls with SimPE, by Charisa. Includes adding Bump/Normal maps. She added a file to clone from in the comments below. It works for normal maps as well. Here's cool discovery in the game files.
Expanding footprint: a mini tutorial, by Deedee.
How to add correct drop shadows to objects, by Yuxi, via Wayback Machine.
Making Objects Viewable in Neighborhood View, by iCad.
Making Objects Visible In Build/Buy Mode, Invisible In Live Mode, by Midge the Tree.
Making Seasons-Friendly Trees, by Echo.
Io/ Serabiet's resources list, mainly for Bodyshop but not just.
Pineapple Forest's Tutorials, useful tips for efficiency and optimization.
MTS modding forum in General.
The Sims 2 Tutorials, on Tumblr. A database, is more updated.
Sims2Artists tutorials section.
LeeFish modding forum.
Garden of Shadows, Tree of Knowledge section.
Troubleshooting: What to do if you get a System.OutOfMemoryException Error, SimPe Forum, via WayBack Machine. Thank you @fanseelamb for the find.
How to read object error logs: I just want to know what causes it!!, by Episims.
Common TS2 errors, by Midge the Tree.
General game fuckery: How to Stop Sims 2 Crashing (Memory Allocation Fix and 4GB Patch Repair), by Jessa.
Graphics card problems, LeeFish forum.
Graphics help - DIY, by Kiri. How to fix faulty Texture Memory allocation, and the problems that stem from it. Tumblr can't handle anymore hyper links so here it is: https://celebkiriedhel.tumblr.com/post/189431721483/graphics-help-diy
General: Switching between save folders without renaming them, by Nopke.
Resources:
3D Models Online*: Various furniture designers' websites: Porada, Zanotta, Muuto, Hay, Poltrona Frau, many luxury furniture designer basically.
3D Warehouse, belongs to Sketchfab (get the Collada files).
Scan the World.
Wikimedia Commons. And more.
*(NOT OPTIMIZED).
Textures: Architextures.
Fabrics & Wallpapers: Natural Stones: Wall Plasters:
iCad's Woods. Shastakiss's Cluedo Metals, Yeti Metals, Pirate Woods. Goat's Woods.
Textures from other games: Dishonored, Thieve and much more, by Saricoya at GoS. Dreamfell by io.
Resource sharing threads at Garden of Shadows.
SimPe - General: CEP Extras list, HugeLunatic at Sims2Artists.
TXMT settings for different materials, by Hafiseazale.
Extended SimStandardMaterial Shader for the Sims 2 + Optionally Brighter Sims, by Crisps&Kerosene.
Custom CubeMaps, by Crisps&Kerosene.
Shiny TXMT Settings & Cube Maps Packs, by Pineapple Forest.
Build/ Buy: Templates for Recoloring Maxis items; MTS Templates sction, Hafiseazale (+cc), ZeroDark.
Template for Seasonal Trees, Gwenke at Sims2Artists.
Making Roof Recolors, Tutorial & template by Numenor, great template by iCad.
Pack for making food clutter usable, by DeeDee.
CAS: Default Makeup Packages - BYO Packages, by Huge Lunatic.
Body shape, Io/Serabiet on Tumblr.
Skin template, Io/Serabiet on Tumblr.
Hair texture, iCad.
Color Actions, Pooklet on Tumblr.
That's it for now.
Edit: forgot about CEP extras. Added more links. Edit 02: Added Troubleshooting section under tutorials.
#ts2#ts2 resources#ts2 creation resources#ts2 resources for creators#the sims 2#sims 2#resources#ts2 cc#sims 2 cc#the sims 2 cc#well its cc related#sims 2 resources#the sims 2 resources
67 notes
·
View notes
Text
Tutorial: How to adjust joint position (in TS2 object skeleton)
This tut is NOT meant for beginners because I don't explain how to use SimPe or Milkshape. But actual process is very basic: you change joint coordinates and do GMDC model rebuild. The tricky part is to get coordinates right.
If you don't know much about joint assignments, start with this tutorial: "Retaining object animations in your new package" by Bluetexasbonnie @ MTS2, which explains how to add joint assignments to custom stuff cloned from functional objects (to make parts of the mesh move when Sims interact with it).
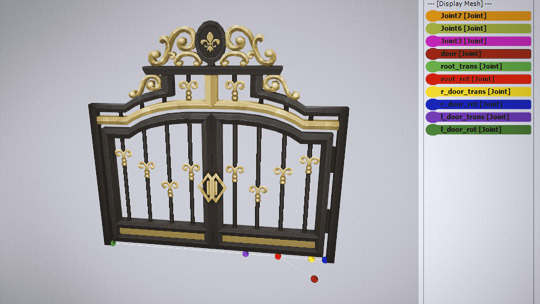
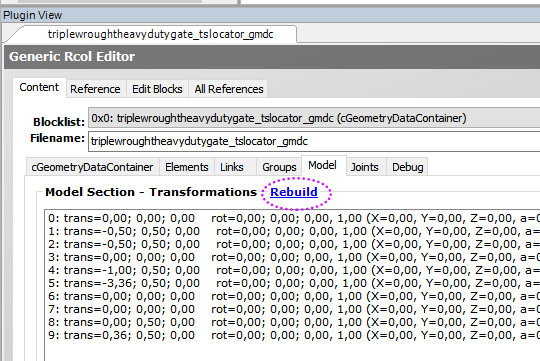
The pic above: SimPe GMDC skeleton preview. You can click on each joint name to see which part is assigned to it. Gate is here.
This will work for simple object skeletons without IK Bones.
There are no plugins that would allow us to properly import TS2 CRES skeleton data with IK bones - like sims, pets and more - to any 3D program
If object has IK Bones - you'll find out when importing CRES to Milkshape. If it displays a notification "joints with rotation values found...", IK Bones are present and there's a high risk that skeleton: A. will not be imported. B. if it's imported, it will get mangled. C. will be mangled after using model rebuild option.
I've experimented with car skeletons (those have IK Bones), managed to edit car door joints but it required removing wheel bone assignments - because wheel movement becomes wonky after doing model rebuild
/FYI: steps 1 - 5 are optional, you can edit CRES joint coordinates right away if you know the right values - which is usually not the case/.
Export GMDC with your custom mesh
Export CRES (if you wish to preview entire skeleton and/or joint names)
Import GMDC to Milkshape
Import CRES (if you need it. Plugin is called: Sims2 AniMesh CRES Skeleton Import. Click 'yes' to 'replace all bones?'). You should be able to see entire skeleton imported. Note that Milkshape won't let you export a GMDC after you imported CRES skeleton unless you change joint comments (point 7.)
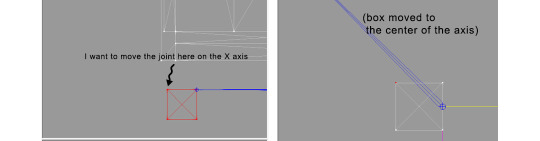
Measure how much you need to move the joint. You can create a box as ruler substitute, then check the distance with extended manual edit plugin. If you're not sure where to place your joint, you can move it and test if object animations look alright (import CRES again to reset joint position).
tip: when working on GMDC in Milkshape you can rename the model parts in model list (door right, door left etc). Only names inside the model comments actually get exported.
6. Go back to SimPe, open CRES resource. Remember TS2 is using flipped coordinates: X = -X, -X = X, Y = Z, Z = Y. Edit joint Translation data, commit, save.
Optional: you can export CRES skeleton again and import to Milkshape to test if joint has moved to the right position.
7. Go to GMDC, Model tab - hit rebuild, commit, save.
if you have the edited object placed on a lot, it's gonna look weird when you load the game. You need to re-buy it from catalogue to see results.
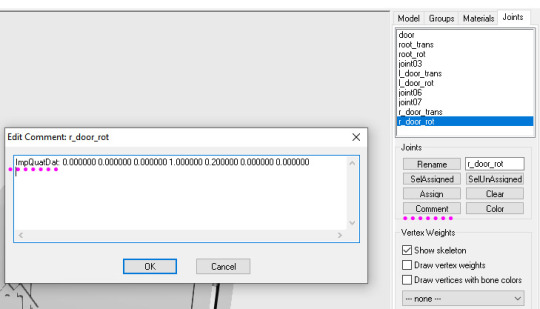
If for some reason you'd like to export entire GMDC with your imported CRES skeleton, Milkshape won't let you do that. You'll get "ERR: No quaternion values stored" error. You need to go to Joints tab and edit each Joint comment to ImpQuatDat: (that's imp, with capital i )
Notes:
if you go to GMDC Joints tab, there's also a rebuild option to update single joint - but I've tried it on car door joints and it didn't work.
If you edit joint coordinates in CRES, for example- move the car door forward, and preview skeleton in GMDC viewer, your model is gonna look fine. But in the game every vertex assigned to that joint will also be moved forward. That's why you need to use model rebuild option. In theory, if you'd like to skip rebuild, you could import GMDC to milkshape and move the door backwards to compensate for joint adjustments? I haven't tried that (yet).
81 notes
·
View notes
Text

THE SIMS 3 TUTORIAL
HOW TO CREATE DEFAULT REPLACEMENT MOD USING CUSTOM MESH & TEXTURE FOR SIMPLE OBJECT
⚠️ Tumblr has 30 pictures limit, so I cannot include too many pictures. If you want to zoom in the pictures, click the pictures to enlarge, or save the pictures into your PC, zoom the pictures on picture viewer or zoom in the pictures on your mobile phone. ⚠️
----------------------------------------------------
I create this tutorial to make easier to follow because there are older tutorials available before but scattered on internet and usually only say "Export to replace s3asc" without explaining how to export the edited object properly.
My method is using TSR Workshop instead of exporting the object using Sims 3 Object Export/Import plug in because exporting to replace the s3asc using that plug in always giving error notification "ERR: Model has 1 groups; original had 0" and cannot be exported.
For beginners who are very new using s3pe and haven't created default replacement mod before, better start from simple object first.
Simple objects I mean in-game object that has single MODL and single texture with no morphs, no GeoStates, no presets, no CAS colour channels, and easily cloned from OBJD on catalogue. Usually as utensils that Sims holding in their hand, not buy/build objects. For example: Pencil, pan, fork, spoon.
----------------------------------------------------
Tools to prepare:
s3oc
s3pe
Milkshape 3D for bone assignment (Version I use 1.8.5 beta, discontinued by its developer, therefore feel free to download the full version with its license key provided).
Sims 3 Object Export/Import 1.01 by Wesley Howe (Milkshape plug-in. Download msS3ObjPluginsV101.rar )
TSR Workshop (Older version for TS3 only version 2.0.88)
TSR Workshop plug-ins for export.import TSRW Object.
3D Program (Blender/Maya/3dsMax)
Editing images software (Photoshop, make sure you have to install .dds plugin by Nvidia. For free software alternative, you can use GIMP with its .dds plugin)
This tutorial will not teach you how to:
Meshing object ❌
Create alpha texture ❌
Change thumbnails in-game ❌
Install programs and plug-ins ❌
This is how I created Chinese chopsticks replacement mod using custom mesh and texture.
In summary, this tutorial has 10 steps:
Step 1. Clone the Object using s3oc
Step 2. Open S3PE to Copy the Original Resource Code and Export the Files
Step 3. Export the Original Mesh as Base Mesh to .obj format
Step 4. Create Your Custom Mesh
Step 5. Bone Assignment & Create Group
Step 6. Create custom Texture
Step 7. Import the .wso of Edited Mesh on TSR Workshop & Export the package
Step 8. Export MODL file from Package saved from TSR Workshop
Step 9. Finalizing in s3pe & Replacing the Original file with Edited File & Correcting the Code As Same As Default Code
Step 10. Test the CC in your game.
-----------------------------------
✳️ Step 1. Clone the Object using s3oc
Before cloning the object, check the Game Folder for in-game object file location. Settings > Game Folders...
Take a look if the Base Game or Expansion Pack for object file you want to clone is in the right folder. For example, my The Sims 3 game are all bought from Steam, so the location is D:\SteamLibrary\steamapps\common\The Sims 3
If you want to clone object from Expansion Pack, make sure input the folder location. For example, the location for World Adventures EP is D:\SteamLibrary\steamapps\common\The Sims 3\EP1

If you are done, close the pop-up box. You can continue click Cloning then choose Normal Object...
Wait until you get the whole catalogue. Click Search...

For example, I clone object from World Adventures Expansion Pack. You can clone object from Base Game or other Expansion Packs as long it is considered as "utensil" that Sim holding on hand. For example: "Pencil" or "Pan"
Search for text: chopsticks
or if you want to clone object from Base Game, search: utensil
Tick check marks for Resource Name, Object Name, Object Desc then click "Search button"
Search result gives you results with name "chopsticks". Here is the object we are looking for: UtensilChopsticks
We need the OBJD file to clone. OBJD = Object Data.

Click "Clone or Fix" at the right bottom. Then you see the next page to determine if you want to clone with renumber or not. If you want to make default replacement, then do not check the Renumber box. Keep it blank.
Tick check box means the s3oc will generate new resource code for new item. Not tick the check means the s3oc will overwrite the same resource code, it is to replace object you cloned in-game.
I am personally a detailed person, so I usually tick as many as I want: tick "Deep clone" "Missing String Tables" and "Include Thumbnail" to include more details. Then click "Start" to proceed.

It will give you file name [CreatorName]_ObjectName_Number
Then save your package file in "DBPF Package" format in your project folder. Always make folder for any file to make everything organized.
✳️ Step 2. Open S3PE to Copy the Original Resource Code and Export the Files
Open S3pe, locate your package file you cloned from s3oc. Find the MODL of Utensil Chopsticks, Right-Click, "Details..."

On Resource Details, click "Copy TGI" to copy the Resource Code. Type, Group, and Instance will automatically be copied on clipboard. Then open Notepad, Right-Click to "Paste".
Click GRID on bottom of the s3pe (I mark it red on picture), it will give you pop-up box with Data Grid. Click "Resources", it will be highlight blue and there's 3 dots button appeared on the right side. Click the 3 dots button. It will give you TGI Block List Editor.
Inside MODL's TGI Block List Editor only has IMG. You may wondering why, but that's how the game coded. Type, Group, Instance of _IMG inside TGI Block List Editor should be the same as _IMG on the package.
Copy the TGI, Group, Instance to your Notepad.

After you copied code of MODL, do the same for the texture image (_IMG), but only copy the code from Resource Details. You cannot edit TGI Block List Editor for _IMG as the Grid button for _IMG is greyed out.
The main task is the code of your edited mesh and texture should be the same as the code you copied now from original package you cloned with s3oc.
Keep the code on notepad. You will need this code later.
Export the MODL file. Right-Click, "Export to s3asc". The file appears in long string such with name for example: S3_01661233_08000001_B619DB2238C3430B%%+MODL_filebase
Do not rename the file. Save.

Export the texture file. Right-Click "Export > To File..." The file will be saved in .dds format. Do not rename the file. Save.

✳️ Step 3. Export the Original Mesh as Base Mesh to .obj format
Open Milkshape. Import the s3asc file you saved before.
More steps click spoiler tag "Read More / Keep Reading" below
File > Import > Sims 3 Object Import v 1.01 by Wesley Howe

Locate the s3asc file, then the original chopsticks mesh appears.
Click the "Joints" tab. It has 4 codes. Check box "Draw vertices with bone colors" It will show Bone Assignment colors on the original mesh. Yellow on top chopstick and light blue on bottom chopstick. The colours are to make the object has rig and movement following the Sim's interaction.

Take a look at the 4 codes on Joints Tab. You can play around to see which colour of the code will appear, after that copy paste the code to Notepad to make it easier to comprehend.
Click Select from Tools menu, Select Options: Face. On "Right/Left/Top/Bottom 2D View", Left-click make selection of one part of chopsticks. While the part of object being selected (Red), click Joints then Choose "Assign".
0x96239247 --> Yellow 0xFEAE6981 --> Purple 0xCD68F001 --> Light Blue 0xD0DECA8E --> Red
Your edited mesh must have the exact same Bone Assignment colour later. Check again if the code and colour are correct.

You can save object mesh as .obj to other 3D software such as Blender or any other 3D software.
✳️ Step 4. Create Your Custom Mesh
Use the original .obj as base model. While you can create longer mesh or any edited version as you wish.
Make sure the scale and position of the edited mesh is same as base original mesh, because the edited mesh will be used on Sim's hand.

If you are done editing the mesh, export the UVmap.
You can export the uvmap in higher resolution, as long as it is Power of 2. 64x64, 128x128, 256x256, 512x512, 1024x1024, 2048x2048, 4096x4096. I export in 1024x1024 pixels to make the size of texture larger and have more details.
Then export the mesh object in .obj format.
✳️ Step 5. Bone Assignment & Create Group
Open Milkshape. Import the original mesh.
Check the Groups Tab. Original mesh has 1 group, "group 00". Group 00 means it is the main mesh. There is no shadow beneath the object.

Import the edited mesh as .obj file.

My edited mesh has one single name "default" name on the Group Tab. While edited mesh may have a lot of file name scattered on Group Tab. Regroup the file name to simplify your edited mesh into one single name. Select > Regroup.
The main task is replacing the EA's original mesh with your edited mesh.
Before you delete anything, you must do Bone Assignment first to the edited mesh you created.
Your edited mesh does not have Bone Assignment, so it appears white.
Remember the 4 codes you copied earlier in Notepad.

Copy Bone Assignment from original mesh to your edited mesh.
This case, your want to Bone Assign Yellow colour.
Select > Face to select one part of chopsticks of your edited mesh. On Joints Tab, double click the appropriate code 0x96239247 in blue highlight then the code box on the right side of "Rename" will appear 0x96239247. Make sure the code is correct. Then you can click "Assign".

Your edited mesh will appear in Yellow colour. Then do the same for another part of chopsticks.
Select another part of chopsticks of your edited mesh. On Joints Tab, double click the appropriate code 0xCD68F001 in blue highlight then the code box on the right side of "Rename" will appear 0xCD68F001. Click "Assign".

Your edited mesh will appear in Light Blue colour.
Then what's the other code for? With colour purple and red?
Leave them. Let the codes have the same exact codes as appear in original mesh and let the colours only assigned Yellow and Light Blue. The colours are to determine rig for interaction in-game, which only use Yellow as upper part of chopstick and Light Blue as bottom part of chopstick.
You can safely delete the original mesh with name group00 until it remains your only your edited mesh.

Rename your edited mesh to group00. Type group00 on the box then click "Rename" on the left side.

Export to TSRW Object in .wso format. .wso is format with bone assignment on object attached.

Save your .wso in your project folder.
✳️ Step 6. Create custom Texture
Import original texture you exported from s3pe to your editing image software.
Look at the original texture made by EA. 32x64 pixels. It is very low resolution, blurry and stretched, because the texture should be compressed as low as possible by game designer. As player you want it has higher detail to look realistic as possible and your PC of course can handle high resolution content, sure you can make the resolution much higher than EA's.

Import the UVMap you saved from 3D software. For example, UVmap I imported has 1024x1024 resolution. Add your custom texture. Then save it to .dds format in the same name as original texture. Save in separate folder, name it "Edited Texture" to keep it separated from original texture.
✳️ Step 7. Import the .wso of Edited Mesh on TSR Workshop & Export the package
Open your TSR Workshop.
Create New Project > New Import >Next...

Then Browse original mesh by EA in package format in your project folder.
On Open file box, you cannot see .package file because the filter is .wrk (TSR Workshop Project). Choose the .package dropdown.

Then you can see .package file.
Open the .package. After the file is located, then Next. On Project Details I usually skip without giving name of Project Name and Title. Next.
You must have seen green land with white blank sky.
Where's the mesh? It is actually there... just being zoomed in too close. You need to zoom out by scrolling down mouse.
You can see the original chopsticks mesh by EA. You can save the project file in .wrk format. After you save the file, import the .wso of your edited mesh. Mesh tab > High Level detail. Click green arrow folder icon to import. Then your edited mesh will appear replacing the original EA mesh.

As you see, the texture is messed up because the texture is still using original EA's texture. But then you check Textures tab and it has blank dropdown...
I cannot change the texture on this TSR Workshop!
Don't worry, we can replace the texture on s3pe later.
No need to change anything other than importing mesh. Click Edit > Project Contents to save as package.
You will see pop up box with number or files DDS, FTPT, LITE, MODL, OBJD, OBJK, etc. Export > To. package. Give name such as "EditedChopsticks_TSRW"

✳️ Step 8. Export MODL file from Package saved from TSR Workshop
Open S3PE, File > Open package "EditedChopticks_TSRW" that you saved from TSR Workshop.
Export MODL. Right-Click, export. It gives you file name with [StringOfNumber] .model .
Save it on project folder. Keep it organized and separated from original MODL. Name the folder "Edited MODL". Do not rename the file.
✳️ Step 9. Finalizing in s3pe & Replacing the Original file with Edited File & Correcting the Code As Same As Default Code
Open s3pe, File > Open original package that you cloned from s3oc. [CreatorName]_ObjectName_Number
Find the MODL. Right-Click > Replace...
Locate to your edited MODL with filename .model .
Then click Open.
The original MODL of the package should be replaced with your edited mesh.
Do the same for the texture.
Locate to your edited texture with filename .dds
Then click Open.
The original texture of the package should be replaced with your edited texture.
Take a look at MODL's Type, Group, Instance. It has the same code as original MODL in the original package cloned with s3oc (because it has been replaced)
Don't forget to see the code inside TGI Block List Editor.
Repeat step 2 how to check the code. Right-Click on MODL/IMG > Details... and click GRID > Resources > TGI Block List Editor.
The Type, Group, Instance of the _IMG are different compared from IMG from original package clone, which means that is the evidence of edited mesh replaced the original.
Rename the Instance with default/original Instance you copied on notepad from Step 2. Type, Group, Instance should be the same as default/original Type, Group, Instance.

Open notepad with resource code you copied from Step 2. Make sure the Type, Group, and Instance are all the same.
If the codes are the same, then your edited mesh and texture will overwrite the default mesh and texture with the same code in the game. Save, Commit, Save the package.
Check again if the texture is replaced properly. Right-Click on _IMG > ViewDDS.
ALTERNATIVES!
Yes, you can delete unwanted files in your edited package, to keep the package clean. Simply Right-Click>Deleted.
The only files needed in package are: MODL, _IMG, _KEY
They are the only files with your edited mesh/texture including codes to overwrite the default codes.
You can Start new fresh blank s3pe. Right-Click>Import from file...
Locate your edited MODL and _IMG (texture) file.
On Resource Details box, tick mark "Use resource name" > OK.
Make sure all the Type, Group, and Instance of MODL and _IMG including in the TGI Block List Editor are all the same as the code in original package.

Save the package.
✳️ Step 10. Test the CC in your game.
Put the package to your CC folder in your The Sims 3 document folder to see if the CC is working or not.
If the CC is working as your intended, with your custom mesh and texture, then test the animation. Are the chopsticks animation working as the same as original EA's? If the animation are working well too, then congratulations!

Your default replacement are working. Give applause to yourself. 👏
-------------------------------------
QUESTIONS!
Q:
Can I use this tutorial for making default replacement for buy/build object?
A: This tutorial covers basic method of using TSR Workshop and replacing the default codes (Type, Group, Instance), so you will understand the basic principle of doing default replacement mod.
Keep in mind that different object has different case. Buy / build object has MLOD (not just MODL) more than one, texture images more than one, has presets, and CAStable colour channels.
The TGI Block List Editor for buy/build object has a lot of codes, so have to spend a lot of time to do trial-and-error to make the default replacement working properly, because a lot of times the texture doesn't work (still using default EA's texture), or when the object appears right with your edited mesh and texture, after you choose the presets, the object reverts back to your edited mesh with default EA's texture.
Q:
Help! The texture is black! / still using same EA's texture when tested in the game!
A: The texture codes must be not the same. Check the Type, Group, Instance of _IMG. Do the codes are the same like codes in original package? Check the TGI Block List Editor for MODL, is the _IMG inside has the same Type, Group, Instance as in original package.
Q:
Help! The object disappears when tested in the game!
A: You must be replacing OBJD in your package. Do not replace OBJD. Just MODL and texture only.
#tutorial#the sims 3#the sims 3 tutorial#thebleedingwoodland#the sims 3 default replacement mod#modding#s3pe#s30c#TSR Workshop
120 notes
·
View notes
Note
What app do you use for animation?
And if its not free, what app do you think is good for beginners? You don’t have to answer if you don’t want to
I’m trying to practice animation :)

It's simple, lightweight and user friendly. So it's great for beginners! But since it's simple, it doesn't have a proper timeline so it uses layers as its frames. But you can make some pretty cool stuff with it! :]

If you wanna turn animation on, click on Animation at the top and turn on animation mode.
Once you have that, turn on the onion skin to see previous frames.


If you want layers for each individual frame, use folders! I'll use another animation that I did as an example. :] (sorry had to chop off TSC's arm for this.)

Here, I'm able to scrub through my animation. Switching between frames is also important cuz you'll need to check if the motions are right.

Select Next and Prev frames are keybinded so I'm able to switch back and forth between drawings and flip through. To change your keybinds, go to File > Shortcut Settings > Animation

Clicking the cog wheel and setting "Number of display frames" is how long you want to hold your drawing for.

"Autoplay" (Animation > Autoplay) is self explanatory, but you can only display and export the GIF in the specific fps firealpaca gives you.
Now for Exporting your animation you can do it straight to GIF or export each frame as a PNG in the "File" setting.

(But if you use "Number of display frames", it's not gonna export how long you've held your frame. So you'll have to set the timing right again in your editing program.) And some great examples of animation made from firealpaca! :] Amelia B: https://youtu.be/NdPGX06Z3Vg

Atlas and the Stars: https://youtu.be/DSV7P5Nib2k

Hope this ramble helps. <3
131 notes
·
View notes
Text
Moffy's Photoshop Tutorial #1: Importing Gifs/Videos + Intro to the Animation Panel
(This tutorial assumes you know general PS things such as layers and blend modes -- but if you have questions, don't be afraid to ask)
---Importing Files---
Okay, so you want to make gifs/animations in photoshop!
First you need to know how to import your files. If you're just working with image files and then exporting as gif, you can start as normal and when ready to animate you can click window > timeline
If you want to import a gif, it's the same as any other image file.
Right Click > Open With > Photoshop (Or just choose File > Open in PS itself, and then click on the file)
(Note! If you don't see PS as an option, you may have to click "chose a default program" and then it will give a menu of programs and you can choose Photoshop from there)
If you want to import a video, from inside Photoshop click
File > Import > Video Frames to Layers
When you do this, you will be greeted with a new window

This is where you choose the section of the video to gif. Be warned, longer videos will be harder to "crop" because this window is quite small and the bar to trim your video is insufficient for longer media. If you can, use small clips that are ten minutes or less.
(Most common video files are able to be opened in PS)
Photoshop has a limit on how many frames it can import at a time, and I have found that limit is 500. At least, with my computer. (who wants to work with this many anyway??) PS may also tell you that it will take time to open the file, so be patient if you have an older computer
I also HEAVILY suggest clicking "limit to every two frames", sometimes I would go as far as every three or four frames, but this may make your final product choppy. Tumblr's size limit for gifs is a lot better than it used to be (10mb) so normally, stick to every two frames for a decent final file size. The longer the selection, the bigger the gif.
You can select whether to import into a timeline or frame animation, for beginners I always suggest frame timeline. This panel is a lot easier to learn and more forgiving. However, if you are experienced in video editing, you may prefer the video timeline.
After imported, you can change the size! 540px is the width of tumblr posts! Height usually isn't an issue for me
---The Animation Panel(s)---
Frame Timeline:

This timeline is beginner friendly, you can work very precisely, very easily. The only downside is that you need to make some edits frame by frame
At the bottom of the frame thumbnail is your delay. I recommend always using 0.08 -- this seems to be the right speed for animation and movie gifs
Make sure "Forever" is selected, of the animation will only play the selected amount of times. (meaning the gif plays once or twice then stops. This is often used in memes though, if you ever wondered)
Use the trash can to delete one frame at a time or select multiple and delete. You can move frames around in this panel, add frames or tweens. (the icons are: add tween, add frame, delete)
The four lines to the right can be used for other options such as changing to a video timeline or reversing the frames. Play around with these! (you can also switch between timelines by clicking the bottom left icon)
Things to know: ALWAYS, ALWAYS, have the first frame selected when making your layer edits IF you want the edit to effect all frames (Such as changing blend modes) Failure to do this means you have to change the blend mode for EVERY frame. and this can take forever.
Certain things will always effect every layer, such as transforming an object. Other will effect the selected frame only, like opacity! So be mindful!
Video Timeline:

This is a timeline I recommend to skilled users, so I won't go too deeply into it (the truth is I rarely use it, so I don't know all the ins and outs)
It works like a video editing software, so if you've used anything similar this will be easy for you.
Layers work just like the layers panel, You can also precisely set the crop of the animation/gif with the blue arrow.
Folders are super useful for this timeline btw!
---EXPORTING---
To export the gift, you need to click ctrl + shift + alt + s at the same time. Just more work than ctrl + s
then you will be greeted with this window, save for web

Here you can experiment with color range, gif modes, and dither. (that's what makes gifs look grainy) I normally use Selective and Diffusion. With dither set as high as possible. (the higher it is, the smoother color gradients looks) I don't have a good way to describing the different modes, so experiment and see what looks best to you!
Need a small gif size? Lower dither, but only a little at a time or the quality will go way down. You can also choose to use less colors. Less colors is great for cel shaded animation, but you'll want the most colors possible for anything realistic.
Click save and your gif is ready to uploaded!
34 notes
·
View notes
Note
how do you usually go about making a song? I've been wanting to try it out, but have never ended up finishing anything. (。•́︿•̀。)
my usual process goes: 1. lay out basic composition and chords (i use hookpad to do this) 2. export chord midis and import into DAW i use (logic pro) 3. mess with samples and vsts until something sounds good..... 4. import instrumental into synthv and figure out topline 5. cry for several months over trying to write lyrics 6. ???????? 7. song i genuinely recommend hookpad/hooktheory for beginners or for figuring out chords, you can look up artists in their theorytab database and look at user-submitted chords for songs you like! don't be afraid to reference chords of things you enjoy. salt wound routine and my other wips i'm working on reference a lot of chords from songs i like (namely touhou ost lol). i forget which specific songs though LOL
41 notes
·
View notes
Text

ANIMATED TEXT TUTORIAL: ★★✩✩✩ Difficulty: Beginner/Intermediate
This is a step by step tutorial on how I did the text for my Pink Venom swinging text.
We are going to be making this text:
Before I start, you WILL need Adobe After Effects, but I will show you step by step how to achieve this.
Tutorial below the cut!
✔ Step One: Composition Open After Effects and create a new project, then a new composition making sure the composition matches your gif settings. (ex: 540 x 540, 2 seconds, 30 fps)


✔ Step Two: Creating Our Text Add a new text layer. It should be the same as Photoshop, you can just select the text tool and write what you want. Customize the text to say what you want and change the font and size to your liking.


We should have something like this:

✔ Step Three: Adding Our Animation There should be a box that says "Effects & Presets", in that box you can search for effects. Search for "Explosion". It will be under Text > Miscellaneous.

Select the first one and you can either drag it on top of your text layer or just double click it with your text layer selected. Sliding the time, we should have something that looks like this:

✔ Step Four: Adjusting the Animation With your text layer still selected, press "U" on your keyboard. This will open our key frames for the animation.

It's a lot to look at but don't worry, we will only be focused on Amount and Opacity, and I will make this as easy as possible for you. On the Opacity setting, click on the little time clock. This will remove the keyframes. Make sure your opacity is set to 100%.

Next we are going to adjust the amount so that it explodes INWARD instead of OUTWARD. Find a good spot where the letters are out and add a new keyframe the same way you would on Photoshop.
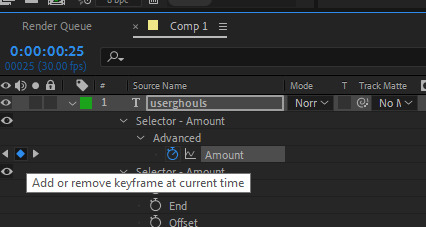
Now swap the two keyframes so the explosion animation is reversed. Next we are going to remove the scale keyframes. Click on the second stop watch for the second amount parameter, and make sure that one is set to zero.

We should be left with only ONE thing that is keyframed. And the keyframes should look like an hourglass.

You can stop now and leave it or we can make it a little smoother and more fun looking.
✔ Step Five: Editing the Graph & Adding Motion Blur To add a motion blur to our text, we just need to select the three little circle stack on our text layer. Also double check that the same symbol is highlighted blue up top.

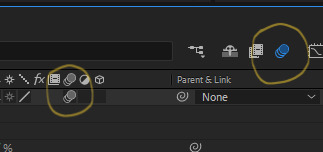
Now we have motion blur. Next we are going to adjust the graph. To open the graph select the little graph icon and then select our keyframed buy clicking on the amount parameter.


Now our graph should look like this:
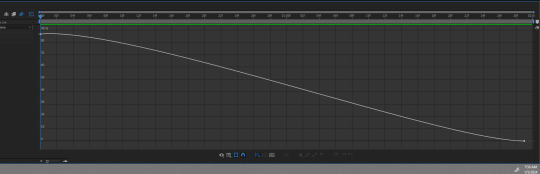
Select one of the dots and two little arms should pop up and we can drag those around to adjust the graph (the speed of our animation). Adjust to your liking, but to make it look like the text in the tutorial, my graph looks like this:
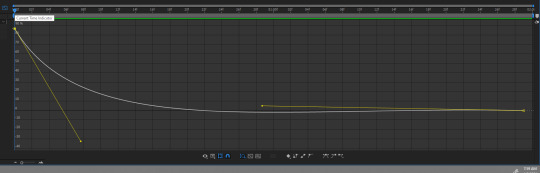
With my graph, the animation looks like this:

Now all the hard work is done!
✔ Step Six: Exporting Now to export our video so it can be turned into a gif: Go to File > Export > Add to Render Queue

We should be at a menu like this:
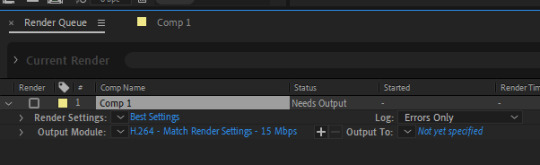
Click on the part that is blue next to "Output Module" and another box should pop up. For format: change to "Quicktime" For Video Output > Channels: select "RBG + Alpha" (this will ensure our background is transparent)
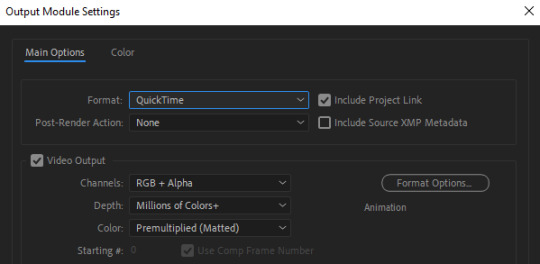
Select "OK" and then under "Output to" select where you want the video to save.
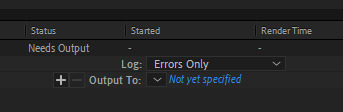
Now all you have to do is Render.
Once that finishes, YOU'RE ALL DONE!
Import video to frames as you usually would in Photoshop, just don't change the frame delay.
Treat it like a normal text layer/smart object.
As usual, you can play around with all the animation settings to get the look you want, this is just the basics for the main animation.
It looks like a lot but the difficulty is minor once you get the hang of the steps.
Any questions you have during the process just DM me! ★
159 notes
·
View notes
Text
making default replacement CAS - TS3
hi i'm writing a rough outline of one way to make default replacements. i discovered this method recently on reddit as shared by 80sBabyGirl and it's worked well for me so far, so i want to share with other creators out there.

a disclaimer: i'm no expert on how to do this so please read w a grain of salt. please also feel free to add further comments and correct me on any errors. i'm sharing this post not as a 100% foolproof tutorial but more of a guide or outline of the basic steps.
i like this method because you can easily turn any CC package into a default replacement package, without exporting a bunch of textures meshes etc that beginners may not be comfortable doing. also great for lazy people like me.
i have had success using this method to make default replacement hairs, beards, and clothing. i assume the principle is the same for most other CAS items although i'm sure there are more complicated exceptions out there.
so with those disclaimers out of the way, let's start:
first, you will need to download Sims 3 Package Editor (S3PE) and Sims 3 Object Cloner (S3OC)
next, you will use S3OC to clone the in-game item you want to replace, such as a hairstyle.
make sure to "deep clone", include the thumbnails, and do not check "renumber internally".
next, you will open the cloned in-game hair using S3PE. you will also be opening and editing your cc hair package in S3PE, so make a backup of that somewhere before proceeding with the edits.
80sBabyGirl on reddit:
"First, export the Maxis hair's CASP resource to a folder, and close the file. Then, export the CC hair's CASP resource to a different folder. Go back to the Maxis hair folder. Don't open the CASP file, don't copy the file either, just copy its name. Go to the CC hair folder and paste the Maxis hair's name to replace the CC hair's name. Then import the renamed CC CASP resource into the CC hair file. Delete the original CASP resource to avoid duplicates. Then you can do the exact same process with thumbnails. For hairs with accessories, you can retrieve thumbnails for all 3 swatches inside the CASThumbnails.package file that's in the Thumbnails folder."
finally, save the cc hair package, close it in S3PE, and put it in your overrides or packages folder to test in-game. it should now function as a default replacement.
thumbnails
another way to make the cc item's thumbnail into the default replacement item's thumbnail:
in your cloned game item, double-click on the thumbnail resource. click on "copy rk".
in your cc item, double-click on the thumbnail resource. click on "paste rk".
this will make the game read the cc item's thumbnail as the default item's thumbnail.
handy reference for which thumbnail codes are for what
in summary
ultimately you are just editing 2 resources in the cc package to turn it into a default replacement.
the CASP resource
the thumbnail resource
testing in game and the textures are fucked up??
whenever you default replace anything, you usually have to delete your caches and re-apply the item in CAS for it appear properly.
the textures are still fucked ?
if this happens, it may be because the default textures and the cc textures need to be properly linked in S3PE.
in your cloned game item, double-click on each "_IMG" resource. click on "copy rk".
in your cc item, double-click on the corresponding "_IMG" resource. click on "paste rk".
you will need to do this for the multiplier, mask, specular, and normal map textures.
this will make the game read each texture as the default item's texture.
in conclusion:

121 notes
·
View notes
Text
(Pro?) Posing tips
It doesn’t matter if you are a beginner or if you already have made your way into blender. As a posemaker myself, I know how hard it is to make a realistic pose - here a few tips you have to think of when making poses, to get your pose to the next level.
(I use shibuisims sunflower rigs for my poses, but in base they work the same as the rigs you export from sims4studio, they only have some handy IK controls)
At first: take your time for details. The base of my poses are mostly done very quickly, but it’s all in the details. Fingers, face, mouth, hips. Take your time for the details. Details can make or fail a pose.
Simripper double textures If you make poses for your own story or edit, you mostly make them with your own textures (through simripper) right? But if you want to also send them to the community to download and use, don’t get rid of the original rig textures bij importing your own sim textures. By toggling off and on the textures under your rig in the scene menu, you can see how poses look on your own sims, but also on the ‘default sim rig texture’.
Elbows and shoulders and relaxation. I think I can best show this in pictures. If holding something we almost never raise our elbows unnatural high. They mostly are more ‘relaxed’ to our body. Lower the elbows! (It’s always good to have a little space for thicker sims ofcourse).


Can you see the difference? Hands I think these are the hardest to do. I still struggle with them sometimes. But the best thing to get the best hands is to have a reference OR make the hand yourself in relaxing state. I see it mostly in a pose in an ‘idle’ state that hands are cramped or straightened. Unless you want this in your pose, try to make a hand in relaxed state.
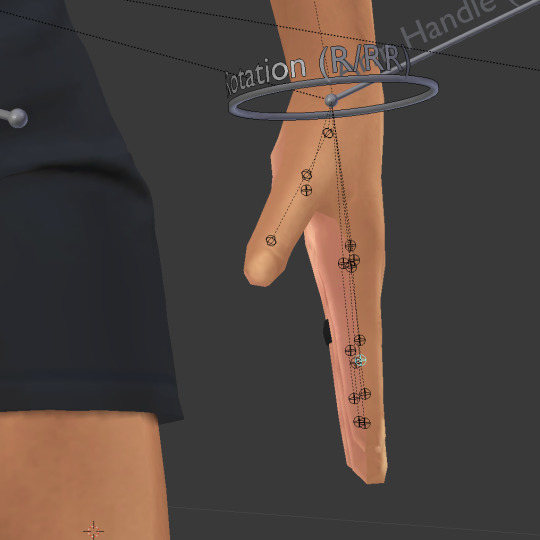
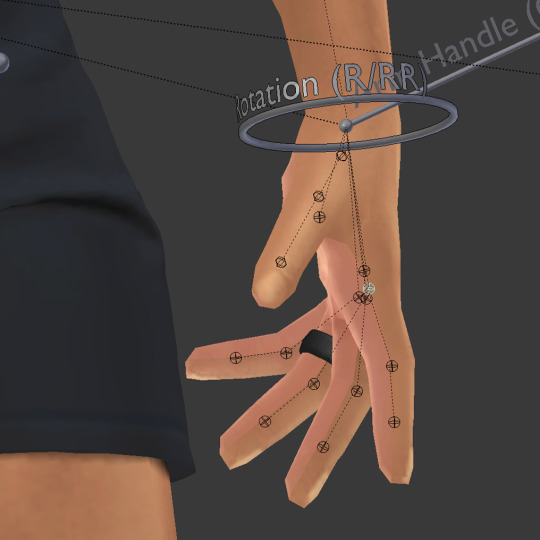

Straightened, cramped or relaxed?
Shoulders I hope every posemaker that makes poses for already a while know this, but I think it's the most important step in starting making poses. Please, start your arm movements (mostly if you want to raise the arms) in the b_R_clavicle or b_L_clavicle joints.


Shoulders are important!
Weight It’s so important in realistic poses to add our gravity. I think this mostly checks out for holding other sims, piggyback poses etc. If you take someone on your back, your back struggles too right? It's heavy! Try to lower that b_ROOT_bind just a little more as what you expect to do in a pose. Don’t forget gravity always pulls us down!

Only a very small distance from the ground is needed sometimes.


Gravity holds our arms down too in 'relaxed' state.
Stiffnes Maybe we can add this to weight aswell, but as humans ourselves, if we are standing ‘idle’. We never stand right up with a straight back, feet perfectly straight next to each other. It’s the same if we sit on a chair, most of us hang a little to the back or to the front. Try to add that in your pose, if you do that - it’s immediately a less stiff pose!
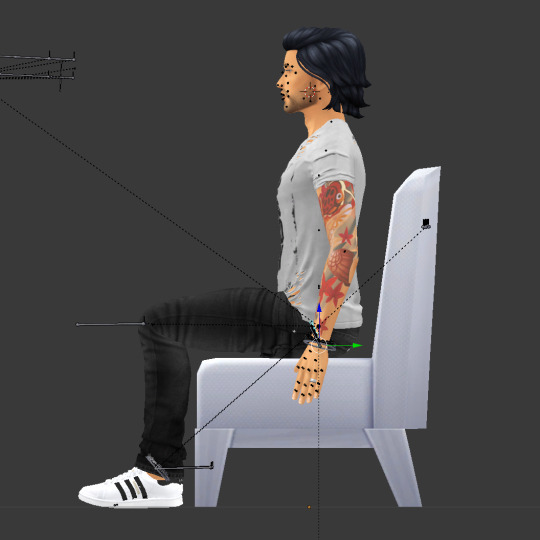

It's only a slight bend in the back joints, but it already looks more natural.
Just remember, you learn by doing and watching. So I hope I can add some more insights to you, as a posemaker for a few years now, to make your poses even better and more realistic. Ofcourse, sims rigs have their limitations, but that's what makes them sims, right? You can find some more simmireen tips on posepack consistency for sharing your poses here
@ts4-poses
#sims4#sims4tutorial#sims 4 poses#ts4poses#ts4 poses#thesims4#ts4cc#simmireen#ts4-poses#posemaker#sims4poses#posepack#ts4#tutorial#posemakingtutorial
369 notes
·
View notes
Text

Hello! In this post I will share some tips I have to help you on your custom content making journey. These are more general rather than creating a specific item, but I may make another part in the future!
Things covered: learning curve of blender, free resources, learning your computer, using references

1️⃣ There’s no need to pay for anything
The only money I have spent on anything related to TS4/custom content is for some of the expansion packs. Every resource I have used I have only had to pay with time. Blender, Sims 4 Studio, and Sims 4 Tray Importer are all free! And for Photoshop, a good free alternative I use is Photopea, which is just a web version. Another good alternative is GIMP, which is an application.
There are applications like Substance Painter and Marvelous Designer, but I would only recommend those if you have a genuine interest in 3D modeling outside of TS4.
And in terms of finding tutorials, scouring the internet will always lead to some result. A good tumblr page is @thefoxburyinstitute, which has many sections based on your level of experience. Adding “reddit” to the end of a search helps too!
2️⃣ You can export anything from Sims 4 Studio as a reference (mod or EA object)
For an EA item, In S4S, go to Tools -> Browse Game Content -> then select the category you need a ref. If it’s a mod, click on My Projects and find the package you want.

From here, you can export the mesh, images, or any textures you need without having to create a new package for it! Best used when you have already created your own package and just need one aspect of the object.
If you want to append in Blender, go to File -> Append (works with any .blend file exported from S4S), then find the location of whatever you exported. Go to the Object folder, find anything labeled s4studio_mesh_number, then append. I just append all of them, then delete ones I don’t need.

Also, in the Scene tab, make sure the cut box is blank for the reference you imported! S4S will confuse this with your mesh if not, as the cut number determines which mesh will replace the EA one.
3️⃣ File management is important!
The more you create, the more random things you’ll download on your computer. You need to be aware of where you’re downloading things from, duplicate files, how much storage it’s taking up, etc. I recommend the Sims 4 Mod Manager by GameTime. Back up your files often and learn how your computer works because every device is different! Below is how I organize my CC (could use some improvement), but use whatever keeps you organized.

4️⃣ Learn Blender outside of Sims 4 CC
There have been so many times when I’m so frustrated about Blender that I have to take a step back and focus on a different hobby. The first time that happened years ago, I decided to learn how to make simple models in Blender, and not only did I enjoy it, but I also learned so much that can be applied to CC! Below are some tutorials that I watched.
Blender 3D Beginner Tutorial by 3DGreenhorn
A simple room tutorial.
3D Isometric Bedroom by artbytran
Another simple room tutorial, but with more cute details.
Creating Stylized Low Poly Characters by lacruzo
How to make a low-poly character and texture paint on it (I used this tutorial to texture paint on a hair clip!)
Intro to Creative Web Development by Andrew Woan
Okay I know the 5 hours is daunting, but only (lol) the first 2 hours are Blender. This video goes more into the technological aspect and making models optimized for video games/web (ahem TS4). After the 2-hour mark, it's all coding, which is not needed for CC making.
5️⃣ It takes time/consistency
As a person who only makes CC once every other month or so, it’s mostly muscle memory and consistent practice that makes someone feel confident in their CC making abilities. Remember how as a kid typing was the slowest thing ever, and today you’re (hopefully) better? It’s cause you kept practicing over a long period of time.
The first time I opened Blender to make poses was in 2021, and 4 years later, there’s so much that I have learned from others, and 10x more that I don’t know due to the endless possibilities of what can be created. But hey, I’m confident enough that I made this post of tips, right? Take small steps, the end goal is to make something you or others enjoy.
Thanks for reading this if you’ve come this far, and here are two pages I recommend reading to help you on your CC journey! :D
Internet safety regarding TS4 by crazy-hazy-sims (pls read this) Custom Content Creation by simlaughlove
6 notes
·
View notes