#Software Localization Tips
Explore tagged Tumblr posts
Visit Tumblr Blog
Explore Tumblr blogs with no restrictions, modern design and the best experience.
Last Seen Tumblr Blogs


Fun Fact
Kazakhstan’s Minister of Communications and Informatics has blocked the Tumblr site because it contained 60 sites of terrorism, extremism, and pornography in 2015.
Text
#Software Localization Tips#Software Localization Tricks#Software Localization Tactics#Software Localization Idea
0 notes
Text
Having Trouble Expanding Globally? The Benefits of Software Localization
Is your software not reaching its full global potential? Discover how affordable software localization services can break down language barriers and know tips.
0 notes
Text
10 Questions to Ask Before Hiring an SEO Agency in Calgary
Hiring the right SEO agency can make a world of difference for your business. With so many options out there, including the best SEO companies in Calgary, finding the perfect match for your needs can be challenging. Before committing to any agency, it’s crucial to ask the right questions to ensure you’re investing in local SEO services in Calgary that deliver results. Here are ten essential questions to guide your decision.

1. What Experience Do You Have with Local SEO in Calgary?
Search engine optimization in Calgary requires a deep understanding of the local market, customer behavior, and competition. Ask the agency about their experience in providing local SEO services in Calgary and whether they have worked with businesses in your industry. Request case studies or examples of their success stories.
2. Can You Provide References or Case Studies?
A reputable agency like ThinkTech Software Inc will have a portfolio of successful projects and happy clients. Ask for references or case studies that demonstrate their ability to deliver results. Speaking directly with previous clients can give you valuable insights into the agency’s performance and reliability.
3. What SEO Strategies Do You Use?
Understanding the agency’s approach to search engine optimization in Calgary is critical. They should be transparent about their techniques, which must align with Google’s guidelines. Look out for agencies that promise quick fixes or guarantee #1 rankings, as these are often signs of black-hat SEO practices.
4. How Do You Measure Success?
Every business has unique goals. Ensure the agency defines success in a way that aligns with your objectives, whether it’s increased website traffic, higher rankings, or more leads. Ask them about the tools and metrics they use to track progress.
5. What Tools and Technologies Do You Use?
The best SEO company in Calgary will leverage advanced tools for keyword research, analytics, and performance tracking. Popular tools include Google Analytics, SEMrush, and Ahrefs. Ask about the tools they use and how they incorporate them into their strategies.
6. How Do You Handle Content Creation and Optimization?
Content is a cornerstone of SEO. Ask the agency about their content strategy, including keyword integration, blog writing, and optimizing existing pages. For example, ThinkTech Software Inc offers tailored content strategies to meet the unique needs of Calgary-based businesses.
7. How Will You Keep Us Updated on Progress?
Transparent communication is vital. Ensure the agency provides regular reports detailing your campaign’s performance. Weekly or monthly updates can help you stay informed and make necessary adjustments.
8. What Is Your Experience in My Industry?
SEO isn’t one-size-fits-all. An agency’s familiarity with your industry can make a big difference. For example, local SEO services in Calgary for a restaurant will differ significantly from those for a law firm.
9. What Are Your Payment Terms?
Understanding the pricing structure is essential to avoid unexpected costs. Ask about their payment terms, whether they offer monthly packages, and what’s included in their services. ThinkTech Software Inc, for instance, offers transparent pricing with no hidden fees.
10. Can You Guarantee Results?
While no one can guarantee specific results, the best SEO company in Calgary will provide realistic expectations and a clear plan to achieve them. Avoid agencies that make unrealistic promises, as SEO is a long-term investment.
Why Choose ThinkTech Software Inc for SEO in Calgary?
At ThinkTech Software Inc, we pride ourselves on offering tailored solutions for search engine optimization in Calgary. Our team of experts has extensive experience in local SEO services in Calgary, helping businesses grow their online presence and achieve their goals.
By asking these ten questions, you can make an informed decision and partner with an agency that aligns with your business objectives. If you’re ready to take your online presence to the next level, contact ThinkTech Software Inc today. Let’s grow your business together!
#SEO agency Calgary#best SEO company in Calgary#local SEO services in Calgary#search engine optimization Calgary#hiring an SEO agency#SEO tips for businesses#Calgary SEO experts#SEO strategies#ThinkTech Software Inc#local business SEO Calgary#questions to ask SEO agency#SEO case studies Calgary#content optimization Calgary#choosing an SEO company#SEO tools and technologies.
0 notes
Text
youtube
Elevate Your Podcast with Riverside's Game-Changing Features!
Discover how Riverside can transform our podcasting journey with its top 10 game-changing features. From studio-quality recording that ensures uncompressed audio and video to local recording capabilities, we’ll explore how this platform keeps our content professional even during shaky internet connections. Riverside also offers separate track recording for ultimate editing control, live streaming options to engage audiences in real-time, and easy remote guest invitations. With automatic transcriptions, integrated editing tools, secure cloud storage, and custom branding options, Riverside is perfect for both beginners and seasoned pros looking to elevate their podcasts.
#Podcasting #Riverside
#Youtube#Riverside platform#Neturbiz#podcasting tools#podcast recording#studio quality audio#high resolution video#local#remote#recording#separate track recording#live streaming podcasts#screen sharing#remote guest invitations#automatic transcriptions#integrated tools#cloud storage#custom branding#podcast production#improve podcast quality#podcasting#for beginners#software#strategies#tips#features#video podcasting#audio podcasting#podcast#editing
1 note
·
View note
Text
For those who are not aware: Bitlocker is encryption software, it encrypts your computer and makes it impossible to access the information on the computer unless you have the key.
It should be standard practice for IT companies to document the bitlocker keys as they are configuring bitlocker on a computer; generally you would do this by creating a record in your client management software for that specific device and putting the key in the record. Sometimes software can be used to extract that information in the event that it's necessary, but even if there's theoretically a way to extract the key, it should be documented somewhere *other* than on the encrypted computer.
This is something that a lot of IT people fuck up on kind of a lot (we've definitely had problems with missing bitlocker keys and I'm quite happy that the people who didn't document those keys aren't my coworkers anymore).
So what do you do if you want to use encryption software and you're NOT an IT company using a remote management tool that might be able to snag the keys?
When you are setting up encryption, put the encryption key in your password manager. Put it in your password manager. Document the important information that you cannot lose in your password manager. Your password manager is a good place to keep important things like your device encryption key, which you do not want lost or stolen. (If you run your password manager locally on an encrypted computer, export the data every once in a while, save it as an encrypted file, and put the file on your backup drive; you are going to have a bad time if your computer that hosts the only copies of your passwords shits the bed so *make a backup*)
This is my tip for home users for any kind of important recovery codes or software product keys: Print out the key and put it in your underwear drawer. Keep it there with your backup drive. That way you've got your important (small) computer shit in one place that is NOT your computer and is not likely to get shifted around and lost (the way that papers in desks often get shifted around and lost).
2K notes
·
View notes
Text
Free or Cheap Spanish Learning Resources So You Can Run at Windmills in Fluent Spanish
I will update this list as I learn of any more useful ones. If you want general language learning resources check out this other post. This list is Spanish specific. Find lists for other specific languages here.
For the purposes of this list "free" means something that is either totally free or has a useful free tier. "Cheap" is a subscription under $10USD a month, a software license or lifetime membership purchase under $100USD, or a book under $30USD. If you want to suggest a resource for this list please suggest ones in that price range that are of decent quality and not AI generated.
WEBSITES
Dreaming Spanish - A website that is also a YouTube Channel. This is a comprehensible input site with videos about a variety of subjects with multiple hosts from multiple countries. It has content for learners from absolute beginner to lower advanced. It lets you sort videos by dialect, subject, length, etc. The free version has a lot of content. The paid version is $9 a month and has many more videos and allows you to track your listening hours. The website is in English but all videos are entirely in Spanish.
Lawless Spanish - A free website with resources to learn Spanish relating to grammar, pronunciation, and vocabulary. The website also has worksheets, charts, an AI chatbot, and reviews of different learning resources. The website is in English.
Spanish Boom - A free website with beginner lessons and free readings with audio and visual aids. They're also associated with a service called Esidioma that provides paid courses with tutor help for around $23 and also sells books. Prices are in Euros but they also sell to people outside of Europe. The website is available in multiple languages.
studyspanish.com - A website with free verb drills and grammar lessons. It's commonly used by high school Spanish students. They also have a blog that hasn't updated in a while but there is an archive to read through. They have a paid tier with access to their podcasts, vocab lessons, and their Spanish learning app which is $10 a month or $120 for a lifetime membership. The website is in English.
Speaking Latino - A website marketed at Spanish teachers but it's in English and has guides to colloquial Spanish and slang in a lot of different countries and a free blog with tips on sounding like a local in different countries. It has a paid tier but that's mostly useful for Spanish teachers. They also sell slang dictionaries for various countries that are usually less than $10.
UT Austin Spanish Proficiency Exercises - A bunch of free grammar, vocab, and pronunciation guides for various tasks you should be able to do in Spanish at various levels from one of my alma maters, the University of Texas at Austin. It's got videos of people from different countries pronouncing things. The podcast links often don't work for some reason but the grammar, vocab, and video links should work fine. The website is in English.
SpanishDict - A free dictionary website and app with a search feature that also has curated vocabulary lists on various topics and articles. They have a paid tier at $13 a month with a writing coach and subscriber only curated lists and articles. Personally I don't think their paid tier is all that special but it's up to you. The website is in English.
BBC Bitesize Spanish - Bitesize is a free study resource for kids and is sorted by level. It has articles aimed at little kids as well as secondary school aged teens studying for their exams or planning to study abroad. The website is in English and available worldwide, not just in the UK.
YOUTUBE CHANNELS
Hola Spanish - A channel by a woman named Brenda from Argentina who makes videos about grammar, pronunciation, culture, media, and general Spanish tips for upper beginner to advanced learners. The channel is almost entirely in Spanish with occasional vocabulary words translated into English onscreen. There are subtitles in Spanish onscreen but sometimes they randomly disappear.
Butterfly Spanish - A channel with free lessons from beginner to lower intermediate. The host also makes videos about useful phrases and listening practice videos. The channel is mostly in English.
Spanish After Hours - A comprehensible input channel for beginner to intermediate learners with vlogs, history, Spanish tips, and news. The descriptions and video titles are in English but the videos are all in Spanish. The channel host is from Spain.
Easy Spanish - A channel part of the easy languages network that makes a combination of videos with useful phrases and terms for beginners and interviews on the street with locals. They have teams in both Barcelona and Mexico City and there are dual language subtitles in Spanish and English onscreen. The hosts also have a podcast for intermediate to advanced learners.
My Daily Spanish - A catchall channel that has lessons, discussions of grammar, culture topics, vlogs, vocabulary, and other various things. The host is from Spain and also makes a lot of YouTube shorts. She mostly speaks in Spanish but occasionally uses English or has English translations onscreen.
Spansh Boost with Martin and Spanish Boost with Mila - These channels are run by a couple from Argentina who also work as tutors on italki. They often appear on each other's channels and both have their own podcasts and vlogs and general content videos that they make discussing their lives, giving tips, and discussing culture. Mila also makes a lot of videos playing the sims.
Spanish Boost Gaming - Run by Martin from Spanish Boost, this is a lets play channel in clear and easy to understand Spanish. Subtitles are available in English and Spanish and a few other languages as well and it's an actual let's play channel. He plays a variety of video games, makes jokes, and says cuss words and everything.
Mextalki - A channel run by a couple of guys from Mexico city that has listening practice, podcasts, street interviews, and Mexican Spanish specific lessons. Some videos have dual language subtitles onscreen while others do not. The channel is majority in Spanish but in a few lesson videos or portions of videos they will speak in English a bit.
Espanol Con Juan - A channel that teaches Spanish in Spanish from upper beginner to upper intermediate. Juan has grammar lessons, vocabulary lessons, and videos about culture. He is from Spain and the channel is entirely in Spanish. He also has a podcast for more advanced learners.
READING PRACTICE
Vikidia - A wikipedia type website specifically made for kids. The articles are short and written in more simple easy to understand Spanish. The website is in Spanish and made for native speaker kids.
Spanish graded readers by Olly Richards - Spanish has short stories and dialogues for beginner and intermediate, books in easy Spanish on world war 1, world war 2, western philosophy, and climate change. There's also dialogue books specific to Mexican Spanish and Spanish used on social media. The books usually go from $5-$20 new depending on how old they are and whether or not you bought a digital copy. These are really easy to find at used bookstores for cheap though, especially in the US.
Conatilteg Digital - This is a mobile app that provides digital versions of the free textbooks for children provided by the Mexican Ministry of Education both historic and current. The link I provided is for iOS but the app is also available on android and the app is available in multiple countries and not just Mexico. The app is entirely in Spanish and categorized by grade from preschool to secondary school so it's a resource appropriate for all levels and may be enjoyable for any kids you know that are learning Spanish. You can also view their browser website here. (also entirely in Spanish)
Hola Que Pasa - A free website with news articles for learners from beginner to intermediate difficulty. They also provide audio and have the news articles available in podcast form. Every article has certain phrases highlighted that you can hover over and get and English translation of. The website is in a mix of English and Spanish.
Spanish in Levels - A world news website in Spanish for learners. The articles are separated into three different levels and the website is in a mix of English and Spanish. Each article also has audio.
PODCASTS
Spanish for False Beginners - An unscripted podcast about various topics hosted by a guy from the UK and a guy from Spain. The podcast is aimed at people who find beginner content to be boring but still find intermediate content to be too difficult. English is very rarely used.
Uforia/Univision - Uforia is a free app aimed at native speakers in the US and has Spanish language radio, music, and podcasts. Univision in general is also useful if you like American and international news and programming in Spanish.
Radio National de Espana - Another site for native speakers, this is Spanish National Radio. They have a variety of free podcasts and radio programs.
Spanish Obsessed - This is a series of lessons in podcast form for learners from absolute beginner to advanced.
Storylearning Spanish Podcast - This podcast tells different short stories in Spanish and is aimed at upper beginner to lower intermediate learners.
Radio Ambulante - A Spanish language podcast from NPR that's similar to something like This American Life that tells stories from around Latin America. Although it's aimed at native speakers, the language used is clear and understandable and transcripts are available. They're also aware that a lot of intermediate and advanced learners use them for listening practice and they have developed a free app that helps with comprehension and vocabulary when listening to their podcast.
SELF STUDY TEXTBOOKS
Madrigal's Magic Key to Spanish - A self study textbook written in the late 80s that still mostly holds up for beginner to upper beginner Spanish. A paperback edition of the textbook is about $25 and used copies and ebooks are also usually available wherever you like to buy books. It's also half off on Amazon pretty often.
Complete Spanish step-by-step by Mcgraw Hill - This is a complete version of the McGraw Hill budget option, the spanish step by step series that focuses on the most frequently used words and grammar. It's $25 new but the individual books in the series usually cost less than $10 and used versions and ebooks are available.
Complete Spanish Grammar from Mcgraw Hill - This is a workbook as well as a textbook that usually costs around $20. The complete Spanish all in one version of the book costs about $40. Used versions of these books can be difficult to find because people tend to write all over them but ebook versions are available. You can also find their beginner workbook for around $18.
Practical Spanish Grammar - This book is usually around $25 but because it's not a workbook it's fairly easy to find used copies. An advanced grammar textbook is also available.
SERIES FOR LEARNERS AND KIDS SHOWS
Destinos - This is a series of over 50 episodes of a telenovela made for Spanish learners. The plot revolves around a group of siblings searching around the world for their long lost half sibling they just learned that they had so the series includes a lot of different Spanish dialects.
Extra Spanish - A 13 episode sitcom made to show in Spanish classrooms that revolves around a group of friends in Spain and a student that just moved there.
Dora la Expladora - Yeah if you remember Dora the Explorer from your preschool days it also unsurprisingly exists in Spanish. You can watch clips and some full episodes on YouTube and buy full seasons for around $8 each on Amazon.
PBS Kids in Spanish - A few PBS Kids shows like Cyberchase and Daniel Tiger have been dubbed into Spanish. The link I've given goes to a place to buy them on Amazon Prime but if you go digging on their YouTube channel or the PBS Kids website you also might be able to find them for free. They don't always make it easy to find though.
Plaza Sésamo - The Spanish language localization of Sesame Street for Mexican audiences with its own unique characters. The YouTube channel has a huge amount of content on it and often has episodes streaming live.
443 notes
·
View notes
Text
How to Deal with Windows 10/11 Nonsense
This is more for my own reference to keep all of this on one post. But hopefully others will find this useful too! So yeah, as the title says, this is a to organize links and resources related to handling/removing nonsense from Windows 10 and Windows 11. Especially bloatware and stuff like that Copilot AI thing.
First and foremost, there's O&O Software's ShutUp10++ (an antispy tool that help give you more control over Windows settings) and App Buster (helps remove bloatware and manage applications). I've used these myself for Windows 10 and they work great, and the developers have stated that these should work with Windows 11 too!
10AppsManager is another bloatware/app management tool, though at the moment it seems to only work on Windows 10.
Winaero Tweaker, similar to ShupUp10++ in that it gives you more control over Windows to disable some of the more annoying settings, such as disabling web search from the taskbar/start menu and disabling ads/tips/suggestions in different parts of the OS. I think ShupUp10++ covers the same options as this one, but I'm not entirely sure.
OpenShell, helps simplify the Start Menu and make it look more like the classic start menu from older versions of Windows. Should work with both 10 and 11 according to the readme.
Notes on how to remove that one horrible AI spying snapshots feature that's being rolled out on Windows 11 right now.
Article on how to remove Copilot (an AI assistant) from Windows 11. (Edit 11/20/2024) Plus a post with notes on how to remove it from Windows 10 too, since apparently it's not just limited to 11 now.
Win11Debloat, a simple script that can be used to automatically remove pretty much all of the bullshit from both 10 and 11, though a lot of its features are focused on fixing Windows 11 in particular (hence the name). Also has options you can set to pick and choose what changes you want!
Article on how to set up Windows 11 with a local account on a new computer, instead of having to log in with a Microsoft account. To me, this is especially important because I much prefer having a local account than let Microsoft have access to my stuff via a cloud account. Also note this article and this article for more or less the same process.
I will add to this as I find more resources. I'm hoping to avoid Windows 11 for as long as possible, and I've already been used the O&O apps to keep Windows 10 trimmed down and controlled. But if all else fails and I have to use Windows 11 on a new computer, then I plan to be as prepared as possible.
Edit 11/1/2024: Two extra things I wanted to add onto here.
A recommended Linux distro for people who want to use Linux instead of Windows.
How to run a Windows app on Linux, using Wine. Note that this will not work for every app out there, though a lot of people out there are working on testing different apps and figuring out how to get them to work in Wine.
The main app I use to help with my art (specifically for 3D models to make references when I need it) is Windows only. If I could get it to work on Linux, it would give me no reason to use Windows outside of my work computer tbh (which is a company laptop anyways).
427 notes
·
View notes
Note
Has there been any instances where Mc and C did work together other than the fake baby thingy?
the science lab was filled with high schoolers scrambling to set up their projects, all of them either too caffeinated or not caffeinated enough for the stress of the prestigious state science fair in washington.
the tables were crammed with an impressive array of projects: models of volcanic eruptions, elaborate circuits blinking in synchronized colors, experiments with soil composition in tiny terrariums. but none of them held a candle to your table, and you knew it.
you worked quickly, your fingers deft as you adjusted the components of the intricate apparatus. the machine—an elegant contraption meant to demonstrate clean energy storage using solar capacitors—was you and C’s brainchild.
they had done the research, the design, the equations scribbled out with ruthless precision in their sharp handwriting. you’d handled the practical end of things: soldering wires, programming the software, ensuring that their theoretical masterpiece could actually, you know, work.
you didn’t notice the way C stood a few feet away, arms crossed tightly, their posture as stiff as a statue’s. their chalcedony green eyes followed your every move like a hawk watching its prey, catching each adjustment you made, each tool you reached for.
finally, they cleared their throat. “you’re doing it wrong.”
you sighed without turning around, tightening a bolt on the panel. “good morning to you, too, lacroix. nice to see you’re in a supportive mood today.”
“supportive?” their voice had that sharp, clipped quality it always took on when they thought you were being deliberately obtuse. “i’d be supportive if you weren’t—” they made an exasperated noise, gesturing vaguely at the machine. “look, the angles on the solar panels are all wrong. the light’s not going to hit them efficiently like that. it’s basic geometry. i explained this to you yesterday.”
“okay,” you said evenly, glancing at them over your shoulder. “anything else?”
C blinked, their expression flickering into something almost like confusion. “you’re just... accepting it? like that?”
“well, yeah,” you said, shrugging. “you’re the brains behind this, aren’t you? if you’ve got more suggestions, i’m open to them.”
C suddenly seemed at a loss for words. the tips of their ears turned a faint pink, and they glanced away.
“well, i, uh...” they began, before scowling at you like it was somehow your fault they’d stumbled. “fine! move the reflector two inches to the left.”
you did as they asked, your motions slow and deliberate. “happy?”
“stop talking to me,” C snapped.
you blinked at them, incredulous. “you’re the one bossing me around!”
C ignored you, their nose tilting upward in that infuriatingly haughty way they’d perfected.
***
when the judges arrived at your school’s section, the air grew thick with anticipation. there were four of them—an engineer from spacex, a college professor from MIT, a tech startup CEO, and some local entrepreneur who had been introduced as a ‘philanthropist.’
they moved from table to table with an efficiency that made your stomach churn. you’d been rehearsing your answers for days, but there was something about the way they scribbled on their clipboards that made even your confidence waver.
but the presentation began smoothly enough, much to your relief. C handled the technical explanations, their voice steady and precise as they guided the judges through the intricacies of your design. you handled the broader picture, spinning a compelling narrative about its real-world applications.
but when the judges started asking questions, something shifted.
“so, who came up with the original concept?” the engineer asked, pen poised over her notepad.
“well,” you started, “it was—”
“me,” C interrupted, their green eyes glinting. “i developed the initial framework.”
you gave them an irritated look. “what they actually meant to say was that it was a joint effort.”
“sure,” C drawled sarcastically. “you jointly borrowed my calculations and then messed up the assembly two separate times.”
you bristled. “maybe if your diagrams weren’t as convoluted as your personality, i wouldn’t have had to ‘mess up’ anything.”
“convoluted? that’s rich, coming from someone who thought capacitors and resistors were interchangeable—”
“that was one time, and it only happened because you mislabeled them!”
the judges exchanged glances, two of them clearly trying not to laugh, the other two looking mildly alarmed.
“would you say you two work well together?” another judge ventured cautiously.
“oh, absolutely,” you said, your tone dripping with sarcasm.
“can’t agree more,” C added, voice as flat as a table.
the judge raised an eyebrow, scribbling something down.
by the end of the presentation, both of you were red-faced and fuming, but the machine worked perfectly, and the judges seemed reluctantly impressed.
***
after the presentation, you and C sat side by side in the waiting area, the hum of chatter and distant applause filling the space. your hands rested in your lap, but when you shifted slightly, your fingers brushed against theirs. the accidental contact sent a jolt of heat up your arm, and you risked a glance at them.
C was staring angrily at the floor as if it had just demanded to drain their bank account, half of their face buried in the high collar of their dark green turtleneck. the tips of their ears had turned even more pink. their foot tapped against the floor in rapid, agitated beats.
when the winners were announced, your names rang out together, tethered like an inevitability.
you and C locked eyes, both startled, before standing up in unison. the applause was loud, but all you could focus on was the awkwardness of walking side by side to accept the award.
you still fell into step beside them, the trophy handed over in a flurry of handshakes and flashes from the crowd’s cameras.
the microphone passed between you two for the acceptance speech.
“we’d like to thank our school for supporting this project,” you began, glancing at C.
“and, of course, this wouldn’t have been possible without the cooperation of my... partner,” they added, their jaw tightening as if the words physically pained them to say.
you were tempted to laugh at how they looked like they were having a particularly bad case of indigestion, but managed to keep a straight face for the cameras.
***
after the ceremony, the two of you lingered near the refreshment table. C cleared their throat awkwardly, avoiding your gaze.
“you did... good,” they muttered.
you cocked your head, thinking you misheard them. “what?”
“i said you did good,” they repeated, louder this time. “you didn’t embarrass us. much.”
you snorted. “thanks, i guess. you weren’t too bad yourself.”
C hesitated, their eyes darting to the trophy in their right hand as their other hand fidgeted with the edge of their aldervale prep blazer.
“you’re smart though,” they said finally, their voice softer than usual. “you would’ve won without me.”
the admission startled you. “was that... a real compliment?”
this time, C’s cheeks turned pink as well, and they huffed loudly, turning on their heel. “i’m leaving. and i’m taking the trophy.”
“wait, what?” you snapped out of your stupor and hurried after them. “that’s not fair, lacroix! we both won!”
“too bad, starkid,” C called over their shoulder, their tone maddeningly smug. “you want it? come and get it.”
you groaned, chasing them through the crowd. “lacroix, get back here!”
and for the first time all day, C’s smile was genuine enough for their dimples to show.
#my god they’re stupid#fellas is it weirdly romantic to chase each other through crowds?#upcoming scenario is gonna be for M 😗#if: the ballad of the young gods#interactive fiction#interactive novel#interactive story#twine wip#ro: c lacroix#ro scenarios
230 notes
·
View notes
Text
as per a request in my local renegade server: here is my process (such as it is) for the stenciled covers i've done for my binds. obviously, huge thanks to everyone in the renegade discord for teaching me most of what i know about bookbinding. this tutorial only exists thanks to the resources they've made available and the conversations i've had there.
material list
vinyl cutter (i have a silhouette portrait 3) + mat + blade
stencil vinyl (i have this one, but have had some adherence troubles with it. unclear whether this is just The Nature Of Stencil Vinyl or whether there's a better brand out there. adhesive vinyl can also be a viable option, although i haven't personally experimented with it yet.)
transfer tape (i have this stuff. it's fine.)
weeding tools (i have this hook and a very fine tip pair of tweezers. i highly recommend getting a hook, especially if you—like me—are haunted by the specter of carpal tunnel. get an off-brand one or get one on sale, though. i only have the silhouette brand one because it was on clearance.)
acrylic medium (i have this one because it was on sale at the time i was buying acrylic medium. when i replace it, i will be replacing it with a matte one. the gloss definitely has a noticeable sheen that i don't love.)
acrylic paint (literally any paint will do. i've been mostly using the decoart extreme sheen because it's $4 at michaels. you may be noticing a theme here.)
stiff stenciling brushes (the ones i have are similar to these but cost even less. again, there's a theme here.)
an iron and some parchment paper (jury is still out on whether using heat to "set" the pattern is necessary, but i do feel like it melts the paint a bit into the bookcloth and lessens the extent to which the pattern sits above the bookcloth.)
your trusty bone folder
instructions and a truly hideous number of words under the cut.
step 0.5: discern what will make a good stencil and what will make you hate yourself, your life, and the art of bookbinding
there are a LOT of different ways to put titling on a book. you could do a paper cover with a printed design or paste paper labels onto bookcloth or foil your title onto your cover with heat activated foil. the best method depends on what kind of design you have in mind, what tools you have available to you, and what materials you're working with (for example, i've had very bad luck getting acrylic paint to adhere to Allure bookcloth, but Allure does foil like a dream).
as far as stencils are concerned, you can kind of sort cover designs into three categories:
BEST for stencils: big, bold shapes on larger format books (think letter folio or letter/legal quarto)
OKAY for stencils, but you might hate yourself: intricate detail at a large enough form factor for it to be cut well by your vinyl cutter
BAD for stencils, you will die and it will hurt the entire time you are dying: lots of intricate detail and lots of fine lines
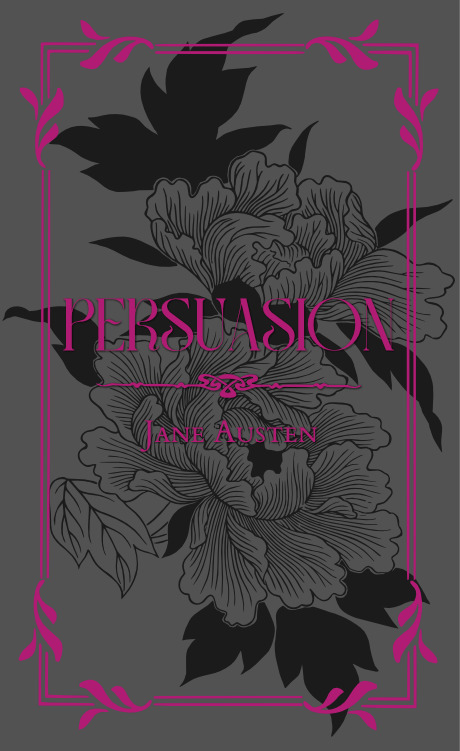
below are examples of category 1, 2, and 3 (all designed for letter folio). to be clear, category 3 can technically be possible, depending on the design. but only undertake it with the awareness that you will die, and it will hurt the entire time you are dying.


step 1: design a thing to put on your cover
i'm not going to go too in depth on this because cover design is a HUGE can of worms. a few pointers, though:
i never start designing my cover until my text block is done. this allows me to design my cover at "full size" based on the measured size of my text block and cover boards.
i fully lay out my cover in a separate program before exporting a transparent PNG to silhouette studio (or whichever proprietary software you have to use to communicate with your particular vinyl cutter). i use affinity designer. some free options would be inkscape (if you want to work with vectors) or gimp.
i design my cover on a document with dimensions of (HEIGHT of boards + 20 mm) x (WIDTH of boards or spine + 20 mm) and 10 mm margins. the area within the margins represents the actual dimensions of the thing i'm designing, while the area outside of the margins creates a mask that prevents me from getting paint on things i don't want paint on (like the covers, if i'm creating a spine stencil).
i always outline my document with a 3 or 4pt black line. this creates the outer edge of my stencil and provides my vinyl cutter with a cut line. if you're working with a smaller vinyl cutter (like the cricut joy) there are ways to jigsaw designs together from smaller pieces of vinyl, but i'm not the person to ask about that. i specifically bought a portrait so that i didn't have to worry about that.
here's an example of one of my affinity files from a recent cover. i've exaggerated my outline to make it clearer. you can also see that i use affinity to experiment with color combinations. before i export, i turn all my elements black and make any backgrounds transparent, meaning that the PNG i import into silhouette studio looks like the one on the right.

step 2: cut and weed your stencil
again, not going to go terribly in depth here. there is a veritable army of youtubers out there with tutorials about how to use [insert propriety vinyl cutter software here]. but, again, a few pointers:
with my particular vinyl cutter and stencil vinyl, i usually cut my stencils with the material set to "washi," depth at 1, force at 13, and speed at 4. google, experiment, see what works. also, you want to put your stencil vinyl on the mat with the blue vinyl facing UP, and you don't want to mirror your design. with stencils, what you see is what you get.
i cut my vinyl a bit bigger than necessary because i'd rather waste a bit of vinyl than have to worry about a stencil falling off the edge of my vinyl because i misaligned it on the mat.
unlike HTV, you will be weeding out all the black parts of your original image. be prepared to hate the letters "e" and "a" forever, because you will have to somehow keep the little eye of them in place while you pry out the rest of it.
step 3: apply your stencil to your case
alright, now let's get into the meat of it. i always stencil after my case is finished but before i case in my book. this means that if i totally fuck it up, i can trash the case instead of the entire book.
additionally, i completely stencil my spine first (as in lay down stencil, paint, remove stencil) and then stencil my covers. i've found that it's easier when you don't have stencils overlapping and sticking to each other.
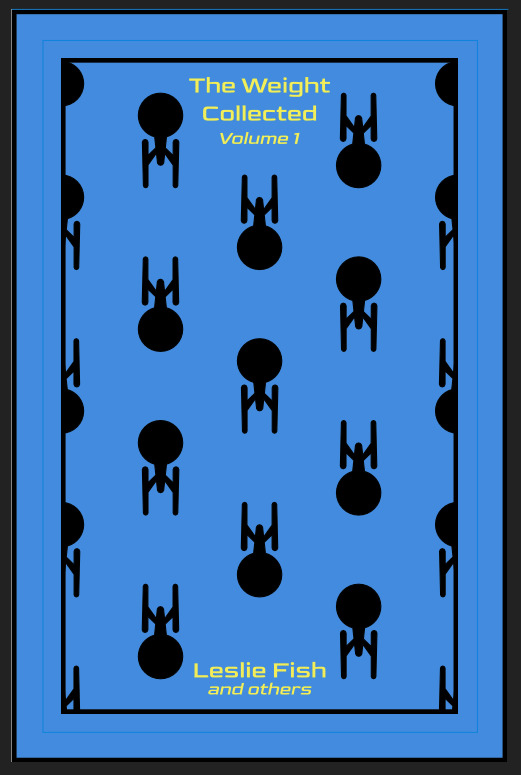
OPTIONAL STEP: mark guides onto your cover to help you position your stencil. whether or not i do this step depends on the design. a lot of the time, i just eyeball it. but for some designs, precision is key. for those projects, i use my ruler to mark out guides in white chalk for where i need certain elements of the stencil to fall. (i used guide marks for the "penguin clothbound" copies of the The Weight Collected that i've been using as an example in this post—the black rectangular boarder would've made uneven placement REALLY obvious.)
use transfer tape to remove your vinyl from its slick backing. what i've found is that you really, really don't want your transfer tape to be too sticky. you want it just barely sticky enough to pick up the stencil if you rub it down with a bone folder or your fingernail. i have a piece of transfer tape that i stuck to my jeans a bunch of times and then proceeded to use for 8 books in a row. it is, frankly, still a little bit too sticky. i have rolled it up so that i can use it for the next 8 books, at which point it will presumably be the right level of stickiness.
position your stencil. when you're happy with it, rub it firmly down with your bone folder. then do it again. then use your fingernail to score down over the titling text. then pray. in my experience, stencils prefer to stick to transfer tape rather than bookcloth. ymmv.
start at one corner of your stencil. carefully begin peeling back the transfer tape. i've found that essentially folding back the transfer tape (like, the corner that's been freed from the stencil being folded back away from the stencil) helps the tape to release. go slowly, rubbing down with the bone fold as necessary.
after you've finally manage to pry the tape off, go back and smooth down the stencil and firmly rub it down to get it to adhere to the bookcloth as thoroughly as possible with as few ripples or air bubbles as possible.
step 4: paint time!
here is a secret that the renegade discord taught me that i am now passing on to all of you: before you put any paint on your stencil, put down a layer of clear acrylic medium. the medium will finish the job of pasting down the stencil to your cover, and any leaks that happen in the process will be clear medium instead of colored paint (and will therefore be basically unnoticeable). ergo:
stipple a thin coat of acrylic medium over your stencil. you want to use an up-and-down daubing motion, not a brushing motion. brushing will get paint under your stencil. let dry.
after your medium is dry, stipple a few thin coats of your colored acrylic paint onto your stencil. let dry between coats. (i usually find that two coats is enough.) again, try to keep your coats thin. you don't want a thick layer of paint because that will create a raised surface above your bookcloth.
let your paint fully dry. i usually leave it overnight, but if i'm feeling especially impatient, i still make sure to at least give it a good three or four hours.
peel up your stencil. your weeding tools will once again come into play here to pry up little bits and pieces of stencil (like the stupid eyes of the "a"s and "e"s that were so annoying during the initial weeding stage).
step 5: optional setting stage
again, jury is still out on whether or not this is necessary, and the effects are pretty subtle. but i do it every time anyway. some tips:
use an iron on very low heat (i keep mine at the low end of the synthetic setting) and with steam turned OFF
keep a piece of parchment paper (NOT waxed paper. you want the slick paper that you put under cookies to keep them from sticking to the pan.) between the iron and your cover.
press the iron down, don't rub it like you're ironing a shirt. it's possible to smear your paint doing that (ask me how i know).
i usually lay the iron down on a section for 10-15 seconds at a time, then lift it and move it to another section.
start with less of everything (less heat, less time) and build up. always better to be conservative with this.
i usually continue until the paint is warm to the touch, then move onto another section. after it's cooled, i evaluate if i feel like it's melted into the cloth enough. if not, i repeat the process.
step 6: BOOK
congrats, you have put a design on a book cover. the world is your oyster. go forth and make books. become ungovernable.


113 notes
·
View notes
Text
Writing Notes: Book Cover

“Don’t judge a book by it’s cover!” We’ve all heard the phrase and we all know that’s impossible. Because the cover of a book is the first thing a potential reader sees—it should stop them in their tracks. It’s a very powerful marketing tool; having a well-designed book cover is crucial.
Tips for Making a Great Book Cover Design
Using more than two to three typefaces on a cover is discouraged, as it can look really messy.
Keep things simple. Your cover will be in a sea of other covers so try to keep your design from getting muddy and make sure it stands out.
Show your designs to people who have a design eye and/or you trust. It’s great to get feedback.
If you hire a professional designer, write a brief and send them info. Be really clear on what you want. Designers usually do a certain number of design rounds included in the agreed upon fee and any extra rounds of design will be extra.
If you hire a professional designer, they will likely have ideas about printing and may have connections to printers. They are a resource so don’t forget to ask questions.
Don’t forget: a book cover is an important part of selling any book. Whether you decide to do it yourself or collaborate with a professional, pay special attention to this part of the process, as a great cover goes a long way.
6-Step Guide: Professional Book Cover
STEP ONE Generate Ideas. Look around at book covers you like. Go to a bookshop and peruse what’s currently happening in book cover design. Take notes of what elements you like on the cover image. A certain typeface? Color? Do you prefer an image or an illustration or something purely typographic on the cover? Another option is to create a mood board. You can use a platform like Pinterest or Evernote, or create a folder on your desktop, and pull book cover inspiration from the web. While you’re gathering inspiration, keep in mind what genre your book is and what kind of book design feels appropriate.
STEP TWO Find a Designer (Who Could Be You!). Do you have design skills? If so, your next step is to begin layouts and mock-ups of the covers. You should use whatever software program you are comfortable with. Most professional book cover designers use a program from the Adobe Creative Suite:
InDesign. InDesign is a multi-page design platform but can also be used for single page design.
Photoshop. Used to manipulate and experiment with photography.
Illustrator. Illustrator is a vector-based program, which means you can create graphic art that can be scaled up or down without loss of quality.
Photoshop and Illustrator. These can also be used together as you can bring your Photoshop file into Illustrator to set the type after you have worked with your cover image.
If you don’t have design skills, now is a great time to hire a book cover designer. The first step is to figure out what kind of budget you have for this. A designer’s fee will range depending on their expertise. Get a figure in mind and then write a design brief which should include the book specs:
Size
Print-run
Intended audience
Where and how the book will be published
Anticipated publish date
You should also include a summary of what the book is about and what you are looking for in a cover. Also share the inspiration you’ve gathered with the designer.
If you don’t have design skills but want to create the cover without the help of a professional, there are a few software programs you can use, such as Canva or 100 Covers, design tools that allow you to DIY the cover (for free or a fee).
STEP THREE Decide on the Dimensions. If you’re self-publishing and printing with a local printer you can work with them to make sure your book dimensions will fit on their printer (remember a book prints front, back, and spine in one sheet of paper). It’s also a good idea to find examples of books whose size you like and feels good to hold. Use that as a jumping off point for your book.
Book Cover Dimensions List. If you are printing for a specific market, from print to ebook, here is a handy list:
Amazon Kindle Direct Publishing File Format: JPEG or TIFF Cover Size (Recommended): 2560x1600 pixels Cover Size Requirements: between 1000x625 pixels and 10,000x10,000 pixels (one side must be at least 1000)
Apple iBooks File Format: JPEG or PNG Cover Size (Recommended): 1400x1873 or 1600x2400 pixels Cover Size Requirements: at least 1400 pixels wide
Barnes & Noble File Format: JPEG or PNG Cover Size (Recommended): Rectangle height and width, at least 1400 pixels Cover Size Requirements: Min. 750 pixels height and width
Kobo Books File Format: JPEG or PNG Cover Size (Recommended): 1600x2400 pixels Cover Size Requirements: Min. 1400 pixels width
Smashwords File Format: JPEG or PNG Cover Size (Recommended): 1600x2400 pixels Cover Size Requirements: Min. 1400 pixels width Draft2Digital
File Format: JPEG Cover Size (Recommended): 1600x2400 pixels Cover Size Requirements: Tall rectangle
STEP FOUR Choose Your Style
Photo-based cover. If you’re creating an photo-based book cover, you’ll need to source stock imagery. There are lots of great resources online to find stock imagery including ShutterStock, Getty Images, and Adobe Stock. (Keep in mind: most photography archives require payment to use their images. Always investigate the copyright of images you’re interested in using.) Look for images that convey or allude to your book’s genre. You can use programs like Photoshop to manipulate your image, making it black and white instead of color or cropping it in a certain way.
Illustration-based cover. If you’re considering a more graphic approach to your cover, Illustrator is the tool to use. You can bring hand-drawn drawings into it and outline them to create scale-able, high-res illustrations which you can manipulate within the program. You can also create shapes, patterns, experiment with typography within illustrator and play with color, transparency, size and much more.
Typography-based cover. Finally, many successful book covers use typography as the main graphic device. This takes some skill and knowledge of typefaces, the historical context of a typeface, and how to manipulate it thoughtfully. That said, using type as a graphic can be very impactful.
STEP FIVE Pick a Typeface (Font). No matter what kind of cover you are designing, you are going to need the title of the book and the author’s name on the cover. As mentioned above, picking an appropriate typeface is very important. You want to pick something that feels right for your book—is it a sans serif or serif? A heavy weight or lighter weight? You want to make sure it’s not something with a lot of baggage, like Comic Sans or Papyrus. It is a good idea to actually do a little research on when, where, and who your typeface was designed by to give you context and feel out if it will be right for your book. You might also consider using up to two different typefaces, one for the title and one for your name. A serif and sans-serif mix can give a bit of contrast and visual interest. There are some typefaces that pair really well together. Check out the website TypeWolf to get ideas of what fonts pair well together.
STEP SIX Test, Tweak, and Repeat. Once you have a few versions of your cover, print them out on your home printer and take a look with a critical eye. Does the type size feel chunky? Too bold? Too small? How does your image look? Is it cropped right? Are the lines of your illustrations too thin and not showing up? Go back and refine your design and then repeat! Don’t forget to look at your book cover as a small thumbnail as well. People are on their mobile phones and you want to make sure your cover still stands out and is impactful.
Book Cover - serves as your first impression with potential readers—and though book covers don’t always look the same, they do tend to contain the same essential elements.
Design standards may be different in the world of traditional publishing than they are in self publishing, and book cover templates for physical paper books may differ from those of ebooks—but they all serve the same purpose.
Some Functions of a Book Cover
A book’s cover provides essential information. At its most elemental, a good cover includes a book’s title, the author’s name, the publisher, and the price.
A good cover offers clues about your book’s content and tone. Your cover design indicates whether your book is a work of high-minded literary fiction, a pulpy page turner, or a compelling work of non-fiction.
A front cover reveals a book’s genre. You can usually tell if you’re holding a thriller, a memoir, a sci-fi epic, or a nineteenth century classic just by looking at a book’s cover art and typography.
A back cover offers broader context. It may feature quotes from reviewers and fellow authors. Softcover books may contain a plot summary or author biography on the back; those summaries and bios are typically moved to the inner flaps of a hardcover book.
How to Hire a Professional Book Cover Designer
Book covers are marketing materials, and a well-designed professional cover can make your book stand out among the competition. If you want someone with expertise in the realm of cover design to work on your book, you may want to hire a professional book cover designer. Here are some steps to consider when hiring creatives to design your book cover:
Hire a cover artist. A cover artist produces the cover art and imagery that will appear on your book cover, either on their own or with heavy input from an author or publisher.
Hire a graphic designer. Certain graphic designers specialize in layout; they incorporate cover art that you provide them—whether that’s an original illustration, photograph, or even a stock image—into the overall design of the cover.
Find a cover designer online. Reedsy is one of a number of online resources for independent authors, self-publishers, and anyone connected to the world of books. Many professional book designers list their services on Reedsy.
Use your personal network. Seek out writers’ groups, either locally or on Facebook. In these groups, people share professional referrals and help support one another when a member has a new book in the works. A group of like-minded individuals can be an invaluable resource when creating your own book cover for the first time.
When to Call a Pro:
You have a budget (a designer’s fee will vary depending on experience and location).
You have enough time to work with the designer.
You have a clear idea of what you want or at least what you don’t want.
You don’t have any design skills.
You don’t want to invest in the design software.
Your book isn’t selling.
How to Design a Book Cover Yourself
If you don’t have the budget for a pro designer or just have a DIY itch you want to scratch, it is easier than ever to design your own book cover. While it may not be quite as rudimentary as when you covered your textbooks in a brown paper bag back in fifth grade, modern technology has made cover image design accessible to anyone with a computer. Here are some tips:
Use a template. There are numerous websites that offer book cover templates and step-by-step tutorials covering basic cover design skills. Some even have a free book cover creator tool, along with cover ideas, design tips, pre-made design templates, and digital cover image tools.
Use standard design software. Book covers can also be made using standard home computing software including Photoshop, Microsoft Word, and even (with a little sweat equity) Google Docs. This is particularly easy if you are importing a pre-made cover image from another source.
Make a prototype. The process for assembling a book is straightforward and satisfying. If you want to test out how your book will appear in print, you can learn to bind a copy yourself.
When to DIY:
You don’t have any budget for design.
You have design skills to do it yourself.
You have the design software.
You have a template and know exactly what you want.
You have people with an eye for design that can guide you.
How to Make a Hardcover Book
So you’re ready to bind your own book. Here’s what you’ll need:
Content, of course.
Uncoated printer paper for book pages
Decorative paper for endpapers, such as wrapping paper or cardstock
Davey board (aka bookbinder’s board), thin chipboard, or cardboard for the book covers
Craft knife
Polyvinyl acetate (PVA) glue such as Elmer’s glue
Hot glue gun and glue sticks
Ruler or straight edge
A long stapler
Thin fabric or book cloth for cover
Binder clips
Thick decorative paper (optional, for dust jacket)
Paper trimmer (optional, for trimming book pages)
Paintbrush (optional, for spreading glue)
There’s more than one way to bind a book, and you’ll find tons of great tutorials online for making homemade books, including Japanese bookbinding and perfect bound softcover books. The most popular style of hardcover book binding is called case binding, which is traditionally done by stitching pages together with thread. Here is how to make a hardcover book step-by-step—no sewing or special materials required:
Assemble the content. The number of pages and the type of paper you work with depends on whether you’re binding a novel, a full-color photo book, or a sketchbook. Familiarize yourself with the format by taking some hardcover books down from your bookshelf and observing how they were made.
Format your pages. If you’re creating a blank book, you can skip this step. If you’re printing a book with text, you'll need to format the text so that you can print it into a book. You can get help with this at a copy shop, or you can download book design software and print at home. Eventually, you’ll end up with a PDF with a page count. This page count has to be divisible by four so that your book can be bound as folios made up of eight sheets of paper (32 pages) each. You may need to add some blank pages at the end of the book to keep your page count correct for the folios.
Print and fold. Once all of your pages are printed, fold pages in half and stack eight within each other, making sure the pages are in the correct order. Staple the folios together in the folds, alternating the location of the staples so that you don’t end up with a bulge in the spine.
Bind your folios together. Arrange all of the folios in the correct order and flatten them between heavy books. Once your folios are flat, it’s time to glue them together. Hold the folios together with binder clips and use a glue gun to glue the folios together along the stapled edge. This will become your book’s spine. Be careful not to overdo it on the glue: Use just enough to keep the folios together. Before the glue cools, use a thin piece of fabric to cover the spine only.
Even out the pages. Carefully trim the edges of the pages with a paper trimmer or craft knife, if needed.
Make the hardcovers. Cut two pieces of cardboard for the front and back covers of your book. For the spine, cut a piece of cardboard that is the same height as the front and back covers, with a width equal to the thickness of the spine plus the front and back covers.
Attach the hardcovers. Paint the cardboard (both covers and the spine piece) with a thin layer of PVA glue and attach to the cloth you’ll use to cover your book, leaving a space between the covers and the spine equal to one and a half times the thickness of the cardboard. Let dry.
Assemble the book. Use PVA glue to attach the fabric-lined spine of your bound folios to the cardboard spine. Keep the book propped up between other books while you wait for it to dry.
Attach the endpapers. Trim the paper lining so that it’s twice the size of the first page and fold it in half. Paint glue onto the inside of the front cover and the front page, and attach paper lining. Repeat with the back cover.
Make the dust jacket. If you’d like to cover your book with a dust jacket, measure a piece of thick decorative paper as tall as your book and as wide as the entire book, plus a few extra inches to fold over the edge of the cover. Fold the dust jacket over the bound book. Lay another heavy book on top of it to help the dust jacket keep its shape. This is the place to add a cover design, if you’d like.
Sources: 1 2 3 4 ⚜ More: Notes & References ⚜ Writing Resources PDFs
#books#book cover#writing tips#writeblr#booklr#literature#writers on tumblr#writing reference#dark academia#spilled ink#writing prompt#creative writing#bookblr#writing inspiration#writing ideas#writing advice#on writing#light academia#writing resources
118 notes
·
View notes
Text
Here’s how to share sensitive leaks with the press
Published Oct. 16, 2019 Updated Jan. 31, 2025 / Freedom of the Press Foundation

[please take a moment to click the links at the bottom to give this website traffic if you can. the only reason I am copy pasting it here is for those who can access tumblr but not necessarily that site.]
~~~
Over the years, we have witnessed abuse and mismanagement in the government and private sector — sometimes bad and sometimes worse — that need to be brought to public attention. For those who would leak information about such misdeeds to the press, giving tips to journalists can be risky and may violate previous legal agreements with the leaker’s organization, such as a nondisclosure agreement or contract. But sometimes, it can also be an effective and courageous way to call attention to misconduct.
This guide describes basic steps for minimizing potential risk when sharing sensitive information with a news organization. We want to be clear that no piece of software, nor security recommendation, will be 100% effective, and the decision to blow the whistle may invite scrutiny or retaliation. At the same time, it may be a choice that drives necessary institutional change. Before reaching out to the press, think carefully about what you can do to minimize that risk and stay as safe as possible.
Before moving ahead, do you have a strong tip?
A good tip requires clear evidence and should be the basis for a story that the broader public needs to know about.
So, for instance, whether or not you have evidence, the broader public might not need to know that a neighbor refuses to pick up after her dog on the morning walk. On the other hand, allegations of corruption or illegality among public officials are certainly newsworthy, but those claims will not make it into a published story without verifiable evidence.
Who are you leaking about and how might they respond?
Think about the sensitivity of the information you’re sharing, and who might be willing to investigate the source of the leak. What are the organization’s capabilities? What resources (e.g., attention and legal, financial, or technical) can it invest in discovering the source? And how likely do you think it is that it will actually investigate?
If you share information about a large, well-resourced organization that requires discretion from employees, such as a government agency, it may have enormous legal, financial, and technical resources available for investigating a leak. If you’re sharing information about a small organization, such as a local restaurant that muzzles workers, its resources are much more constrained, and it may not have the capacity or willingness to investigate. Act accordingly.
Proceed with caution
Be cautious about behaviors that could make you readily identifiable as a source.
Keep all of your leaking activities outside the view of your organization. That means no calling from work, no emailing from a work email address, and staying off work devices or wireless networks.
It's common for well-resourced organizations to keep logs of activities on employees’ workplace devices and online activities. Likewise, sometimes workplaces have “BYOD” (bring your own device) technologies that could allow them to log your activity on your personal device. So if you work at a large organization and you're reading this article on a workplace device or Wi-Fi network, chances are your workplace already has a log that you've accessed this page. Similarly, a visit to a news organization's tip page (like https://www.nytimes.com/tips) may be logged by your workplace. This is why it's so important to limit your leaking activities to devices and networks that your workplace doesn't control.
Has your workplace ever required you to install monitoring software (or software of any kind) on your work or personal device? If so, you probably don't want to use those devices for any whistleblowing activities.
Be cautious about giving tips on anything that only you could know or materials that only you could access. And consider whether the increased risk of being caught sharing these kinds of materials is worthwhile, or if you feel you have a strong moral obligation to do so.
If you are the only one at your organization surfacing a specific grievance, and information about that grievance is later reported by the press, it may give your organization a strong hint about who shared the information.
Don’t tell anyone about your leaking activities (even perhaps the journalist or news organization you’re leaking to), except where absolutely necessary and in cases where you may want legal advice from a practicing lawyer.
Reporters generally take their commitment to protecting your identity very seriously and will do everything in their power to fight potential legal requests for identifying information about you. But often, it’s safer not to give your identity if you don’t have to. Keep in mind that journalists prefer to have proof of your claims and information to demonstrate your identity is a part of that.
Tactics for minimizing risk
There are a lot of ways to minimize the risk of a tip being tied to you, like potentially through your continued communications with reporters.
Send your materials through physical mail. You can mail electronic documents (e.g., on an SD card) or physical documents through ordinary mail. Be warned: The U.S. postal service takes pictures of the exterior of physical mail. So don’t use a return address that is associated with you and instead mail it in from a sidewalk mailbox in a location you don’t usually frequent. If you have a particular reporter you want to look into your story, copy them on the envelope.
Call from a phone number unconnected to you. For example, go to a business you don’t usually go to and ask to use their phone. You can also buy a cheap cell phone and a prepaid phone card that cannot be traced back to you. But know this involves several careful steps: You must pay with cash, and if your organization can have access to phone location records, it’s best to only turn on the phone in locations unassociated with you. That also means using the phone in locations separate from your permanent phone. If you can, remove the battery when it’s not in use.
Use Signal for private messaging. Signal is a secure, free, and open source messaging app for iPhones and Android devices. Signal gives you end-to-end encrypted messages and phone calls, and only retains your phone number, your signup date, and when you were last active. In Signal, you can also make messages automatically self-destruct for everyone in the conversation after a set amount of time. This makes it significantly harder (but not impossible) to eavesdrop on your conversations. If you want help getting started, read this beginner-friendly guide on using Signal. Note that Signal allows usernames, so you do not need to give your name or phone number to media organizations unless you choose to. Make sure your username is enabled and understand that Signal is not designed for complete anonymity.
Before looking into news organizations, consider using the Tor Browser for greater privacy. Tor Browser is a modified version of Firefox. Tor encrypts and tunnels your web traffic within a global network of computers before connecting you to your final destination. When you access a website through Tor (for example, Amazon.com), you will appear to connect from a remote location — likely another country. Again, don't use a work device or network for this kind of research.
Use a whistleblower submission system. Tools such as SecureDrop can provide protection by allowing you to share documents and communications through an anonymous and encrypted drop box.
More technical, but more secure: SecureDrop
With SecureDrop, which is maintained by Freedom of the Press Foundation, not even the news organization knows who you are unless you choose to tell them.
A growing number of news organizations (e.g., The New York Times, The Washington Post, The Intercept, The Guardian) are using SecureDrop to allow sources to reach out and share files or communications anonymously. With SecureDrop, not even the news organization knows who you are unless you choose to tell them.
You can access a news organization’s SecureDrop page through Tor Browser.
People on your network can’t see what you’re doing on Tor, but it’s still possible to tell that you’re using Tor. With that in mind, do not use it at work. For greater security, consider using Tor Browser only over a Wi-Fi network in a location that is not tied to you (perhaps a coffee shop you don’t normally visit) and pay with cash.
As opposed to a “.com” web address, you get to SecureDrop through a unique .onion web address, which can only be accessed through Tor.
Using SecureDrop is fairly easy
Follow the directions to download the Tor Browser at torproject.org and install it.
Launch the Tor Browser application and click "Connect" to log into the network.
Click the shield icon in the top corner > Advanced Security Settings… > Safest
Within Tor Browser, navigate to the SecureDrop directory and search for your preferred news organization: securedrop.org/directory
Find the .onion URL for your preferred publication (e.g., The New York Times: securedrop.org/directory/new-york-times), then copy and paste it into the address bar in Tor Browser.
From here, you can leave messages and files that the news organization will check from time to time.
You will be given a random “codename” for continued conversation with the news org. Keep this information safe, and don’t share it with anyone. If you lose your codename, they can’t reach you anymore.
(For more technically adept users, consider accessing SecureDrop through an operating system designed for privacy and anonymity, such as Tails.)
Dealing with file metadata
Sharing information may be less risky than sharing documents because they can be embedded with information about the file, which we call metadata. For example, if you create a .docx file, it may have identifying information about you embedded in the file. Consider carefully whether you really need to share files or just the information.
To deal with hidden metadata, rather than sending the file itself, consider taking a picture of a document with an old-fashioned camera (not a smartphone), or taking a screenshot of the document. On most operating systems, screenshots come with little useful metadata. For more technical users, you can find metadata removal tools here.
Where do you find a news organization's contact details?
First, be careful where you reach out.
Freedom of the Press Foundation maintains a list of organizations that support the secure communications practices outlined above, and how you can contact them. Such practices are becoming standard, and we hope other news organizations looking for great tips will follow suit.
Freedom of the Press Foundation hosts a directory of SecureDrop and secure tip pages for dozens of news organizations around the world. Whether you want to reach out to The New York Times, The Washington Post, The Guardian, The Intercept, or others, you can find their information here: https://securedrop.org/directory. (We would not recommend investigating this at work.)
If not you, then who?
Sharing information with the press is not always an easy decision, but your information can help to hold powerful people and institutions accountable. Just be sure to move ahead with a strong understanding of your organization’s capabilities and how to share tips safely.
https://freedom.press/digisec/blog/sharing-sensitive-leaks-press/
https://bsky.app/profile/freedom.press/post/3lh2rgopf5225
127 notes
·
View notes
Note
Do you have any tips to be more punk in 2025 specifically for minors?
Hey, great question! Let's take a look at our list and see what still applies and what we can flip around for you.
Cut fast fashion - Still applies! Try clothing swaps with friends.
Cut subscriptions Analyze your media consumption - Do you tend to play phone games that are psychologically manipulative? Are algorithms taking you to content that makes you upset? Track your screen time, think about what's being sold to you, and resist only consuming the media that is fed to you.
Green your community self - Forget touching grass, find ways to touch dirt. Spend time outside in nature. Go for hikes, look at trees, track how plants and animals change over the seasons. You're part of the natural world, so go connect with it!
Be kind - Still applies! Try handing out more compliments.
Intervene - Still applies, and especially applies to bullies, including teachers. This can be as simple as saying, "That was a really messed up thing to say. I think you owe X an apology."
Get closer to your food - Still applies! Try packing your lunch.
Use opensource software Reject Web 2.0 - Before you try to learn Linux, people your age need to start by learning some basic computer and coding skills. My generation was given computer classes and had social media that encouraged custom coding. Yours has been deprived of this education and given prepackaged web content. Reject AI. Right click + inspect element + fuck around. Learn Raspberry Pi. Become the cyberpunk hacker you want to see in the world.
Make less trash - Still applies! If mom won't let you start a compost in the backyard, propose starting one at school!
Get involved in local school politics - Know what's going on with your school board, with school administration. Start an underground, uncensored school newspaper with the real dirt.
DIY > fashion - High school is where a lot of adults learned their bad habits about keeping up with appearance/fashion demands. Refuse to buy in now and make homemade the new cool.
Ditch Google - Still applies! And also check your app settings to see if you have apps with unnecessary permissions.
Forage - Still applies!
Volunteer - Still applies! There might be fewer opportunities for minors, but you'll never know until you ask. Don't be afraid to be the only young person at the volunteer session.
Help your neighbors classmates - Offer to study with students who are struggling. Become someone people can trust to tell if their home situation is difficult. If you have friends who don't get enough to eat at home, bring them home for dinner. Check on people.
Fix stuff - Still applies! This can be a fun activity with friends, too. Let's all hang out and see if we can fix this busted stereo!
Mix up your transit - Still applies! Is taking the bus considered lame at your school? Do it anyway.
Engage in the arts - Still applies! Pay attention to art events that your classmates are putting on. Go to the school play - or join! Stop in the art classrooms to see what people are working on.
Go to the library - Still applies, public and school libraries! Talk to the librarians - they know things. Find out if there are after school programs you can take advantage of.
Listen local - Even more local! Stop by the band room after school to listen to practice. Does someone in your school have a band? Listen to them, cheer them on! Start a band! The great thing about punk music is that you can be really, really awful and still sound punk as hell.
Buy local Barter local - Lots of young folks don't have much control over or access to money, but that doesn't mean you and your classmates can't engage in barter. Figure out what you have to offer that other people might want, and trade for stuff you want. I used to cut hair and pierce ears in exchange for weed and rides to the mall. Maybe you can sew a friend's jacket in exchange for them bringing you a homemade lunch.
Become unmarketable - Still applies! PLEASE do this.
Use cash Steal ethically - Before engaging in shoplifting, make sure you know who you're stealing from! Stealing from Walmart is morally correct. Stealing from a family-owned grocery, a local coop, or a local artist? That fucking sucks, dude. Don't do it.
Give what you can - And only what you can. We ask a godawful lot from teens. You're in school all day, you're doing extracurriculars and maybe working and doing homework. You probably don't have a lot of money. You probably don't have a lot of time. But maybe you can bring your elderly neighbor's trash cans up from the street. Find the small actions that you have space for.
Talk about wages - PLEASE! If you have a job, this applies to you even more. Why? Because the adults working at your minimum wage job probably can't afford to be rabble rousers, but what do you have to lose except your shitty part-time Panera job?? A teenager who doesn't actually need their job to live has the opportunity to be the voice of truth in any workplace.
Think about wealthflow Resist indoctrination - Education systems are being gutted. Algorithms are feeding us misinformation. Cocomelon probably gave you ADHD or some shit - Jesus. It's a mess. Do what you can to practice critical thinking, expand your literacy, read stuff that seems boring. Start a book club or philosophy club with your friends. Ask who's profiting from a given situation. Resist knee-jerk reactions. Becoming an educated, thoughtful person is one of the greatest acts of resistance a young person today can engage in.
61 notes
·
View notes
Text
Important Tips & Best Practices for Software Localization
Learn valuable insights on software localization, including tips for website localization and how to find affordable software localization services. Master the art of global software deployment.
0 notes
Text
Dumb donald Chump crossed all my lines, so I told his crimes to the FBI. 'Cause Kamala needed cold hard proof, so I gave her some. Now she's got the envelope, where you think she got it from?
To report donald j. trump and all of his potential allies to the FBI for the federal crimes of 2024 election fraud:
https://tips.fbi.gov/home Choice 1: Federal Election Crime
Choice 2: Voter/Ballot Fraud/Corrupt Election Official
For the "Subject" information, choose "This subject is a business" Business Name: Electors and governors attempting to elect insurrectionist Donald J. Trump in violation of Sec3/14A
When did the crime occur? 11/05/2024
Where did the crime occur? Specific location: AL, AK, AZ, AR, FL, GA, ID, IN, IA, KS, KY, LA, ME, MI, MS, MO, MT, NE, NV, NC, ND, OH, OK, PA, SC, SD, TN, TX, UT, WV, WI, WY
How did you discover the election fraud? Donald J. Trump is an impeached, congressionally investigated, criminally indicted and prosecuted insurrectionist attempting to hold federal office in violation of Section 3 of the 14th Amendment.
What false information was provided? The lies that a U.S. national popular vote, or a ruling of the U.S. Supreme Court, could clear Donald J. Trump's insurrectionist disqualification, instead of a two-thirds vote of the House and Senate.
Did the individual receive something in exchange for their illegal voting activity? Unknown
Did the subject vote multiple times or vote when ineligible to vote? Yes
Did an election official violate a voting law? Yes
Were ballots from the election destroyed? Unknown
Were vote tallies falsified? Unknown
Was there a voting machine/tabulation/software malfunction? Unknown
Please provide a brief description of the incident: On December 17th, 2024, state electors and governors from Alabama, Alaska, Arizona, Arkansas, Florida, Georgia, Idaho, Indiana, Iowa, Kansas, Kentucky, Louisiana, Maine, Michigan, Mississippi, Missouri, Montana, Nebraska, Nevada, North Carolina, North Dakota, Ohio, Oklahoma, Pennsylvania, South Carolina, South Dakota, Tennessee, Texas, Utah, West Virginia, Wisconsin, and Wyoming will be faced with the choices of engaging in fraud by an elections official or other individual, conspiracy against the United States, corruptly obstructing, influencing, and impeding an official proceeding, and conspiracy against rights by giving aid and comfort to disqualified insurrectionist Donald J. Trump in violation of Section 3 of the 14th Amendment of the U.S. Constitution. State electors and governors attempting to vote for and create certificates of ascertainment to elect Donald J. Trump would be instantly disqualified from holding office per Sec3/14A, thereby rendering all their actions unlawful.
Are you reporting on behalf of yourself or someone else? Someone else
Victim Information: First Name: Kamala Middle Name: Devi Last Name: Harris Date of Birth: 10/20/1964 Phone Number: Business: (202) 456-1111 Email: [email protected] Address: 1600 Pennsylvania Avenue NW, Washington, DC 20500
Complainant Information: Please uncheck any fields you would prefer not to answer. You don't have to enter your personal information here if you don't want to.
Reported To Law Enforcement: Have you reported this information to another law enforcement or government agency (local, state, or federal)? No
At this point, you can click "Show All" to review your tip. Once you're satisfied with it, just click "Submit Tip" and you're good to go.
For anyone suggesting this is inaccurate, here you go (compiled from Wikipedia):
Article 2: Clause 3: Electoral College See also: Twelfth Amendment to the United States Constitution, Twentieth Amendment to the United States Constitution, Contingent election, Electoral College abolition amendment, Efforts to reform the United States Electoral College, and National Popular Vote Interstate Compact The Electors shall meet in their respective States, and vote by Ballot for two Persons, of whom one at least shall not be an Inhabitant of the same State with themselves. And they shall make a List of all the Persons voted for, and of the Number of Votes for each; which List they shall sign and certify, and transmit sealed to the Seat of the Government of the United States, directed to the President of the Senate. The President of the Senate shall, in the Presence of the Senate and House of Representatives, open all the Certificates, and the Votes shall then be counted. The Person having the greatest Number of Votes shall be the President, if such Number be a Majority of the whole Number of Electors appointed; and if there be more than one who have such Majority, and have an equal Number of Votes, then the House of Representatives shall immediately chuse [sic] by Ballot one of them for President; and if no Person have a Majority, then from the five highest on the List the said House shall in like Manner chuse [sic] the President. But in chusing [sic] the President, the Votes shall be taken by States, the Representation from each State having one Vote; A quorum for this Purpose shall consist of a Member or Members from two thirds of the States, and a Majority of all the States shall be necessary to a Choice. In every Case, after the Choice of the President, the Person having the greatest Number of Votes of the Electors shall be the Vice President. But if there should remain two or more who have equal Votes, the Senate shall chuse [sic] from them by Ballot the Vice President.
Electoral College Elector Selection Process Article II, Section 1, Clause 2 of the Constitution requires each state legislature to determine how electors for the state are to be chosen, but it disqualifies any person holding an Office of Trust or Profit under the United States, from being an elector. Under Section 3 of the Fourteenth Amendment, any person who has sworn an oath to support the United States Constitution in order to hold either a state or federal office, and later rebelled against the United States directly or by giving assistance to those doing so, is disqualified from being an elector. Congress may remove this disqualification by a two-thirds vote in each house. (Wikipedia)
Conspiracy against the United States, or conspiracy to defraud the United States, is a federal offense in the United States of America under 18 U.S.C. § 371. The statute originated under a federal law enacted in 1867 that was codified in the Revised Statutes of the United States in 1874, in a subsequent codification of federal penal statutes in 1909, and ultimately in the United States Code in 1948. The crime is that of two or more persons who conspire to commit an offense against the United States, or to defraud the United States.
Statute 18 U.S.C. § 371 provides that:
If two or more persons conspire either to commit any offense against the United States, or to defraud the United States, or any agency thereof in any manner or for any purpose, and one or more of such persons do any act to effect the object of the conspiracy, each shall be fined under this title or imprisoned not more than five years, or both.
Corruptly obstructing, influencing, or impeding an official proceeding is a felony under U.S. federal law. It was enacted as part of the Sarbanes–Oxley Act of 2002 in reaction to the Enron scandal, and closed a legal loophole on who could be charged with evidence tampering by defining the new crime very broadly.
This part of the Act later became known as a charge against defendants associated with the 2021 U.S. Capitol attack for attempting to obstruct that year's Electoral College vote count, as well as former President Donald Trump for broader alleged activities to obstruct the election. In June 2024, the Supreme Court ruled in Fischer v. United States that the statute could only be applied when the defendant impaired a physical document or object used in an official proceeding or attempted to do so, a higher bar for conviction than had been used in trials to that point.
Legal basis The crime is codified as 18 U.S.C. § 1512(c)(2). The relevant subsection reads:
(c) Whoever corruptly—
(1) alters, destroys, mutilates, or conceals a record, document, or other object, or attempts to do so, with the intent to impair the object's integrity or availability for use in an official proceeding; or (2) otherwise obstructs, influences, or impedes any official proceeding, or attempts to do so, shall be fined under this title or imprisoned not more than 20 years, or both.
The term "official proceeding" is defined in 18 U.S.C. § 1515(a)(1) to include proceedings before federal judges, Congress, federal government agencies, and regulators of insurance businesses.
Conspiracy against rights is a federal offense in the United States of America under 18 U.S.C. § 241:
If two or more persons conspire to injure, oppress, threaten, or intimidate any person […] in the free exercise or enjoyment of any right or privilege secured to him by the Constitution or laws of the United States, or because of his having so exercised the same;…
They shall be fined under this title or imprisoned not more than ten years, or both; and if death results from the acts committed in violation of this section or if such acts include kidnapping or an attempt to kidnap, aggravated sexual abuse or an attempt to commit aggravated sexual abuse, or an attempt to kill, they shall be fined under this title or imprisoned for any term of years or for life, or both, or may be sentenced to death.
Charges of conspiracy against rights concerning federal election offenses cover activities subverting the integrity of federal elections and do not require direct action towards an individual voter. Election conspiracies prosecuted under conspiracy against rights can be classified as either public schemes (where public officials commit a §241 violation under color of law) or private schemes (where conspirators impinge on the ability for voters to vote).
Michigan Attorney General Dana Nessel announced on July 18, 2023, that she had charged sixteen individuals with eight felony counts each, including forgery and conspiracy, alleging they had knowingly signed certificates of ascertainment falsely claiming they were "duly elected and qualified electors" for Michigan. One defendant entered into a cooperation agreement with prosecutors in October 2023 in exchange for charges against him being dropped. Nessel's office disclosed during an April 2024 court hearing that Trump, Meadows, Giuliani and Ellis were unindicted co-conspirators.
On August 1, 2023, at the request of Jack Smith and the Justice Department, a federal grand jury indicted Trump on charges of conspiracy to defraud the United States, conspiracy against rights, obstructing an official proceeding and conspiracy to obstruct an official proceeding. The indictment accused Trump of orchestrating a criminal conspiracy to subvert the 2020 election, and identified the fake electors scheme as part of the conspiracy.
On August 15, 2023, Trump and eighteen others were indicted in Georgia. The defendants, who included Trump, Giuliani, Eastman, Meadows, Chesebro, Sidney Powell, David Shafer and Shawn Still among others, were charged with a variety of offenses, many of which related to involvement in the fake electors plot. On October 20, Chesebro pleaded guilty to conspiring to file a false document and was sentenced to five years of probation; he also agreed to testify against the other defendants. Three other defendants (including Powell) also pleaded guilty to charges.
On December 6, 2023, a Clark County, Nevada, grand jury indicted six Republican party officials, including the chair of the Nevada Republican Party, on two felony charges each of submitting fraudulent documents to state and local officials.
By December 2023, 24 fake electors had been criminally charged in three states, and Chesebro was "a witness in all of the cases". However, in January 2024, the Attorney General of New Mexico stated that the fake electors couldn't be prosecuted given the laws of that state.
An Arizona grand jury named eleven alleged fake electors in an April 2024 indictment. Among those named were former Arizona Republican Party chair Kelli Ward and Tyler Bowyer, chief operating officer of Turning Point USA. Names of seven others charged were redacted from the indictment, and Trump was listed as "Unindicted Coconspirator 1". The Washington Post reported the redacted individuals were Mark Meadows, Rudy Giuliani, Jenna Ellis, John Eastman, Christina Bobb, Boris Epshteyn and Mike Roman. The Post reported that names of those indicted who were not in Arizona were redacted until they could be served with their indictments.
#2024 presidential election#2024 election#election 2024#kamala harris#harris walz 2024#donald trump#trump vance 2024#trump 2024#trump#president trump#republicans#gop#evangelicals#democrats#us elections 2024#us elections#politics#us politics#american politics#uspol
62 notes
·
View notes
Text
How to make a moodboard workshop
Are you interested in Last Moodboard Artist Standing but have never created a moodboard before? Or maybe you want to brush up with some tips and tricks from creators in the fandom? Great news! @ato-the-bean and KittenKin will be running a workshop for you.
Join us in the MI6 Cafe Discord on April 26th at 11am PST (Your local time here). No specific software is required, although they suggest coming prepared with some images for inclusion and a gmail account if you want to follow along with the Adobe express portion.
Discord invite link
35 notes
·
View notes
Note
Hi! I made an account just so I could follow your work. Your art is brilliant and honestly and inspiration to where I want to be. I’m an older artist who has all the anxiety when it comes to improving my process. I’m trying to get into digital portraits and I have so many ideas in my head, but it’s frustrating because I’m not where I want to be to make this happen. What are some tricks that help you/software do you use? Of course, you don’t have to share anything that makes you uncomfortable. I currently have procreate and an iPad, but I feel a little lost. Wondering if I need a different writing tablet and photoshop. Not sure. I just eventually want to find that 3D, but also artistic look you are able to achieve.
hey there! thank you so much!!
ultimately, I will sound like a broken record but I always recommend you sign up for local figure drawing or painting classes. have people pose for you at home and sketch with charcoal and paper. go to the zoo and sit down in front on an exhibit for an hour and try to draw the animals in front of you as fast as you can and fill a couple of pages, move on to a new exhibit and do it again!
nothing is more powerful of a tool to learn than whatever writing utensil you have in your purse and the back of a napkin when you see something you'd like to capture. I've spent quite frankly my entire rememberable life doing this. I used to spend every single day in middle school/high school/my brief failed stint in community college with a pack of cheap sharpies and a beat up binder full of old worksheets and homework to draw on the backs of.
drawing/painting from life will teach you better than anything.
I use a very outdated version of Photoshop, and only got a "nice" tablet in the past 7 months.
Also, a huge tip to you and anyone else reading this: do NOT get too focused on a "style" that you want. Obsessing over that just ruined me for years and years. I wanted so, so, so badly to be the next Matsuri Hino when I was a kid. I copied her work religiously and it NEVER looked right. Frustrated me to no end. And you know why my stuff never looked like hers? Because I'm not her! You can't force your art to come out any way that isn't natural, and the sooner you can accept the art your hand wants to create, the happier you'll be and the easier art will get for you.
The past couple of years before I started diving into this more realism based work, I was just shoving myself through trying to make what art I envied of others. Very stylized/textured watercolor comic book style stuff. And I just was NOT getting any better at it. I have always been more inclined toward realism work, but I've hated it and yearned for stylized work. Yoshitaka Amano? God, I just drooled over that artstyle and beat myself up for never being able to capture it in studies or otherwise.
I finally essentially restructured my entire career around making the art that makes me happy instead of what I "wanted" it to look like. I was extremely depressed, my life was falling apart, and I still needed to make art to survive but I couldn't "art" if I was depressed and hated doing it, so I just had to step back and stop worrying so much about what I thought I wanted to make, and started making what felt most natural.
there's no easy way, and art can be a soul destroying path at times, truly. your software and hardware should come very last place compared to practicing from life (it doesn't matter if you want to paint cartoony stuff of realistic stuff, always start from life). naturally you will find what makes your heart sing the most.
I get a lot of messages from people telling me similar stuff "oh your art is EXACTLY what I want to do!" but I promise you that kind of thought process is chasing a dragon that is likely to harm or drag your creative process down. art style is such a deeply personal thing, so of COURSE it's important to find inspiration, but the second looking at someone else's artwork stops inspiring you and starts frustrating you, put it away.
There are some artists who I love, that I do not check up on often because their artwork ignites, like, serious bitter jealousy in me. It's the truth. I get so mad at myself for not being more like them, and it's such a poison. I think more artists should be transparent about this feeling because I KNOW the art community has a lot of jealousy and ugliness in it.
A fact of being an artist is that you will never be completely happy with a piece you make. You are always going to see the flaws, and that doesn't change whether you'd been drawing for 2 months or 20 years. Occasionally, you will get one piece that you are like "how did I make that???" and then get frustrated that you can't recreate it lol! It's a tough beast.
It's just really important to step back and work on yourself and where you are at, because at the end of the day, the way your soul wants to express artwork might be WILDLY different from what your brain wants, and it can be really detrimental to let those two go to war.
I hope this helps. I'm very passionate about this, and when I started out I ALWAYS ignored the artists who gave the same exact tips as above. I thought they were so annoying and unhelpful, but now I /get it/.
72 notes
·
View notes