#ao3 tutorial
Explore tagged Tumblr posts


Text
AO3 now has a tag for AI works!!! That means you can filter it out!* To filter it from your account, and never see any of it again, follow these steps.
- First, log in to your AO3 account
- Click on this link or paste this in your browser bar
https://archiveofourown.org/skins/new?skin_type=Skin
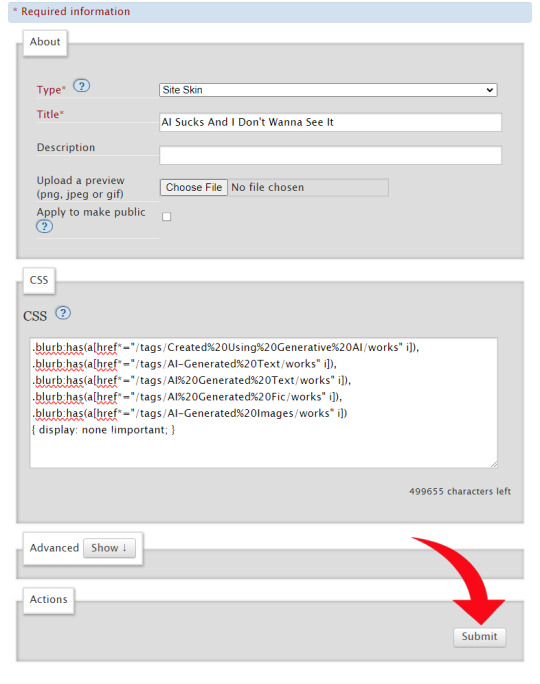
- Set "Type" to "Site Skin"
- Set "Title" to whatever you want (Something like “No AI” so you'll know what Skin you just made)
- Then click into the large "CSS" box and paste all of the bolded text below - hit the "Submit" button
.blurb:has(a[href*="/tags/Created%20Using%20Generative%20AI/works" i]), .blurb:has(a[href*="/tags/AI-Generated%20Text/works" i]), .blurb:has(a[href*="/tags/AI%20Generated%20Text/works" i]), .blurb:has(a[href*="/tags/AI%20Generated%20Fic/works" i]), .blurb:has(a[href*="/tags/AI-Generated%20Images/works" i]) { display: none !important; }
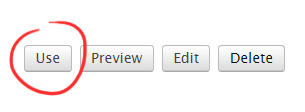
- Hit "Use"
Presto!
No more AI fics or art in your results! (assuming everyone tagged properly and your browser has the flags enabled)
A blocklist to be used with the Permablocking Specific Tags - Site Skin tutorial by Eli0t
*browser dependent
1K notes
·
View notes
Text

My AO3 is so pretty 😍
You all should show me your AO3 dashboard. If you want to know how to do this it's simple just message me and I'll send you links, what I used ect. ect.
33 notes
·
View notes
Text
Btw I don't know who needs to hear this, but if you write a fic inspired by another fic (or a comic, a fanart, ect ect) you can like. Directly link the inspiration on the fic.
It will look like this in the beginning notes of the fic

615 notes
·
View notes
Text
Fanfiction readers: I am begging you to create an AO3 account.
If you don't have one, you're likely missing out on some of the good stuff and don't even know it.

With the uptick in robo-plagiarism, AI scraping and bot abuse, more and more AO3 authors are setting their works so they are visible only to logged-in users (whether or not this actually prevents bots from accessing them is another discussion, but it is the current trend). This means when users without an account go to AO3 to look for something to read, a large percentage of potential matches do not appear in the search results. Nor can those users see that more stories exist, or even look up a locked work by author or title.
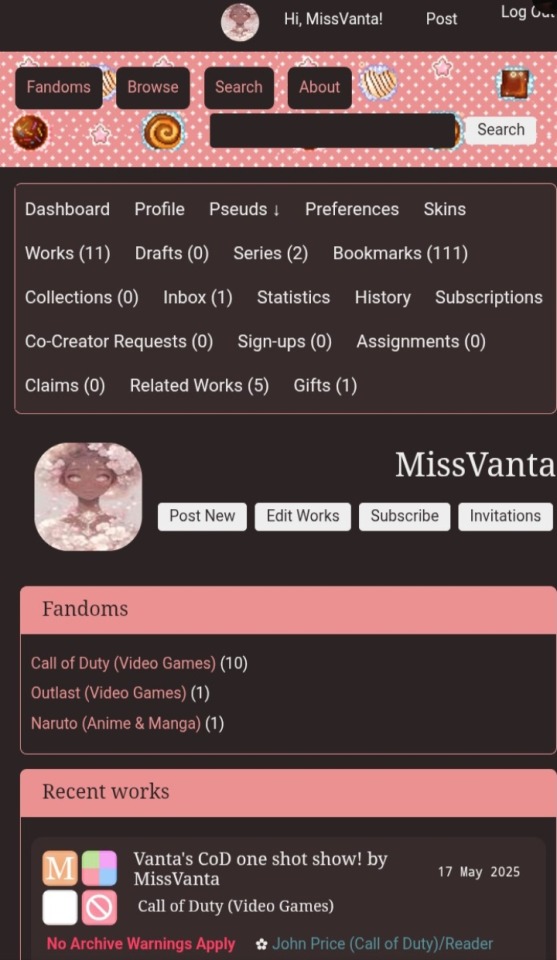
To demonstrate, I've locked my works to logged-in users only. Here's the Works count displayed on my public-facing author profile when I'm logged in:
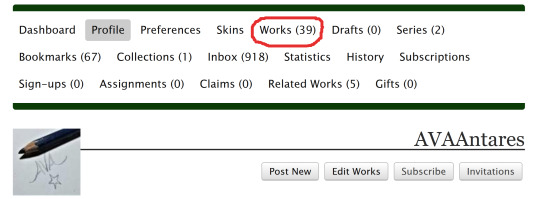
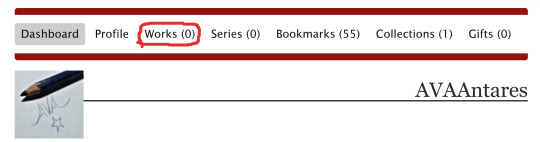
And here's the Works count displayed on my author profile when I'm not logged in:
Even related works linked within the site will not display anything about the story, including its title. Here's how a translation link looks when logged in:

And the same story, when logged out:

To users without an account, those stories aren't only not readable, they're completely invisible.
Fortunately, it's easy to create an account. Just click the Invite Requests link below and enter your email address, and then follow the directions in the invite email when it arrives (usually in one to two weeks, depending on request backlog).
If there's a reason you don't want to/aren't allowed to receive AO3 email at your primary email account, you can make a free webmail account (Gmail, Yahoo, Outlook, Hushmail, GMX, et al.) and use that to sign up. (Once your account has been created, you can also disable all future email communication from AO3.)
Then, if you click "Keep me logged in" when you sign into AO3 on your computer or mobile device, you will remain logged in on that device/browser indefinitely without needing to re-enter your password (though clearing cookies or updating your browser may require logging back in). You will also be able to view and comment on user-locked stories, curate your own bookmarks and collections, manage your reading history, customize your site skins and reading preferences, and more. There are also lots of privacy options.
I know it's an extra step to go through, but it's simple, it's free, and under the current onslaught of AI and bot nonsense, it's becoming a necessity.
33 notes
·
View notes
Text
TIVA CHALLENGES is a fanfiction writing project for fans of Tony and Ziva from NCIS (2003) running before the spin-off NCIS: Tony & Ziva drops, with new writing prompts every month! Organized by @television-overload and @indestinatus

TUTORIAL:
"Wait, how do I post to a collection?"
I'm so glad you asked!
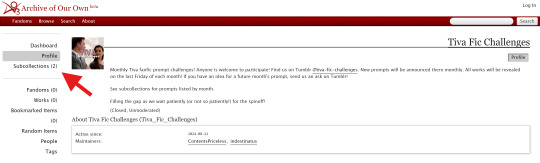
The parent collection can be found here (Tiva Fic Challenges) on AO3. To see monthly challenges, you'll need to navigate to a subcollection. See here:
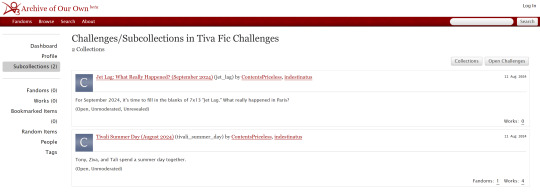
Tah-dah!
Great. Now you can find the collections. But how do you post to them?
For that, you only need to change one thing in your usual "Post New Work" workflow. Start by going into the AO3 story posting page and fill out all relevant information as you typically would. Title, tags, summary, notes... All of that will be the same.
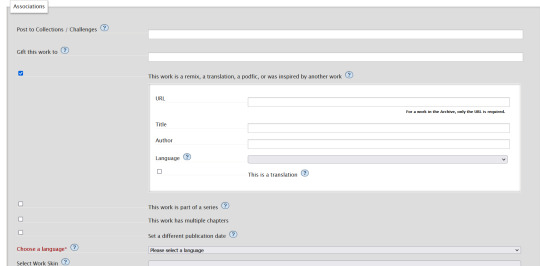
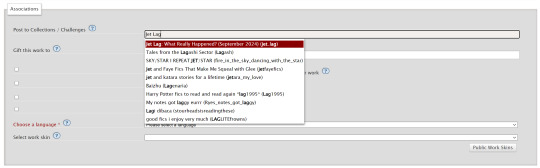
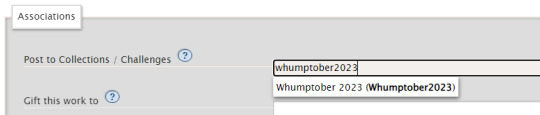
The additional step is found in the Associations section, seen below:
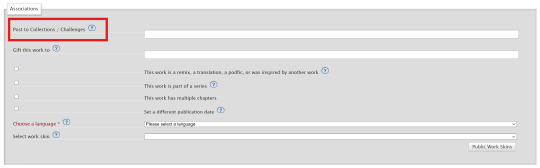
There it is. All you need to do is type in the name of that month's challenge and select it, and it will appear with the other works relating to that prompt.
Now, an important note: Because these challenges will be set as "unrevealed" on AO3, that means you can post your fic any time in the month, and it will not be visible to readers until the last Friday, when all works will be revealed. Until that time, this is how it will appear to readers:
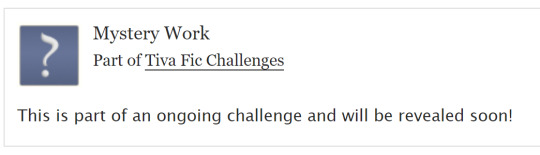
Fun, right?
If you're running behind and are writing a fic for a certain prompt, but don't finish on time, don't stress it! After all the works are revealed, the challenge will remain open and any fics posted to it will automatically be visible to readers. Even if you're months late and you have a fic you think fits the challenge, go ahead and include it in the collection! The more the merrier!
Hopefully this answers most of your questions about how this will work. If you have any others that might need answers, our askbox is open!
#faq#how to#tivachallenges#tiva fanfiction#ao3#ao3 collections#ao3 tutorial#ncis#tiva#tiva spinoff#tony dinozzo#ziva david#writing#*howto
23 notes
·
View notes
Text
FIC REC WEEK 14 – AUTHOR WEEK
AUTHOR SPOTLIGHT: La_Temperanza
If you've ever wondered how I and other writers create special work skins for certain fics, look no further! La_Temperanza has a whole library of tutorials for AO3 work skins and general tips and tricks. I've definitely made use of their code for a whole bunch of different projects, and I bet that you'll find something that'll help you in your writing journey.
Here's some of their tutorials that have helped me throughout the years:
Work-Skins:
How to Mimic Letters, Fliers, and Stationery Without Using Images
How to Mimic Author's Notes and Kudos/Comment Buttons
How to Mimic Email Windows
How to Make iOS Text Messages on AO3
How to Create Notebook Lined Paper on AO3
Sticky Notes on AO3 Without Using Images
How to Make Deadpool's Thinking Boxes on AO3
How to Make Newspaper Articles on AO3
Tips and Tricks:
How To Make Images Fit in Mobile Browsers
How to Make Linked Footnotes on AO3
How To Change Text on AO3 When the Cursor is Hovering Over It (Or Clicked on Mobile)
How to Wrap Text around Images
How to Make Customized Page Dividers
How to Make Invisible Text (That Can Be Highlighted)
34 notes
·
View notes
Text
How to Add Images to Ao3
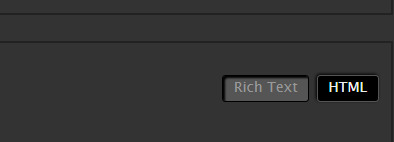
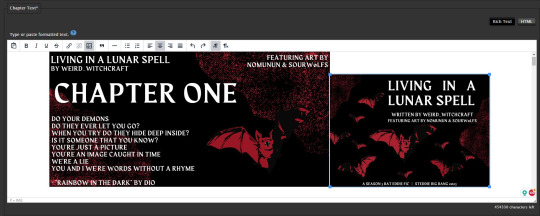
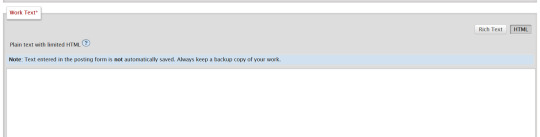
Since it's @steddiebang season I thought I'd do a quick guide on how to add images to your fics in case people don't know how! First off, you need to use the "Rich Text" Editor on Ao3
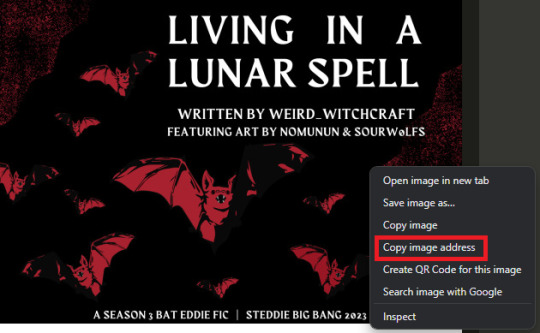
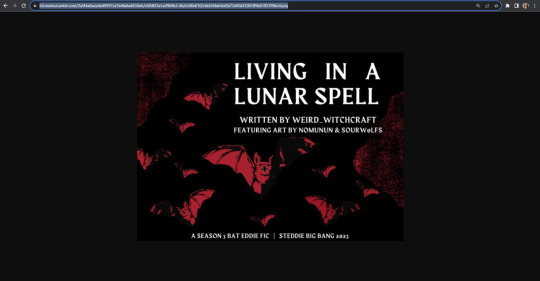
Next, you need the url of the image you want to embed. This needs to be a direct link to the image (not the post of it on socials) the way to get this is to right click on the pic wherever it's posted and "copy image address" this will copy the direct link to the image
In the Ao3 Rich Text editor click the picture icon to "insert/edit image" paste the "source" url adjust width and height as needed
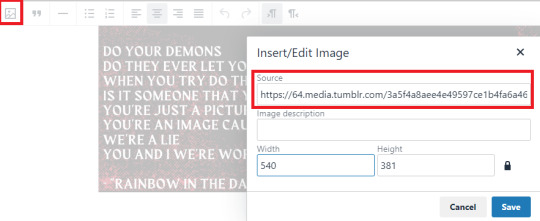
There you go! Image in your fic! A few things to note: I copied this url from tumblr, the quality is significantly lower than the Ch1 image I already have in there. Since I haven't posted all my title cards on socials I posted them on imgur and set them to private. You could also post them on a private Pinterest board or another hosting site, you just need that url to the image address.
If you want the image to be centered (something i struggled with for a while) you can click next to it to select the text line it's sitting in and center it from there
Personally, when I embed art in fics I add a line underneath to link to credit the artist & the original post to encourage readers to engage with the art directly. You can do that in the rich text editor like so:
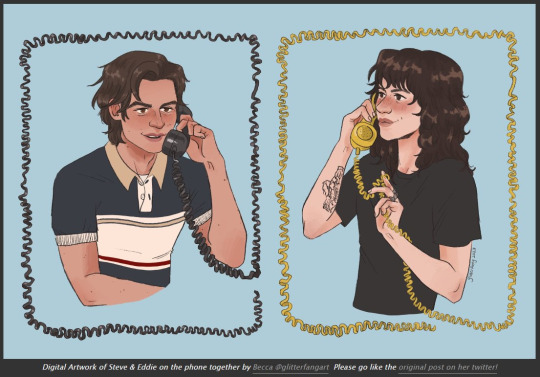
And cause i'm a stickler for crediting here's the link to this art by @glitterfang on Twitter & Tumblr
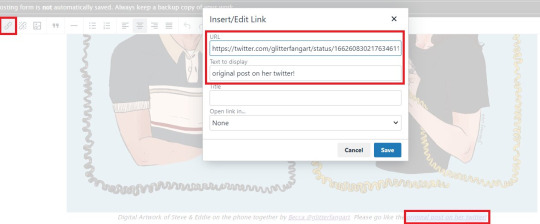
If you want to link anything in the Summary or Notes then you need to use html like this: <a href="LINK URL" rel="nofollow">DISPLAY TEXT</a> Okay! Thanks for coming to my ted talk, hope that helps at least one person!


67 notes
·
View notes
Text
how to block tags on ao3 permanently (for both mobile and desktop):
1) if you don't already use firefox as your browser, download and switch to it. there's a ton of tutorials out there on it and it's super easy to move your bookmarks and such over, so i won't go into detail on that here. (links: desktop - ios - android).
2) download and add tampermonkey to your extensions.
3) download ao3 savior and ao3 savior config. when you click install script, it should open up a second window with tampermonkey, where you will click install again.
4) the scripts will download really fast. once you're done, check if they downloaded by clicking on the tampermonkey icon on your browser, and then the dashboard. it should show your installed scripts now!
5) restart your browser (close all tabs and/or just close firefox if you're on mobile).
6) reopen your browser and go to tampermoney's dashboard again, where you can see your installed scripts.
7) click edit on the ao3 config *savior* script. the icon should look like a square and pencil.
8) scroll down until you find the tagBlacklist part. there are already three tags added there as an example (['dobby', 'jar jar binks', '*mimes']).
9) get rid of those and add in your own tags, making sure they match the same format as the examples. asterisks work as ANYTHING, meaning that if you never wanted to see [any character]/reader again, you would put '*reader' as a tag. this would also include anything like 'strong!reader' or 'male!reader' though, so be careful with how you word it. here is an example of what my blacklisted tags look like:
tagBlacklist: ['Harry Potter *', 'Reader-Insert', '*Reader', 'Reader*', 'Dean Winchester', 'Sam Winchester'],
10) if you wanted to exclude every [any character]/reader fic again EXCEPT for a certain pairing or fandom, then you'll head over to the tagWhitelist section. here, any tags you add will always make a work shown, even if they contain tags from your your blacklist. you can also do this with authors in the authorWhitelist section!
11) decide if you want to see when a fic is blocked for you/if you want to see why a fic is blocked. if you just want the fics to be hidden without any warning, then change showReasons and showPlaceholders to true. if not, leave it as is.
12) put // in front of any of the sections that you don't want to mess with right now. for instance, if you don't have any authors you want to blacklist, put // in front of authorBlacklist to make sure it doesn't run the examples for now. you can always get rid of the // later on if you want to add something and make it run again.
12) click on file, then save. go over to ao3 and check if the tags you have blocked are hidden. if they're not, move to the next step.
13) if the tags you have muted are still showing up, try changing them a little. for instance, 'harry potter - j.k. rowling' fics kept showing up for me until i changed it to just 'harry potter *'. you should also try restarting your computer/phone to see if that works. if nothing works even after trial and error, feel free to dm me and i'll try to help you out personally!
14) enjoy never having to filter out anything you hate ever again (unless you come across a new tag that you want to add to your block list) :>
the og tutorial i made some tweaks to is here. credits to the author of that one! <3
#ao3#archive of our own#tutorial#ao3 tutorial#fandom things#fandom#writers on tumblr#writeblr#writblr#lumi's posts
6 notes
·
View notes
Text
AO3 Tutorial: Basic Formatting
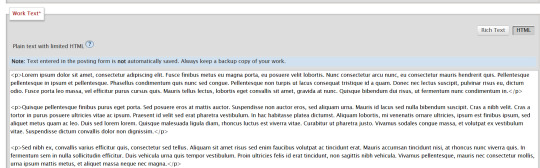
So, if you've ever posted anything on ao3, you will recognize this screen:
And today I am here to talk to you specifically about those two buttons on the right, which you might have missed at first glance.
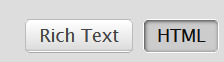
By default, ao3 is in html mode. It's all in the title: any text you enter here in html will be translated to the appropriate formatting. It's useful if you want to do fancy stuff. However, that also means that if you want italics, bold text, or even just appropriate spacing after a paragraph break, you'll have to manually code that in. (If you ever copy/pasted your fic in and discovered afterwards that there was no spacing after any paragraph, the issue was probably that you used html formatting.)
If you just to copy/paste your fic and have all the formatting kept from your word doc, you ought to use rich text.

Which will also has a much more intuitive interface if you want to edit stuff.
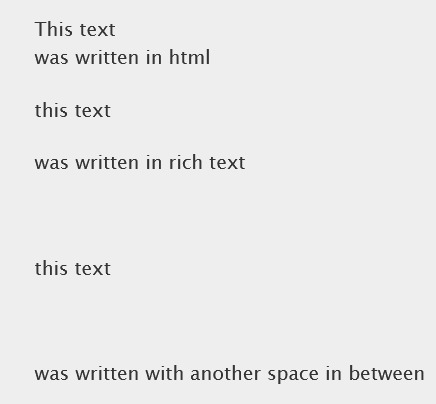
But wait! I hear you say. When I use rich text, I get DOUBLE spacing after all my paragraphs, and it looks ugly as hell!
Rich text automatically adds a space after every paragraph breaks. Which is great, but that also means that if you're the kind of person to hit enter twice after every paragraph in your word doc, ao3 registers it as two different lines, so two different paragraph breaks.
To avoid that, don't add a physical space between your paragraphs. Instead, tinker with your text editor to have a space after each paragraph breaks.
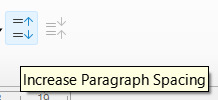
(This is the button you're looking for on libreoffice. Your own text editor/google doc should have something similar.)
TL;DR:
Use rich text. Increase paragraph spacing. Stop hitting enter twice after each paragraph.
26 notes
·
View notes
Text
quick "how to embed google drive images into ao3" bc it took me a bit to figure out
make sure the file is set to be visible to anyone with the link
copying the share link gives you this -> https://drive.google.com/file/d/IMAGEID/view?usp=drive_link
put the whatever string of numbers and letters is in the IMAGEID part into this -> https://lh3.googleusercontent.com/d/IMAGEID
it took me a while to figure out and half the stuff i found was outdated so here u go
33 notes
·
View notes
Text
Embedding audio in AO3 fics
A few people have asked about me adding atmospheric audio to my fic on AO3, and it took me quite a while to figure out so I wanted to document how to do it somewhere. In this example, I wanted some of the atmospheric background music from Ace Attorney, so I'll stick with that. I'm going to assume limited familiarity with HTML here. You will need to start by pasting your writing into the rich text editor. Now, flicking over to HTML like this I appreciate can make it look intimidating. So a quick 'pre-tip' is to actually click on preview (beside the 'post' button), and then return to edit again. For some reason, this makes paragraphs reappear in the HTML editor, which I just find easier to work with.
Adding your audio
I only directly know how to make it work with Soundcloud, though I think any hosting site that lets you embed like this would work. Be warned that Spotify only allows the first 30 seconds of a song to play, if you're using that.
Anyway, the next step is getting the embed code. This is not a link to the website! You need to go to 'share', and then to 'embed', and copy that code.
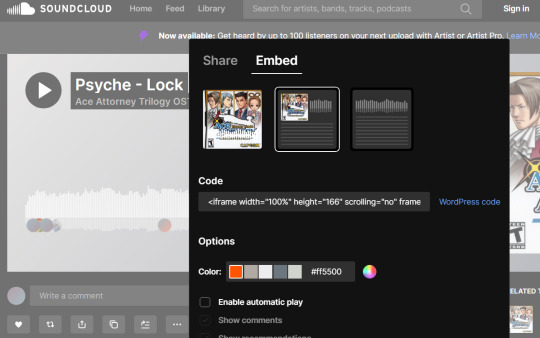
By the way, Soundcloud gives you a few options for how you want the embed to appear - with the more simplistic option being paywalled. You can then paste this directly into the HTML editor:

I appreciate this is a scary amount of text if you're not used to code, but fear not! This is actually all you need to do for the bare minimum. See how this looks in my preview:
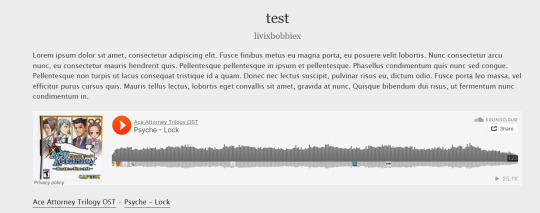
Technically, you can stop here if you're happy with this outcome. However, especially if you're putting this in the middle of other text, I find this a bit overlarge. Thankfully, despite Soundcloud's paywalls, we can edit the code ourselves.
Refining the code
Going back to edit, AO3 has changed my code slightly (I input a paragraph at the top to show this off clearer):

From this point out, I will just paste the code directly as text here. In order to not make it actually embed into tumblr, I have replaced < and > with [ and ] so keep that in mind.
[iframe width="100%" height="166" frameborder="no" src="https://w.soundcloud.com/player/?url=https%3A//api.soundcloud.com/tracks/842658844&;color=%23ff5500&auto_play=false&hide_related=false&show_comments=true&show_user=true&show_reposts=false&show_teaser=true"][/iframe][div] [p][a href="https://soundcloud.com/user-338850232" title="Ace Attorney Trilogy OST" rel="nofollow"]Ace Attorney Trilogy OST · [a href="https://soundcloud.com/user-338850232/psyche-lock" title="Psyche - Lock" rel="nofollow"]Psyche - Lock[/a][/div][/p]
Firstly, we don't need anything after the [/iframe] part. All this bottom part is doing is providing additional hyperlinks. So, you can delete everything after the [div]
We can change the numbers to make the player smaller. This is really up to your preference. I have found about 300 for width still looks okay on mobile browser. In this example, I change height to a value of 80.
We can also remove the audio artwork. In the part of the code right before [/iframe] (but still within the "quote marks"), add: & amp ; show_artwork=false
Note that this "& amp ;" part should not have spaces in it, I just have to type it this way to get it to appear on tumblr... If in doubt, look at my screenshots.
You can also just alter the other trues and falses to get rid of the interface showing comments etc.
In my case, I also want to align this button to the middle of the page. This is very simple. You just add [p align="center"] before [iframe], and close the link with [/p]
The final code, again with the caveat that [] need to be replaced by <> is as follows:
[p align = "center"][iframe width="300" height="80" frameborder="no" src="https://w.soundcloud.com/player/?url=https%3A//api.soundcloud.com/tracks/842658844&;color=%23ff5500&auto_play=false&hide_related=false&show_comments=false&show_user=false&show_reposts=false&show_teaser=true&show_artwork=false"][/iframe][/p]
And this is how the code looks without the weird brackets:

And this is how it looks when you go to preview:
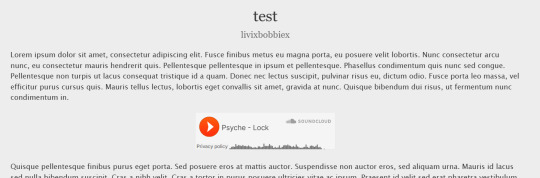
You can mess around with it a bit more, such as changing the colour of the button for example, but I think this concludes the basics of how to achieve this
2 notes
·
View notes
Note
So I've been reading through bloodletting and I'm very curious about how the Creator's Style works
You use it to give the translation hover option whenever characters speak in Mando'a and I'll be honest, I had no clue that was even an option or how to even go about doing that for my own fics
Sorry if this is a stupid question, but do you have a resource for how to use Creator's Style like that?
Hi anon! I'm copy and pasting a post I did with instructions and comments on how I use this function (below the cut). I hope it helps!
I had an awesome commenter (the lovely @notquiteaghost) suggest a CSS script, since the initial hover text translations I used didn't work on mobile.
Here's the link to the instructions: https://archiveofourown.org/works/30290274
Fair warning, it took me a little bit to get the hang of it. If you're like me and need a little hand-holding, here's how I implement the script:
Copy the code from the CSS section into a new work skin (or the one you're currently using)
Save that skin and make sure to enable it in the work you're going to implement hover text on
Open up your chapter or fic and switch to "HTML" instead of "Rich Text"
When you find the word or phrase you want to have hover text, paste this:

Next, replace the Text to hover over section with whatever your original word or phrase was -- this is the only place that word should appear, and it should still have whatever punctuation you need in it
Replace the text for the tooltip section with whatever your translation or hover text is
Finally, triple check that there's a space between the final section and the rest of your sentence or paragraph. If there isn't a space, sometimes the script pushes the translation onto the next word or shoves them together and italicizes them
Here's what this looks like in my HTML view:

Here's what that looks like in my rich text view:

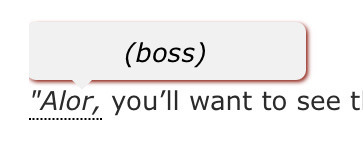
and here's what the final product looks like:
You should be able to hover over those underlined sections on mobile or desktop and see the translation you inputted. If you don't see it, there might be an issue with how you set up the individual tooltip, or the workskin itself.
My other tips for using this:
Keep a copy of the basic HTML tooltip script to copy and paste into your work as you edit it
Test your hover text in draft view on ao3. You should be able to see it.
Using italics can make the HTML part a little bit harder but it's not impossible
Keep an eye out for your punctuation! Sometimes the formatting can throw your commas and periods around without warning
Try to keep any translations or comments to one sentence max, otherwise the hover text bubble can be cut off in mobile view or stretch the view strangely
If you're translating many words (like I am in my current fic) it's easier to copy and paste a HTML tooltip that's complete but shorter so it doesn't throw off every single line (like copying a one-word translation instead of the original tooltip template)
Hope this helps! I really love using this for my fics and I'm so grateful to @notquiteaghost and everyone else in my comments who offered solutions for my hover text issues.
Here's my current fic with the hover text if anyone wants to see how I'm using it throughout the chapters.
#asks#anon#bloodletting#bloodletting my beloved#fic#fic writing#html#ao3#ao3 tips#archive of our own#hovertext#ao3 tutorial
33 notes
·
View notes
Text
How to orphan fics on Ao3
Got a fic you don't want anything to do with but don't want to destroy in case there are people who still feel a connection to it? Good news! Ao3 has an option for that specifically! It's called orpahning.
Here's how you do it if you're interested in this option.
1) log into your account and find the work you would like to orphan
2) click the button to Edit. This should be located at the top of the page, next to the button to add a chapter
3) click "orphan work" this button will be at the top of the page again, by the add chapter button
4) this will take you to a page that explains orphaning a fic and asks you to confirm. It also asks you if you would like your psude removed, essentially if you still want your name on it while not getting notified about it, choose whichever option you prefer.
5) enjoy the lack of connection to the old work.
Orphaning is a great option that allows people who may have found a lot of value in your art still access it while allowing you to wash your hands of it. I would definitely recommend considering this option if you want to be rid of your old work.
10 notes
·
View notes
Note
I have never added anything to an AO3 collection before, so I was wondering how to do that? I'm still new to the publishing side of AO3, and I've never put my fics in a collection like that before. And building off of that, is there a way to add a series instead of individual fics? (Sorry if you've answered this already).
All of the prompts are very inspiring! Thank you all so much for the hard work you put into putting this together! <3
So you can add a fic to an ao3 collection two different ways.
The first way is when you post a fic, there will be an option under the 'Associations' section where you can post to a collection. If you type in the collection you want, it should appear in the drop down menu. Click on the collection you want, and then when you click post it should be added to the collection.

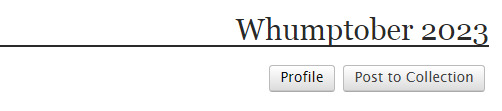
The second way is going straight to the collection. You can find the 2023 Collection here. Click on Post to Collection, and then from that point you just fill everything out like you would when you usually post a fic, but it'll add it to the collection as well.
To create a series and add a fic to you, you will go about the same way you will post any fic. But under the 'Associations' section again, you want to click the box next to 'This work is part of a series' which will then give you some options.
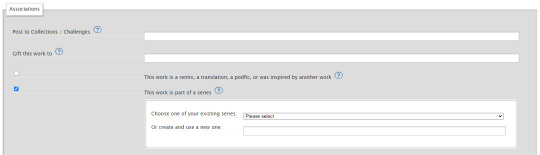
Now, if you are adding a fic to an existing series, click the drop down menu and it'll give you a list of all your series. Click the one you want. If you don't have any series or want to add this fic to a new series/you want to create a new series, type the name of the series in the box beneath that. Then when you post, the series will be created and the fic will be added to it. From that point, you can go into the individual series to edit it if you want to add a summary or mark it complete.
Hope this helps!
20 notes
·
View notes
Note
Any tips on using fonts in ao3?
going to assume you're familiar with the basics — creating a new workskin at Dashboard → Skins → My Work Skins, and selecting a skin on the Edit Work page. if not, AO3 has a tutorial for this
(though skimming the tutorial, it doesn't seem to mention the <span> tag, which is your best friend when it comes to applying styles to a bit of text within a paragraph)
now for the more specific part of this question. also, be warned i'm going to be embarrassingly technical before i actually answer your question.
this is going to sound funny, but i am by and large not a fan of manipulating fonts as a stylistic device. my personal opinion is that what font a text is displayed in should be for the user to decide, both for preference and for accessibility reasons (e.g. there's fonts designed for dyslexic readers). i also tend to find most font changes to be a a bit goofy and immersion-breaking
it's different when i do it, but i'll explain my cope in a second
anyway, the style property you want to change to set in your work skin is font-family. e.g. font-family: monospace will give text a code/"typewriter" look, and on my own site i use "font-family: Newsreader, serif;". (the comma there essentially says 'if you don't have Newsreader installed, any serif font will do)
but as mentioned, i don't like messing with fonts, and in fact, there is no font styling as such in my fic at all. what gives?
(note: im going include mildly spoilery excerpts from my fic, Hostile Takeover)
but basically, i wrap cyn's dialogue in <code> tags, and most browsers will make that monospaced by default, but it leaves the door open for custom userskins to add their own flair to code blocks.
for example, my site puts little boxes around them

but with all that said, i think i might be taking this question overly literally. i think it's likely you aren't talking specifically about just fonts, and most of the interesting things people want to replicate from my fic aren't about what shape the letters are.
my secret weapon for styling this fic is the humble text-shadow property.
what it does is simple: it creates a copy of the text, and you have four knobs to turn: you can shift it over horizontally or vertically, blur it, and of course change the color
text-shadow: 1px 2px 3px red;
this gives you a copy of the text shifted to the right 1 pixels, down 2 pixels, blurred 3 pixels and colored red.
text-shadow: 1px 2px 3px red, -1px -2px 3px blue;
same deal but now there's another in the opposite directions colored blue, like a chromatic aberration.
you don't have to include the color or the blur if you dont want color or blur.
now i'll run through some real examples
the "pain" effect is what you get when you stack text vertically

text-shadow: 0 -3px 0px, 0 3px 0px;
the "beyond the grave" effect is text stacked horizontally

text-shadow: 2px 0px 0px;
the famous "i want you destroy you" text is of course colored, and here i offer an actual tip

you can predict the offsets, but the color is special
text-shadow: 2px -1px 0px #da38;
full explanation here, but basically, when you write a color with four values, the first three are RGB, but the last is the opacity. i think this matters because, if the earlier part of this post didn't make it clear, i care about readers getting a good experience no matter how they choose their custom styles (within reason, ofc)
by making the color slightly transparent, it blends with the background color, means whether you read with a light them or dark, it meets you half way

(try removing the transparency on that shade, and it's a pretty harsh contrast on both modes — though part of that might be that i made it super saturated to compensate for the transparency.)
i have some complaints about how ao3 handles css, and one of them is that it forbids you from using the very convenient filter: blur() function. to work around this, i cooked up a very "we have blur at home" solution
text-shadow: 0px 0px 6px, 1px 1px 3px, -1px -1px 3px; opacity: 50%;
(it looks much better on my site, where i can filter: blur all i like)
one of the reasons this sucks is that without a doubt the biggest limiter on doing really complicated stuff with text shadows is that they don't stack.
you'll notice that when the "pain" effect shows up, the "blur" effect disappears.
this matters most for what is definitely the most striking and involved use of text shadows in the work: the big man himself

the basic principle here isn't that special. the illusion of depth is accomplished by increasing blur and opacity the 'deeper' the text is supposed to be. the biggest trick here is that instead of the 'px' we've been using everywhere before, the offsets use 'em', which is a unit that relative to the font size.
but there is a nuance. you see:
text-shadow: 0px 1px 0px, 0px -1px 0px, #fd64 2px 2px 2px, #fd68 2em 1em 3px, #fd65 4em 2em 5px; text-shadow: #fd64 2px 2px 2px, #fd65 2em 1em 5px; text-shadow: #fd6 2px 2px 5px, 0px -3px 0px, 0px 3px 0px, #fd68 2em 1em 3px;
the "translate" looks like a combination of the new effect and the pain effect, but i had to give it a special style, specifying both by hand.
if you want to layer things, it will get out of hand, and if you ever opt to revise the specific colors or values, solver help you.
also, this doesnt show up anywhere in HT (yet), but i've used it in the past — only setting the blur of a text-shadow lets you give words an 'aura', and it's a neat and simple effect
(excerpt from Eifre Quest, an original work of mine from years ago. i have mixed feelings about it)
sorry if that was a long ramble or self-indulgent, but hopefully something there was new or helpful.
thanks for asking!
19 notes
·
View notes
Text
The other day, I was feeling nostalgic for one of my OTPs back in 2019 on AO3. Hope that was coherent. So I decided to do a little time travel. And it occurred to me that some of y'all might not know how to do that. So I created this shitty, half assed tutorial. This is for mobile, but the basics should be the same.
So you're in a long running ship like Destiel. And you remember a time period when it seemed like there were more fics to your tastes. Wouldn't it be nice to travel back in time and sort and filter to your heart's content?
What you're going to wanna do is click this here button

Filter all you like, then hit this bad boy

This will come up. Ignore the calendar, it's horrible. You're going to type the dates you want, into the little boxes. Like so

Click away somewhere with no links to close the calendar box. It might glitch at you, but usually saves your date. Then, viola! We're back to 2016 Destiel.

Hope this is useful 💜
2 notes
·
View notes